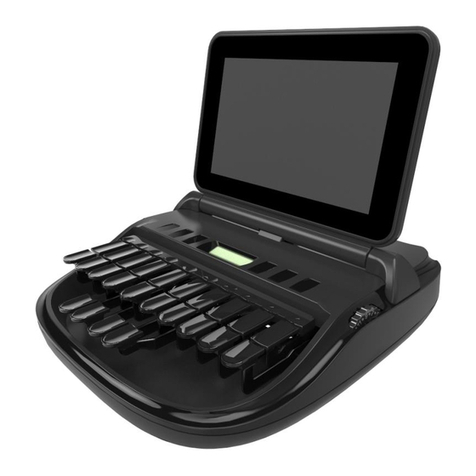
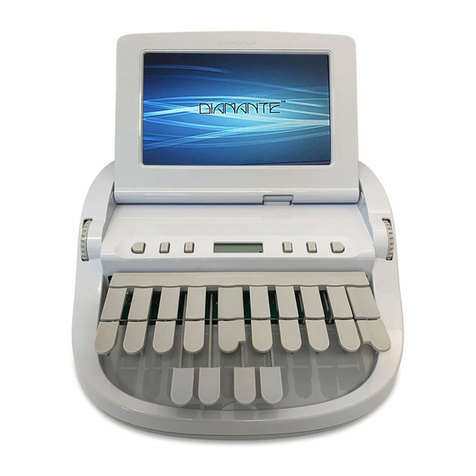
Stenograph WAVE User manual

Wave® User Guide

Release: April 2017, May 2016, January 2016, March 2012, July 2011; November 2010.
Copyright 2016, Stenograph, L.L.C. All Rights Reserved.
Stenograph Adjustable LCD Screen Assembly for Writing Machine. U.S. patent 7,403,375, filed May 27,
2005, and issued July 22, 2008.
This material is protected by law, including the Copyright Act of 1976, and is not to be copied, reproduced,
modified sold, stored or transmitted in any form or by any means (electronic, mechanical, photocopy,
recording or otherwise), or used in any other manner, without the prior written permission of Stenograph.
STENOGRAPH PROPRIETARY: This material constitutes proprietary and trade secret information of
Stenograph and shall not be disclosed to any third party, nor used by the recipient, except under the terms
and conditions of the purchase agreement between the customer and Stenograph.
Changes may be made periodically to the information in this publication. Such changes will be incorporated
in any new edition of this manual.
Stenograph is a Pettibone Company.
Case CATalyst, CATalyst, EasyLock, Wave, Diamante, TrueStroke Technology (patent pending), élan Mira,
Stentura Fusion, Stentura, Stenograph logo and Stenograph are trademarks and registered trademarks of
Stenograph.
Windows are registered trademarks of Microsoft Corporation in the United States and other countries.
All other trademarks are the property of their respective owners.

iii
© 2017 Stenograph
We strongly encourage you to read this User Guide and practice using your writing machine according to the
instructions contained therein. This will allow you to become comfortable and familiar with it before taking it
on a job or into class.
Your Wave comes with rechargeable batteries: one main battery pack and an internal backup battery.
Advanced battery technology prevents the batteries from overcharging so you don’t have to worry about
leaving the batteries on the charger overnight or over a weekend. Be aware that batteries are consumable
items and are usually ready to be replaced every twelve to eighteen months.
EasyLockTM Z12 tripod positioning with a positive-locking mechanism provides quick and easy setup. Simply
open and set the tripod on the floor and place your machine on it according to the instructions in this guide.
The design of the tripod assures a smooth, even writing platform for you to enjoy.
You’ll probably notice how light the Wave is - - just 4.7 pounds. The carrying case also lightens your load.
Remember to check the Stenograph®web site, www.stenograph.com, for updates to the Wave. The Wave
was designed with you in mind. We know you’ll enjoy using it!
STENOGRAPH, L.L.C.
Congratulations on the Purchase of Your Wave!

iv
© 2017 Stenograph
Stenograph believes that the Wave shorthand machine, when used in compliance with the enclosed
instructions and information, is safe. Certain sources, though controverted, suggest a relationship between
injuries of the hands and forearms with prolonged use of any type of keyboard or other equipment involving
repetitive movements of the hands. At the same time, other sources indicate that there is no such cause and
effect.
Because the safety and well-being of persons using Stenograph equipment is of paramount concern and
because we recognize that these medical and scientific questions are not definitively resolved, Stenograph
encourages all users of our writers to carefully review the following Work Area Checklist and to use
appropriate work habits.
Remember, personalizing your environment so that it is comfortable for you, promotes a healthy physical
and mental work lifestyle.
The following Work Area Checklist is not intended to be all inclusive but a guideline for you to use. Only you
can determine what is best for you. Use the checklist to assess and adjust your work area to suit your own
needs. Personalizing your environment so that it is comfortable for you promotes a healthy physical and
mental work lifestyle.
At Your Wave
Use a comfortable chair conducive to correct posture.
Adjust the height of the shorthand machine
appropriately for your body.
Position the shorthand machine comfortably close to
you.
Place the tripod between your knees. Do not sit
“sidesaddle”.
Minimize the use of the shorthand machine on surfaces
other than the tripod stand.
At Your Computer
Place the monitor screen perpendicular to the window to
help avoid glare.
Adjust or close window coverings.
Arrange materials such as reference books or a
telephone close to you to help avoid excessive reaching
or twisting.
Clear the area under and around the desk to leave room
for your feet and legs.
Remove sources of distraction around the monitor.
Keep noise to a minimum.
See accompanying materials provided by the computer
keyboard manufacturer.
Your Body
Take frequent breaks to stretch or exercise.
Maintain a straight wrist position.
Avoid resting your wrists while writing.
Keep your hands level with your forearms.
Let your fingers curve naturally.
Let your forearm go up and down a little when you
write, pivoting at the elbow, not at the wrists.
Pull your steno machine comfortably close to you.
Keep your feet on the floor or supported by a
footrest.
Support your lower back.
Assure that your knees are bent at an angle of 90° or
more and your thighs at an angle of 90° or greater in
relation to your torso.
Adjust the chair position and your posture throughout
the day.
If you experience any aching, numbing, or tingling in
your arms, wrists, or hand, consult a qualified health
care professional.
Work Area Checklist
The Importance of Working Comfortably and Effectively

v
© 2017 Stenograph
Chapter 1: Setting Up the Wave ..................................................................................... 7
Wave Features ..................................................................................................................................... 8
Tripod Setup ......................................................................................................................................... 9
Charge the Batteries............................................................................................................................. 11
Install the Wave USB Driver ................................................................................................................. 12
Wave Technical Support....................................................................................................................... 13
Chapter 2: Understanding the Shorthand Machine...................................................... 15
Chapter 3: Wave Hardware Features ............................................................................. 17
Batteries................................................................................................................................................ 18
Communication Port ............................................................................................................................. 23
Function Buttons................................................................................................................................... 27
Keyboard Depth and Tension Controls................................................................................................. 28
Reset .................................................................................................................................................... 29
Status LCD ........................................................................................................................................... 30
Tilting Color Screen .............................................................................................................................. 31
Chapter 4: Writing on the Wave ..................................................................................... 33
Accessing Wave Features .................................................................................................................... 34
Writing Jobs .......................................................................................................................................... 36
Beeper Volume ..................................................................................................................................... 37
Copy Log .............................................................................................................................................. 38
Display Set Strokes Per Minute ............................................................................................................ 39
Electronic Marks ................................................................................................................................... 40
Keyboard Layout................................................................................................................................... 41
Keyboard Options ................................................................................................................................. 42
Memory................................................................................................................................................. 45
Options ................................................................................................................................................. 48
Prompt to End a Job Option ................................................................................................................. 49
Scroll..................................................................................................................................................... 50
Search .................................................................................................................................................. 51
Serial Protocol Option........................................................................................................................... 52
Status.................................................................................................................................................... 53
Steno Test ............................................................................................................................................ 54
Test Mode............................................................................................................................................. 55
Tilting Screen Appearance ................................................................................................................... 56
Time and Date ...................................................................................................................................... 58
USB Communication Option................................................................................................................. 59
Chapter 5: Troubleshooting ........................................................................................... 61
Appendix A: Installing the USB Drivers ........................................................................ 63
Install Wave Drivers.............................................................................................................................. 64
Appendix B: Updating Wave Software .......................................................................... 67
Appendix C: Wave Utilities ............................................................................................. 69
Copy Log Support Info Retrieval........................................................................................................... 70
Contents

Wave User Guide
vi © 2017 Stenograph
Splash Screen ...................................................................................................................................... 71
TrueView............................................................................................................................................... 73

7
© 2017 Stenograph
Chapter 1, Setting Up the Wave, describes the steps to set up your new writing machine, charge the
batteries, load the USB drivers and access the Wave tutorials. It also provides Technical Support contact
information should you need additional assistance.
Package Contents
Review your package contents before setting up your Wave. Your new Wave comes with the following
items:
•Wave
• Carrying case
•EasyLock
TM Z12 tripod
• 1 main removable, rechargeable battery pack
• 110/220 AC adapter/charger
• USB cable (6 ft.)
• Optical-quality spray cleaner and cleaning cloth
• Stenograph One-Year Commercial Warranty document
Chapter 1
Setting Up the Wave

Wave User Guide
8© 2017 Stenograph
Wave Features

9
Chapter 1: Setting Up the Wave
© 2017 Stenograph
Tripod Setup
Tripod setup includes attaching the Wave to the tripod, adjusting the tripod height, Wave tilt position and
Tilting screen.
To use a different tripod with the Wave, it is necessary to remove the bottom plate on the tripod interface.
Removing the bottom plate, also removes the tilting mechanism. Please visit the Stenograph Help Desk
at www.stenograph.com for instructions on removing the Wave plate.
Attach the Tripod
The Wave uses only the EasyLock Z12 tripod designed with three straight legs and constructed of high
gauge aluminum to provide a lightweight but strong and stable stand for your Wave. When folded, the
tripod is 12 inches long.
1. Fully extend each leg of the tripod, making sure the braces lock.
2. Set the tripod on the floor.
3. Loosen the thumb-lock knob on the tripod base.
4. Extend the inner tripod tube to a comfortable height.
5. Turn the tripod head so that one of the flat sides of the tripod head is facing you.
EasyLock Z12 Tripod Head
6. Tighten the thumb-lock knob.
7. On the bottom of the Wave, locate the positive locking mechanism that looks like a large, round
keyhole. The top of the EasyLock Z12 tripod fits like a key into the recessed tilt mechanism.
8. Lift the Wave on two sides of the machine and lower it evenly onto the top of the tripod with one of
the flat sides of the writing machine facing you.

Wave User Guide
10 © 2017 Stenograph
9. Grasp the inner tripod tube with one hand and with the other hand, rotate the machine clockwise until
you hear a solid click. Ensure the Wave is firmly attached to the tripod tube.
Adjust the Tripod Height
1. Grasp the tripod tube firmly, directly beneath the Wave, with one hand.
2. Use your other hand to loosen the thumb-lock knob on the tripod. As you loosen the thumb-lock,
support the weight of the Wave with your hand.
3. Adjust the Wave to the desired height.
4. Tighten the thumb-lock knob.
Adjust the Tilting Screen
1. Gently pull up on the display and adjust the tilt as necessary.
2. To fold it flat, gently pull down on the display. When the Wave is On and the display is folded flat, the
display remains On.
Tilting the Wave
The Wave is constructed with a built-in recessed tilt mechanism. Once the Wave is secured on the
tripod, tilt the writing machine forward or backward within 10 degrees to a position comfortable for your
writing style.
To tilt the Wave:
1. Open the Tilting screen before adjusting the tilt position of the Wave.
2. Position one hand on the back of the Wave behind the Tilting screen and the other hand on the front
of the machine under the vowel keys.
3. Gently lift up or push down to the desired position. The movement of the Tilting mechanism is stiff to
ensure the position of the desired tilt is secure while writing.
Remove the Tripod
To remove the tripod, follow these steps:
1. Position the tripod firmly on the floor.
2. Locate the quick release lever on the left underside of the Wave.
3. Push the quick release lever towards the back of the Wave, then rotate the Wave counterclockwise
one quarter of a turn.
4. Lift the Wave from the tripod.

11
Chapter 1: Setting Up the Wave
© 2017 Stenograph
Charge the Batteries
The Wave comes with one main rechargeable battery and an internal backup rechargeable battery.
Stenograph recommends that you charge the batteries in your Wave before using it for the first time.
Charging time for the main battery is approximately 4 - 5 hours. Be sure to review the additional battery
charging details in the Wave Features chapter.
To charge your Wave batteries:
1. Ensure the main battery is in the Wave. For details about inserting the battery See Changing the
Battery on page 22.
2. Plug the AC charger/adapter into a wall outlet. Use only the AC charger/adapter supplied with your
Wave.
3. Insert the small plug on the AC adapter/charger cord into the CHGR socket on the back of the Wave.
4. The Wave turns On. A black dot in the lower right corner of the Status LCD indicates the Wave is On.
A row of running blocks indicates the batteries are charging. Press the first gray button on the left
side of the Wave to turn the writing machine On and Off.
If you plug your Wave in to charge and only the black dot displays, the batteries are charged.
Charging is not necessary and no charging occurs.

Wave User Guide
12 © 2017 Stenograph
Install the Wave USB Driver
Install the necessary Wave USB driver on your computer. The USB driver allows communication via
USB cable between the Wave writing machine and your computer. This includes reading notes, realtime
writing and installing updates.
The Wave USB device drivers are available for download from the Stenograph website at
www.stenograph.com. At the Stenograph website: click Support, Download Center and Utilities & links.
Right click the on the Stenograph Writer USB Drivers and select Save Target as or Save Link as and
save the file to a location on computer desktop or your hard drive.
1. Turn your computer On. Ensure it is fully booted.
2. The Wave USB device drivers are available for download from the Stenograph website at
www.stenograph.com. At the Stenograph website: click Support, Download Center and Utilities &
links.
3. Right click the on the Stenograph Writer USB Drivers and select Save Target as or Save Link as
and save the file to a location on computer desktop or your hard drive.
4. Navigate to the location where you saved the file, highlight the file, right click and select Extract All.
Then double click the StenographDriverInstall.exe to install the drivers.
The Windows Security screen may display, prompting you to install the Stenograph L.L.C. Ports
(COM & LPT) virtual serial driver. Click the option, Always trust software from “Stenograph” and
then click Install. If a second prompt displays for the Stenograph USB Writer driver, click Install.
5. The Wave driver installation begins.
6. Once the drivers install, the Stenograph Writer Drivers Setup Complete dialog box displays. Press
Enter (Finish) to close the wizard.

13
Chapter 1: Setting Up the Wave
© 2017 Stenograph
Wave Technical Support
If you encounter a problem you cannot solve,a Wave Support Specialist is available to assist you at:
1.800.323.4247 or 1.630.532.5100, touch 2, then 2
8:00 a.m. to 6:00 p.m. (CT)
Monday through Friday
Excluding Stenograph Holidays
To assist the Specialist, have the Wave with you, know your customer number and know your Wave
serial number. The serial number is located on the bottom of the writing machine. Be prepared to
describe your question or problem in detail.
Additional Help topics are available at www.stenograph.com. Click Support, Solution Center.
To order accessories, visit www.stenograph.com.

Wave User Guide
14 © 2017 Stenograph

15
© 2017 Stenograph
Chapter 2, Understanding the Shorthand Machine, provides an overview of the machine shorthand
keyboard. It also describes machine shorthand and how an individual uses the writer.
The shorthand machine is designed to accurately make a written record of spoken words at high speeds.
Using sounds instead of spelling out each letter, a machine shorthand writer presses down several keys
at once to record a word. This is much faster than a typewriter or computer keyboard where you can only
press one key at a time. This means that the machine shorthand writer, using sounds, can write whole
words or even a phrase in just one downward motion of their fingers.
As you look at the front of your writer, notice that the keyboard is divided into four sets, or banks, of keys:
•Number Bar—the long solid bar at the top of the keyboard.
•Upper Bank—the row of 10 keys just below the number bar.
•Lower Bank—the remaining consonant keys located below the Upper Bank.
•Vowel Keys—the four keys at the front of the keyboard.
The Upper and Lower banks of keys to the left of the asterisk are the Initial keys. These consonants are
generally used to begin a word. The Upper and Lower bank of keys to the right of the asterisk are the
Final keys. These constants are generally used following the vowels to end a word or abbreviated
phrase.
The Number Bar is used in conjunction with the upper bank of keys to write numbers. When the Number
Bar is depressed along with the initial "S" on the left side of the keyboard, it produces the number 1.
When the Number Bar is depressed with the initial "T" it produces the number "2" and so on. The
Number Bar depressed with the asterisk key produces a space in the steno notes.
The asterisk key produces an asterisk. The asterisk symbol is generally used to denote a mistake,
indicate a correction, or to distinguish homonyms.
Similar to a typewriter, your fingers have a home position on the keyboard as shown in the previous
diagram. Notice that the Vowel keys are slightly lower than the other three banks of keys. This allows for
the natural position of your thumbs.
Chapter 2
Understanding the Shorthand Machine

Wave User Guide
16 © 2017 Stenograph
Unlike the typewriter where each key is pressed one at a time, any number or all of the keys on a
shorthand machine can be "stroked,” or pressed down at the same time. This means that a machine
shorthand writer can write an entire word, syllable, or phrase in just one stroke. Although the keyboard
does not contain all the letters of the alphabet, letters are used in combination to identify the remaining
consonants. You will also notice, that while some letters do not appear at all, other letters appear twice.
The machine shorthand keyboard was designed to write sounds. Most word and syllable sounds begin
with one or more consonants, followed by a vowel, and end with one or more consonants. For example:
R E D; SH O P; ST A RT. While the machine shorthand writer may write words exactly as they are
spelled, R E D or SH O P, they often are writing the words or syllables as they phonetically hear them.
For example, in two strokes they may write "courthouse"-- K O R T/H O U S or "workhorse"-- WORBG/
HORS. The writer may also record an entire phrase in just one stroke, "state your name"-- ST A U R PL
or "could you tell us" -- KOUTS. The machine automatically creates spaces between the strokes, so the
writer never needs to take their fingers off the keyboard to press a Return or Enter key.
Computer software translates each stroke or group of strokes immediately into text by comparing the
strokes to an electronic table of words and phrases called a "dictionary." This dictionary automatically
provides for correct spelling of words, punctuation and spacing between words. Once the steno strokes
are translated into words, text editing software is used to make corrections and to produce a final printed
transcript.
The first shorthand machines were developed in the late 1800s and have evolved over time to the
present-day Wave. To learn more about the evolution of the shorthand machine that brought the
technology to this point, visit www.stenograph.com and view “The History of Machine Shorthand.”

17
© 2017 Stenograph
Chapter 3, Wave Hardware Features provides information about the hardware components of your
Wave. This includes details on battery charging and use; communication port and setup; function buttons
for accessing menus; Status LCD icons; adjusting the Tilting screen; personalizing the opening graphic
and resetting the writing machine.
Chapter 3
Wave Hardware Features

Wave User Guide
18 © 2017 Stenograph
Batteries
The Wave comes with one main rechargeable battery, an internal backup rechargeable battery and an
AC adapter/charger. You can operate your writing machine on battery power, using the AC adapter/
charger without the main battery or using the AC adapter/charger with the main battery charging.
Although you can use the Wave with the AC adapter/charger, Stenograph recommends that you charge
the battery in your Wave before using it for the first time.
The main battery, fully charged, operates all the features on the Wave for approximately 8 - 10 hours.
Charging time for the main battery is approximately 4 - 5 hours.
The internal backup battery provides a FailSafe mode if the charged level of the main battery becomes
too low and you are not using the AC adapter/charger. In FailSafe mode, the Tilting screen turns Off.
Your steno notes continue to be written to and stored in the Memory and sent to the realtime screen, if
writing realtime. The backup battery operates for approximately 8 hours and charges at the same time
the main battery is charging.
A third, small internal battery functions to retain the Wave date, time and user settings. This battery has
a lifespan of approximately 10 years.
It is not necessary to keep the Wave plugged into the AC adapter/charger when not in use for long
periods of time. If you have an additional main battery pack, Stenograph recommends alternating the
batteries monthly.
Charging the Batteries
When the Wave is powered by the AC adapter/charger, both the main battery and backup battery levels
are automatically maintained. The batteries fully charge in 4 -5 hours. You can use your writing machine
while the AC adapter/charger charges the batteries.
The Wave batteries only charge when low. Once the batteries are charged, it is not necessary to keep
the writing machine plugged into the AC adapter/charger, however, keeping the writing machine plugged
in does not damage the batteries.
Use only the battery charger supplied with the Wave. Chargers designed for other Stenograph writing
machines do not power the Wave. Although the Stentura®charger fits the Wave, it does not charge the
Wave battery.
Battery Charging Procedure
To charge your Wave batteries, follow these steps:
1. Ensure the main battery is in the Wave.
2. Plug the AC charger/adapter into a wall outlet.
3. Insert the small plug on the AC adapter/charger cord into the CHGR socket on the back of the Wave.

19
Chapter 3: Wave Hardware Features
© 2017 Stenograph
4. The Wave turns On. A black dot in the lower right corner of the Status LCD indicates the Wave is On.
A row of running blocks indicates the batteries are charging. If you plug your Wave in to charge and
only the black dot displays, the batteries are charged. Charging is not necessary and no charging
occurs.
You can use the Wave while the batteries charge. When you begin writing, the running blocks do not
display but the Wave continues to charge. See Status LCD on page 30 for more information about
Status LCD indicators.
To turn the Wave Off while charging the batteries, press the On/Off button. Although the Tilting
screen turns off, the Wave remains On while charging as indicated by the black dot on the Status
LCD.
View Battery Charging Status
The Tilting screen and the Status LCD display graphic indicators that reflect the charging status of both
the main and backup battery. To view specific battery voltage levels, current charging status and the
most recent charging history, See View Battery Voltage Levels on page 19.
When the AC adapter/charger is connected to the Wave charging the batteries, the title bar on the Tilting
screen displays a battery icon with the battery gauge showing running black and yellow stripes. When
the batteries are fully charged, a plug icon replaces the battery icon until you disconnect the AC adapter/
charger.
Battery Charging Battery Fully Charged
When the main battery is charging, the Status LCD displays black bars in running sequence from left to
right. The black bars are not visible when you are writing, but redisplay when you close the job. When
the Wave is finished charging, the bars move from each side of the screen to the middle of the screen in
a “clapping” motion. If the AC adapter/charger is plugged in for a long time, the “clapping” motion stops,
however the battery is fully charged.
When the backup battery is charging along with the main battery, the battery icon displays on the Status
LCD along with black bars in running sequence from left to right. When the backup battery is fully
charged the battery icon no longer displays.
View Battery Voltage Levels
The Battery diagnostic screen displays the voltage level, charging status and most recent charging
history for the Wave batteries. This includes both the main battery and the backup Lithium ion battery.
To view battery voltage and charging status:
1. Make sure the charger/adapter is not plugged into the Wave. If you just disconnected the charger/
adapter from the Wave, turn the Wave On and wait 10 – 15 minutes to get an accurate battery
voltage reading.

Wave User Guide
20 © 2017 Stenograph
2. From the Opening menu, Diag and then press Battery. The battery status screen displays.
Wave Battery Status Screen
3. Review the following battery information:
•Indicator bar—provides an approximate indication of the battery voltage level. Green indicates
the battery is fully charged; yellow indicates it is charged and red indicates it is low.
•Voltage—the actual voltage amount. A main battery reading of 7.4 volts or higher indicates
normal operating voltage. 7.0 volts or below indicates the battery is very low and indicates
approximately one hour of operating time remaining.
A backup, Lithium Ion, battery reading of 3.9 or above indicates the backup battery is charged
and does not charge when the adapter/charger is attached; 3.8 or below indicates the backup
battery needs charging and automatically charges when the charger/adapter is attached.
•State—the most recent charging history. When checking battery status with the adapter/charger
not attached, the message Not Charging displays. If the adapter/charger was removed before the
charging is complete, an INCOMPLETE message displays along with a Cause of Failure
message indicating the charger was removed.
4. To display the Opening menu, press OK,Quit.
Low Battery Warnings
As the main battery becomes progressively low, the Wave displays warnings using the battery gauge on
the title bar of the Tilting screen and messages on the Status LCD. When the main battery becomes low
while connected to a computer with a USB cable, low battery messages continue to display until the
battery is depleted. All the features continue to operate. See Powering With the USB Cable on page 23.
Use the Wave Diagnostic feature to check the specific voltage levels of the batteries. See View Battery
Voltage Levels on page 19.
Table of contents
Other Stenograph Typewriter manuals
Popular Typewriter manuals by other brands
Brother
Brother EM-550 user guide
Panasonic
Panasonic KX-E4500 Operator's instruction manual
Hermes
Hermes Media 3 user manual
Imperial
Imperial Good Companion Model T Instruction book
Digital Equipment
Digital Equipment DECwriter Correspondent Technical manual
Qwerky Toys
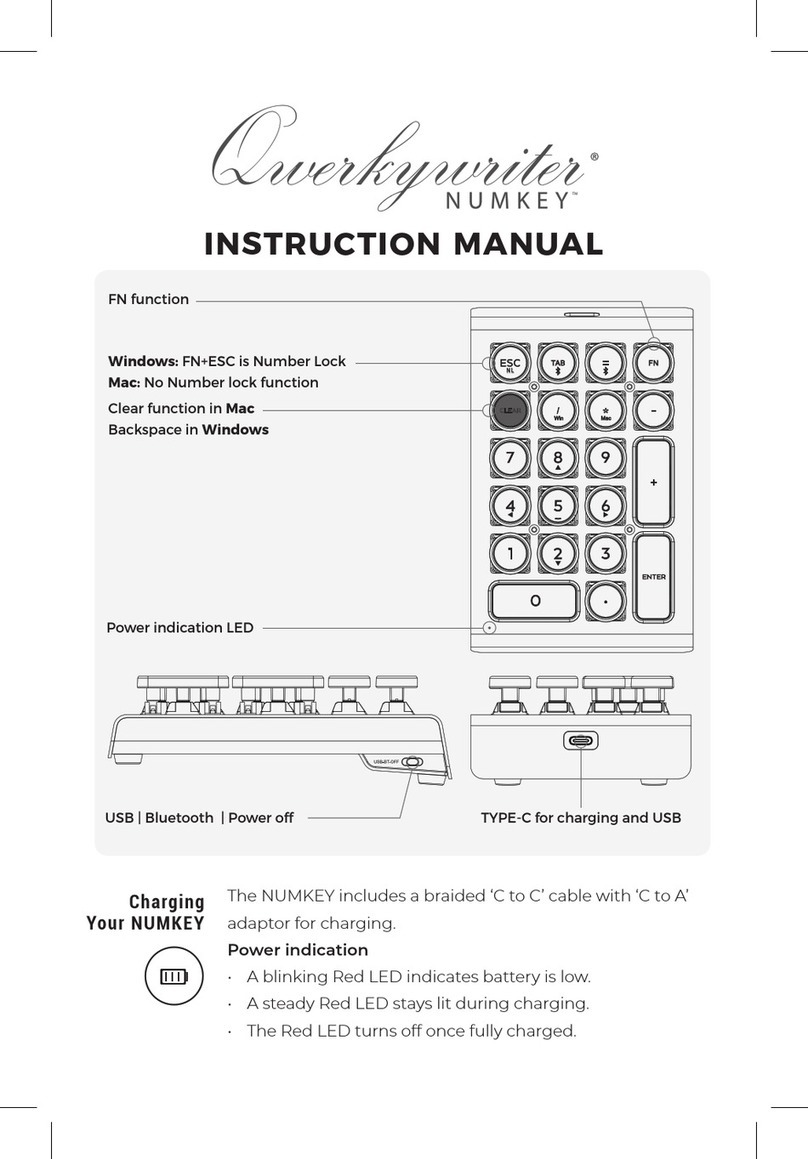
Qwerky Toys QWERKYWRITER NUMKEY instruction manual
