Stenograph elan Cybra User manual

élan Cybra®User Guide
Stenograph, L.L.C.
1500 Bishop Court
Mount Prospect, Illinois 60056
www.stenograph.com

Release: July 2007; March 2007; July, 2006
Copyright 2006, Stenograph, L.L.C.
All Rights Reserved. Printed in U.S.A.
No part of this publication may be reproduced, stored in a retrieval
system, or transmitted in any form or by any means (electronic,
mechanical, photocopy, recording or otherwise) without the prior
written permission of Stenograph, L.L.C.
Case CATalyst, EasyLock, élan Cybra and Stenograph are
trademarks and registered trademarks of Stenograph, L.L.C.
Windows is a registered trademark of Microsoft Corporation.
All other trademarks are the property of their respective owners.

iii
We strongly encourage you to read the User Guide and practice
using your machine according to the instructions contained herein.
This will allow you to become comfortable and familiar with your
new writer before taking it on a job or to class.
Your élan Cybra comes with one rechargeable battery pack.
Advanced battery technology prevents the battery from
overcharging so you don’t have to worry about leaving the battery
on the charger overnight or over a weekend. Be aware that batteries
are consumable items and are usually ready to be replaced every
twelve to eighteen months.
EasyLock®tripod positioning with a positive-locking mechanism
provides quick and easy setup. Simply open and set the tripod on
the floor and place your machine on it according to the instructions
in this guide. The design of the tripod assures a smooth, even
writing platform for you to enjoy.
You’ll probably notice how light the élan Cybra is -- just over 5
pounds which makes it a lot easier to carry than earlier models.
Depending on your model, the wheeled backpack or soft-sided
carrying case also lightens your load when moving from place to
place for CART, transcription or captioning jobs.
Be sure to check the Stenograph web site, www.stenograph.com,
for updates to the élan Cybra. The élan Cybra was designed with
you in mind. We know you’ll enjoy using it!
STENOGRAPH, L.L.C.
Congratulations on the purchase of your new élan Cybra!

iv
Stenograph believes that the élan Cybra shorthand machine, when
used in compliance with the enclosed instructions and information,
is safe. Certain sources, though controverted, suggest a relationship
between injuries of the hands and forearms with prolonged use of
any type of keyboard or other equipment involving repetitive
movements of the hands. At the same time, other sources indicate
that there is no such cause and effect.
Because the safety and well-being of persons using Stenograph
equipment is of paramount concern and because we recognize that
these medical and scientific questions are not definitively resolved,
Stenograph encourages all users of our writers to carefully review
the following Work Area Checklist and to use appropriate work
habits.
Remember, personalizing your environment so that it is
comfortable for you, promotes a healthy physical and mental work
lifestyle.
The following Work Area Checklist is not intended to be all
inclusive but a guideline for you to use. Only you can determine
what is best for you. Use the checklist to assess and adjust your
work area to suit your own needs. Personalizing your environment
so that it is comfortable for you promotes a healthy physical and
mental work lifestyle.
The Importance of Working Comfortably and Effectively

v
At Your élan Cybra
9Use a comfortable chair
conducive to correct posture.
9Adjust the height of the
shorthandmachineappropriately
for your body.
9Position the shorthand machine
comfortably close to you.
9Place the tripod between your
knees. Do not sit “sidesaddle.”
9Minimize the use of the
shorthand machine on surfaces
other than the tripod stand.
At Your Computer
9Place the monitor screen
perpendicular to the window to
help avoid glare.
9Adjust or close window
coverings.
9Arrange materials such as
reference books or a telephone
close to you to help avoid
excessive reaching or twisting.
9Clear the area under and around
the desk to leave room for your
feet and legs.
9Remove sources of distraction
around the monitor.
9Keep noise to a minimum.
9See accompanying materials
provided by the computer
keyboard manufacturer.
Your Body
9Take frequent breaks to stretch
or exercise.
9Maintain a straight wrist
position.
9Avoid resting your wrists
while writing.
9Keep your hands level with
your forearms.
9Let your fingers curve
naturally.
9Let your forearm go up and
down a little when you write,
pivoting at the elbow, not at
the wrists.
9Pull your steno machine
comfortably close to you.
9Keep your feet on the floor or
supported by a footrest.
9Support your lower back.
9Assure that your knees are
bent at an angle of 90° or more
and your thighs at an angle of
90° or greater in relation to
your torso.
9Adjust the chair position and
your posture throughout the
day.
9If you experience any aching,
numbing, or tingling in your
arms, wrists, or hand, consult a
qualified health care
professional.
Work Area Checklist

vi

vii
Chapter 1: Introduction........................................... 9
élan Cybra Features ............................................................ 9
Typographical Conventions in this Guide .......................... 10
How This Guide is Organized ............................................ 11
élan Cybra Technical Support............................................. 13
Chapter 2: Setting Up Your élan Cybra................. 15
Tripod.................................................................................. 15
Attaching the Tripod..................................................... 15
Removing the Tripod.................................................... 17
Battery................................................................................. 18
Charging Recommendations......................................... 18
Battery Charging Procedure.......................................... 19
Nameplate........................................................................... 20
Attaching a Nameplate.................................................. 20
Removing the Nameplate.............................................. 21
Chapter 3: Understanding the Shorthand Machine...23
Chapter 4: Using Your élan Cybra......................... 27
Turning the élan Cybra On and Off.................................... 27
LCD Icon Descriptions....................................................... 28
Connect the Writer to the Computer................................... 30
USB Cable .................................................................... 30
Powering with the USB Cable................................ 32
Updating with the USB Cable ................................ 32
Serial Cable................................................................... 32
Reestablishing Realtime Connection............................ 33
Reading Steno Notes........................................................... 34
USB............................................................................... 34
Serial Cable................................................................... 35
Contents

élan Cybra User Guide
viii
Transmit Only Serial Mode ................................................ 36
Steno Note Storage ............................................................. 37
Clearing the Memory.................................................... 37
Reset.................................................................................... 38
Test Mode ........................................................................... 39
Chapter 5: Maximizing Key Contact Performance.. 41
Opening the Cover.............................................................. 42
Setting the Keyboard Tension............................................. 43
Adjusting Depth of Stroke.................................................. 44
Adjusting Individual Key Contacts..................................... 46
Understanding Key Contact.......................................... 46
How Depth of Stroke Affects Key Contact ............ 47
Overlapping Strokes and Missing Characters......... 47
Testing and Adjusting the Key Contacts ...................... 48
Chapter 6: Troubleshooting .................................... 53
Appendix A: Installing the USB Driver.................. 55
Appendix B: Updating élan Cybra Software......... 59
Download the Update to Your Computer........................... 60
Update the élan Cybra......................................................... 61
Index .......................................................................... 63

9
Congratulations on the purchase of your élan Cybra writer. Read
this manual to familiarize yourself with your writer’s components.
It provides detailed information about setting up your tripod,
charging your battery and making adjustments to the élan Cybra to
suit your personal writing needs.
Chapter 1, Introduction:
•Highlights the features of your élan Cybra.
•Describes typographical conventions used in this guide.
•Outlines the organization of this guide.
élan Cybra Features
The élan Cybra provides you with the following features:
•Realtime ready through USB cable with USB compatible CAT
software such as Case CATalyst V4.0 and higher.
•Realtime ready through serial port.
•Transmit Only Serial mode, on the Professional model, allows
data transfer without verification for faster transmission.
•Update élan Cybra software from Internet download via USB.
•Wireless capabilities. (optional)
Chapter 1
Introduction

élan Cybra User Guide
10
Typographical Conventions in this Guide
We use symbols and typographical conventions in this manual to
make it easier for you to use:
• A bullet indicates an item in a list.
1. Numbered lists take you step-by-step through procedures.
A note indicates supplementary information.
Bold text indicates a key you press or emphasizes a selection
choice.

11
Chapter 1: Introduction
How This Guide is Organized
This élan Cybra User’s Guide contains chapters and sections. A
chapter is built around a specific topic and a section is a component
of the chapter.
Chapter 1: Introduction
Introduction acquaints you to the élan Cybra features and explains
this user’s guide. All features apply to both the Cybra Student and
Cybra Professional models unless otherwise noted.
Chapter 2: Setting Up Your élan Cybra
Setting Up Your élan Cybra explains how to prepare the élan Cybra
for writing.
Chapter 3: Understanding the Shorthand Machine
Understanding the Shorthand Machine provides an overview of the
machine shorthand keyboard.
Chapter 4: Using the élan Cybra
Using the élan Cybra explains the features used during writing.
Chapter 5: Inside the élan Cybra
Inside the élan Cybra discusses the key contact adjustments that
may be necessary to customize the steno keys on your writing
machine.
Chapter 6: Troubleshooting
Troubleshooting suggests possible solutions to some common
situations that you may encounter when using the élan Cybra.

élan Cybra User Guide
12
Appendix A: Installing the USB Driver
Installing the USB Driver explains how to load the USB driver
required for USB cable connection between the élan Cybra and a
USB compatible software such as Case CATalyst V4.0 and higher.
Appendix B: Updating élan Cybra Software
Updating élan Cybra Software instructs you on how to download
available updates for your élan Cybra from the Stenograph web
site.

13
Chapter 1: Introduction
élan Cybra Technical Support
If you encounter a problem you cannot solve,an élan Cybra
Support Specialist is available to assist you at:
1-800-323-4247, press 2, then 2
or
1-847-803-1400
8:00 a.m. to 6:00 p.m. (CT)
Monday through Friday
Excluding Stenograph Holidays
To assist the Specialist, have the élan Cybra with you, know your
customer number, and be prepared to describe your question or the
problem in detail.
Additional Help topics are available at www.stenograph.com. Click
Support/Go to Help Desk now.
To order supplies and accessories visit www.stenograph.com.

élan Cybra User Guide
14
15
Chapter 2, Setting Up Your élan Cybra, discusses how to set up the
élan Cybra on the tripod and charge your battery. Although you can
use the writer with the AC adapter/charger, it is recommended that
you charge the battery so that it is ready when needed.
Tripod
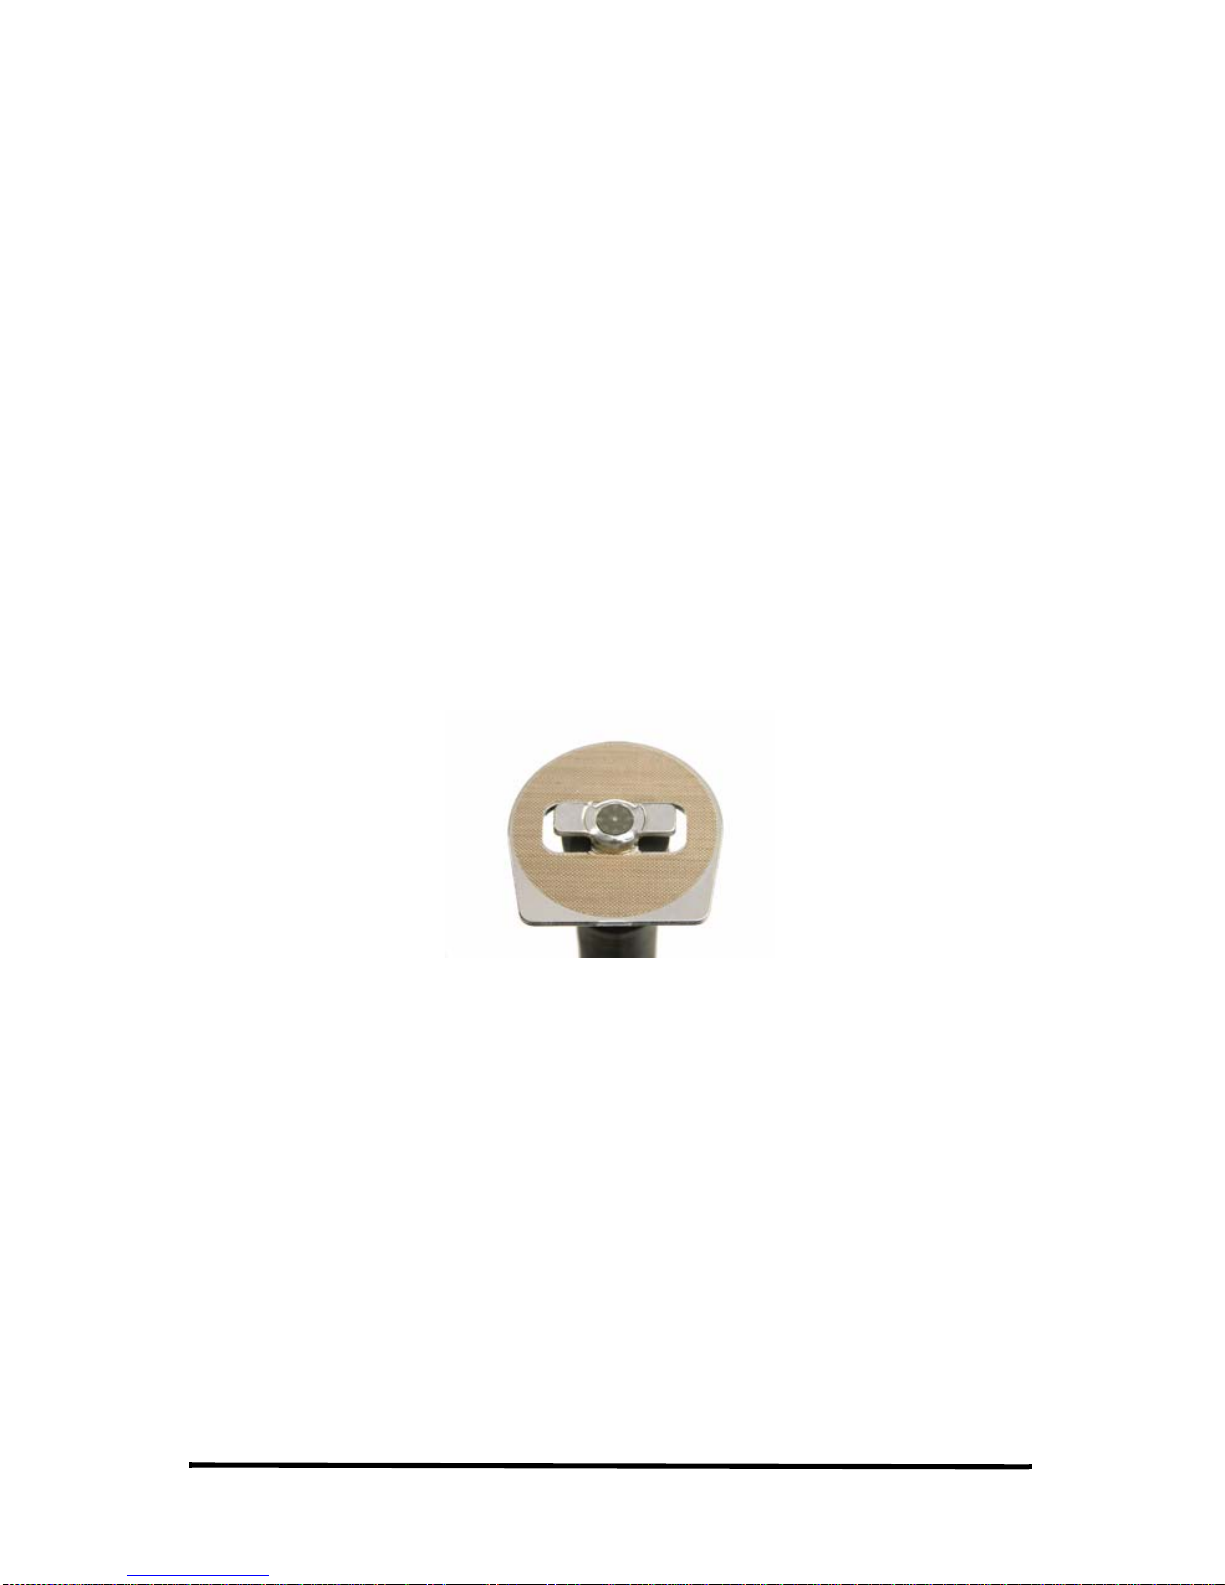
On the bottom of the élan Cybra is a positive locking mechanism
that looks like a large, round keyhole. The top of the EasyLock
tripod fits like a key into the hole.
EZ Lock Tripod Top
Attaching the Tripod
To attach the tripod:
1. Fully extend each leg of the tripod, making sure the braces lock.
2. Place the tripod firmly on the floor.
3. Loosen the thumb-lock knob on the tripod base.
4. Extend the inner tripod tube fully and tighten the thumb-lock
knob.
Chapter 2
Setting Up Your élan Cybra

élan Cybra User Guide
16
5. Turn the tripod so that the flat side of the silver disk on the top
of the tripod tube is facing you.
6. Lift the élan Cybra on both sides of the machine and lower it as
evenly as possible onto the top of the tripod. Rotate the machine
clockwise until you hear a solid click. The élan Cybra should be
firmly attached to the tripod pole.
7. Adjust the tripod height:
•With one hand, grasp the tripod pole firmly, directly beneath
the élan Cybra.
•Using your other hand, loosen the thumb-lock knob on the
tripod. As you loosen the thumb-lock, support the weight of
the writer with your other hand.
•Adjust the élan Cybra to the desired height.
•Tighten the thumb-lock knob.
If you hear a grinding noise when you begin using the élan
Cybra, the writer is not level on the tripod. This does not harm
the machine. Reseat the élan Cybra on the tripod. See the
Removing the Tripod section for instructions on how to remove
the tripod from the writer.

17
Chapter 2: Setting Up Your élan Cybra
Removing the Tripod
To remove the tripod, follow these steps:
1. Position the tripod firmly on the floor.
2. Locate the quick release lever on the left underside of the élan
Cybra.
3. Push the quick release lever towards the back of the writer, then
rotate the élan Cybra counterclockwise one quarter of a turn.
4. Lift the élan Cybra from the tripod.

élan Cybra User Guide
18
Battery
The élan Cybra comes with one rechargeable battery pack and an
AC adapter/charger. You can operate your writer using only the
battery, using only the AC adapter/charger, or using the
AC adapter/charger while the battery is in the writer charging.
When the élan Cybra is powered by the AC adapter/charger, the
battery level is automatically maintained. Continuous charging does
not damage the battery.
The battery fully charges within 3.5 hours. A completely
discharged battery fully charges in 12-14 hours. A fully charged
battery operates the élan Cybra for approximately 3-4 days. As the
battery becomes progressively low, the LCD battery icon flashes.
Charging Recommendations
To utilize the full capacity of the battery, Stenograph recommends
that you charge the battery when you are not using your élan Cybra.
Continuous charging does not damage the batteries.
If you do not use your élan Cybra for an extended period of time,
recharge the batteries approximately every month. Stenograph
recommends you store your élan Cybra with the battery installed.
Use only the battery adapter/charger supplied with the élan Cybra.
Although other adapters/chargers may appear to fit the élan Cybra,
they may not charge the battery and could damage the machine.

19
Chapter 2: Setting Up Your élan Cybra
Battery Charging Procedure
1. Slide the battery into the battery slot of the élan Cybra and press
firmly until it locks into place.
2. Plug the AC adapter/charger into a wall outlet.
3. Insert the small plug on the AC adapter/charger cord into the
AC port on the back center of the writer.
The élan Cybra powers On. When the AC adapter/charger is
connected to the élan Cybra charging the battery, the battery
icon on the LCD displays in steady view.
élan Cybra User Guide
20
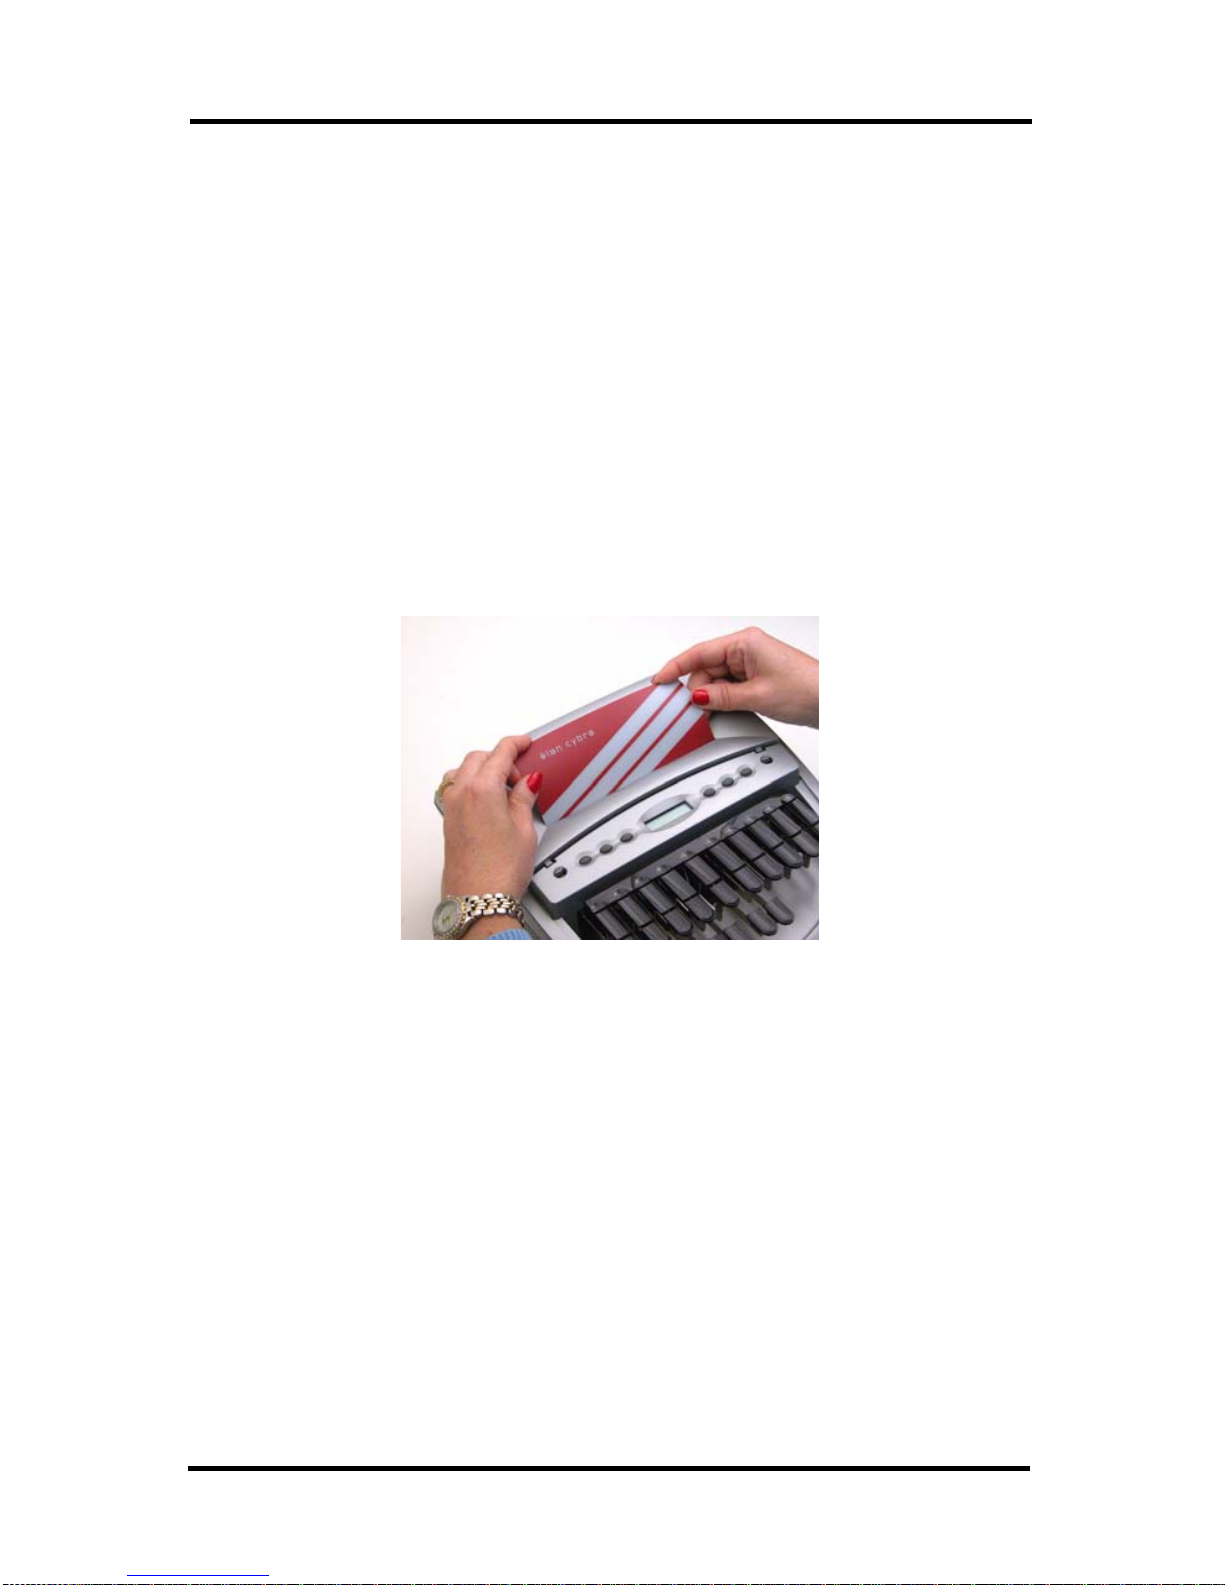
Nameplate
Your élan Cybra Student model comes with three interchangeable
nameplates. The Professional model comes with a nameplate
factory installed.
Attaching a Nameplate
To attach a nameplate:
1. Select a nameplate.
2. With the front of nameplate facing you, place the bottom edge
into the front lip of the nameplate frame on the élan Cybra.
3. Push the top gently to slightly bow the nameplate and insert the
top into the top of the nameplate frame.
Table of contents
Other Stenograph Typewriter manuals


