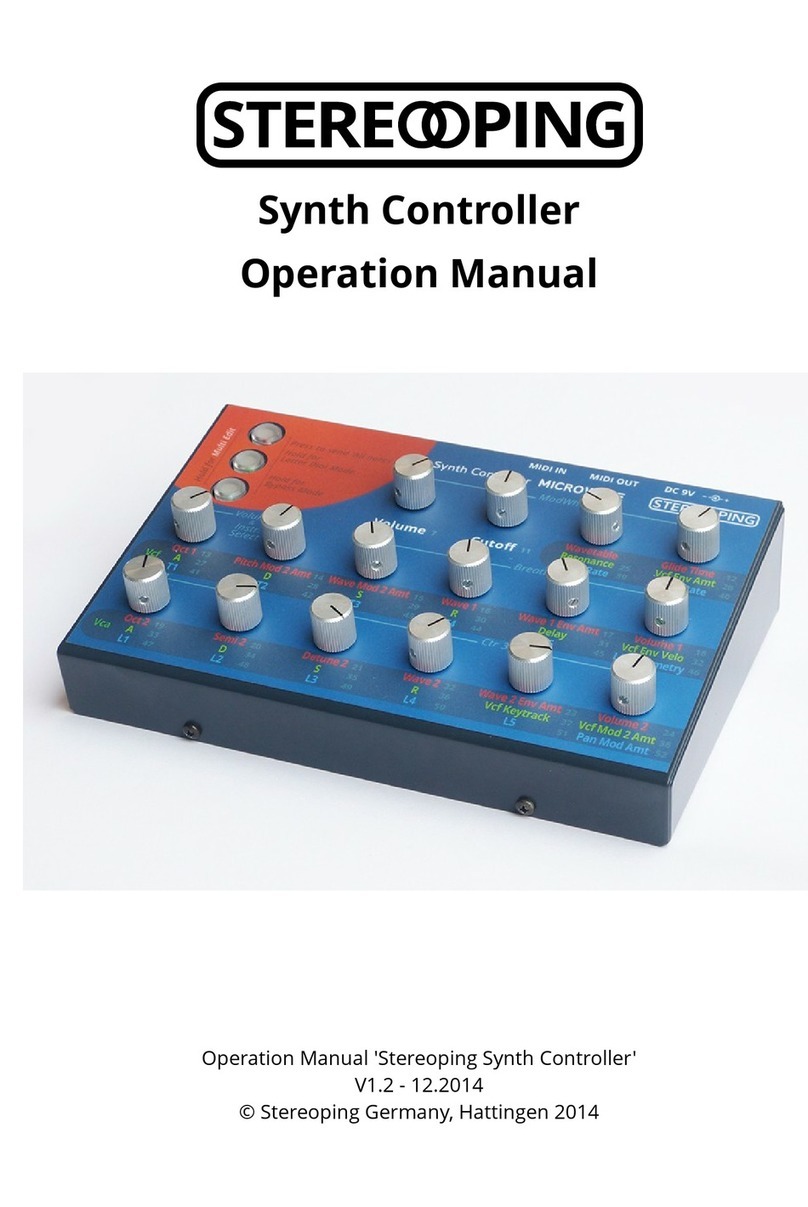
Stereoping Synth Controller User guide


Hello and thanks for getting a Stereoping Synth Controller. This manual's content:
1. Features, power supply, editions
2. Integration into your setup
3. Operation
4. 'Midi Controller Change Message' to 'Sys x' translator
5. Technical limitations
6. Updating firmware
7. Imprint
Information on Disposal for Users of Waste Electrical & Electronic Equipment (private households)
This symbol on the product(s) and / or accompanyin documents means that used electrical and electronic
products should not be mixed with eneral household waste. For proper treatment, recovery and recyclin ,
please take this product(s) to desi nated collection points where it will be accepted free of char e.
Alternatively, in some countries you may be able to return your products to your local retailer upon
purchase of an equivalent new product. Disposin of this product correctly will help save valuable resources
and prevent any potential ne ative effects on human health and the environment, which could otherwise arise from
inappropriate waste handlin .Please contact your local authority for further details of your nearest desi nated
collection point.Penalties may be applicable for incorrect disposal of this waste, in accordance with you national
le islation.
For business users in the European Union
If you wish to discard electrical and electronic equipment, please contact your dealer or supplier for further
information.
Information on Disposal in other Countries outside the European Union
This symbol is only valid in the European Union. If you wish to discard this product please contact your local
authorities or dealer and ask for the correct method of disposal.

1. Features, power supply, editions
The Stereoping Synth Controller offers 16 knobs and 3 buttons to quickly t eak the sound of your favourite
vintage music synthesizer in a comfortable ay. Right at the moment you dial a knob, it sends the appropriate
message in Midi SysEx-format over the Midicable into your synth, changing it's sound immediately.
Features
•Synthesizer hard are realtime editor
•Frontpanel designed to match the target synthesizer's design
•Easy operation, avoiding cryptic 'Shift' or 'Alt' operations
•Beautiful lighted colored buttons of durable quality
•Tough and handsome steelcase
•Protection diode to avoid damage from PSUs ith rong polarity
•Built in 'Midi Control Chan e to SysEx'-translator for changing and automating your synths parameters
ith standard Midi Control Change messages
•Handy 'move pot without sendin messa es'-feature to prevent excessive parameter jumps
•Useful 'Bypass Mode' letting all Mididata pass unfiltered for smallest latency and ignoring pot changes
•Learnt Midichannel keeps stored in memory
•Firm areupdate via SysEx-dump
•Hard are compatible throughout all editions
•Current dra 40 mA
•Weight ithout po er supply 660g
•Size incl. Knobs and rubber feet about 180 x 130 x 60 mm
Technical handlin
The Synth Controller as built to be used in a comfortable music studio environement. You can operate it under
free skies of course. But please keep in mind, it uses electricity for proper operation and therefore is quite
sensitive to ater, drinks or other fluids. Excessive heat or exposition to sunlight is also not advised.

Power supply
You can use any ordinary 9 Volt DC po ersupply to operate your controller. The connector should have Plus on
the outside and Ground - sometime labeled as 'Minus' - on it's centerpin. Most guitar effects al arts use this
pin-standard. The Synth Controller has a protection diode for not doing any harm if the polarity of the po er
supply is rong, it just on't ork.
The current of the PSU should at least offer about 100 mA (=0.1 A). If it supplies more current (e.g. 500mA) this is
fine and on't cause problems.
Please do N V R use a powersupply having an 'AC'-Output. AC means alternate current. AC-PSUs have the
letter combination AC/AC or a sine ave symbol besides the ord 'output'.
Editions and this manual
The Synth Controller is available in different versionen ('Editions') each carefully designed for a special target
synthesizer. This manual describes the properties common throughout all editions. Some editions offer
further features, this is documented in an addendum covering the edition's details. All addendums are freely
available for do nload on our ebsite. Please follo this product's subdomain:
sc-en.stereoping.com

2. Integration into your setup
Example 1 - Synth Controller with a keyboard synth
Connect 'Midi Out' of the Synth Controller ith a Midi cable to 'Midi In' of your synth:

Example 2 - Midi-Sequencer/DAW -> Synth Controller -> Synth
If you ant to edit your Synth hile it's being fired ith notes from a sequencer you might prefer this setup:
The Synth Controller merges data (notes, velocity, pitchbend...) coming from the sequencer ith the SysEx-data
generated by itself and sends them all together into your synth.

Automatin parameters in your DAW
Maybe you'd like to automate e.g. cutoff, envelope times or other parameters in your song? For automation e
do not recommend recording the Synth Controller's output into your DAW. Besides the fact fe DAWs can record
SysEx-Data at all, your recorded t eaks could not be edited further.
The follo ing makes much more sense: most DAWs allo collecting a set of t eakable controls/knobs/sliders
into a 'dashboard' or 'mixermap' (or hatever). These controls can be programmed to send midi controller
change data ('CC'). You then configure these knobs to send the CC-numbers you ill find on the Synth
Controller's faceplate besides your desired parameter.
No hen you move / automate your DAW's knob, it sends CC-data into the Synth Controller hich immediately
translates the CCs into the SysEx-commands, your synth ants to see. More about that in chapter 4.
The cable-setup for this automation method is the same as sho n above in example 2.

3. Operation
After all midi cables are connected, 2 more things need to be checked before starting:
1. the midichannel of the Synth Controller and your synth have to be identical.
Ho to set the Synth Controller's default channel is described belo .
2. some synths have a parameter for 'allowing' Sys x-Data receiving
Some synthesizers have a special SysEx-receive/recognize-parameter hich needs to be set accordingly.
Other ize the commands of the Synth Controller are ignored. Examples are Roland JX-8P, Yamaha TX81-Z, Ka ai
K3, Oberheim Matrix 6 Korg DW-/EX-8000 … If your synth ont respond to the controller, even both
midichannels are set to identical values please have a look into your editions addendum you can do nload from
sc-en.stereoping.com
On to operation: In the upper left corner you find 3 colored
lighted buttons hich activate one of the 3 color modes. Each
color mode has a set of parameters printed on the frontpanel
in exactly THAT color, hich are sent out the MIDI Out jack
hen the appropriate pot is dialed. For example if you press
the green button, it ill light up and the parameters on the
frontpanel printed in green ill be sent to the synth as you
move the pots. If you find a parameter you ant to change
next, have a look at it's color and change into that color mode
ith one of the 3 buttons - if it is not already selected.
Some editions have got some parameters like 'Volume' or
'Cutoff' in neutral color ( hite, grey, black). These parameters ill be sent al ays, no matter hich color mode is
currently selected.

Pot dialin without sendin data
Changing bet een the color modes logically involves the un anted side effect, the rotation angle of a pot often
not corresponding the appropriate parameter value in your synth. Moving such a pot ill cause the synthesizer's
parameter to jump to the ne value immediately, causing a sometimes unpleasant sonic experiance.
Example on a Kor DW-8000: the synths delay level is at 0 % and you want to increase the delay level softly. After
switchin into the blue color mode you realize, the last pot in the second row for the delaylevel unfortunately is set fully
clockwize. If you would move the pot now, the delay level of the DW-8000 would most likely jump shortly to a hi h level,
even if you tried turnin the pot quickly to it's 0 % position.
We have a orkaround: pressing and holding an already lighted color-button will prevent the Synth
Controller's pots from sending data. Release the color-button and the messages ill be sent again - of course
from the ne pot position on.
For the upper example, we would hold the li hted blue color button, dial the pot to the left, release the button and start
to softly fade in the delay level dialin the pot clockwize.
Button Combinations and special modes
According to the edition you purchased, the one or other specialmode is available and can be engaged holding a
button combination. If more 'special modes' are available than explained here, they are described in detail in the
edition specific addendum you can do nload any time from sc-en.stereoping.com
All Notes off
It should not happen but for several reasons it mi ht happen that a ringing note of your synthesizer ill not stop
anymore. This is caused by a missing midi message called 'Note Off' hich as lost for some reason. It is not
necessary to po er your synth or the controller off and on again. For these occasion: to send an 'All Notes Off'
event to your synth, shortly press the button combination printed on the frontpanel. In most editions, the
combination consists of the upper 2 buttons.

Midi channel learn mode
The Synth Controller has a Midi Channel Learn Mode. Once engaged, the Synth Controller aits for an incoming
Midi note on it's Midi In jack.
Exceptions for the editions '1016R' and 'Qfeld': they await a NoteOn or Pitchbend. More details in the edition's
addendum. To keep thin s simple we just talk about midi notes in the followin .
Exception for 'Microwave' edition: your controller needs the midi channel only for the CC-SysEx-translator, not for
normal operation. For midi channel learn mode on this edition hold ALL three buttons for 2 seconds.
To enter the Midi Channel Learn Mode, hold the button combination printed on the frontpanel for about
2 seconds. The lights of the pressed buttons ill start flashing, you can release the buttons no . The Synth
Controller a aits an incoming note on it's Midi In jack. If nothing comes in for about 30 seconds, the Synth
Controller ill return to normal operation mode, keeping it's old Midichannel. If the Synth Controller learnt
hich channel to use, it ill nicely flash and return to normal operation. You can also leave this mode manually
by shortly pressing any of the buttons.
Bypass Mode
This mode is for optimizing mididata flo and locking the user interface against unintended parameter changes
at the same time. You can enter the Bypass Mode by holding the button combination printed on the frontpanel.
The corresponding lights ill flash to indicate your Synth Controller is in Bypass Mode.
In Bypass Mode, most routines of the Synth Controller's soft are are skipped and incoming Midi is passed
through unprocessed offering the least latency. In addition any dialing of the pots is ignored. This is useful for
several situations:
•your perfect song is ready for being recorded and you ant to ensure the smallest latency for mididata
going through the Synth Controller
•you got kids or cats (or both) in your studio and ant to prevent, they destroy your soundpatch
masterpiece at the moment they see the a esome Synth Controller and can't stand to fiddle the pots
You can leave Bypass Mode by pressing any of the 3 buttons.

4. 'Midi Controller Change Message' to 'SysE ' translator
As described in chapter 2, CC-data is the better choice for automation of parameters.
We therefore spent the Synth Controller a little data translator hich offers the possibility to remote control the
parameters on the frontpanel by incoming CC changes. The little numbers besides the parameters sho the
number you need to send into the Synth Controller to translate this parameter. To still allo the standard CCs
like volume (#7) or paning (#10) the numbers start ith #11 and end ith max. #63.
The CC message must be sent on the same midichannel as the Synth Controller's and the synthesizers
midichannel. When the Synth Controller detects a CC message ith a suitable controller number, it translates it
into the appropriate SysEx message and sends it out to your synth.
Technical info: some editions do not have this translator becuase they already use CC-messa es for chan in
parameters.

5. Technical limitations
Some synthesizers offer far more parameters than the Synth Controller's concept can handle. Especially the
Waldorf Micro ave and the Oberheim Matrix 1000 / 6 / 6r ith their extensive modulation capabilities can not
be controled entirely ith a small box ith fe knobs. We tried to find and implement the most relevant and
interesting parameters into the Synth Controller, but your synth might offer much more. Please check your
synth's manual to find out hat it has to offer apart from the Synth Controller's frontpanel.
Parameter jumps
We already talked about that above: changing a color mode by pressing one of the unlighted buttons naturally
leads to knobs, rotated to positions not corresponding ith the parameter values in your synth. Dialing one of
these pots lets the appropriate parameter jump immediately onto it's ne value hich might result in
unpleasant sound changes. To overcome this issue, e implemented a handy shortcut feature hich helps in
many cases: a pot's parameter is NOT sent to your synth as long as the already lighted button is held do n. Let
the button go and the messages ill be sent again on dialing.
Notes la in in time
Another issue you might encounter hile using the Synth Controller are delayed or timing related unprecise
notes hile excessive pot fiddling. This problem is not caused by the Synth Controller, it is dismantled by it. The
lags arise hen too much data ants to travel the small pipe of the Midi dataline. Synth editing through the
Synth Controller is performed using so called 'Midi SysEx data' hich uses quite many databytes and normaly
plays a secondary role in everyday's Midi orld.

6. Updating firmware
The day may come you ant to update your edition or try out another. Your Synth Controller offers a firm are
update mode for this. After entering this mode you just send a firm are-file into the controllers Midi-In jack. The
firm ares in SysEx-format are all compatible to your controller and freely available on our ebsite. You can
dump them ith any standard SysEx dump tool of hich several are available as free are for different operating
systems.
The technical part: Plug 'Midi Out' of your midi-interface into the 'Midi In' of the Synth Controller, if possible
ithout a midi-patchbay in bet een and ith a short cable.

To enter bootloader mode, hold the topmost button while powering the Synth Controller on. The middle
button will light up. You can release the button then of course. Configure the SysEx-dump-soft are to use the
correct Midi Output, open the firm are file and send it into the Synth Controller.
While the incoming stream is valid and saved into the program memory, the lights are flashing slo ly one after
the other. The dump process should take less than a minute. If the button's lightsho ends and the lo est
button keeps flashing, an error occured. Either the firm are file as corrupt (unlikely) or the incoming data as
sent faster than the controller could rite the data before. The soft are you dump the Firm are-File into the
controller should have a parameter some here like "Delay bet een Buffers". Set this parameter to at least
100 mS.
After the successful dump, the Synth Controller restarts again, elcoming you ith some nicely flashing buttons
going into normal operation.

Other manuals for Synth Controller
2
Table of contents
Other Stereoping Music Equipment manuals

