Stevens ROAD User manual
English | S - 1
STEVENS User Manual Road | Gravel | Cyclocross
Caution:
Be sure to also observe the instructions of the component manufacturers on our website at
www.stevensbikes.de/manual. These operating instructions are subject to European law. If the STEVENS
bicycle is delivered to countries outside Europe, supplementary instructions may have to be provided by
the manufacturer.
Caution:
Read pages 6 to 19 before your first ride!
Perform the functional check on pages 20 and 21 before every ride!
Observe the service schedule, the bike card and the handover report!
Note:
You find the instructions of the component manufacturers and the respective weblinks on our website at
www.stevensbikes.de/manual
These operating instructions comply with the requirements of the EN ISO standard 4210-2 for road
racing bicycles. There is a separate manual for STEVENS e-bikes that you can find on our website
www.stevensbikes.de/manual
EN ISO 8098
STEVENS USER MANUAL
ROAD
|
GRAVEL
|
CYCLOCROSS
ROAD RACING BICYCLES
TRIATHLON / TIME TRIAL BICYCLES
CYCLOCROSS BIKES
GRAVEL BIKES
EN ISO 4210-2 CYCLES – SAFETY REQUIREMENTS FOR BICYCLES
For more information see the instructions on our website at www.stevensbikes.de

S - 2| English English | S - 3
Frame:
aTop tube
bDown tube
cSeat tube
dRear stay
eChainstay
fHead tube
1 Saddle
2 Seat post
3 Seat post clamp
4 Front derailleur
5 Rear brake
6 Cassette sprockets
7 Rear derailleur
8 Chain
9 Chainring
10 Crank arm
11 Stem
12 Handlebar
13 Brake lever/shifter
14 Headset
15 Fork
16 Front brake
17 Brake disc/rotor
18 Drop-out
Wheel:
19 Valve
20 Quick-release/thru axle
21 Rim
22 Spoke
23 Tyre
24 Hub
Component Description
Road racing bicycle
Table of Contents
Component Description ...............................................................................................................................2
Imprint .........................................................................................................................................................5
Some Notes on these STEVENS Operating Instructions ..............................................................................6
General Safety Instructions .........................................................................................................................7
Intended Use................................................................................................................................................9
Categories .........................................................................................................................................................9
Maximum Permissible Overall Weight.............................................................................................................14
Use of Trailers..................................................................................................................................................14
Use of Child Seats ...........................................................................................................................................16
Use of Roller Trainers ......................................................................................................................................17
Before Your First Ride ................................................................................................................................18
Before Every Ride ......................................................................................................................................20
Legal Requirements for Riding on Public Roads........................................................................................22
Adjusting the STEVENS Bicycle to the Rider..............................................................................................23
Sloping Geometry – How to Determine or Measure the Frame Size ...............................................................24
Stack-to-Reach...............................................................................................................................................25
Adjusting the Saddle to the Correct Height .....................................................................................................26
Adjusting the Height of the Handlebar ............................................................................................................28
Stems for Threadless Systems, the Aheadset®-System......................................................................................29
Integrated Cable Routing .................................................................................................................................31
Correcting the Fore-to-Aft Position and Tilt of the Saddle...............................................................................32
Adjusting the Brake Lever Reach on STEVENS Road Racing Machines, Cyclocross Bicycles
and Gravel Bikes..............................................................................................................................................34
What to Bear in Mind with Time Trial Handlebars on STEVENS Triathlon and Time Trial Machines..........................34
Adjusting the Tilt of the Handlebar and the Brake Levers
of STEVENS Road Racing Machines, Cyclocross Bicycles and Gravel Bikes .........................................................35
Triathlon Handlebars........................................................................................................................................35
The Pedal Systems ....................................................................................................................................36
Different Systems at a Glance – How They Work ............................................................................................36
Adjustment and Maintenance..........................................................................................................................37
The Brake System......................................................................................................................................38
Functioning and Wear......................................................................................................................................38
Rim Brakes (General).......................................................................................................................................39
Hydraulic Disc Brakes (General)......................................................................................................................42
Checking and Readjusting Hydraulic Disc Brakes ..............................................................................................43
Mechanical Disc Brakes ..................................................................................................................................44
Functional Check ............................................................................................................................................44
Wear and Maintenance....................................................................................................................................44
The Gears...................................................................................................................................................45
Derailleur Gears ..............................................................................................................................................45
Functioning and Operation...............................................................................................................................46
Checking and Readjusting the Gears ................................................................................................................49
Shimano Di2...................................................................................................................................................51
SRAM ETAP/AXS ROAD ...................................................................................................................................53
11
12
13
14
19
15
16
17
18
20
21
22
23
24
1
2
3
4
5
6
7
8
9
10
a
bc
d
e
f

S - 4| English English | S - 5
Chain Maintenance..........................................................................................................................................54
Chain Wear.....................................................................................................................................................54
The Wheels ................................................................................................................................................55
Tyres, Tubes, Rim Tapes, Valves, Inflation Pressure.........................................................................................55
Rim Trueness, Spoke Tension ..........................................................................................................................57
How to Use Quick-Releases and Thru Axles....................................................................................................58
Quick-Releases...............................................................................................................................................58
Thru Axles ......................................................................................................................................................60
Repairing Punctures........................................................................................................................................61
Wheel Removal...............................................................................................................................................61
Removing Clincher and Folding Tyres ...............................................................................................................62
Mounting Clincher and Folding Tyres ................................................................................................................63
Removing Tubular Tyres...................................................................................................................................64
Mounting Tubular Tyres....................................................................................................................................65
Tubeless Tyres (UST tyres) ...............................................................................................................................66
Mounting Wheels ............................................................................................................................................67
The Headset...............................................................................................................................................68
Checking the Bearing Play ..............................................................................................................................68
Adjusting the Threadless Headset: Aheadset®Headsets.................................................................................69
Special Characteristics of Carbon .............................................................................................................70
Care Instructions .............................................................................................................................................72
Parts and Components Made of Carbon..........................................................................................................72
Replaceable Derailleur Hanger .........................................................................................................................72
Bottle Cage.....................................................................................................................................................72
What to Bear in Mind When Braking With Carbon Wheels...............................................................................73
Carbon Handlebars..........................................................................................................................................74
Mounting Carbon Handlebars...........................................................................................................................74
Carbon Seat Posts ...........................................................................................................................................76
Mounting the Seat Post ...................................................................................................................................76
Mounting the Aero Seat Post with Top Tube Clamp ............................................................................................77
Suspension Forks ......................................................................................................................................79
Functioning......................................................................................................................................................80
Adjusting Suspension Forks.............................................................................................................................80
Blocking the Suspension Forks (Lockout) .......................................................................................................82
Maintenance....................................................................................................................................................83
Things Worth Knowing about Bicycles.......................................................................................................84
Cycling Helmets and Glasses ..........................................................................................................................84
Pedals and Shoes............................................................................................................................................85
Accessories .....................................................................................................................................................86
Bicycle Locks..................................................................................................................................................86
Puncture Kit....................................................................................................................................................86
Cycle Computers.............................................................................................................................................86
Transport of the STEVENS Bicycle...................................................................................................................87
By Car............................................................................................................................................................87
By Train / By Public Transport...........................................................................................................................89
Bicycle Transport in a Bicycle Case or in a Sturdy Bicycle Cardboard Carton........................................................90
Terms of Guarantee of STEVENS Vertriebs GmbH......................................................................................93
STEVENS “Crash Replacement” Program..................................................................................................95
General Notes on Care and Servicing........................................................................................................97
Maintenance and Servicing.............................................................................................................................97
Cleaning and Caring for your STEVENS Bicycle...............................................................................................97
Safekeeping and Storing your STEVENS Bicycle.............................................................................................98
Service and Maintenance Schedule ..........................................................................................................99
Recommended Torque Settings...............................................................................................................101
Recommended Torque Settings for Disc Brakes and Hydraulic Rim Brakes .................................................102
Maximum Torque Settings of Standard Bolts ................................................................................................103
Service Schedule.....................................................................................................................................104
Bike Card .................................................................................................................................................106
Handover Report......................................................................................................................................107
Editor
STEVENS Vertriebs GmbH
Asbrookdamm 35
D-22115 Hamburg
Phone: 040-716070-0
Fax: 040-465314
www.stevensbikes.de
Imprint
Edition 15, October 2022
Editor: STEVENS Vertriebs GmbH
© Text, concept, photos and graphic design: Zedler – Institut für Fahrradtechnik und -Sicherheit GmbH
©
Technical details in the text and illustrations of these operating instructions are subject to change.
Liability of the editor, the editorial team and other third parties for contributions in this booklet and resulting damage
whatsoever shall be excluded, unless in the event of gross negligence. No part of this publication may be reprinted,
translated, copied or transmitted in any form or by any means, electronic, mechanical, by hand or otherwise for
another business purpose without prior written permission of the author and the editor.
Place of jurisdiction Hamburg
District Court Hamburg HRB52130
Tax ID: 46-760-00351
VAT ID: DE157760068
WEEE-Reg.-No. DE65306856
Registered office: 22115 Hamburg

S - 6| English English | S - 7
Some Notes on these STEVENS Operating
Instructions
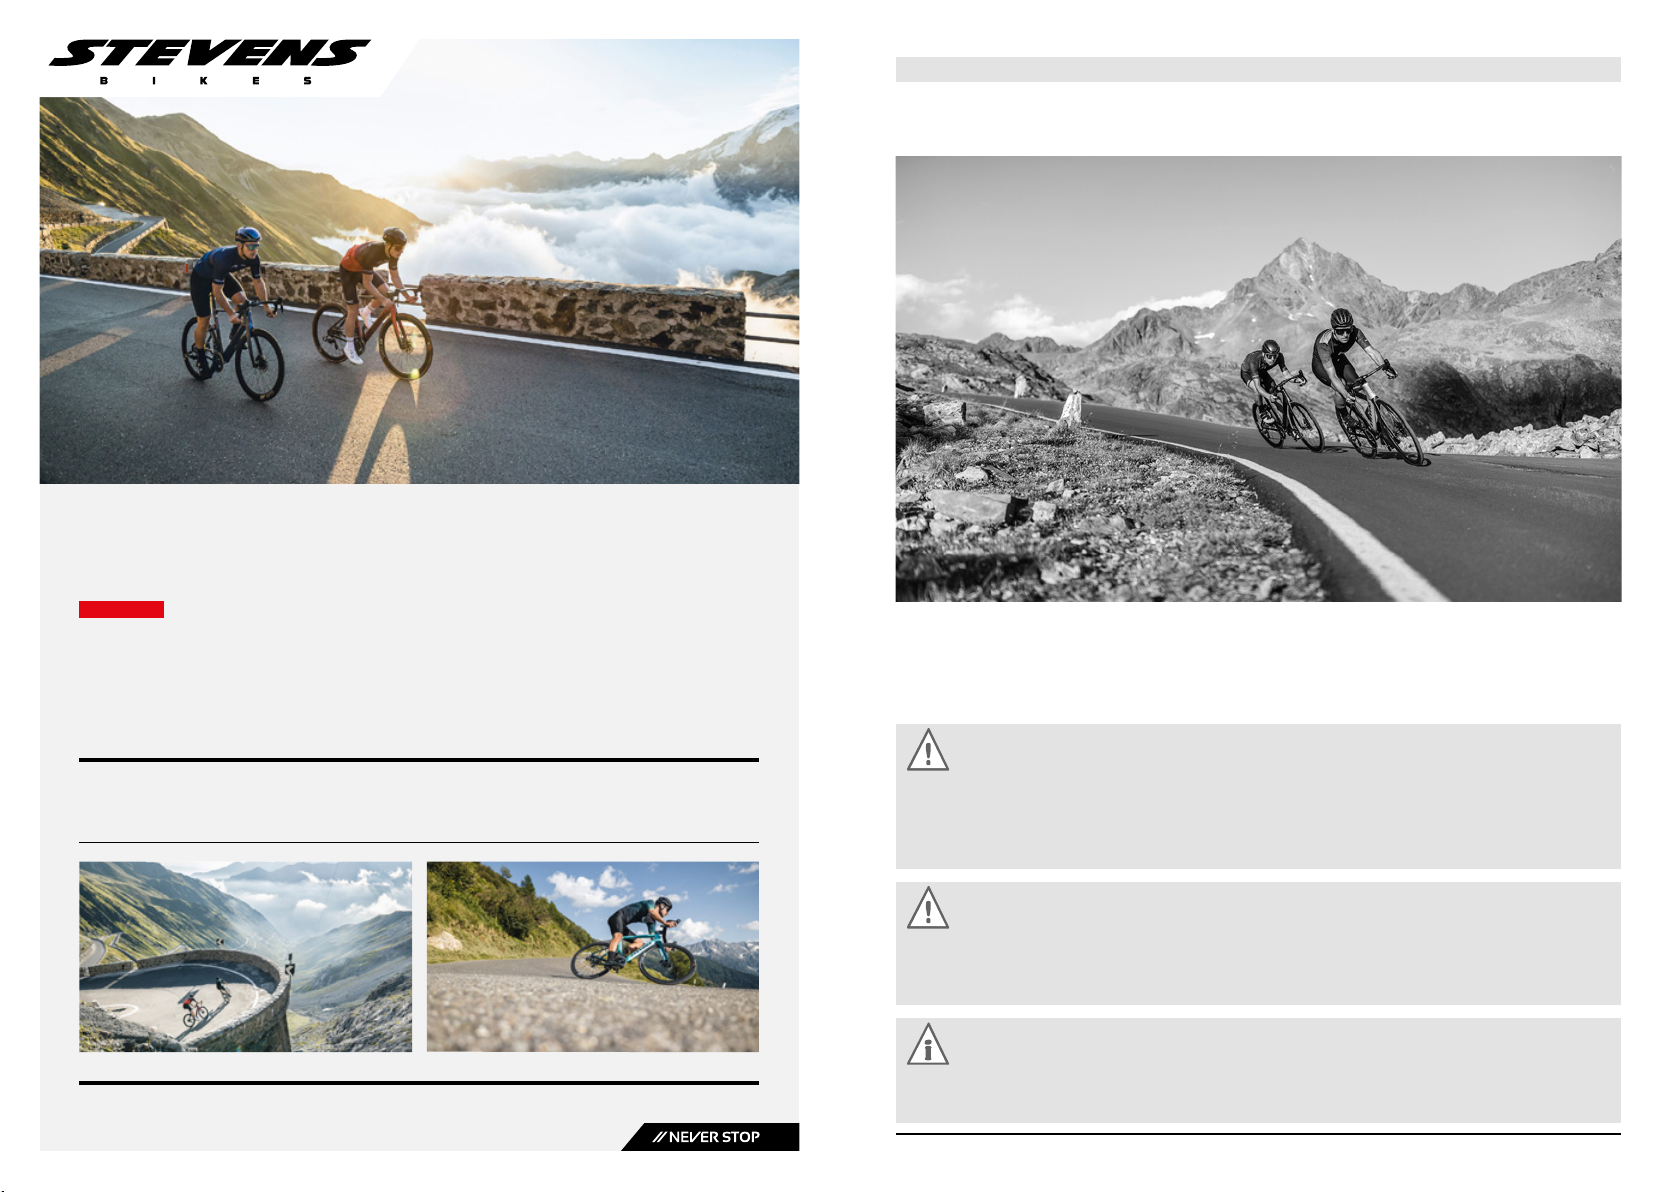
The picture on the front page of the STEVENS operating instructions shows
a typical STEVENS road bike/gravel/cyclocross. This bicycle corresponds to the
STEVENS bicycle you purchased. Today’s bicycles come in various types that are
designed for specific uses and equipped accordingly. The STEVENS operating
instructions include the following bicycle types:
Road racing bicycles
Triathlon/time trial bikes
Cyclocross bikes
Gravel bikes
Pay particular attention to the following symbols:
Danger:
This symbol indicates an imminent risk to your life or health unless you
comply with the instructions given or take preventive measures.
Caution:
This symbol warns you of wrongdoings which may result in damage to
property and environment.
Note:
This symbol provides you with information about how to handle the prod-
uct or refers to a passage in the operating instructions that deserves your
special attention.
The described possible consequences will not be repeated in the STEVENS
operating instructions every time one of the symbols appears. These operating
instructions are not intended to help you assemble a STEVENS bicycle from indi-
vidual components, to repair it or to make a partly assembled bicycle ready-for-
use.
These STEVENS operating instructions are not applicable to any other than the
displayed bicycle types.
General Safety Instructions
Dear STEVENS customer,
In purchasing this STEVENS bicycle you have chosen a product of high quality
and technology. Each component of your new STEVENS bicycle has been designed,
manufactured and assembled with great care and expertise. Your STEVENS dealer
gave the bicycle its final assembly and adjustment to guarantee proper operation
and many enjoyable riding experiences with complete peace of mind from the
very first metres.
This manual contains a wealth of information on the proper use of your
STEVENS bicycle and a lot of interesting facts about bicycle technology, mainte-
nance and care. Read these STEVENS operating instructions thoroughly. We are
sure that even if you have been cycling all your life you will find useful and detailed
information. Bicycle technology has developed at a rapid pace during recent years.
Therefore, before setting off on your new STEVENS bicycle, be sure to read at
least the chapter “Before Your FIRST Ride”.
To ensure as much fun and safety as possible during cycling, be sure to carry
out the functional check described in the chapter “Before EVERY Ride” before
setting off on your STEVENS bicycle.
Even a manual as big as an encyclopaedia could not describe any possible com-
bination of bicycle models and components or parts on the market. The STEVENS
operating instructions therefore focus on your newly purchased STEVENS bicycle
and standard components and provides useful information and warnings.
When doing any adjusting and maintenance work, be aware that the detailed
instructions provided in your manual only refer to this STEVENS bicycle.
The information included here is not applicable to any other bicycle type. As
bicycles come in a wide variety of designs with frequent model changes, the rou-
tines described may require complementary information. Be sure to also observe
the instructions of the component manufacturers.
Be aware that these STEVENS operating instructions may require further
explanation, depending on the experience and/or skills of the person doing the
work. For some jobs you may require additional (special) tools or supplementary
instructions. This manual cannot teach you the skills of a bicycle mechanic.
Caution:
If you have purchased
a STEVENS e-bike/
EPAC, be sure to read
the supplied translation
of the original STEVENS
operating instructions.
There you will find
further categories.
S - 8| English English | S - 9
Intended Use
Your bicycle was designed for a specific use by our STEVENS engineers.
Be sure to use your STEVENS bicycle only for its intended purpose, as it may
otherwise not withstand the stress and fail. Risk of accident!
Categories
Keep in mind that every bicycle type, referred to in the following as category is
built for a specific intended use. Be sure to use your STEVENS bicycle exclusively
according to its intended use. Otherwise your STEVENS bicycle may not withstand
the stress, fail and cause an accident with unforeseeable consequences!
Any improper use will invalidate the warranty.
The category of your STEVENS bicycle is specified on the category sticker on
your STEVENS bicycle.
For more information see the bike card. Ask your STEVENS bicycle dealer to
confirm the category to which your STEVENS bicycle belongs.
Note:
Detailed information on your STEVENS bicycle
is provided at www.stevensbikes.de/manual
Before you set off, let us point out a few things that are very important to every
cyclist: Never ride without a properly adjusted helmet and without glasses and take
care to always wear suitable, bright clothing. At least you should wear straight cut
trousers or leg bands and sturdy shoes fitting the pedal system. Always ride care-
fully on public roads and observe the traffic rules so as not to endanger yourself
or others.
This manual cannot teach you how to ride. Be aware that cycling is a poten-
tially dangerous activity that requires the rider to stay in control of his or her
STEVENS bicycle at all times.
Like any sport, cycling involves the risk of injury and damage. Keep this in
mind. When you decide to ride a STEVENS bicycle you need to accept the risk
inherent to cycling. Note that on a STEVENS bicycle you have no protection tech-
nology around you (e.g. bodywork, ABS or air bag) like you have in a car. Therefore,
always ride carefully and do respect the other traffic participants.
Never ride under the influence of drugs, medication, alcohol or when you are
tired. Be sure to never ride with a second person on your STEVENS bicycle (except
on a STEVENS tandem) and always ride with your hands on the handlebar.
Observe the legal regulations concerning off-road cycling. These regulations
may differ in each country. Respect nature when riding through the forest and in
the open countryside. Ride on signposted and paved paths as well as on roads with
and smooth surfaces only.
First we would like to familiarise you with the various components used on your
STEVENS bicycle. On the front page of the STEVENS operating instructions you
find an exemplary, typical STEVENS road racing bicycle showing all the essential
components.
You find all STEVENS user manuals, the instructions of the
component manufacturers as well as detailed information
on your STEVENS bicycle at www.stevensbikes.de/manual
Have a lot of fun with your new STEVENS bicycle!
Danger:
There are different types
of bicycles that are
subject to different legal
framework conditions.
Therefore, be sure to
observe the sticker on
your STEVENS bicycle.
Danger:
Be sure to observe the
category to which your
STEVENS bicycle be-
longs. From the category
you can conclude which
grounds and riding
actions are suitable for
your STEVENS bicycle.
Note:
Inform yourself at
www.stevensbikes.de
and check the category
your STEVENS bicycle
belongs to.
Danger:
For your own safety,
never do work on your
bicycle unless you feel
absolutely sure about it.
If you are in doubt or if
you have any questions,
contact your STEVENS
dealer.
Note:
Register your STEVENS
bicycle at
www.stevensbikes.de.
You will be informed
about technical up-
grades, if necessary.
S - 10 | English English | S - 11
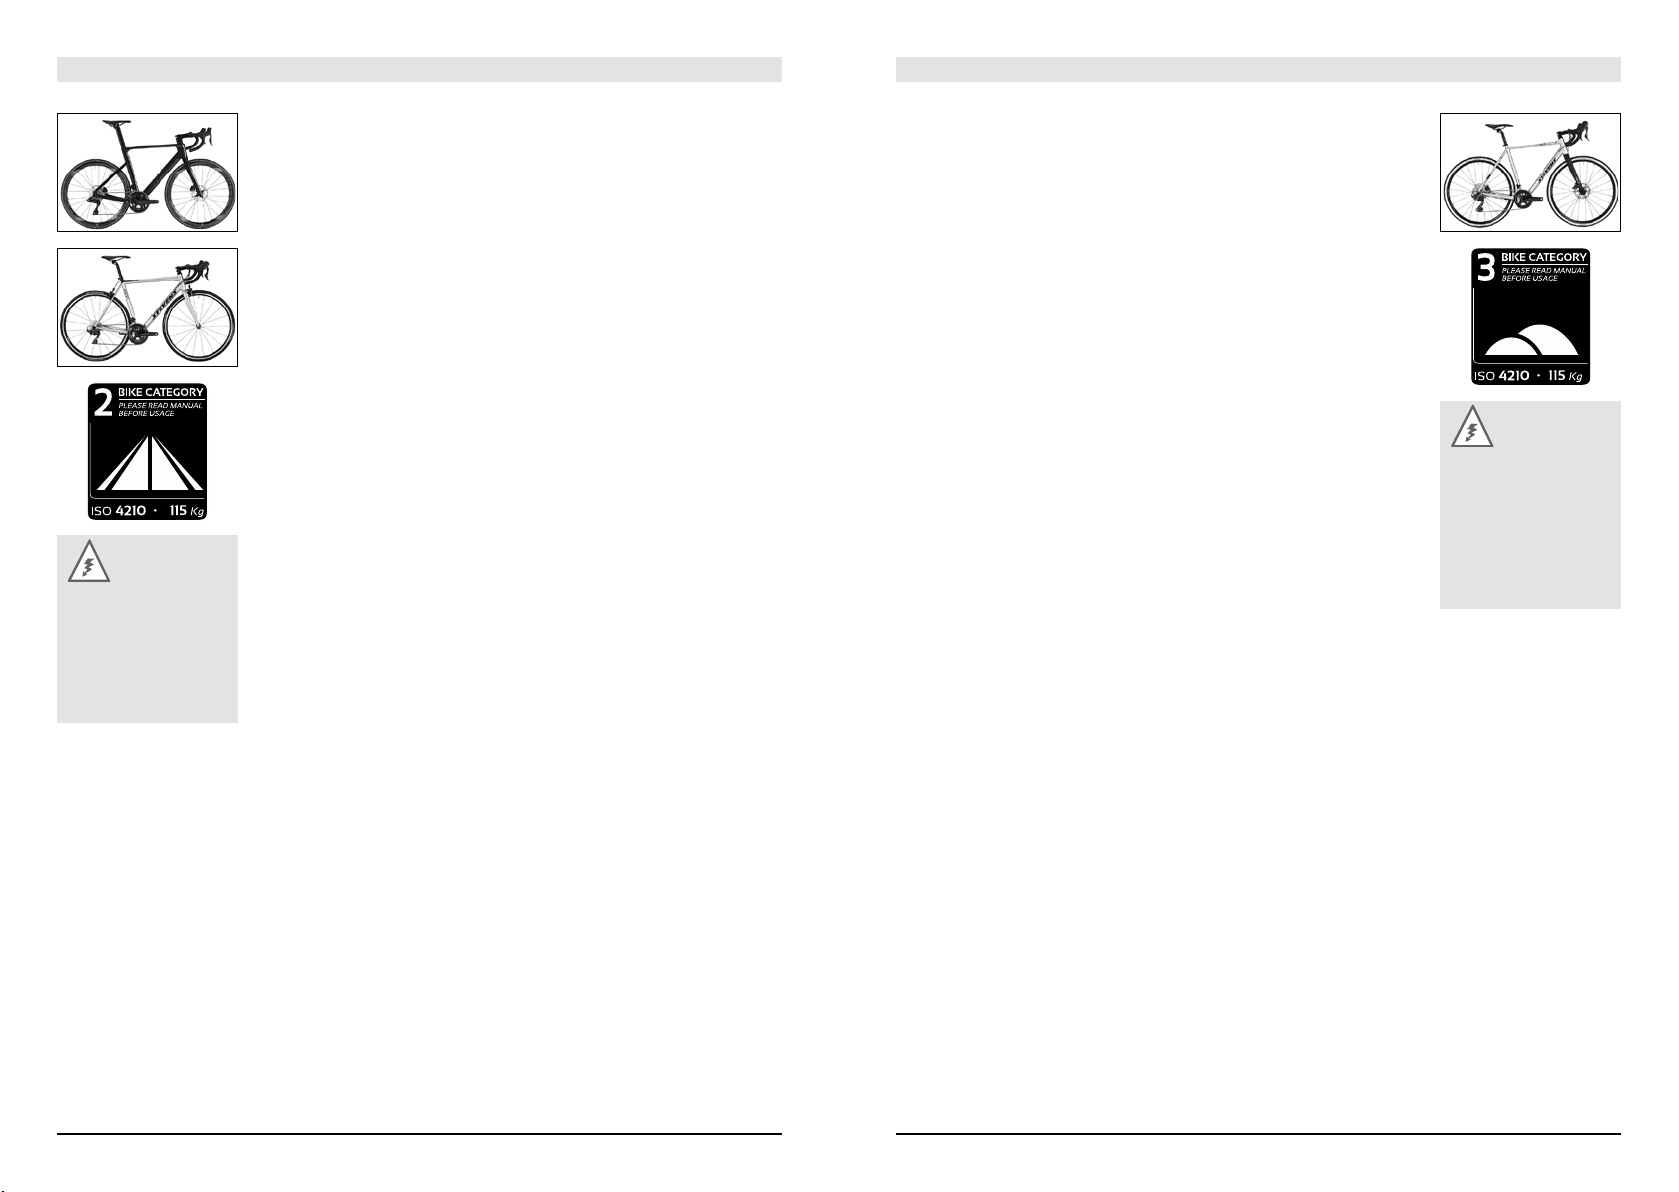
Category 2: STEVENS road racing and triathlon bikes as well as time trial
machines
This category describes STEVENS road racing and triathlon bikes as well as
time trial machines. These are in general road racing bikes with racing handle-
bars or straight handlebars, triathlon or time trial bicycles. The tyre width is very
narrow, i.e. 22 to max. 32mm. STEVENS Custom Road, Triathlon, Road.
STEVENS road racing and triathlon bikes as well as time trial machines
are intended for use on roads and trails with tarred or paved surface, where the
wheels remain in permanent contact to the ground.
• If you want to use STEVENS road racing and triathlon bikes as well as time
trial machines on public roads, these bikes must be equipped with the pre-
scribed equipment. Observe the traffic rules when riding on public roads. For
more information see the chapter “Legal Requirements for Riding on Public
Roads”.
• The maximum permissible overall weight (rider incl. luggage and bicycle)
should not exceed 115kg. Under certain circumstances this maximum per-
missible overall weight can be further limited by the component manufactur-
ers’ recommendations for use or weight restrictions.
You find more information in the operating instructions or on the websites of
the respective component manufacturers.
• On STEVENS road racing and triathlon bikes as well as on time trial machines
(kids’) trailers, pannier racks and child seats are not permitted.
• You find more information on how to use your STEVENS road racing bicycle on
free rollers (bike rollers without brake) and roller trainers in the chapter “Use
of Roller Trainers”.
Danger:
STEVENS bikes of the
category 2 are not
suitable for off-road use,
jumps, slides, stair rid-
ing, stoppies, wheelies,
tricks etc.!
Category 3: STEVENS cyclocross bikes
This category describes STEVENS cyclocross bikes. They have 28"-wheels
with narrow tyres. The tyre width is 28 to max. 42mm. STEVENS Cyclocross.
STEVENS cyclocross bikes are intended for hard-surface terrain, i.e. for
tarred roads and bicycle lanes or gravel field tracks, where the wheels do not lose
ground contact. In addition, they are suitable for well maintained gravel field and
forest tracks as well as for off-road trails with a slight slope where a temporary
loss of tyre contact with the ground due to small steps may occur.
They are suitable for use on easy terrain and cyclocross competitions, however
not for off-road use (mountain bike use), namely for all mountain, enduro, downhill
(DH), freeride, dual slalom, downhill/freeride parks, jumps, drops and in bike parks
etc.
• Due to their design and equipment, STEVENS cyclocross bikes are not always
suitable for being used on public roads. If you want to use them on public
roads, these bikes must be equipped with the prescribed equipment. Observe
the traffic rules when riding on public roads. For more information see the
chapter “Legal Requirements for Riding on Public Roads”.
• The maximum permissible overall weight (rider incl. luggage and bicycle)
should not exceed 115kg. Under certain circumstances this maximum per-
missible overall weight can be further limited by the component manufactur-
ers’ recommendations for use or weight restrictions. You find more information
in the operating instructions or on the websites of the respective component
manufacturers.
• On STEVENS cyclocross bikes made of aluminium the use of trailers is per-
mitted. On STEVENS cyclocross bikes made of carbon, however, the use of
trailers is not permitted.
• On STEVENS cyclocross bikes made of
carbon child seats are not permitted.
On STEVENS cyclocross bikes made of aluminium child seats are permitted.
For more information see the chapter “Use of Child Seats”.
Danger:
STEVENS bicycles of the
category 3 are not suita-
ble for off-road use over
challenging and blocked
terrain, jumps, slides,
stair riding, stoppies,
wheelies, tricks etc.!
S - 12 | English English | S - 13
Category 4: STEVENS cross and gravel bikes
This category describes STEVENS cross and gravel bikes. They have 28"-
wheels with narrow tyres. The tyre width is 28 to max. 42mm. STEVENS X Cross,
STEVENS Gravel.
STEVENS cross and gravel bikes are intended for hard-surface terrain, i.e.
for tarred roads and bicycle lanes or gravel field tracks, where the wheels remain
in permanent contact to the ground. In addition, they are suitable for well main-
tained gravel field and forest tracks as well as for off-road trails with a slight slope
where a temporary loss of tyre contact with the ground due to small steps may
occur. They are not suitable for off-road use (mountain bike use), namely for all
mountain, enduro, downhill (DH), freeride, dual slalom, downhill/freeride parks,
jumps, drops and in bike parks etc.
• Due to their design and equipment, STEVENS cross and gravel bikes are not
always suitable for being used on public roads. If you want to use them on
public roads, these bikes must be equipped with the prescribed equipment.
Observe the traffic rules when riding on public roads. For more information see
the chapter “Legal Requirements for Riding on Public Roads”.
• The
maximum permissible overall weight (comprising rider, luggage, pos-
sibly trailer load and bicycle) should not exceed
130kg. Under certain circum-
stances this maximum permissible overall weight can be further limited by the
component manufacturers’ recommendations for use or weight restrictions.
You find more information in the operating instructions or on the websites of
the respective component manufacturers.
• STEVENS cross and gravel bikes are designed for a trailer load of 40kg
without and 80 kg with trailer brake. On STEVENS gravel bikes made of
carbon, however, the use of trailers is not permitted.
• On STEVENS cross and gravel bikes made of carbon child seats are not
permitted. On STEVENS cross and gravel bikes made of aluminium child seats
are permitted. For more information see the chapter “Use of Child Seats”.
Danger:
STEVENS bikes of the
category 4 are not
suitable for off-road use,
jumps, slides, stair rid-
ing, stoppies, wheelies,
tricks etc.!
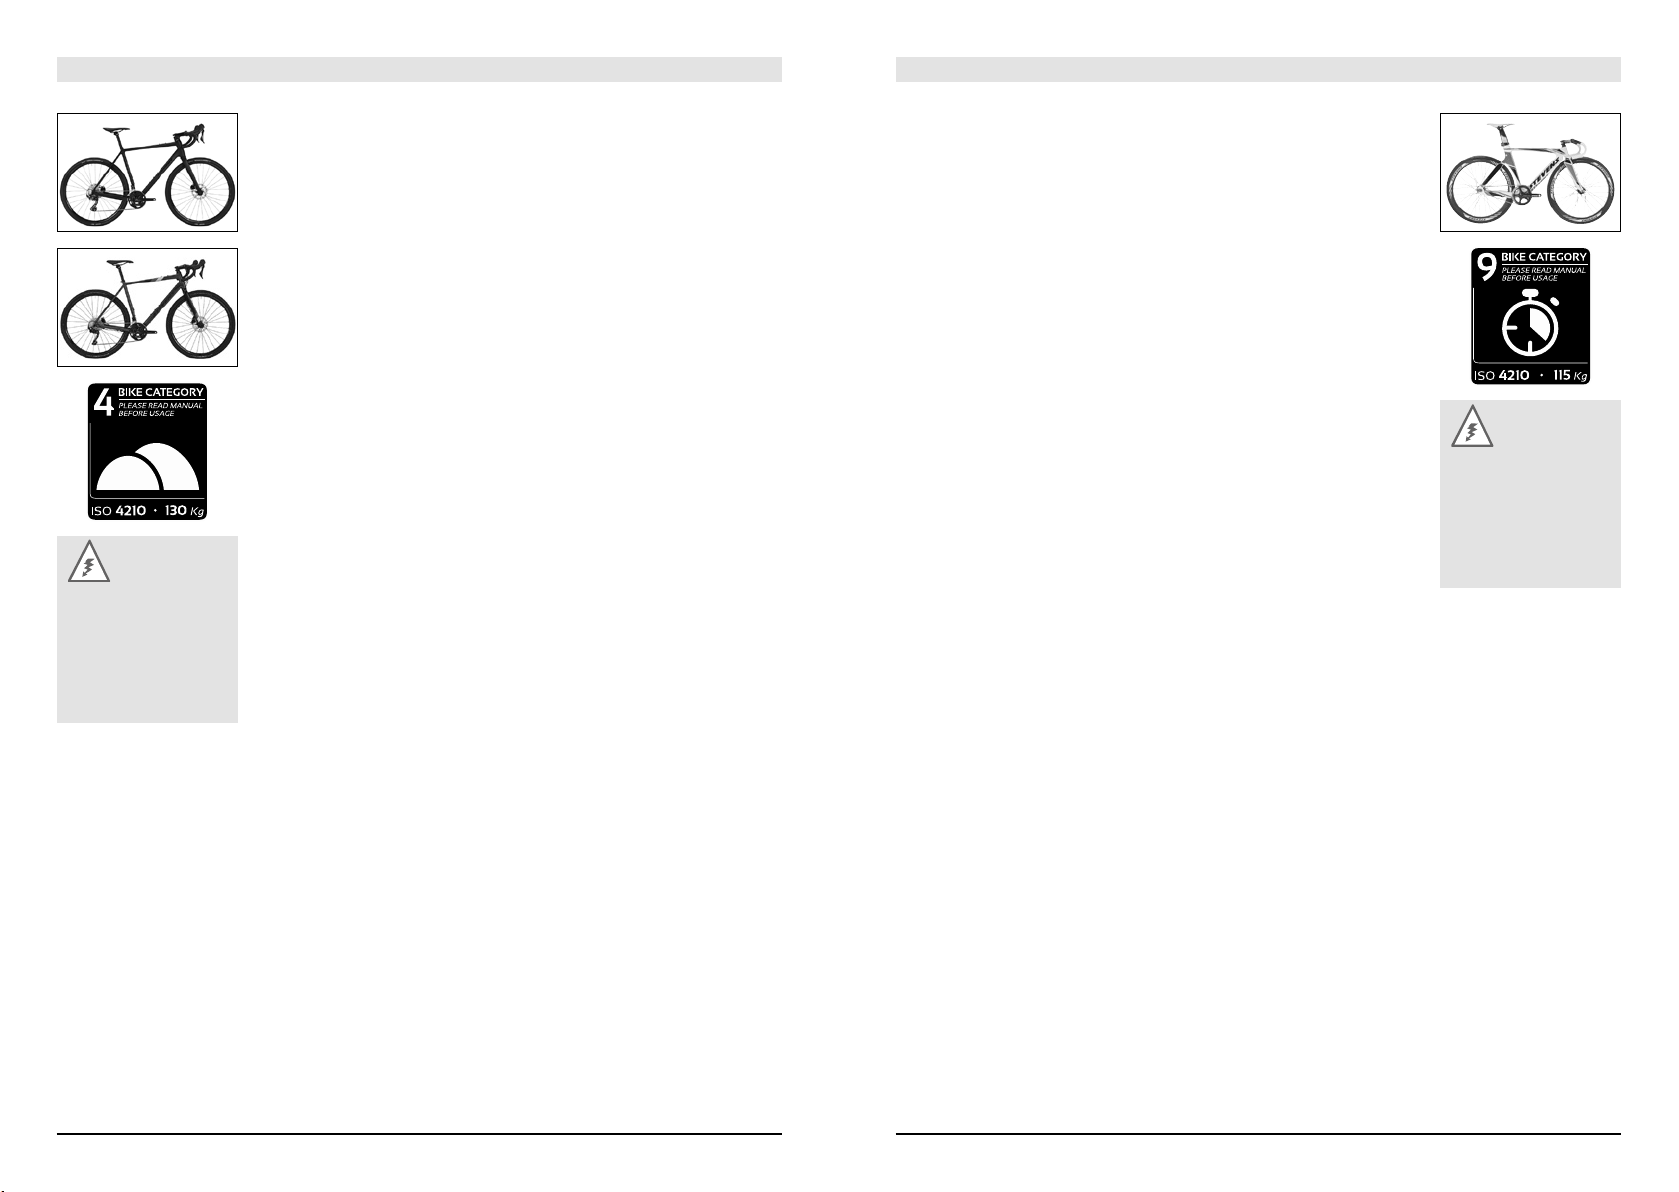
Category 9: STEVENS track bicycles
This category describes STEVENS track bicycles.
STEVENS track bicycles are true-bred sports bikes and only intended for use
on open or enclosed race tracks. The use of track bicycles on public roads or lanes
is neither intended nor permitted.
• The maximum permissible overall weight (rider incl. luggage and bicycle)
should not exceed 115kg. Under certain circumstances this maximum per-
missible overall weight can be further limited by the component manufactur-
ers’ recommendations for use.
• Some wheel or component manufacturers recommend shortening the service
intervals if the rider’s weight reaches a certain weight limit. Ask your STEVENS
dealer for the appropriate intervals.
• On STEVENS track bicycles (kids’) trailers, pannier racks and child seats are
not permitted.
Danger:
STEVENS bikes of the
category 9 are not
suitable for off-road use,
jumps, slides, stair rid-
ing, stoppies, wheelies,
tricks etc.!

S - 14 | English English | S - 15
When using a trailer, observe the following points:
• The trailer with its actual weight incl. cargo is considered to be part of the
permissible weight of your STEVENS bicycle. For more information see the
chapter “Maximum Permissible Overall Weight”.
• Be sure to fix the trailer coupling exclusively to the rear axle or to specific
mounts at the drop-out.
Danger:
With some trailer models it is necessary to replace the original thru axle by
a specific thru axle of the trailer manufacturer or to clamp an adapter with
the original thru axle. In this case, make sure that the axle thread and the
axle nut thread are fully covered.
The possibly required replacement axles must comply with the specifica-
tions of the original axle of your STEVENS bicycle (clamping width, thread
pitch and thread length, material and diameter).
Danger:
The permissible maximum speed indicated by the trailer manufacturer
must be observed. Also observe the operating instructions of the trailer
manufacturer.
Note:
You find all STEVENS user manuals, the instructions
of the component manufacturers as well as the
respective weblinks at www.stevensbikes.de/manual
Maximum Permissible Overall Weight
The maximum permissible overall weight is indicated on the category sticker
on your STEVENS bicycle.
The maximum permissible overall weight limit is made up as follows:
Weight cyclist (kg)
+ Weight bicycle (kg)
+ Weight luggage (kg)
+ Overall weight trailer incl. cargo and/or persons
(if in place) (kg)
= Maximum permissible overall weight (kg)
Use of Trailers
Most STEVENS bikes are approved for being used with trailers to transport
cargo and children.
With special child trailers that are towed behind a bicycle you can transport
one or two children.
The following STEVENS bicycles are approved for being used with trailers:
• STEVENS city and trekking bikes
• STEVENS cyclocross/gravel bikes made of aluminium
• STEVENS hardtail mountain bikes
• Full suspension STEVENS bikes made of aluminium
The following bicycles are not approved for being used with trailers:
• STEVENS bicycles with carbon frames or forks
• Full suspension STEVENS bicycles made of carbon
• STEVENS cyclocross/gravel bikes made of carbon
• STEVENS speed pedelecs
• STEVENS kids’ and junior bikes
• STEVENS track bicycles
• STEVENS tandem bicycles
Danger:
Attaching the trailer
coupling to the frame
tubes, rear stays or seat
post is not permitted.
Danger:
Keep in mind that
your stopping distance
increases with the
additional load due to
the transport of children
and cargo.
Danger:
Persons must only be
transported in trailers
approved for this pur-
pose.
Danger:
Trailers affect the braking behaviour and the width of your STEVENS bicy-
cle. First, practise riding with an empty trailer. Equip the trailer with a long
pole with coloured pennant to increase visibility.
Danger:
If the lighting equipment on your STEVENS bicycle is covered by the trailer,
it has to be mounted visibly to the trailer. When riding in the dark, provide
the rear end of the trailer with a battery/accumulator-operated lamp.
Danger:
Always secure the chil-
dren with the seat belt,
uncontrolled movements
inside the trailer can
make your STEVENS
bicycle or the trailer tilt.
Danger:
Make sure that your
child always wears a
suitable helmet. A trailer
is only an insufficient
protection in case of an
accident. Keep in mind
that you always wear a
helmet, as well.

S - 16 | English English | S - 17
Danger:
Observe the maximum permissible overall weight of the child seat and be
sure not to exceed it. You find more information in the instructions of the
child seat manufacturer.
Use of Child Seats
Most STEVENS bicycles are approved for being used with child seats.
The following STEVENS bicycles are approved for being used with child seats:
• STEVENS city and trekking bikes
• STEVENS cross ad cyclocross bikes made of aluminium
• STEVENS gravel bikes made of aluminium
• STEVENS hardtail mountain bikes made of aluminium
The use of child seats is not permitted on:
• STEVENS bicycles with carbon frames or forks
• STEVENS road racing and triathlon bikes as well as time trial machines
• Full suspension STEVENS bikes
• STEVENS cross and cyclocross bikes made of carbon
• STEVENS gravel bikes made of carbon
• STEVENS speed pedelecs
• STEVENS kids' and junior bikes
• STEVENS tandem bicycles
When taking your child with you in a child seat, observe the following points:
• Always put a fitting helmet on your child and this already before you place him/
she in the child seat. Many accidents happen when the bicycle is stationary,
e.g. when it tips over. Be a good example and remember to always wear a
helmet yourself.
• Never set off before having buckled up your child in the child seat. Uncontrolled
movements of the child can make your STEVENS bicycle tilt.
• Do not overload your child seat. Overloading can result in breakage of the
frame, the fork or the components. Risk of accident and injury!
• Cover the springs of your saddle to make sure that your child will not have the
fingers pinched.
• Adjust the tyre pressure to the additional weight. The maximum pressure is
indicated on the tyre side
Danger:
Child seats mounted with a suitable adapter for pannier racks/luggage
carriers are only permitted, when the pannier rack complies with the
requirements of ISO11243 and has a maximum payload of at least 25kg.
Danger:
Child seats are only permitted on STEVENS bikes, when indicated in the
bike card.
Use of Roller Trainers
Your STEVENS road racing bicycle is designed to be used on free rollers (roller
trainers without brake). In addition, on roller trainers as far as your STEVENS bicy-
cle is clamped at the rear wheel axle.
When using your STEVENS road racing bicycle on a roller trainer, observe the
following points:
• Be sure to use the accessories supplied by the manufacturer of the roller
trainer (e.g. specific axles).
• Drying sweat is harmful to your STEVENS road racing bicycle. Therefore, regu-
lar cleaning and anti-corrosion protection of all components of your STEVENS
road racing bicycle should be part of your compulsory exercises. You find
detailed information on care and cleaning in the chapter “Cleaning and
Caring for your STEVENS Bicycle”.
• Some manufacturers offer specific sweat catchers as paint protector. You find
more information in the instructions of roller trainer manufacturer.
If you are uncertain whether your roller trainer is suitable for your STEVENS
road racing bicycle, contact your STEVENS dealer.
Caution:
Your STEVENS road rac-
ing bicycle is designed
to be used on free rollers
(roller trainers without
brake) as well as on
bicycle rollers, provided
the road racing bicycle
is clamped at the rear
wheel axle and the
accessories supplied
by the manufacturer of
the bicycle rollers (e.g.
specific axles) are used.
Danger:
Child seats that are
mounted to the seat
tube are the only child
seats permitted. Child
seats that are mount-
ed to the seat post or
the top tube are not
permitted.
Danger:
Be sure to only use
child seats which are
mounted in the rear with
the child sitting behind
the rider. Child seats
that are mounted in
front of the rider are not
permitted.
Danger:
When mounting a child
seat, observe the maxi-
mum permissible overall
weight of your STEVENS
bike. For more infor-
mation see the chapter
“Maximum Permissible
Overall Weight”.
Note:
You find all STEVENS user manuals, the instructions
of the component manufacturers as well as the
respective weblinks at www.stevensbikes.de/manual
Danger:
Have your child seat
mounted exclusively by
your STEVENS dealer.
Danger:
Be sure to only mount
and use a child seat,
if permitted by the
national and regional
regulations of the
country where you are
travelling.
S - 18 | English English | S - 19
Before Your First Ride
1. If you want to use your bicycle on public roads, it has to comply with the
respective legal requirements. These regulations differ from country to coun-
try. Therefore, bicycles are not necessarily equipped completely. Ask your
STEVENS dealer for the laws and regulations applicable in your country or in
the country where you intend to use the STEVENS bicycle. Have your STEVENS
bicycle equipped accordingly, before using it on public roads.
2. Are you familiar with the brake system? Have a look at the bike card and check
whether the brake lever of the front brake is on the side you are used to (right
or left). If it is not, ask your STEVENS dealer to switch the brake levers before
you set off for the first time.
Your new bicycle is equipped with modern brakes which may be far more
powerful than those you were used to so far. Be sure to first practise using the
brakes on a level, non-slip surface off public roads!
For more information see the chapter “The Brake System” further below as
well as the instructions of the component manufacturers.
3. Are you familiar with the type and functioning of the gears? Ask your STEVENS
dealer to explain to you the gear system and make yourself familiar with your
new gears in an area free of traffic, if necessary.
For more information see the chapter “The Gears” further below as well as
the instructions of the component manufacturers.
Danger:
Be aware that the dis-
tance you need to stop
your bicycle increases,
if you have aerobars or
ride with your hands on
the top of the handlebar.
The brake levers are
not in all grip positions
within easy reach.
4. Are both the saddle and the handlebar properly adjusted? The saddle should
be set to a height from which you can just reach the pedal in its lowest position
with your heel. Check whether your toes reach to the floor when you are sitting
on the saddle.
For more information see the chapter “Adjusting the STEVENS Bicycle to
the Rider” further below as well as the instructions of the component manu-
facturers.
5. If your STEVENS bicycle is equipped with clipless or step-in pedals: Have you
ever tried the shoes they go with? Do not set off until you have practised
engaging and disengaging the shoes from the pedals while stationary.Ask your
STEVENS dealer to explain to you the pedals.
For more information see the chapter “The Pedal Systems” as well as the
instructions of the component manufacturers.
6. If you have bought a STEVENS bicycle with suspension, you should ask your
STEVENS dealer to properly adjust the chassis. Improperly adjusted suspen-
sion components are liable to malfunction or damage. In any case, the riding
behaviour deteriorates and you do not achieve maximum riding safety and
riding pleasure.
For more information see the chapter “Suspension Forks” as well as the
instructions of the component manufacturers.
Danger:
In case you had a crash with your STEVENS bicycle, perform at least the
check described in the chapter “Before Every Ride”. Ride back very care-
fully by taking the shortest route possible, even if your STEVENS bicycle
went through this check without any problems. Do not accelerate or brake
hard and do not ride your bicycle out of the saddle. If you are in doubt,
have yourself picked up by car, instead of taking any risk. Back home you
need to check once again your STEVENS bicycle thoroughly. If you are in
doubt or if you have any questions, contact your STEVENS dealer!
Note:
Be sure to observe the STEVENS user manuals, the
instructions of the component manufacturers as
well as the respective weblinks on our website at
www.stevensbikes.de/manual
Danger:
A lack of practice when
using clipless pedals or
too much spring tension
in the mechanism can
lead to a very firm con-
nection, from which you
cannot quickly step out.
Risk of accident!
Caution:
Prior to towing a trailer
with your STEVENS bicy-
cle or mounting a child
seat, read the chapters
“Use of Child Seats”
and “Use of Trailers”
and have a look at the
bike card. If you are in
doubt or if you have
any questions, ask your
STEVENS dealer.
Danger:
Make particularly sure there is enough space between your crotch and the
top tube so that you do not hurt yourself, if you have to get off your bike
quickly.
Note:
It is recommendable that you take out a private liability insurance. Contact
your insurance agency. Becoming member in a bicycle association may
also provide insurance coverage.

S - 20 | English English | S - 21
Before Every Ride
Your STEVENS bicycle has undergone numerous tests during production and
a final check has been carried out by your STEVENS dealer. Nevertheless, be sure
to check the following points before you set off for the first time to exclude any
malfunctioning that may be due to the transport of your STEVENS bicycle or to
changes a third person may have performed on your STEVENS bicycle during a
standstill:
1. Are the quick-release levers, thru axles or the bolted connections of the front
and rear wheel, the seat post and other components properly closed and tight-
ened?
For more information see the chapter “How to Use Quick-Releases and
Thru Axles” further below as well as the instructions of the component man-
ufacturers.
2. Are the tyres in good condition and do they have sufficient pressure? The
minimum and maximum pressure (in bar or PSI) is indicated on the tyre side.
For more information see the chapter “The Wheels” further below as well as
the instructions of the component manufacturers.
3. Let both wheels rotate freely to check whether the rims run true. Watch the gap
between rim and brake pad or, in the case of disc brakes, between frame and
rim or tyre. Poor concentricity can also be an indication of laterally burst tyres,
broken axles or torn spokes.
For more information see the chapter “The Wheels” further below as well as
the instructions of the component manufacturers.
4. Test the brakes while stationary by firmly pulling the brake levers towards the
handlebar.
The brake pads of rim brakes must hit the rim sides at the same time and with
their entire surface. They must not get in contact with the tyre during braking or
when opened or in between. Make sure that you cannot pull the brake levers
all the way to the handlebar and check the hydraulic brake hoses for leaks!
Check the thickness of the brake pads as well.
With disc brakes you should have a stable pressure point at once. If you have
to actuate the brake lever more than once to get a positive braking response,
have your STEVENS bicycle checked by your STEVENS dealer.
For more information see the chapter “The Brake System” further below as
well as the instructions of the component manufacturers.
5. Let your STEVENS bicycle bounce on the ground from a small height. If there
is any rattling, see where it comes from. Check the bearings and bolts, if nec-
essary.
6. If you want to ride on public roads, make sure your STEVENS bicycle is
equipped according to the regulations of the respective country. In any case,
riding without lights and reflectors in dark or dim conditions is very dangerous.
A lighting set that corresponds to the regulations is a must on public roads.
Turn on the lights as soon as dusk sets in.
For more information see the chapter “Legal Requirements for Riding on
Public Roads”.
7. In case you have a STEVENS bicycle with suspension, press down on STEVENS
bicycle and see whether the spring elements retract and extend as usual.
For more information see the chapter “Suspension Forks” as well as the
instructions of the component manufacturers.
8. Make sure that the kick stand, is fully raised before you set off. Risk of acci-
dent!
9. Do not forget to take a high quality folding, D- or chain lock with you on your
ride. The only way to effectively protect your STEVENS bicycle against theft is
to lock it to an immovable object.
Danger:
Be aware that the dis-
tance you need to stop
your bicycle increases,
if you have aerobars or
ride with your hands on
the top of the handlebar.
The brake levers are
not in all grip positions
within easy reach.
Danger:
Do not use your
STEVENS bicycle, if
it fails on one these
points! Riding a defec-
tive STEVENS bicycle
can result in serious
accidents! If you are in
doubt or if you have any
questions, contact your
STEVENS dealer.
Danger:
During use your STEVENS bicycle is undergoing stress resulting from the
surface of the road and from the rider’s action. Due to these dynamic
loads, the different parts of your bicycle react with wear and fatigue. Check
your STEVENS bicycle regularly for wear marks, scratches, deformations,
colour changes and any indication of cracking. Components which have
reached the end of their service life may break without previous warning.
Let your STEVENS dealer maintain and service your STEVENS bicycle regu-
larly and in cases of doubt it is always best to replace components.
Danger:
Improperly closed
fastenings can cause
components of your
STEVENS bicycle to
come loose and result in
serious accidents!

S - 22 | English English | S - 23
Adjusting the STEVENS Bicycle to the Rider
Your body height and proportions are decisive for the frame size of your
STEVENS bicycle. Make particularly sure there is enough space between your
crotch and the top tube so that you do not hurt yourself, if you have to get off your
bike quickly.
By choosing a specific type of bicycle you roughly determine the posture you
will be riding in. However, some components of your STEVENS bicycle are espe-
cially designed so that you can adjust them to your body proportions up to a
certain degree. This includes the seat post, the handlebar and stem as well as the
brake levers or brake levers/shifters.
As these adjustments require know-how, experience, appropriate tools and
a certain amount of skill, you should restrict yourself to the adjustment of the
seating position. Ask your STEVENS dealer for the correct seating position or if you
want something changed. They will see to your wishes the next time you leave the
STEVENS bicycle at the workshop, e.g. for the first inspection.
After any adjustment/assembly work, be sure to make a short functional check
as described in the chapter “Before Every Ride” and do a test ride on your
STEVENS bicycle in an area free of traffic.
Danger:
If you have a very small frame, there may be the danger of your foot
colliding with the front wheel. Therefore, Make sure that your cleats are
properly adjusted.
Danger:
All tasks described in the following require the know-how of a mechanic
and appropriate tools. Make it a rule to tighten the bolted connections
always with greatest attention. Increase the torque values bit by bit and
check the fit of the component in between. Use a torque wrench and do
not exceed the maximum torque values! You find them on the components
themselves and/or in the chapter “Recommended Torque Settings”.
Note:
If sitting on the saddle causes you trouble, e.g. because it numbs your
crotch, this may be due to the saddle. Your STEVENS dealer has a very
wide range of saddles available and can offer advice on position.
Danger:
When replacing the sad-
dle, Make sure that the
saddle rail is compatible
with the seat post. If
you are in doubt or if
you have any questions,
contact your STEVENS
dealer.
Note:
The seating position
depends highly on how
you want to use the
STEVENS bicycle. Ask
your STEVENS dealer or
your trainer for help. The
advices given below are
suitable for typical road
racing bicycles.
Legal Requirements for Riding on Public Roads
If you want to use your STEVENS bicycle for riding on public roads, it has to be
equipped according to the regulations of the respective country.
Pay particular attention to your STEVENS bicycle being equipped with the
required set of lights and reflectors.
Ask your STEVENS dealer to inform you about the regulations in force in the
country where you use your STEVENS bicycle. Make yourself familiar with the road
traffic rules for riding on public roads and off-road.
Note:
You find more important
tips on cycling in the
chapter “General Safety
Instructions”.
Danger:
For your own safety, be
sure to switch on the
light as soon as dusk
sets in.
Danger:
Keep the lighting set
clean and check its
functioning at regular
intervals.
Note:
If you want to use your STEVENS bicycle for riding on public roads, it has
to be equipped according to the regulations of the respective country. Ask
your STEVENS dealer about the regulations in force in your country or in
the country where you intend to use the STEVENS bicycle.
Note:
When riding on public roads cyclists must in general observe the same
traffic rules as car drivers. Make yourself familiar with the road traffic rules
of your country.

S - 24 | English English | S - 25
Sloping Geometry – How to Determine or Measure
the Frame Size
The geometry of some STEVENS frames is referred to as “sloping geometry”.
This means that the top tube inclines towards the seat tube and is not in parallel
to the ground. Other STEVENS frames have a horizontal top tube.
This gives the frame a more compact appearance and more stiffness in the
area of the bottom bracket. For this reason sloping frames can also be used under
certain circumstances by riders who have problems getting on and off their bicycle
with a level top tube due to a bigger standover height (standover clearance when
standing over the bicycle). Even though the optical proportions of the bicycle may
appear mismatching due to the deeply inserted seat post, the selection of a slop-
ing frame is a reasonable alternative.
The sloping design requires a modified formula to determine the frame size. In
the case of STEVENS road bike frames the frame size is normally measured from
the centre of the bottom bracket to the top edge of the top tube.
The size of today’s “sloping top tube“ frames is measured in a different way
than a few years ago when the seat tube length was the decisive measure. The
seat tubes are now shorter in general; the “nominal measure” of seat tube and
top tube are therefore considered to determine the optimal frame size. These are
quasi theoretical dimensions with an imaginary straight top tube.
In the case of the sloping top tube frames, the frame size (nominal seat tube
length) is measured from the centre of the bottom bracket to the top edge of the
nominal top tube. This may be the same as the length to the top edge of the seat
tube, but it does not have to.
On our website www.stevensbikes.de there is now a guide for each bike that
helps you find the proper frame size (“What size fits me?”).
STEVENS road frames sized 56cm have a 56-cm-long seat tube (measured
from the bottom bracket to the top edge of the top tube), if the top tube were in
parallel to the ground. The seat tube is now a little shorter; this does however not
affect the seating position and the length of the frame. These measures can hardly
be measured; in our geometry tables on the internet you find the values for the
nominal top tube as well as for the real seat tube measures.
As a general rule, if you had a 56-cm-frame (centre of bottom bracket – top
edge of top tube) of a traditional design with horizontal top tube before, you now
need a sloping frame at STEVENS size 56cm, as well. Because the frame propor-
tions, such as the nominal top tube length, remained the same. The only difference
is the junction between top tube and seat tube which was lowered a little. If you
have determined your frame size at 56cm (centre of bottom bracket – top edge of
top tube), you should choose a road bike frame sized 56cm and not a larger one.
Stack-to-Reach
Apart from the freight height, the stack-to-reach measure is another meas-
ure to determine the frame size. The stack-to-reach measure indicates how spor-
tive the seating position provided by the bike is. Furthermore, stack-to-reach is
designed to compare frame sizes.
Stack is the vertical distance from the centre of the bottom bracket to the top
edge of the head tube
.
Reach is the horizontal distance from the centre of the bottom bracket to the
top edge of the head tube
.
The quotient is usually between 1.35 and 1.65.
The lower the value, the more sportive or extended is the seating position.
reach
stack
Note:
Due to the shorter seat
tube on sloping frames
the seat post must be
pulled out further than
in the case of standard
frames. It is therefore
advisable to use a
longer seat post to
make sure that 100mm
of the seat post at least
remain in the seat tube.
Note:
Keep in mind that the
length “centre of bottom
bracket to top edge
of seat tube” is never
equal frame size!
Note:
Your STEVENS dealer
will be pleased to help
you find the frame size
that fits you.
Note:
To check the frame size
take the separate
geometry tables as
reference! You find them
on the internet at
www.stevensbikes.de
with each bike.
S - 26 | English English | S - 27
Adjusting the Saddle to the Correct Height
The correct saddle height depends on the length of your legs. When pedalling,
the ball of your foot should be positioned above the centre of the pedal axle. With
your feet in this position you should not be able to stretch your legs completely
straight at the lowest point, otherwise your pedalling will become awkward. Check
the height of your saddle with flat-soled shoes. This is best done with suitable
cycling shoes. Sit on the saddle and put your heel on the pedal at its lowest point.
Your leg should be fully extended and your hips should remain horizontal.
To adjust the saddle height loosen the quick-release lever (see chapter “How
to Use Quick-Releases and Thru Axles”) or the binder bolt of the seat post
clamp at the top of the seat tube. The latter requires suitable tools, e.g. an Allen
key, with which you turn the bolt two to three turns anticlockwise.
Rule of thumb to determine the suitable saddle height:
Inside leg (barefoot) x 0.885
Now you can perform the vertical adjustment of the seat post. Be sure not to
pull out the seat post too far – the mark on the seat post (max., min., stop or the
like) should always remain within the seat tube – and to grease the surface of an
aluminium or titanium seat post that is inserted into a seat tube made of alumin-
ium, titanium or steel. Do not grease carbon seat posts and/or carbon seat tubes
in the clamping area! Use special carbon assembly paste instead.
Align the saddle with the frame by using the saddle nose and the bottom
bracket or top tube as a reference point.
Caution:
If the seat post wobbles
in the seat tube or does
not slide easily, ask your
STEVENS dealer for
advice. Do not use brute
force!
Note:
If your STEVENS road
racing bicycle has an
aero seat post, be sure
to observe the chapter
“Mounting the Aero
Seat Post with Top Tube
Clamp”.
Clamp the seat post until it is tight by closing the quick-release, as described in
the chapter “How to Use Quick-Releases and Thru Axles” or by turning the seat
post binder bolt clockwise in half turns. You should not need using great manual
forces to achieve a sufficient clamping effect. Otherwise the seat post does not
match the frame.
Always check between the steps that the seat post is sufficiently tight by hold-
ing the saddle at both ends with your hands and by trying to twist it. If it does,
gently retighten the binder bolt by half a turn and check again.
Is the leg extension correct when you check again? Check by moving your foot
and pedal to the lowest point. When the ball of your foot is exactly above the pedal
centre in the ideal pedalling position, your knee should be slightly bent. If it is,
you have adjusted the saddle height correctly. Check whether you can still reach
the ground safely while sitting on the saddle. If you cannot, you should lower the
saddle a little, at least to begin with.
Danger:
Under no circumstances
grease the seat tube of
a carbon frame. If you
mount a carbon seat
post, do not put any
grease on it, even if the
frame is made of metal.
Once greased, carbon
components may never
again ensure reliable
clamping! Use special
carbon assembly paste
instead.
Danger:
Make sure not to
overtighten the binder
bolt of the seat post
clamp. Otherwise you
may damage the seat
post or the frame. Risk
of accident!
Danger:
Never ride your bike with the seat post drawn out beyond the limit, maxi-
mum, or stop mark! The seat post might break or cause severe damage to
the frame. In the case of frames with seat tubes that extend beyond the top
of the frame’s top tube the seat post should be inserted into the seat tube at
least below the bottom of the top tube and below the top of the seat stays! If
seat post and frame require different minimum insertion depths, you should
opt for the deeper insertion depth.
Caution:
Tighten carefully by approaching the prescribed maximum torque value
in small steps (0.5 Nm increments) and check in between the proper fit of
the component. You find them on the components themselves and/or in the
chapter “Recommended Torque Settings”. Do not exceed the maximum
torque value indicated by the manufacturer!

S - 28 | English English | S - 29
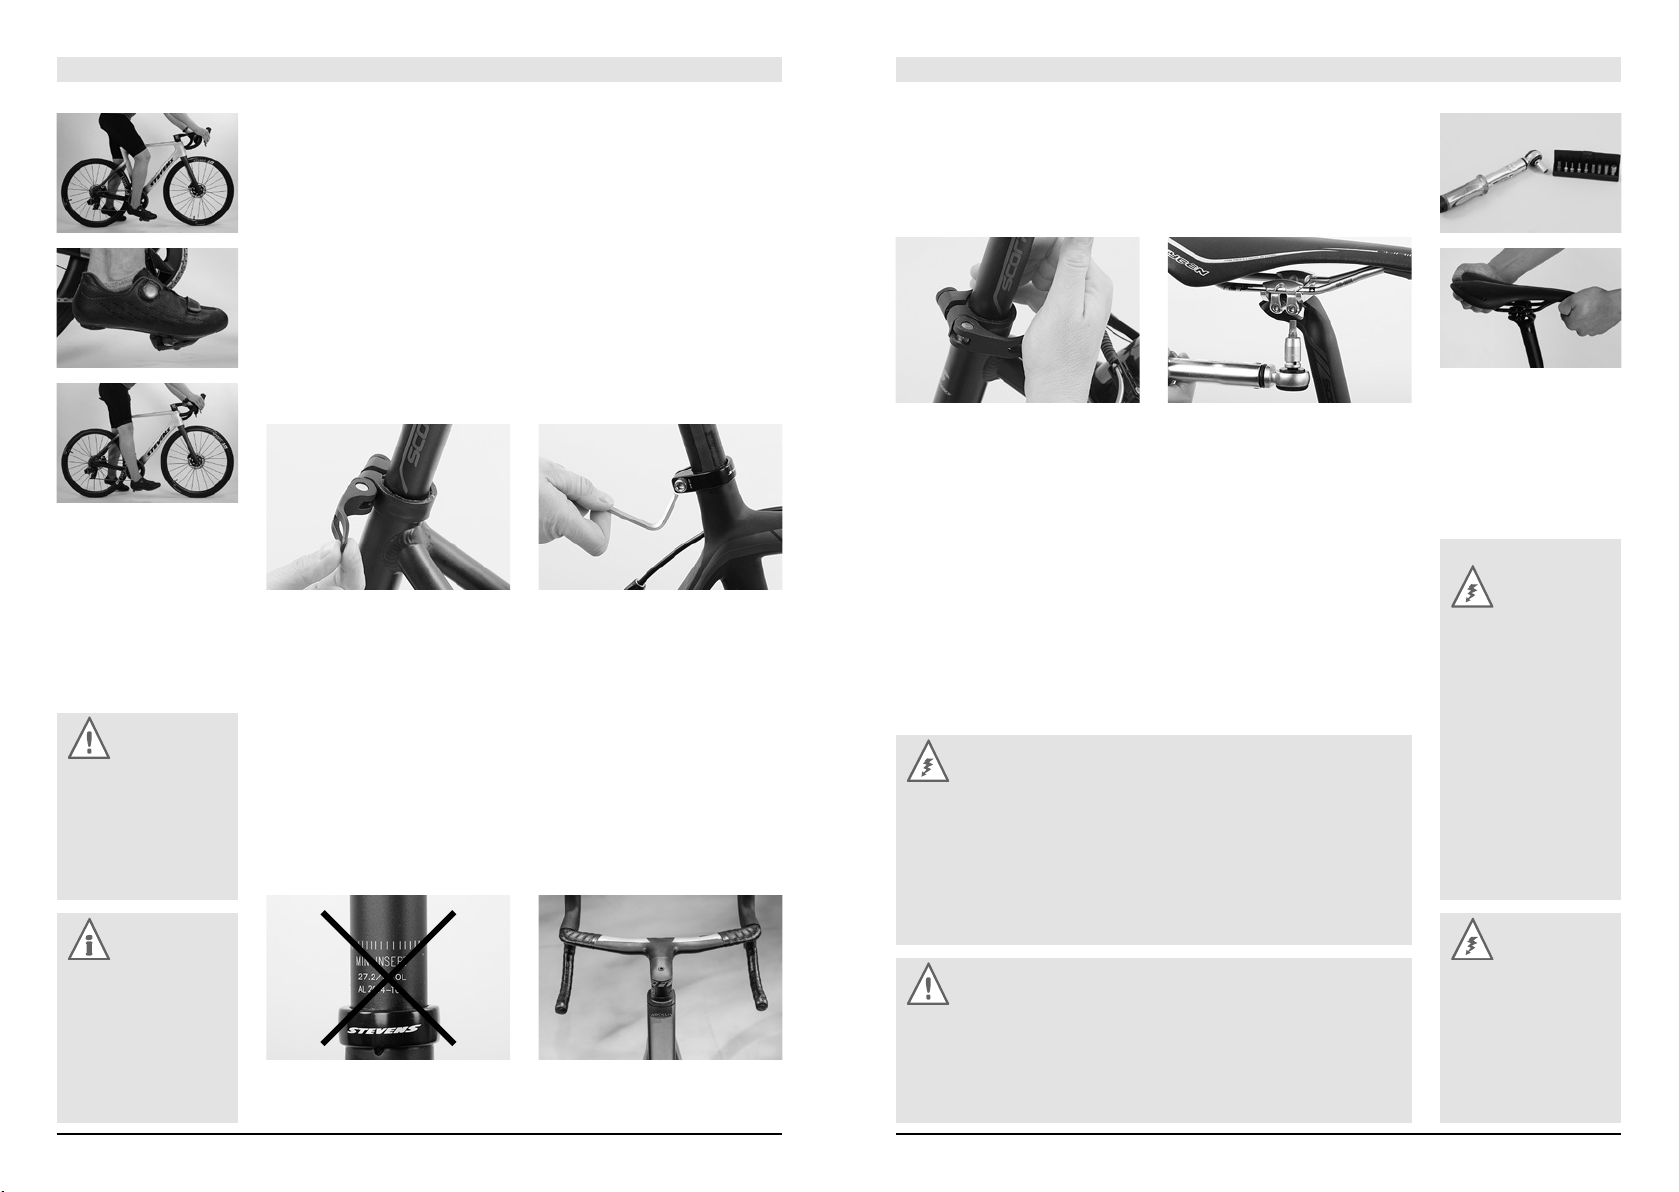
Adjusting the Height of the Handlebar
In principle, road racing or gravel bikes are sports bikes designed for speed.
For this reason alone riding a road racing or gravel bike requires certain basic
preconditions of the trunk, shoulder and neck muscles.
The height of the handlebar compared to the saddle and the distance between
saddle and handlebar determine how much your upper body will be inclined for-
ward. Lowering the handlebar gives you a streamlined position and brings more
weight to bear on the front wheel. However, it also entails an extremely forward
leaning posture which is tiring and less comfortable, because it increases the
strain on your wrists, arms, back, upper body and neck. As a general rule, you
should be able to adopt all three basic handlebar positions on a road racing bicycle
without any problems.
On road racing and gravel bikes an Aheadset
®
-stem allows the vertical adjust-
ment of the handlebar. This requires special knowledge. In this regard, the descrip-
tions hereafter may be incomplete. If you are in doubt or if you have any questions,
contact your STEVENS dealer.
Danger:
The stem is one of the load bearing parts of your STEVENS bicycle.
Changes to it can impair your safety. If you are in doubt or if you have any
questions, contact your STEVENS dealer!
Danger:
The bolted connections of stem and handlebar have to be tightened to
the prescribed torque values. If you disregard the prescribed values, the
handlebar or stem may come loose or break. Use a torque wrench and do
not exceed the maximum torque values! You find them on the components
themselves and/or in the chapter “Recommended Torque Settings”.
Caution:
Keep in mind that
readjusting the position
of the stem changes the
position of the handlebar,
brake levers and shifters.
Readjust these compo-
nents, as described in
the chapter “Adjusting
the Tilt of the Handlebar
and the Brake Levers of
STEVENS Road Racing
Machines, Cyclocross
Bicycles and Gravel
Bikes”.
Note:
When doing any
adjusting observe the
instructions of the stem
manufacturer. Ask
your STEVENS dealer
to explain to you both
function and adjustment
of your stem or let him
do that work.
Caution:
Never try to unscrew the
top race of the headset
when you only want to
adjust the stem, as you
will otherwise alter the
bearing play!
Note:
Spacers can only be
removed by shortening
the steerer tube at the
same time. This change
is irreversible. Have this
shortening only done by
your STEVENS dealer
when you are absolutely
sure about the position.
Danger:
In case you turn the stem around, the cables may be too short. In this case
riding on your bicycle is dangerous. Ask your STEVENS dealer for advice.
Danger:
Do not mount any stem extenders, speed-lifters or the like.
Danger:
Spacers must be removed by the STEVENS dealer only, as this requires the
shortening of the fork steerer.
Danger:
These routines require a certain amount of manual skill and (special) tools
and are best left to your STEVENS dealer. Nevertheless, if you want to try
it by yourself, read the chapter “Adjusting the Height of the Handlebar”
beforehand.
Stems for Threadless Systems, the Aheadset®-System
In the case of STEVENS road and cyclocross bikes or gravel bikes with Ahead-
set®the stem also serves to adjust the bearing preload. If you change the position
of the stem you have to readjust the bearing play.
You can adjust the height to a limited extent by displacing the spacers or by
turning the stem around in the case of flip-flop models, see the chapter “The
Headset”.

S - 30 | English English | S - 31
• Release the bolt at the top of the fork steerer tube which serves to adjust the
initial bearing pressure and remove the Ahead cap.
• Loosen the bolts on the side of the stem by two to three turns.
• Remove the stem from the fork steerer tube. In doing so keep hold of both
frame and fork to prevent the fork from slipping off the head tube.
• Now you can remove the spacers.
• Remount the stem entirely on the fork steerer tube and slip the spacers you
have removed above the stem.
• In case you want to turn the stem around: To do so release the bolts of the
stem face plate clamping the handlebar and remove them carefully. Refasten
the handlebar after you have turned the stem.
• Centre the handlebar accurately in the stem clamp, i.e. the drops should be
in parallel to the ground or point with the ends slightly downwards. Tighten
all bolts of the stem clamp with a torque wrench according to the indications.
• Readjust the headset and retighten the stem to the recommended torque value
after you have aligned it (see also the chapter “The Headset”).
Danger:
Stems come in very different lengths and shaft and binder tube diameters.
A stem of inappropriate dimensions can become a serious source of dan-
ger: Handlebars and stems can break and thus cause an accident. Make
sure that the stem clamp (the handlebar clamping) and the steerer tube
clamping are free of sharp edges. Your STEVENS dealer will be pleased to
help you.
Caution:
With full carbon forks keep in mind that sufficient clamping forces are
usually already reached well below the maximum torque values indicated
by the stem manufacturer!
Danger:
Be sure to tighten the
bolted connections
of the stem and the
handlebar properly.
Otherwise the handlebar
or stem may come loose
or break. You find the
prescribed values on the
components themselves
and/or in the chapter
“Recommended Torque
Settings”.
Check whether the handlebar is firmly seated in the stem by trying to rotate the
handlebar downwards. Also check whether the handlebar/stem unit can be turned
relative to the fork. Do this by taking the front wheel between your knees and trying
to twist the handlebar. If the parts can still be moved, the bolts must be carefully
tightened once again and the tight fit must be checked once again. Do not exceed
the maximum torque values.
STEVENS recommend that you always use handlebar and stem of the same
quality from the same manufacturer.
Integrated Cable Routing
Some models have integrated cables. This means that there is an internal
routing of brake hoses, Bowden cables in the handlebar-stem-combination, in the
frame and possibly also in the fork.
Adjustment work requires specialist knowledge, experience, suitable tools and
manual skills and should therefore only be carried out by professionals. Contact
your STEVENS dealer.
Nevertheless, if you want to do it yourself, make sure that the hoses remain
free of too high tensile forces when you adjust the handlebar-stem-combination,
e.g. when adjusting the handlebar height and aligning the handlebar. Therefore,
proceed with caution when doing this work.

S - 32 | English English | S - 33
Correcting the Fore-to-Aft Position and Tilt of the Saddle
The distance between the handlebar grips and the saddle affects the inclina-
tion of your upper body, and hence your riding comfort and riding dynamics. This
distance can be altered slightly by changing the position of the saddle rails in the
seat post clamp. However, this also influences your pedalling. The rider pedals
more or less from the back. If the saddle is not in horizontal position, the rider
cannot pedal in a relaxed manner. If it is tilted, you will constantly have to lean
against the handlebar to prevent yourself from slipping off the saddle.
Adjusting Saddle Position and Tilt
There are some seat posts mounted STEVENS bicycles which have two Allen
bolts positioned one after the other holding the seat post head and fix the tilt as
well as the horizontal position of the saddle. Some seat posts have two bolts
side-by-side.
Release the bolt(s) at the top of the seat post. Loosen the bolt(s) two to three
turns at the most, otherwise the whole mechanism can fall apart. Move the saddle
forth or back, as desired. You may have to give the saddle a light tap to move it.
With patent seat posts a single bolt fixes the clamping mechanism, which
controls both the tilt and the horizontal position of the saddle. Some seat posts
have two bolts side-by-side.
Observe the marking on the saddle rail and do not go beyond. Make sure
that the top edge of the saddle remains horizontal as you retighten the bolt(s).
STEVENS bicycle should stand on level ground while you adjust the saddle.
Danger:
Check the bolts by using a torque wrench once a month according to the
values indicated on the components themselves and/or in the instructions
of the component manufacturers.
Danger:
Poorly tightened or
loosening bolts can fail.
Risk of accident!
Danger:
The adjustment range of
the saddle is very small.
Replacing the stem
allows you to make far
bigger adjustments to
the rider’s fore-to-aft
position, as stems come
in different lengths. You
can achieve a difference
of more than 10cm.
In most cases, the
length of the Bowden
and brake cables must
be adjusted in length,
a job best left to your
STEVENS dealer!
Danger:
The saddle clamping
bolts belong to the most
delicate bolts of the
entire STEVENS bicycle.
Therefore, strictly ob-
serve the recommended
minimum and maximum
torque values. Do not
under- or overtighten.
You find them on the
components themselves
and/or in the chapter
“Recommended Torque
Settings”. Always use a
torque wrench.
Having found your preferred position, Make sure that both clamp halves fit
snugly around the saddle rails before tightening the bolt(s) to the correct torque
value as prescribed by the seat post manufacturer.
Retighten the bolt(s) with a torque wrench according to the instructions of the
manufacturer. After fastening the saddle, check whether it resists tilting by bringing
your weight to bear on it once with your hands at either end of the saddle.
Danger:
The bolted connections of the seat post have to be tightened to the
prescribed torque value. Use a torque wrench and do not exceed the max-
imum torque values! You find them on the components themselves and/or
in the chapter “Recommended Torque Settings”.
Danger:
Make sure that the saddle is clamped within the range of the marking on
the saddle rail. Otherwise the saddle rail can fail! Check the bolts by using
a torque wrench once a month according to the values indicated on the
components themselves and/or in the chapter “Recommended Torque
Settings”.
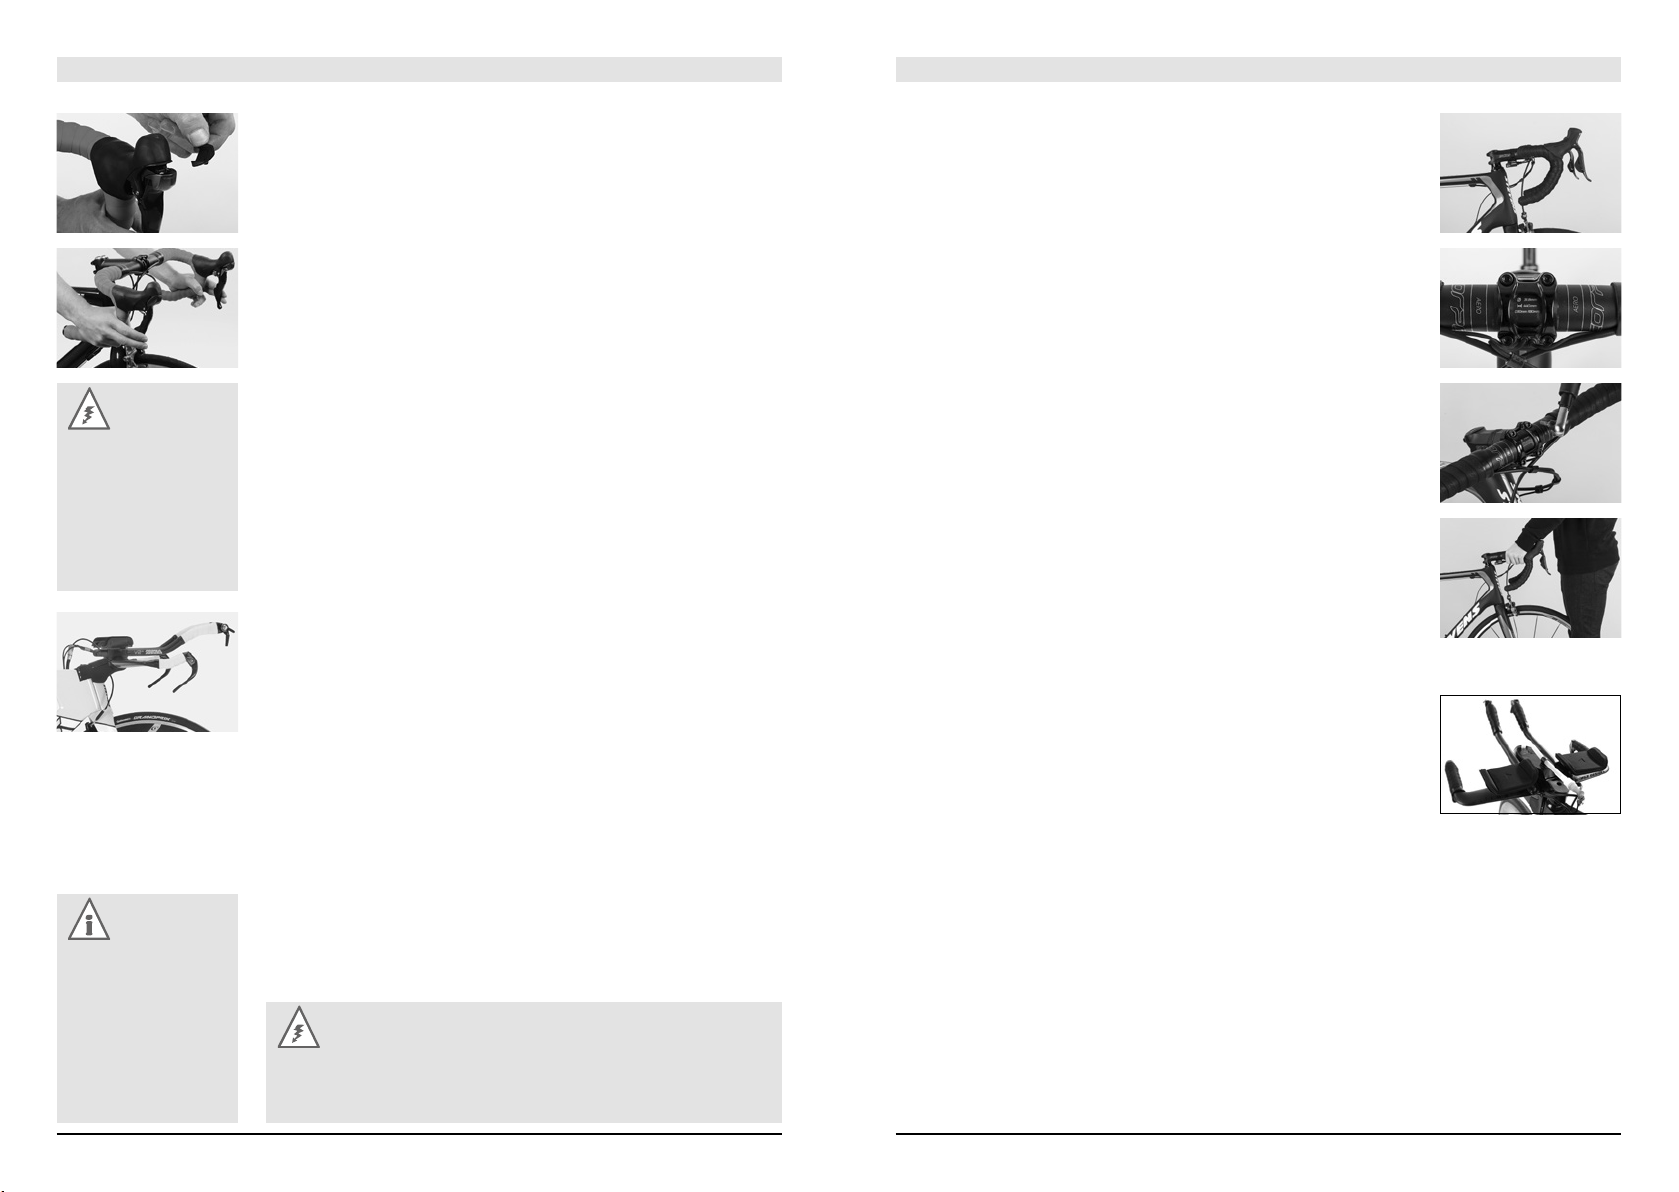
S - 34 | English English | S - 35
Adjusting the Tilt of the Handlebar and the Brake Levers
of STEVENS Road Racing Machines, Cyclocross Bicycles and
Gravel Bikes
The straight extensions below the drops should be parallel to the ground or
point slightly downwards towards the rear. The ends of the brake lever/shifter units
should meet an imaginary extension of the bottom line of the drops, the upper
part of the lever is then in horizontal position or points slightly upwards. Adjusting
the brake levers/shifters is a job best left to your STEVENS dealer, as it involves
retaping the handlebar afterwards.
To adjust the tilt of the handlebar, release the Allen bolt(s) on the underside or
faceplate of the stem. Turn the handlebar to the desired position. Make sure that
the handlebar is accurately centred in the stem.
Carefully retighten the bolt(s) with the torque wrench. Make sure that the upper
and lower clamping slots of the stem are parallel and identical in width. If you have
a stem with several bolts, tighten them evenly in a cross pattern by using a torque
wrench and observe the recommended torque values.
Try rotating the handlebar once clamped in the stem and tighten the bolt a
little more, if necessary. Use a torque wrench and do not exceed the maximum
torque values! You find them on the components themselves and/or in the chapter
“Recommended Torque Settings”.
Triathlon Handlebars
In triathlon sport where a particularly aerodynamic seating position is impor-
tant, aero bars are used usually. With these aero models the shifters are often
positioned at the ends of the handlebar. When you ride with your back in a hori-
zontal position, the brake levers are out of reach and the reaction time is longer,
which makes your stopping distance longer. For this reason it is very important to
anticipate problems during the ride.
Within certain limits the position of the handlebar can be adjusted according
to your personal preferences. That means that the straight part of the handlebar
should point only slightly downwards or upwards by maximal 30 degrees.
Make sure that your forearms are always comfortably rested, i.e. your elbows
should project a little towards the rear.
Note:
There are brake levers/
shifters from Shimano
and SRAM that are
suitable for small
hands. If you have any
problems with the brake
lever reach, contact your
STEVENS dealer.
Adjusting the Brake Lever Reach on STEVENS Road Racing
Machines, Cyclocross Bicycles and Gravel Bikes
In particular, riders with small hands should ask their STEVENS dealer to adjust
the brake lever position, i.e. the position where the brake starts to be effective, to
the length of the rider’s fingers immediately on purchase.
Some models of various brands allow an adjustment at the brake lever/shifter,
e.g. by means of adjusting bolts or spacers. In the case of the other models the
brake cables are clamped according to your wishes at the brake bodies. Adjusting
bolts located in this area only serve to compensate brake pad wear.
Have the lever reach adjusted and Make sure that the first phalanx of the
index finger reaches around the brake lever/shifter. Finish by checking the correct
adjustment and function of the brake system as described in the chapter “The
Brake System” and in the instructions of the component manufacturers.
What to Bear in Mind with Time Trial Handlebars on STEVENS
Triathlon and Time Trial Machines
In triathlon sport and time trial, where a particularly aerodynamic seating posi-
tion is important, so called aero handlebars are used. With these aero models the
shifters are often positioned at the handlebar ends, the brake levers at the ends
of bull-horn handlebar. When you ride with your back in a horizontal position, the
brake levers are out of reach and the reaction time is longer, which makes your
stopping distance longer. For this reason it is very important to anticipate problems
during the ride.
Within certain limits the position of the handlebar can be adjusted according
to your personal preferences. That means that the straight part of the aero bars
should point only slightly downwards or upwards. The basic handlebar should be
parallel to the ground or point slightly upwards. Make sure that your forearms are
always comfortably rested, i.e. your elbows should project beyond the armrests a
little towards the rear.
Danger:
Note that the distance you need to stop your bike increases, while riding
with the hands on the top handlebar. The brake levers are not in all grip
positions within easy reach.
Danger:
Make sure that you
cannot pull the brake
levers all the way to
the handlebar. Your
maximum brake force
should be reached short
of this point.
S - 36 | English English | S - 37
The Pedal Systems
Not all shoes are suited for cycling. Shoes used for cycling should have a stiff
sole and provide a firm support for your feet. If the soles are too soft, the pedals
can press through and cause foot pain. The force transmission is less efficient. The
sole should be not too broad near the heels, as the rear stays will otherwise get
in the way of your pedalling. This will prevent your feet from assuming a natural
position and may cause knee pain in the long run.
Different Systems at a Glance – How They Work
We recommend pedals that provide a lock and release mechanism for your
shoe, known as step-in pedals. The firm connection between shoe and pedal pre-
vents your feet from slipping off when pedalling fast or when riding over rough
ground. Besides this, it enables you not only to push but also to pull the pedals,
which makes your pedalling more fluent. A further advantage is that the ball of
your big toe comes to rest biomechanically just at the right place on the pedal axle
and that you do not block unintentionally the front wheel with the tips of your feet
during steering.
With step-in pedals a special cycling shoe forms a lock-in connection with the
pedal, similar to a ski binding.
To engage with the pedal is to turn it to the horizontal using the tip of the cleat
(the plate on the sole of the shoe) and then rest your foot on it. Some pedal sys-
tems have the lock-in mechanism on both sides of the pedals, there is no need to
turn the pedal, you just step in. The shoe engages with the pedal with a click which
you will hear and feel clearly. With all commercially available systems the shoe is
disengaged from the pedal by twisting the heel outward.
Lean against a wall or ask someone to hold you when you try to engage and
disengage the shoe from the pedal.
Functional differences between the pedal systems concern the shape of the
cleat, the release angle and the rigidity of the connection. Cyclists predisposed
to knee trouble should choose a pedal system that has some "float", so that the
heel can move sideways a little while the shoe is engaged with the pedal. Some
step-in pedals have cleats embedded into the sole which is a great advantage, as
it ensures stable walking.
Adjustment and Maintenance
The various pedal systems differ sometimes significantly in their technical
design. Nevertheless, there are some general rules for adjustment which apply
to all of them.
• The cleat has to be fastened to the shoe in such a position that the ball of the
foot comes to rest on the pedal axle.
• Your feet should assume a natural position when pedalling. For most people
this means that the heels will point inward a little. Make sure that the fastening
bolts are properly tightened, as you will find it almost impossible to disengage
your shoe from a loose plate!
• Adjust the required releasing force according to your needs. It is advisable to
adopt a low releasing force setting to begin with. Turn the small Allen bolt and
examine the change in releasing force when you engage and disengage the
shoe from the pedal.
• Exposed springs and other components that attract dirt have to be cleaned and
regreased regularly.
• Squeaking or creaking cleats can often be silenced by applying a little grease
to the point of contact between cleat and pedal. These noises may also be
signs of wear.
• Check the cleats regularly for wear, especially in case of plastic cleats.
• If your shoe wobbles on the pedal, the cleat or the sole of your shoes might
be worn.
Note:
Read the operating
instructions of the pedal
and shoe manufactur-
ers carefully. In case
of inquiries, ask your
STEVENS dealer for
advice.
Note:
Before mounting the
pedals, check the
marking on the pedal
axles first. “R” stands
for right pedal and “L”
for left pedal. Note that
the left pedal has a
left-handed thread that
has to be tightened
contrary to the direction
you are accustomed to,
i.e. anticlockwise.
Danger:
Taking up the pedals, engaging the shoes and disengaging them by turning
the heel outward should first be practised while stationary. Later you can
refine your technique in a place clear of traffic.
Danger:
Only use clipless pedals allowing you to engage and disengage smoothly.
A defective pedal or a badly worn cleat can make the shoe disengage from
the pedal. Risk of accident!

S - 38 | English English | S - 39
The Brake System
Brakes are used for adjusting one’s speed to the surrounding terrain and traf-
fic. In an emergency situation, the brakes must bring the STEVENS bicycle to a
halt as quickly as possible. In the event of such emergency braking, the rider’s
weight shifts forward abruptly, thus reducing the load on the rear wheel. On a
grippy surface it is therefore more likely that the rear wheel will come up and
that the STEVENS bicycle will overturn than that the tyres will lose grip. Such a
problem becomes particularly acute when riding downhill. Therefore, in case of an
emergency braking situation you must try to shift your weight back and down as
far as possible.
Actuate both brakes simultaneously and bear in mind that due to the weight
shift the front brakes can achieve a higher braking force.
With rim brakes long lasting braking or permanent dragging of the brake
pads can overheat the rim. This can affect the inner tube negatively or cause the
tyre to slip on the inner rim. Sudden loss of pressure while cycling can result in a
serious accident.
With disc brakes prolonged braking or permanent dragging of brake pads can
overheat the brake system. This can result in a loss of braking force, even to the
point of total brake failure, provoking serious accidents.
Therefore, check your riding manners and make it a habit to brake hard and
then to open the brake again, whenever the road surface and the situation allows
it. It is better to stop for a moment and let the rim cool down with the brake lever
released rather than to risk anything.
Functioning and Wear
Actuating the hand lever on the handlebar causes a stationary brake pad to
be pressed against a rotating braking surface generating friction. The resulting
friction slows down the wheel. The rate of deceleration is not only determined by
the force with which the brake pad is pressed against the braking surface, but
also to a decisive degree by the coefficient of friction, which depends on the two
materials that are rubbed against each other.
When water, dirt or oil gets in contact with one of the engaging surfaces, this
changes the coefficient of friction. This is why brakes respond at a slight delay and
less powerfully in wet weather. This applies in particular to rim brakes.
In order to maintain their effectiveness brakes need to be checked and read-
justed from time to time.
Rim Brakes (General)
The friction generated by braking causes wear to the brake pads as well as
to the rims. Frequent rides in the rain and soiling hasten wear on both engaging
surfaces. Once the abrasion of the rim has reached a certain critical point, the rim
may break under the tyre pressure. This can make the wheel jam or the inner tube
burst, both of which can cause a fall!
Contact your STEVENS dealer and have the remaining thickness of the rims
checked when you have worn through your second set of brake pads at the latest.
The rim thickness can be checked by a specialist with special measuring instru-
ments.
Some rims are provided with wear indicators. Once the abrasion of the rim
has reached a certain critical point, the brake indicator becomes visible in form
of small slots or a permanent strip or disappears (according to the model). In this
case you should also contact your STEVENS dealer at once and have your rim
replaced.
Danger:
Be careful while getting
used to the brakes.
Practise emergency
stops in a place clear
of traffic until you are
comfortable controlling
your STEVENS bicycle.
This can save you from
having accidents.
Danger:
Ensure that braking
surfaces and brake
pads are absolutely free
of wax, grease and oil.
Risk of accident!
Danger:
The assignment of brake lever to brake calliper can vary, e.g. left lever acts
on front brake. Have a look at the bike card and check whether the brake
lever of the front brake is on the side you are used to (right or left). If it is
not, ask your STEVENS dealer to switch the brake levers before you set off
for the first time.
Danger:
Wet weather reduces
the braking effect and
the road grip of the
tyres. Be aware of
longer stopping distanc-
es when riding in the
rain, reduce your speed
and actuate the brakes
carefully.
This manual suits for next models
2
Table of contents
Other Stevens Bicycle manuals


