Stihl FSE 60 User manual

Contents
1 Guide to Using this Manual.........................2
2 Safety Precautions and Working Techni‐
ques............................................................ 2
3 Using the Unit............................................. 7
4 Approved Combinations of Cutting Attach‐
ment, Deflector, Handle and Harness.........8
5 Mounting the Drive Tube.............................8
6 Mounting the Loop Handle..........................9
7 Mounting the Deflector................................9
8 Mounting the Cutting Attachment................9
9 Mounting Depth Wheel............................. 10
10 Converting Unit to Power Edger............... 11
11 Connecting to Power Supply.....................11
12 Fitting the Harness....................................12
13 Switching On.............................................12
14 Switching Off.............................................12
15 Overload Cutout........................................12
16 Storing the Machine.................................. 13
17 Maintaining the Mowing Head...................13
18 Maintenance and Care..............................14
19 Minimize Wear and Avoid Damage...........14
20 Main Parts.................................................15
21 Specifications............................................15
22 Maintenance and Repairs......................... 16
23 Disposal.................................................... 16
24 EC Declaration of Conformity................... 16
25 General Power Tool Safety Warnings.......17
1 Guide to Using this Manual
1.1 Pictograms
All the pictograms attached to the machine are
shown and explained in this manual.
1.2 Symbols in text
WARNING
Warning where there is a risk of an accident or
personal injury or serious damage to property.
NOTICE
Caution where there is a risk of damaging the
machine or its individual components.
1.3 Engineering improvements
STIHL's philosophy is to continually improve all
of its products. For this reason we may modify
the design, engineering and appearance of our
products periodically.
Therefore, some changes, modifications and
improvements may not be covered in this man‐
ual.
2 Safety Precautions and
Working Techniques
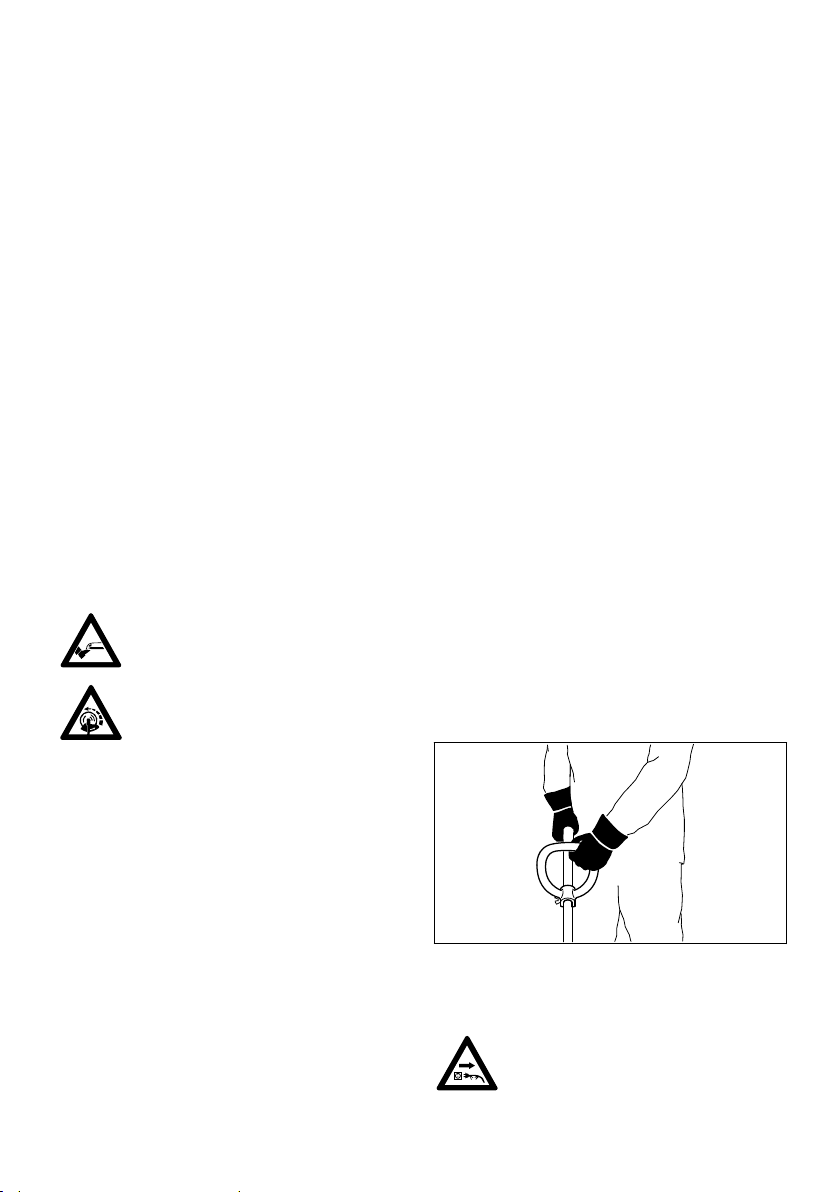
Special safety precautions must be
observed when working with this
machine because of the very high
speed of its cutting attachment and
the fact that it is powered by electric‐
ity.
Before commissioning, it is important
to read and understand the User
Manual and to keep it in a safe place
for future reference. Failure to
observe the User Manual may lead to
serious or even fatal injury.
Observe the national safety regulations issued,
e.g. by the employers' liability insurance associa‐
tion, social security institutions, occupational
safety and health authorities and other organiza‐
tions.
If you have not used this machine before: Have
your dealer or other experienced user show you
how to handle your machine safely or attend a
specialist course.
Minors should never be allowed to use the
machine – except for young trainees over the
age of 16 when working under supervision.
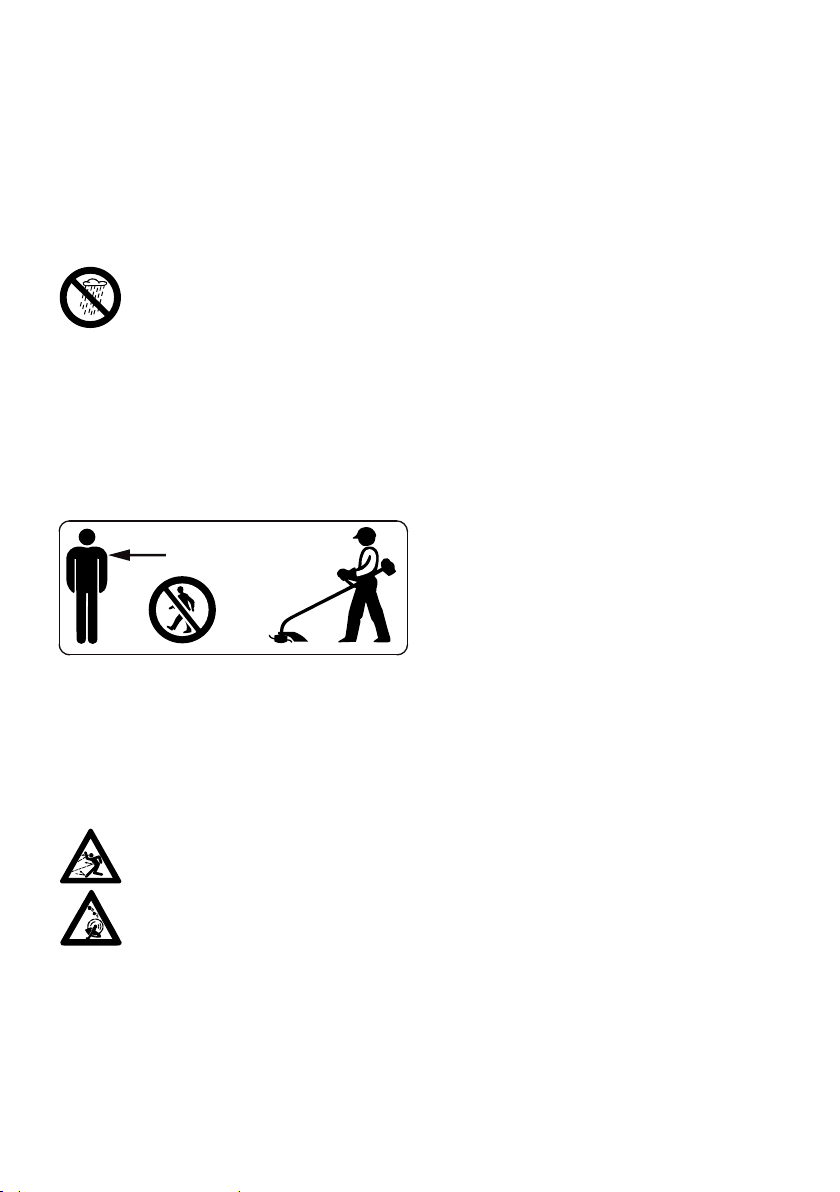
Children, animals and onlookers must not be
allowed near the machine.
When the machine is not in use, shut it off so
that it does not endanger others. Secure it
against unauthorized use and disconnect the
mains plug.
The user is responsible for accidents or risks
involving third parties or their property.
Do not pass on or lend the machine to persons
who are not familiar with this model and its han‐
dling – always include the User Manual.
Persons who are not able to operate the power
tool safely due to limited physical, sensory or
mental ability may work with it only under super‐
vision or after being instructed appropriately by a
responsible person.
The use of noise-emitting power tools may be
restricted to certain times by national or local
regulations.
Before each use, check that the unit is in proper
condition. Pay special attention to the connecting
cable, mains plug and safety devices.
English
2 0458-282-0121-C
© ANDREAS STIHL AG & Co. KG 2023
0458-282-0121-C. VA1.C23.
Printed on chlorine-free paper
Paper is recyclable.
Original Instruction Manual
0000000880_023_GB

Do not use the connecting cable to pull or trans‐
port the unit.
Disconnect plug from wall outlet before perform‐
ing any work on the machine, e.g. cleaning,
maintenance, replacing parts.
The deflector on this power tool cannot protect
the operator from all objects ejected by the cut‐
ting attachment (stones, glass, wire, etc.). Ejec‐
ted objects may also ricochet and strike the oper‐
ator.
Do not use a high-pressure washer to clean the
power tool. The solid jet of water may damage
parts of the unit.
Do not spray the power tool with water.
2.1 Physical fitness
To operate the power tool you must be rested,
and in good physical condition and mental
health.
If you have any condition that might be aggrava‐
ted by strenuous work, check with your doctor
before operating a power tool.
Do not operate the power tool if you have con‐
sumed alcohol or taken medication which may
impair responsiveness, or taken drugs.
2.2 Accessories and Spare Parts
Only use cutting attachments and accessories
that are explicitly approved for this power tool by
STIHL or are technically identical. If you have
any questions about this, consult your dealer.
Use only high-quality parts and accessories. Oth‐
erwise, there is a risk of accidents and damage
to the unit.
STIHL recommends the use of genuine STIHL
tools and accessories. They are specifically
designed to match the product and meet your
performance requirements.
Never attempt to modify your power tool in any
way since this may increase the risk of personal
injury. STIHL excludes all liability for personal
injury and damage to property caused while
using unauthorized attachments.
2.3 Applications
Depending on the cutting attachment fitted, use
your power tool only for cutting grass, over‐
growth and similar materials.
Do not use the power tool for any other purpose
because of the increased risk of accidents and
damage to the power tool itself. The product
must not be modified in any way - this may also
lead to accidents or damage to the unit.
2.4 Clothing and Equipment
Wear proper protective clothing and equipment.
Clothing must be sturdy but allow
complete freedom of movement.
Wear close-fitting clothing – a boiler‐
suit, not a loose work jacket.
Do not wear clothing which could become trap‐
ped in wood, brush or moving parts of the
machine. Do not wear a scarf, necktie or jewelry.
Tie up and secure long hair above your should‐
ers.
Wear sturdy shoes with non-slip
soles.
WARNING
To reduce the risk of eye injuries,
wear close-fitting safety glasses in
accordance with European Standard
EN 166. Make sure the safety
glasses are a snug fit.
Wear face protection and make sure it is a good
fit. Face protection alone is not sufficient to pro‐
tect the eyes.
Wear "personal" sound protection, e.g. ear
defenders.
Wear sturdy protective gloves made
of a resistant material (e.g. leather).
STIHL offers a comprehensive range of personal
protective equipment.
2.5 Transporting the Unit
Always switch off the machine and unplug it from
the mains plug.
Carry the machine hanging from the shoulder
strap or properly balanced by the shaft or loop
handle.
Transporting by vehicle: Properly secure the
machine to prevent tipping over and damage.
2.6 Before Starting Work
Check the unit
Check that your machine is in safe operating
condition – refer to appropriate sections in the
User Manual:
2 Safety Precautions and Working Techniques English
0458-282-0121-C 3

–The starting lockout lever and trigger switch
must move freely – the switch must return to
the idle position when it is released.
–Use only an approved combination of cutting
attachment, deflector, handle and carrying
strap. All parts must be assembled properly
and securely. To reduce the risk of injury,
never use metal cutting attachments!
–Check that the cutting attachment is properly
and securely mounted and in good condition.
–Check safety devices (e.g., deflector for cut‐
ting attachments) for damage and/or wear.
Always replace damaged parts. Never operate
the unit with a damaged deflector
–Keep the handles dry, clean and free from dirt,
for safe control of the power tool
–Adjust handle to suit your height and reach.
To reduce the risk of accidents and personal
injury, do not operate the unit if it is not in proper
condition!
Only operate the unit if all of its components are
undamaged and securely mounted.
Never attempt to modify the controls or safety
devices.
Before switching on your power tool, make sure
the cutting attachment is not touching the ground
or any other object.
Avoid contact with the cutting attach‐
ment – risk of injury!
Note that the cutting attachment con‐
tinues to run for a short period after
the power tool is switched off – fly‐
wheel effect.
Electrical connection.
Reduce the risk of electric shock:
–Voltage and frequency of the machine (see
rating plate) and the voltage and frequency of
your power supply must be the same.
–Examine the connecting cord, power plug and
extension cord for damage. Damaged cords,
couplings and plugs or connecting cords that
do not comply with the regulations must not be
used
–Always connect the engine analyzer to a prop‐
erly installed wall outlet.
–Check that the insulation of the connection
cable, extension cord, plug and coupling is in
good condition.
–Never touch the power plug, power cord and
extension cord, and electrical plug connec‐
tions with wet hands.
–Any extension cords used must comply with
the specifications for the particular application
Position the connection cable and extension cord
correctly:
–Check minimum cross section of wires (wire
gauge) – see "Connecting to Power Supply".
–To reduce the risk of stumbling, position and
mark the connecting cord so that it cannot be
damaged or endanger others.
–Using unsuitable extension cords can be dan‐
gerous. Only use extension cords that are
approved for outdoor use, are appropriately
labeled and have a sufficient cable cross-sec‐
tion.
–The plug and coupling of the extension cord
must be water-proof and must never be
immersed in water.
–Do not allow cord to rub on edges or pointed
or sharp objects.
–don't trap or squeeze the cord in or under
doors or windows
–If cords are twisted – unplug the power tool
and straighten them out
–Never touch the rotating cutting attachment
–Always unwind the extension cord completely
from the cable reel to reduce the risk of fire
from overheating.
2.7 Holding and Guiding the Tool
Always hold the tool firmly with both hands on
the handles. Make sure you always have a firm
and secure footing.
Always hold the machine on the right-hand side
of your body.
002BA117 KN
Left hand on loop handle, right hand on control
handle, even if you are left-handed.
2.8 While Working
If the power cord is damaged, imme‐
diately disconnect the plug from the
wall outlet to avoid the risk of electric
shock.
English 2 Safety Precautions and Working Techniques
4 0458-282-0121-C

Avoid damage to the power supply cord. Do not
drive over it, pinch or tug it.
Never jerk the connecting cord to disconnect it
from the wall outlet. To unplug, grasp the plug,
not the cord.
The power cord and power plug must never be
touched with wet hands.
Never spray water on the unit – risk of short cir‐
cuit!
The drive motor is not waterproof. To
reduce the risk of a short circuit or
electrocution, never work with the
power tool in the rain or in wet or very
damp locations.
Do not leave the unit outdoors in the rain.
In case of imminent danger or in an emergency,
switch off the motor immediately – release the
trigger switch and starting lockout.
Your power tool is designed to be operated by
one person only. Do not allow other persons in
the work area.
15m (50ft)
There is a risk of accident from ejected objects
within a wide area around the working space, so
you must ensure that there is no-one within a
15 m radius of the machine. This distance must
also be maintained in relation to objects (vehi‐
cles, window panes) – risk of property damage!
Even at distances beyond 15 m, the danger can‐
not be ruled out.
Check the work site – rocks, metal
objects etc. could get caught up and
ejected – potentially beyond a dis‐
tance of 15 m – risk of injury! Such
objects can also damage the cutting
attachment and other property (e.g.
parked vehicles, windows).
Never work without protection suitable for the
respective machine and cutting tool – risk of
injury from ejected objects!
Do not cut wet grass.
Take care in slippery conditions on slopes and
uneven ground.
Keep the connecting cord behind the power tool
at all times – do not walk backwards – risk of
stumbling.
Watch out for obstacles: Tree stumps, roots –
risk of tripping or stumbling!
Only work while standing on the ground, never
on a ladder, work platform or other unstable sur‐
face.
Be particularly alert and cautious when wearing
hearing protection because your ability to hear
warnings (shouts, alarms, etc.) is restricted.
Take breaks when you start getting tired or feel‐
ing fatigue – risk of accidents!
Work calmly and carefully – in daylight conditions
and only when visibility is good. Proceed with
caution, do not put others in danger.
Be particularly careful when working on difficult,
densely grown terrain.
When mowing in high bushes, under shrubbery
and hedges: Hold the cutting tool at a working
height of at least 15 cm – to avoid risks to ani‐
mals.
Check the cutting tool regularly at frequent inter‐
vals, and immediately if you notice a change in
its behavior:
–Switch off the tool, hold it firmly and press the
cutting attachment into the ground to bring it to
a standstill, and disconnect the plug from the
power supply.
–Check condition and tightness of connections,
look out for fine cracks
–Immediately replace defective cutting tools,
also in the event of minor hairline cracks
–Clean grass and plant residue off the cutting
attachment mounting at regular intervals –
remove any accumulated material from the
cutting attachment and deflector.
Always switch off the tool and unplug it from the
power supply before replacing the cutting attach‐
ment. Risk of injury from the motor starting unin‐
tentionally!
Do not continue using or attempt to repair dam‐
aged or cracked cutting attachments by means
of welding, straightening or modifying the shape
(unbalanced).
Particles or pieces may come off and hit the
operator or a bystander at a high speed – risk of
most severe injuries!
If a rotating cutting attachment touches a rock or
another hard object, sparks may be generated
2 Safety Precautions and Working Techniques English
0458-282-0121-C 5

which may possibly ignite combustible materials.
Dried-out plants and undergrowth are combusti‐
ble, especially in hot and dry weather. If there is
a risk of fire, do not use cutting attachments in
the vicinity of combustible materials, dried-out
plants or brushwood. It is mandatory that you ask
the responsible forestry office about current fire
hazards.
Only use the deflector with properly mounted
blade that ensures the mowing line is restricted
to the permissible length.
To reduce the risk of injury, avoid contact with
the blade.
To reduce the risk of injury, always switch off the
tool and unplug it from the power supply before
manually adjusting the mowing line.
Misuse with mowing lines that are too long
reduces the working speed of the engine. This
results in overheating and damage to the motor.
To reduce the risk of injury, never use wire in
place of the nylon cutting line.
If the unit is subjected to unusual stress for which
it was not designed (e.g., heavy impact or a fall),
always check that it is in safe operating condition
before continuing work – see also "Before Start‐
ing Work". Make sure the safety devices are
working properly. Do not continue operating your
machine if it is damaged. In case of doubt, con‐
tact a dealer.
Before leaving the machine unattended: Turn it
off and disconnect the mains plug.
2.9 Vibrations
Prolonged use of the power tool may result in
vibration-induced circulation problems in the
hands (whitefinger disease).
No general recommendation can be given for the
length of usage because it depends on several
factors.
The period of usage is prolonged by:
–Hand protection (wearing warm gloves)
–Work breaks
The period of usage is shortened by:
–Any personal tendency to suffer from poor cir‐
culation (symptoms: frequently cold fingers,
tingling sensations).
–Low outside temperatures.
–The force with which the handles are held (a
tight grip restricts circulation).
Continual and regular users should monitor
closely the condition of their hands and fingers. If
any of the above symptoms appear (e.g. tingling
sensation in fingers), seek medical advice.
2.10 Maintenance and Repairs
Always switch off the machine and disconnect
the plug from the power supply before carrying
out any maintenance work to reduce the risk of
injury from the motor starting unintentionally.
Service the machine regularly. Do not attempt
any maintenance or repair work not described in
the instruction manual. Have all other work per‐
formed by a servicing dealer.
STIHL recommends that you have servicing and
repair work carried out exclusively by an author‐
ized STIHL servicing dealer. STIHL dealers are
regularly given the opportunity to attend training
courses and are supplied with the necessary
technical information.
Only use high-quality replacement parts in order
to avoid the risk of accidents and damage to the
machine. If you have any questions in this
respect, consult a servicing dealer.
STIHL recommends the use of genuine STIHL
replacement parts. They are specifically
designed to match your machine model and
meet your performance requirements.
Never attempt to modify your power tool in any
way since this will increase the risk of personal
injury.
Regularly check that the insulation of the power
cord and plug is in good condition and shows no
sign of ageing (brittleness).
Electrical components, e.g. power cord, may only
be repaired or replaced by a qualified electrician.
Clean plastic components with a cloth. Do not
use aggressive detergents. They may damage
the plastic.
Do not spray the machine with water.
Check tightness of mounting screws on safety
devices and the cutting attachment and retighten
if necessary.
Clean cooling air inlets in motor housing as nec‐
essary.
Store the machine is a safe and dry place.
English 2 Safety Precautions and Working Techniques
6 0458-282-0121-C

3 Using the Unit
3.1 Mowing
282BA011 KN
► Hold your trimmer with both hands – right
hand on the control handle – left hand on the
loop handle.
► Stand upright – hold the unit in a relaxed posi‐
tion and always on right side of your body.
► Swing the trimmer steadily to the left and right
like a scythe, while maintaining the required
cutting height.
► Avoid contact with fences, walls, rocks, etc.
since it will result in a higher rate of wear.
3.1.1 Mowing with depth wheel
282BA012 KN
A depth wheel can be quickly fitted to the trim‐
mer (see "Mounting Depth Wheel").
–It limits the cutting range of the mowing line
–reduces the risk of the rotating mowing line
causing damage (e.g. tree bark)
3.2 Edging
282BA013 KN
The unit can be quickly converted to a power
edger (see "Converting Unit to Power Edger").
► Use the unit as shown
► Guide the mowing line along the edge of the
lawn – use the depth wheel (see "Mounting
Depth Wheel") or hold the unit at the right
height.
3.3 Disposal
Do not throw cuttings in the garbage can – they
can be composted.
3 Using the Unit English
0458-282-0121-C 7

4 Approved Combinations of Cutting Attachment, Deflector, Han‐
dle and Harness
Cutting Attachment Deflector Handle Harness
282BA010-A2
34
2
1
4.1 Approved Combinations
Select correct combination from the table accord‐
ing to the cutting attachment you intend to use.
WARNING
For safety reasons no other combinations are
permitted – risk of accidents.
Only mowing heads (1) may be used on trim‐
mers with a curved drive tube and loop handle.
4.2 Cutting Attachments
4.2.1 Mowing heads
1 STIHL AutoCut C 6‑2
4.3 Deflector
2 Deflector with blade, for mowing heads
4.4 Handle
3 Loop handle
4.5 Harness
4 Shoulder strap may be used
5 Mounting the Drive Tube
1
238BA016 KN
3
A
2
A
► Pull the protective cap off the drive tube.
► Push the drive tube (1) into the motor hous‐
ing (2) as far as the mark (A), turning the drive
tube back and forth at the same time.
► Tighten down the screw (3) in the housing
firmly.
English 4 Approved Combinations of Cutting Attachment, Deflector, Handle an…
8 0458-282-0121-C

6 Mounting the Loop Handle
6.1 Mounting the Loop Handle
4
1
2
3
5
A
282BA001 KN
40 mm
► Fit the loop handle (1) on the drive tube at a
distance A of about 30 cm from the control
handle (2).
► Insert the hex nut (3) in the loop handle (1).
► Squeeze the ends of the clamp together, fit
the M6x40 screw (4) with washer (5) from the
other side and tighten down firmly.
6.2 Adjusting Loop Handle to Most
Comfortable Position
► Loosen the screw (4).
► Move the loop handle (1) along the drive tube
to the required position – tighten down the
screw (4) firmly.
7 Mounting the Deflector
1
238BA003 KN
2
► Push the deflector (1) over the clamp (2) as far
as stop.
238BA004 KN
4
3
► Fit the locknut (3) in the hex recess on the
deflector.
► Make sure the holes line up.
► Insert the M6x30 screw (4) and tighten it down
firmly.
8 Mounting the Cutting
Attachment
8.1 Placing Power Tool on the
Ground
238BA021 KN
► Switch off the power tool.
► Lay your trimmer on its back with the loop
handle facing down and the output shaft facing
up.
8.2 Fitting Mowing Head without
Screw Mounting
Keep the supplement sheet for the mowing head
in a safe place!
6 Mounting the Loop Handle English
0458-282-0121-C 9

8.2.1 STIHL AutoCut C 5-2
9
681BA018 KN
Schnur/LINE 2
Schnur/LINE 1
2
8
► Slip the mowing head (2) on to the shaft – as
AutoCut 5-2.
► Turn the spool (9) clockwise until the two
arrow heads line up – secure the spool in this
position.
► Insert the cap (8) in the spool, press it down
as far as stop and turn it clockwise at the
same time.
► Turn the cap until you feel resistance and then
tighten it down firmly by hand.
8.2.2 STIHL AutoCut C 6-2
0000-GXX-3937-A0
2
1
3
4
► Place the mowing head (2) on the shaft (3)
while inserting the internal hexagon (2) on the
hexagon (4)
► Hold the mowing head (2) with your hand.
► Turn cap (1) clockwise and tighten it firmly by
hand.
8.3 Removing the Mowing Head
► Hold the spool housing steady
► Unscrew the cap counterclockwise.
9 Mounting Depth Wheel
The depth wheel is included in the scope of sup‐
ply or is available as a special accessory.
It limits the working range of the mowing line.
–It helps reduce the risk of the rotating mowing
line causing damage (e.g. tree bark).
–It maintains the correct ground clearance
when edging.
3
282BA014 KN
1
2
B
CA
The depth wheel (1) can be locked in three differ‐
ent positions (A, B or C) on the support (2). This
allows the reach of the mowing line to be varied.
A Working range of mowing line extends
beyond the outside diameter of the depth
wheel, e.g. for lawn edging.
B Working range of mowing line extends up to
outside diameter of depth wheel.
C Working range of mowing line does not reach
as far as outside diameter of depth wheel,
e.g. for mowing around trees.
9.1 Mounting Depth Wheel on Sup‐
port
3
282BA014 KN
1
2
B
CA
► Push the depth wheel (1) into the required
position on the support (2) until the locking
hooks (3) engage.
English 9 Mounting Depth Wheel
10 0458-282-0121-C

Squeeze the locking hooks (3) together to
release the depth wheel (1) from the support (2).
9.2 Fitting Depth Wheel on Deflec‐
tor
1
282BA015 KN
4
► Push the depth wheel (1) with support on to
the deflector (4).
5
56
1
282BA016 KN
4
► Secure the depth wheel (1) on the deflec‐
tor's (4) hook (6) with the locking tab (5).
The depth wheel (1) can be released from the
hook (6) and pulled off the deflector (4) by raising
the locking tab (5) slightly.
10 Converting Unit to Power
Edger
1
2
282BA017 KN
► Loosen the screw (1).
► Rotate the loop handle (2) 180°.
► Tighten down the screw (1) firmly.
282BA018 KN
The trimmer can now be turned through 180°
and used as a power edger (see "Applications").
11 Connecting to Power Sup‐
ply
The voltage and frequency of the machine (see
rating plate) must match the voltage and fre‐
quency of the power connection.
The minimum fuse protection of the power con‐
nection must comply with the specifications – see
"Specifications".
The machine must be connected to the power
supply via an earth-leakage circuit breaker to dis‐
connect the power supply if the differential cur‐
rent to earth exceeds 30 mA.
The power connection must correspond to
IEC 60364 and relevant national regulations.
11.1 Extension cord
The design of the extension cord must at least
fulfill the same features as the connecting cord
on the machine. Observe the design marking
(type designation) on the connecting cord.
The cores in the cord must have the following
minimum cross-section depending on the mains
voltage and cord length.
Cord length Minimum cross-section
220 V – 240 V:
Up to 20 m 1.5 mm2
20 m to 50 m 2.5 mm2
100 V – 127 V:
Up to 10 m AWG 14 / 2.0 mm2
10 m to 30 m AWG 12 / 3.5 mm2
10 Converting Unit to Power Edger English
0458-282-0121-C 11

238BA008 KN
12
► Insert the plug (1) into the extension cord cou‐
pling (2)
11.2 Strain relief clamp, strain relief
flap (supports extension cord
and reduces the likelihood of
disconnection of extension cord
receptacles and trimmer plug)
The strain relief (cable retainer) protects the con‐
necting cable from damage.
4
238BA009 KN
5
3
► make a loop (3) in the extension cord
► Pass the loop (3) through the opening (4)
► Slip the loop (3) over the hook (5) and pull it
tight
► Plug the extension cord into a properly instal‐
led outlet
12 Fitting the Harness
A shoulder strap is available as a special acces‐
sory.
Wear the shoulder strap over your left shoulder
and adjust its length so that the spring hook lies
against your right hip.
The open side of the hook should face away
from your body. Attach the spring hook to the
carrying ring (see "Main Parts").
13 Switching On
2
1
238BA010 KN
► make sure you have a firm and secure stance
► Hold your trimmer with both hands – right
hand on the control handle – left hand on the
loop handle.
► Stand upright – hold the unit in a relaxed posi‐
tion and always on right side of your body.
► The cutting attachment must not touch any
objects or the ground
► Press down the starting lockout lever (1) and
hold it in that position.
► Squeeze the trigger switch (2).
14 Switching Off
► Release the trigger switch and starting lockout
lever.
WARNING
Note that the cutting attachment continues to run
for a short period after you let go of the throttle
trigger and starting lockout lever – flywheel
effect.
During longer work breaks – disconnect the plug
from the power supply.
When the machine is not in use, shut it off so
that it does not endanger others.
Secure it against unauthorized use.
15 Overload Cutout
STIHL FSE 71 and FSE 81 electric trimmers are
equipped with an overload cutout.
The overload cut out cuts off the power supply in
case of mechanical or thermal overload.
If the overload cutout has cut off the power sup‐
ply:
► Wait about 3 minutes before switching on
again.
English 12 Fitting the Harness
12 0458-282-0121-C

Do not switch on the unit during this period
because you will otherwise prolong the required
cooling time.
Once the motor starts:
► Run the unit for about 15 seconds off load.
This helps cool the motor windings and con‐
siderably delays renewed tripping of the over‐
load cutout.
16 Storing the Machine
If not used for periods of about 30 days or longer
► Thoroughly clean the machine, especially the
ventilation slots
► Take out the spool with mowing lines and
engage the ends of the lines in the spool's
notches. Clean and inspect the spool.
The resilience and service life of the mowing line
can be increased by storing it in a container filled
with water.
► Store the machine in a dry and secure loca‐
tion. Keep out of the reach of children and
other unauthorized persons
17 Maintaining the Mowing
Head
17.1 Placing Power Tool on the
Ground
238BA021 KN
► Switch off the power tool.
► Lay your trimmer on its back with the loop
handle facing down and the output shaft facing
up.
17.2 Re-Adjusting the Mowing Line
1
232BA007 KN
2
► hold the rotating mowing head above the
ground – tap it on the ground once – about
3 cm fresh line is advanced.
► The blade (1) on the deflector (2) trims surplus
mowing line to the correct length – avoid tap‐
ping the mowing head more than once at a
time!
Line feed operates only if both lines still have a
minimum length of 2.5 cm.
If the line is shorter than 2.5 cm:
WARNING
To reduce the risk of injury, always shut off the
engine before adjusting the nylon mowing line by
hand.
► Lay your trimmer on its back, make sure it is
secure.
► Press down the cap on the spool as far as
stop.
► Pull the ends of the lines out of the spool.
If the spool is empty, refill with mowing line
17.3 Replacing the Mowing Line
Always check the mowing head for wear before
replacing the mowing line.
WARNING
If signs of heavy wear are visible, the mowing
head must be completely replaced.
The mowing line is referred to as ‘line’ in the fol‐
lowing.
An illustrated guide to replacing lines is supplied
with the mowing head. So keep the instructions
for the mowing head in a safe place.
► Remove the mowing head if necessary
16 Storing the Machine English
0458-282-0121-C 13

18 Maintenance and Care
The following intervals apply to normal operating conditions
only. If your daily working time is longer or operating conditions
are difficult (very dusty work area, etc.), shorten the specified
intervals accordingly.
before starting work
after finishing work or daily
weekly
monthly
if problem
if damaged
if required
Complete machine Visual inspection (condition) X
Clean X
Power cord Check X
Have replaced by dealer1) X
Switch, starting lockout Check operation X
Have replaced by dealer1) X X
Cooling inlets Clean X
All accessible screws and nuts Retighten X
Cutting attachment (mowing
head)
Visual Inspection X
Replace X
Check tightness X
Safety labels Replace X
19 Minimize Wear and Avoid
Damage
Observing the instructions in this manual helps
reduce the risk of unnecessary wear and dam‐
age to the power tool.
The power tool must be operated, maintained
and stored with the due care and attention
described in this instruction manual.
The user is responsible for all damage caused by
non-observance of the safety precautions, oper‐
ating and maintenance instructions in this man‐
ual. This includes in particular:
–Alterations or modifications to the product not
approved by STIHL.
–Using tools or accessories which are neither
approved or suitable for the product or are of a
poor quality.
–Using the product for purposes for which it
was not designed.
–Using the product for sports or competitive
events.
–Consequential damage caused by continuing
to use the product with defective components.
19.1 Maintenance Work
All the operations described in the "Maintenance
Chart" must be performed on a regular basis. If
these maintenance operations cannot be per‐
formed by the owner, they should be performed
by a servicing dealer.
STIHL recommends that you have servicing and
repair work carried out exclusively by an author‐
ized STIHL servicing dealer. STIHL dealers are
regularly given the opportunity to attend training
courses and are supplied with the necessary
technical information.
If these maintenance operations are not carried
out as specified, the user assumes responsibility
for any damage that may occur. Among other
things, this includes:
–Damage to the motor due to neglect or defi‐
cient maintenance (e.g. not cleaning cooling
air inlets).
–Damage due to incorrect electrical connection
(voltage, inadequately rated connecting
cords).
–Corrosion and other consequential damage
resulting from improper storage.
1) STIHL recommends a STIHL servicing dealer.
English 18 Maintenance and Care
14 0458-282-0121-C

–Damage to the product resulting from the use
of poor quality replacement parts.
19.2 Parts Subject to Wear and Tear
Some parts of the power tool are subject to nor‐
mal wear and tear even during regular operation
in accordance with instructions and, depending
on the type and duration of use, have to be
replaced in good time. Among other parts, this
includes:
–Cutting attachment
–Deflector
–Carbon brushes
20 Main Parts
9
11
13
12
7
8
3
1
2
4
5
6
#
10
282BA021 KN
1 Power cord
2 Angle screwdriver
3 Cooling inlets
4 Switch
5 Starting lockout lever
6 Carrying ring
7 Loop handle
8 Drive tube
9 Mowing head
10 Line limiter blade
11 Deflector
12 Depth wheel (included as standard equipment
or available as special accessory)
13 Strain relief (cord retainer)
# Serial number
21 Specifications
21.1 Engine
21.1.1 FSE 60
Rated voltage: 230 V
Frequency: 50 Hz
Rated current: 2.3 A
Power: 540 W
Rated speed at mowing line
diameter of 350 mm:
7400 rpm
Protect with a fuse min. 10 A
Protection class: II, E
21.1.2 FSE 71
Rated voltage: 230 V1)
Frequency: 50 Hz
Rated current: 2.3 A
Power: 540 W
Rated speed at mowing line
diameter of 350 mm:
7400 rpm
Protect with a fuse min. 10 A
Protection class: II, E
21.1.3 FSE 81
Rated voltage: 230 V
Frequency: 50 Hz
Rated current: 4.3 A
Power: 1000 W
Rated speed at mowing line
diameter of 350 mm:
7400 rpm
Protect with a fuse min. 10 A
Protection class: II, E
21.2 Length
FSE 60: 1530 mm
FSE 71: 1530 mm
FSE 81: 1530 mm
21.3 Weight
complete with cutting attachment and deflector
FSE 60: 3.9 kg
FSE 602):4.5 kg
FSE 71: 4.0 kg
FSE 712): 4.6 kg
FSE 81: 4.7 kg
FSE 812):5.3 kg
1) Version for Australia: 240 V
2) Version with 10 meter power supply cord for UK
20 Main Parts English
0458-282-0121-C 15

21.4 Noise and Vibration Data
Noise and vibration data are determined on the
basis of the rated maximum speed.
For further details on compliance with Vibration
Directive 2002/44/EC see
www.stihl.com/vib
21.4.1 Sound pressure level Lp to
EN 62841-4-4
FSE 60: 83 dB(A)
FSE 71: 82 dB(A)
FSE 81: 83 dB(A)
21.4.2 Sound power level Lw to
EN 62841-4-4
FSE 60: 94 dB(A)
FSE 71: 93 dB(A)
FSE 81: 93 dB(A)
21.4.3 Vibration level ahv to EN 62841-4-4
Handle, left Handle,
right
FSE 60: 3.9 m/s23.6 m/s2
FSE 71: 3.3 m/s22.9 m/s2
FSE 81: 2.9 m/s22.2 m/s2
The K‑factor in accordance with Directive
2006/42/EC is 2.0 dB(A) for the sound pressure
level and sound power level; the K‑factor in
accordance with Directive 2006/42/EC is
2.0 m/s2 for the vibration level.
21.5 REACH
REACH is an EC regulation and stands for the
Registration, Evaluation, Authorization and
Restriction of Chemical substances.
For information on compliance with the REACH
regulation (EC) No. 1907/2006 see
www.stihl.com/reach
22 Maintenance and Repairs
Users of this machine may only carry out the
maintenance and service work described in this
user manual. All other repairs must be carried
out by a servicing dealer.
STIHL recommends that you have servicing and
repair work carried out exclusively by an author‐
ized STIHL servicing dealer. STIHL dealers are
regularly given the opportunity to attend training
courses and are supplied with the necessary
technical information.
When repairing the machine, only use replace‐
ment parts which have been approved by STIHL
for this power tool or are technically identical.
Only use high-quality replacement parts in order
to avoid the risk of accidents and damage to the
machine.
STIHL recommends the use of original STIHL
replacement parts.
Original STIHL parts can be identified by the
STIHL part number, the { logo and the
STIHL parts symbol K (the symbol may appear
alone on small parts).
23 Disposal
Contact the local authorities or your STIHL serv‐
icing dealer for information on disposal.
Improper disposal can be harmful to health and
pollute the environment.
000BA073 KN
► Take STIHL products including packaging to a
suitable collection point for recycling in accord‐
ance with local regulations.
► Do not dispose with domestic waste.
24 EC Declaration of Con‐
formity
ANDREAS STIHL AG & Co. KG
Badstr. 115
D-71336 Waiblingen
Germany
declares under our sole responsibility that
Designation: Electric trimmer
Make: STIHL
Series: FSE 60
FSE 71
FSE 81
Serial identification number: 4809
conforms to the relevant provisions of Directives
2011/65/EU, 2006/42/EC, 2014/30/EU and
2000/14/EC and has been developed and manu‐
factured in compliance with the following stand‐
ards in the versions valid on the date of produc‐
tion:
English 22 Maintenance and Repairs
16 0458-282-0121-C

EN 55014‑1, EN 55014‑2, EN 62841-1,
EN 62841-4-4, EN 61000‑3‑2, EN 61000‑3‑3
The measured and guaranteed sound power
level was determined according to Directive
2000/14/EC, Annex VIII, using the ISO 11094
standard.
Notified body involved:
VDE Prüf- und Zertifizierungsinstitut
Merianstrasse 28
63069 Offenbach
Measured sound power level
FSE 60: 94 db(A)
FSE 71: 93 db(A)
FSE 81: 93 db(A)
Guaranteed sound power level
FSE 60: 96 db(A)
FSE 71: 95 db(A)
FSE 81: 95 db(A)
Technical documents deposited at:
ANDREAS STIHL AG & Co. KG
Produktzulassung
The year of construction, the country of manufac‐
ture and the machine number are shown on the
machine.
Done at Waiblingen, 01.08.2022
ANDREAS STIHL AG & Co. KG
pp
Robert Olma, Vice President, Regulatory Affairs
& Global Governmental Relations
25 General Power Tool Safety
Warnings
25.1 Introduction
This chapter reproduces the pre-formulated, gen‐
eral safety precautions specified in the
IEC 62841 standard for hand-held motor-oper‐
ated electric tools.
STIHL is obliged to publish these texts.
The safety precautions and warnings on avoiding
an electric shock given under “Electrical Safety”
do not apply to STIHL cordless products.
WARNING
■Read all safety warnings, instructions, illustra‐
tions and specifications provided with this
power tool. Failure to follow all instructions lis‐
ted below may result in electric shock, fire
and/or serious injury. Save all warnings and
instructions for future reference.
The term "electric power tool" in the safety warn‐
ings refers to mains-operated (corded) power
tools or battery-operated (cordless) power tools.
25.2 Work area safety
a)Keep work area clean and well lit. Cluttered
or dark areas invite accidents.
b)Do not operate power tools in explosive
atmospheres, such as in the presence of
flammable liquids, gases or dust. Power
tools create sparks which may ignite the dust
or fumes.
c)Keep children and bystanders away while
operating a power tool. Distractions can
cause you to lose control.
25.3 Electrical safety
a)Power tool plugs must match the outlet.
Never modify the plug in any way. Do not
use any adapter plugs with earthed (groun‐
ded) power tools.Unmodified plugs and
matching outlets will reduce risk of electric
shock.
b)Avoid body contact with earthed or grounded
surfaces, such as pipes, radiators, ranges
and refrigerators. There is an increased risk
of electric shock if your body is earthed or
grounded.
c)Do not expose power tools to rain or wet
conditions. Water entering a power tool will
increase the risk of electric shock.
d)Do not abuse the cord. Never use the cord
for carrying, pulling or unplugging the power
tool. Keep cord away from heat, oil, sharp
edges or moving parts. Damaged or entan‐
gled cords increase the risk of electric shock.
e)When operating a power tool outdoors, use
an extension cord suitable for outdoor use.
Use of a cord suitable for outdoor use
reduces the risk of electric shock.
25 General Power Tool Safety Warnings English
0458-282-0121-C 17

f)If operating a power tool in a damp location
is unavoidable, use a residual current device
(RCD) protected supply. Use of an RCD
reduces the risk of electric shock.
25.4 Personal safety
a)Stay alert, watch what you are doing and use
common sense when operating a power tool.
Do not use a power tool while you are tired
or under the influence of drugs, alcohol or
medication. A moment of inattention while
operating power tools may result in serious
personal injury.
b)Use personal protective equipment. Always
wear eye protection. Protective equipment
such as a dust mask, non-skid safety shoes,
hard hat or hearing protection used for
appropriate conditions will reduce personal
injuries.
c)Prevent unintentional starting. Ensure the
switch is in the off-position before connecting
to power source and/or battery pack, picking
up or carrying the tool. Carrying power tools
with your finger on the switch or energising
power tools that have the switch on invites
accidents.
d)Remove any adjusting key or wrench before
turning the power tool on. A wrench or a key
left attached to a rotating part of the power
tool may result in personal injury.
e)Do not overreach. Keep proper footing and
balance at all times. This enables better con‐
trol of the power tool in unexpected situa‐
tions.
f)Dress properly. Do not wear loose clothing or
jewellery. Keep your hair and clothing away
from moving parts. Loose clothes, jewellery
or long hair can be caught in moving parts.
g)If devices are provided for the connection of
dust extraction and collection facillities,
ensure these are connected and properly
used. Use of dust collection can reduce dust-
related hazards.
h)Do not let familiarity gained from frequent
use of tools allow you to become complacent
and ignore tool safety principles. A careless
action can cause severe injury within a frac‐
tion of a second.
25.5 Power tool use and care
a)Do not force the power tool. Use the correct
power tool for your application. The correct
power tool will do the job better and safer at
the rate for which it was designed.
b)Do not use the power tool if the switch does
not turn it on and off. Any power tool that
cannot be controlled with the switch is dan‐
gerous and must be repaired.
c)Disconnect the plug from the power source
and/or remove the battery pack, if detacha‐
ble, from the power tool before making any
adjustments, changing accessories, or stor‐
ing power tools. Such preventive safety
measures reduce the risk of starting the
power tool accidentally.
d)Store idle power tools out of the reach of
children and do not allow persons unfamiliar
with the power tool or these instructions to
operate the power tool. Power tools are dan‐
gerous in the hands of untrained users.
e)Maintain power tools and accessories.
Check for misalignment or binding of moving
parts, breakage of parts and any other condi‐
tion that may affect the power tool’s opera‐
tion. If damaged, have the power tool
repaired before use. Many accidents are
caused by poorly maintained power tools.
f)Keep cutting tools sharp and clean. Properly
maintained cutting tools with sharp cutting
edges are less likely to bind and are easier
to control.
g)Use the power tool, accessories and tool bits
etc. in accordance with these instructions,
taking into account the working conditions
and the work to be performed. Use of the
power tool for operations different from those
intended could result in a hazardous situa‐
tion.
h)Keep handles and grasping surfaces dry,
clean and free from oil and grease. Slippery
handles and grasping surfaces do not allow
for safe handling and control of the tool in
unexpected situations.
25.6 Service
a)Have your power tool serviced by a qualified
repair person using only identical replace‐
ment parts. This will ensure that the safety of
the power tool is maintained.
25.7 Grass Trimmer/Lawn Edge
Trimmer Safety Warnings
a)Do not use your machine in bad weather,
especially during thunderstorms. This will
reduce the risk of being struck by lightning.
English 25 General Power Tool Safety Warnings
18 0458-282-0121-C

b)Thoroughly check the work area for wild ani‐
mals. Wild animals may be injured by the
machine when it is running.
c)Thoroughly search the work area and
remove all stones, sticks, wires, bones and
other foreign objects. Ejected parts may
cause injuries.
d)Always check that the cutting tool and the
cutting unit are not damaged before use.
Damaged parts increase the risk of injury.
e)Check the power cable and any extension
cables for signs of damage or aging before
use. If the power cable is damaged or worn
during use, turn off the machine and do not
touch the cable before you have disconnec‐
ted the mains plug. A damaged power or
extension cable may result in an electric
shock, fire and/or serious injury.
f)Always keep the protective covers in their
proper place. Protective covers must always
be ready for use and properly fastened. A
protective cover that is loose, damaged or
not functioning properly may result in injury.
g)Keep air inlet openings free from debris.
Blocked air inlets and debris may cause
overheating or pose a fire hazard.
h)Wear eye protection and ear muffs. Wearing
suitable personal protective equipment will
reduce the risk of injury.
i)Always wear non-slip, protective shoes when
operating the machine. Never work barefoot
or with open sandals. This will reduce the
risk of a foot injury due to contact with the
rotating cutting element.
j)When operating the machine, always wear
clothing that covers your legs, such as pants.
Contact with the rotating cutting element or
lines may cause injuries.
k)Keep bystanders away from the area where
the machine is operated. Ejected parts may
cause serious injuries.
l)Do not operate the machine higher than
waist level. This will avoid unintended con‐
tact with the cutting element and will enable
better control of the machine in unexpected
situations.
m)Do not operate the machine in wet grass.
Walk when you operate the machine, never
run. You will thereby reduce the risk of slip‐
ping or falling, which may result in injury.
n)Do not operate the machine on overly steep
slopes. This will reduce the risk of losing
control, slipping or falling, which may result
in injury.
o)When working on slopes, always make sure
you have a firm footing; always work across
the slope, never up or down and always be
extremely careful when changing the direc‐
tion of work. This will reduce the risk of los‐
ing control, slipping or falling, which may
result in injury.
p)Keep all power cables away from the cutting
area. Power cables may be hidden in hedges
or bushes and may accidentally be damaged
or nicked by the cutting element.
q)Keep all parts of your body away from the
rotating cutting element or cutting lines.
Never remove any material from the machine
unless you have disconnected the machine
from the power supply. The rotating cutting
element or the cutting lines may result in
serious injuries.
r)When carrying the machine, always make
sure that it is turned off and turned away
from your body. Proper handling of the
machine will reduce the likelihood of acci‐
dental contact with the rotating cutting ele‐
ment or cutting lines.
s)Only use replacement cutting heads as well
as plastic cutting lines and elements accord‐
ing to the manufacturer's specifications.
Wrong spare parts may result in loss of con‐
trol, breakage or injuries.
t)Do not replace the plastic lines or blades
with metal wires or blades. Use of the
machine with cutting elements that are not
recommended may result in injuries.
25 General Power Tool Safety Warnings English
0458-282-0121-C 19
Other manuals for FSE 60
14
This manual suits for next models
2
Table of contents
Other Stihl Trimmer manuals

Stihl
Stihl FS 240 R User manual

Stihl
Stihl HSA 65 User manual

Stihl
Stihl HSA 30.0 User manual

Stihl
Stihl FSA 135 R User manual

Stihl
Stihl HSE 61 User manual

Stihl
Stihl HSA 66 User manual

Stihl
Stihl FSA 130 R User manual

Stihl
Stihl FSA 57 User manual

Stihl
Stihl FS 44 User manual

Stihl
Stihl ACK 050 User manual