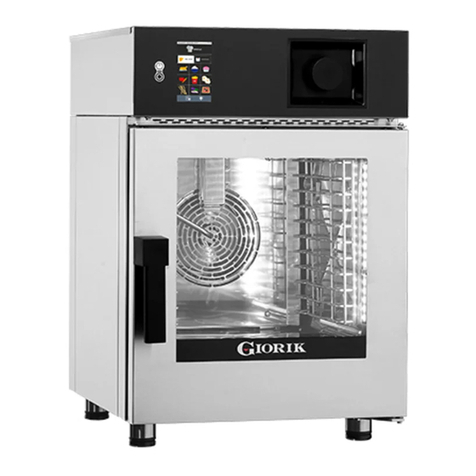
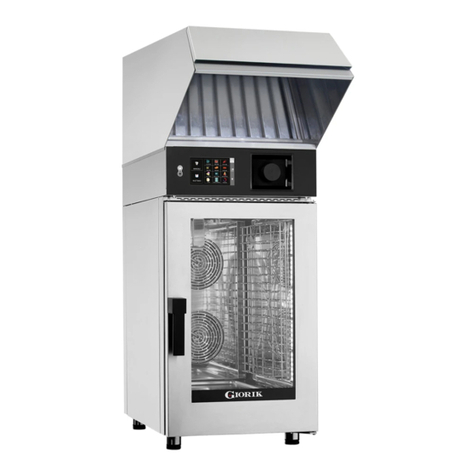
STODDART Giorik SEH061WT User manual

Revision: 02 - 21/11/2022 - A
Electric Models:
SEH061WT / SEH062WT
SEH101WT / SEH102WT
Gas Models:
SEHG061WT
SEHG101WT / SEHG102WT
ESSENCE OF EVOLUTION COMBI OVENS
STACKED INSTALLATION
(READ ALL INSTRUCTIONS BEFORE USE)
TO BE USED IN CONJUNCTION WITH USER MANUAL SUPPLIED WITH OVEN

Page 1
Due to continuous product research and development,
the information contained herein is subject to change without notice.
www.stoddart.com.au
www.stoddart.co.nz
Installation
Setting Up Information . . . . . . . . . . . . . . . . . . . . 2
Handling
Unpacking
Positioning . . . . . . . . . . . . . . . . . . . . . . . . . . 3
General Information
Spacing
Levelling
Stacking Kit . . . . . . . . . . . . . . . . . . . . . . . . . 5
Hardware
Assembly
Water Connection . . . . . . . . . . . . . . . . . . . . . . 9
Stoddart Standard Filter
Stoddart Supplied Reverse Osmosis Filter
Drainage Connection . . . . . . . . . . . . . . . . . . . . 13
Notes
Contents

Page 2
Due to continuous product research and development,
the information contained herein is subject to change without notice.
www.stoddart.com.au
www.stoddart.co.nz
IMPORTANT
THIS MANUAL IS TO BE USED IN CONJUNCTION WITH THE
USER MANUAL SUPPLIED WITH THE OVEN
Installation
Setting Up Information
Handling
Unpacking
• Use suitable means to move the unit;
- For smaller items use two people
- For large items a fork lift, pallet trolley or similar (the forks should reach completely beneath the pallet)
• Check the unit for damage before and after unpacking. If unit is damaged, contact the distributor and manufacturer
• Should any item have physical damage, report the details to the freight company and to the agent responsible for the dispatch within
seven (7) days of receipt. No claims will be accepted or processed after this period
• Remove all protective plastic film, ties and packers before installing and operating
• Clean off any remaining residue from the interior/exterior of the unit using a clean cloth dampened with warm soapy water
WARNING
Improper installation, adjustments, alterations, service or
maintenance can cause property damage, injury or death
IMPORTANT
To be installed only by an authorised service technician

Page 3
Due to continuous product research and development,
the information contained herein is subject to change without notice.
www.stoddart.com.au
www.stoddart.co.nz
Installation
IMPORTANT
Do not install unit under a bench.
Under bench installation will void warranty
Positioning
• The oven must be installed under an extraction canopy that meets AS 1668.2.
• Have a smooth, level floor which can bear the weight of the appliance at full load
• Have a room temperature above +4°C with a maximum humidity of 70%;
• Comply with the regulations in force in terms of safety in the workplace and the systems;
• Not contain potentially explosive materials or substances;
• Be dedicated to food preparation. In addition, a gas-fired appliance requires, by law, rooms with a surface area and ventilation that are
suitable for the power of the oven and that have a means of externally evacuating flue gases
• Please consult national and local standards to ensure that your unit is positioned and ventilated in accordance with any existing
requirements
• Do not allow cables or other items to rest/hang over the exhaust vents
• Do not install unit under a bench
• No equipment is to be installed/placed on the Service compartment (top of oven) excluding stacked applications using a Stoddart
stacking kit and/or Stoddart Recirculating Hood. The service compartment must be easily accessible. Failure to adhere may add service
costs due to lack of access.
General Information
To allow access to service panel and protection of the control components,
the service side of the Combi oven must have the following minimum
clearances:
Service compartment Heat Source
500mm clearance from another heat source, in order to protect the oven
control components and allow access to the service panel. For distances
under 500mm, it is mandatory for Stoddart heat shields to be fitted (for
a minimum distance of 300mm from the service compartment). Failure
to adhere to minimum clearances may void the oven warranty and add
service costs due to lack of access
Service compartment Non-Heat Source
300mm clearance from a non-heat source to allow access to the service
panel. Any distance under 300mm, will add service costs due to lack of
access
WALL
50mm
500mm
500mm
HEAT
SOURCE
HEAT
SOURCE
OVEN
Service Compartment
WALL
50mm
250mm
250mm
300mm
HEAT
SOURCE
HEAT
SOURCE
OVEN
Heat Shield
Heat Shield
Service Compartment
300mm
WALL
50mm
300mm
NON - HEAT
SOURCE OVEN
50mm
Service Compartment
Spacing Heat Source
Heat Source With Heat Shield
Non - Heat Source

Page 4
Due to continuous product research and development,
the information contained herein is subject to change without notice.
www.stoddart.com.au
www.stoddart.co.nz
Installation
• Before assembling the stacking kit the base combi
oven must be level
• Using a spirit level, ensure that the Combi oven is
level. Adjust the foot height to level Combi oven if
required
Levelling

Page 5
Due to continuous product research and development,
the information contained herein is subject to change without notice.
www.stoddart.com.au
www.stoddart.co.nz
Installation
Stacking Kit
Hardware
1
234
810
7
911
5
6
1Base Unit
2Lower Humidity Vent Extension
3Polier Screw M5 x 50mm
4Boiler Vent Extension
5Self Tapping Screws x 2
6Hose Clamp Large x 2
7Small Feet
8Cable Gland Nut x 2
9Cable Gland x 2
10 Silicone Tube
11 Upper Humidity Vent Extension

Page 6
Due to continuous product research and development,
the information contained herein is subject to change without notice.
www.stoddart.com.au
www.stoddart.co.nz
Installation
Assembly
1. Remove the boiler cap 2. Remove the service compartment panel
3. Loosen the hose clamp holding humidity vent pipe
4. Remove humidity vent
5. Insert the gland nuts into the stacking base and secure with
gland nuts
6. Place the stacking base onto the base oven
91
8

Page 7
Due to continuous product research and development,
the information contained herein is subject to change without notice.
www.stoddart.com.au
www.stoddart.co.nz
7. Place the boiler vent extension in position and secure with the
polier screw
8. Attach the previously removed boiler cap to the extension
9. Insert the lower humidity vent extension through the opening
10. Secure hose clamp over extension pipe
11. Re-install service compartment panel
12. Replace the four feet on the oven with the four small feet 13. Place upper oven on the stacking kit (minimum four people)
Ensure the four small feet sit in the locating holes
Installation
3
2
4
7

Page 8
Due to continuous product research and development,
the information contained herein is subject to change without notice.
www.stoddart.com.au
www.stoddart.co.nz
14. Attach silicone tube to the lower humidity extension, secure
with hose clamp
15. Insert the upper humidity extension into the silicone tube,
secure with hose clamp
16. Secure the top of the humidity vent to the oven using the self
tapping screws
Installation
11
5

Page 9
Due to continuous product research and development,
the information contained herein is subject to change without notice.
www.stoddart.com.au
www.stoddart.co.nz
IMPORTANT
This oven must be installed in accordance with AS/NZS 3500.1
The Oven must be installed with the supplied Dual Check Valve,
Water Filter and Pressure Limiting Valves
Supplied Components
(Plumbing Kit / Water Filter Kit)
A. 1 x BWT Filter
B. 1 x Dual Check Valve
C. 1 x 4 Way Manifold
D. 5 x 3/4” BSP To 3/8” Tube Connector
E. 2 x 1/2” BSP To 3/8” Tube Connector
F. 4 x 3/8” John Guest Stem Elbow
G. 3 x Pressure Limiting Valve 300-350 Kpa
H. 1 x Nipple, 3/4” Male
I. 1 x 3/8 Tube (Water)
J. 21 x John Guest Locking Clip
K. 1 x John Guest T section
• Water connections are labelled on the oven
• Isolation valve must be installed at the water supply outlet
• Water Temperature:
Cold water connection - Min 10°C, Max 35°C
• Steam Generation:
The Combi oven requires filtered water supplied to its steam generation system. Water pressure must be 150-350 kPa at oven
connection. This is controlled with the supplied PLV
• Wash System:
The Combi oven requires unfiltered water supplied to its wash system.
Water pressure must be 150-350 kPa at oven connection. This is controlled with the supplied PLV
• Refer to the Stoddart Standard Filter user manual for filter setup
WASH
SYSTEM
INLET
STEAM
GENERATION
INLET
Installation
Water Connection
Stoddart Standard Filter

Page 10
Due to continuous product research and development,
the information contained herein is subject to change without notice.
www.stoddart.com.au
www.stoddart.co.nz
UPPER OVEN
WASH
SYSTEM
UPPER OVEN
STEAM
GENERATION
LOWER OVEN
WASH
SYSTEM
LOWER OVEN
STEAM
GENERATION
COLD WATER CONNECTION
WITH ISOLATION VALVE
(EXISTING CONNECTION)
A
J
I
II
K
D
H
C
B
E E
G
G
G
F F
F F
D D
D D
Installation

Page 11
Due to continuous product research and development,
the information contained herein is subject to change without notice.
www.stoddart.com.au
www.stoddart.co.nz
Supplied Components
(Plumbing Kit / Water Filter Kit)
A. 1 x Ro Unit
B. 1 x Dual Check Valve
C. 1 x 4 Way Manifold
D. 5 x 3/4” Bsp To 3/8” Tube Connector
E. 2 x 1/2” Bsp To 3/8” Tube Connector
F. 4 x 3/8” John Guest Stem Elbow
G. 2 x Pressure Limiting Valve 300-350 Kpa
H. 1 x Pressure Limiting Valve 350-600 Kpa
I. 1 x Nipple, 3/4” Male
J. 1 x 3/8 Tube (Water)
K. 1 x 1/4 Tube (Drain)
L. 21 x John Guest Locking Clip
M. 1 x John Guest T section
IMPORTANT
This oven must be installed in accordance with AS/NZS 3500.1
The Oven must be installed with the supplied Dual Check Valve,
Water Filter and Pressure Limiting Valves
• Water connections are labelled on the oven
• Isolation valve must be installed at the water supply outlet
• Water Temperature:
Cold water connection - Min 10°C, Max 35°C
• Steam Generation:
The Combi oven requires filtered water supplied to its steam generation system. Water pressure must be 150-350 kPa at oven
connection. This is controlled with the Stoddart RO system
• Wash System:
The Combi oven requires unfiltered water supplied to its wash system.
Water pressure must be 150-350 kPa at oven connection. This is controlled with the supplied PLV
• Refer to the Stoddart supplied RO user manual for filter setup
WASH
SYSTEM
INLET
STEAM
GENERATION
INLET
Installation
Stoddart Supplied Reverse Osmosis Filter

Page 12
Due to continuous product research and development,
the information contained herein is subject to change without notice.
www.stoddart.com.au
www.stoddart.co.nz
K
L
WATER CONNECTION
WITH ISOLATION VALVE
(EXISTING CONNECTION)
UPPER OVEN
WASH
SYSTEM
UPPER OVEN
STEAM
GENERATION
LOWER OVEN
WASH
SYSTEM
LOWER OVEN
STEAM
GENERATION
A
I
JJ
M
D
I
C
B
HEE
G
G
FF
FF
DD
DD
Installation

Page 13
Due to continuous product research and development,
the information contained herein is subject to change without notice.
www.stoddart.com.au
www.stoddart.co.nz
300mm
25mm
Drainage Connection
• Drain kit is supplied with oven as illustrated. Any modification or extension to the kit must be able to resist temperatures up to 100°C
• Plumb supplied waste pipes to the Tundish
• Tundish needs to be a minimum of 300mm from the outlet on the service side of the oven
• Tundish should never be located directly below the waste outlet, or close to or under the oven control compartment. Steam from drainage should not be
allowed to rise up underneath the oven control compartment
• Waste pipe must sit 25mm above the Tundish
• Secure waste pipe to the Combi oven. Securing bracket is attached to top of the Combi oven. Remove screw, reposition bracket, then secure in place
with previously removed screw
Installation

Page 14
Due to continuous product research and development,
the information contained herein is subject to change without notice.
www.stoddart.com.au
www.stoddart.co.nz
Notes

www.stoddart.com.au
International
Sales
Tel: +617 3440 7600
Email: [email protected]
Service / Spare Parts
Tel: +617 3440 7600
Email: [email protected]
Service Request
www.stoddart.co.nz
New Zealand Business Number: 6837694
New Zealand
Sales
Tel: 0800 79 1954
Email: [email protected]
Service / Spare Parts
Tel: 0800 935 714
Email: [email protected]
Service Request
www.stoddart.com.au
Australian Business Number: 16009690251
Australia
Sales
Tel: 1300 79 1954
Email: [email protected]
Service / Spare Parts
Tel: 1300 307 289
Email: [email protected]
Service Request
Other manuals for Giorik SEH061WT
1
This manual suits for next models
6
Table of contents
Other STODDART Oven manuals

STODDART
STODDART GIORIK MOVAIR MTE523WRT User manual

STODDART
STODDART Giorik Minitouch KM061WT User manual

STODDART
STODDART Giorik Kore Mini-Touch KB061WT User manual

STODDART
STODDART Giorik Movair MTE5WRT User manual

STODDART
STODDART Giorik SEHE061WT User manual
STODDART
STODDART Giorik Movair MTE5WRT User manual