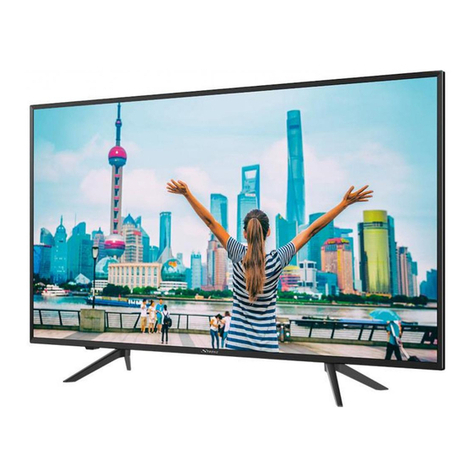
Strong SRT P 4205 User manual

(QJOLVK
- 1 -
Contents
Remote Control Buttons ......................... 2
PLASMA TV ............................................. 3
Installation Of Plasma Panel To
The Wall ............................................... 5
Assembling The Speakers (Optional) . 5
Preparation ............................................. 7
Feat res ............................................... 7
Panel Feat res .................................... 7
Safety Precautions ................................. 7
Before Switc ing On Your TV ................ 9
Power Connection ............................... 9
Connections To The RF Inp t Socket .. 9
How To Connect Other Devices ........... 9
Inserting Batteries In The Remote
Control Handset ................................... 9
Switc ing T e TV ON/OFF ...................... 9
To switch the TV on: ............................. 9
To switch the TV off: .............................. 9
Operating T e TV .................................. 10
Initial APS (A tomatic Programming
System) .............................................. 10
Operating with the b ttons on
the TV set ........................................... 10
Operating With Remote Control ........ 10
layo t men ........................................ 11
pict re men ...................................... 12
window men ..................................... 13
a dio men ........................................ 14
options men ..................................... 15
settings men .................................... 16
aps men ........................................... 16
program table ..................................... 17
programming men ........................... 18
so rce select ..................................... 19
Ot er Features ...................................... 19
TV Stat s ............................................ 19
Active window switch ......................... 20
Programme Swap (SWAP) ................ 20
Freeze Pict re .................................... 20
So nd Indicator .................................. 20
M te Indicator ..................................... 20
AV Modes ............................................ 20
Teletext .................................................. 21
To Operate Teletext ............................ 21
To Select A Page Of Teletext ............... 21
To Select Index Page ......................... 21
To Select Teletext With A TV
Programme ........................................ 21
To Select Do ble Height Text ............. 21
To Reveal Concealed Information ... 21
To Stop A tomatic Page Change ....... 21
To Select A S bcode Page ................. 22
Split Screen ........................................ 22
To Exit Teletext .................................... 22
To Display The Time .......................... 22
Fastext ................................................ 22
Connect Perip eral Equipment ........... 23
Via The E roconnector ...................... 23
Via Ant Inp t ........................................ 23
Decoder .............................................. 23
TV And Video Recorder ...................... 23
Playback NTSC .................................. 23
Copy Facility ....................................... 23
Search For And Store The Test Signal
Of The Video Recorder ...................... 23
Antenna Connections ........................... 24
Camera And Camcorder .................... 25
Connect The Decoder To The Video
Recorder ............................................ 25
Connecting Headphones .................. 25
Tips ........................................................ 25
Care Of The Screen ........................... 25
Poor Pict re ........................................ 25
No Pict re ........................................... 25
So nd ................................................. 25
Remote Control .................................. 25
Specifications ....................................... 26
01-ENG-4205-1546UK-PLASMA BýnT-(3D PANORAMA)(10 PAGE)(SAMV3)-50061377.p65 28.01.2005, 16:041

(QJOLVK
- 2 -
Remote Control Buttons
= Stand By
= C rsor Up
= C rsor Right
OK = Okay / Freeze
0 - 9 = Direct Program
= Image size
SWAP = Program / So rce swap
P/CH + = Programme Up
+ = Vol me Up
= TV / Q it Men
SOURCE = So rce select
= PIP size / YELLOW
= Split screen / BLUE
= Hold
= Update
= Index Page
= Reveal
= Expand
= Mix / Zoom-Pan
= Teletext
= Time / S bpage
= PIP / RED
= PIP position / GREEN
= M te
I-II = Mono/Stereo - D al A-B
- = Vol me Down
- P/CH = Programme Down
=Previo s Programme
= Info (Program Table)
M = Men
= C rsor Down
= C rsor Left
79
2.
,,,
6285&(
01-ENG-4205-1546UK-PLASMA BýnT-(3D PANORAMA)(10 PAGE)(SAMV3)-50061377.p65 28.01.2005, 16:042

(QJOLVK
- 3 -
PLASMA TV
FRONT VIEW
REAR VIEW
/(' 212))
6:,7&+
01-ENG-4205-1546UK-PLASMA BýnT-(3D PANORAMA)(10 PAGE)(SAMV3)-50061377.p65 28.01.2005, 16:043

(QJOLVK
- 4 -
99
$&a+]
781(5 3&$8',2 3&,1387'9,
On/Off switch
Vol me Up, Vol me Down b ttons
Program Up, Program Down b ttons
MENU b tton
TV/AV b tton
S-VHS Inp t
Video Inp t
A dio Inp t (Left, Right)
Headphone
Power cord inp t
Antenna
A dio Line O t L, R
Scart 1
Scart 2
A dio In (for VGA and DVI so rce)
DVI Inp t
VGA Inp t
} F ll Scart
01-ENG-4205-1546UK-PLASMA BýnT-(3D PANORAMA)(10 PAGE)(SAMV3)-50061377.p65 28.01.2005, 16:044

(QJOLVK
- 5 -
Installation Of Plasma Panel To The Wall (Optional)
1- To install the plasma panel on the wall, first of all, foot assembly sho ld be removed.
(Fig re 1). Unscrew the 4 screws (M5 x 12) that attach the foot assembly to the panel and
remove the foot assembly from the panel.
The plasma TV can be installed to the wall with or witho t speakers.
2- Install the wall hanger as in fig re 2 to the wall with 4 anchors (M10 x 50) and 4 screws
(M7 x 60).
Decide the place on the wall where the plasma panel wo ld be placed. Level and mark with
a pencil the 4 mo nting points on the wall hanger. Drill pilot holes for the plastic anchors and
then fix the wall hanger with 4 screws (M7 x 60).
3- Raise the plasma panel and hang it to the holes on the wall hanger from the 2 hanging
screws at the rear of the plasma panel.
Assembling The Speakers (Optional)
T rn the rear side of the plasma panel and place it on a solid s rface s ch as a table or a
desk. P t the speakers to the left and right sides of the panel. Place the speaker holders (2
on the left speaker and 2 on the right speaker) on the holes at the plasma panel and fix one
holder with 4 screws (M5 x 12) to the speaker and the panel. Connect the speaker cables to
the speakers and the Plasma Panel.
)227$66(0%/<
3/$60$3$1(/
63($.(5/()7
0(7$/,16(57
63($.(55,*+7
63($.(5+2/'(5
6&5(:60;
6&5(:6
0;
),*85(
01-ENG-4205-1546UK-PLASMA BýnT-(3D PANORAMA)(10 PAGE)(SAMV3)-50061377.p65 28.01.2005, 16:045

(QJOLVK
- 6 -
),*85(
:$//+$1*(5
:$//+$1*(5
PP
3/$67,&$1&+25
0[
3/$60$3$1(/
6&5(:
0[
02817,1*+2/(6
:$//
+$1*,1*6&5(:6
PP
(Optional)
01-ENG-4205-1546UK-PLASMA BýnT-(3D PANORAMA)(10 PAGE)(SAMV3)-50061377.p65 28.01.2005, 16:046

(QJOLVK
- 7 -
Preparation
For ventilation, leave a space of at least 10
cm free all aro nd the set. To prevent any
fa lt and nsafe sit ations, please do not
place any objects on top of the set.
Use this apparat s in tropical and/or moder-
ate climates.
Features
Remote controlled color television.
100 programmes from VHF, UHF bands or
cable channels can be preset.
It can t ne cable channels.
Controlling the TV is very easy by its men
driven system.
It has 2 E roconnector sockets for external
devices (s ch as video, video games, a -
dio set, etc.)
Stereo so nd system (German+Nicam).
F ll f nction Teletext .
Fastext (10 Pages), TOP text.
Headphone connection.
Direct channel access.
A.P.S. (A tomatic Programming System).
All programmes can be named.
Programme swapping between the two last
watched programmes.
Forward or backward a tomatic t ning.
Sleep timer.
A tomatic so nd m te when no transmis-
sion.
Letterbox, 14:9, fill all (16:9), normal (4:3),
A to switch WSS (Wide Screen Signaling).
NTSC Playback.
Back AV in is available.
It has VGA and DVI connector for external
devices s ch as comp ter.
It has PIP / PAP / PAT f nctions.
AVL (A tomatic Vol me Limiting)
TV Pict re in PC
When no valid signal is detected, after 5
min tes the TV switches itself a tomatically
to stand-by mode.
PLL (Channel Search)
PC Inp t (S pport p to WXGA 1280 x 768)
1 SVHS Inp t and 1 RCA AV Inp t are avail-
able.
Headphone o tp t.
Stereo PC A dio Inp t
Pl g&Play for Windows 9X, ME, 2000, XP
4H Comb Filter
A dio Line O t
Panel Features
High resol tion, 42-inch PLASMA display.
WVGA resol tion (852 x 480)
Contrast ratio (3000:1 typical)
Brightness (typical) 1000 cd/m2.
Viewing angle greater than 160°
Display color 16.7 Million.
Safety Precautions
1. Power Sour e
The receiver sho ld be operated only from a
220-240V AC, 50 Hz. o tlet. Ens re yo se-
lect the correct voltage setting for yo r conve-
nience.
2. Power Cord
The power s pply cord sho ld be placed so
that it is not likely to be walked on or pinched
by items placed pon them or against it. Pay
partic lar attention to cord where it enters
the pl g, power o tlet, and the point where it
exits from the receiver.
3. Moisture and Water
Do not se this eq ipment in a h mid and
damp place (avoid the bathroom, the sink in
the kitchen, and near the washing machine).
Do not expose this eq ipment to rain or wa-
ter, as this may be dangero s and do not
place objects filled with liq ids on top. Avoid
from dripping or splashing.
01-ENG-4205-1546UK-PLASMA BýnT-(3D PANORAMA)(10 PAGE)(SAMV3)-50061377.p65 28.01.2005, 16:047

(QJOLVK
- 8 -
The Plasma TV is a very high techology
prod ct giving yo fine pict re details. Occa-
sionally, a few non-active pixels may remain
still on the screen. Long-time nmoving still
pict res may ca se permanent shade effect
on the screen and even the pict re has been
changed, its infl ence lasts as ghost pic-
t re. This ghost effect may dist rb the ser
even it diminishes in the co rse of time. To
prevent this, don't leave still pict res for ex-
ample teletext pages or frozen pict res on
the screen for a long time. Please note that
this does not affect the performance of yo r
prod ct.
DO NOT LEAVE YOUR TV AT STAND-BY
OR OPERATING WHEN YOU LEAVE YOUR
HOUSE
4. Cleaning
Before cleaning, npl g the receiver from
the main s pply, o tlet. Do not se liq id or
aerosol cleaners. Use soft and dry cloth.
5. Ventilation
The slots and openings on the receiver are
intended for ventilation and to ens re reli-
able operation. To prevent overheating,
these openings m st not be blocked or cov-
ered in anyway.
6. Lightning
In case of storm and lightning or when go-
ing on holiday, disconnect the power cord
from the wall o tlet.
7. Repla ement Part
When replacement parts are req ired, be s re
the service technician has sed replacement
parts which are specified by the man fact rer
or have the same specifications as the origi-
nal one. Una thorised s bstit tions may re-
s lt in fire, electrical shock, or other hazards.
8. Servi ing
Please refer all servicing to q alified per-
sonnel. Do not remove cover as this may re-
s lt in electric shock.
9. Naked Flame Sour es
Do not place naked flame so rces on the
apparat s.
WARNING: When the device is not in use
for a long time, disconnect from power.
Instructions for waste disposal:
Packaging and packaging aids are recy-
clable and should principally be recycled.
Packaging materials, such as foil bag, must
be kept away from children.
Battery, including those which is heavy
metal-free, should not be disposed of with
household waste. Please dispose of used
battery in an environmentally sound man-
ner. Find out about the legal regulations
which apply in your area.
01-ENG-4205-1546UK-PLASMA BýnT-(3D PANORAMA)(10 PAGE)(SAMV3)-50061377.p65 28.01.2005, 16:048

(QJOLVK
- 9 -
Before Switching On Your TV
Power Conne tion
IMPORTANT: The TV set is designed to op-
erate on 220-240V AC, 50 Hz.
After npacking, allow the TV set to reach the
ambient room temperat re before yo con-
nect the set to the mains.
Conne tions To The RF Input
So ket
9+)8+)
:
5($52)7+(79
&$%/(79
Connect the aerial or cable TV pl g to the
RF inp t socket located at the rear of the TV
and connect the cable pl g coming o t from
the TV o t socket located on the devices
(VCR, DVB etc.) to this socket as well.
How To Conne t Other Devi es
IMPORTANT: Switch off the TV before con-
necting any external device.
Sockets for external connections are at the
rear side of the TV. For connection of other
devices via E roconnector refer to the man -
als of the related devices.
Inserting Batteries In The Remote
Control Handset
Place the batteries in the right directions as
seen below.
Remove the battery cover located on the
back of the handset by gently p lling p-
wards from the indicated part.
Insert two MN2400 AAA or eq ivalent type
batteries inside.
Replace the battery cover.
NOTE: emove the batteries from remote
control handset when it is not to be used for
a long period.Otherwise it can be damaged
due to any leakage of batteries.
Switching The TV O /OFF
To swit h the TV on:
Yo r TV will switch on in two steps:
1- Connect the power s pply cord to the sys-
tem. Press On/Off switch at the bottom
right side of the TV. Then the TV switches it-
self to stand-by mode and the led becomes
red located on the front of the TV.
2- To switch on the TV from stand-by mode
either:
Press a digit b tton on the remote control so
that a programme n mber is selected,
or,
Press the "" or " " b tton at the bottom of
the TV or press the -P/CH or P/CH+ b t-
ton on the remote control, so that last mode
switched off is selected.
By either ways the TV will switch on and the
led becomes green.
To swit h the TV off:
Press the (stand-by) b tton on the re-
mote control, so the TV will switch to stand-
by mode and the GREEN LED will become
RED.
To power down the TV completely, press
On/Off switch ,
or,
01-ENG-4205-1546UK-PLASMA BýnT-(3D PANORAMA)(10 PAGE)(SAMV3)-50061377.p65 28.01.2005, 16:049

(QJOLVK
- 10 -
Unpl g the power cord from the mains
socket.
Operating The TV
Yo can operate yo r TV sing both the re-
mote control handset and onset b ttons.
Initial APS (Automati Programming
System)
The following men will be displayed on the
screen when yo t rn on yo r TV for the first
time. APS, searches and sorts all channels
and stores them a tomatically on yo r TV,
according to the transmission of
programme systems in yo r area.
LQLWLDODSV
*HUPDQ\
RN!WRHQDEOH
SOHDVHFKHFNWKHDQWHQQDFDEOH
79!WRFDQFHO
ULJKWOHIWWRFKDQJHODQJXDJH
ODQJXDJH
FRXQWU\
DXWRVHW
HQJOLVK
To cancel APS before starting, press the
TV b tton. First of all choose language and
country by sing / and / b t-
tons. This, will effect the sort process in
APS. To start aps, select autoset by sing
/ b ttons and press / or OK
b tton.
FKDQQHOVHDUFKLQJ
SOHDVHZDLWRU
SUHVVPHQXWRFDQFHO
After APS is finalized, the programme table
will be appeared on the screen. In the
programme table yo will see the
programme n mbers and names assigned
to the programmes.
If yo do not accept the locations and / or the
programme names of programmes, yo
can change them in aps s bmen in the
settings men . (See page 17 for Program
table explanation.)
Operating with the buttons on the
TV set
Vol me setting and programme selection
can be made by sing the b ttons on the
control panel at the bottom of the TV.
Volume Setting
Press the "- " b tton to decrease vol-
me or the " +" b tton to increase vol-
me, so a vol me level scale (slider) will be
displayed at the bottom of the screen.
YROXPH
PHQXWRUHWXUQ ULJKWOHIWWRDGMXVW
Programme Selecting
Press the " " b tton to select the next
programme or the " " b tton to select the
previo s programme.
"" / " " and " + / - " b ttons on the
TV are sed as navigation b ttons in men .
Entering T e Menu
Press the "MENU" b tton on the control
panel at the bottom of the TV to enter the
men .
"" / " " and " + / - " b ttons on the
control panel at the bottom of the TV work as
direction b ttons in the men .
AV Mode
Press the "AV" b tton on the control panel
at the bottom of the TV to switch yo r TV to
AV mode (See AV Modes in page 20).
Operating With Remote Control
The remote control handset of yo r TV is de-
signed to control all the f nctions of the
model yo selected. The f nctions will be
described in accordance with the men sys-
tem of yo r TV.
F nctions of the men system are de-
scribed in Men System section.
01-ENG-4205-1546UK-PLASMA BýnT-(3D PANORAMA)(10 PAGE)(SAMV3)-50061377.p65 28.01.2005, 16:0410

(QJOLVK
- 11 -
Volume Setting
Press the " +" b tton to increase vol-
me. Press the "- " b tton to decrease
vol me. A vol me level scale (slider) will be
displayed at the bottom of the screen.
79
,,,
6285&(
YROXPH
PHQXWRUHWXUQ ULJKWOHIWWRDGMXVW
Programme Selecting
(Previo s or next programme)
Press the - P/CH b tton to select the previ-
o s programme.
Press the P/CH + b tton to select the next
programme.
Programme Selecting (direct access):
Press digit b ttons on the remote control
handset to select programmes between 0
and 9. The TV will switch to the selected
programme after a short delay.
For a two digit program n mber enter the
second digit after pressing the first digit
within 2 seconds.
Menu System
Yo r TV has been designed with a men
system to provide easy manip lation of a
m ltif nction system. Press the M (MENU)
b tton to enter the men . The M b tton
has two f nctions; opening or closing the
men and closing the s bmen and then
opening its parent men .
Press / b tton to select a men title
and then / b tton to select a men
item and / or OK b tton to enter the
men item. To exit a men press the "M"
b tton.
layout menu
By pressing / b tton, select the first
icon. Layo t men appears on the screen.
GRZQIRUFXUUHQWVFUHHQOD\RXWRSWLRQV
IXOOVFUHHQ
SLS
VSOLWVFUHHQ
OD\RXW
full screen
By pressing / b tton, select full
screen. <ok> activates one window lay-
out is seen on the screen. Press or
OK b tton. One programme is displayed
on the whole screen at this option.
pip
By pressing / b tton, select pip.
<ok> activates pip window layout is seen
on the screen. Press or OK b tton. The
first programme from the t ner 1 can be
watched on the backgro nd. The second
programme from the t ner 2 is seen at the
pip window.
Yo can activate PIP layo t directly by press-
ing the (RED) b tton.
split screen
By pressing / b tton, select split
screen. <ok> activates two window lay-
out is seen on the screen. Press or
OK b tton. The first programme from the
t ner 1 can be watched on the left side of the
screen. The second programme from the
t ner 2 is seen on the right side of the
screen.
Yo can activate Split Screen layo t directly
by pressing the (BLUE) b tton.
At pip and split screen layo t, active window
is selected by / b ttons. By /
01-ENG-4205-1546UK-PLASMA BýnT-(3D PANORAMA)(10 PAGE)(SAMV3)-50061377.p65 28.01.2005, 16:0411

(QJOLVK
- 12 -
b ttons, the selected window is activated.
sign is displayed in the activated window.
The so nd of the pict re at the selected win-
dow is heard and all men f nctions are
only valid for this window. All the b ttons (ex-
cept stand-by and " +" / "- ") on the
remote control and the TV are only active for
this window.
Press the M b tton to exit layo t men .
pi ture menu
By pressing / b tton, select the sec-
ond icon. Pict re men appears on the
screen.
GRZQIRUSLFWXUHVHWWLQJVIRUFXUUHQWZLQGRZ
EULJKWQHVV
FRQWUDVW
VKDUSQHVV
FRORU
SLFWXUH
brig tness
By pressing / b tton, select brig t-
ness. rig t/left to adjust brig tness is
seen on the screen. Press b tton to in-
crease brightness. Press b tton to de-
crease brightness. Brightness level can be
adj sted between 0 and 100.
contrast
By pressing / b tton, select con-
trast. rig t/left to adjust contrast is seen
on the screen. Press b tton to increase
contrast. Press b tton to decrease con-
trast. Contrast level can be adj sted be-
tween 0 and 100.
s arpness
By pressing / b tton, select s arp-
ness. rig t/left to c ange s arpness is
seen on the screen. Press b tton to in-
crease sharpness. Press b tton to de-
crease sharpness. Sharpness level can be
adj sted between 0 and 8.
color
By pressing / b tton, select color.
rig t/left to adjust color is seen on the
screen. Press b tton to increase color.
Press b tton to decrease color. Color
level can be adj sted between 0 and 100.
tint
This item is displayed in pict re men when
the TV is in AV mode and at NTSC signal. By
pressing / b tton, select tint. "rig t/
left to adjust tint" is seen on the screen.
Press b tton to increase tint. Press
b tton to decrease tint. Tint level can be ad-
j sted between 0 and 100.
GRZQIRUSLFWXUHVHWWLQJVIRUFXUUHQWZLQGRZ
EULJKWQHVV
FRQWUDVW
VKDUSQHVV
FRORU
WLQW
SLFWXUH
When the TV is in AV mode; pict re men
items (brightness, contrast, sharpness and
color) may req ire re-adj stment.
W en VGA Or DVI Is Connected To TV:
GRZQIRUSLFWXUHVHWWLQJVIRUFXUUHQWZLQGRZ
EULJKWQHVV
FRQWUDVW
SKDVH
SLFWXUH
RSWLRQDO
brig tness
By pressing / b tton, select brig t-
ness. "rig t/left to adjust brig tness" is
seen on the screen. Press b tton to in-
crease brightness. Press b tton to de-
01-ENG-4205-1546UK-PLASMA BýnT-(3D PANORAMA)(10 PAGE)(SAMV3)-50061377.p65 28.01.2005, 16:0412

(QJOLVK
- 13 -
crease brightness. Brightness level can be
adj sted between 0 and 100.
contrast
By pressing / b tton, select con-
trast. "rig t/left to adjust contrast" is seen
on the screen. Press b tton to increase
contrast. Press b tton to decrease con-
trast. Contrast level can be adj sted be-
tween 0 and 100.
p ase (optinal)
This item is not available in the pict re
men when DVI is connected to the TV.
By pressing / b tton, select p ase.
"rig t/left to adjust p ase" is seen on the
screen. Press b tton to increase phase.
Press b tton to decrease phase. Phase
level can be adj sted between 0 and 100.
window menu
By pressing / b tton, select the third
icon. Window men appears on the screen.
If f ll screen option was selected at the lay-
o t men , the window men is seen as be-
low.
GRZQIRUVL]HVHWWLQJ
LPDJHVL]H
ZLQGRZ
ILOODOO
image size
By pressing / b tton, select image
size. "rig t/left to c ange image size" is
seen on the screen. By pressing /
b tton, yo can change image size to fill all,
zoom, letterbox, subtitles, normal, 14:9
and auto.
Yo can enter image size directly by press-
ing the b tton.
If pip option was selected, the window men
is seen as below.
GRZQIRUVL]HVHWWLQJ
LPDJHVL]H
SLSVL]H
SLSSRVLWLRQ
ZLQGRZ
DXWR
image size
By pressing / b tton, select image
size. "rig t/left to c ange image size" is
seen on the screen. By pressing /
b tton, yo can change image size to fill all,
normal and auto.
Yo can enter image size directly by press-
ing the b tton.
pip size
By pressing / b tton, select pip size.
"rig t/left to adjust PIP size" is seen on the
screen. Press b tton to increase pip
size. Press b tton to decrease pip size.
Pip size can be adj sted between 0 and
100.
Yo can change the pip size directly by
pressing the (YELLOW) b tton.
pip position
By pressing / b tton, select pip posi-
tion. "rig t/left to adjust PIP position" is
seen on the screen. By pressing /
b tton, yo can change the pip position as
left top, right top, middle, left bottom or right
bottom (as seen on the men above).
Yo can enter pip position directly by press-
ing the "GREEN" b tton.
01-ENG-4205-1546UK-PLASMA BýnT-(3D PANORAMA)(10 PAGE)(SAMV3)-50061377.p65 28.01.2005, 16:0413

(QJOLVK
- 14 -
W en VGA Or DVI Is Connected To TV:
GRZQIRUVL]HVHWWLQJ
LPDJHVL]H
ZLQGRZ
ILOODOO
image size
By pressing / b tton, select image
size. "rig t/left to c ange image size" is
seen on the screen. By pressing /
b tton, yo can change image size to fill all,
fill 1:1 and fill aspect.
audio menu
By pressing / b tton, select the
fo rth icon. A dio men appears on the
screen.
GRZQIRUDXGLRDGMXVWPHQWV
YROXPH
KSYROXPH
EDODQFH
HTXDOL]HU
DXGLR
KSVRXQGPRGH PRQR
$9/
ZLGHVRXQG
'SDQRUDPD
RQ
RQ
RII
volume
By pressing / b tton, select volume.
"rig t/left to adjust volume" is seen on the
screen. Press b tton to increase vol-
me level. Press b tton to decrease vol-
me level. Vol me level can be adj sted be-
tween 0 and 54.
p volume
By pressing / b tton, select p vol-
ume. "rig t/left to adjust p volume" is
seen on the screen. Press b tton to in-
crease hp vol me level. Press b tton to
decrease hp vol me level. Hp vol me
(headphone vol me) level can be adj sted
between 0 and 100.
p sound mode
By pressing / b tton, select p
sound mode. "rig t to adjust p sound
mode" is seen on the screen. Press
b tton change hp so nd mode.
Hp so nd mode is sed to identify so nd
mode of the headphone. hp so nd mode can
be set to stereo, dual a or dual b according to
the transmission.
balance
By pressing / b tton, select balance.
"rig t/left to adjust balance" is seen on the
screen. Press b tton to increase bal-
ance rightward. Press b tton to de-
crease balance leftward. Balance level can
be adj sted between -50 and 50.
3D Panorama
This f nction creates a 3-dimensional
so nd by sing yo r 2 existing lo dspeak-
ers on yo r TV set. It does not need any ad-
ditional center or s rro nd speakers. Yo
m st be close to yo r TV set (abo t 3
meters) and be in front of it to hear the 3D
Panorama effect better.
If 3D Panorama is set to on, equalizer, AVL,
wide sound and dynamic bass become in-
active and can not be accessed.
equalizer
By pressing / b tton, select equal-
izer. "rig t/left for equalizer settings" is
seen on the screen. Press / or OK
b tton to enter eq alizer men . In eq alizer
men the so nd mode can be changed to
user, flat, pop, rock, jazz and classic by
pressing / b tton. Eq alizer men
settings can be changed only when sound
mode is user. Select the desired freq ency
by / b tton and increase or decrease
the freq ency gain by pressing / b t-
ton.
Press the M b tton to exit the eq alizer
men .
01-ENG-4205-1546UK-PLASMA BýnT-(3D PANORAMA)(10 PAGE)(SAMV3)-50061377.p65 28.01.2005, 16:0414

(QJOLVK
- 15 -
+]
+]
N+]
N+]
N+]
VRXQGPRGH
XVHU
AVL
By pressing / b tton, select AVL.
"rig t/left for AVL on/off" is seen on the
screen. By pressing / b tton set to
AVL on to activate it or off to deactivate it.
wide sound
It is sed to gain saloon effect to the so nd.
By pressing / b tton, select wide
sound. "rig t/left for wide sound off/stereo/
mono" is seen on the screen. By pressing
/ b tton set to wide so nd on to acti-
vate it or off to deactivate it.
dynamic bass
Dynamic Bass is sed to increase bass ef-
fect of the TV set.
By pressing / b tton, select dynamic
bass. "rig t/left for dynamic bass on/off" is
seen on the screen. By pressing /
b tton set to dynamic bass on to activate it
or off to deactivate it.
options menu
By pressing / b tton, select the fifth
icon. Options men appears on the screen.
GRZQIRUYDULRXVV\VWHPRSWLRQV
ODQJXDJH
RVGWLPHRXW
PHQXEDFNJURXQG
VFDUWRXW
VOHHSWLPHU
VOHHSWLPHUHPDLQLQJ
RSWLRQV
VHF VHF
VHF
WUDQVOXFHQW
PLQXWHV
PLQXWHV
6FDUW
HQJOLVK
FKLOGORFN RQ
RII
language
By pressing / b tton, select lan-
guage. "rig t/left to c ange language" is
seen on the screen. By pressing /
b tton, yo can select the lang age.
vcr
This item is displayed only when the TV is in
AV mode. By pressing / b tton, se-
lect vcr. "rig t/left to c ange vcr status" is
seen on the screen. By pressing /
b tton set vcr to on or off.
GRZQIRUYDULRXVV\VWHPRSWLRQV
ODQJXDJH
RVGWLPHRXW
PHQXEDFNJURXQG
VFDUWRXW
VOHHSWLPHU
VOHHSWLPHUHPDLQLQJ
RSWLRQV
VHF VHF
VHF
WUDQVOXFHQW
PLQXWHV
PLQXWHV
6FDUW
HQJOLVK
YFU
RQ
RII
FKLOGORFN RQ
RII
osd timeout
By pressing / b tton, select osd
timeout. "rig t/left to c ange osd timeout"
is seen on the screen. By pressing /
b tton, yo can change osd timeo t to 5
sec, 15 sec or 60 sec.
menu background
By pressing / b tton, select menu
background. "rig t to c ange menu back-
ground" is seen on the screen. Yo can
change men backgro nd to translucent or
opaque by pressing b tton.
c ild lock
Yo can se this feat re to prevent children
t rning on TV or changing programs or ad-
j stments etc. witho t remote control.
By pressing / b tton, select child
lock. "rig t/left to c ange" is seen on the
screen. The child lock feat re can be set by
01-ENG-4205-1546UK-PLASMA BýnT-(3D PANORAMA)(10 PAGE)(SAMV3)-50061377.p65 28.01.2005, 16:0515

(QJOLVK
- 16 -
or b tton to either on or off. When
off is selected, there will be no difference in
the operation of yo r TV. When on is se-
lected, the TV can only be controlled by the
remote control handset.
scart 2 out
By pressing / b tton, select scart 2
out. "rig t/left to select scart 2 out" is seen
on the screen. Yo can set scart 2 o t to
Scart 1, Tuner or FAV by pressing /
b tton.
sleep timer
By pressing / b tton, select sleep
timer. "adjust sleeptimer" is seen on the
screen. Yo can set the sleep time to Off,
15, 30, 60, 90 or 120 minutes by pressing
/ b tton. The sleep timer is sed to
t rn the TV off after a pre-defined period.
sleep time remaining
Selected and remaining sleep time is dis-
played at this area. Sleep time remaining
item can not be selected by / b tton.
settings menu
By pressing / b tton, select the sixth
icon. Settings men appears on the screen.
If f ll screen option was selected at the lay-
o t men , the settings men is seen as be-
low.
GRZQIRUYDULRXVV\VWHPVHWWLQJV
WY WXQHU
VRXUFHVHOHFW
VHWWLQJV
If pip or split screen option was selected at
the layo t men or in AV mode, the settings
men is seen as below.
GRZQIRUYDULRXVV\VWHPVHWWLQJV
VRXUFHVHOHFW
VHWWLQJV
tv tuner
By pressing / b tton, select tv tuner.
"<ok> to activate tuner menu" is seen on
the screen. By pressing / or OK
b tton enter the men . tv tuner men has
two s b-men named as aps and pro-
gramming.
GRZQWRFKDQJHDSVRSWLRQV
DSV
SURJUDPWDEOH
FRXQWU\
DXWRVHW
*HUPDQ\
RN!WRHQDEOH
GRZQWRSURJUDPPLQJRSWLRQV
SURJUDPPLQJ
SURJUDP
ILQHWXQH
FKDQQHO
VWDQGDUG
FKDQQHOW\SH
HGLWODEHOV
VWRUHSURJUDP
PDQXDOVHDUFK
WUNL\H
&
6
%*
aps menu
By pressing / b tton in tv t ner men
select the second icon. aps men appears
on the screen.
GRZQWRFKDQJHDSVRSWLRQV
DSV
SURJUDPWDEOH
FRXQWU\
DXWRVHW
*HUPDQ\
RN!WRHQDEOH
01-ENG-4205-1546UK-PLASMA BýnT-(3D PANORAMA)(10 PAGE)(SAMV3)-50061377.p65 28.01.2005, 16:0516

(QJOLVK
- 17 -
program table
By pressing / b tton, select program
table. "rig t/left to enter program table" is
seen on the screen. By pressing / or
OK b tton, yo can enter the following pro-
gram table.
Programme table is also entered directly by
pressing the b tton.
Program table may be entered only when
the layo t is full screen. Yo can not enter to
program table when layo t is pip or split
screen.
&11
5$,
6$7
5$,
79
=')
5$
&
6
&
'HOHWH ,QVHUW 1DPH
SURJUDPWDEOH
Moving the c rsor to fo r direction yo can
reach 30 programmes in the same page. By
scrolling the pages p or down by pressing
the navigation b ttons yo can select all the
programmes in TV mode (except the AV
mode).
In program table, / b ttons work like
"Direction Up" and "Direction Down". By
moving the c rsor, programme selection is
done a tomatically.
Programme N mber is between 01 and 99.
00 is not displayed on program table.
Programme Name has a name string with 5
characters. After a toset process the
Programme Names are set to "C02" or
"S07" (channel type and channel n mber)
or name of the t ned channel if defined.
At the bottom of the program table there is a
programme sort f nctions section. Each
f nction is activated by a color b tton (seen
above). Using Delete yo can delete
programmes. Insert section is for inserting
programmes into another programme
space. Name allows changing the
programme name.
Delete:
To delete press the RED b tton. The follow-
ing warning men comes to screen. Press-
ing the M b tton cancels the activated "De-
lete" process. Pressing the OK b tton
erases the selected programme from the
programme list, and the programmes below
shift one p.
$UH\RXVXUH\RXZDQWWRGHOHWH"
&DQFHO 'HOHWH
0! 2.!
Insert:
Select the program which yo want to insert
by navigation b ttons. Press the GREEN
b tton. By navigation b ttons move the se-
lected programme to the decided
programme space and press the GREEN
b tton again.
Name:
To change the name of a decided
programme, select the programme and
press the YELLOW b tton. The following
men comes to screen.
=')
XSGRZQOHIWULJKWWRHGLWODEHO
VRXUFH!WRFOHDUODEHO
PHQX!WRUHWXUQ
The first letter of the selected name is high-
lighted. To change that letter / b tton
can be sed, and to select the other letters,
/ b tton can be sed. If the c rsor is
on the last letter of the Programme Name,
pressing b tton moves the c rsor to the
beginning. If the c rsor is at the beginning of
the Programme Name, pressing b tton
moves the c rsor to the end.
country
By pressing / b tton, select country.
"rig t/left to c ange country" is seen on
the screen. By pressing / b tton, yo
sho ld select the co ntry where yo are.
01-ENG-4205-1546UK-PLASMA BýnT-(3D PANORAMA)(10 PAGE)(SAMV3)-50061377.p65 28.01.2005, 16:0517

(QJOLVK
- 18 -
autoset
By pressing / b tton, select autoset.
"<ok> to start aps function" is seen on the
screen. When / or OK b tton is
pressed, the following men comes to the
screen. If yo want to cancel a toset f nc-
tion, press the M b tton. Yo will ret rn to
aps men .
If yo press the M b tton after a toset is
started, program table appears on the
screen.
$OOSUHVWRUHGSURJUDPV
ZLOOEHGHOHWHG
FDQFHO VWDUW
0! 2.!
If OK b tton is pressed, a toset f nction
starts and the following men comes to the
screen.
FKDQQHOVHDUFKLQJ
SOHDVHZDLWRU
SUHVVPHQXWRFDQFHO
After a toset is finalized, the program table
comes to the screen.
programming menu
By pressing / b tton in tv tuner
men , select the first icon. Programming
men appears on the screen.
GRZQWRSURJUDPPLQJRSWLRQV
SURJUDPPLQJ
SURJUDP
ILQHWXQH
FKDQQHO
VWDQGDUG
FKDQQHOW\SH
HGLWODEHOV
VWRUHSURJUDP
PDQXDOVHDUFK
WUNL\H
&
6
%*
program
By pressing / b tton, select pro-
gram. "rig t/left to select program" is seen
on the screen. By pressing / b tton,
yo can select the program n mber. Yo
can also enter a n mber via digit b ttons on
the remote control. There are 100 program
storage between 0 and 99.
fine tune
By pressing / b tton, select fine
tune. "rig t/left to adjust fine tuning" is
seen on the screen. By pressing /
b tton, yo can adj st the t ning. The adj st
val es are between -50 and +50.
c annel
By pressing / b tton, select c annel.
"rig t/left to c ange c annel" is seen on
the screen. By pressing / b tton, yo
can change the channel n mber. Yo can
also enter a n mber via digit b ttons on the
remote control. The adj st val es change
according to the standard and c annel type.
standard
By pressing / b tton, select stan-
dard. "rig t/left to c ange standard" is
seen on the screen. By pressing /
b tton, yo can change the standard to B/G,
D/K, I or L/L'.
c annel type
By pressing / b tton, select c annel
type. "rig t/left to c ange c annel type" is
seen on the screen. By pressing /
b tton, yo can change the channel type to C
or S.
edit labels
By pressing / b tton, select edit la-
bels. "rig t/left to edit labels" is seen on
the screen. By pressing / or OK
b tton, yo can enter the following men .
=')
XSGRZQOHIWULJKWWRHGLWODEHO
VRXUFH!WRFOHDUODEHO
PHQX!WRUHWXUQ
/ or / b ttons are sed to edit
labels.
01-ENG-4205-1546UK-PLASMA BýnT-(3D PANORAMA)(10 PAGE)(SAMV3)-50061377.p65 28.01.2005, 16:0518

(QJOLVK
- 19 -
store program
By pressing / b tton, select store
program. "rig t/left to store program" is
seen on the screen. By pressing / or
OK b tton, yo can store the program and
following men appears on the screen.
SUR
J
UDPVWRUHG
manual searc
By pressing / b tton, select manual
searc . "rig t/left to searc " is seen on the
screen. By pressing or b tton, yo
can start program searching and following
men appears on the screen.
FKDQQHOVHDUFKLQJ
SOHDVHZDLWRU
SUHVVPHQXWRFDQFHO
sour e sele t
By pressing / b tton, select source
select in settings men . "<ok> to activate
source selection menu" is seen on the
screen. By pressing / or OK b tton,
yo can enter the so rce select men .
WXQHU
6FDUW
6FDUW5*%
6FDUW
6FDUW5*%
3&
'9,
)$9
69LGHR
VRXUFHVHOHFW
ULJKWWRVHOHFWVRXUFH
In so rce select men , switch on one of the
so rces by pressing / b tton and
select it by pressing b tton. The so rce
types are tuner, Scart 1, Scart 1 RGB, Scart
2, Scart 2 RGB, PC, DVI, FAV and S-Video.
Other Features
TV Status
Programme Number, Programme Name
and Sound Indicator are displayed on the
pper right side of the screen. Source is
also displayed with them on the right bottom
side of the screen. They are displayed after
programme change d ring 3 seconds.
3
Programme N mber
35
Programme Name (5 characters)
These OSDs are displayed when a new
programme is entered by digit b tton, by
pressing the P<P b tton or the -P/CH or
P/CH+ b tton or the TV b tton.
79
,,,
6285&(
Previous Programme
Press the "P<P" (Previo s Programme) b t-
ton to select the last selected programme.
This b tton provides swapping between the
two last selected programmes. For ex-
ample, select programme 8, then select
programme 2. Now, if yo press the "P<P"
b tton, programme 8 will be selected. If yo
press the same b tton again, programme
2 will be selected and so on.
01-ENG-4205-1546UK-PLASMA BýnT-(3D PANORAMA)(10 PAGE)(SAMV3)-50061377.p65 28.01.2005, 16:0519

(QJOLVK
- 20 -
A tive window swit h
In PIP and PAP modes and b ttons
are sed to select active window. and
c rsors are sed to show the m te sta-
t s osd of the active window.
2.
Programme Swap (SWAP)
This b tton is sed to swap between the
programmes in the PIP window and main
pict re if the screen layo t is selected as
PIP.
PC screen is not displayed in PIP window.
Freeze Pi ture
Yo can freeze the pict re on the screen by
pressing the OK b tton. Display layo t
sho ld be selected as full screen for this
feat re. At split screen and PIP layo ts; this
f nction is invalid.
Sound Indi ator
The alternatives of the indicator are Mono,
Stereo, Dual A and Dual B. This indicator is
displayed nder the programme n mber in-
dicator on the screen. "I-II" b tton is sed to
select Mono, Stereo, Dual A or Dual B.
0212
In Mono broadcast or in forced-mono (for
stereo broadcast).
67(5(2
In Stereo broadcast.
'8$/$
If d al broadcast detected. Dual A is se-
lected in defa lt and also can be selected
after Dual B by Remote Control.
'8$/%
If Dual B selected by Remote Control.
Mute Indi ator
It is placed in the pper left side of the
screen when enabled.
To cancel m te, there are two alternatives,
the first one is pressing the " " b tton, th s
the vol me is set to the preceding val e, and
the second one is increasing/decreasing
the vol me level, th s it starts from the previ-
o s level to increase/decrease.
79
,,,
6285&(
If PIP layout is selected, m te indicator is
displayed at the pper middle of the PIP win-
dow.
If Split Screen is selected, m te indicator is
displayed at the pper left side of the active
window.
AV Modes
By pressing the SOURCE b tton or via
source select men , yo can switch yo r TV
to AV modes (except being in Teletext).
Pressing this b tton consec tively will
switch the TV in one of the optional AV
modes: Tuner 1, Scart 1, Scart 1 RGB,
Scart 2, Scart 2 RGB, PC, DVI, FAV and
SVideo.
While watching VCR; vcr item in options
men sho ld be set to on.
In order to q it the AV mode press the TV,
the digit b ttons or the -P/CH or P/CH+ .
01-ENG-4205-1546UK-PLASMA BýnT-(3D PANORAMA)(10 PAGE)(SAMV3)-50061377.p65 28.01.2005, 16:0520
Other Strong TV manuals

Strong
Strong SRT 43UD6593 User manual

Strong
Strong SRT 43UD7593 User manual

Strong
Strong srt 32hx1001 User manual

Strong
Strong D555 Series User manual

Strong
Strong 32HD5553-HD User manual

Strong
Strong SRT L 2750 User manual

Strong
Strong srt 24hx4003 User manual

Strong
Strong SRT L 300 User manual

Strong
Strong SRT 40FA3303U User manual

Strong
Strong SRT SRT 43UC6433 User manual