StrongBond FNX800 User manual

User Manual
Strongbond Grinder
Model:FNX800
Flooring Wholesale Limited
T/A Look Floors
9 Industry Road,
Penrose, Auckland 1061,
New Zealand

2
Introduction
Thank you for using Strongbond floor grinder Model FNX800 distributed by Flooring Wholesale Limited T/A Look
Floors. This model FNX800 is a multi-functional floor grinder. It is used for grinding and polishing of old and
new floor, which greatly improves the efficiency of construction, renovation and maintenance of concrete, Stone,
and epoxy floor. It meets the high standards of surface treatment and maintenance, saves construction time and
cost, the operation of machine is easy and efficient.
This manual provides as detailed a description as possible of the use, maintenance, attention and caution, fault
diagnosis and countermeasures of the grinder FNX800 provided by STRONGBOND. This manual is a guide to your
proper use, realizing its superior performance and safe operation. Please ensure to read it in detail and keep it in
a safe place.In the use process, if there are any difficult problems or special requirements, please contact
LOOK FLOORS, we will serve you wholeheartedly.
Our company has always been committed to continuous innovation and improvement of equipment, If the
product of this model has been improved and its relevant information has been changed, we will update it as
soon as possible.

3
Contents
Chapter I Safety and Attention
1.1 Safety guidance
1.2 Precautions
Chapter II Inspection, Technical Data and Product Description
2.1 Inspection
2.2 Technical Data
2.3 Product Description
Chapter III Operational Instructions
3.1 Method of operation
3.2 Equipment relocation after use
3.3 Handling of equipment
Chapter IV Equipment Connections and Reset of Inverter
4.1 Guide to wiring
4.2 Switch boxes, inverter and electrical wiring
4.3 Reset of inverter
Chapter V Maintenance and Repair of Equipment
5.1 Maintenance and repair
Chapter VI Quality Assurance
6.1 Scope and duration of warranty
6.2 Conditions of warranty
Chapter VII Simple Fault Removal

4
Chapter I Safety and Attention
To ensure the safety of your machine operator, equipment and property, please read this manual carefully before
using the machine. Strictly follow and implement the manual in the process of handling, installation, debugging,
operation and overhaul.
1.1 Safety guidance
(1) Operators must wear waterproof and insulated work safety shoes and gloves, it is strictly prohibited to
operate the machine barefoot.
(2) The power supply cable shall use insulated soft cables produced by the regular manufacturer that meet the
relevant national standards. The cable shall use a cross-sectional area of 3 * 4 mm2+1 * 2.5 mm2or more,
that is, the cross-sectional section (Square mm) of the three live wires shall be 4 mm2or more, the
cross-sectional area of a grounding line must be 2.5 mm2, and the grounding line must be firmly grounded to
prevent leakage.
(3) Before using the machine, it is necessary to carefully check whether the power cord is broken or worn. If this
occurs, the power cord should be replaced immediately to prevent short-circuit leakage.
(4) Before the machine is plugged in, you must carefully check whether the electrical control box has a leakage
protection device, whether it is firmly grounded, and whether the socket is grounded.
(5) It is strictly prohibited for personnel to sit on the motor of the machine; Do not place machine and cable plugs
in water or in overly humid environments or use high-pressure water to shower motors and electric boxes to
avoid short-circuits and damage to equipment and injury to personnel.
(6) During wet grinding, the motor, inverter, and control panel shall be waterproof protected to avoid
short-circuit or leakage of electricity from the equipment line, resulting in the inability of the machine to
operate.
(7) When using the machine, do not crush the wire. Avoid causing damage to the wire and causing safety
hazards.
(8) When using the machine, please do not plug in by wet hands so as not to cause injuries.
(9) In the process of moving the machine, please use the appropriate handling tools and methods to avoid
causing the equipment to fall, roll and crash causing injuries.

5
1.2 Precautions
(1) After both dry or wet grinding, clean the dust or mud at the bottom of the gearbox. Also clean the bottom
of the gearbox when the abrasive is changed, to improve the heat dissipation effect of the gearbox and
increase the service life of the machine.
(2) When dry grinding, please connect to the vacuum cleaner to reduce dust pollution to the inverter and
ensure normal operation of the machine. The operator should wear dust protection and other necessary
safety equipment.
(3) In the process of replacing consumables and handling machine, please ensure that the machine is lightly
placed. In particular, it is prohibited to move the handle lock to avoid the impact of the gearbox causing oil
leakage and injury to others (if one person cannot easily carry the machine during the operation, please
find someone to help). The additional weight must be moved backwards to ensure that the center of
gravity of the machine is backward.
(4) The inverter may produce resonance within a certain output frequency range and cause the device to stop
working. In this case, please avoid resonance frequency operation.
(5) When working on the floor with a large fall, be sure to grind from the high point to the low point to avoid
damaging the grinding discs and gearbox (grind in a downwards direction).
(6) Often check the grinding discs, if the grinding disc is loose and the bolt is bent, please maintain and change
the bolt in time.
(7) Please note whether there is a steel bar protruding or serious groove on the ground before or during
grinding, if so, please handle it in time, and keep away from it to prevent the machine gearbox from being
damaged due to impact.
(8) Additional weight is the sliding design, please lock after sliding.
Chapter II Inspection, Technical Data and Product Description
2.1 Inspection
(1) Before unpacking, please check whether the outer packaging of the product has been damaged by careless
transportation.
(2) After opening the box, please check that the specifications and models of the products are in conformity
with the order.

6
(3) Check the interior of machine for any damage. If there is any obvious damage, please do not
operate or use the machine and contact LOOK FLOORS in time to avoid any accidents.
(4) Check the items are complete: one machine, two lifting rods, one water retaining belt, one industrial plug,
one vacuum cleaner connector, and twelve abrasive switch discs.
2.2 Technical Data
Model
FNX800
Motor Power
11KW
Inverter Capacity
11KW (15HP)
Voltage
380V AC
Current
21.9A
Frequency
50Hz
Motor Speed
0~1800pm
Grinding Width
800mm
Grinding Disc
270mmx3
Quantity of Grinding Pads
12pcs * 100mm(4“)
Weight
400Kg
Packing Size
1250*800*1050

7
2.3 Product Description
○
1 -Handle ○
2 -Hand shank ○
3 -Button ○
4 -Digital Panel ○
5 - Additional Weight ○
6 -Ventilation
○
7 -Electric Box ○
8 -Water tank ○
9 -Pedals ○
10 -Support Wheel ○
11 -Water Valve ○
12 -Motor ○
13 -Rubber
Wheel ○
14 -Frame ○
15 -Gear Box Cover ○
16 -shroud
Chapter III Operational Instructions
3.1 Method of Operation
3.1.1 Preparation for machine operation
(1) First check whether the power switch is turned off to ensure safety.
(2) Move the additional weight backward to the operator, hold the handle in both hands, step on pedal, press
down hard, uplift the machine head and secure it. Check whether the gearbox output shaft connection disc,
coupler and grinding discs are fully equipped, whether there is misloading, lack of parts or loose. If any parts are
found out of place, please adjust immediately.

8
(3) After the inspection is complete, install the grinder on the grinder installation plate. The basic steps are as
follows:
(a) Clean the surface of the abrasive mounting surface, pin and magnet.
(b) Align the holes of the diamond abrasive matrix or the holes of the resin abrasive joint plate with the pins,
insert them and be absorbed by magnets on the chassis, check for firmness, and note that the particle size of all
abrasive tools in a set of processes must be the same.
(c) When fitted, hold the handle in both hands and put one foot on the pedaling pole. Using the body weight to
balance the weight of the head, slowly lift the handle and gently put the head back on the ground. Take care
not to hit the ground. Damage to gearbox, causing oil leakage, etc.. If one person is unable to operate easily
during the operation, please find someone to help complete this operation.
(d) Turn the handle backwards and pull the handle pin to adjust the height of the handle to fit the position of
the machine that is easy to operate.
(4) Adjustment of handle
(5) Before wet grinding, please inject the tank into the appropriate amount of water.
3.1.2 Machine Operation
(1) Press the stop button, plug in the power, move the light on the digital panel to the voltage position, and check if
the voltage is normal.
(2) Turn the speed knob back to the minimum speed, release the stop button, press the start button, and the
machine begins to rotate.
(3) The speed knob can adjust the grinding speed of the machine, clockwise rotation is for acceleration, and
counterclockwise rotation is for deceleration. Low and medium speed is used in rough grinding, high speed is

9
forbidden to be used for rough grinding, and medium and high speed is used in fine grinding or polishing.
(4) For emergency stops, first rotate the speed knob counterclockwise to zero speed, and then press the stop
button.
(5) Adjust the water valve to inject water.
(6) The machine can be connected to the vacuum cleaner to ensure dust-free operation during dry grinding.
(7) During the grinding process, the staff should pay attention to the wear and tear of the abrasive material so that
the grinding discs do not touch the floor and cause damage to the grinding discs.
(8) The ventilation hole of the motor should not be blocked when it is used. Please clean up when it is blocked.
Please ensure the normal ventilation of the motor.
(9) Operation of additional weight: The additional weight which is patented design can increase pressure or
reduce pressure to the floor according to the working condition.
a) Increase pressure:move the additional weight forward on the machine head, loose the locking screw on
the additional weight, move the additional weight along the lever to the required position, lock the
locking screw.
b) Reduce pressure: loose the locking screw on the lever, move the additional weight backward to the fix
position, loose the locking screw on the additional weight, move the additional weight along the lever to
the required position, lock the locking screw.

10
c) Tilt up the additional weight: before upward the machine head, lock the additional weight to the hole
on the lever, move the additional weight to the tilted position, fix the locking screw to the positioning bolt
on the wheel leg, be careful not to move too fast and too hard.
3.2 Equipment relocation after use
(1) Place the hand shank in a suitable position and disconnect the power cable. Pull out the plug and put it in a
dry place.
(2) Uplift the machine head and clean the mud and dust from the bottom of the gearbox and the grinding plate
system.

11
(3) Clean the ventilation of inverter and motor. After the machine was used in a wet environment, pay attention
to cleaning the surface of the machine.
(4) Clean the dust of the inverter and the ventilation hole of the motor with a dry rag to avoid failure due to the
backlog of dust in the next use.
(5) Check whether the machine and its accessories are in good condition. Conduct necessary maintenance
before storing it.
(6) Store the machine in a clean, dry place. When storing, keep the handle in the vertical position and lock it
tightly.
3.3 Handling of equipment
(1) Before moving the machine, make sure that the industrial connector on the power supply cable has been
pulled out of the machine and the water tank has no excess water.
(2) When handling, it must be safe to use the lifts with a bearing capacity greater than the weight of the
machine. Two people should cooperate in lifting, one person steps on the lift, and another person holds the
handle, notices that the machine's grinding disc must be placed on the effective position of the lifter, and
pays attention to the center of gravity should be stable, slow operation, and light handling to avoid colliding
with other items and walls; If one person is unable to complete this operation, please assign multiple people
to complete the operation.
(3) You may use lifting rods when handling, be careful not to put your feet into the gearbox cover.
Chapter IV Equipment Connections and Reset of Inverters
4.1 Guide to Wiring
(1) The power supply cable of this equipment shall use products that meet the relevant standards. The motor of
220V and 11KW recommends that the external cable use 6mm2X3 cable, and the motor of 380V and 11KW
recommends that the external cable use 3 * 4mm2+1 * 2.5mm2or 4mm2X4 cable to ensure that the cable
has sufficient load flow.
(2) The wiring must be performed by a professional certified electrician.
(3) The electrical system of this equipment must strictly follow the parameters (voltage, frequency) marked on
the motor nameplate. Before connecting the power supply, please check and ensure that the voltage and
frequency of the external power supply meet the requirements of the machine.

12
(4) The grounding line of the equipment must be reliably connected to the ground line of the power supply
system to prevent the operator from being subjected to electric shocks.
(5) The power supply cable of this equipment shall use 3 wires and 1 grounding wire. Please insert the plug of
the power supply cable into the suitable power socket. The grounding wire in the cable shall be connected
to the grounding terminal in the industrial plug and industrial connector. It is strictly forbidden to connect
the ground line to the ground line of the non-power supply system.
4.2 Switch boxes, inverter and electrical wiring
M
3
L1
L2
L3
L1
L2
L3
U
V
W
正转 FWD
停止 OFF
公共端 COM
X1
X2
COM
电位器Potentiometer
10V
AI1
GND
启动 ON
M
380V AC风扇
380V AC Fan
3
2
1
变频器
Inverter
编程继电器
Programmed
relay
4.3 Reset of inverter
When the device is shut down due to low voltage or overload, turn off the power and turn it on after three
minutes. The device can resume normal operation. If not, you can also use the control panel for reset. See the user
manual of the inverter.
Chapter V Maintenance and Repair of Equipment
5.1 Maintenance and Repair
(1) After the equipment being in use for 20 days, please clean up the dust of the ventilation filter, dust removal
before operating. If the equipment is dry grinding without vacuum cleaner connection, it is necessary to
clean up the dust of the ventilation filter once in 2 days.

13
(2) When using this equipment for dry grinding, staff must be equipped with a suitable vacuum cleaner.
(3) Please change gear oil of 220 # regularly. The new machine grinds about 10,000 square meters and needs to
change gear oil once. After 12 months of grinding period, change gear oil once. The FNX800 needs 11 liters
of gear oil of 220 #.
(4) Please regularly add oil, after every 2 to 3 months, open the oil hole screw plug, check the oil level height,
not less than 40mm, if it is less than 40mm, please add oil to the oil level height of 50mm.
(5) Please clean the surface of the equipment after each use of the equipment and place it in a dry and cool
place for the next use to increase the service life of the machine.
(6) Please strictly comply with the requirements of the instruction manual to operate this equipment so as to
avoid unnecessary loss of property.
Chapter VI Quality Assurance
6.1 Scope and duration of warranty
Since the date of purchase of this equipment, the warranty period of the motor is one year and frequency
converter is 18 months as specified by the manufacturer, gearbox warranty period is one year, water supply
switches, racks, handles, grinding disc and other vulnerable parts warranty period of three months.
6.2 Conditions of warranty
(1) Under the promise of strict compliance with this manual, non-human’s improper operation, warranty parts
are damaged during the warranty period, and the manufacturer provides free repair and replacement.
(2) If the customer needs to repair by himself, it must be done under the manufacturer's permission and in
accordance with the guidance plan, Otherwise the manufacturer will not be legally liable.
(3) If the equipment fails due to improper disassembly, we shall charge for maintenance.
(4) Please keep this warranty card properly. Please attach it immediately after the warranty, otherwise it will
not be handled.
(5) If the vulnerable parts are judged to have been intentionally damaged during the warranty period, it is not
within the scope of the warranty.
(6) If the motor or inverter is burned or damaged is by an abnormal voltage during operation (for example,
voltage range of FNX800 is 220V-240V, and the construction voltage in the United States is 440V-480V,
which is an abnormal voltage for the equipment), it is not covered by the warranty.

14
(7) When the machine cannot run normally due to the wrong wiring method, if it is necessary for the
manufacturer to send people to overhaul, if the non-machine fault is checked by the maintenance people,
the customer must pay the travel expenses and working fee within the warranty period.
Chapter VII Simple Fault Removal
If there is a sudden shutdown during the operation of the machine, please check it as follows:
(1) Check whether the connection wire screw of the power supply general switch is secure and the ammeter
number meets the machine requirements (50 amps or more is recommended).
(2) Check whether the internal wiring of industrial plugs, industrial connectors, and sockets is loose or has poor
contact.
(3) Check whether the inside of the motor junction box is wet or burned.

15
Equipment warranty card for FNX800
After-sales service Site:
Customer Name
Contact person
Telephone
Machine Type
Motor Model
Converter model
Purchasing Date
Fault Description
Solution
Remarks
Customer’s
Signature
Date
Repairman's
Signature
Date
Note:
1. The warranty period of motor of FNX800 is one year and frequency converter has a warranty of 18 months.
The warranty period of gearbox is one year. Other vulnerable parts which includes water supply switches, racks,
handles, grinding disc has a warranty period of three months
2. Please do not refit or disassemble our equipment. If the equipment is refitted or disassembled, our company
will not guarantee it.
3. If there is any problem with the machine, you can consult Flooring Wholesale Ltd first.
Table of contents
Popular Floor Machine manuals by other brands

Sandia
Sandia 80-5000 Operation and maintenance manual

Jon-Don
Jon-Don Prospector PE100 Safety, operation and maintenance manual with parts list
Pioneer Eclipse
Pioneer Eclipse PE400BU manual
Magnum
Magnum 28'' DISK operating instructions

Hofmann
Hofmann MTS 300 operating instructions
Husqvarna
Husqvarna PG 690 Operator's manual
Numatic
Numatic TTB-1620 Owner's instructions

RCm
RCm Brava 800 Instruction and maintenance handbook

Craftsman
Craftsman 151.74946 Operator's manual
Taski
Taski ergodisc 165 Instructions of use

Aqua Laser
Aqua Laser Delta Sweeper 815.563 instruction manual
SCANMASKIN
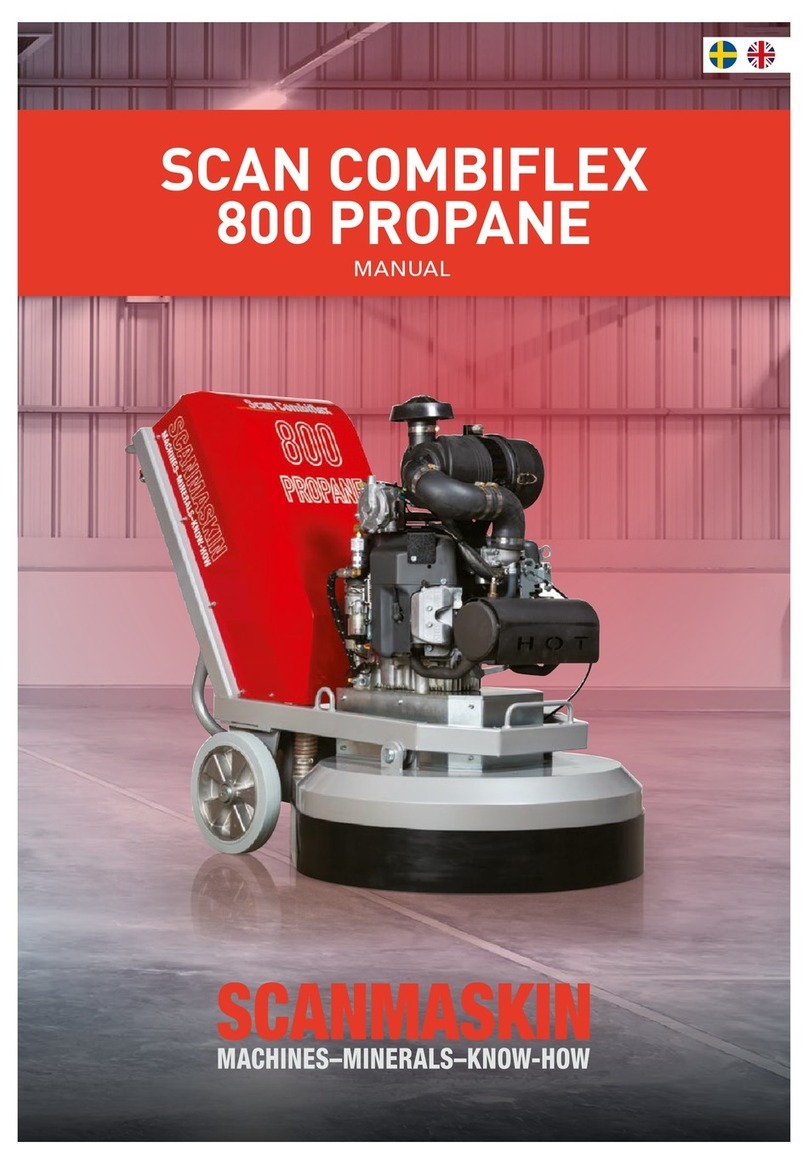
SCANMASKIN SCAN COMBIFLEX 800 PROPAN manual

