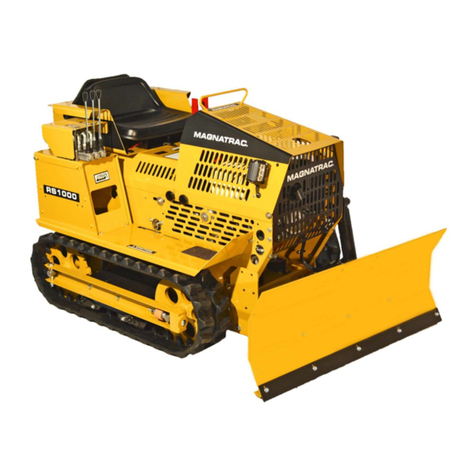
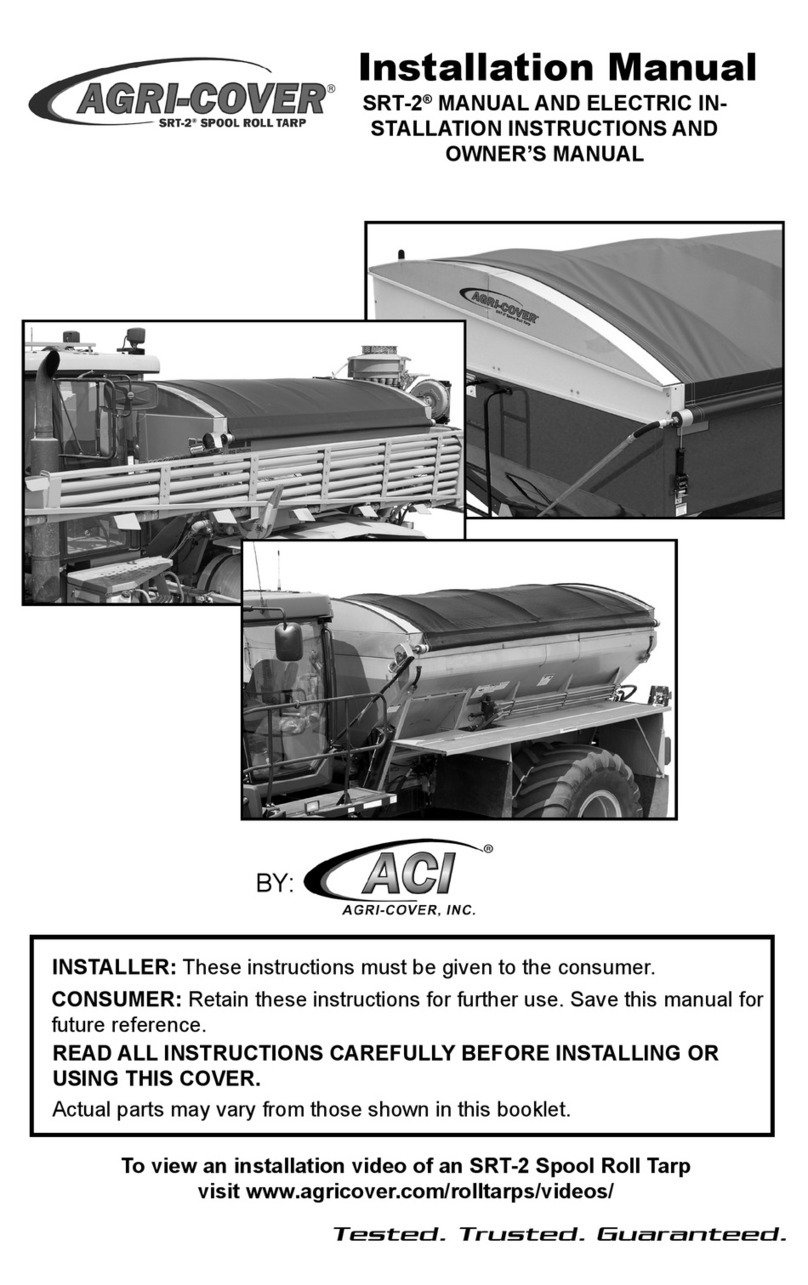
Struck Magnatrac RS1000 User manual

MAGNATRAC®
RS1000
Operator / Technical Manual
Version 1.01.19
Struck Corp. - Cedarburg, WI 53012
Copyright 2019 C. F. Struck Corp. All rights reserved.
RS1000 Operator Manual 1.01.19.qxp_Layout 1 4/24/19 12:41 PM Page 1

Very mportant Facts
& Tips for
Top Performance
The following are random facts that will be ex-
panded on within this Manual. They are brought
to you “first” to impress upon you their primary im-
portance in preventing damage to your RS1000
and also to protect your safety and prevent costly
and unnecessary maintenance expenses.
SAFE BLOCK NG AREA
When “blocking” your Crawler off the ground for
service, be aware that you should only apply a
hydraulic jack, in the black shaded area
marked below.
ENG NE TORQUE
The greatest amount of power (drawbar torque)
your RS1000 can deliver is near the Engine’s mid-
speed range. This is marked on your dash area.
To go faster, your Engine’s “drawbar torque” will
be diminished by having to go faster.
Doing all your heavy work at mid-speed does
three things:
1. t keeps the Engine cooler working at a
slower speed.
2. t gives you maximum drawbar torque.
3. t provides time to make “attachment ad-
justments” on the go!
You’re encouraged to completely read this Man-
ual to get a firm over-view of: how your RS100 op-
erates, significant safety points, and also
maintenance tips on how to increase your MAG-
NATRAC’S life.
PARK NG BRAKE
NEVER FORGET to take off your Parking Brake...
BEFORE you drive away. If you fail to disengage
the Parking Brake, it will wear very rapidly and be
of no value in an emergency!
LUBR CAT ON OF POWER SHAFT
ENDS
Read and understand the “Special Note” in the
“Belt Installation” section of this manual. By fol-
lowing it ‘s simple lubrication instructions your can
save yourself a lot of work, and potential expense
in the future and make Belt changing much easier.
CLUTCH BELTS
The use of rugged, though uncomplicated Belt
Clutches, gives the RS1000 amazing performance
while at the same time keeps its initial purchase
price and later maintenance costs within the
homeowner’s budget.
The life expectancy of these Clutch Belts is the di-
rect result of the type of work being done and the
operator’s driving technique. It is strongly recom-
mended at this time that you thoroughly read the
Track Clutch Belt Removal & Installation chapter
in the Service Section of this Manual to give you
an over-view of the mechanics of your drive sys-
tem.
In factory tests of different driving techniques, it
has been found that Belt life will range from 25 to
200 hours. This testing proved that the operator
is the greatest variable in determining Belt life.
From these tests, the following driving rules have
evolved. If followed, they will give you the best
Belt life consistent with the severity of work you
are doing.
2
RS1000 Operator Manual 1.01.19.qxp_Layout 1 4/24/19 12:41 PM Page 2

1.Do not “ride” your Clutch Controls ...rather op-
erate them smoothly and engage your belts fully.
If your Crawler can not push a particular load you
have two options: immediately reduce the load
(raise the Bucket or Blade) or backup and take a
new angle at the load...never hold your track
controls in a fixed position (forward or rearward)
against an immovable object, you will unneces-
sarily wear the Belts.
2. Your RS1000 has outstanding pushing ability,
but its up to you, the operator, to use its ability in
the most efficient and economical manner.
3. When you want to go slowly for a sustained pe-
riod, reduce your engine speed...do not “slip” your
Belt Clutches for long periods of time! Your Belt
Clutches are no different than the disk clutch
found in a large truck...if you constantly slip the
Clutch under heavy loads you will burn the clutch
faces and decrease clutch life. It’s no different
with your Belt Clutches.
4. Reserve horsepower has been designed into
your Crawler. This means you can reach the max-
imum torque necessary to fully drive your RS1000
with your engine operating at only about half-
speed.
TRACKS
The track system of your Magnatrac is the result of
over 50 years of experience.
It is not uncommon in the inital operating hours for
the steel track system to make popping noises
as the intial “wear in” occurs.
The steel track system is of an “unguided” design,
but is extremely stable due to its double track
chain design. A few rules are listed below that if
followed will give you maximum Track perform-
ance.
1. Avoid overloading your track system with the
material you are working in. Always work in loose
materials by clearing a “driving path” with the at-
tachment (Blade, Bucket, etc.) you are using. This
technique will allow a minimum amount of material
to enter the track system.
2. Avoid climbing on a pile of loose material and
counter-rotating your tracks. This action will “cork-
screw” the Tracks into the pile and force unnec-
essarily large amounts of material into the Tracks.
The steel or rubber track system is designed to
absorb a great deal of material, but the less you
force it to “digest”, the greater will be the Track’s
stability and overall life.
3. Periodically, following the Steel or Rubber Track
Tensioning instructions in your Operator’s/Techni-
cal Manual, check your Track tension by checking
the length of the #1806 Spring.
4. Though this Spring adjustment is not a precise
type of adjustment, it must be realized that to over-
tension the Spring will cause a higher level of wear
in your track bearings, while under-tensioning will
cause potential derailing of your Track.
As always, the Struck Corporation through the
customer service department, stands ready to
help you with any technical or work related ques-
tions you may have either now or in the future!
Call (262) 377-3300 or Fax (262) 377- 9247.
3
RS1000 Operator Manual 1.01.19.qxp_Layout 1 4/24/19 12:41 PM Page 3

LIMITED WARRANTY
NEW STRUCK CRAWLERS and/or ATTACHMENTS
(Effective with shipments made after August 1st, 2017)
A. ENERAL PROVISIONS
C.F. Struck Corp. will repair or replace, at its option, for the original purchaser of a new Struck Crawler and/or Attach-
ment, any covered part or parts found upon examination at our factory in Cedarburg, Wisconsin, to be defective in mate-
rial or workmanship or both; this is the exclusive remedy. Warranty service must be performed by the C. F. Struck Corp. at
their factory in Cedarburg, Wisconsin 53012. Warranty service will be performed without charge for parts or labor. The
purchaser will be responsible, however, for transportation charges to and from the factory.
B. WHAT IS WARRANTED
All parts of any new Struck Crawler and/or Attachment are warranted for two (2) years, with the following exceptions: Belts,
which are warranted for 90 days (excludes normal wear and tear); Engines, which are warranted by their manufacturer;
and Batteries, which are provided on a complimentary basis and carry no warranty whatsoever. C. F. Struck Corp. re-
serves the right to make product design and specification changes without notice and without obligation on their part to
present product owners. The Warranty term begins on the date the product is shipped to the purchaser.
C. WHAT IS NOT WARRANTED
(1) Used Products; (2) Any product that has been altered or modified in ways not approved by C. F. Struck Corp.; (3) De-
preciation or damage caused by normal wear, lack of reasonable and proper maintenance, failure to follow the product’s
Operator’s/Technical Manual instructions, failure to upgrade crawler with parts furnished at no charge, misuse, lack of
proper protection during storage, or accident (4) Normal maintenance parts and service; (5) Use of Struck Crawler and/or
Attachments in certain industrial-type applications may affect Warranty coverage.
D. RETURNS AND REFUNDS
In the event of defective materials or workmanship the purchaser agrees to allow C.F. Struck Corp the opportunity to cor-
rect the defect in a timely manner at the expense of C.F. Struck Corp. It is at the discretion of C.F. Struck Corp to either
correct the defect or refund the purchaser.
To return a Struck Crawler and/or attachment for reasons other than defect the purchaser will be financially responsible
for an 8% restocking fee, and for shipping the Struck Crawler and/or Attachment to the C.F Struck Corp. factory in Cedar-
burg, Wisconsin 53012. No Returns after 90 days.
E. SECURIN WARRANTY SERVICE
To secure Warranty service, the purchaser must:
(1) Report the product defect to the factory in Cedarburg, Wisconsin 1-262-377-3300 or 1-877-828-8323.
(2) Make the part available to the factory in a reasonable period of time.
F. LIMITATION OF IMPLIED WARRANTIES AND OTHER REMEDIES
To the extent permitted by law, neither C. F. Struck Corp. nor any company affiliated with it makes any Warranties, rep-
resentations or promises as to the quality, performance or freedom from defect of the products covered by this Warranty.
IMPLIED WARRANTIES OF MERCHANTABILITY AND FITNESS FOR A PARTICULAR PURPOSE, TO THE EXTENT APPLI-
CABLE, SHALL BE LIMITED IN DURATION TO THE APPLICABLE PERIOD OF WARRANTY SET FORTH ON THIS PA E. THE
PURCHASER’S ONLY REMEDIES IN CONNECTION WITH BREACH OR PERFORMANCE OF ANY WARRANTY ON C. F.
STRUCK CORP. PRODUCTS ARE THOSE SET FORTH ON THIS PA E. IN NO EVENT WILL C. F. STRUCK CORP. OR ANY
COMPANY AFFILIATED WITH IT BE LIABLE FOR INCIDENTAL OR CONSEQUENTIAL DAMA ES.
(Note: Some states do not allow limitations on how long an implied Warranty lasts or the exclusion or limitation of incidental
or consequential damages so the above limitations and exclusions may not apply to you.) This Warranty gives you specific
legal rights, and you may also have other rights which vary from state to state.
. ASSEMBLY RESPONSIBILITY
Though the MA NATRAC RS1000, MH4900 and MH8500 are offered completely assembled, it’s still the customer’s re-
sponsibility to provide competent service ability! The servicing can be provided either by the mechanically customer, or by a
local mechanic. All Attachments and accessories are shipped in easy-to-assemble “semi-kit” form for lowest cost shipping. We
provide Manuals and Illustrations for complete service and repair so that anyone with reasonable mechanical skill can preform
all required service work. Check the MA NATRAC Specifications & Ratings (in Spec Book or Buyer’s uide) for a list of all
standard features.
I hereby accept the terms and conditions of Warranty described above:
RS1000
M 4900
M 8500
Warranty 9.18
signature
print name
date
4
RS1000 Operator Manual 1.01.19.qxp_Layout 1 4/24/19 12:41 PM Page 4

TABLE OF CONTENTS
VERY MPORTANT FACTS & T PS FOR PERFORMANCE . . . . . . . . . . . . . . . . . . . . . . . . . . . . . . . . . . . . .2
1- TO THE OPERATOR . . . . . . . . . . . . . . . . . . . . . . . . . . . . . . . . . . . . . . . . . . . . . . . . . . . . . . . . . . . . . . . . .6
Recognize Safety Information . . . . . . . . . . . . . . . . . . . . . . . . . . . . . . . . . . . . . . . . . . . . . . . . . .6
Understand Signal Words . . . . . . . . . . . . . . . . . . . . . . . . . . . . . . . . . . . . . . . . . . . . . . . . . . . . .6
Follow Safety Instructions . . . . . . . . . . . . . . . . . . . . . . . . . . . . . . . . . . . . . . . . . . . . . . . . . . . . .6
Service Records . . . . . . . . . . . . . . . . . . . . . . . . . . . . . . . . . . . . . . . . . . . . . . . . . . . . . . . . . . . .7
2- SAFETY RULES . . . . . . . . . . . . . . . . . . . . . . . . . . . . . . . . . . . . . . . . . . . . . . . . . . . . . . . . . . . . . . . . . . . .8
Safety Before Starting or Operating . . . . . . . . . . . . . . . . . . . . . . . . . . . . . . . . . . . . . . . . . . . . .8
Operation Safety . . . . . . . . . . . . . . . . . . . . . . . . . . . . . . . . . . . . . . . . . . . . . . . . . . . . . . . . . . . .8
Service Safety . . . . . . . . . . . . . . . . . . . . . . . . . . . . . . . . . . . . . . . . . . . . . . . . . . . . . . . . . . . . . .9
Fire Prevention Maintenance . . . . . . . . . . . . . . . . . . . . . . . . . . . . . . . . . . . . . . . . . . . . . . . . . .9
Protection From Noise . . . . . . . . . . . . . . . . . . . . . . . . . . . . . . . . . . . . . . . . . . . . . . . . . . . . . . .10
Start Engine From Operator Seat Only . . . . . . . . . . . . . . . . . . . . . . . . . . . . . . . . . . . . . . . . . . .10
3- CONTROLS AND NSTRUMENTS . . . . . . . . . . . . . . . . . . . . . . . . . . . . . . . . . . . . . . . . . . . . . . . . . . . . . .11
Left & Right Clutch Controls . . . . . . . . . . . . . . . . . . . . . . . . . . . . . . . . . . . . . . . . . . . . . . . . . . .12
Dashboard Controls . . . . . . . . . . . . . . . . . . . . . . . . . . . . . . . . . . . . . . . . . . . . . . . . . . . . . . . . .13
4- OPERAT ON . . . . . . . . . . . . . . . . . . . . . . . . . . . . . . . . . . . . . . . . . . . . . . . . . . . . . . . . . . . . . . . . . . . . . . .15
Pre-Starting Inspection . . . . . . . . . . . . . . . . . . . . . . . . . . . . . . . . . . . . . . . . . . . . . . . . . . . . . . .15
Prepare For Engine Starting . . . . . . . . . . . . . . . . . . . . . . . . . . . . . . . . . . . . . . . . . . . . . . . . . . .15
Starting the Engine . . . . . . . . . . . . . . . . . . . . . . . . . . . . . . . . . . . . . . . . . . . . . . . . . . . . . . . . . .15
Warm-up Period . . . . . . . . . . . . . . . . . . . . . . . . . . . . . . . . . . . . . . . . . . . . . . . . . . . . . . . . . . . .16
Traveling . . . . . . . . . . . . . . . . . . . . . . . . . . . . . . . . . . . . . . . . . . . . . . . . . . . . . . . . . . . . . . . . . .16
Parking & Storage . . . . . . . . . . . . . . . . . . . . . . . . . . . . . . . . . . . . . . . . . . . . . . . . . . . . . . . . . . .17
5- FUELS AND LUBR CANTS . . . . . . . . . . . . . . . . . . . . . . . . . . . . . . . . . . . . . . . . . . . . . . . . . . . . . . . . . . . .18
6- LUBR CAT ON AND PER OD C SERV CE . . . . . . . . . . . . . . . . . . . . . . . . . . . . . . . . . . . . . . . . . . . . . . . .19
Lubrication and Service Intervals & Periodic Servce Chart . . . . . . . . . . . . . . . . . . . . . . . . . . .19
7- SERV CE . . . . . . . . . . . . . . . . . . . . . . . . . . . . . . . . . . . . . . . . . . . . . . . . . . . . . . . . . . . . . . . . . . . . . . . . .21
Engine & Starter . . . . . . . . . . . . . . . . . . . . . . . . . . . . . . . . . . . . . . . . . . . . . . . . . . . . . . . . . . . .21
Battery . . . . . . . . . . . . . . . . . . . . . . . . . . . . . . . . . . . . . . . . . . . . . . . . . . . . . . . . . . . . . . . . . . . .21
Safety Interlock Switches . . . . . . . . . . . . . . . . . . . . . . . . . . . . . . . . . . . . . . . . . . . . . . . . . . . . .22
Seat & Rear Cover Assembly . . . . . . . . . . . . . . . . . . . . . . . . . . . . . . . . . . . . . . . . . . . . . . . . . .23
Rear Drive Chain Tensioning . . . . . . . . . . . . . . . . . . . . . . . . . . . . . . . . . . . . . . . . . . . . . . . . . .25
Parking/Emergency Brake Adjustment . . . . . . . . . . . . . . . . . . . . . . . . . . . . . . . . . . . . . . . . . . .26
Track Clutch Belts (Removal & Install) . . . . . . . . . . . . . . . . . . . . . . . . . . . . . . . . . . . . . . . . . . .27
Engine Drive Chain (If equipped) . . . . . . . . . . . . . . . . . . . . . . . . . . . . . . . . . . . . . . . . . . . . . . .35
Eninge Drive Micro V-Belt (If equipped) . . . . . . . . . . . . . . . . . . . . . . . . . . . . . . . . . . . . . . . . . .36
Steel Track Removal (If equipped) . . . . . . . . . . . . . . . . . . . . . . . . . . . . . . . . . . . . . . . . . . . . . .39
Steel Track Tensioning (If equipped) . . . . . . . . . . . . . . . . . . . . . . . . . . . . . . . . . . . . . . . . . . . .41
Rubber Track Removal (If equipped) . . . . . . . . . . . . . . . . . . . . . . . . . . . . . . . . . . . . . . . . . . . .43
Rubber Track Tensioning (If equipped) . . . . . . . . . . . . . . . . . . . . . . . . . . . . . . . . . . . . . . . . . .45
8- TROUBLE SHOOT NG . . . . . . . . . . . . . . . . . . . . . . . . . . . . . . . . . . . . . . . . . . . . . . . . . . . . . . . . . . . . . . .48
9- SAFETY & WORK PROCEDURES . . . . . . . . . . . . . . . . . . . . . . . . . . . . . . . . . . . . . . . . . . . . . . . . . . . . . .50
Loader Operation . . . . . . . . . . . . . . . . . . . . . . . . . . . . . . . . . . . . . . . . . . . . . . . . . . . . . . . . . . .55
Bulldozing . . . . . . . . . . . . . . . . . . . . . . . . . . . . . . . . . . . . . . . . . . . . . . . . . . . . . . . . . . . . . . . . .59
Backhoe Operation . . . . . . . . . . . . . . . . . . . . . . . . . . . . . . . . . . . . . . . . . . . . . . . . . . . . . . . . . .63
Misc. (Snowplowing, logging, etc.) . . . . . . . . . . . . . . . . . . . . . . . . . . . . . . . . . . . . . . . . . . . . . .68
10- PARTS L ST NG & D AGRAMS . . . . . . . . . . . . . . . . . . . . . . . . . . . . . . . . . . . . . . . . . . . . . . . . . . . . . . .71
Index of Parts . . . . . . . . . . . . . . . . . . . . . . . . . . . . . . . . . . . . . . . . . . . . . . . . . . . . . . . . . . . . . .71
Wiring Diagram . . . . . . . . . . . . . . . . . . . . . . . . . . . . . . . . . . . . . . . . . . . . . . . . . . . . . . . . . . . . .76
IMPORTANT: Though the MAGNATRAC is offered completely assembled, it’s still the customer’s responsibility
to provide competent service ability! The servicing can be provided either by the mechanically-inclined cus-
tomer, or by a local mechanic. We provide manuals & drawings for complete service and repair so that anyone
with reasonable mechanical s ill can perform all required service wor .
5
RS1000 Operator Manual 1.01.19.qxp_Layout 1 4/24/19 12:41 PM Page 5

Congratulations…
on your purchase of a quality-built, American
made compact Crawler. We are confident that the
dependability and economical performance of
your Magnatrac will prove that you made a wise
choice.
The purpose of this Manual is to acquaint you with
the RS1000 Magnatrac Crawler. This Manual ex-
plains how to operate and service your Crawler,
and how to maintain its high operating efficiency.
Instructions are given clearly, with the intention of
making these operations as easy as possible.
Keep this Manual in a convenient place for quick
and easy reference. Use it as a guide whenever
questions arise. You have purchased a depend-
able, sturdy Crawler, but only by operating and
caring for it properly can you expect to receive the
service and long life for which it was designed.
If in the future you need new parts to replace
those that may be worn, insist on genuine Struck
parts. They are exact duplicates of the originals,
made from the same patterns and of the same
high-quality materials.
When ordering parts, always be sure to give the
following information for your Crawler:
MAGNATRAC Records
MAGNATRAC Model: _ _ _ _ _ _ _ _ _ _ _ _ _ _ _ _ _ _ _ _ _ _ _
MAGNATRAC Serial # _ _ _ _ _ _ _ _ _ _ _ _ _ _ _ _ _ _ _ _ _ _
Engine Model: _ _ _ _ _ _ _ _ _ _ _ _ _ _ _ _ _ _ _ _ _ _ _ _ _ _ _ _ _ _
Engine Serial # _ _ _ _ _ _ _ _ _ _ _ _ _ _ _ _ _ _ _ _ _ _ _ _ _ _ _ _ _
Ship Date: _ _ _ _ _ _ _ _ _ _ _ _ _ _ _ _ _ _ _ _ _ _ _ _ _ _ _ _ _ _ _ _ _ _
Mail: STRUCK CORPORAT ON
W51N545 STRUCK LANE
CEDARBURG, WI 53012
Phone*: (262) 377-3300 local
(877) 828-8323 toll-free
Fax: (262) 377-9247
email: [email protected]
Web: www.struckcorp.com
*For immediate service always call the factory
and as for a technician.
1- TO THE OPERATOR
RECOGN ZE
SAFETY
NFORMAT ON
This is the safety-alert symbol. When
you see this symbol on your Crawler or
in this Manual, be alert to the potential
for personal injury.
UNDERSTAND S GNAL WORDS
A signal word — DANGER, WARNING, or CAU-
TION — is used with the safety-alert symbol.
DANGER identifies the most serious hazards.
Safety labels with the signal word DANGER or
WARNING are typically near specific hazards.
General precautions are listed on CAUTION
safety labels. CAUTION also calls attention to
safety messages in this Manual.
FOLLOW SAFETY NSTRUCT ONS
Carefully read all safety messages in this Manual
and on your Crawler and Attachment safety labels.
Follow recommended precautions and safe oper-
ating practices.
Keep safety labels in good condition. Replace
missing or damaged safety labels.
To keep your Crawler running efficiently, read the
instructions in this Manual.
Left side, right side, front, and rear are viewed by
facing in the direction of the Crawler’s forward
travel.
Record your Crawler serial numbers in the space
provided. You need this information when you
order parts.
6
RS1000 Operator Manual 1.01.19.qxp_Layout 1 4/24/19 12:41 PM Page 6

Date Service Work
_ _ _ _ _ _ _ _ _ _ _ _ _ _ _ _ _ _ _ _ _ _ _ _ _ _ _ _ _ _ _ _ _ _ _ _ _ _ _ _ _ _ _ _ _ _ _
_ _ _ _ _ _ _ _ _ _ _ _ _ _ _ _ _ _ _ _ _ _ _ _ _ _ _ _ _ _ _ _ _ _ _ _ _ _ _ _ _ _ _ _ _ _ _
_ _ _ _ _ _ _ _ _ _ _ _ _ _ _ _ _ _ _ _ _ _ _ _ _ _ _ _ _ _ _ _ _ _ _ _ _ _ _ _ _ _ _ _ _ _ _
_ _ _ _ _ _ _ _ _ _ _ _ _ _ _ _ _ _ _ _ _ _ _ _ _ _ _ _ _ _ _ _ _ _ _ _ _ _ _ _ _ _ _ _ _ _ _
_ _ _ _ _ _ _ _ _ _ _ _ _ _ _ _ _ _ _ _ _ _ _ _ _ _ _ _ _ _ _ _ _ _ _ _ _ _ _ _ _ _ _ _ _ _ _
_ _ _ _ _ _ _ _ _ _ _ _ _ _ _ _ _ _ _ _ _ _ _ _ _ _ _ _ _ _ _ _ _ _ _ _ _ _ _ _ _ _ _ _ _ _ _
_ _ _ _ _ _ _ _ _ _ _ _ _ _ _ _ _ _ _ _ _ _ _ _ _ _ _ _ _ _ _ _ _ _ _ _ _ _ _ _ _ _ _ _ _ _ _
_ _ _ _ _ _ _ _ _ _ _ _ _ _ _ _ _ _ _ _ _ _ _ _ _ _ _ _ _ _ _ _ _ _ _ _ _ _ _ _ _ _ _ _ _ _ _
_ _ _ _ _ _ _ _ _ _ _ _ _ _ _ _ _ _ _ _ _ _ _ _ _ _ _ _ _ _ _ _ _ _ _ _ _ _ _ _ _ _ _ _ _ _ _
_ _ _ _ _ _ _ _ _ _ _ _ _ _ _ _ _ _ _ _ _ _ _ _ _ _ _ _ _ _ _ _ _ _ _ _ _ _ _ _ _ _ _ _ _ _ _
_ _ _ _ _ _ _ _ _ _ _ _ _ _ _ _ _ _ _ _ _ _ _ _ _ _ _ _ _ _ _ _ _ _ _ _ _ _ _ _ _ _ _ _ _ _ _
_ _ _ _ _ _ _ _ _ _ _ _ _ _ _ _ _ _ _ _ _ _ _ _ _ _ _ _ _ _ _ _ _ _ _ _ _ _ _ _ _ _ _ _ _ _ _
_ _ _ _ _ _ _ _ _ _ _ _ _ _ _ _ _ _ _ _ _ _ _ _ _ _ _ _ _ _ _ _ _ _ _ _ _ _ _ _ _ _ _ _ _ _ _
_ _ _ _ _ _ _ _ _ _ _ _ _ _ _ _ _ _ _ _ _ _ _ _ _ _ _ _ _ _ _ _ _ _ _ _ _ _ _ _ _ _ _ _ _ _ _
_ _ _ _ _ _ _ _ _ _ _ _ _ _ _ _ _ _ _ _ _ _ _ _ _ _ _ _ _ _ _ _ _ _ _ _ _ _ _ _ _ _ _ _ _ _ _
_ _ _ _ _ _ _ _ _ _ _ _ _ _ _ _ _ _ _ _ _ _ _ _ _ _ _ _ _ _ _ _ _ _ _ _ _ _ _ _ _ _ _ _ _ _ _
_ _ _ _ _ _ _ _ _ _ _ _ _ _ _ _ _ _ _ _ _ _ _ _ _ _ _ _ _ _ _ _ _ _ _ _ _ _ _ _ _ _ _ _ _ _ _
_ _ _ _ _ _ _ _ _ _ _ _ _ _ _ _ _ _ _ _ _ _ _ _ _ _ _ _ _ _ _ _ _ _ _ _ _ _ _ _ _ _ _ _ _ _ _
_ _ _ _ _ _ _ _ _ _ _ _ _ _ _ _ _ _ _ _ _ _ _ _ _ _ _ _ _ _ _ _ _ _ _ _ _ _ _ _ _ _ _ _ _ _ _
_ _ _ _ _ _ _ _ _ _ _ _ _ _ _ _ _ _ _ _ _ _ _ _ _ _ _ _ _ _ _ _ _ _ _ _ _ _ _ _ _ _ _ _ _ _ _
_ _ _ _ _ _ _ _ _ _ _ _ _ _ _ _ _ _ _ _ _ _ _ _ _ _ _ _ _ _ _ _ _ _ _ _ _ _ _ _ _ _ _ _ _ _ _
_ _ _ _ _ _ _ _ _ _ _ _ _ _ _ _ _ _ _ _ _ _ _ _ _ _ _ _ _ _ _ _ _ _ _ _ _ _ _ _ _ _ _ _ _ _ _
_ _ _ _ _ _ _ _ _ _ _ _ _ _ _ _ _ _ _ _ _ _ _ _ _ _ _ _ _ _ _ _ _ _ _ _ _ _ _ _ _ _ _ _ _ _ _
_ _ _ _ _ _ _ _ _ _ _ _ _ _ _ _ _ _ _ _ _ _ _ _ _ _ _ _ _ _ _ _ _ _ _ _ _ _ _ _ _ _ _ _ _ _ _
_ _ _ _ _ _ _ _ _ _ _ _ _ _ _ _ _ _ _ _ _ _ _ _ _ _ _ _ _ _ _ _ _ _ _ _ _ _ _ _ _ _ _ _ _ _ _
_ _ _ _ _ _ _ _ _ _ _ _ _ _ _ _ _ _ _ _ _ _ _ _ _ _ _ _ _ _ _ _ _ _ _ _ _ _ _ _ _ _ _ _ _ _ _
_ _ _ _ _ _ _ _ _ _ _ _ _ _ _ _ _ _ _ _ _ _ _ _ _ _ _ _ _ _ _ _ _ _ _ _ _ _ _ _ _ _ _ _ _ _ _
_ _ _ _ _ _ _ _ _ _ _ _ _ _ _ _ _ _ _ _ _ _ _ _ _ _ _ _ _ _ _ _ _ _ _ _ _ _ _ _ _ _ _ _ _ _ _
_ _ _ _ _ _ _ _ _ _ _ _ _ _ _ _ _ _ _ _ _ _ _ _ _ _ _ _ _ _ _ _ _ _ _ _ _ _ _ _ _ _ _ _ _ _ _
_ _ _ _ _ _ _ _ _ _ _ _ _ _ _ _ _ _ _ _ _ _ _ _ _ _ _ _ _ _ _ _ _ _ _ _ _ _ _ _ _ _ _ _ _ _ _
_ _ _ _ _ _ _ _ _ _ _ _ _ _ _ _ _ _ _ _ _ _ _ _ _ _ _ _ _ _ _ _ _ _ _ _ _ _ _ _ _ _ _ _ _ _ _
_ _ _ _ _ _ _ _ _ _ _ _ _ _ _ _ _ _ _ _ _ _ _ _ _ _ _ _ _ _ _ _ _ _ _ _ _ _ _ _ _ _ _ _ _ _ _
_ _ _ _ _ _ _ _ _ _ _ _ _ _ _ _ _ _ _ _ _ _ _ _ _ _ _ _ _ _ _ _ _ _ _ _ _ _ _ _ _ _ _ _ _ _ _
_ _ _ _ _ _ _ _ _ _ _ _ _ _ _ _ _ _ _ _ _ _ _ _ _ _ _ _ _ _ _ _ _ _ _ _ _ _ _ _ _ _ _ _ _ _ _
_ _ _ _ _ _ _ _ _ _ _ _ _ _ _ _ _ _ _ _ _ _ _ _ _ _ _ _ _ _ _ _ _ _ _ _ _ _ _ _ _ _ _ _ _ _ _
_ _ _ _ _ _ _ _ _ _ _ _ _ _ _ _ _ _ _ _ _ _ _ _ _ _ _ _ _ _ _ _ _ _ _ _ _ _ _ _ _ _ _ _ _ _ _
_ _ _ _ _ _ _ _ _ _ _ _ _ _ _ _ _ _ _ _ _ _ _ _ _ _ _ _ _ _ _ _ _ _ _ _ _ _ _ _ _ _ _ _ _ _ _
SERV CE & MA NTENANCE RECORDS
Proper service and maintenance work is critical to trouble free operation of your equipment. It is
also critical to diagnosing problems should they arise. Use the space provided on the following -
page to record maintenance and service work performed.
7
RS1000 Operator Manual 1.01.19.qxp_Layout 1 4/24/19 12:41 PM Page 7

2- SAFETY RULES
Reports on accidents show that care-
less use of machinery causes a high
percentage of accidents. You can avoid
many accidents by following the safety
rules on these pages. Study these rules carefully
and enforce them on the job
.
SAFETY BEFORE START NG OR
OPERAT ON
The Crawler should be operated only by persons
approved to do so.
Clothing worn by the operator should be fairly tight
and belted.
Fasten a first aid kit to the Crawler.
Fasten a fire extinguisher to the Crawler. Keep
the extinguisher fully charged. Learn to use it cor-
rectly.
If the Crawler has an unsafe condition, do not op-
erate. Put a tag on the Track Drive Controls.
Do not start or operate the Crawler unless you are
in the operator’s seat.
Before you start the Engine, be sure there is
plenty of ventilation.
Keep hands, feet, and clothing away from power-
driven parts.
Fasten a slow-moving vehicle sign to the rear of
the Crawler.
Guards, shields, and other protective devices
must be in place and in good condition.
Before you start or operate the Crawler, clear the
area of all persons and obstacles.
OPERAT ON SAFETY
When you operate the Crawler, do not allow any-
one to ride on the Crawler or its equipment.
Drive at safe speeds at all times, especially on
rough ground and hillsides.
Carry the Bucket or Blade as low as possible at
all times, especially when you work on a hillside
or back up a steep hill.
Do not drive too close to the edge of a ditch or ex-
cavation.
Watch for overhead wires. Do not touch wires
with any part of the Crawler or its Attachments.
Do not leave your Crawler unattended with the En-
gine running.
Keep work areas as level as possible.
When loading logs with the Log Forks, make sure
the logs are balanced.
When you drive out of a ditch or excavation, or up
a steep hillside, or when Crawler is hitched to a
heavy load, engage Track Drive Controls slowly. If
the front of the Crawler comes off the ground, re-
lease Track Controls immediately.
Do not use the Crawler as a battering ram.
Do not guide cable onto Winch Drum with your
hands.
When you drive the Crawler on a road, use the
correct lights to warn operators of other vehicles.
Before you move any equipment, be sure all per-
sons are away from the Crawler.
When the Crawler is operating, only the operator
should be on it.
If it is necessary to make checks with the Engine
running, always use two people...the operator at
the controls should be able to see the person
doing the checking
KEEP HANDS AWAY FROM MOV NG PARTS!
BEFORE YOU GET OFF THE UN T:
Move Track Drive Controls to neutral.
Engage Parking Brake Lever.
Lower all equipment to the ground.
Move throttle to idle for 1 minute.
Stop Engine and remove the key.
8
RS1000 Operator Manual 1.01.19.qxp_Layout 1 4/24/19 12:41 PM Page 8

SERV CE SAFETY
Be sure you understand a service procedure be-
fore you work on the Crawler.
Unauthorized modifications to the Crawler may
impair the function and/or safety and affect
Crawler life.
Do not work under Crawler or raised equipment
unless it is correctly supported...contact factory for
recommended procedures.
Before you work on the Engine or electrical sys-
tem, disconnect the battery’s “ground” ( - ) termi-
nal first! When work is finished, connect battery’s
“ground” terminal ( - ) last.
When driving connecting pins (Spring Pins), wear
goggles or safety glasses.
Do not run Engine while working on the Crawler.
Be careful when handling any type of fuel. Do not
smoke while filling the fuel tank or working on the
fuel system.
Check for faulty wiring or loose connections.
Do not lubricate or work on the Crawler while it is
moving.
When you work near the Track Springs, use ex-
treme care. Do not disassemble parts unless you
know the correct procedure and have correct
tools.
F RE PREVENT ON MA NTENANCE
Be prepared if an accident or fire should occur.
Know where the first aid kit and the fire extin-
guisher are located...know how to use them.
Check fire extinguisher for correct charge.
Do not smoke while refueling or handling highly
flammable material.
Shut off the Engine when refueling.
Use care in refueling if the Engine is hot.
Do not use open pans of gasoline or diesel fuel for
cleaning parts. Use good commercial, nonflam-
mable solvents.
Provide adequate ventilation when charging bat-
tery.
Do not check battery charge by placing metal ob-
jects across the posts.
Do not allow sparks or an open flame near battery.
Do not smoke near battery.
Never check fuel, battery electrolyte, or coolant
levels with an open flame.
Never use an open flame to look for leaks any-
where on the equipment.
Never use an open flame as light anywhere on or
around the equipment.
When preparing Engine for storage, remember
that inhibitor is volatile and therefore dangerous.
Seal and tape openings after adding the inhibitor.
Keep container tightly closed when not in use.
Inspect electrical wiring for worn or frayed insula-
tion. Install new wiring if wires are damaged.
Temperature in Engine compartment may go up
immediately after you stop the Engine. Be on
guard for fires.
Before you clean trash from the Engine compart-
ment, wait until the Engine has cooled. Open
ood to cool the Engine faster. While the Engine
cools, clean trash from other areas.
Check for leaking fuel lines or fittings with a piece
of cardboard or wood. Do not use your hands.
Tighten loose fittings. If hoses are kinked, install
new parts.
9
RS1000 Operator Manual 1.01.19.qxp_Layout 1 4/24/19 12:41 PM Page 9

NO SE PROTECT ON
Prolonged exposure to loud noise can cause im-
pairment or loss of hearing. Wear a suitable hear-
ing protective device such as earmuffs or earplugs
to protect against objectionable or uncomfortably
loud noise.
START ENG NE ONLY FROM THE
OPERATOR’S SEAT!
Avoid possible injury or death from Crawler run-
away.
Do not start Engine by shorting across starter so-
lenoid terminals. Crawler may start and move if
normal circuitry is bypassed.
CAUT ON: Never start Engine while
standing on ground. Start Engine only
from operator’s seat, with Brake en-
gaged.
Inspect your Crawler carefully each day before
you start it. See “Pre-Start Inspection”.
Clean your Crawler regularly.
10
RS1000 Operator Manual 1.01.19.qxp_Layout 1 4/24/19 12:41 PM Page 10

3- CONTROLS
& NSTRUMENTS
Learn the location and purpose of all Controls,
Instruments and Warning labels. Thoroughly
study the Operator’s Manual furnished by the en-
gine manufacture and included with your Crawler
instructions.
A - LEFT TRACK
CLUTCH CONTROL
B - R GHT TRACK
CLUTCH CONTROL
C - THROTTLE CONTROL
D - CHOKE CONTROL
E - HEADL GHT SW TCH
F - KEY GN T ON SW TCH
G - C RCU T PROTECTOR
H - FUEL VALVE
- PARK NG BRAKE (not shown)
J - HOUR METER/TACH (if equipped)
11
AB
C
D
E
F
G
J
RS1000 Operator Manual 1.01.19.qxp_Layout 1 4/24/19 12:41 PM Page 11

A & B - LEFT & R GHT
TRACK CLUTCH CONTROLS
NTRODUCT ON: The turn
demonstrated (above) is the key to
your Crawler’s superior maneuver-
ability. It is accomplished with only
two controls, the A&BLeft & Right
Track Controls. The illustrations
(below) show how to maneuver
your crawler in other turns.
MOV NG FORWARD:
To move straight ahead, simulta-
neously push forward on both Left
and Right Track Controls.
MOV NG REARWARD:
To move straight rearward, simultaneously pull
rearward on both Left and Right Track Controls.
TURN NG R GHT:
To turn sharply right, push forward on Left Track
Control while holding Right Track Control in neu-
tral.
TURN NG LEFT:
To turn sharply left, push forward on Right Track
Control while holding Left Track Control in neutral.
COUNTER-ROTAT NG TRACKS
To counter-rotate Tracks (tightest turn possible),
push one Track Control forward while simultane-
ously pulling rearward on the other Track Control.
NOTE: When either Track Control is “slowly” re-
leased, it will automatically return to neutral.
NEVER allow Track Controls to “snap-back” to
neutral. See OPERATION section of this manual
for further instructions.
12
A - Left
B - Right
RS1000 Operator Manual 1.01.19.qxp_Layout 1 4/24/19 12:41 PM Page 12

DASHBOARD CONTROLS
C - THROTTLE CONTROL
The Throttle is lever operated, rotating in a wide
arc. This arc is divided into two speed ranges; the
slower Work Speeds and the faster Travel
Speeds. Your Crawler has maximum “pushing
force” (maximum torque, according to the engine
manufacturer) at the mid-range speed but with a
declining level of torque as you increase your
travel speed. We advise using only as much throt-
tle as needed for a particular application. If the
engine bogs down, please feel free to use more
throttle when you feel it is needed.
Though all crawlers by their design are somewhat
“rough riding”, you can minimize the “roughness”
by traveling at the lowest speeds when going over
hard surfaces.
D - CHOKE
The Choke Control is lever operated. Rotate the
lever counter-clockwise to increase engine chok-
ing; rotate clockwise to decrease engine choking.
(Consult engine manual for more information).
E - HEADL GHT SW TCH
The eadlight Switch is a basic “Pull ON”, “Push
OFF” switch. Behind the Switch is a replaceable
Safety Fuse. When replacing, use a new fuse of
the same amps as the one being replaced.
F - KEY GN T ON SW TCH
Switch is activated by rotating key clockwise.
Turning it fully clockwise will engage engine starter
...release key and it will re-
turn automatically to the
RUN “ON” position. Turn
fully counter-clockwise to
OFF position to stop en-
gine. Remove key.
G - C RCU T
PROTECTOR
The Circuit Protector pro-
tects the battery charging
circuit. (Consult engine
manual for more informa-
tion).
H - FUEL SHUT OFF VALVE
The Fuel Shut Off
Valve Lever con-
trols the fuel to the
carburetor. Turn it
OFF for transport
or when cleaning
carburetor. (Con-
sult Engine Manual
for more informa-
tion).
13
Hard Surface Travel
Maximum Torque
D
C
E
H
F
G
RS1000 Operator Manual 1.01.19.qxp_Layout 1 4/24/19 12:41 PM Page 13

- PARK NG BRAKE
The Parking Brake acts both as a parking brake
and as an emergency brake.
To “engage” Parking Brake, pull Brake andle up
firmly and loop it “up and over”the Carriage Bolt
provided...make sure handle edge is on top of Bolt
and behind “inside face” of Carriage Bolt.
To “disengage” Parking Brake, reverse the above
procedure and allow Brake andle to rest on
Fender.
As the Parking Brake is also your emergency
brake, it’s extremely important to maintain its per-
formance with daily inspection. See Service sec-
tion of this manual for proper procedures.
EXTREMELY MPORTANT:
As it’s mandatory to engage the Parking Brake be-
fore starting your crawler, always remember to
disengage it before driving away.
f you fail to disengage the Parking
Brake it will wear very rapidly and be
of no value in an emergency!!
J - HOUR METER /TACH ( f equipped)
The our Meter/Tach dis-
plays the hours run and the
RPM of the engine. Keeping
up with your maintenance of
your MAGNATRAC keeps it
running in top condition!
HOUR METER / TACH FLASH ALERT:
Flashes “CHG O L” at 100 hour service
intervals and “LUBE” at 25 hour service inter-
vals, the service interval is based on actual run
hours.
OPERAT ON:
Alerts begin flashing a warning 4 hours be-
fore service is due, and clear automatically 1 hour
afterward. Meter displays RPM while enigne is
running, hours while eningeis off.
FLASH SERV CE RESET:
Service alarms will automatically reset 1
hour after service interval.
14
D SENGAGED
I - Brake andle
I - Brake andle
ENGAGED
Carriage Bolt
RS1000 Operator Manual 1.01.19.qxp_Layout 1 4/24/19 12:41 PM Page 14

4- OPERAT ON
PRE-START NG NSPECT ON
Before you start your Crawler for the first time
each day, perform the following checks:
ENG NE COMPARTMENT
Check oil level.
Check air intake system.
Remove trash and oil/dirt deposits.
TRACKS, ATTACHMENTS, SHEET METAL
Check for bent, broken, or missing parts.
Check Track Springs.
HARDWARE
Check for loose or missing parts.
ELECTR CAL SYSTEM
Check for worn or frayed wires or loose
connections.
LUBR CAT ON
Check lubrication points shown in Periodic
Service section of this Manual.
GUARDS AND SH ELDS
Check for tightness and condition.
BATTERY COMPARTMENT
Remove trash.
Check cables for tightness and corrosion.
FUEL TANK
Check fuel level.
OPERATOR’S STAT ON
Check control levers for free movement.
Clean fenders and instrument panel.
Adjust Seat location to fit operator.
CAUT ON - Before you start the engine:
Clear the work area of people and obstacles
Check the condition of the Crawler. (Prestart
inspection).
Be sure there is enough ventilation.
Be sure to know the correct starting and stop
ping procedure.
Sit in the Operator’s Seat.
PREPARE FOR ENG NE START NG
1. Allow Left (A) and Right (B) Track Controls to
assume their natural “spring-loaded” center neu-
tral positions.
2. Engage Parking Brake ( ). (Make sure Brake
lever is pulled “up and over” round head of Car-
riage Bolt provided...make sure handle “edge” is
on top of this Bolt and behind its inside face).
3. Check that all Attachments are in the fully low-
ered position.
4. Make sure you are properly seated so Seat
Safety Switch will engage
START NG THE ENG NE
1a. Cold Engine - Place the Throttle Control (C)
midway between the Slow and Fast positions.
Place the Choke Control (D) into the On (fully
choked) position.
1b. Warm Engine (normal operating tempera-
tures) - Place the Throttle Control midway be-
tween the Slow and Fast positions. Place the
Choke Control into the Off (no choke) position.
2. Activate the Key Ignition Switch (F) by rotating
the key clockwise until starter engages. Release
the key as soon as the Engine starts ...Switch will
return to the Run “On” position.
NOTE: After starting a “cold” Engine, it may be
necessary to leave the Choke partially On for a
few minutes before moving it to the Off position
15
RS1000 Operator Manual 1.01.19.qxp_Layout 1 4/24/19 12:41 PM Page 15

CAUT ON: Do not crank the Engine
continuously for more than 10 seconds
at a time. If the Engine does not start,
allow a 60-second cool-down period be-
tween starting attempts. Failure to follow these
guidelines can burn out the starter motor.
CAUT ON: If the Engine develops suffi-
cient speed to disengage the starter but
does not keep running (a “false start”),
the Engine rotation must be allowed to
come to a complete stop before attempting to
restart the Engine.
If the starter is engaged while the flywheel is ro-
tating, the starter pinion and flywheel ring gear
may clash, resulting in damage to the starter.
If the starter does not turn the Engine over, shut off
starter immediately. Do not make further attempts
to start the Engine until the condition is corrected.
If the battery charge is not sufficient to turn over
the Engine, recharge the battery.
CAUT ON: Do not attempt to jump start
the Engine with another battery. Start-
ing with batteries larger than those rec-
ommended can burn out starter motor.
WARM-UP PER OD
Run Engine at half speed for 5 minutes.
Do not run Engine at fast, or slow idle.
Operate Crawler at less-than-normal loads and
speeds for the first 15 minutes.
WARN NG: Lethal Exhaust Gases!
Engine exhaust gases contain poison-
ous carbon monoxide. Avoid inhaling
fumes, and never run the Engine in a
closed building or confined area.
NOTE: Assembled Crawlers are “run in”
under no load at the factory to properly
break-in their drive train.
TRAVEL NG
Disengage Parking Brake ( ); Fully raise all At-
tachments to recommended traveling heights.
To move straight ahead, simultaneously push
both Left Track Control (A) and Right Track Con-
trol (B) forward.
To move straight to the rear, simultaneously pull
both Right and Left Track Controls rearward.
To turn sharply to the right, push Left Track
Control fully forward...leave Right Track Control in
neutral.
To turn slowly to the right, push Left Track Con-
trol fully forward while simultaneously pushing
“partially” forward on Right Track Control...the far-
ther you push the Right Track Control forward, the
slower you will turn right.
16
D SENGAGED
I - Brake andle
Reverse
Reverse
Forward Forward
Neutral Neutral
Control AControl B
RS1000 Operator Manual 1.01.19.qxp_Layout 1 4/24/19 12:41 PM Page 16

To turn sharply to the left, push Right Track
Control fully forward...leave Left Track Control in
neutral.
To turn slowly to the left, push Right Track Con-
trol fully forward while simultaneously pushing
“partially” forward on the Left Track Control...the
farther you push the Left Track Control forward,
the slower you will turn to the left.
To counter-rotate Tracks, (shortest turn possi-
ble), push one Track Control forward while simul-
taneously pulling rearward on the other Track
Control. You may counter-rotate “clockwise” or
“counter-clockwise”; move in which ever direction
satisfies the job at hand.
Stopping the Crawler: The Right and Left Track
Controls are of the self-centering (neutral) type.
This allows you to simply release pressure on both
Track Controls to disconnect (declutch) active
power to the Tracks and come to a complete stop.
Never “snap” Track Controls back into neutral!
PARK NG THE CRAWLER
1. Lower all Attachments to the ground.
2. Allow Right and Left Track Controls
to go “slowly” to neutral.
3. Engage Parking Brake.
4. Run Engine at half speed 2 minutes
without load.
5. Move Throttle Control to slow idle.
6. Turn Ignition Switch to Off.
MPORTANT: If Engine stops under load, remove
load. Start Engine immediately. Run 30 seconds
at half speed before adding load.
CAUT ON: When you park your
Crawler on a slope, put blocks against
tracks. Do not park Crawler with
tracks pointed downhill, always park
“cross-ways” to the hill!
STORAGE
Always store your MAGNATRAC in a garage,
shed or barn. If the only option is to park outside,
make sure to securely tarp the unit and park on a
flat surface with the parking brake engaged.
During freezing weather, park on a hard surface
to avoid freezing the Steel Tracks (if equipped) to
the ground. We recomend parking on rubber track
mats or using some inexpensive plywood. This will
keep moisture away from the steel tracks and ex-
tend the life of them. If Tracks are frozen to the
ground, be careful to avoid damage to the Tracks
and drive train when you try to move the Crawler.
We advise to turn off the fuel shut off valve and
run until the unit stops if going to store for a long
period of time. This is to ensure easy starting dur-
ing the next season. Remember to turn ON the
fuel when ready for work the next time!
17
Reverse
Reverse
Forward Forward
Neutral Neutral
Control AControl B
RS1000 Operator Manual 1.01.19.qxp_Layout 1 4/24/19 12:41 PM Page 17

5- FUELS
&
LUBR CANTS
FUELS
FUEL SPEC F CAT ONS
Add fuel to fuel tank per engine manual specs.
Unleaded 86 octane or higher is recc-
ommended per ONDA. Verify fuel shut-
off valve is in the open position.
F LL NG FUEL TANK
The Fuel Tank is located underneath the hood, on
the eninge.
Fill Fuel Tank at end of each day’s operation.
Fuel Tank capacity is 6.4 U.S. qts. or 1.6 gallons.
Use unleaded gasoline per Engine Owner’s Man-
ual.
CAUT ON: andle fuel carefully. Do
not fill fuel tank when the Engine is running. Do
not smoke while you fill fuel tank or work on fuel
system.
STOR NG FUELS
Keep fuel in a container in a protected area.
Water and sediment must be removed before fuel
gets to the Engine. Do not depend on fuel filters
to remove water.
If possible, install a water separator at the storage
tank outlet.
Store fuel drums on their sides with plugs up.
MPORTANT: Keep all dirt, scale, water, or other
foreign matter out of fuel.
LUBR CANTS
ENG NE O L
Check enclosed Engine Owner’s Manual and
closely follow their recommendations.
HYDRAUL C O L ( f equipped)
Use a premium quality hydraulic oil with max-
imum anti-wear properties, rust and oxidation
treatment. A high quality antiwear hydraulic fluid
designed for use in high pressure, high speed hy-
draulic pumps in industrial hydraulic systems. We
use an AW46 Hydraulic Oil. (ISO 46). An SO of
46 is good in standard temperatures. f oper-
ated at exteme hot or cold temperatures,
please consult a local oil shop for an oil vis-
cosity best suited for your conditions.
f the above specifications can not be found
consult with a local tractor/equipment dealer-
ship or oil supplier for other brands of hy-
draulic oil suitable for loaders, backhoe, and
hydraulic drive systems.
Fill ydraulic Oil Tank through #616 breather,
on the top of the hydraulic tank, behind the oper-
ator seat. Check level by “eye check”, it should be
a few inches from the top...remove breather with
a crescent wrench at the black nut and hand
tighten once full!
Approximately 2 gallons of hydraulic fluid
fills the hydraulic reservoir to the proper
level (when empty & no hydraulic cylinders
are attached).
GREASE
Use premium quality SAE Multi-Purpose Grease
in a grease gun with a flexible “nose” to lubricate
grease zerks throughout the MAGNATRACS pivot
points.
STOR NG LUBR CANTS
Store lubricants in clean containers in an area pro-
tected from dust, moisture, and other contamina-
tion.
18
RS1000 Operator Manual 1.01.19.qxp_Layout 1 4/24/19 12:41 PM Page 18

6- LUBR CAT ON
&
PER OD C SERV CE
LUBR CAT ON AND SERV CE
NTERVALS
Recommended service intervals are for normal
conditions. Service more often if Crawler is oper-
ated under more difficult conditions such as high
temperature, dust, etc. Use only quality lubricants
at intervals specified in this manual.
PER OD C SERV CE CHART
Air Cleaner(s) - Service per instructions in En-
gine Owner’s Manual.
Engine Oil - Service per instructions in Engine
Owner’s Manual
Battery - Change as needed. Approximately every
3 years.
1ST USAGE
1ST USAGE
Hydraulic Oil - Attach any additional attach-
ments first (Grapple, backhoe, rear hitch,
etc.) Check level on a flat & level surface;
with equipment on the ground (retract all
possible cylinders), level should be ap-
prox. 5” away from the top of the tank.
Add additional fluid if needed.
Engine Oil - Check enigne oil level before use to
make sure oil level is at acceptable level
on the dipstick. Add additonal if needed.
NOTE: First oil change for a new Engine
is at 5 hours
Fuel - Add fuel to fuel tank per engine manual
specs. Unleaded 86 octane or higher is
reccommended per ONDA. Verify fuel
shut-off valve is in the open position.
EVERY TEN HOURS
EVERY TEN HOURS
Grease Fittings - Lubricate all grease fittings
per location instructions in manual of
each attachment you have mounted on
your MAGNATRAC. Recommended
grease: Multipurpose NLG 2 Grade
Lithium Complex, SO VG 220.[Clean
grase fittings and area around them be-
fore servicing].
Clean area around each grease fitting on Front
Idler and Rear Drive Assemblies. Grease each
grease fitting until you feel back pressure building.
A small breakdown of how many grease fittings
are on the RS1000 and various Attachments is as
follows:
RS1000 with Steel Tracks: 6
RS1000 with Rubber Tracks: 10
Note: 4 are located on the front idlers &
rear drives and 2 are on the #1791 Rear
Bearings. (shown on the next page)
For all others, please see each individual
attachment for the quantity of grease fit-
tings.
As a standard guide, there will be a grease
fitting for each Axle/Pin that you see on a
particular attachment. (See below).
HFH15 Front Hitch: 2
D1060 Backhoe: 14
D1060UG Backhoe: 18
HRH35 Rear Hitch: 2
Rubber Track dlers: 4
#1791 Bearing Assemblies: 2
Lubricate the “grease fitting” in each #1791
Bearing Assembly. NOTE: The #1791
Bearings are the hardest working Bearings
in your RS1000, never spare proper lubri
cation and maintenance! See picture on
the next page.
19
RS1000 Operator Manual 1.01.19.qxp_Layout 1 4/24/19 12:41 PM Page 19

EVERY F FTY HOURS
EVERY F FTY HOURS
Engine Oil
Drain and refill per recommendations in
Engine Owner‘s Manual.
NOTE: Change Engine oil every 25 hours
if you’re working under constant heavy
loads or extremely dirty conditions.
Filters
Replace Engine Air Filter with filter recom-
mended in Engine Owner’s Manual.
Tracks and Track Sprockets
Pressure wash track system, including:
Front Idler and Rear Drive Sprockets.
Track Tension
Maintain 1-3/8” overall length of #1806
Spring on each Track.
Check Service section of this Manual for
complete explanation and Track Tension-
ing procedures.
Rear Drive Chain Tension
Maintain proper chain tension in Crawler’s
Rear Drive. Check Service section of this
Manual for complete Rear Drive Chain
Tensioning procedures.
Rear Drive Chain Lubrication
Use SAE 30 motor oil in pressure oil can.
Thoroughly lubricate each Drive Chain.
[TIP: Drive Crawler forward approximately
six feet stopping to oil the Chain every
foot]. Don’t forget to do both Drive Chains!
Tip: wipe the chain down after oiling to keep oil
spatter to a minimum.
Engine Drive Chain Tension ( f equipped)
Maintain proper chain tension in Crawler’s
Engine Drive Chain. Check Service sec-
tion of this Manual for complete Engine
Drive Chain tensioning procedures.
General Once-Over
Check for loose nuts and bolts and any
signs of premature wear. Correct any
problems immediately. Contact factory
with any questions or requests for help.
EVERY 200 HOURS
EVERY 200 HOURS
Fuel Tank
Remove and drain tank of any water or
sediment. Clean or replace the in-tank
fuel filter.
Fuel Filter - Replace with new Fuel Filter at this
time: Filters can be purchased through the
Struck Corporation or through local engine
dealers.
Hydraulic Oil ( f equipped) - Run the RS1000 for
approx. 5 minutes at idle, shut off. Drain
system by angling the 90 degree fitting on
the bottom right of the hydraulic oil tank.
NOTE: Drain when fluid is warm. Block up
the right front corner of Crawler a few
inches to get oil to flow completely to drain
opening. Refill with approx. 2 gallons of hy-
draulic fluid. Fill the hydraulic reservoir to
the proper level. (See PP35 Power Pack
section of the attachment manual)
Enigne Spark Plugs - Replace Engine Spark
Plugs with spark plugs recommended in
Engine Owner’s Manual.
20
Zerk
#1791 Bearing Assembly
RS1000 Operator Manual 1.01.19.qxp_Layout 1 4/24/19 12:41 PM Page 20
Other manuals for Magnatrac RS1000
1
Table of contents
Other Struck Tractor manuals

