Volante - Magnetic Echo Machine
pg 4
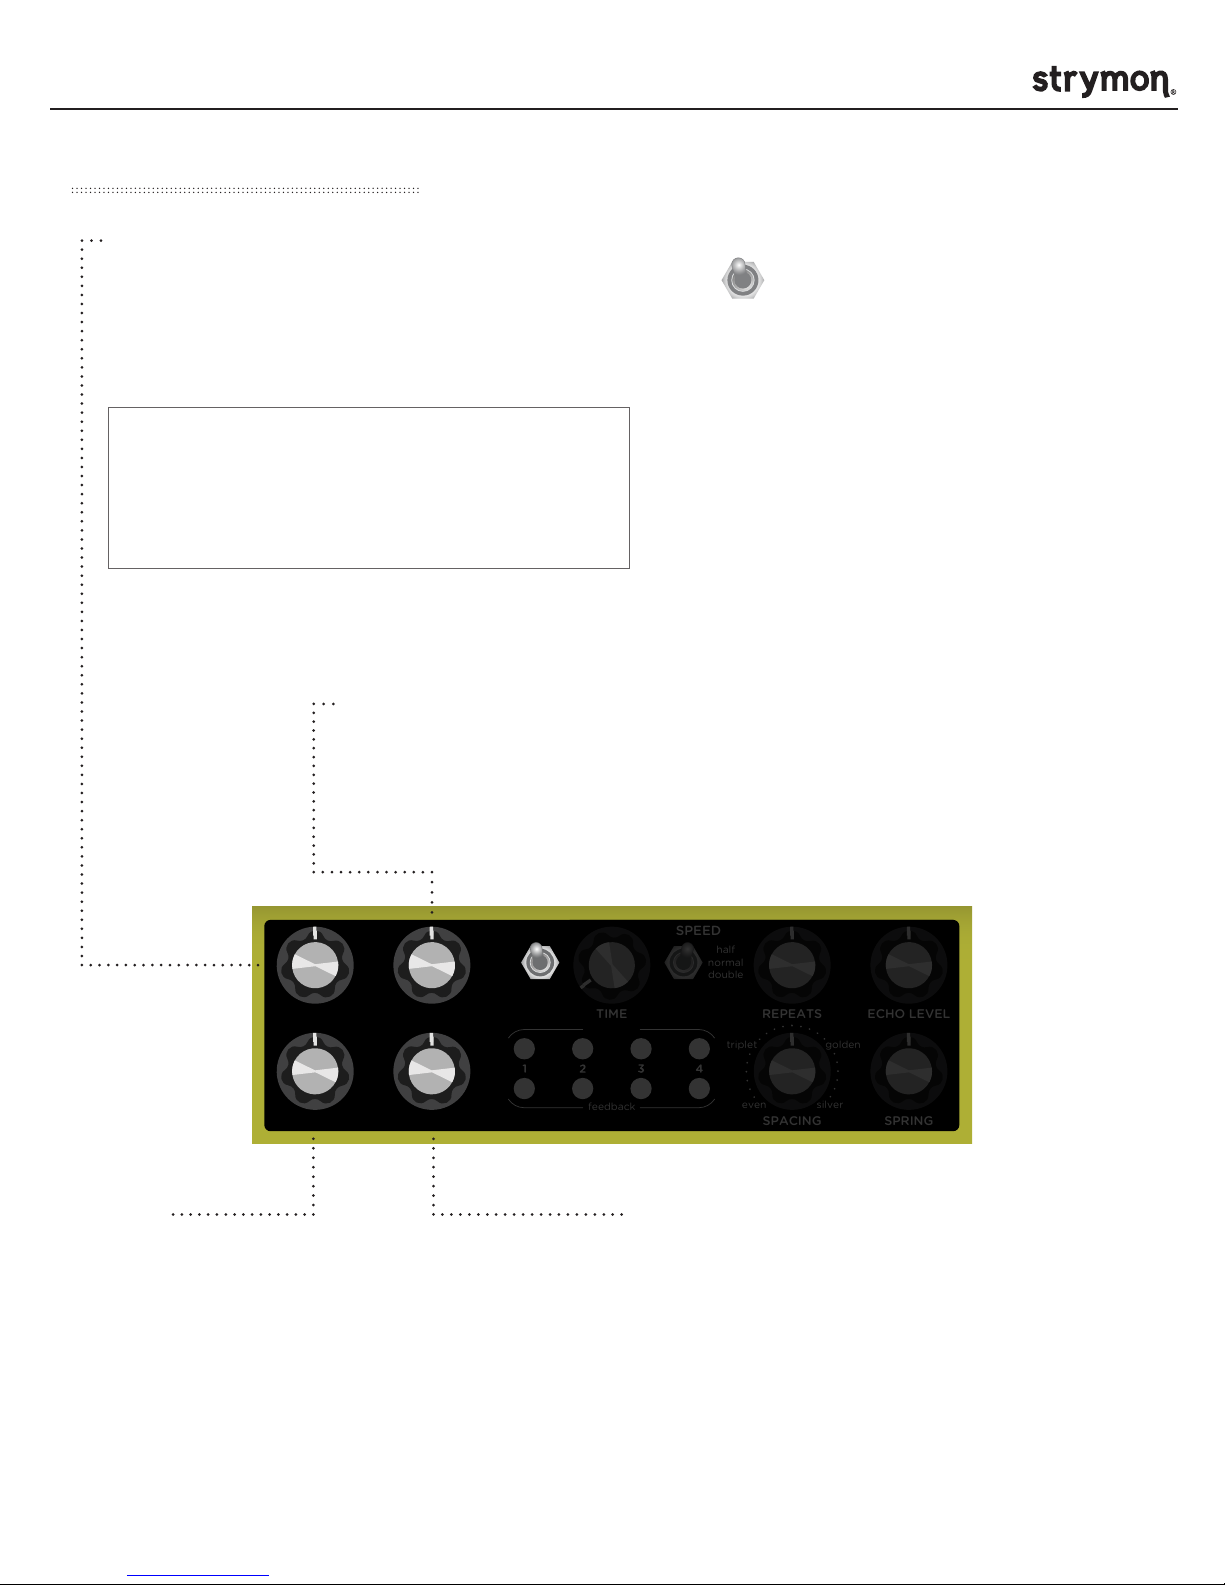
Front Panel - Head Configuration
feedback
Enables or disables feedback of the corresponding
playback head signal to the record head.
PANNING
Turn the TIME knob while pressing and holding the
individual feedback buttons to adjust the panning
for each playback head. Adjusting the knob to twelve
o’clock returns the head to the center position (the
corresponding playback button will light up RED.)
playback
Selects which of the individual playback heads
are engaged (GREEN LED ON).
HEAD VOLUME
Press and hold for one second to toggle between
half and full volume.
GREEN LED ON = full volume.
AMBER LED ON = half volume.
even: Sets the heads evenly to produce delays of sixteenth note, eighth note,
dotted eighth, and quarter note.
triplet: Sets heads to sixteenth note triplet, eighth note triplet, quarter note
triplet and quarter note.
golden: Sets the distances between each of the heads according to the golden
ratio, resulting in the fastest density buildup when multiple heads are repeating.
silver: Sets the distances between heads according to the silver ratio, resulting
in repeats that “bunch up” closer to the head 4 quarter note.
playback
33 3
REPEATS
Controls the feedback amount for the heads that
have their feedback enabled.
SPACING
Adjusts the spacing between the heads. Turning the knob morphs the heads in between the marked settings.
SPACING CONFIGURATIONS
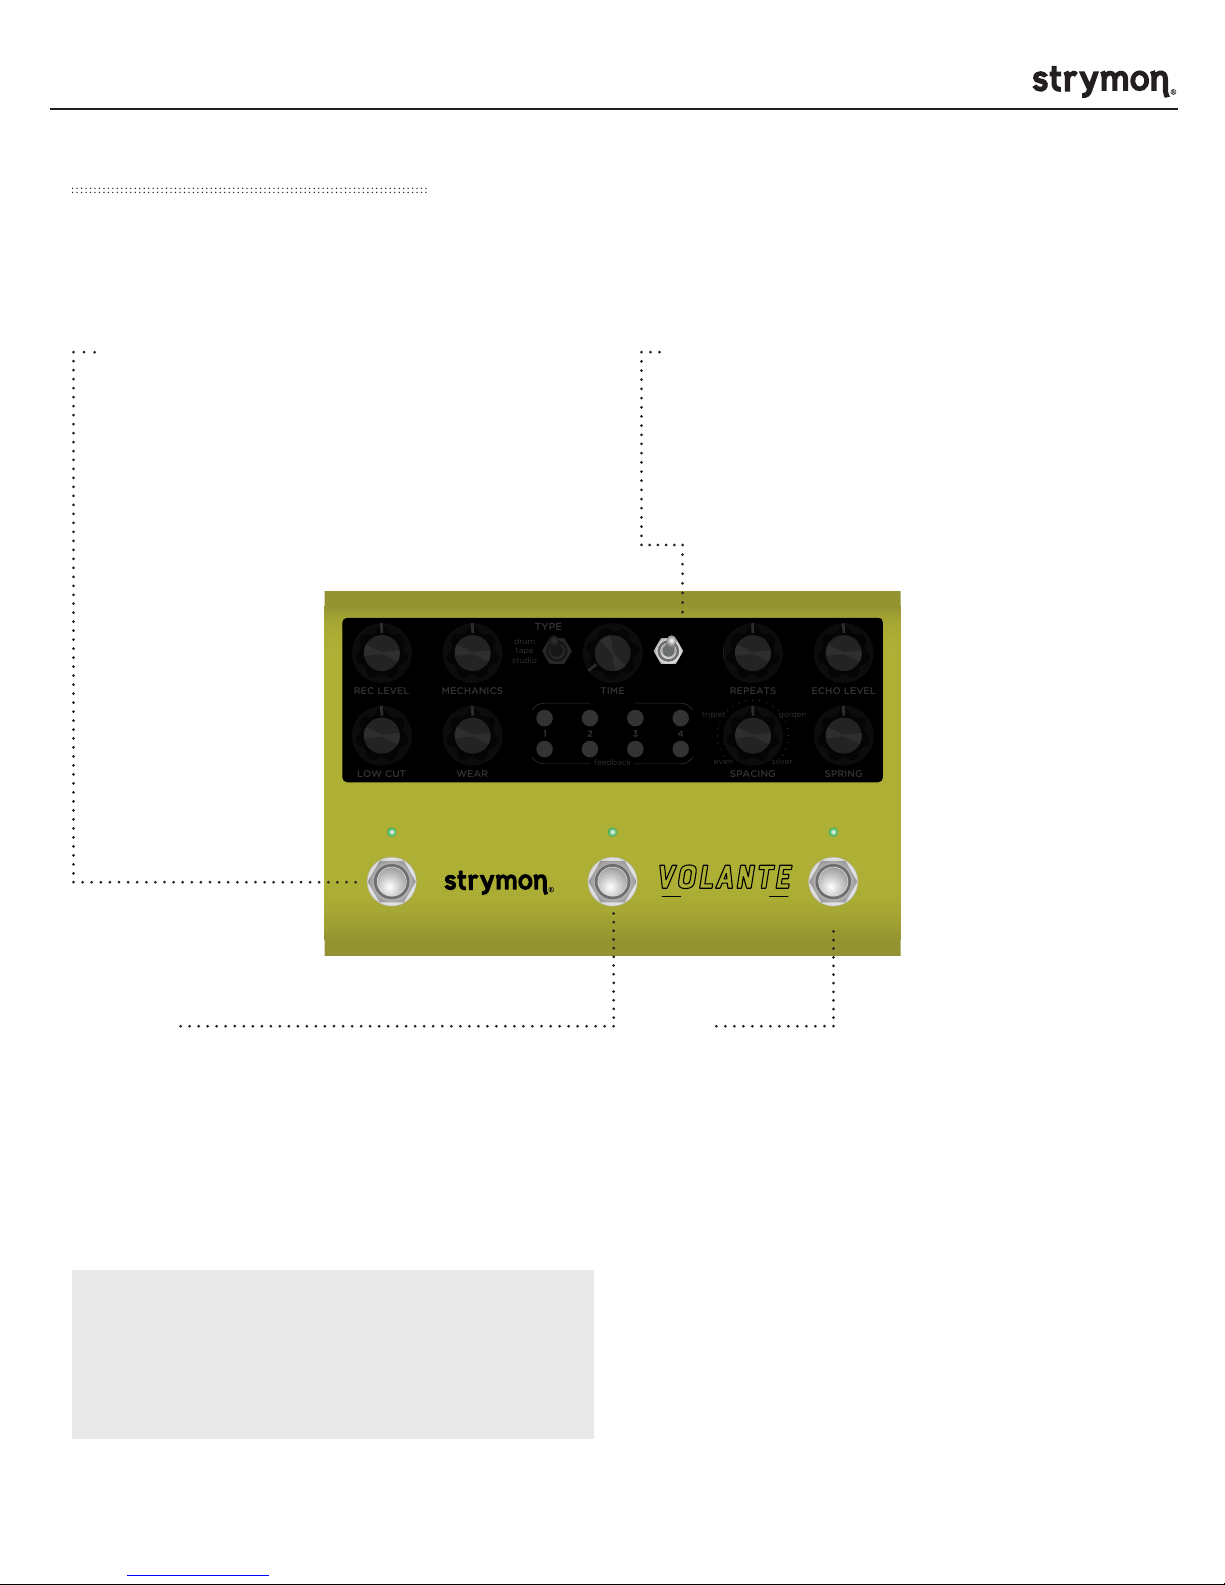
WEAR
ECHO LEVELTIME
SPEEDTYPE
drum
tape
studio
half
normal
double
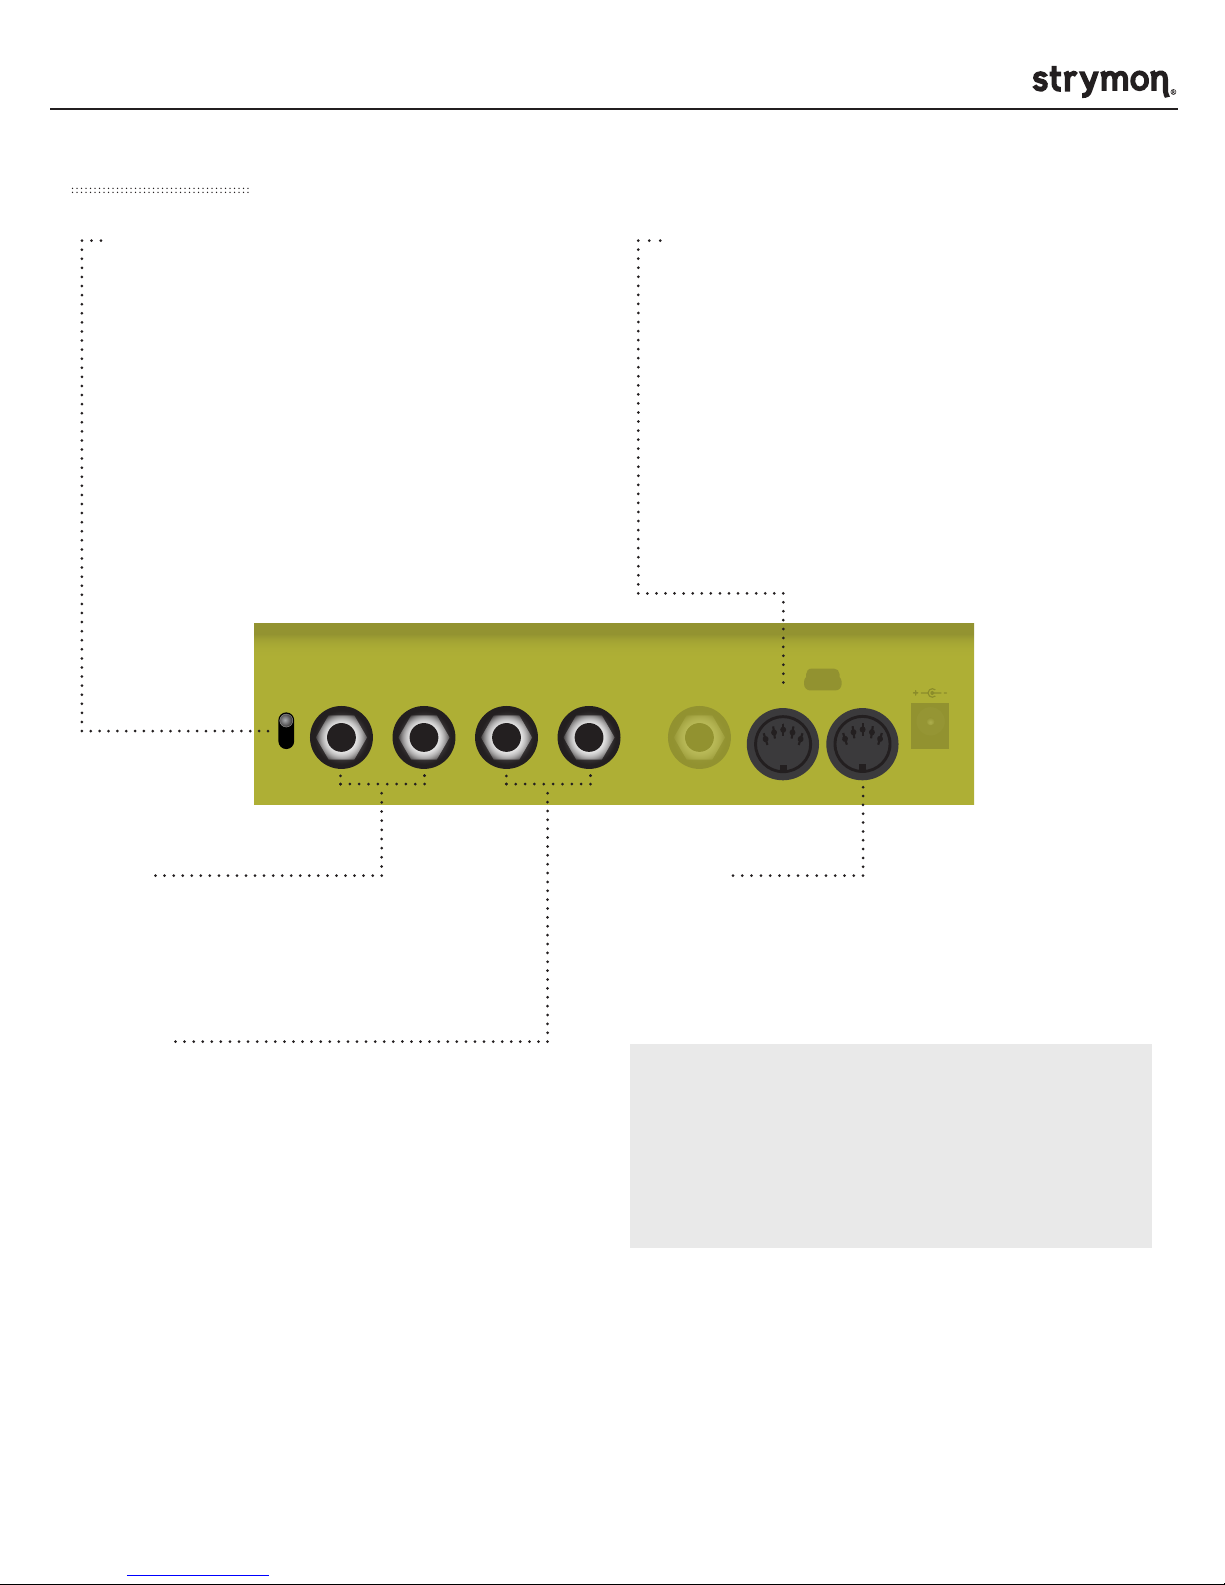
LOW CUT SPRING
REC LEVEL MECHANICS
even
triplet golden
silver
playback
feedback
SPACING
REPEATS
NOTE: A head can be fed back to the input even
if its playback is disengaged.
NOTE: When all heads are panned to center, a
psychoacoustic stereo process is applied to the
delay signal.