Summer Prodigy User manual

the most intelligent choice…
™
infant car seat
WARNING:
USER GUIDE
This infant seat is for use by
children who meet BOTH
of the requirements below:
Weight:
4-32 lbs (1.8-14.5 kg)
Height:
32 inches (81.3 cm) or less
DEATH or SERIOUS INJURY
can occur.
-HPS\YL[V9,(+HUK
<5+,9:;(5+[OPZ<:,9
.<0+,ILMVYL\ZPUN
[OPZJOPSKYLZ[YHPU[
PUJYLHZLZ[OLYPZRVM
ZLYPV\ZPUQ\Y`VYKLH[O
PUHZ\KKLUZ[VWVY
JYHZO
:;69,<:,9.<0+,PU
YLHYVMJOPSKYLZ[YHPU[
NEW!
SmartScreen
technology for
ACCURATE
installation
EVERY TIME
Summer Infant, Inc.
1275 Park East Drive
Woonsocket, RI 02895
1-800-268-6237
www.summerinfant.com
©2011 Summer Infant, Inc. All rights reserved.
This product and its components are subject to change without notice.

3
BeforeYou Begin
Safety Information .............................................4
Registration, Recall, and Expiration Information .... 4
Warnings .......................................................................... 6
Re-Use After a Crash ..................................................10
Use Recommendations ...............................................11
Infant Seat Features .........................................12
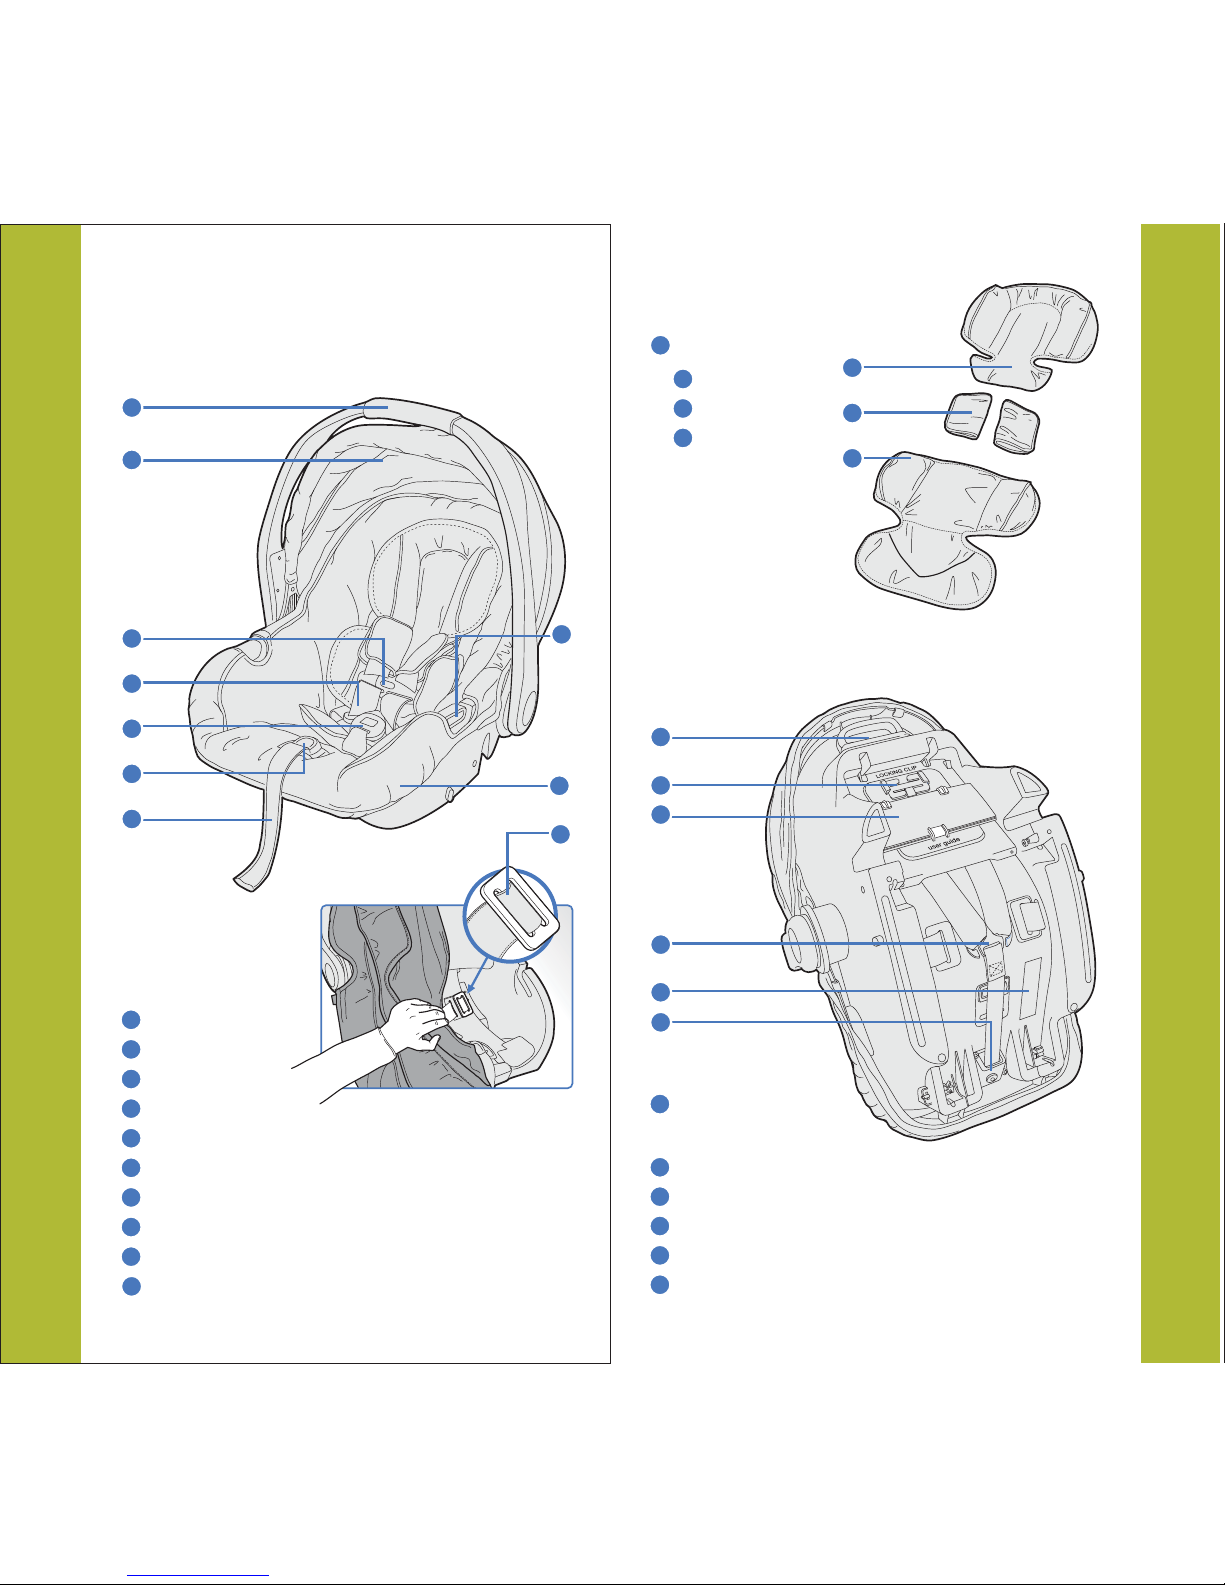
Prodigy Infant Car Seat Parts .................................. 12
Prodigy Infant Base Parts .......................................... 14
Smart Screen Technology .......................................... 16
Belt Tightening System ............................................... 17
Safe Guard 1Adjust Harness System ..................... 17
Vehicle Compatibility .......................................18
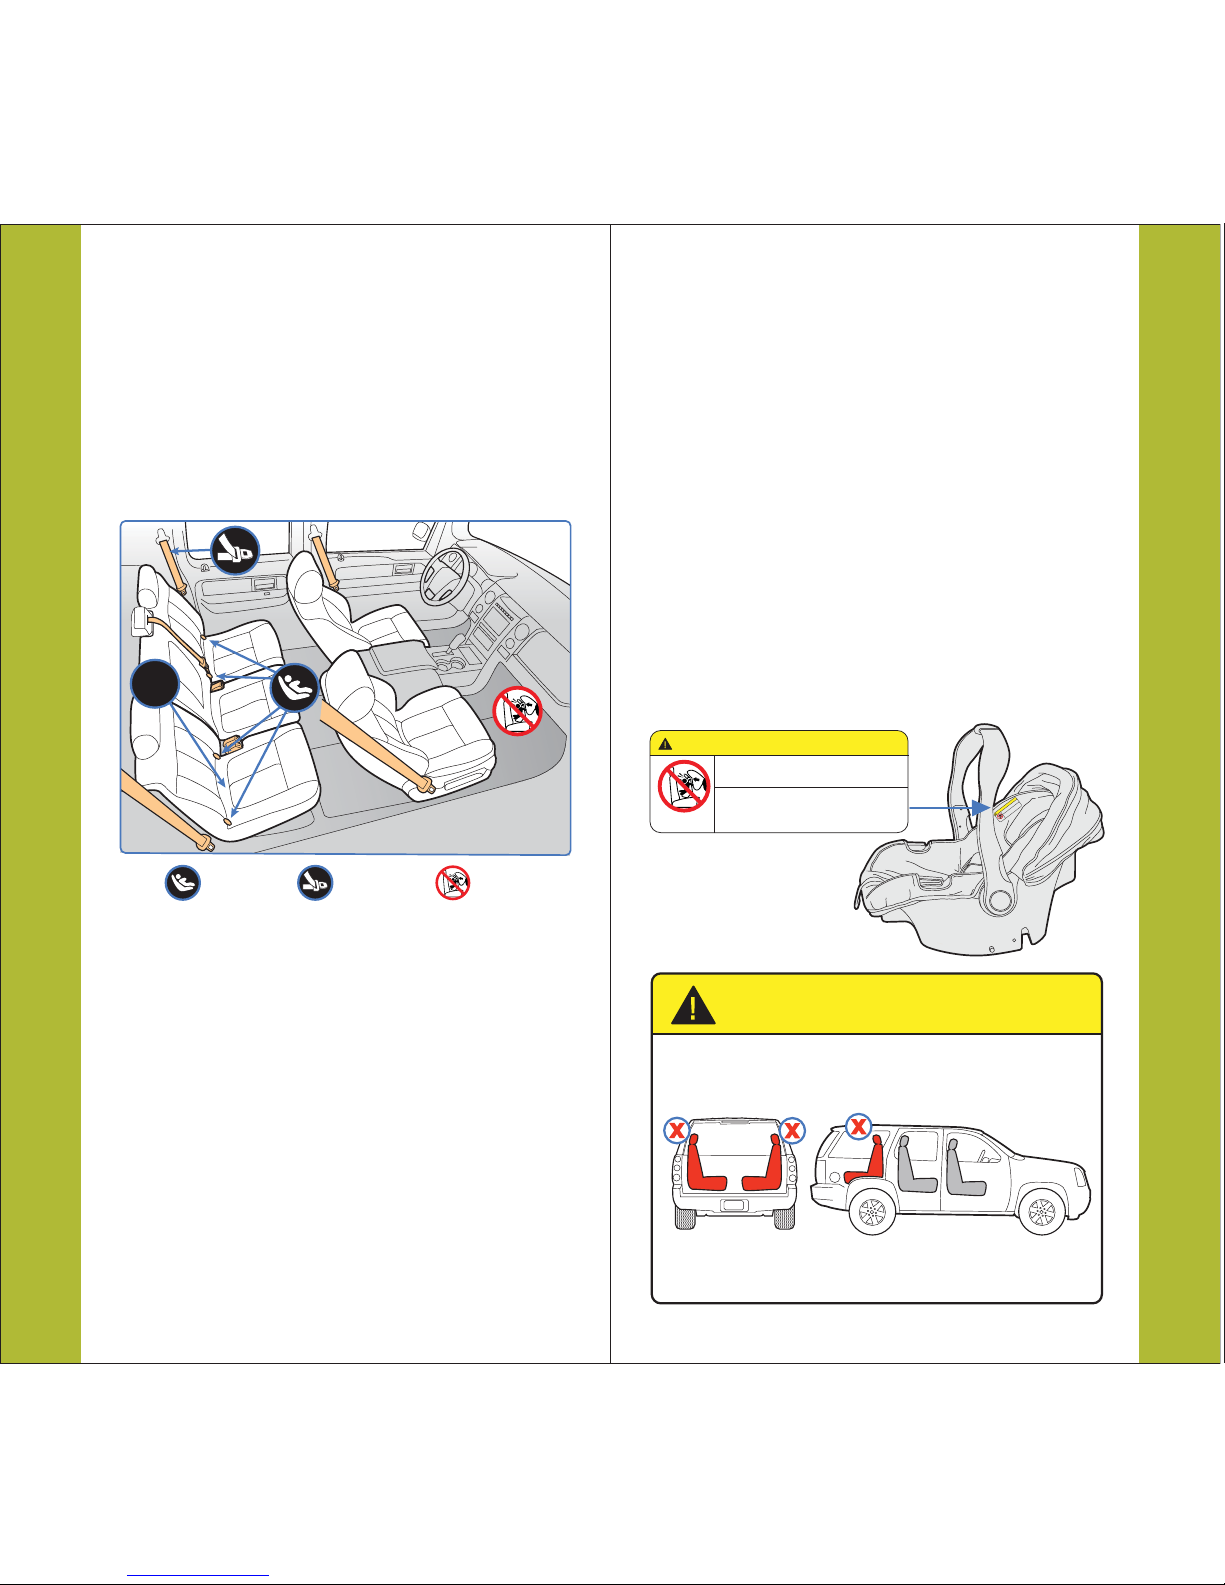
Selecting a Vehicle Seating Position ......................... 18
Options for SecuringYour Child Restraint ............20
Identifying Your Vehicle Seat Belts ............................22
Installation and Use
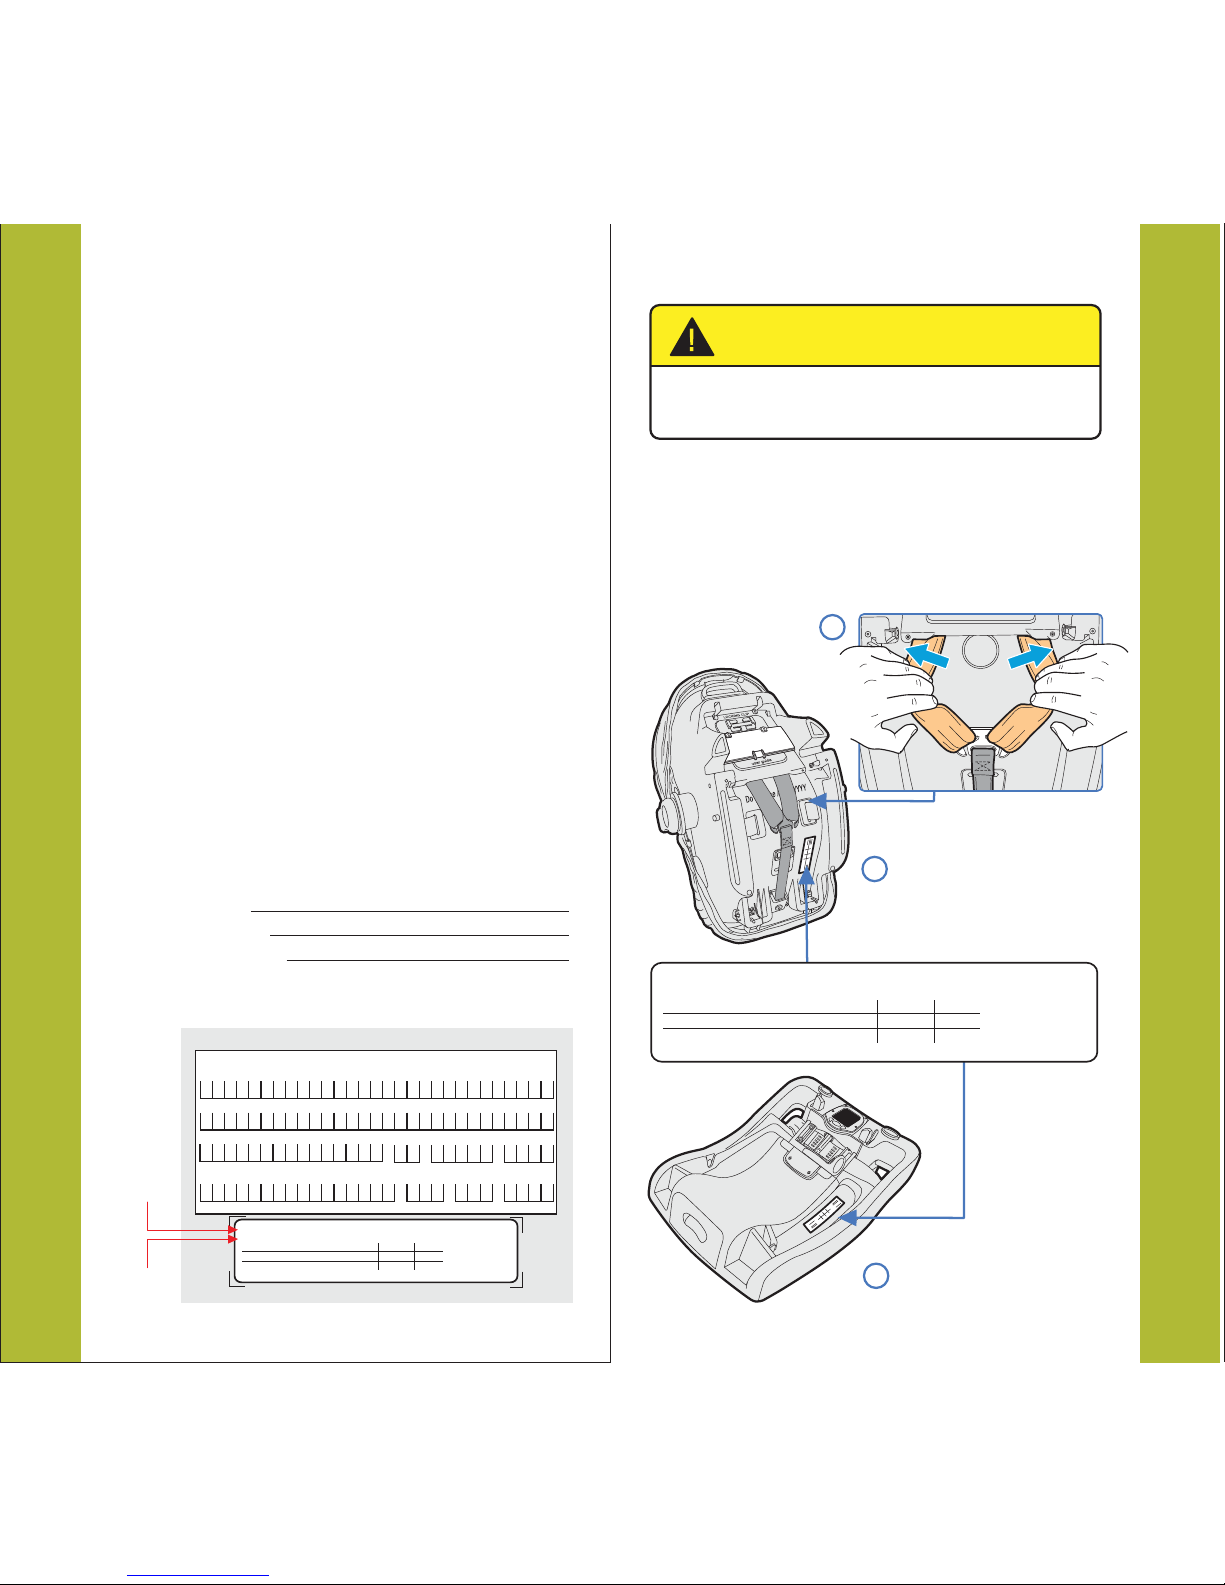
Base Installation ............................................... 28
Base Installation with LATCH .................................. 28
Base Installation with Lap/Shoulder Belt ................34
Base Installation with Locking Clip ..........................42
Base Installation with Lap Belt ..................................44
Carrier Attachment/Removal ....................................51
Releasing Base and LATCH Connectors ................52
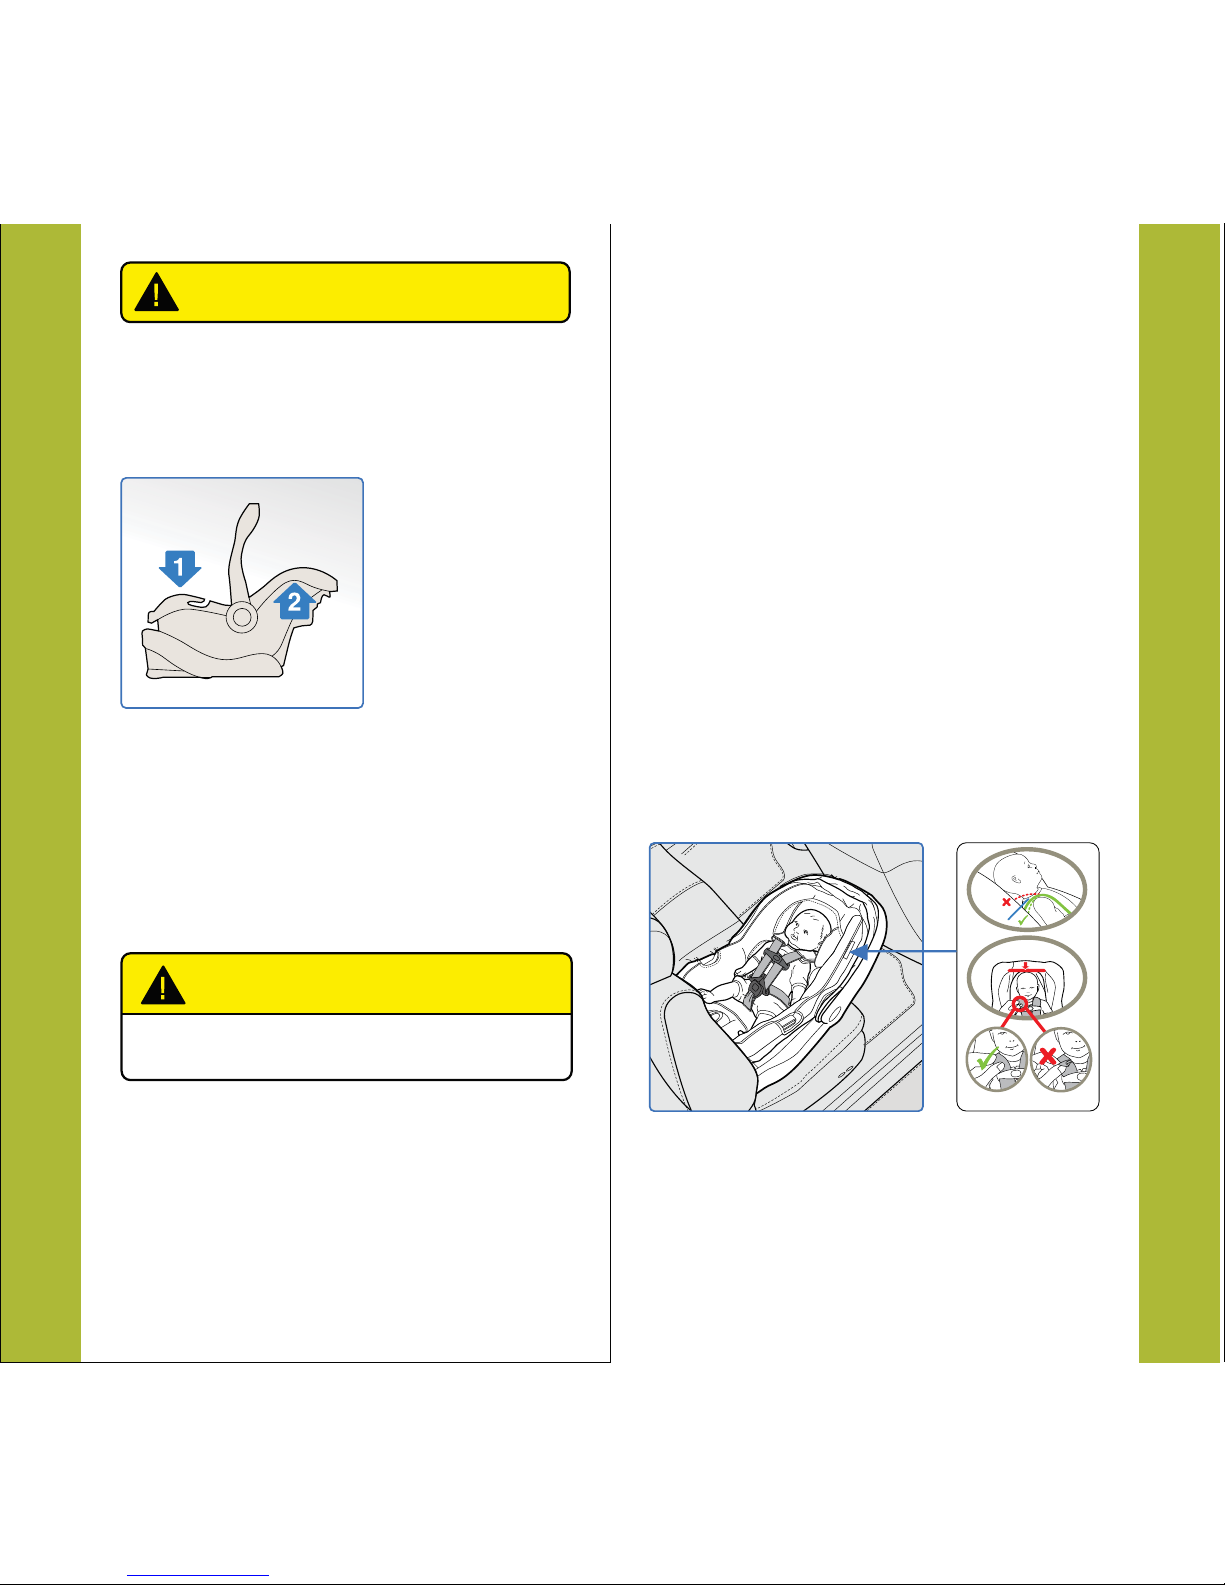
Carrier Installation ...........................................54
Carrier Installation withVehicle Belt .......................54
Carrier Installation with Locking Clip .....................59
General Use ...................................................... 62
Securing Your Child .................................................... 62
Adjusting Buckle Position .......................................... 66
Adjusting the Handle................................................... 67
Canopy Use .................................................................. 68
Removing the Seat Pad ...............................................69
Replacing Batteries ......................................................73
Additional Information
Additional Resources ..................................................74
Safe Practices ................................................................74
Care and Cleaning .......................................................75
Certification ..................................................................76
Aircraft Use ...................................................................76
Replacement Parts ...................................................... 76
Warranty ........................................................................77
Thank you...from Summer
Dear Parents,
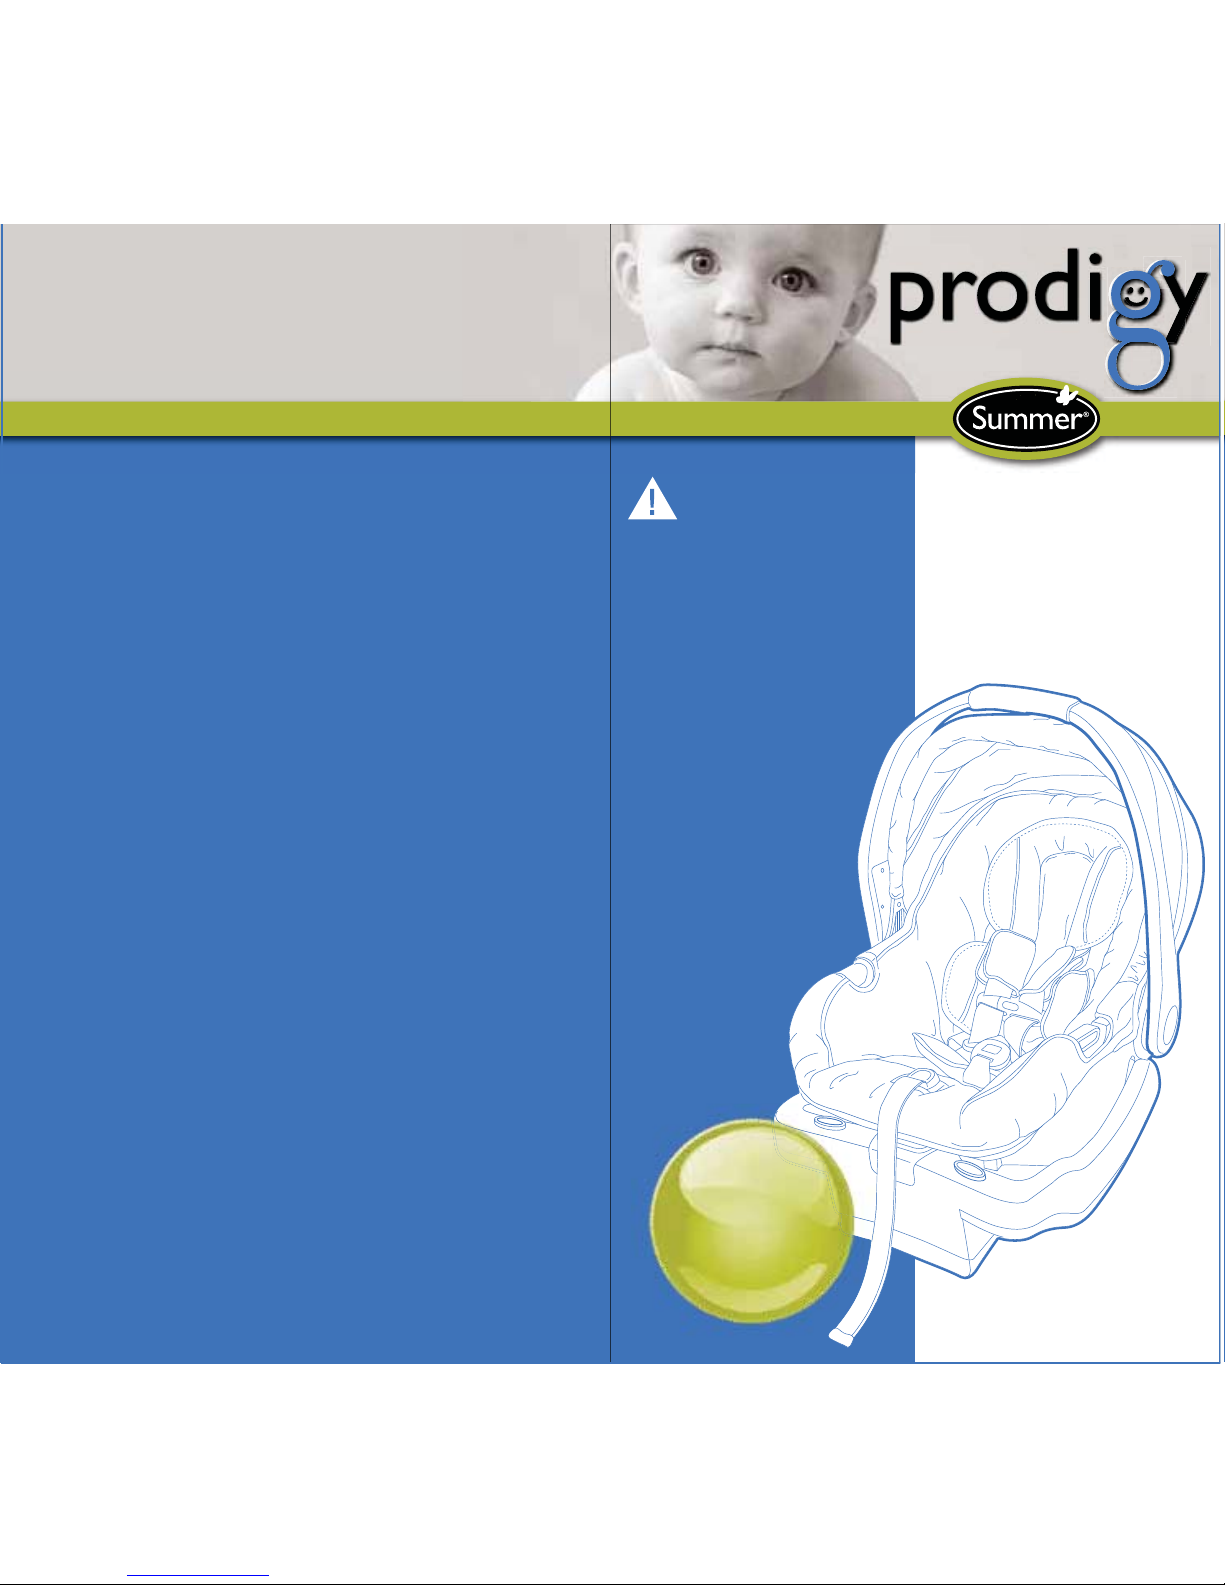
Thank you for purchasing the innovative Prodigy Infant
Car Seat and Base! It is our strong belief that this
one-of-a-kind system will make travel with your baby
safer, simpler and more comfortable.
Knowing that over 75% of infant car seats are installed
incorrectly, Summer Infant saw an opportunity to
develop a revolutionary car seat that is both easy to
install and safe for your child. It is important to take the
time to read and understand all of the information in
this User Guide and on the product labels. While our
system is intuitive and easy to use, it’s important to
familiarize yourself with all of the information we have
provided. For more information on your new Prodigy
Infant Car Seat and Base, remember to visit us online at
www.summerinfant.com/prodigy.
Here at Summer Infant, we are proud of the Prodigy
Infant Car Seat’s ground-breaking design and we trust
that it will meet and exceed all of your expectations.
Please enjoy your Prodigy and may each and every trip
you take be “the best time of your life ”!
If you have any questions or concerns about
this child restraint, please contact us at:
Website: www.summerinfant.com
Email: customerser[email protected]
Fax: 401-671-6051
Phone: 1-800-268-6237
8 A.M. – 6 P.M. EST M-F
Mailing Summer Infant, Inc.
1275 Park East Drive
Woonsocket, RI 02895
Thank you...from Summer
2
Table of Contents
Table of Contents
Address:
®™
™
™
™
™
®
™
™

Registration, Recall and
Expiration Information
Registration and Recall
Your Prodigy comes with a registration card
(fig. 1) that contains important information
regarding your child restraint – mail it in today!
Child restraints could be recalled for safety
reasons.You must register this restraint to be
reached in a recall. Send your name, address,
email address if available and the restraint’s
model number and manufacturing date to
1275 Park East Drive,Woonsocket, RI 02895 or
call 1-800-268-6237 or register online at
http://www.summerinfant.com/productregistration
For recall information, call the U.S. Government’s
Vehicle Safety Hotline at 1-888-327-4236
(TTY: 1-800-424-9153), or go to
http://www.NHTSA.gov.
Please take a moment to fill in your product
information below for future reference.
Model Name:
Model Number:
Date of Purchase:
Safety Information
4
Notice of Expiration Date
To prevent injury due to deterioration or hidden
damage, do not use this child restraint after the
expiration date or if it has been in a crash. (see
“Re-Use After a Crash” section of this User
Guide for more information).There are three (3)
locations where the expiration date can be found:
Safety Information
5
Label on the bottom
of the Carrier
Label on the top
of the Base
Engraving on the
back of the Carrier
Do Not Use After YYYY
DO NOT use this child restraint if it is more
than 6 years old.
WARNING:
1
2
3
CHILD RESTRAINT REGISTRATION CARD
TARJETA DE REGISTRO PARA SILLA DE AUTO
Name / Nombre
Address / Dirección
City / Cuidad State / Zip Code / Código Postal
Estado
Email Address (optional) / Correo Electrónico (opcional) Telephone / Teléfono
Tear off and mail this card. / Corte y envíe esta tarjeta.
—
——
21060-L01
MODEL NAME / NOMBRE DEL MODELO:
MODEL NUMBER / NÚMERO DEL MODELO:
MANUFACTURED IN / FABRICADO EN:
DO NOT USE AFTER / NO USAR DESPUÉS DE:
FACTORY CODE / CÓDIGO DE FÁBRICA: 24
Year/Año Month/Mes Day/Día
Summer Infant, Inc.
1275 Park East Drive
Woonsocket, RI
02895 USA
www.summerinfant.com
1-800-268-6237
MADE IN CHINA
Prodigy Travel System
21050
2011 01 27
2017 01 27
Model
Name
Model
Number
MODEL NAME / NOMBRE DEL MODELO:
MODEL NUMBER / NÚMERO DEL MODELO:
MANUFACTURED IN / FABRICADO EN:
DO NOT USE AFTER / NO USAR DESPUÉS DE:
FACTORY CODE / CÓDIGO DE FÁBRICA: 24
Year/Año Month/Mes Day/Día
Summer Infant, Inc.
1275 Park East Drive
Woonsocket, RI
02895 USA
www.summerinfant.com
1-800-268-6237
MADE IN CHINA
Prodigy Travel System
21050
2011 01 27
2017 01 27
fig.1- Example registration card
Example manufacture label
™

sA snug strap should not allow any slack.
It lies in a relatively straight line without
sagging. It does not press on the child’s
flesh or push the child’s body into an
unnatural position.
sNEVER use clothing or blankets that interfere
with fastening or tightening the harness.
Instead, place a blanket over the child AFTER
they have been properly secured in the
harness.
sNEVER leave the child unattended.
sALWAYS keep the child properly secured in
the harness when the child is in the carrier.
Installation in Vehicle
sNEVER place this child restraint on a front
seat with an air bag. DEATH OR SERIOUS
INJURY can occur. An airbag can strike a
rear-facing infant restraint with enough force to
crack the shell and seriously injure or kill an
infant.
sRefer to the vehicle owner’s manual before
installing this restraint in a seating position with
side airbags.
sAccording to accident statistics, children are
safer when properly installed in the rear seating
positions rather than in the front seating
positions.
BeforeYou Begin
sYour child’s safety depends on you! Please take
the time to read and understand all instructions
and warnings in this User Guide.
sCheck your vehicle owner’s manual for
information on installing child restraints.
sNEVER allow others to use this child restraint
unless they have read and understood all
instructions in this User Guide.
sPlease keep this User Guide in the storage
location on the back of the carrier for future
use.
Fit to Child
sUse this child restraint with children who weigh
between 4 and 32 pounds (1.8 and 14.5 kg)
AND whose height is 32 inches (81.3 cm)
or less.
sDO NOT use this child restraint if the top of
the child’s head is less than 1 inch (25 mm) from
the top of the shell.
s!LWAYSUse the newborn inserts for infants who
weigh between 4 and 11 pounds (1.8 and 5 kg).
sSnugly adjust the harness around your child. A
loose harness could cause ejection in a sudden
stop or crash, which may result in serious injury
or death.
7
6
Safety Information
Safety Information
WARNING: WARNING:

- DO NOT place carrier near a window
where cords from blinds or drapes can
strangle a child.
- DO NOT hang strings on or over the
carrier or attach strings to toys and carts.
- DO NOT place items with a string around
a child’s neck, such as hood strings, pacifier
cords, etc.
sFall Hazard:
Child’s movements can slide carrier.
- NEVER place carrier near edges of
countertops, tables, or other elevated
or uneven surfaces.
- DO NOT use on shopping carts.
General Use Warnings
sCheck the condition of the restraint.
DO NOT use this child restraint if it is
damaged or broken. Call 1-800-268-6237 to
find out if the damaged part(s) can be replaced.
sDO NOT use this restraint if any of the straps
are cut, frayed or damaged in any way.
sNEVER modify this restraint in any way
except as instructed to in this User Guide.
sDO NOT use any accessories, pads, toys, or
other products supplied by other
manufacturers with this child restraint.These
items have not been crash tested with this
restraint and may cause serious injuries to
your child and other occupants.
sALWAYS install this child restraint rear-facing
when using in a vehicle. Your child could be
seriously injured or killed if you install this
restraint forward facing.
sONLY install this child restraint in forward
facing vehicle seats.
sNEVER install this child restraint in rear or
side -facing vehicle seats.
sNEVER use this restraint in a vehicle seating
position where it cannot be tightly secured.
sALWAYS secure this child restraint with
either the vehicle’s child restraint anchorage
system (LATCH), if available, or with a vehicle
seat belt. Follow the instructions in this User
Guide for proper installation.
sALWAYS secure this restraint to the vehicle,
even when not occupied. In a crash an
unsecured child restraint may injure other
occupants.
Infant Carrier Use
sNEVER leave child unattended.
sSuffocation Hazard:
Infant carrier can roll over on soft surfaces
and suffocate child. NEVER place carrier on
beds, sofas or other soft surfaces.
sStrangulation Hazard:
Child can strangle in loose restraint straps.
Always use harness. NEVER leave child in
carrier when straps are loose or undone.
- Keep strings and cords away from child.
Strings and cords can cause strangulation. 9
8
Safety Information
Safety Information
WARNING: WARNING:

Use Recommendations
Children should remain rear-facing until
they have reached a minimum of 1year of
age AND weigh at least 20 pounds (9kg).
Summer Infant and the American
Academy of Pediatrics recommend
keeping children rear-facing for AS LONG
AS POSSIBLE. It is best for children to
ride rear-facing to the highest weight or
height allowed by the manufacturer.
Use this infant child restraint with children who
meet ALL of the following requirements:
Please refer to the “Securing Your Child” section
of this User Guide for more detailed instructions
for fitting your child to this infant seat.
Discontinue use of the child restraint if
your child does not meet ALL of the
requirements listed above. 11
10
Safety Information
Safety Information
Weight:
Between 4 and 32 lbs. (1.8-14.5 kg)
Height:
s32 in (81.3 cm) or less
sTop of head is at least 1in (25 mm)
below the top of the shell
CLICK! CHECK!
WARNING:
21060-L28
www.summerinfant.com
1-800-268-6237
MAX HEAD HEIGHT
ALTURA MAX.
1” (25 mm)
Warm Weather Warnings
s)NWARMWEATHERCONDITIONSACHILDRESTRAINT
may become very hot. Check all surfaces of
the child restraint before placing your child in it.
Re-Use After A Crash
sDO NOT re-use this car seat after a crash.
sDO NOT sell or allow others to use this car
seat if it has been in a crash. Damage on car
seats can be difficult to see and verify. You may
contact your automobile insurance company
for information regarding replacement of car
seats after a crash.
DEATH or SERIOUS INJURY can occur
WARNING:
sTo prevent ejection when Carrier is used
with base, make sure the Carrier is
secured to Base. Lift front and back to
check that Carrier is secured.

13
Front
Infant Seat Features
12
Infant Seat Features
Harness Anchor
(located behind seat pad)
Handle
Canopy
Chest Clip
Harness Straps
Buckle
Harness Adjuster Button
Harness Adjuster Strap
Carrier Belt Guides
Seat Pad
Anchor Clips
Back
Carrier Release
Handle
Locking Clip
User Guide Storage
Splitter Plate
Manufacture Label
A-Lock
Infant Cushions
Head Support
Shoulder Pads
Body Insert
Prodigy™Infant Car Seat Parts
11
1
2
3
4
5
7
6
8
1
2
3
4
5
7
6
9
8
a
b
c
a
b
c
12
13
15
14
17
16
12
17
15
16
13
14
10
10
9

15
Infant Seat Features
14
Infant Seat Features
Prodigy™ Infant Base Parts
Battery Compartment
Recline Adjustment Foot
LATCH Connectors
LATCH Connector Storage
Recline Adjustment Buttons (x2)
Control Panel with Smart Screen
Carrier Attachment Hooks
Tension Sensor
LATCH Webbing
Spool
Belt Tightening Handle
Manufacture Label
Additional Storage
9
8
10
11
12
12
13
13
11
1
2
3
4
5 6 7
10
1
2
3
4
5
7
6
9
8
push!
press!
pull!

Car Seat Features
Your Prodigy Infant Car Seat has three (3)
innovative features that you should know and
understand:
1. Smart Screen Technology
2. Belt Tightening System
3. SafeGuard 1Adjust Harness System
Smart Screen Technology
The Smart Screen Technology guides parents
through the quick and easy installation process.
The screen on the control panel guides you
through the installation process:
“Click” – Attach the Base to the vehicle.
“Level” – Adjust the Base angle to achieve
the correct amount of recline
for your baby.
“Tighten” – The Belt Tightening System makes
it easy and fast for you to
properly secure the Base to the
Vehicle.
There is a “Test” button located on the Control
Panel that allows you to check that the
installation is secure. It is recommended to
“Test” the base installation once a month, or
more frequently as needed. The Control
Panel will power off on its own. 17
Infant Seat Features
16
Infant Seat Features
pull!
Belt Tightening System
The system
consists of a Belt
Tightening Handle
and a Spool. The
Base can be
installed with
either the Vehicle
Seat Belt OR
LATCH.
The Belt Tightening System is an easy-to-use
ratcheting system that firmly fastens the base to
the vehicle seat without any strenuous effort on
the part of the caregiver.
The SafeGuard
1Adjust Harness
System is a
one-handed,
no-rethread
harness system.
With one pull it
automatically
adjusts to the
child’s height,
allowing for a
fast and snug fit.
NOTE:The Spool
must be rotated
to the proper
position for
installation with
either the Vehicle
Seat Belt OR
LATCH.
Installation
with Seat Belt
SafeGuard 1Adjust Harness System
Installation
with LATCH
OR
®™
®™
®
™
™

19
Selecting a Vehicle Seating
Position
Always refer to your vehicle owner’s manual to
help identify your vehicle’s specific features and
child restraint installation instructions.
NOTE: Your vehicle’s features may be
considerably different than those pictured below.
Selecting a seating position is a crucial
part of the installation process.
Please consult your vehicle owner’s manual for
more information on seating positions that can
be used safely with this child restraint. If you are
still unsure where to place your child, please
contact your vehicle manufacturer.
Safety Tips
s.ATIONAL(IGHWAY4RAFFIC3AFETY!DMINISTRATION
(NHTSA) alerts vehicle owners that, according
to crash statistics, children 12 and under are
Vehicle Compatibility
18
Vehicle Compatibility
safer when properly restrained in the rear
seating positions rather than in front
seating positions.
s!LWAYSREFERTOYOURVEHICLEOWNERSMANUAL
for child restraint installation instructions.
- Whenever a secure installation can be
achieved, install the child restraint in
the rear center seating position.
- For vehicles with airbags, always refer to
vehicle owner’s manual for child restraint
installation information.
- DO NOT use child restraint rear-facing on
a front seat with an active airbag.
- If a vehicle front seat location with an active
airbag must be used, follow the vehicle
manufacturer’s instructions for disabling
airbags.
DO NOT place rear-facing child seat on front seat with air bag.
DEATH OR SERIOUS INJURY can occur. The back seat is the
safest place for children 12 and under.
NO poner sillas de auto de espaldas en asientos
frontales equipados con bolso de aire. Se pueden producir
LESIONES GRAVES O LA MUERTE. El asiento trasero es el lugar
más seguro para niños menores de 12 años.
WARNING / ADVERTENCIA:
www.summerinfant.com
1-800-268-6237
21060-L29
Seat beltsLATCH Airbag
DONOTplace rear-facingchild seat on front seat with air bag.
DEATHORSERIOUS INJURYcan occur. The back seat is the
safestplacefor children 12 andunder.
NOponersillasde auto de espaldas a la marcha en asientos
frontalesequipadoscon airbag. Se pueden producir LESIONES
GRAVESOLA MUERTE. El asiento trasero es el lugar más seguro
paraniñosmenores de 12 años.
WARNING/ ADVERTENCIA:
www.summerinfant.com
1-800-268-6237
21060-L29
Vehicle seats that face
the side of the vehicle
Vehicle seats that face
the rear of the vehicle
DO NOT use this child restraint with the
following vehicle seats:
WARNING:
Seat
Bight

21
Options For SecuringYour
Child Restraint
There are two methods for securing your child
restraint:
1.LATCH OR 2. Vehicle Seat Belt
Please consult your vehicle owner’s manual for
information regarding LATCH and your vehicle’s
seat belt systems.
NOTE: Some vehicles do not have LATCH and
some vehicles have multiple types of vehicle seat
belt systems.
LATCH stands for Lower Anchors and Tethers
for CHildren. (NOTE: Only lower anchors are
used with this child restraint. No tether is
needed.)
Most vehicles manufactured after September
2002 are equipped with LATCH.
Vehicle Compatibility
20
Vehicle Compatibility
Consult your vehicle owner’s manual to
determine if your vehicle has LATCH.
NOTE: Some vehicle owner’s manuals may
identify LATCH as “ISOFIX”. ISOFIX is the
European term for LATCH and can be used in
the same way as the LATCH.
LATCH is the preferred method of
installation if LATCH is available in your
vehicle.
Vehicle Seat Belts
sThere are some vehicle belts that will
NOT work with this child restraint or
that require additional steps.
s#HECKYOURVEHICLEOWNERSMANUAL
for seating locations recommended
for installing a child restraint.
s4HISCHILDRESTRAINTCANBESECUREDWITHTHE
vehicle belt:
with base without base
LATCH
DO NOT use both LATCH and the vehicle
seat belt at the same time to secure your child
restraint. Use one or the other.
WARNING:
If your vehicle
does not have
LATCH the child
restraint MUST
be properly
secured with the
vehicle seat belt.
Top Tether
Anchor
Lower
Anchor

23
IdentifyingYour Vehicle
Seat Belts
Consult your vehicle owner’s manual for
information regarding your vehicle seat belt
system(s). You must determine if your vehicle
seat belts are compatible with this child restraint.
NOT all vehicle seat belts will work with
this child restraint.
UNSAFE Vehicle Seat Belt Systems
DO NOT use any of the following seat belt
systems to secure this child restraint:
Vehicle Compatibility
22
Vehicle Compatibility
Lap Belts with
Emergency Locking
Retractor (ELR)
This lap belt stays loose
and only locks in a crash
or sudden stop.
Motorized
(automatic) Vehicle
Seat Belts
Lap/Shoulder
Vehicle Seat Belts with
2 Retractors
Unless the lap portion
has a “Lock Mode”
SAFE Vehicle Seat Belt Systems
The following seat belt systems can be used with
this child restraint if the seating location meets all
other requirements of these instructions
and those in your vehicle owner’s manual.
Lap/Shoulder Belts
Switchable Retractor with Sliding Latch Plate
Has a latch plate that slides freely on the webbing
(fig.1). Has a retractor that manually switches
from ELR (Emergency Locking Retractor)
mode (fig. 2) to ALR (Automatic Locking
Retractor) mode (fig. 4) once the belt webbing
has been pulled completely out of the retractor
(fig. 3).
webbing buckle
sliding latch plate
1
2
3
retractor
Door Mounted
Vehicle Seat Belts
Inflatable
Lap/Shoulder
Vehicle Seat Belts
4
5
latch plate
buckle
vehicle belt webbing
fig.1fig.2 ELR
2
4
3
1
5

The retractor only locks in an emergency
situation, such as a sudden stop or crash.The
latch plate locks the vehicle belt when the latch
plate and webbing lie flat (fig. 1). If the latch plate
and vehicle belt do not lie flat then the vehicle
belt may remain unlocked (fig. 2).
locking
latch plate
webbing buckle
Pull the seat belt all the
way out of the retractor to
switch to LOCKING mode.
ELR with Sliding Latch Plate
(Requires a Locking Clip)
ALR with Sliding Latch Plate
ELR with Locking Latch Plate
webbing buckle
sliding latch plate
fig.3 fig.4 ALR
fig.1 Locked
fig.2 Unlocked
fig.3
Has a latch plate that slides freely on the
webbing (fig.1). The retractor only locks in an
emergency situation, such as a sudden stop or
crash.
IMPORTANT: This seat belt system requires
the use of a Locking Clip (fig. 2). See page 42 for
installation with Base, or page 59 for installation
with Carrier only.
Has a latch plate that slides freely on the
webbing (fig. 1). The ALR functions by pulling the
seat belt out at least 24” - 36” to activate the
LOCKING mode (fig. 2). Once the locking
mode is activated, the belt should only get
shorter (fig. 3).
fig.1
25
Vehicle Compatibility
24
Vehicle Compatibility
webbing buckle
sliding latch plate
fig.1
fig.2
1 inch!

27
Vehicle Compatibility
26
Vehicle Compatibility
Automatic Locking Retractor (ALR)
with Sewn-On Latch Plate
The latch plate is sewn-on to the vehicle belt
webbing (fig.1).The ALR functions by pulling the
seat belt out at least 24 - 36” to activate the
LOCKING mode (fig.2). Once the locking
mode is activated, the belt should only get
shorter (fig.3).
24” to
36”
fig.3fig.2
Lap Belts
Locking Latch Plate
When buckled, if the seat belt and latch plate lie
flat, the latch plate will lock (fig.1). If they are
tilted, the latch plate will remain unlocked (fig. 2).
Locked Locking Bar Unlocked
locking
latch plate
webbing
buckle
fig.1fig.2
fig.1
fig.3
sewn-on
latch plate
webbing buckle
fig.2
24” to
36”

Base
Installation
with LATCH
Remove LATCH
connectors from the
storage area on the
bottom of the Base.
Place the base on
the vehicle seat with
the Control Panel
closest to the seatback.
29
Base Installation
28
Base Installation
1
2
IMPORTANT! The LATCH belt webbing
MUST be looped onto the Spool BEFORE
installing. If already looped onto Spool, skip
to step 3 on page 30.
Rotate the Belt
Tightening Handle
to the left until the
LATCH icon on the
Spool is facing up.
rotate!
rotate!
Spool
Before you begin
sCheck that your vehicle has LATCH.
Refer to your vehicle owner’s manual and see
page 20 of this User Guide for more
information about LATCH.
s4HISCHILDRESTRAINTISMANUFACTUREDTOBEREADY
to install with LATCH - out of the box. If you
are going to install with the vehicle seat belt,
please refer to page 34 of this User Guide.
s2EADANDUNDERSTANDTHEh3ELECTINGA6EHICLE
Seating Position” section on page 18 of this
User Guide.
s#HECKTHATYOUAREPARKEDONALEVELSURFACE
(fig.1).
sNOTE: This child restraint
can be installed and used
without the use of the
Control Panel with Smart
Screen. The Smart Screen
is an aid for installation, but
is NOT required. Follow
the directions carefully on page 31step 6.
sIMPORTANT! Install this child
restraint with LATCH OR the vehicle
seat belt. DO NOT USE BOTH.
fig.1
LATCH icon facing up.
To attach the LATCH
belt onto the Spool,
open the loop on the
belt and slide the loop
onto the short end of
the Spool.
A
B
C
(Remove Battery Tab)

Press on the
Control Panel once
you’ve attached the
LATCH connectors to
the vehicle anchorage
bars.
The word “Level” will
light up, indicating that
you need to adjust the
base angle.
Press the Recline
Adjustment Buttons on
both sides of the
Control Panel while
lifting or lowering the
base until a appears.
Ideally the “level to
ground” line on the side
of the base should be
level to the ground.
Press the
button on the Control
Panel. The word
“Click” will light up.
Attach the LATCH
connectors to the
vehicle anchorage bars
located in the seat
bight (crease of the
vehicle seat).
31
Base Installation
30
Base Installation
press!press!
CARRIERIS INSTALLED IN VEHICLE WITH THE BASE.
LATCH
STORAGE
LINEMUST BE LEVEL WITH GROUND WHEN
21110-L22
CARRIER IS INSTALLED IN VEHICLE WITH THE BASE.
LATCH
STORAGE
LINE MUST BE LEVEL WITH GROUND WHEN
21110-L22
press!press!
click!
click!
NEXT
NEXT
The connection is
secure when a click
is heard. Check that
the LATCH webbing
is not twisted.
(To release, press
the red button on
the connector and
pull off the vehicle
anchor bar.)
push!
push!
click!
pull!
press!
NEXT NEXT
3
4
5
6
click!
click!

Once the angle is
correct the word
“Tighten” will
automatically light up
on the Smart Screen.
Tighten the installa-
tion by rotating the
Belt Tightning Handle
to the left until a
appears.
The word “Complete”
will light up on the
Smart Screen letting
you know the installa-
tion is complete.
ALWAYS check
for a secure installation.
If the Base moves more
than one inch side-to-
side at the Belt Path,
repeat the above steps.
Base Installation
32 33
Base Installation
rotate!
rotate!
NOTE: If needed, a
pool noodle or a
tightly rolled towel
may be used under
the Recline Adjust-
ment Foot to
correctly adjust the
angle of the base.
The foot MUST be
on the lowest
position (#1).
7
8
Checklist
Check that the base angle is correct when
parked on a level surface:
1. Check that the Smart Screen shows a
under “Level”, AND
2. Check that the “level to ground” line
on the side of the Base is level to
the ground.
Check that the Base is securely fastened
to the vehicle.
Check that the base cannot move more than
one inch side-to-side at the belt path.
REMEMBER! Use the “TEST” button
on the Control Panel to check your
installation approximately 30 days
from now, or as needed.
Check that the
LATCH connec-
tors are secure,
untwisted, and
in the upright
position.
less
than
1”

1
Base Installation
34
Base Installation
with Lap/Shoulder
Belt
Place the base on
the vehicle seat with
the Control Panel
closest to the seatback.
35
Base Installation
Before you begin
s)DENTIFYYOURTYPEOFVEHICLESEATBELTSYSTEMS
and ensure that they are compatible with this
child restraint. Refer to your vehicle owner’s
manual for more information on how to lock
your vehicle seat belt for installation with child
restraints.
It is VERY IMPORTANT that you
know how to LOCK your vehicle seat belt
when installing this child restraint.
s2EADANDUNDERSTANDPAGESOFTHIS
User Guide. Depending on the type of seat
belt system(s) you have in your vehicle, it might
require additional steps or parts to properly
install this child restraint.
s4HISCHILDRESTRAINTISMANUFACTUREDTOBEREADY
to install with LATCH - out of the box. If you
are installing with the vehicle seat belt, please
follow the directions on page 35 to remove
the LATCH webbing.
s2EADANDUNDERSTANDTHEh3ELECTINGA6EHICLE
Seating Position” section on page 18 of
this User Guide.
s#HECKTHATYOUAREPARKEDONALEVELSURFACE
(Refer to fig. 1on page 28)
sNOTE: This child restraint
can be installed and used
without the use of the
Control Panel with Smart
Screen. The Smart Screen
is an aid for installation, but is NOT required.
Follow the directions on page 39 step 10.
sIMPORTANT! Install this child
restraint with LATCH OR the vehicle
seat belt. DO NOT USE BOTH.
IMPORTANT! The LATCH belt webbing
MUST be removed from Spool BEFORE
installing. If already removed from Spool,
skip to step 2 on page 36.
To remove the
LATCH belt from
the Spool, slide the
webbing down and
off the short end of
the Spool.
NOTE: You may
not be able to see
the short end of
the Spool.
Rotate the Belt
Tightening Handle
to the left until the
seat belt icon on
the Spool is facing
up.
Seat belt icon facing
up.
rotate!
rotate!
remove!remove!
Spool
A
B
C
(Remove Battery Tab)

Pull the SHOULDER
portion of the seat belt
to make the LAP
portion of the seat belt
webbing snug.
Thread ONLY lap
portion only of seat
belt through Spool.
Thread BOTH lap
and shoulder portions
of seat belt through
Tension Sensor.
Pull on the
SHOULDER portion
of the vehicle belt to
remove excess slack.
Press the
button on the Control
Panel. The word
“Click” will light up.
Route the seat belt
through the belt path.
Buckle the seat belt.
Base Installation
36 37
Base Installation
pull snug!
pull snug!
thread
webbing!
thread
webbing!
5
click!
click!
NEXT
NEXT
3
2
4
8
6
7

Press the button
on the Control Panel.
The word “Level” will
light up, indicating that
you need to adjust the
base angle.
Press the Recline
Adjustment Buttons on
both sides of the Control
Panel while lifting or
lowering the base until a
appears. Ideally the
“level to ground” line
on the side of the base
should be level to the
ground.
Remove excess slack
and pull snug.
MAKE SURE:
1. LAP portion only is
routed through Spool.
2. LAP and
SHOULDER portions
are routed through
Tension Sensor.
Base Installation
39
Base Installation
38
CARRIER IS INSTALLED IN VEHICLE WITH THE BASE.
LATCH
STORAGE
LINE MUST BE LEVEL WITH GROUND WHEN
21110-L22
NEXT
9
NEXT
10
press!press!
press!
press!
CARRIERIS INSTALLED IN VEHICLE WITH THE BASE.
LATCH
STORAGE
LINEMUST BE LEVEL WITH GROUND WHEN
21110-L22
lock
vehicle
belt!
lock
vehicle
belt!
LOCK YOUR
VEHICLE SEAT
BELT!
REFER TO page 22 of
this User Guide and to
your vehicle owner’s
manual for more
information regarding
locking your vehicle
belt.
If you have an ELR (Emergency Locking
Retractor) with a sliding latch plate, a
LOCKING CLIP must be used. Please refer
to page 42 of this User Guide for more
detailed installation instructions.
Shown: Switchable Retractor
pull snug!
pull snug!
Table of contents
Other Summer Car Seat manuals