43
when properly restrained in rear vehicle seating
positions, rather than in the front of the vehicle.
Never leave child unattended.
Never leave child restraint and base or
other item unbelted
or unsecured in your
vehicle. Any unsecured
item when in motion
can harm occupants.
Always check carrier
to base connection.
DO NOT allow carrier
or handle to contact
interior of vehicle when installed on base.
Always check buckle and other parts for
hot surfaces. A carrier left uncovered in the
sun could burn a child. Cover with blanket if
leaving in car.
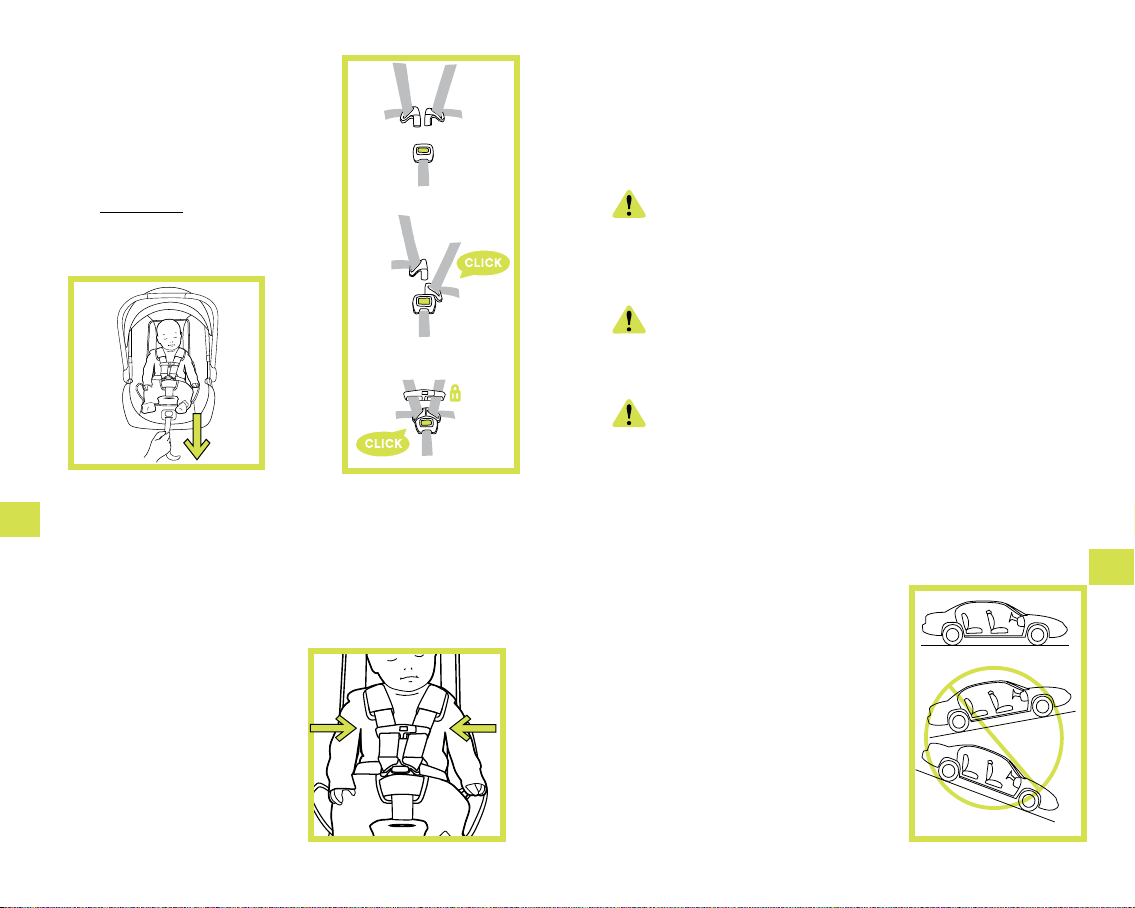
Never install Child
restraint in a seat with
a front airbag. DEATH
or SERIOUS INJURY may
occur. Refer to your
vehicle owner’s manual
or side airbag warnings
and information.
Do not use child restraint if any harness
straps are cut, frayed or damaged.
Do not use child restraint if base or
carrier are damaged in anyway. To find
out if damaged parts are replaceable, call
1-855-NUNA-USA.
Replace this child restraint if it has been
involved in a car accident, even if it was
minor and there appears to be no damage
to the child restraint.
Never modify any part of the child restraint.
Only disassemble child restraint if instructed
to by instruction manual.
Do not use any products or accessories
in conjunction with child restraint not
supplied with child restraint.
Do not use child restraint if it is more than
7 years old. Check the manufacturer´s label
or stamped ‘do not use after’ date on the
underside of the carrier and base.
NEVER use clothing or blankets that
interfere with providing a properly tightened
harness. An unsecured child can come
out of the restraint during a crash. Place
blankets over child AFTER harness has
been properly tightened.
Fall hazard: Child’s movement can slide
carrier. NEVER place carrier near edges of
countertops, tables or other high surfaces.
Always stay within arms reach whenever
carrier is not on floor/ground.
Suffocation hazard: Infant carrier can roll
over on soft surfaces and suffocate child.
Never place carrier on beds, sofas, or other
soft surfaces.
Strangulation hazard: Child can strangle in
loose restraint straps. Always use harness.
Never leave child in carrier when straps are
loose or undone.
A snug strap should not allow any slack. It lies
in a relatively straight line without sagging. It
CLICK
1
2
CHECK