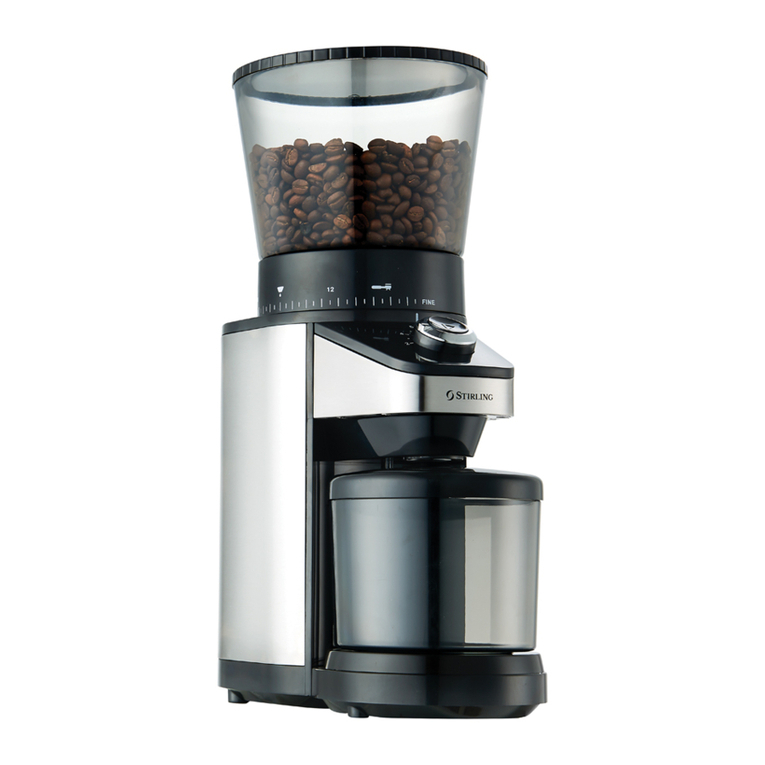
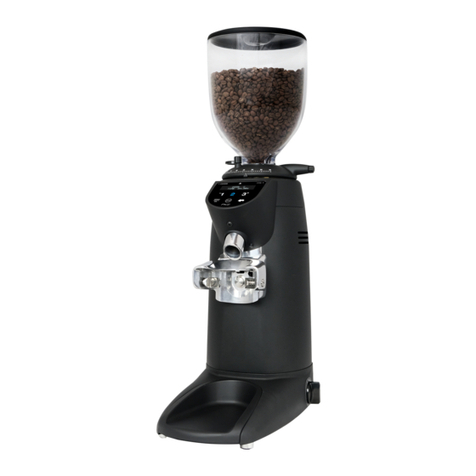
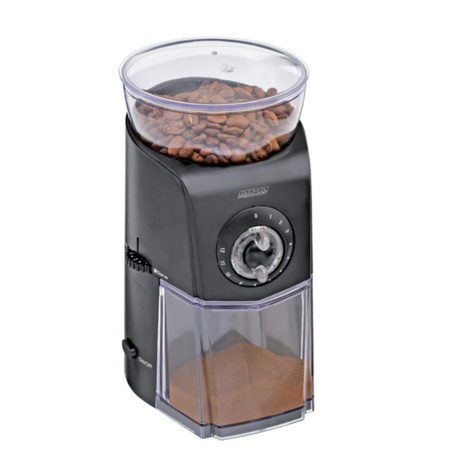
Sunbeam GrindFresh EM0440 User manual

GrindFresh
Conical Burr Coffee Grinder
Instruction Booklet
EM0440
Please read these instructions carefully
and retain for future reference.

Important instructions – retain for
future use.
Contents
Sunbeam’s Safety Precautions 1
Features of your coffee grinder 2
Operating your coffee grinder 4
Adjusting the Grind Setting 6
Care and Cleaning 7

1
Sunbeam’s Safety Precautions
SAFETY PRECAUTIONS FOR YOUR
SUNBEAM COFFEE GRINDER
• Checkthegrindingbowlforthepresenceof
foreignobjectsbeforeusing.
• Alwaysoperatethegrinderwiththeground
coffeecontainerproperlyinsertedinthe
grinder.
• Donotplaceyourhandinorneartheburrs
whilethegrinderisinoperation.
• Alwaysplacetheunitonaflat,levelsurface.
• Switchoffandunplugatpowerpointbefore
cleaning.
• Donotattempttore-grindgroundcoffee.
Sunbeam is very safety conscious when
designing and manufacturing consumer products,
but it is essential that the product user also
exercise care when using an electrical appliance.
Listed below are precautions which are essential
for the safe use of an electrical appliance:
• Readcarefullyandsavealltheinstructions
providedwithanappliance.
• Alwaysturnthepoweroffatthepoweroutlet
beforeyouinsertorremoveaplug.Remove
bygraspingtheplug-donotpullonthecord.
• Turnthepoweroffandremovetheplug
whentheapplianceisnotinuseand
beforecleaning.
• Donotuseyourappliancewithanextension
cordunlessthiscordhasbeenchecked
andtestedbyaqualifiedtechnicianor
serviceperson.
• Alwaysuseyourappliancefromapower
outletofthevoltage(A.C.only)marked
ontheappliance.
• Thisapplianceisnotintendedforuseby
persons(includingchildren)withreduced
physical,sensoryormentalcapabilities,or
lackofexperienceandknowledge,unlessthey
havebeengivensupervisionorinstruction
concerninguseoftheappliancebyaperson
responsiblefortheirsafety.
• Childrenshouldbesupervisedtoensurethat
theydonotplaywiththeappliance.
• Thetemperatureofaccessiblesurfacesmaybe
highwhentheapplianceisoperating.
• Neverleaveanapplianceunattendedwhile
inuse.
• Donotuseanapplianceforanypurpose
otherthanitsintendeduse.
• Donotplaceanapplianceonornearahotgas
flame,electricelementoronaheatedoven.
• Donotplaceontopofanyotherappliance.
• Donotletthepowercordofanappliancehang
overtheedgeofatableorbenchtoportouch
anyhotsurface.
• Donotoperateanyelectricalappliancewith
adamagedcordoraftertheappliancehas
beendamagedinanymanner.Ifdamageis
suspected,returntheappliancetothenearest
SunbeamAppointedServiceCentre
forexamination,repairoradjustment.
• Foradditionalprotection,Sunbeam
recommendtheuseofaresidualcurrent
device(RCD)withatrippingcurrentnot
exceeding30mAintheelectricalcircuit
supplyingpowertoyourappliances.
• Donotimmersetheapplianceinwater
oranyotherliquidunlessrecommended.
•Appliancesarenotintendedtobeoperated
bymeansofanexternaltimerorseparate
remotecontrolsystem.
•Thisapplianceisintendedtobeusedin
householdandsimilarapplicationssuch
as:staffkitchenareasinshops,officesand
otherworkingenvironments;farmhouses;by
clientsinhotels,motelsandotherresidential
typeenvironments;bedandbreakfasttype
environments.
Ifyouhaveanyconcernsregardingtheperformanceanduseofyourappliance,
pleasevisitwww.sunbeam.com.auorcontacttheSunbeamConsumerServiceLine.
Ensuretheabovesafetyprecautionsareunderstood.

2
Features of your Coffee Grinder
250g Bean hopper
Grind adjustment collar
Largeandeasytouse,thecollarhasawide-
rangeof25grindsettings.Thecoffeemakercan
selectafinegrindtosuitcommercialespressoor
adjustthesettingforotherbrewingstyles–from
Turkishtoplunger.Withsuchprecisesettingsthe
usercontrolstheparticlesizeandultimatelythe
qualityofthebrew.
Grind on demand button
Positionthegrouphandleintothegrouphandle
locator,pushagainstthebuttonandfreshly
groundcoffeewillflowdirectlyintothebasket,
pullthehandleawayandgrindingwillstop.
Preparation mat
Positionedunderthegrindingspoutthe
preparationmatisidealforcatchingloosecoffee
grindswhilefillingdirectlyintothegrouphandle.
Rubber feet
Thenon-sliprubberfeetensurethegrinder
remainsstableandpreventsslippingonthe
benchtopduringuse.

3
Burr shield
Italian conical burrs
Italiandesignedandmanufactured,themetal
conicalburrdesignachievesexcellentgrind
consistencyandminimisesheattransferto
thecoffeeduetotheslowlyrotatingburrs.
Group handle locator
Cord stuff
Hidesawayunwantedcordtokeepbench
topclean.
Burr cleaning brush
Strongbristleshelpsweepoutgrindsfrom
theburrs.
Silicon spout cover
Simplyslidethespoutcoverontothegrinder
spout.Thisminimisesthedropofcoffeefrom
thegrinderspouttothecoffeefilter,thus
reducingcoffeewaste.
Commercial size
group handle locator
Domestic size
group handle locator

4
Heading
Operating your coffee grinder
Beforeusingthecoffeegrinder,wipethe
baseexteriorwithadampcloth.Washthe
beanhopper,hopperlidandgroundcoffee
containerinwarmsoapywater,thenrinse
anddry.
Note:Donotimmersetheburrsinwateror
anyotherliquid.
Note: Donotplaceanypartsofthecoffee
grinderinthedishwasher.
1.Placethecoffeegrinderbaseonadry,
levelsurface.
Note: Alwaysensurethatthecollaris
attachedtothecoffeegrinderbasefirst,then
attachthebeanhopper.
2.Positionthecollarsothatthenotchonthe
collarisalignedwiththearrowontherear
ofthegrinderbase.
Seefigure1
3.Nowattachthebeanhopper.Insertthe
beanhopperbyaligningthenotcheson
thebaseofthehopperwiththeguideson
theinsideofthecollar.Positionuntilthe
hoppersitsflat.Seefigure2.
4.Tolockthecollarandbeanhopperinto
place,holdthecollarandturnitclockwise
untilthe‘UNLOCK’buttonreleases.
Seefigure3.
5.Fillthebeanhopperwithcoffeebeans.
Tip:Remembertokeepthehopperfullat
alltimes.Havinganevenweightbearing
downontheburrsisimportanttoensurea
consistentgrind.
Note:Thiscoffeegrinderisintendedtogrind
wholecoffeebeansonly.
6.Placethehopperlidontothebeanhopper.
7.Plugthepowercordintoa230-240VAC
poweroutletandswitchthepoweron.
Figure 1
Figure 3
Figure 2

5
Heading
Operating your coffee grinder (continued)
8.Selectthegrindbyturningthegrind
adjustmentcollartothedesiredsetting,
seefigure4.
Refertothegrindsettingtableonpage6to
assistyouinselectingthecorrectgrindlevel
forthedesiredbrewingmethod.
9.Positionthegrouphandleintothegroup
handlelocator,seefigure5.
Note:Therearetwogrouphandlelocators
providedasmallersizetofitdomestic
handlesandalargersizeforcommercial
handles.
10.Togrindcoffee,pressthegrouphandle
againstthebuttonlocatedinthecentre
ofthegrouphandlelocator,seefigure6.
11.Whenthebasketisfull,pullthegroup
handleoffthebutton.Collapsethecoffee
inthebasketbytappingitonthebench
andrepeatuntilthedesiredamountof
coffeehasbeenground.
Note: Foreignobjectslikestonesortwigs
cansometimesbefoundinwholebean
coffeeandcancausethecoffeegrinderto
jam.ShouldthisoccurrefertotheCareand
Cleaningsectiononpage7astheseobjects
needtoberemovedimmediately.
Figure 5
Figure 6
Figure 4

6
Heading
A starting point for grind settings:
SETTING BREWING METHOD
2–6 Turkish
12–16 Espresso
12–16 StoveTop
20–23 DripFilter
20–23 Plunger
Note:Thesettingsnotedinthetableaboveare
astartingguideonly.Forexamplethesetting
forespressowillvarydependingonthequality
androastdegreeofthebeansandthetypeof
espressoextractiondesired.
Thewide-rangeof25grindsettingsallows
forprecisionadjustment.Thecoffeemaker
hascompletecontroloftheparticlesizeand
ultimatelythequalityoftheresultingbrew.
Somethingstorememberwhenusingthecoffee
grinder;
• Thesmallertheparticlesizethelongeritwill
taketogrind.
• Whenusingthefinersettingsthecoffeemay
becomestuck,werecommendtappingonthe
lidofthebeanhoppertodislodgeanyclumps
ofcoffeeblockingtheflow.
• Afterlongperiodsofusingthefinersettings
werecommendremovingtheupperburrand
sweepingawayanyresidualcoffeetoavoid
clogging.SeetheCareandCleaningsection
onpage7formoredetails.
Tips
1.Selectthecorrectgrindforthebrewing
methodyouareusing.25grindsettingsare
availabletoensureprecisionadjustment.
Setting1producesthefinestgrind,12to16
aremediumgrindsappropriateforespresso
coffeemakers,and25isthecoarsestgrind
youcanachieve.Experimentwiththegrind
settingstoachievetheidealbrewthatbest
suitsyourtastes.
2.Fordripfiltercoffeemachines,agood
startingpointistouse8grams(1scoop)
ofcoffeeforevery4cupsofbrewwater
asmeasuredwiththecarafe.Finergrinds
usuallyrequirelesscoffee,butusingtoofine
agrindwillresultinabrewthatisbitterin
flavour.
3.Forthosethatpreferweakercoffee,continue
tousetherecommendedamountofground
coffeeandthendilutetheresultingbrew
withfreshhotwater.Doingthiswillmaximise
flavourandminimisebitterness.
4.Coffeethatisgroundtoofineforaparticular
brewingprocesswillresultinover-extraction
andthecoffeewilltastebitter.Ontheother
hand,coffeethatistoocoarseforaparticular
brewingmethodwillresultinunder-extraction
andthecoffeewillbethinandpoorin
flavour.
5.Oncecoffeeisgrounditquicklylosesits
flavourandaroma.Forthebestresultswe
recommendyougrindbeansimmediately
priortobrewing.
6.Buyfreshwholecoffeebeansweekly.
7.Toretainfreshness,storewholecoffeebeans
inanairtightcontainerinacool,dark,dry
place.Itisnotrecommendedthatyoustore
beansinthegrinder’sbeanhopperfora
prolongedperiod.
8.Toensurethebestresultsfromthecoffee
grindercleanthebeanhopperandconical
burrsregularly.Oursuggestionisevery3
weeks.
Always Remember
PROBLEM DESCRIPTION RESULT
OVER-
ExTRACTION
Overdevelopment
offlavourparticles
(sugarsetc.)
Sharp,
burnt,
bitter
UNDER-
ExTRACTION
Underdevelopment
offlavourparticles
Thin,
watery,
weak
Adjusting the Grind Setting

7
Important Notes:
• Spotsandmarksonthesurfaceofthe
burrsarepartofthehardeningprocess.
Thesemarksdonotaffecttheperformance
ofthegrinderorthetasteofthecoffee.
• Ensurethecoffeegrinderisswitchedoff
andunpluggedfromthepoweroutletprior
tocleaning.
• Donotimmersethemotorbaseofthe
coffeegrinderinwater.
• Donotimmerseanypartoftheburr
assemblyinwateroranyotherliquid.
• Donotplaceanypartsofthecoffeegrinder
inthedishwasher.
• Donotuseabrasivecleansersorscouring
pads.
Cleaning the base and coffee container
1.Cleanthemotorbaseexteriorusinga
dampsoftspongewithmilddetergentand
wipedry.
2.Washthebeanhopper(onceremoved)and
coffeecontainerinwarmsoapywater,then
rinseanddry.
Cleaning the burrs
Ifthecoffeegrinderisusedfrequently(every
day),theburrsneedtobecleanedevery
threeweekstoensurebestperformanceof
thecoffeegrinder.Regularcleaninghelps
theburrsachieveconsistentgrindingresults,
whichisespeciallyimportantwhengrinding
coffeeforespresso.
NOTE:ALWAYSemptyallthecoffeebeans
beforeremovingthebeanhopper.
Thiscanbedonebysimplyturningthe
grinderupsidedownandemptyingthebeans
intoacontainer
1.Ensurethecoffeegrinderisswitchedoff
andunpluggedfromthepoweroutlet.
2.Toremovethebeanhopperwithtopburr
andcollarfromthegrinderbase,turnthe
collaranti-clockwiseuntilitstops.
Seefigure7.
3.Pressandholddownthe‘UNLOCK’
buttonattherearofthegrinderbaseand
continuetoturnthecollaranti-clockwise
untilthenotchonthecollarisalignedwith
thearrowontherearofthegrinder.
Seefigure8.
Care and Cleaning
Figure 7
Figure 8

8
Care and Cleaning (continued)
4.Liftandremovebeanhopperandcollar
frombase.Thenpullthebeanhopperaway
fromthecollartodetachthetwopieces
andcleanusingtheburr-cleaningbrush.
5.Cleanthebottomburrusingtheburr-
cleaningbrush,seefigure9.
NOTE:Anyloosebeanssittingonthebottom
burrcanberemovedbyeitherturningthe
grinderbaseupsidedownandlettingthem
fallintoabinoralternativelyuseavacuum
toremoveanybeans.
6.Onceboththeburrsarecleaned,returnthe
collartothegrinderbasebyaligningthe
notchonthecollarwiththearrowonthe
rearofthegrinderbase.Seefigure10.
7.Attachthebeanhopperbyaligningthe
notchesonthebaseofthehopperwiththe
guidesontheinsideofthecollar.Position
untilthehoppersitsflat.Seefigure11
8.Turnthecollarclockwiseuntilthe
‘UNLOCK’buttonclicks.
Adjusting the burrs for wear
Theconicalburrsaremadeoftool
hardenedsteelforextralonglife.However
afterprolongedusetheburrswillrequire
adjustmenttocompensateforwear.Asignof
thisiswhenthegrindsarenotasfineasthey
usedtobe,checkbyrubbingsomeofthe
grindsbetweentwofingersorforespressothe
extractionwillalsoshowsignsthatthegrind
needsadjusting.
Replacing the burrs
Toinquireabouthavingtheburrsreplaced
contacttheSunbeamConsumerHotlineon
Australia
1300881861
New Zealand
0800786232
Figure 9
Figure 10
Figure 11

Shouldyouexperienceanydifficultieswith
yourappliance,pleasephoneourcustomer
servicelineforadviceon1300881861in
Australia,or0800786232inNewZealand.
Alternatively,youcansendawrittenclaim
toSunbeamattheaddresslistedbelow.
Onreceiptofyourclaim,Sunbeamwill
seektoresolveyourdifficultiesor,ifthe
applianceisdefective,adviseyouonhow
toobtainareplacementorrefund.
YourSunbeam12MonthReplacement
Guaranteenaturallydoesnotcovermisuse
ornegligenthandlingandnormalwearand
tear.
Similarlyyour12MonthReplacement
Guaranteedoesnotcoverfreightoranyother
costsincurredinmakingaclaim.Please
retainyourreceiptasproofofpurchase.
Thebenefitsgiventoyoubythisguarantee
areinadditiontoyourotherrightsand
remediesunderanylawswhichrelatetothe
appliance.
Ourgoodscomewithguaranteesthatcannot
beexcludedundertheAustralianConsumer
LawandundertheNewZealandConsumer
GuaranteesAct.
InAustraliayouareentitledtoa
replacementorrefundforamajorfailureand
forcompensationforanyotherreasonably
foreseeablelossordamage.Youarealso
entitledtohavethegoodsrepairedor
replacedifthegoodsfailtobeofacceptable
qualityandthefailuredoesnotamountto
amajorfailure.
Shouldyourappliancerequirerepairor
serviceaftertheguaranteeperiod,contact
yournearestSunbeamservicecentre.
ForacompletelistofSunbeam’sauthorised
servicecentresvisitourwebsiteorcall:
Australia
www.sunbeam.com.au
1300881861
Units5&6,13LordStreet
BotanyNSW2019Australia
New Zealand
www.sunbeam.co.nz
0800786232
26VesteyDrive,MtWellington
Auckland,NewZealand
In the unlikely event that this appliance develops any malfunction
within 12 months of purchase (3 months commercial use) due to
faulty materials or manufacture, we will replace it for you
free of charge.
12 Month Replacement Guarantee

is a registered trademark.
Need help with your appliance?
Contactourcustomerserviceteamorvisit
ourwebsiteforinformationandtipson
gettingthemostfromyourappliance.
In Australia
Visit www.sunbeam.com.au
Or call 1300 881 861
In New Zealand
Visit www.sunbeam.co.nz
Or call 0800 786 232
Made in China.
Due to minor changes in design or otherwise,
the product may differ from the one shown in this leaflet.
© Copyright. Sunbeam Corporation Limited 2012.
ABN 45 000 006 771
Units 5 & 6, 13 Lord Street
Botany NSW 2019 Australia
Unit 3, Building D
26 Vestey Drive
Mt Wellington Auckland
New Zealand
Sunbeam Corporation is a division of GUD Holdings Ltd. 1/12
Table of contents
Other Sunbeam Coffee Grinder manuals

Sunbeam
Sunbeam EM0480 User manual
Sunbeam
Sunbeam EM0400 User manual
Sunbeam
Sunbeam AutoGrinder EM0410 User manual
Sunbeam
Sunbeam EM0480 User manual

Sunbeam
Sunbeam EM0480 User manual

Sunbeam
Sunbeam CAFE EM0490 User manual
Sunbeam
Sunbeam EM0700 User manual

Sunbeam
Sunbeam GrindMaster EM0360 Service manual

Sunbeam
Sunbeam AutoGrinder EM0420 User manual

Sunbeam
Sunbeam MultiGrinder II EM0405 User manual
