http://www.sunflower-solar.com/
Version 11.04
Subject to change 2011 SUNFLOWER SOLAR
2
SFH-S1 Series Solar Water Heater
Assembly Manual
Content
1. FEATURES.....................................................................................................................................................................3
2. SOLAR WATER HEATER SIZE AND WEIGHT.....................................................................................................4
3. HOW TO TRANSPORT AND CARRY IT................................................................................................................4
4. NAME OF THE PARTS AND COMPONENTS........................................................................................................4
4.1 THE STRUCTURE OF WHOLE SOLAR WATER HEATER ...................................................................................................5
4.2 THE STRUCTURE OF WATER TANK AND CONNECTION.................................................................................................6
5. ASSEMBLY OF THE SOLAR WATER HEATER.....................................................................................................7
5.1 ASSEMBLE FRAMES.......................................................................................................................................................7
5.1.1 Assemble side parts
......................................................................................................................................7
5.1.2 Assemble the cross bars and connect them
.........................................................................................7
5.1.3 Assemble horizontal bars and tie bar-1
.................................................................................................8
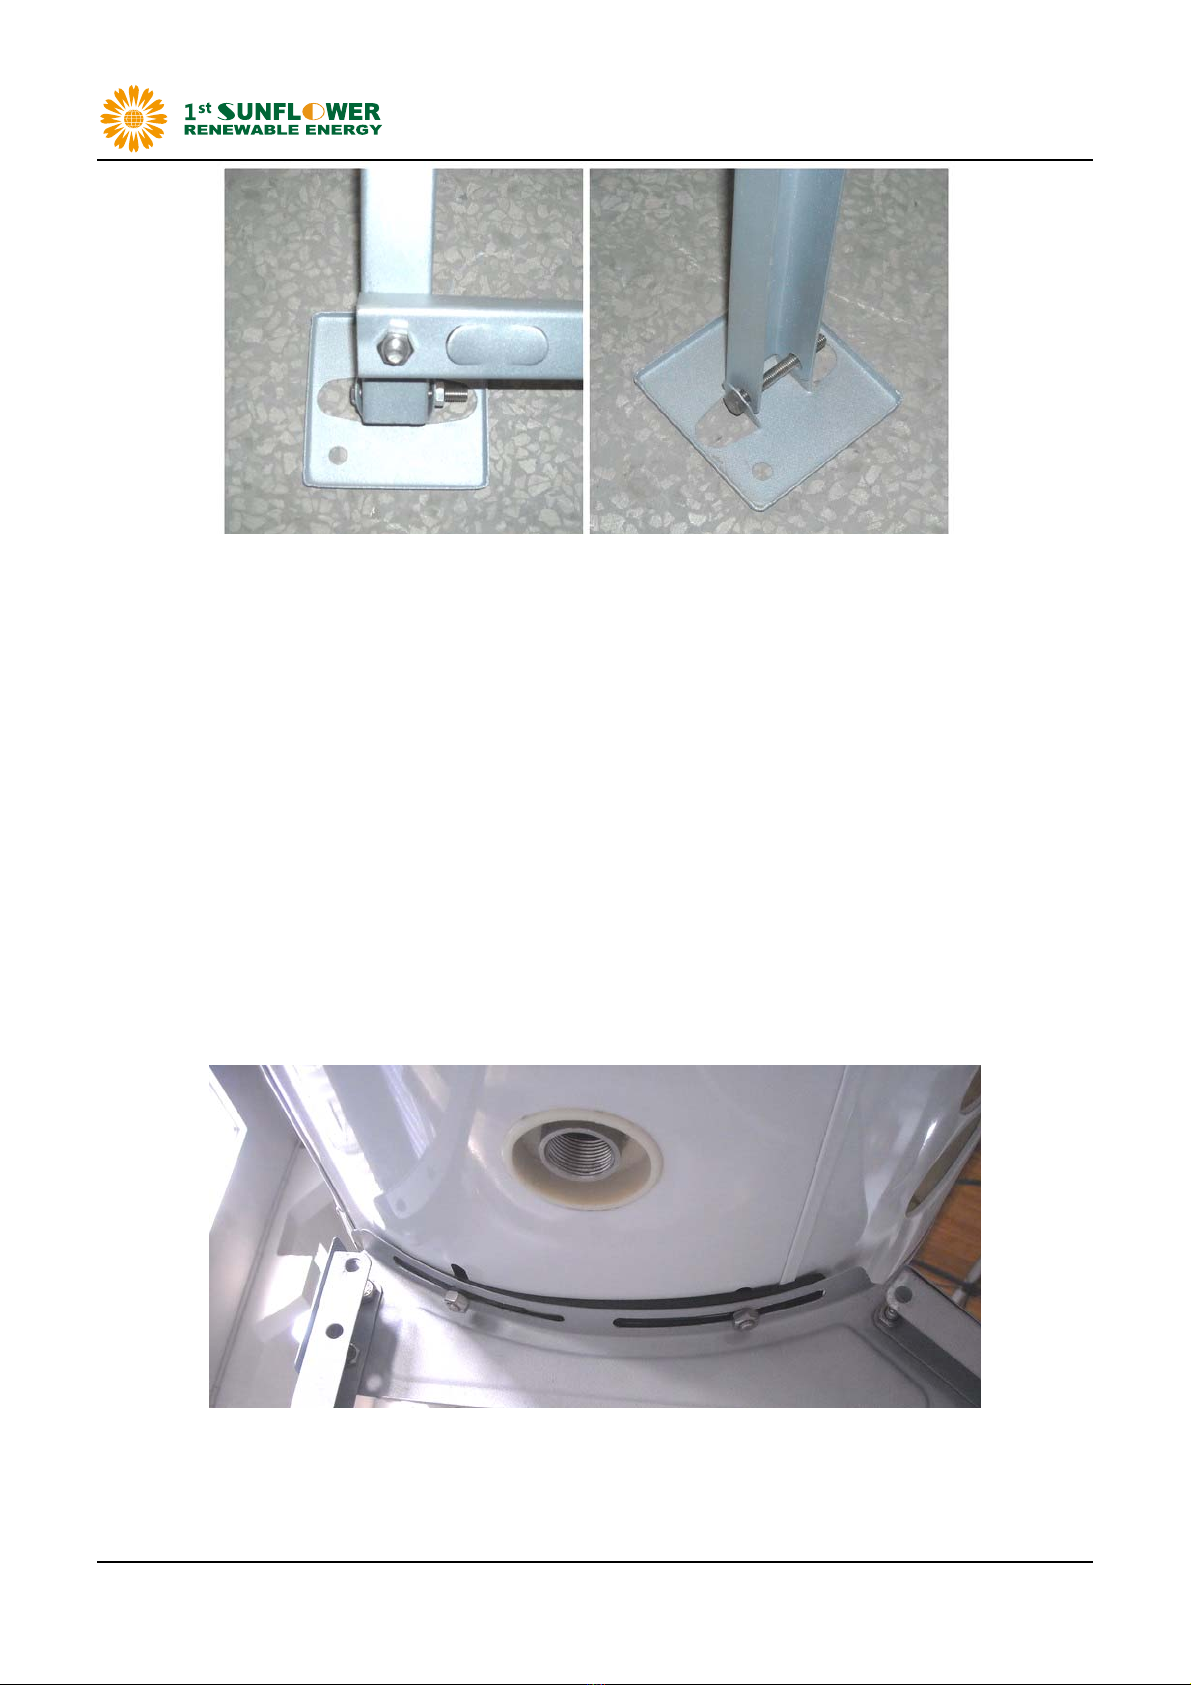
5.1.4 Assemble tube holder and foot pad
.........................................................................................................9
5.2 ASSEMBLE THE WATER CYLINDER (WATER TANK)...................................................................................................10
5.3. ASSEMBLE VACUUM TUBES (PLEASE WEAR GLOVES TO PROTECT YOURSELF IN CASE OF A BROKEN TUBE)....................11
5.3.1 Loosen the screw of the spiral tight clip so that the spiral tight clip can be opened
..........11
5.3.2 Insert the glass tubes into the water tank
.........................................................................................11
5.4 INSTALL IMMERSION HEATER AND MAGNESIUM BAR (IF YOU BUY THEM FROM US)........................................13
5.5 INSTALL CONTROLLER (IF YOU BUY IT FROM US)..............................................................................................13
5.6
INSTALL THE SINGLE DIRECTION VALVE
..............................................................................................................14
5.7 CHECK AND INSPECTION......................................................................................................................................14
6LIGHTNING PROTECTION....................................................................................................................................14
7PRECAUTIONS..........................................................................................................................................................14
8MAX. WORKING PRESSURE.................................................................................................................................14
9INSTALLATION ANGLE..........................................................................................................................................15
10 WIND RESISTANCE AND SNOW ACCUMULATION ..................................................................................15
11 MAINTENANCE REQUIREMENTS ...................................................................................................................15
11.1 CLEANING ................................................................................................................................................................15
11.2 LEAVES .....................................................................................................................................................................15
11.3 BROKEN TUBE..........................................................................................................................................................15


 Operation and maintenance instructions")