Sunpak Folding Vlogging Kit User manual

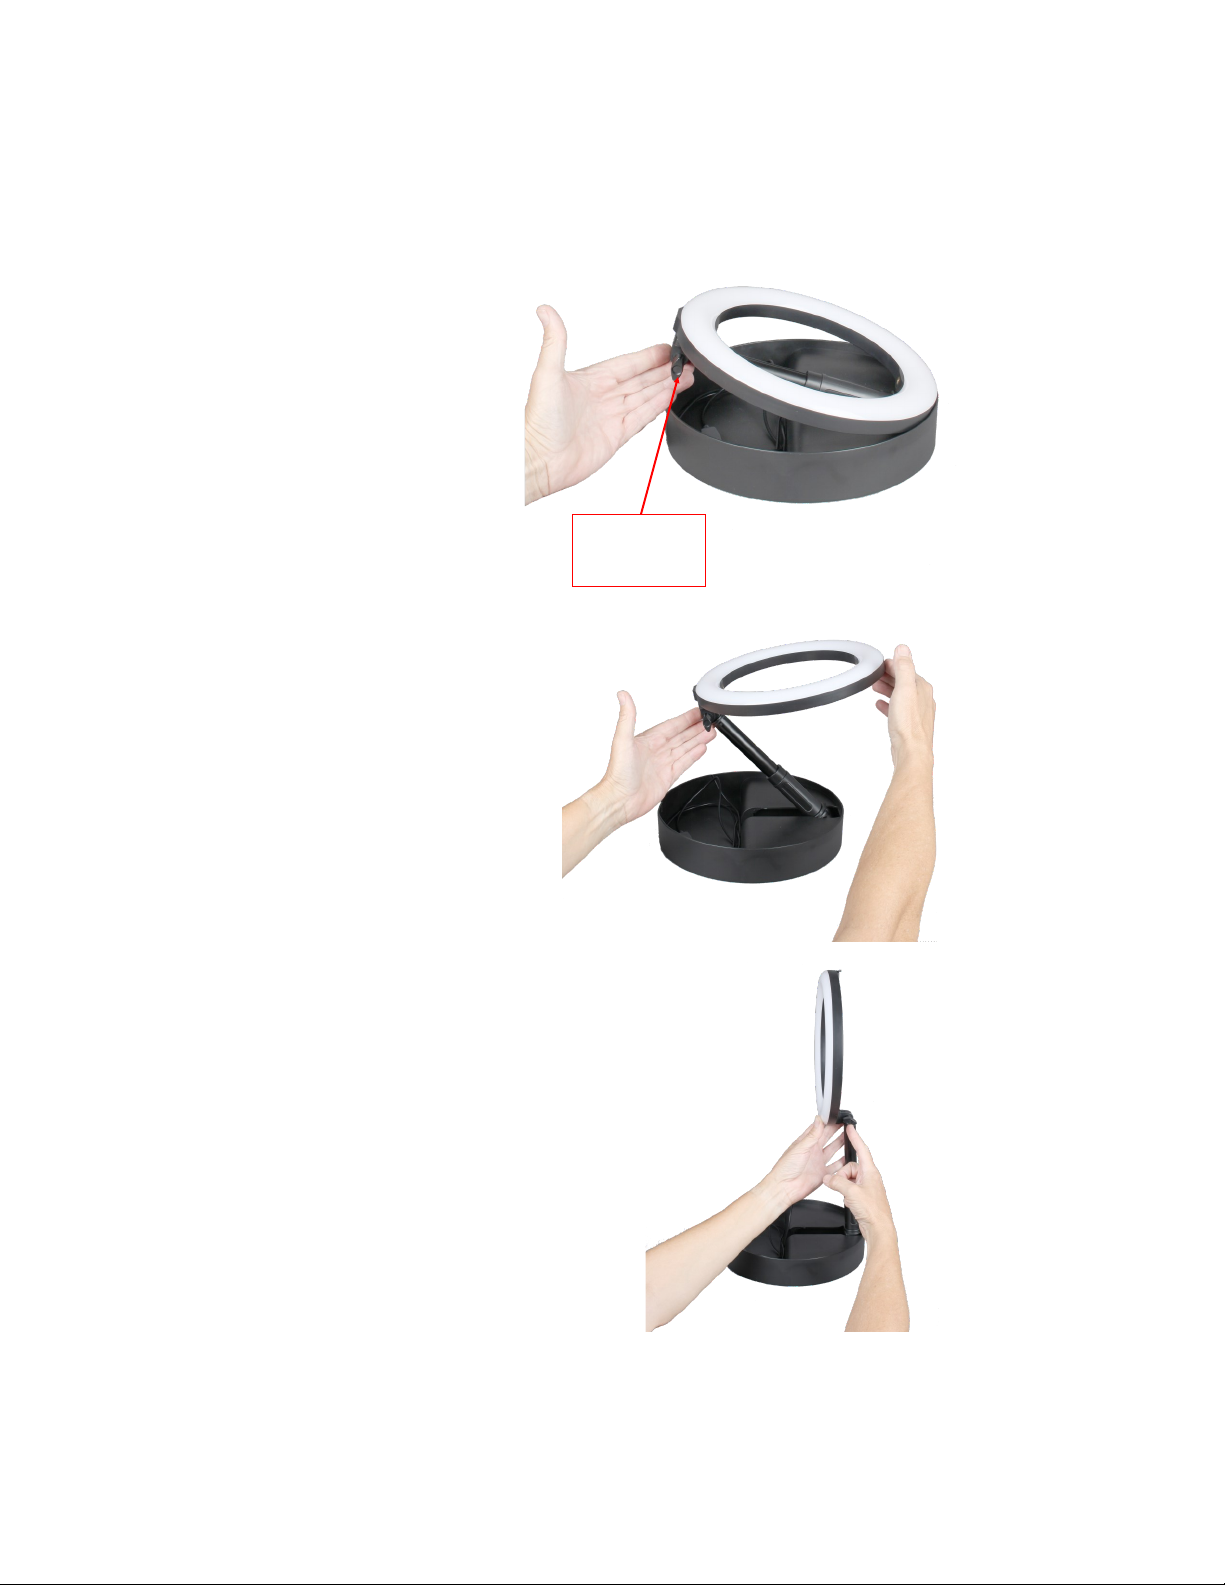
1. Your kit comes
retracted so that it’s
only 2.76” high for
easy transport. In
order to set up your
unit, first lift the ring
light out of the base.
Loosen the Ring
Light Lock Knob to
allow the light to
swivel.
2. As you are extracting
the ring light from the
base, bring the center
column to a vertical
position.
3. Once vertical, tighten the
Ring Light Lock Knob, so that it
is secure prior to mounting your
smartphone or camera to the
ring light.
Ring Light
Lock Knob
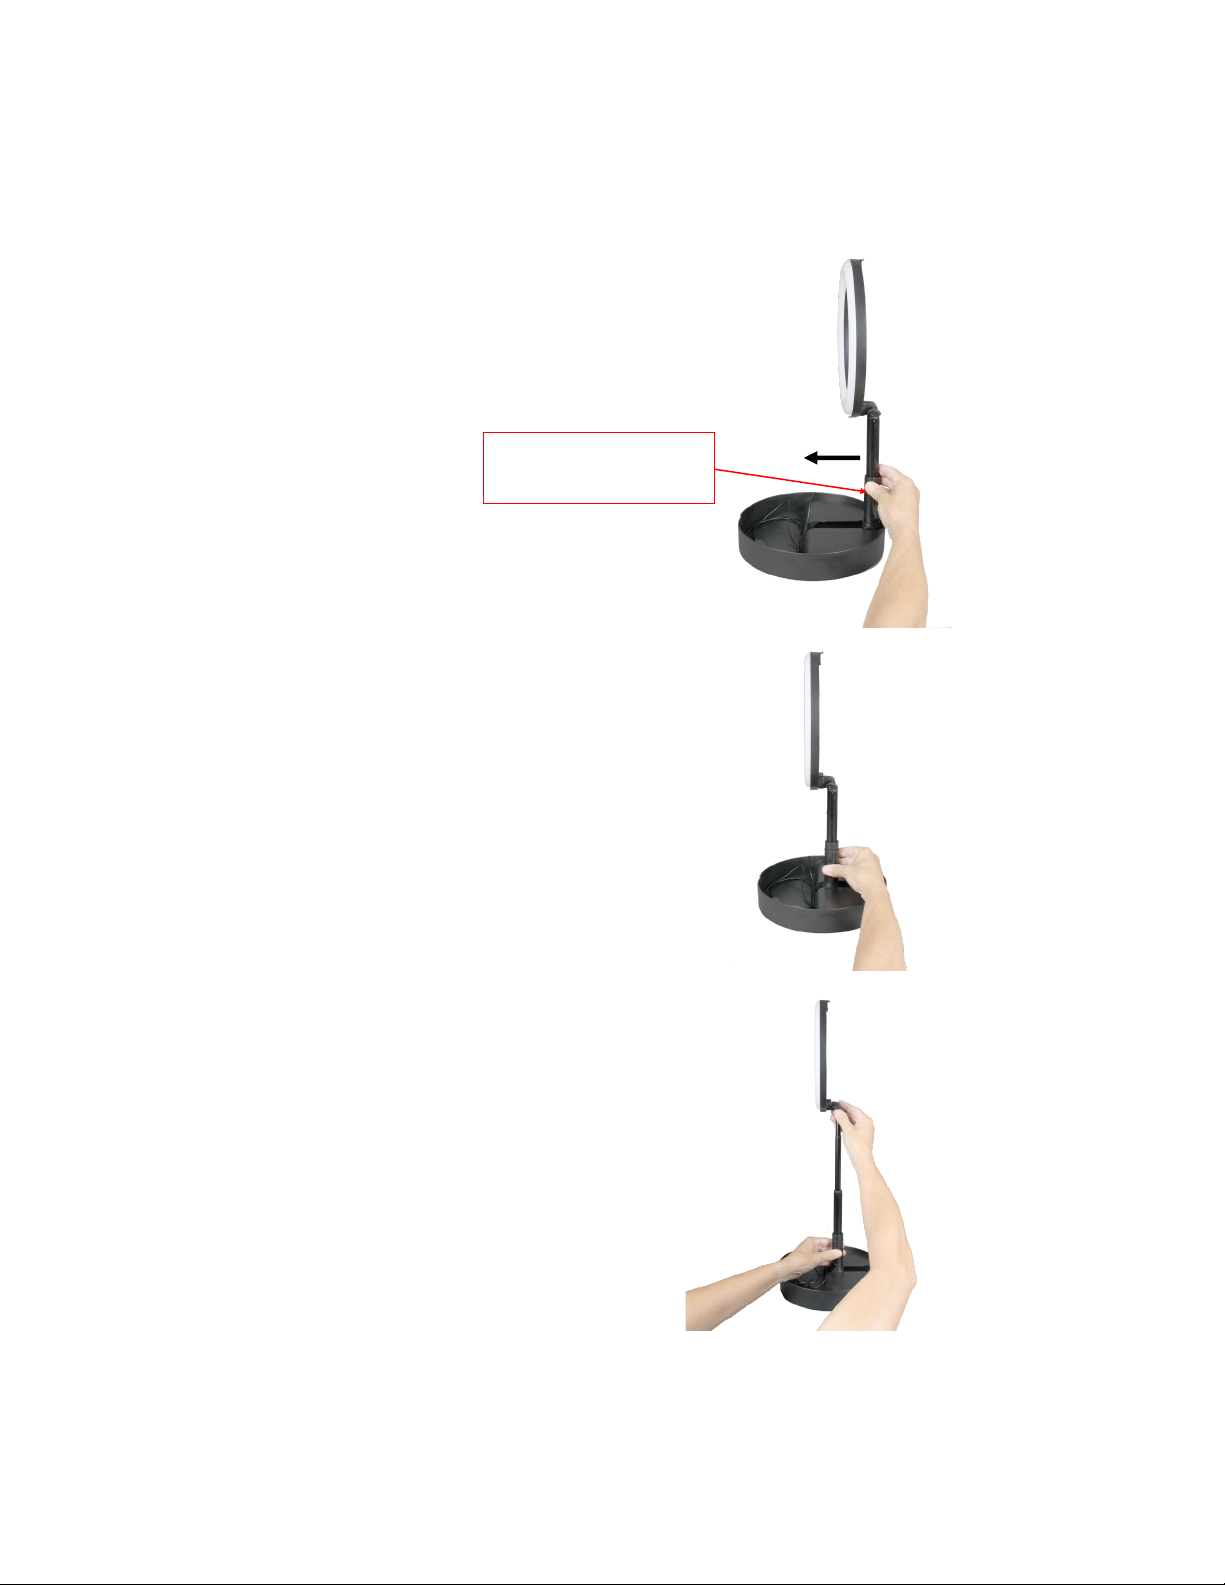
4. Loosen the Extendable Column
Locking Collar at the bottom of the
column by rotating it counter-clockwise
to allow you to slide the Extendable
Column toward the center of the base.
5. When the Extendable Column is at
the center of the unit, tighten the lock-
ing collar by rotating it clockwise to
lock it in place.
6. While holding the base, pull up on
the top of the column (the base of
the ring light) to raise the ring light to
your desired height.
You may encounter some resistance
when pulling it up. This is a normal
function of the column in order to
keep it from self-collapsing.
Extendable Column
Locking Collar

7. You can fully extend the column to a full 54" and use it
as a floor standing unit or collapse the column and use it
as a tabletop unit
***Warning***
When used in any of the extended height set-
tings, do not mount a camera in this mode.
When using a camera or any device other than
a smartphone, only use it at the shortest
height (tabletop mode) to avoid the possibility
of accidentally tipping over.
Correct Correct Correct Wrong
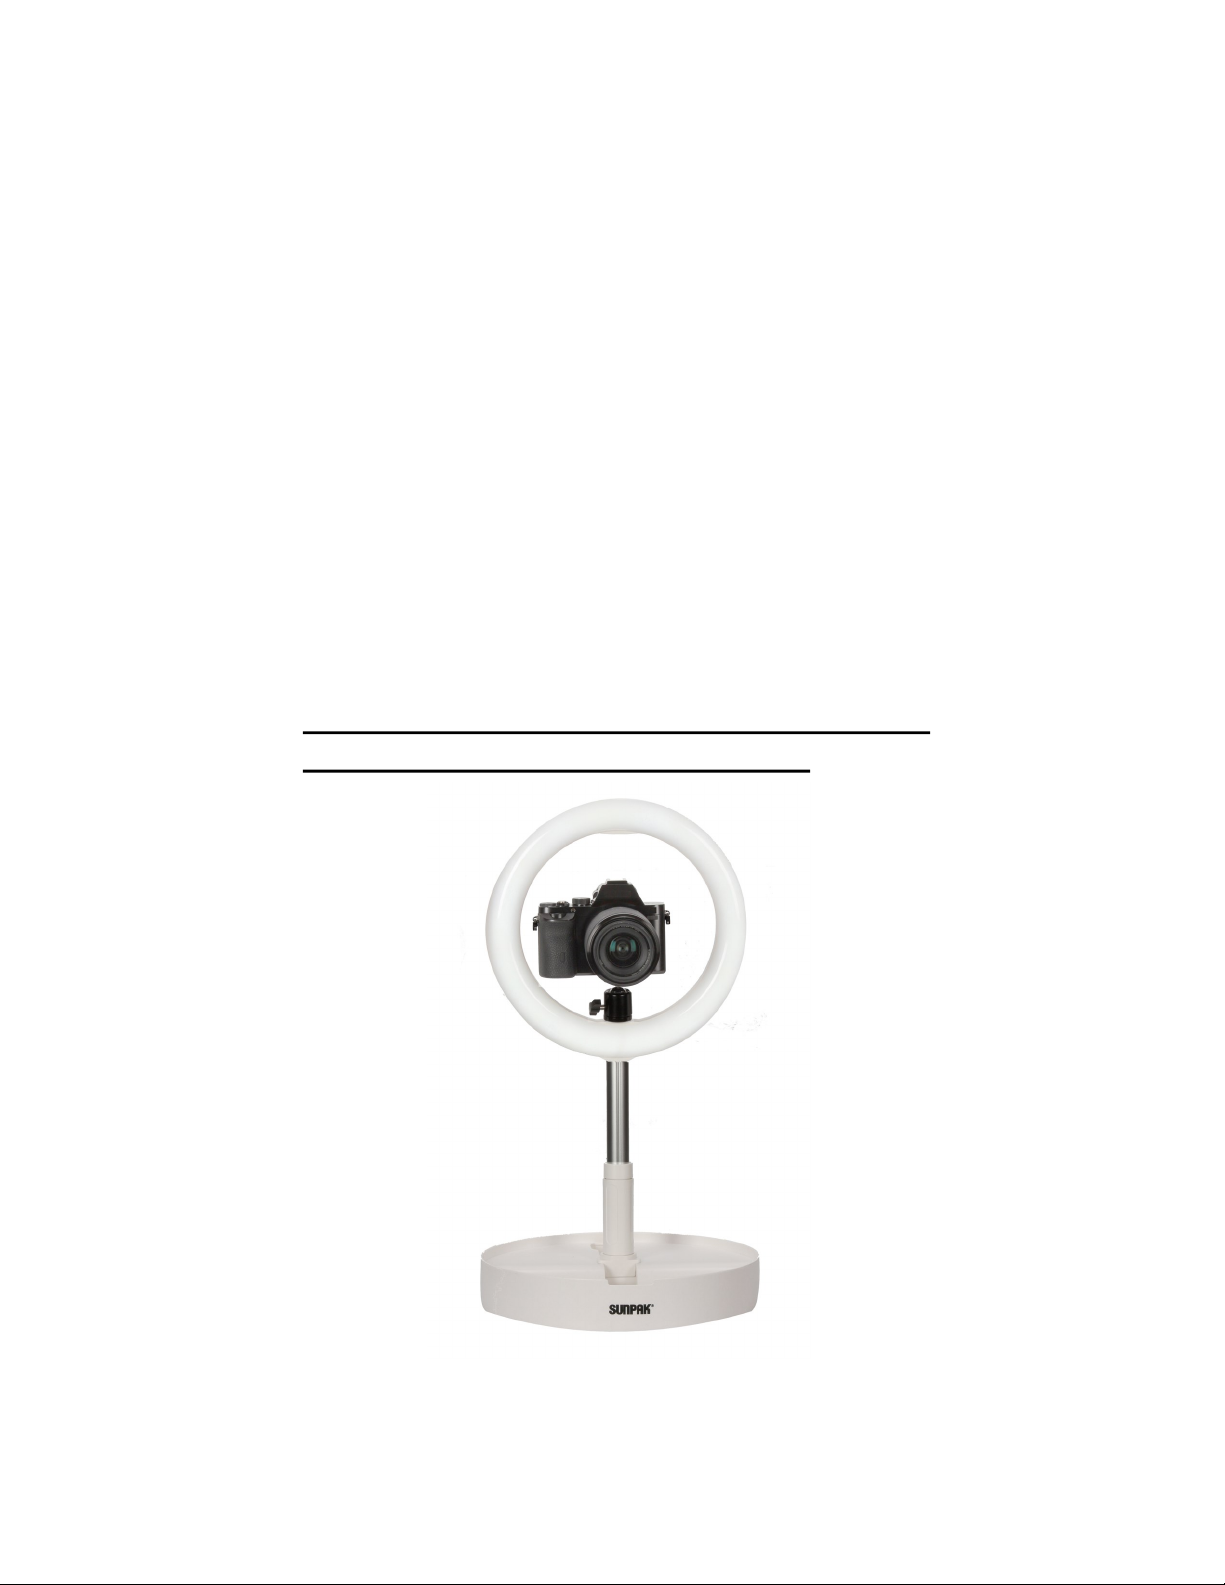
8. When mounting a camera, first remove the Flexible
Smartphone Mount from the ring light. Lock the head of
the ball head and install the ball head to the 1/4”-20 recep-
tacle on the bottom of your camera. Screw the base of the
ball head into the threaded socket of your ring light by
rotating the camera while it is mounted on the ball head.
Note: You may need to remove the lens from your
camera body as you are rotating the camera and ball
head onto the ring light. Likewise, when removing the
camera from the ring light, you may need to remove
your lens from the camera body prior to uninstalling
your lens.
When using a camera, only use the ring light in
the lowest setting (as pictured below).
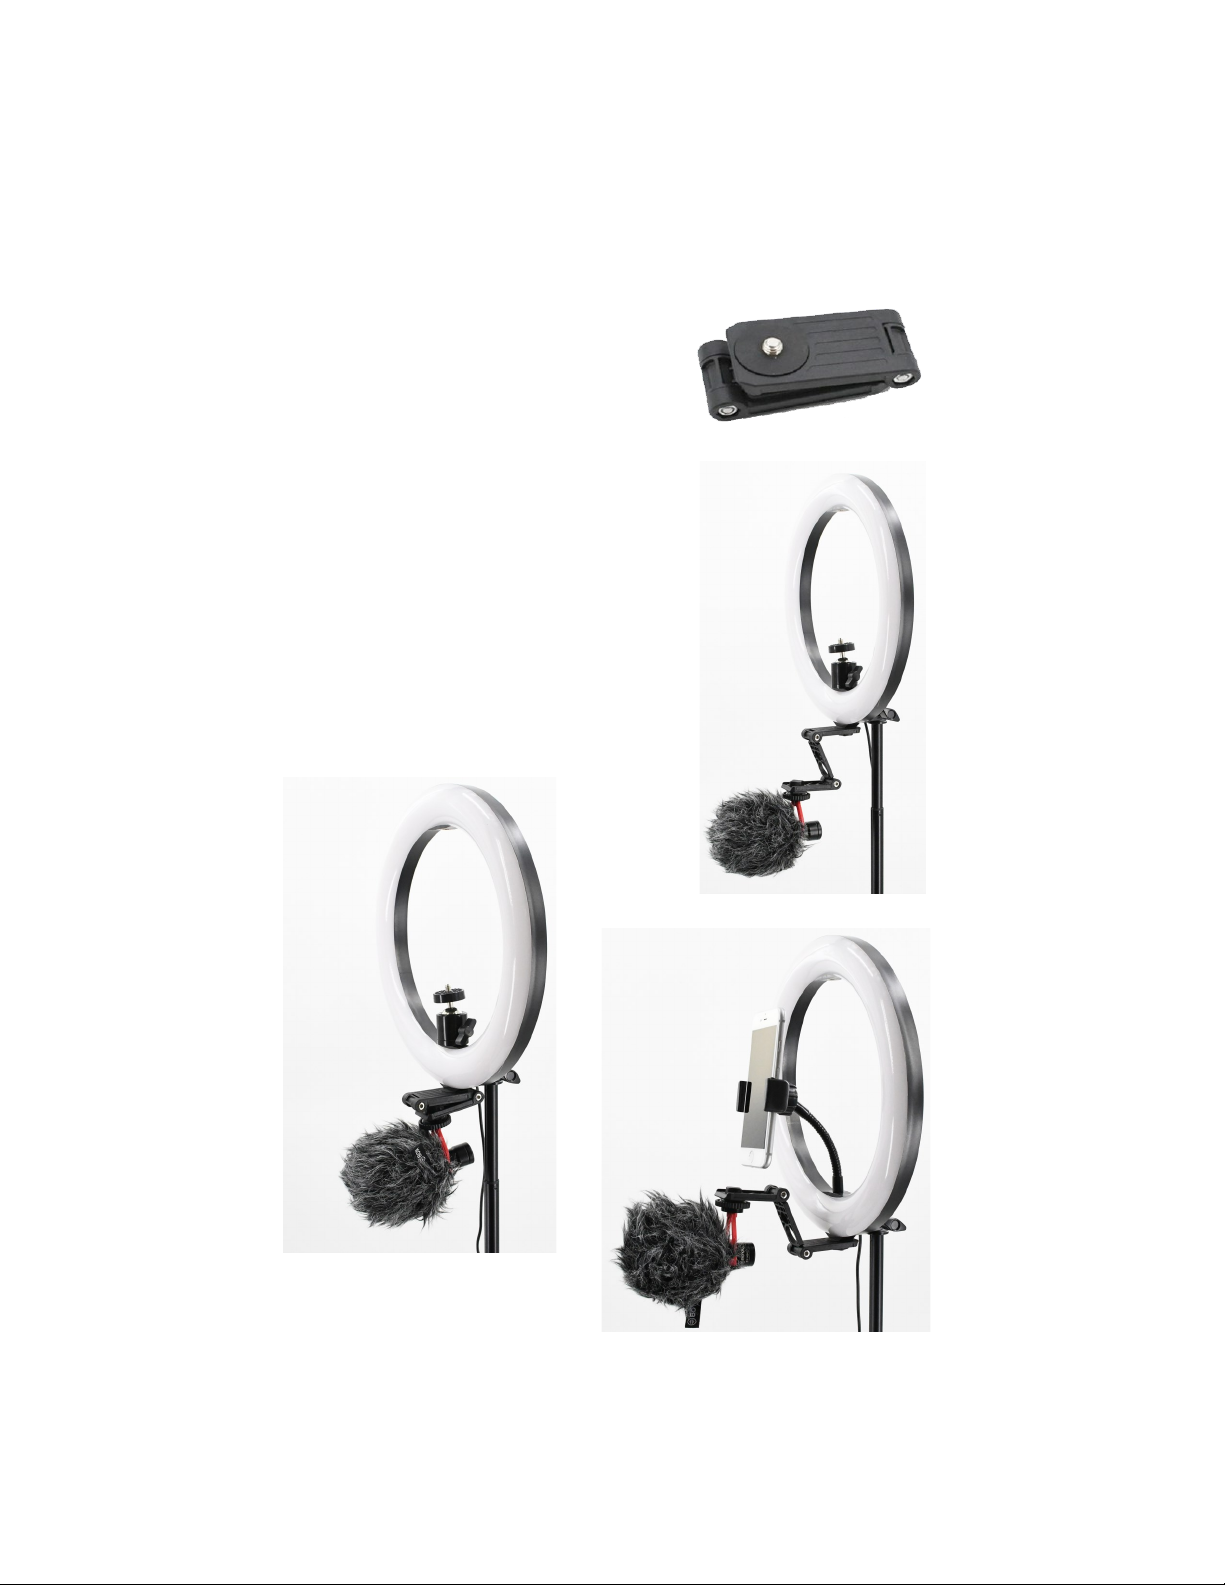
9. To mount the microphone:
Your BOYA microphone can be
mounted to the ring light via the
included folding bracket, which has
two 1/4”-20 screws at opposite
ends.
Screw the shock mount of your
microphone to the 1/4”-20 threaded
screw, of the bracket and then
screw the other end of the bracket
to the 1/4”-20 mount underneath
your ring light.
You can position the folding bracket
in various positons (see below).

10. To use your Bluetooth remote, follow these steps:
Turn the On/Off Switch on the Bluetooth Remote to the
“On” position.
Turn on your smartphone’s Bluetooth function. When
you see SUNPAK in your list of Bluetooth devices, pair
your phone to that device.
Once paired, open up the camera feature of your
smartphone.
Attach your phone to the smartphone mount. The
smartphone mount can accept phones up to 3.5” wide.
To take a picture, press the Shutter Release button on
the Bluetooth remote. For Apple (iPhones), press the
iOS button. For Android phones, press the Android but-
ton.
Note: Some Android users may notice the camera
zooming when the Shutter Button on the remote is
pressed. If this occurs, please go into your
smartphone’s camera settings and change the “Volume
Key” setting to “Camera”. Please refer to your
smartphone manual for assistance in changing this
setting.
Note: You cannot pair more than one remote at the same
time.
On / Off
Switch
Android Shutter
Button
Apple Shutter
Button

Sunpak One Year Limited Warranty
This Sunpak product has been carefully manufactured, accurately adjusted, inspect-
ed and thoroughly tested before shipment to assure you of the highest quality.
Should this product require service, we will repair or replace, at our option, any part
or the product itself, which our examination shows to be defective in material or
workmanship. This warranty does not apply to wear and tear associated with the
normal use of the product. This warranty is non-transferable.
Repairs will be made to the product at no charge, under the terms of the warranty as
stated above, only when accompanied by a dated and itemized bill of sale and
nominal handling charge.
Be certain to follow all assembly and/or operating instructions with this product. This
warranty is not valid if the product has been misused or damaged in any way that is
beyond our control or through normal wear and tear associated with use. This
warranty applies only to the product and we are not responsible in any way for
losses, damages or any inconvenience caused by equipment failure.
Some states do not allow the exclusion or limitation of consequential damages, so
the above limitation or exclusion may not apply to you. This warranty gives you
specific legal rights and you may have other rights which may vary from state to
state.
Should service be required, the product should be carefully packed (in the original
packaging if possible) and sent, prepaid and insured, along with a check or money
order for $9.95 (shipping and handling), to the address listed below. A note briefly
describing the nature of the defect should also be enclosed to expedite handling.
Proof of purchase and payment for shipping and handling must be included
for all warranty repairs.
Sunpak, ToCAD America Inc., 105 West Dewey Avenue, Building D, Units 7-9,
Wharton, NJ 07885 Attention Service Department
Specifications:
Power; USB 5V Input
Illumination: 128 high power LEDs
Light Output: Daylight (5500°K) and Tungsten (3200°K)
Light Dimensions: Outer: 10.5 inches / Inner: 7.75 inches
Height: Folded: 2.76 inches / Min: 20 inches / Max: 54 inches
Maximum Load Capacity: 2.5 lbs.
Weight: 2.54 lbs.
Warranty: 1 year limited
Product design and specifications subject to change without notice.
11. Connect the ring light to a USB charger, power bank or
AC adapter (not included). Press and hold the Power
button on the inline remote.
Adjust output intensity by pressing the + or - buttons on the
inline remote.
Change the color temperature by pressing the Color
Temperature button. Brightness Up
Color Temperature
Power
Brightness Down
Table of contents
Other Sunpak Cell Phone Accessories manuals


