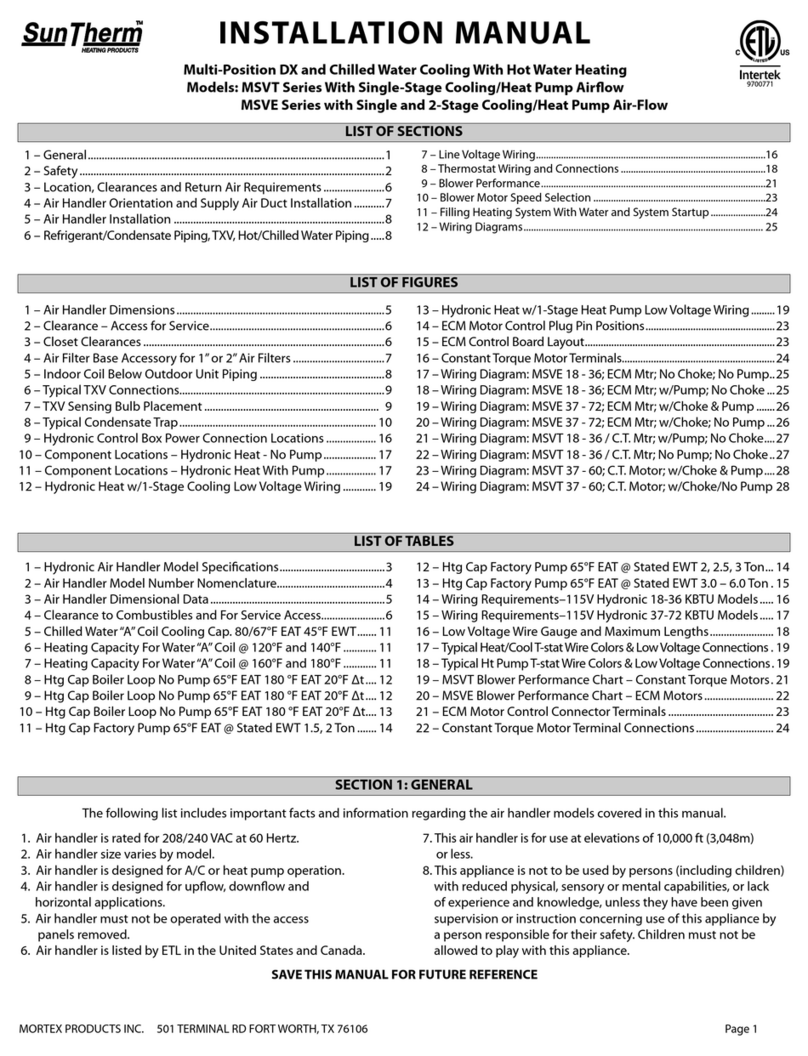
Suntherm SEHX Series User manual

MORTEX PRODUCTS INC. 501 TERMINAL RD FORT WORTH, TX 76106 Page 1
INSTALLATION MANUAL
LIST OF SECTIONS
LIST OF FIGURES
LIST OF TABLES
SECTION 1: GENERAL
8 – Line Voltage Wiring................................................................................................21
9 – Thermostat Wiring and Connections ..............................................................23
10 – Blower Performance .............................................................................................28
11 – Blower Motor Speed Selection .........................................................................30
12 – Final System Checkout and Startup................................................................31
13 – Wiring Diagrams.....................................................................................................30
17 – Components and Water Connections ............................................................15
18 – Proper Wiring of the SHL Temperature Switch............................................23
19 – Component Locations – No Heat Control Box ........................................... 23
20 – Component Locations - Hydronic Heat Control Box................................ 23
21 – Heat/Cool Tstat Connections - Separate Tstats & Single Tfmr................24
22 – Heat/Cool Tstat Connections-Separate Tstats & Separate Tfmrs...........24
23 – Heat/Cool Tstat Connections - Single Tstat & Separate Tfmrs................25
24 – Heat/Cool Tstat Connections - Single Tstat & Single Tfmr.......................25
25 – Heat Pump Tstat Connections - Single Tstat & Single Tfmr.....................25
26 – Constant Torque Motor Control Module Terminals ..................................30
27 – Constant Torque Blower Assembly .................................................................30
28 – Wiring Diagram - No Heat; C.T. Motor ............................................................30
29 – Wiring Diagram 3kW-10kW Electric Ht; C.T. Motor w/ Lockout.............32
30 – Wiring Diagram Hydronic Heat; C.T. Motor; No Water Pump.................33
31 – Wiring Diagram Hydronic Heat; C.T. Motor and Water Pump ................33
12 – Electrical Data – Electric and Hot Water Heat ............................................ 22
13 – Electric Heater Heating Capacity .................................................................... 22
14 – Low Voltage Wire Gauge and Maximum Lengths..................................... 23
15 – Thermostat Terminal Designations................................................................. 25
16 – Air Handler Low Voltage Pigtail Wire Colors & Connections ................. 26
17 – Typical Heating/Cooling Tstat Wire Colors & Connections..................... 26
18 – Typical Heat Pump Tstat Wire Colors & Connections ............................... 26
19 – 28 – Blower Performance..............................................................................28-29
29 – Constant Torque Motor Terminals - Electric Heat Models...................... 30
30 – Constant Torque Motor Terminals - Hydronic Heat Models .................. 30
1 – General............................................................................................................................1
2 – Safety, General, Dimensional & Model Number Nomenclature ................2
3 – Location and Clearances...........................................................................................6
4 – Return and Supply Air Requirements ..................................................................7
5 – Air Handler Installation..............................................................................................8
6 – Refrigerant Piping, TXV, Flowrator & Condensate Drain ........................... 10
7 – Hot Water and Chilled Water........................................................................................ 14
1. This air handler is rated at 208/240 VAC (electric heat) or 115 VAC
(hydronic heat), 60 Hertz, Single-Phase
2. This air handler is not designed to operate at 50 Hertz.
3. Air handler size varies by model.
4. This air handler is designed for both A/C and heat pump applications
5. Use 4-wire thermostat cable for heating/cooling
applications and 7-wire thermostat cable for heat pump applications.
6. This air handler is designed for horizontal applications only.
7. This air handler must not be operated without the access
panels installed.
8. This air handler and its components listed are listed by ETL for the
United States and Canada.
9. This air handler is for use at elevations of 10,000 ft (3,048m) or less.
10. This appliance is not to be used by persons (including children) with
reduced physical, sensory or mental capabilities, or lack of experience
and knowledge, unless they have been given supervision or instruction
concerning use of this appliance by a person responsible for their safety.
1 – CEHX/CCWE Dimensions........................................................................................4
2 – SEHX/SCWE Dimensions.........................................................................................5
3 – Clearance For Service Access ................................................................................7
5 – Return & Supply Duct Transitions........................................................................8
6 – Cased Air Handler Mounting ................................................................................9
7 – Piping for Air Handler Below Outdoor Unit ................................................. 10
8 – TXV Sensing Bulb Placement ............................................................................. 10
9 – TXV Sensing Bulb Location................................................................................. 10
10 – Typical TXV Connections ................................................................................... 12
11 – Flowrator Distributor Assembly....................................................................... 13
12 – SHL Temperature Sensor Location ................................................................. 13
13 – SHL Temperature Sensor Mounting............................................................... 13
14 – SHL Temperature Switch Wiring ...................................................................... 13
15 – Typical Condensate Trap..................................................................................... 14
16 – Condensate Drain Pan......................................................................................... 14
1 – CEHX/CCWE/CDXW/CCWW Dimensional Data..............................................4
2 – SEHX/SCWE/SDXW/SCWW Dimensional Data................................................5
3 – SEHX/CEHX/SCWE/CCWE Model Nomenclature ...........................................6
4 – Clearance to Combustibles....................................................................................6
5 – Optional Ceiling Access Panels.............................................................................8
6 – SCWW/CCWW Chilled Water Capacity 4&5 Row Coil – C.T .................... 16
7 – SCWE/CCWE Hot Water Capacity 4&5 Row Coil – C.T............................... 17
8 – SCWW/CCWW Chilled Water Capacity 4&5 Row Coil – C.T .................... 18
9 – SCWW/CCWW Hot Water Capacity 4 & 5 Row Coil – C.T......................... 19
10 – SCWW/CCWW Hot Water Capacity 2 Row HW Coil – C.T........................ 20
11 – SDXW/CDXW Hot Water Capacity 2 Row HW Coil – C.T.......................... 20
The following list includes important facts and information regarding this air handler.
Horizontal Air Handler Models:
SEHX - DX Cooling w/ Electric Heat, Uncased SDXW - DX Cooling w/ Hot Water Heat, Uncased
CEHX – DX Cooling w/ Electric Heat, Cased CDXW – DX Cooling w/ Hot Water Heat, Cased
SCWE – Chilled Water Cooling w/Electric Heat, Uncased-2P SCWW – Chilled Water Cooling w/Hot Water Heat, Uncased-4P
CCWE – Chilled Water Cooling w/Electric Heat, Cased-2P CCWW – Chilled Water Cooling w/Hot Water Heat, Cased-4P
9700771

MORTEX PRODUCTS INC. 501 TERMINAL RD FORT WORTH, TX 76106 Page 2
Improper installation may create a condition where the
operation of the product could cause personal injury or
property damage.
Improper installation, adjustment, alteration, service or
maintenance can cause injury or property damage. Refer
to this manual for assistance; or for additional information
consult a qualified contractor, installer, or service agency.
FIRE OR ELECTRICAL HAZARD
Failure to follow the safety warnings exactly could result
in serious injury, death, or property damage.
A fire or electrical hazard may result causing property
damage, personal injury or loss of life.
This product must be installed in strict compliance with the
installation instructions and any applicable local, state, and
national codes including, but not limited to; building,
electrical, and mechanical codes.
Safety Requirements
This air handler must be installed in accordance with all national
and local building/safety codes and requirements, local plumbing
and waste water codes, and other applicable codes. In the
absence of local codes, install in accordance with the following
codes.
• Standard for the Installation of Air Conditioning and
Ventilating Systems (NFPA 90A)
• Standard for the Installation of Warm Air heating and Air
Conditioning Systems (NFPA 90B)
• National Electrical Code (NFPA 70)
• Canadian Electrical Code, Part I (CSA C22.2) or ANSI/NFPA
No. 70
• All local codes (State, City, and Township)
NOTE: All applicable codes take precedence over any
recommendation made in these instructions. SunTherm
assumes no responsibility for units installed in violation of any
code or regulation.
1. Refer to the air handler rating plate for the air handler model
number and refer to the dimensions page of this manual
for return air plenum dimensions for the applicable model
(see Figures 2 and 3 and Tables 9 and 10). The return air
plenum must be installed according to the above listed codes
or the instructions in this manual.
2. Refer to the dimensions page of these instructions to
determine the proper location to install the air handler.
3. This air handler is not ETL listed or approved for installation in
a manufactured (mobile) home.
4. Provide clearances from combustible materials as listed in the
LOCATION AND CLEARANCES section.
5. Provide clearances for service access panel to allow access
to the control box, electric heater elements, hot water coil,
and blower.
6. Power supply wiring and circuit breakers/fuses must be sized
for the electrical characteristics listed on the air handler rating
plate.
7. Failure to carefully read and follow all instructions in this
manual can result in malfunction of the air handler, death,
personal injury, and/or property damage.
8. Electric heat air handlers must be installed so the electrical
components are protected from water.
9. Installing and servicing heating/cooling equipment can be
hazardous due to electrical components.
10. Only trained and qualied personnel should install, repair, or
service heating/cooling equipment. Untrained service
personnel only perform basic maintenance functions such as
cleaning of exterior surfaces and replacing the air lters.
11. Observe all precautions shown in the manuals and on
labels attached to the air handler when servicing or
conducting maintenance tasks.
The Clean Air Act of 1990 bans the intentional venting of
refrigerant (CFC’s and HFC’s) as of July 1, 1992. Approved
methods of reclaiming must be followed. Fines and/or
incarceration may be levied for non-compliance
This is a safety alert symbol. When you see this symbol on
labels or in manuals, be alert to the potential for personal
injury. Understand and pay particular attention to the signal
words DANGER, WARNING, or CAUTION.
DANGER: Indicates an imminently hazardous situation, which
if not avoided, will result in death or serious injury.
WARNING: Indicates a potentially hazardous situation, which
if not avoided, could result in death or serious injury.
CAUTION: Indicates a potentially hazardous situation, which
if not avoided, may result in minor or moderate injury.
It is also used to alert against unsafe practices and hazards
involving property damage.
SECTION 2: SAFETY, GENERAL, DIMENSIONAL & MODEL NUMBER NOMENCLATURE

MORTEX PRODUCTS INC. 501 TERMINAL RD FORT WORTH, TX 76106 Page 3
12. These instructions cover minimum requirements and conform
to existing national standards and safety codes. In some cases,
these instructions exceed certain local codes and ordinances,
especially those who have not kept up with changing home
construction practices. These instructions are to be followed
and are the minimum requirement for a safe installation.
13. The capacity of the air handler should be based on an
acceptable heat loss calculation for the structure such as
ACCA Manual J or other approved methods.
14. 115 VAC models must be connected to a nominal 115 VAC,
Single-Phase, 60-Hertz power supply. DO NOT CONNECT
THIS APPLIANCE TO A 50 HZ POWER SUPPLY OR VOLTAGE
ABOVE 132 VOLTS OR BELOW 98 VOLTS.
15. 208/240 VAC models must be connected to a nominal 208
or 240 VAC, Single-Phase, 60-Hertz power supply. DO NOT
CONNECT THIS APPLIANCE TO A 50 HZ POWER SUPPLY OR
VOLTAGE ABOVE 253 VOLTS OR BELOW 187 VOLTS.
16. Ground wire connections must be securely fastened to the
ground lugs inside the control box.
17. Ductwork must be installed in accordance with the standards
of the National Fire Protection Association (NFPA) Warm Air
Heating and Ventilation Systems (NFPA Standards 90A and
90B). The air distribution duct should be sized for 0.2 inches
of static pressure. See Air Conditioning Contractors of America
(ACCA) Manual D for duct sizing.
18. The safety testing label appearing on this air handler covers
the air handler and the factory installed coil only. It does not
cover any other equipment.
19. Exterior surface of the cabinet may sweat when installed in a
non-conditioned space such as an attic or garage. Installer
must provide protection for the building structure such as
a full size auxiliary drain pan under all air handlers installed in
the non-conditioned space. The auxiliary drain pan is needed
to prevent building damage from condensation runo from
the unit casing.
20. Cabinet insulation used in this air handler is rated for R-2.1
(standard) and is ½”thick. Some jurisdictions require R-4.2 or
R-6.0 on installations in a non-conditioned spaces. Add 1”thick
insulation to the exterior casing of the air handler to comply in
these jurisdictions and add a vapor barrier on the outside of
the added insulation.
ALWAYS SHUT OFF ELECTRICITY AT THE DISCONNECT
SWITCH OR TURN OFF THE CIRCUIT BREAKERS IN THE MAIN
ELECTRICAL ENTRANCE BEFORE PREFORMING ANY SERVICE
ON THE APPLIANCE.
GENERAL INFORMATION
This air handler provides the flexibility for installation in any
horizontal application and may be used with or without electric
heat or hydronic heat. The direct-drive three 3-speed PSC motor
or 5-speed constant torque motor is capable of providing
sufficient air flow for most applications. Return air may enter the
bottom or end of a cased air handler.
Inspection
As soon as the air handler is received, it should be inspected
for damage that may have occurred during transit. If shipping
damage is found, the extent of the damage should be noted
on the carrier’s freight bill. A separate request for inspection by
the carrier’s agent should be made in writing. Before installing
the air handler, check the cabinet for screws or bolts which may
have become loose during transit. Some air handler models
have shipping supports for the blower motor shaft. Remove this
support before operating the air handler unit.
See the local wholesale distributor for more information. Mortex
Products, Inc assumes no liability for freight damage.

MORTEX PRODUCTS INC. 501 TERMINAL RD FORT WORTH, TX 76106 Page 4
Figure 1: CEHX/ CCWE/ CDXW/ CCWW Dimensions - DX or Chilled Water Cooling With or Without Electric Heat
Table 1: CEHX/ CCWE/ CDXW/ CCWW Dimensional Data
Model Number Physical Dimensions
A B C D E F G H
CEHX / CCWE / CDXW / CCWW - 18 41 2.625 7.125 4 3 5.25 2.625 3.75
CEHX / CCWE / CDXW / CCWW - 19 41 2.625 7.125 4 3 5.25 2.625 3.75
CEHX / CCWE / CDXW / CCWW - 24 41 2.625 7.125 4 3 5.25 2.625 3.75
CEHX / CCWE / CDXW / CCWW - 25 47 2 10.5 2.5 1.5 4.625 2 2.6875
CEHX / CCWE / CDXW / CCWW - 30 47 2 10.5 2.5 1.5 4.625 2 2.6875
CEHX / CCWE / CDXW / CCWW - 31 47 2 10.5 2.5 1.5 5.875 2 2.6875
CEHX / CCWE / CDXW / CCWW - 34 53.5 3.25 13.75 3.25 2.75 5.875 3.25 3.9375
CEHX / CCWE / CDXW / CCWW - 35 53.5 3.25 13.75 3.25 2.75 5.875 3.25 3.9375
CEHX / CCWE / CDXW / CCWW - 36 60.5 3.25 17.5 3.25 2.75 5.875 3.25 3.9375
CEHX / CCWE / CDXW / CCWW - 37 60.5 3.25 17.5 3.25 2.75 5.875 3.25 3.9375

Model Number Physical Dimensions
Liquid Line Suction
Line
Evap. Rows A B C Ship
Weight
SEHX / SCWE / SDXW / SCWW - 18 3/8 3/4 3 37 34.25 30 60
SEHX / SCWE / SDXW / SCWW - 19 3/8 3/4 4 37 34.25 30 65
SEHX / SCWE / SDXW / SCWW - 24 3/8 3/4 3 37 34.25 30 60
SEHX / SCWE / SDXW / SCWW - 25 3/8 3/4 4 45 42.25 38 75
SEHX / SCWE / SDXW / SCWW - 30 3/8 3/4 3 45 42.25 38 70
SEHX / SCWE / SDXW / SCWW - 31 3/8 3/4 4 45 42.25 38 75
SEHX / SCWE / SDXW / SCWW - 34 3/8 3/4 3 49 46.25 42 74
SEHX / SCWE / SDXW / SCWW - 35 3/8 3/4 4 49 46.25 42 80
SEHX / SCWE / SDXW / SCWW - 36 3/8 3/4 3 56 53.25 49 85
SEHX / SCWE / SDXW / SCWW - 37 3/8 3/4 4 56 53.25 49 90
MORTEX PRODUCTS INC. 501 TERMINAL RD FORT WORTH, TX 76106 Page 5
Figure 2: SEHX/ SCWE/ SDXW/ SCWW Dimensions - DX or Chilled Water Cooling With or Without Electric Heat
Table 2: SEHX/ SCWE/ SDXW/ SCWW Dimensional Data

MOTOR & BLOWER CODE
80 - 1/3 HP, 208/240V, Constant Torque Mtr; (2) 7.00” x 8.00” Blowers (High EFF.)
81 - 1/2 HP, 208/240V, Constant Torque Mtr; (2) 7.00” x 9.00” Blowers (High EFF.)
82 - 1/3 HP, 115V, Constant Torque Mtr; (2) 7.00” x 8.00” Blowers (High EFF.)
83 - 1/2 HP, 115V, Constant Torque Mtr; (2) 7.00” x 9.00” Blowers (High EFF.)
UNIT VOLTAGE
A - 115/1/60
C - 208/240/1/60
TIME DELAY RELAY
0 - No TDR (not required, blower time delay
built into constant torque motor)
ORIFICE OR EXPANSION VALVE NUMBER
D - TXV4-A (E410A 1.5 to 2.5 Ton)
Y - TXV4-A (R410A 3.0 Ton)
4 - 4 Row Chilled Water Coil (CW)
5 - 5 Row Chilled Water Coil (CW)
HEATING CAPACITY
03 - Electric Heat Capacity in kW
26 - Hot Water Heat Capacity in M/BTUH
TONS
Nominal Cooling BTUH
TYPE
EHX - DX Coil and Electric Heat
CWE - Chilled Water Coil and Electric Heat
DXW - DX Coil and Hot Water Heat
CWW - Chilled Water Coil and Hot Water Heat
SERIEC
S - Horizontal Firdown Unit Uncased
C - Horizontal Firdown Unit Cased
S E D 0 C 7924 03EHX
Expansion Device Code
E = Expansion Valve (DX)
2 = 2 Pipe Chilled Water (CW)
4 = 4 Pipe Chilled Water (CW)
MORTEX PRODUCTS INC. 501 TERMINAL RD FORT WORTH, TX 76106 Page 6
Table 3: SEHX/CEHX/SCWE/CCWE/SDXW/CDXW/SCWW/CCWW Model Number Nomenclature
Location
Access for servicing is an important factor when selecting the
location of an air handler. Provide a minimum of 30 inches under
the air handler for access to the control box, heating elements,
water pump, blower, and air filters. The air handler can be serviced
entirely from the bottom, including replacing the air filter on
models equipped with a louvered ceiling access panel with an
integrated filter rack.
NOTE: The air handler is designed for horizontal applications only
and is therefore not designed to be installed in a closet or flush
mounted in a wall in an upflow vertical position.
Location is usually predetermined. Check with the homeowner
or general contractor for predetermined installation plans. If
location has not been decided, consider the following in choosing
a suitable location.
1. Select a location with adequate structural support, space for
service access, and clearance for return and supply duct
connections. The air handler is designed to fit in a 12” high drop
down space (furred-in area).
2. Normal operating sound levels may be objectionable if the air
handler is placed directly over or under some rooms such as
bedrooms, study, etc.
3. Locate the air handler where the supply and return air ducts can
provide even air distribution to and from the living spaces.
4. Locate the air handler where the electrical supply wiring can
be easily routed from main electrical panel to the air handler
and where electrical wiring will not be damaged.
5. Supply power wiring may be installed in a flexible conduit
or armored cable. The installer must refer to National Electrical
Code (NFPA 70), Canadian Electrical Code, Part I (CSA C22.2),
ANSI/NFPA No. 70 and/or any local codes to ensure supply
wiring complies with all applicable codes.
6. Locate appliance where thermostat wiring can be easily
routed from the thermostat to the air handler and where the
wiring will not be damaged. Make sure the wiring has enough
length so it will not to block access to any components that
may need to be replaced or serviced.
7. Locate the air handler where refrigerant lines can be easily
routed from the air handler to the outdoor unit.
8. Primary and secondary drain lines must be routed so air filter
replacement is not obstructed.
9. The blow-thru design of this air handler will cause the exterior surface
of cabinet to sweat when installed in a non-conditioned space such
as an attic or garage. The installer must provide protection such
as a full size auxiliary drain pan under any unit installed in a non
conditioned space to prevent damage to the building structure from
condensation runoff.
Clearances
This air handler is approved for 0 inches of clearance to
combustible material on any part of the air handler exterior
casing and the inlet or outlet ducts (See Table 12). A clearance
of 30 inches below the air handler is required for the service
access panel to swing open (See Figure 3).
SECTION 3: LOCATION AND CLEARANCES
Top
(inches)
Back
(inches)
Sides
(inches)
Supply Duct
(inches)
0 0 0 0
Table 4: Clearance to Combustibles

NON-METALLIC RETURN DUCTS MAY NOT BE ALLOWED IN
SOME STATES, COUNTIES, OR CITIES.
CHECK ALL STATE, LOCAL AND FIRE CODES TO DETERMINE
IF NON-METTALIC RETURN DUCTS ARE ALLOWED.
FIRE HAZARD:
NON-METALIC DUCTS CAN COLLECT DUST AND DEBRIS
WHICH CAN RESULT IN A FIRE HAZARD. BE SURE TO
THOROUGHLY CLEAN THE DUCT SYSTEM ANNUALLY TO
REMOVE ALL DUST AND DEBRIS.
MORTEX PRODUCTS INC. 501 TERMINAL RD FORT WORTH, TX 76106 Page 7
SECTION 4: RETURN AND SUPPLY AIR REQUIREMENTS
RETURN AIR REQUIREMENTS
Provisions shall be made to permit air in the conditioned space to
return to the air handler. Failure to provide means for adequate
return air will result in reduced airflow through the air handler
causing improper heating and cooling of the living space.
Reduced airflow may also cause the cooling coil to freeze up and
the electric heat limit(s) to cycle, resulting in premature heating
element failure.
Uncased Air Handler – Return Air
If a louvered service access panel with an integral filter (See Figure
4) is not used, a return air duct should be routed between the
ceiling joists from the furred-in area around the air handler to a
return air filter grille located in the ceiling. The return air grille
must never be located in a closet.
NOTE: The return air must be filtered to prevent a buildup of lint,
dust, and debris on the coil surface.
Cased Air Handler – Return Air
A cased air handler can utilize a louvered ceiling access panel
with an integral filter (See Figure 4) as a means of returning the
conditioned air from the conditioned space to the air handler.
A cased air handler may also utilize a non-louvered ceiling access
panel with a return air duct attached to the return air opening in
the air handler. If a return air duct is used, the return air opening
knock-out must be removed to allow the return air to enter the
air handler through the return air opening. The return air duct
may consist of an elbow that drops directly into a return air filter
grille in the ceiling or the return duct may be routed between the
ceiling joists to a return air filter grille located in the ceiling away
from the air handler.
NOTE: The return air must be filtered to prevent a buildup of lint,
dust, and debris on the coil surface.
Return Air Filter Location
Horizontal air handlers are not factory equipped with an air filter.
The air filter can be installed in the filter rack of the louvered
ceiling access panel (See Figure 4 and Table 13) or it may be
located remotely in a ceiling mounted return air filter grille. If
a return duct and return air filter grille is used, a non-louvered
ceiling access panel will be required.
The louvered ceiling panel air filter size for the SEHX, CEHX, SCWE
and the CCWE models is 20”x 20” x 1”.
The recommended minimum filter sizes for a return air filter grille
is shown below.
Standard Throw-Away Air Filter @ 300 ft/min or Less
600 CFM = 16”x 20”x 1”
700 CFM = 20”x 20”x 1”
800 CFM = 20”x 20”x 1”
900 CFM = 20”x 24”x 1”
1000 CFM = 20”x 24”x 1”
NOTE: Pleated filters are not recommended due to their higher
pressure drop.
Figure 3: Clearance for Service Access
Figure 4: Ceiling Access Panel

Extreme caution must be taken that no internal damage will
result if screws or holes are drilled into the cabinet.
The air handler and enclosure must be covered during the
drywall installation, texturing, and painting process to
prevent spray and debris from collecting on and entering
the air handler and enclosure.
MORTEX PRODUCTS INC. 501 TERMINAL RD FORT WORTH, TX 76106 Page 8
IMPACT HAZARD
Use extreme caution when removing the ceiling
access panel screws. The panel is secured to the
frame assembly with the thumb screws. Once the
thumb screws have been removed, the ceiling
access panel will swing down rapidly and can
injure anyone standing underneath the panel. The
panel must be supported from underneath as it
swings downward to prevent injury.
The louvers can also have sharp edges which can
cut hands or fingers. Wearing gloves is recommended
when servicing the horizontal air handler.
Table 5: Optional Ceiling Access Panels
Figure 5: Supply and Return Duct Transitions
USING A DUCTED RETURN WILL RESULT IN QUIETER
OPERATION THAN USING A LOUVERED CEILING ACCESS
PANEL USED FOR RETURN AIR.
Part
Number
Overall
Frame
Dimensions
Type SunTherm Horizontal Fan Coil Models Ship
Weight
CPL1 27.5 x 43 Louvered SCWE/CCWE/SDXW/CDXW/CCWW-12,
SCWE/CCWE/SDXW/CDXW/CCWW-18
SCWE/CCWE/SDXW/CDXW/CCWW-19,
SCWE/CCWE/SDXW/CDXW/CCWW-24,
SCWE/CCWE/CCWW-25
18
CPNL1 27.5 x 43 Non-Louvered 18
CPL2 27.5 x 49 Louvered SCWE/CCWE/SDXW-25
SCWE/CCWE/SDXW/CDXW/CCWW-30,
SCWE/CCWE/SDXW/CDXW/CCWW-31
20
CPNL2 27.5 x 49 Non-Louvered 20
CPL3 27.5 x 55.5 Louvered SCWE/CCWE/SDXW/CDXW/CCWW-34,
SCWE/CCWE/SDXW/CDXW/CCWW-35
21
CPNL3 27.5 x 55.5 Non-Louvered 21
CPL4 27.5 x 62.5 Louvered SCWE/CCWE/SDXW/CDXW/CCWW-36,
SCWE/CCWE/SDXW/CDXW/CCWW-37
22
CPNL4 27.5 x 62.5 Non-Louvered 22
SUPPLY AIR REQUIREMENTS
The horizontal air handler can be mounted into the ceiling to
allow horizontal left supply air flow or horizontal right supply air
flow. The supply air plenum is attached and secured to the air
handler duct flanges using screws. Use a non-tape sealant such
as mastic or an aerosol sealant to seal the plenum to the air
handler to prevent air leakage. The supply plenum must be the
same size as the supply air opening.
The entire supply duct system must be designed for a total of
0.20”W.C. static pressure drop or less and each individual duct
must be sized to deliver the proper amount of air to each room
of the conditioned space. Holes cut in the supply plenum for
ducts must be the same size as the supply ducts. Use a duct
starting collar to attach the ducts to the plenum. Use a non-tape
sealant such as mastic or an aerosol sealant to seal the ducts to
the plenum to prevent air leakage.
If the supply duct system is installed in an non-conditioned space,
the duct system must be insulated and installed in accordance
with local codes.
SECTION 5: AIR HANDLER INSTALLATION
Ceiling Installation
The area in the ceiling where the air handler is to be located
should have a framed in structure so the air handler can be
properly mounted and secured. The inside height of the area
must be 12 inches. Prior to installing the air handler, holes must
be cut into the frame for the refrigerant tubing, drain line(s),
electrical wiring, thermostat wiring, and outdoor unit control
wiring to enter the air handler. The air handler must be level in
both directions to allow proper condensate drainage.
NOTE: Cased air handlers require return and supply
transition ducts to assure proper airflow. Uncased air
handlers only require a supply duct transition. See Figure 5
below for factory recommendations.

MORTEX PRODUCTS INC. 501 TERMINAL RD FORT WORTH, TX 76106 Page 9
Cased Air Handler
The following steps are required to properly install a cased
air handler.
1. Remove the top shipping cover and corner posts.
2. Remove the bottom shipping cover.
3. Use screws to secure the 4 straps to the ceiling joists where
the air handler will be installed (See Figure 6). The straps must
be located so the hooks in the straps line up with the slots in
the base of the air handler.
4. Raise the air handler into place and place the hooks into the
slots in the base. Bend the hooks back to keep the hooks from
slipping out of the slots in the base.
5. Connect the supply air plenum to the air handler supply air
duct flanges as described in SUPPLY DUCT REQUIREMENTS
found in SECTION 3 of these instructions.
6. New Installations Only:
a. If a non-louvered ceiling access panel is being used, connect
the return air duct to the air handler as described in
RETURN AIR REQUIREMENTS / Cased Air Handler found in
SECTION 3 of these instructions.
b. After the air handler is mounted, a 2x2 or 2x4 frame must be
installed around the base of the air handler to create an air
tight seal and support the ceiling access panel frame.
c. Install the ceiling access panel.
NOTE: The ceiling access panel is sold separately. It is not
included with the air handler.
7. Remove the thumb screws that secure the ceiling access panel
and slowly swing the panel down.
8. Remove the control box cover.
9. Connect the electrical supply wires and the thermostat control
wires to the appropriate terminal block and pigtails in the
control box as described in SECTIONS 8 and 9 of these
instructions.
NOTE: An ON/OFF switch must be installed in the supply
circuit to disconnect the power to the air handler during
servicing. The switch must be easily accessible and clearly
identified.
10. Connect the refrigerant lines or chilled water lines to the coil
as described in SECTIONS 6 and 7 of these instructions.
Figure 6: Cased Air Handler Mounting
11. Make the necessary blower motor speed changes as described
in SECTION 10 of these instructions.
12. Install the control box cover.
13. Raise the ceiling access panel into place and secure with the
thumbscrews.
14. Turn the power on to the unit by following the procedure
found in SECTION 11 of these instructions and in the Users
Information Manual to place the air-handler into service.
15. Set the thermostat to the desired operating mode and
temperature.
Uncased Air Handler
The following steps are required to properly install an uncased
air handler.
1. Remove the top shipping cover and corner posts.
2. Remove the screws from the control box cover and remove
the cover.
3. Remove the bottom shipping cover.
4. Raise the air handler into place and install the lag bolts with
washers through the slots in the top cover. Tighten the lag
bolts until the air handler is securely fastened to the ceiling.
5. Connect the supply air plenum to the air handler supply air
duct flanges as described in SUPPLY DUCT REQUIREMENTS
found in SECTION 3 of these instructions.
6. New Installations Only:
a. If a non-louvered ceiling access panel is being used,
install the return air duct as described in RETURN AIR
REQUIREMENTS / Uncased Air Handler found in SECTION 3
of these instructions.
b. After the air handler is mounted, a 2x2 or 2x4 frame must
be installed around the base of the air handler to create an
air-tight seal and support the ceiling access panel frame.
c. Install the ceiling access panel.
NOTE: The ceiling access panel is sold separately. It is not
included with the air handler.
7. Remove the thumb screws that secure the ceiling access
panel and slowly swing the panel down.
8. Remove the control box cover.
9. Connect the electrical supply wires and the thermostat
control wires to the appropriate terminal block and pigtails
in the control box as described in SECTIONS 8 and 9 of
these instructions.
NOTE: An ON/OFF switch must be installed in the supply
circuit to disconnect the power to the air handler during
servicing.

CONDENSING UNIT
LIQUID LINE
SUCTION LINE
EVAPORATOR COIL
MORTEX PRODUCTS INC. 501 TERMINAL RD FORT WORTH, TX 76106 Page 10
SECTION 6: REFRIGERANT PIPING, TXV,
FLOWRATOR, CONDENSATE DRAIN
DX Cooling / Chilled Water Cooling
DX Refrigerant Piping:
Air handlers with DX type evaporator coils require liquid and
suction piping sized in accordance with the outdoor unit
manufacturer’s instructions. The DX coil has sweat copper
connections. Refrigerant lines should be soldered with silver
solder or high temperature brazing alloy. The suction line must
be insulated to prevent condensate from forming and dripping
off. Armaflex (or equivalent) with 3/8” (1 cm) minimum wall
thickness is recommended. In severe conditions, such as hot
or high humidity areas, insulation with 1/2”(1.3 cm) minimum
wall thickness may be required. If the outdoor unit is installed
above air handler, oil traps are required at equal intervals along
suction line (See Figure 7). Horizontal suction lines should slope
downward 1 inch for every 20 feet toward the outdoor unit.
Flow dry nitrogen through refrigerant lines during the soldering
operation to prevent oxidation of the inside surface of the
copper tubing which can result in debris plugging the TXV or
orifice screen.
• Install 1 oil trap for a height difference of 15 ft to 25 ft
(4.6 m to 7.6 m) between indoor and outdoor units.
• Install 2 oil trap for a height difference of 26 ft to 50 ft
(7.9 m to 15.2 m) between indoor and outdoor units.
• Install 3 oil trap for a height difference of 51 ft to 100 ft
(15.5 m to 39.5 m) between indoor and outdoor units.
• Install 4 oil trap for a height difference of 101 ft to 150 ft
(30.8 m to 45.7 m) between indoor and outdoor units.
Figure 7: Piping for Air Handler Below Outdoor Unit
Figure 8: TXV Sensing Bulb Placement
SPECIAL INSTRUCTIONS FOR COILS WITH
THERMAL EXPANSION VALVES (TXV)
The thermal expansion valve (TXV) used in this air handler has a
built-in check valve making it heat pump capable. The external
equalizer line attached to the TXV has a female flare nut with built
in Schrader valve depressor that attaches to the Schrader valve
port located on the coil suction manifold.
Figure 9: TXV Sensing Bulb Location
The best location for the TXV sensing bulb is on a horizontal
section of the suction line tube and positioned between 10
o’clock and 2 o’clock on the tube. (See Figures 8 and 9).
NOTE: The sensing bulb must never be located at the bottom of
the suction line due to the possibility of oil and refrigerant laying
in the bottom of the pipe causing false signals.
The sensing bulb must be able to sense the temperature of the
superheated suction vapor and must therefore not be located in
a position that will expose it to extraneous heat/cold. The sensing
bulb must be insulated to isolate it from the surrounding air. The
TXV must be the proper size and type to achieve the performance
ratings of the system.
NOTE: If a non-bleed type TXV is used, the outdoor unit may
require a hard start kit to allow the compressor to start under load.
How the TXV Controls Superheat
The TXV is a precision device designed to regulate the rate at
A TXV has a thermostatic element separated from the valve body
by a diaphragm designed to regulate the rate at which refrigerant
flows into the evaporator.

MORTEX PRODUCTS INC. 501 TERMINAL RD FORT WORTH, TX 76106 Page 11
which liquid refrigerant flows into the evaporator. This controlled
flow is necessary to provide optimum performance and to
prevent the return of liquid refrigerant to the compressor.
The TXV separates the high pressure and low-pressure sides of a
refrigeration or air conditioning system. Liquid refrigerant enters
the TXV under high pressure, but the pressure is reduced when
the flow of the refrigerant is restricted by an internal moving pin
and port.
It is important to remember that the TXV only controls the level
of superheat of the refrigerant in the suction line. The TXV is not
designed to control air temperature, head pressure, capacity,
suction pressure, or humidity. Attempts to adjust the TXV to
control any of these system variables will lead to poor system
performance and possible compressor failure.
The TXV responds to the temperature of refrigerant gas as it
leaves the evaporator. This temperature is detected by the sensing
bulb which is located near the evaporator outlet. The TXV also
responds to the refrigerant pressure within the evaporator, which
is transmitted to the TXV by an equalizer tube connected to the
coil suction manifold. By responding to these variables, the TXV
maintains a predetermined superheat level exiting the evaporator
which maintains proper system stability, performance, and
reliability.
TXV TROUBLESHOOTING
The thermostatic expansion valve (TXV) is like the carburetor in
a car engine. It opens and closes to allow the correct amount of
refrigerant flow through the system. When the TXV isn’t working
properly, the capacity and efficiency of the system is reduced. If a
faulty TXV is suspected, perform the following tests:
Connect refrigerant gauges to the system and check that the
refrigerant pressures, liquid subcooling and suction superheat
levels are correct according to the outdoor unit charging chart.
Subcooling at the outdoor unit liquid service valve is normally
around 10°F and superheat at the outdoor unit suction service
valve is normally between 8-12°F, but these can vary depending
on the manufacturer and model of the outdoor unit.
Check to see if the indoor airflow through the system is correct.
Check to see if the indoor and outdoor coils and indoor air filters
are dirty. Clean dirty coils and clean/replace dirty air-filters as
necessary before measuring air-flow and checking pressures,
superheat, and subcooling.
Make sure the refrigerant charge in the system is correct. This
step may require weighing the refrigerant in the system. Once
refrigerant charge weight has been adjusted as necessary, recheck
the pressures, subcooling and superheat. If these values are still
not correct, the TXV may be defective or the TXV inlet strainer or
the liquid line filter dryer is plugged with debris.
A good way to determine if the TXV is defective is to remove the
TXV’s sensing bulb from the suction line and check the pressures,
subcooling, superheat again. No change in the pressures,
subcooling, and superheat levels is an indication the TXV is
defective. Another test that can be performed is to place the
sensing bulb in ice water and recheck the pressures, superheat,
and subcooling levels. If these values don’t change, the TXV is
likely defective.
Additional TXV Troubleshooting Information
Low Suction Pressure – High Superheat
POSSIBLE CAUSES:
1. Undersized TXV
2. TXV superheat adjustment too high
3. High indoor coil pressure drop due to internal restriction
4. TXV sensing bulb installed on bottom of suction line
5. Restricted or capped TXV external equalizer tube
6. Improper TXV external equalizer location (must be located
on suction manifold after the last feeder tube)
7. Low refrigerant charge
8. Plugged liquid line filter dryer
9. Plugged TXV inlet strainer
10. Low outdoor ambient temperature
High Suction Pressure – Low Superheat
POSSIBLE CAUSES:
1. Oversized TXV
2. TXV seat leakage
3. TXV superheat adjustment too low
4. Improper TXV sensing bulb installation
a. Poor thermal contact with suction line (loose clamp)
b. Uninsulated sensing bulb
c. Warm location
5. Bad compressor (low capacity)
6. Incorrectly located external equalizer line (must be located on
suction manifold after the last feeder tube)
Low Suction Pressure – Low Superheat
POSSIBLE CAUSES:
1. Low system load:
a. Insufficient indoor airflow
b. Dirty indoor air filters
c. Return air too cold
d. Indoor coil icing or frosting
2. Poor air distribution over indoor coil
3. Improper indoor/outdoor coil internal volume balance on
heat pump systems (improper air handler/outdoor unit
match up; indoor coil too big or too small causing incorrect
refrigerant charge balance between cooling and heating modes.
4. Oil trapped in indoor coil
Things to Check Before Replacing TXV
1. Slowly loosen the flare nut on the TXV external equalizer
connected to the suction line port with a flare nut. If there is a
large pressure release when the nut has been loosened,
tighten the nut. If this results in a slight pressure release or no
pressure release; the Schrader valve stem is not being
depressed. Install an anti-blow back fitting to the external
equalizer line of the TXV to depress the Schrader valve stem
and check for proper operation of the TXV.
2. Remove the sensing bulb from the suction line and hold in
a warm hand. The high side pressure should drop and low side
pressure should increase as the TXV opens. Place the sensing
bulb in ice water. The high side pressure should increase and
the low side pressure should decrease as the TXV closes. If the
pressures do not change when these tests are conducted, the
TXV is faulty.
FLOWRATOR TO TXV CONVERSION
While thermal expansion valves can be factory installed, they
are normally available in kit form for field installation. Follow the
installation instructions provided with the TXV kit. The TXV must

The indoor coil is pressurized with nitrogen. Relieve
pressure before installing TXV by depressing Schrader
valve on coil suction manifold.
MORTEX PRODUCTS INC. 501 TERMINAL RD FORT WORTH, TX 76106 Page 12
Field Installed TXV Installation Procedure
1. Remove the cap on Schrader valve port on coil suction
manifold.
2. Depress the Schrader valve to relieve the pressure inside
the coil.
3. Only after coil pressure has been relieved, turn the female
swivel nut counter-clockwise to separate it from the
distributor.
4. Remove the piston orifice from the flowrator distributor
assembly using a small diameter wire or paper clip.
5. As shown in Figure 10, the TXV assembly must be installed
between the distributor and the liquid line connector.
6. Attach the TXV by connecting the female swivel nut on TXV
outlet to the flowrator distributor (aligning Teflon seal first)
and torque swivel nut to 10-30 ft. lbs.
7. Attach the liquid line connector with female swivel nut to
male rotalock fitting on TXV inlet (aligning Teflon seal first)
and torque swivel nut to 10-30 ft. lbs.
8. Attach equalizer tubing with 1/4”female flare nut that includes
depressor to the male Schrader port on the coil suction
manifold and torque nut to 10-30 ft. lbs.
9. Install the TXV bulb to the suction line using the two bulb
clamps furnished with kit.
a. The sensing bulb should be installed on a horizontal run of
the suction line if possible and should be positioned
between 10 o’clock and 2 o’clock as shown in Figure 8.
b. If the sensing bulb is installed on a vertical run of the suction
line, the bulb should be located at least 6 inches away from
any bend and on the side of the tube that is above the
inside of the bend. On vertical run bulb installations, the
bulb should be positioned with the bulb capillary tube at
the top.
c . The bulb should be insulated using thermal insulation
to protect it from the effect of the surrounding ambient
temperature.
10. After completing the TXV installation, leak check all TXV
fittings and thoroughly evacuate the coil through the service
access fittings on the outdoor unit liquid and suction service
valves prior to charging the system with refrigerant.
be installed before system is charged with refrigerant. Installation
of the TXV requires no cutting or brazing.
IMPORTANT NOTE: The flowrator piston must be removed from
the flowrator distributor prior to the installation of the TXV (See
Figure 11).
Field Installed TXV Kit Information
R72DB0053HX: R-410A, 1.5 – 2.5 Ton, 15% Bleed,
Inlet: Male Rotolock. Outlet: Female Swivel Nut
R72DB0054HX: R-410A, 3.0 – 5.0 Ton, 15% Bleed,
Inlet: Male Rotolock, Outlet: Female Swivel Nut
Figure 10: Typical TXV Connections
SPECIAL INSTRUCTIONS FOR COILS WITH
FLOWRATOR DISTRIBUTOR ASSEMBLIES
The sizing of the orifice piston should be based on the rated
capacity of the outdoor unit and air handler match-up.
Summit provides capacity performance ratings that match both
same size and upsized air handlers with specific manufacturer’s
outdoor units. Consult the local Summit distributor for the proper
size orifice piston to be used for a specific outdoor unit model
number. The factory installed orifice piston size is marked on the
flowrator distributor assembly and the air handler carton.
Failure to install the proper size orifice piston can lead to poor
system performance and possible compressor damage. A
variation of one piston size smaller or larger is not normally
critical. Mortex/Summit reserves the right to substitute a factory
installed piston one size smaller or greater if the piston size
ordered is out of stock. A selection of replacement orifice pistons
is available from the local Summit distributor.
ORIFICE PISTON REPLACEMENT
If the flowrator is being used instead of a TXV, the piston must be
installed oriented as shown in Figure 11 in the distributor body
and the existing liquid line attached to the flowrator distributor.
1. Remove the cap on Schrader valve port on coil manifold.
2. Depress the Schrader valve to relieve the pressure inside the coil.
3. Only after coil pressure has been relieved, turn the female
swivel nut counter-clockwise to separate it from the distributor.
4. Replace the orifice piston with the correct size piston for the
application. Make sure the tapered end of the piston is facing
the feeder tubes on the distributor body.
5. Turn the female swivel nut on clockwise the flowrator
distributor (aligning Teflon seal first) and torque swivel nut to
10-30 ft. lbs.
6. After completing the installation of the correct size orifice
piston, leak check the flowrator distributor fitting and
thoroughly evacuate the system through the service fittings on
the outdoor unit liquid and suction service valves.

MORTEX PRODUCTS INC. 501 TERMINAL RD FORT WORTH, TX 76106 Page 13
Figure 11: Flowrator Distributor Assembly
FIELD INSTALLED SUPPLEMENTAL HEAT LOCKOUT (SHL) KIT
A field installed supplemental heat lockout (SHL) kit must be
used with SEHX and CEHX models equipped with electric heat
when used in a heat pump system. The purpose of the SHL is to
prevent excessive refrigerant pressures due to the indoor coil
being located downstream of the electric heating elements. If
the electric heater is energized while the heat pump is operating
in the heat mode, the additional heat imparted to the indoor
coil by the electric heater elements can cause the refrigerant
pressures to be excessively high. The SHL temperature switch
contacts will open and lock out the electric heat when the hot gas
line temperature entering the indoor coil reaches approximately
120°F. The contacts will close when the hot gas line temperature
falls to approximately 109°F which will allow the electric heat
to operate.
Installation of the SHL Kit
After brazing and leak testing of the refrigerant lines is
completed and the lines have sufficiently cooled, mount the
SHL temperature sensor securely to the suction/hot gas
refrigerant line that connects to the coil manifold (larger line;
suction in cooling mode; hot gas in heating mode) with the 2
plastic wire ties provided in the kit assuring that the temperature
switch has good contact with the refrigerant line and is not
located where it may be damaged. Wrap the sensor on the
refrigerant line using the insulation tape provided in the kit and
secure with the insulation with the 2 plastic wire ties provided in
the kit (See Figure 12).
SHL Switch Wiring:
One of the SHL switch pigtail leads is connected to the air handler
white pigtail wire with a wire nut (See Figure 13). The other SHL
switch pigtail lead is connected to the white thermostat wire from
the thermostat W terminal and secured with a wire nut. Check the
outdoor unit and thermostat wiring diagrams to assure the SHL
will prevent the supplemental electric heat from being energized
when the switch contacts are open.
Figure 12: Supplemental Heat Lockout (SHL)
Temperature Sensor Location
Figure 14: Supplemental Heat Lockout
(SHL) Switch Wiring
Figure 13: Supplemental Heat Lockout (SHL)
Temperature Sensor Mounting

This air handler must not be located where water can cause
damage to the adjacent area if the condensate drain pan
should overflow or if any condensate drain connections
should leak.
When such locations can’t be avoided, a suitable auxiliary
drain pan must be installed under the air handler and
connected to an adequate drain. The auxiliary drain pan
should be at least 2” greater in length and width than the
air handler dimensions and should be at least 1.5” deep.
The manufacturer of this air handler is not liable for any
water damage related to the air handler.
Toxic chemicals used for treatment of boilers or non-
potable water heating appliances shall never be introduced
into a potable water space heating system.
MORTEX PRODUCTS INC. 501 TERMINAL RD FORT WORTH, TX 76106 Page 14
Figure 15: Typical Condensate Trap
CONDENSATE DRAIN PIPING
The blow-through coil design of this air handler will create
positive pressure in the condensate drain system. To prevent air
from being blown out of the condensate drain, it is recommended
that a trap with an anti-siphon air vent be installed as shown in
Figure 15. Piping from the condensate drain connection must
have a 2-inch minimum trap and must provide adequate slope for
drainage to a visible area.
NOTE: A condensate trap may be required by local codes.
Installing a trapped secondary drain line is also recommended
to prevent condensate pan overflow should the primary drain
become clogged. A secondary drain float switch that will shut the
cooling system off should the primary drain become clogged may
be installed instead of a secondary drain line.
NOTE: Do not pipe the primary and secondary drains together. If
the secondary drain is not used, it must be capped.
The air handler cooling DX coil condensate drain pan has one ¾”
NPT female primary and one ¾” NPT female secondary connection
located on the same side as the refrigerant line connections (See
Figure 16). The other side of the condensate drain pan has one ¾”
NPT female primary drain connection and no secondary
drain connection.
NOTE: The condensate drain connections are located on the
condensate drain pan inside the cabinet of a cased air handler.
Condensate drain piping must enter through the holes in the
cabinet and then connect to the drain pan connections within the
cabinet. Refer to Figure1 for condensate drain pipe entrances.
Figure 16: Condensate Drain Pan
Hot Water Piping
All water piping must be supported independent of the air
handler to prevent vibration and stress on the coil headers.
Swing joints or flexible fittings must be provided to absorb
expansion and contraction of the piping. Rigid piping reduces
the effectiveness of vibration isolators. Water pipes must be
adequately vented in order to prevent air binding. The air handler
is equipped with manual air vents mounted on the coil manifold.
Total hot water piping length should not exceed 140 feet. All
hot water piping to the coil should be 3/4 inch ID (7/8 inch OD)
copper. CPVC and PEX piping may also be used in applications
where the water temperature does not exceed 150°F. It is
recommended a water isolation valve and a union be placed in
the water lines to and from the coil, near the coil, for serviceability,
repair or replacement of the coil. A thermal expansion tank is
recommended on any closed loop system to relieve thermal
expansion due to pressure increase.
After piping has been installed, allow the system to fill with water
and check connections for leaks. To ensure complete filling of the
system, follow the Filling Hydronic Heating System With Water,
Purging Air From System, and System Startup procedure found in
SECTION 11: Final System Checkout and Startup in
these instructions.
SECTION 7: HOT AND CHILLED WATER
“Massachusetts requires an electronically controlled
pump timer that activates the pump every 6 hours
for 60 seconds and limits the distance between the
water heater and the air handler to 50 feet max.”
Chilled Water Piping
Supply and return chilled water piping to the coil should be ¾
inch ID for models with a capacity up to 42,000 BTU/H and 1 inch
on models with a capacity greater than 42,000 BTU/H. Water pip-
ing must always be connected so that the entering water is on the
leaving side of the coil for best performance.

When system requires water at temperatures higher
than required for other uses, a means such as a mixing
valve must be installed to temper the water temperature
for those uses in order to reduce the potential of a scald
hazard.
The air handler must not be located where water will cause
damage to the adjacent area should any water connection leak.
When such locations can’t be avoided, a suitable auxiliary
drain pan must be installed under the air handler and
connected to an adequate drain. The auxiliary drain pan
should be at least 2 inches greater in length and width
than the air handler dimensions and should be at least 1.5
inches deep.
The manufacturer of this air handler is not liable for any
water damage related to the air handler.
Hot water from a boiler used to satisfy heating
requirements can be heated to temperatures of 180°F.
Parts containing water this hot can scald very quickly.
Use extreme caution when servicing or performing
maintenance on any parts containing hot water.
MORTEX PRODUCTS INC. 501 TERMINAL RD FORT WORTH, TX 76106 Page 15
Figure 17: Components and Water Connections

Model Number Evaporator
Coil Number
of Rows
Type
Of
Blower
Motor
Chilled Water Capacities @ Entering
Water Temperatures
CFM GPM Pressure
Drop Water
( Ft Water )
Pressure
Drop Air
( IN WC )
80° F/67° F/45° F 80° F/67 ° F/42° F
Total Sensible Total Sensible
SCWE/CCWE
18-XX-24-OC 80
4 C.T. 14,700 12,900 15,800 13,400 600 2.0 1.2 0.29
18,100 14,600 19,700 15,300 3.0 2.6
20,600 15,800 22,700 16,600 4.0 4.4
22,600 16,700 25,000 17,600 5.0 6.8
24,200 17,300 26,822 18,400 6.0 9.6
SCWE/CCWE
19-XX-25-OC 80
5 C.T. 17,900 14,500 19,400 15,000 600 2.0 2.1 0.35
21,500 16,000 23,500 16,900 3.0 4.6
24,100 17,100 26,600 18,200 4.0 7.9
26,000 17,900 28,800 19,100 5.0 12.0
27,400 18,500 30,400 19,900 6.0 17.0
SCWE/CCWE
24-XX-24-OC 80
4 C.T. 16,400 15,000 17,500 15,800 800 2.0 1.2 0.44
20,400 17,500 22,100 18,300 3.0 2.6
23,500 19,000 26,000 20,000 4.0 4.4
25,800 20,100 28,300 21,200 5.0 6.8
27,700 21,000 30,600 22,200 6.0 9.7
SCWE/CCWE5
25-XX-25-OC 81
5 C.T. 20,300 17,200 21,800 18,000 800 2.0 2.1 0.55
24,700 19,500 26,750 20,400 3.0 4.6
27,800 20,900 30,500 22,000 4.0 7.9
30,300 22,000 33,300 23,300 5.0 12.0
32,100 22,800 35,600 24,300 6.0 17.0
SCWE/CCWE
30-XX-24-OC 81
4 C.T. 19,500 17,800 20,800 18,700 1000 2.0 1.3 0.40
24,500 21,200 26,500 22,200 3.0 2.8
28,300 23,200 30,700 24,300 4.0 4.9
31,200 24,600 31,190 25,900 5.0 7.5
33,800 25,700 37 ,000 27,200 6.0 10.6
SCWE/CCWE
31-XX-25-OC 81
5 C.T. 24,300 20,500 25,800 21,400 1000 2.0 2.4 0.53
29,600 23,600 31,800 24,700 3.0 5.2
33,500 25,500 36,300 26,800 4.0 9.0
36,500 26,900 40,000 28,400 5.0 13.6
38,800 27,900 42,900 29,700 6.0 19.2
SCWE/CCWE
34-XX-24-OC 81
4 C.T. 20,900 19,100 22,400 20,100 1200 2 .0 1.4 0.41
26,500 22,900 28,500 24,100 3 .0 3.0
30,500 25,200 33,100 26,400 4 .0 5.1
33,800 26,800 37,000 28,200 5.0 7.8
36,400 28,000 40,000 29,600 6.0 11.1
SCWE/CCWE
35-XX-25-OC 81
5 C.T. 26,100 21,900 27,700 22,900 1200 2.0 2.6 0.52
31,900 25,600 34,200 26,700 3.0 5.6
36,100 27,700 39,200 29,100 4.0 9.5
39,400 29,200 43,100 30,800 5.01 4.4
42,000 30,300 46,300 32,200 6.0 20.3
SCWE/CCWE
36-XX-24-OC 81
4 C.T. 22,300 19,900 23,700 20,900 1200 2.0 1.5 0.31
28,000 23,800 30,200 24,900 3.0 3.2
32,300 26,100 35,100 27,300 4.0 5.6
35,800 27,800 39,100 29,200 5.0 8.5
38,600 29,100 42,350 30,700 6.0 12.0
SCWE/CCWE
37-XX- 25 - OC 81
5 C.T. 27,400 22,600 29,100 23,600 1200 2.0 2.9 0.40
33,400 26,300 35,900 27,500 3.0 6.1
37,800 28,600 41,000 29,950 4.0 10.4
41,300 30,100 45,200 31,800 5.0 15.9
43,850 31,200 48,500 33,250 6.0 22.3
MORTEX PRODUCTS INC. 501 TERMINAL RD FORT WORTH, TX 76106 Page 16
Table 6: SCWE/CCWE Chilled Water Capacity; 4 & 5 Row Chilled Water Coil; 18 - 37 BTU/H Models; 208/240 VAC;
PSC Blower Motor; With or Without Electric Heat
NOTE: These models are capable of using the chilled water coil for hot water heat as well as chilled water cooling using a valve on the
hot water line and a valve on the chilled water line to isolate the hot water from the chilled water.
CAUTION: Never operate air handler with hot water heat and electric heat energized at the same time.

Model Number Evaporator
Coil Number
of Rows
Type
Of
Blower
Motor
Chilled Water Capacities @ Entering
Water Temperatures
CFM GPM Pressure
Drop Water
( Ft Water )
Pressure
Drop Air
( IN WC )
80° F/67° F/45° F 80° F/67 ° F/42° F
Total Sensible Total Sensible
SCWE/CCWE
18-XX-24-OC 80
4 C.T. 14,700 12,900 15,800 13,400 600 2.0 1.2 0.29
18,100 14,600 19,700 15,300 3.0 2.6
20,600 15,800 22,700 16,600 4.0 4.4
22,600 16,700 25,000 17,600 5.0 6.8
24,200 17,300 26,822 18,400 6.0 9.6
SCWE/CCWE
19-XX-25-OC 80
5 C.T. 17,900 14,500 19,400 15,000 600 2.0 2.1 0.35
21,500 16,000 23,500 16,900 3.0 4.6
24,100 17,100 26,600 18,200 4.0 7.9
26,000 17,900 28,800 19,100 5.0 12.0
27,400 18,500 30,400 19,900 6.0 17.0
SCWE/CCWE
24-XX-24-OC 80
4 C.T. 16,400 15,000 17,500 15,800 800 2.0 1.2 0.44
20,400 17,500 22,100 18,300 3.0 2.6
23,500 19,000 26,000 20,000 4.0 4.4
25,800 20,100 28,300 21,200 5.0 6.8
27,700 21,000 30,600 22,200 6.0 9.7
SCWE/CCWE5
25-XX-25-OC 81
5 C.T. 20,300 17,200 21,800 18,000 800 2.0 2.1 0.55
24,700 19,500 26,750 20,400 3.0 4.6
27,800 20,900 30,500 22,000 4.0 7.9
30,300 22,000 33,300 23,300 5.0 12.0
32,100 22,800 35,600 24,300 6.0 17.0
SCWE/CCWE
30-XX-24-OC 81
4 C.T. 19,500 17,800 20,800 18,700 1000 2.0 1.3 0.40
24,500 21,200 26,500 22,200 3.0 2.8
28,300 23,200 30,700 24,300 4.0 4.9
31,200 24,600 31,190 25,900 5.0 7.5
33,800 25,700 37 ,000 27,200 6.0 10.6
SCWE/CCWE
31-XX-25-OC 81
5 C.T. 24,300 20,500 25,800 21,400 1000 2.0 2.4 0.53
29,600 23,600 31,800 24,700 3.0 5.2
33,500 25,500 36,300 26,800 4.0 9.0
36,500 26,900 40,000 28,400 5.0 13.6
38,800 27,900 42,900 29,700 6.0 19.2
SCWE/CCWE
34-XX-24-OC 81
4 C.T. 20,900 19,100 22,400 20,100 1200 2 .0 1.4 0.41
26,500 22,900 28,500 24,100 3 .0 3.0
30,500 25,200 33,100 26,400 4 .0 5.1
33,800 26,800 37,000 28,200 5.0 7.8
36,400 28,000 40,000 29,600 6.0 11.1
SCWE/CCWE
35-XX-25-OC 81
5 C.T. 26,100 21,900 27,700 22,900 1200 2.0 2.6 0.52
31,900 25,600 34,200 26,700 3.0 5.6
36,100 27,700 39,200 29,100 4.0 9.5
39,400 29,200 43,100 30,800 5.01 4.4
42,000 30,300 46,300 32,200 6.0 20.3
SCWE/CCWE
36-XX-24-OC 81
4 C.T. 22,300 19,900 23,700 20,900 1200 2.0 1.5 0.31
28,000 23,800 30,200 24,900 3.0 3.2
32,300 26,100 35,100 27,300 4.0 5.6
35,800 27,800 39,100 29,200 5.0 8.5
38,600 29,100 42,350 30,700 6.0 12.0
SCWE/CCWE
37-XX- 25 - OC 81
5 C.T. 27,400 22,600 29,100 23,600 1200 2.0 2.9 0.40
33,400 26,300 35,900 27,500 3.0 6.1
37,800 28,600 41,000 29,950 4.0 10.4
41,300 30,100 45,200 31,800 5.0 15.9
43,850 31,200 48,500 33,250 6.0 22.3
MORTEX PRODUCTS INC. 501 TERMINAL RD FORT WORTH, TX 76106 Page 17
Table 7: SCWE/CCWE Chilled Water Capacity; 4 & 5 Row Chilled Water Coil; 18 - 37 BTU/H Models; 208/240 VAC;
Constant Torque Blower Motor; With or Without Electric Heat
NOTE: These models are capable of using the chilled water coil for hot water heat as well as chilled water cooling using a valve on the
hot water line and a valve on the chilled water line to isolate the hot water from the chilled water.
CAUTION: Never operate air handler with hot water heat and electric heat energized at the same time.

Model Number Evaporator
Coil Number
of Rows
Type Of
Blower
Motor
Hot Water Capacities @ 65 °F
Entering Model Number Water Tempera-
ture
CFM GPM Pressure
Drop Water
( Ft Water )
Pressure
Drop Air
( IN WC )
140°F 160°F 170°F 180° F
SCWE/CCWE
18-XX-24-OC 79
4 PSC 33,998 41,000 45,400 49,850 600 2.0 1.2 0.29
38,103 46,000 50,900 55,870 3.0 2.6
39,658 48,785 53,900 58,150 4.0 4.4
41,718 50,400 55,790 61,170 5.0 6.8
42,639 51,500 57,000 62,520 6.0 9.6
SCWE/CCWE
19-XX-25-OC 79
5 PSC 36,801 44,420 49,200 53,960 600 2.0 2.1 0.35
41,108 49,690 54,980 60,275 3.0 4.6
43,307 52,370 57,935 63,500 4.0 7.9
44,596 53,945 59,660 65,390 5.0 12.0
45,428 54,950 60,780 66,610 6.0 17.0
SCWE/CCWE
24-XX-24-OC 79
4 PSC 39,154 47,200 52,300 57,410 800 2.0 1.2 0.44
45,193 54,510 60,380 66,265 3.0 2.6
48,695 58,765 65,080 71,400 4.0 4.4
50,945 61,510 68,100 74,700 5.0 6.8
52,494 63,400 70,190 76,970 6.0 9.7
SCWE/CCWE
25-XX-25-OC 65
5 PSC 42,645 51,515 57,025 62,530 800 2.0 2 .1 0.55
49,288 59,550 65,910 72,270 3.0 4 .6
52,974 64,020 70,845 77,675 4.0 7.9
55,249 66,740 73,900 81,010 5.0 12.0
56,766 68,640 75,940 83,235 6.0 17.0
SCWE/CCWE
30-XX-24-OC 65
4 PSC 45,183 54,530 60,390 66,250 1000 2.0 1.3 0.40
53,517 64,600 71,530 78,470 3.0 2.8
58,509 70,640 78,210 85,790 4.0 4.9
61,769 74,600 82,580 90,570 5.0 7.5
64,036 77,365 85,630 93,895 6.0 10.6
SCWE/CCW E
31-XX-25-OC 65
5 PSC 48,695 58,880 65,140 71,400 1000 2.0 2.4 0.53
58,048 70,170 77,640 85,115 3.0 5.2
63,494 76,750 84,910 93,100 4.0 9.0
66,904 80,900 89,501 98,100 5.0 13.6
69,216 83,715 92,600 101,490 6.0 19.2
SCWE/CCWE
34-XX-24-OC 65
4 PSC 49,281 59,500 65,880 72,260 1200 2.0 1.4 0.41
59,617 72,020 79,745 87,415 3.0 3.0
66,120 79,835 88,390 96,950 4.0 5.1
70,437 85,075 94,175 103,280 5.0 7.8
73,492 88,785 98,270 107,760 6.0 11.1
SCWE/CCWE
35-XX-25-OC 65
5 PSC 52,804 63,880 70,660 77,425 1200 2.0 2.6 0.52
64,592 78,100 86,410 94,710 3.0 5.6
71,787 86,800 96,030 105,260 4.0 9.5
76,466 92,470 102,300 112,120 5.01 4.4
79,692 96,380 106,615 116,850 6.0 20.3
SCWE/CCWE
36-XX-24-OC 65
4 PSC 50,563 61,100 67,620 74,140 1200 2.0 1.5 0.31
61,448 74,220 82,150 90,100 3.0 3.2
68,173 82,370 91,160 99,960 4.0 5.6
72,633 87,780 97,140 106,500 5.0 8.5
75,770 91,585 101,340 111,100 6.0 12.0
SCWE/CCW E
37-XX-25-OC 65
5 PSC 53,731 65,045 71,920 78,785 1200 2.0 2.9 0.40
66,031 79,890 88,350 96,820 3.0 6.1
73,506 88,925 98,350 107,780 4.0 10.4
78,324 94,760 104,800 114,845 5.0 15.9
81,612 98,740 109,200 119,665 6.0 22.3
MORTEX PRODUCTS INC. 501 TERMINAL RD FORT WORTH, TX 76106 Page 18
Table 8: SCWE/CCWE Hot Water Capacity; 4 & 5 Row Chilled Water Coil; 18 - 37 BTU/H Models; 208/240 VAC;
PSC Blower Motor; With or Without Electric Heat
NOTE: These models are capable of using the chilled water coil for hot water heat as well as chilled water cooling using a
valve on the hot water line and a valve on the chilled water line to isolate the hot water from the chilled water.
CAUTION: Never operate air handler with hot water heat and electric heat energized at the same time.

Model Number Evaporator
Coil Number
of Rows
Type Of
Blower
Motor
Hot Water Capacities @ 65 °F
Entering Model Number Water Tempera-
ture
CFM GPM Pressure
Drop Water
( Ft Water )
Pressure
Drop Air
( IN WC )
140°F 160°F 170°F 180° F
SCWE/CCWE
18-XX-24-OC80
4 C.T. 33,998 41,000 45,400 49,850 600 2.0 1.2 0.29
38,103 46,000 50,900 55,870 3.0 2.6
39,658 48,785 53,900 58,150 4.0 4.4
41,718 50,400 55,790 61,170 5.0 6.8
42,639 51,500 57,000 62,520 6.0 9.6
SCWE/CCWE
19-XX-25-OC80
5 C.T. 36,801 44,420 49,200 53,960 600 2.0 2.1 0.35
41,108 49,690 54,980 60,275 3.0 4.6
43,307 52,370 57,935 63,500 4.0 7.9
44,596 53,945 59,660 65,390 5.0 12.0
45,428 54,950 60,780 66,610 6.0 17.0
SCWE/CCWE
24-XX-24-OC80
4 C.T. 39,154 47,200 52,300 57,410 800 2.0 1.2 0.44
45,193 54,510 60,380 66,265 3.0 2.6
48,695 58,765 65,080 71,400 4.0 4.4
50,945 61,510 68,100 74,700 5.0 6.8
52,494 63,400 70,190 76,970 6.0 9.7
SCWE/CCWE
25-XX-25-OC81
5 C.T. 42,645 51,515 57,025 62,530 800 2.0 2 .1 0.55
49,288 59,550 65,910 72,270 3.0 4 .6
52,974 64,020 70,845 77,675 4.0 7.9
55,249 66,740 73,900 81,010 5.0 12.0
56,766 68,640 75,940 83,235 6.0 17.0
SCWE/CCWE
30-XX-24-OC81
4 C.T. 45,183 54,530 60,390 66,250 1000 2.0 1.3 0.40
53,517 64,600 71,530 78,470 3.0 2.8
58,509 70,640 78,210 85,790 4.0 4.9
61,769 74,600 82,580 90,570 5.0 7.5
64,036 77,365 85,630 93,895 6.0 10.6
SCWE/CCWE
31-XX-25-OC81
5 C.T. 48,695 58,880 65,140 71,400 1000 2.0 2.4 0.53
58,048 70,170 77,640 85,115 3.0 5.2
63,494 76,750 84,910 93,100 4.0 9.0
66,904 80,900 89,501 98,100 5.0 13.6
69,216 83,715 92,600 101,490 6.0 19.2
SCWE/CCWE
34-XX-24-OC81
4 C.T. 49,281 59,500 65,880 72,260 1200 2.0 1.4 0.41
59,617 72,020 79,745 87,415 3.0 3.0
66,120 79,835 88,390 96,950 4.0 5.1
70,437 85,075 94,175 103,280 5.0 7.8
73,492 88,785 98,270 107,760 6.0 11.1
SCWE/CCWE
35-XX-25-OC81
5 C.T. 52,804 63,880 70,660 77,425 1200 2.0 2.6 0.52
64,592 78,100 86,410 94,710 3.0 5.6
71,787 86,800 96,030 105,260 4.0 9.5
76,466 92,470 102,300 112,120 5.01 4.4
79,692 96,380 106,615 116,850 6.0 20.3
SCWE/CCWE
36-XX-24-OC81
4 C.T. 50,563 61,100 67,620 74,140 1200 2.0 1.5 0.31
61,448 74,220 82,150 90,100 3.0 3.2
68,173 82,370 91,160 99,960 4.0 5.6
72,633 87,780 97,140 106,500 5.0 8.5
75,770 91,585 101,340 111,100 6.0 12.0
SCWE/CCWE
37-XX-25-OC81
5 C.T. 53,731 65,045 71,920 78,785 1200 2.0 2.9 0.40
66,031 79,890 88,350 96,820 3.0 6.1
73,506 88,925 98,350 107,780 4.0 10.4
78,324 94,760 104,800 114,845 5.0 15.9
81,612 98,740 109,200 119,665 6.0 22.3
MORTEX PRODUCTS INC. 501 TERMINAL RD FORT WORTH, TX 76106 Page 19
Table 9: SCWE/CCWE Hot Water Capacity; 4 & 5 Row Chilled Water Coil; 208/240 VAC; 18 - 37 BTU/H Models;
Constant Torque Blower Motor; With or Without Electric Heat
NOTE: These models are capable of using the chilled water coil for hot water heat as well as chilled water cooling using a
valve on the hot water line and a valve on the chilled water line to isolate the hot water from the chilled water.
CAUTION: Never operate air handler on hot water heat and electric heat at the same time.

Table 11: SCWW/CCWW Hot Water Capacity; 2 Row Hot Water Coil; 18 - 37 BTU/H Models; 115 VACc
Constant Torque Blower Motor
Table 10: SCWW/CCWW Hot Water Capacity; 2 Row Hot Water Coil; 18 - 37 BTU/H Models; 115 VAC;
PSC Blower Motor
Model Number Coil
Rows
CFM Type Of
Blower
Motor
Heating Capacities
Entering Water Temperature
Heating
GPM
(2)
Max.
Fuse
130°F 140°F 150°F 160° F 170° F 180° F
SCWW/CCWW-18-21-0A-0A78 2 600 PSC 18,000 21,000 24,200 27,300 30,500 33,600 3.0 3.3
SCWW/CCWW-19-22-0E-0A78 2 600 PSC 19,200 22,500 25,800 29,100 32,400 35,800 3.0 3.3
SCWW/CCWW-23-21-09-0A78 2 800 PSC 19,300 22,700 26,000 29,400 32,700 36,100 3.0 3.3
SCWW/CCWW-25-23-09-0A70 2 800 PSC 19,300 22,700 26,000 29,400 32,700 36,100 3.0 3.3
SCWW/CCWW-30-27-0J-0A70 2 1000 PSC 23,700 27,800 32,000 36,000 40,100 44,300 3.0 3.7
SCWW/CCWW-31-28-05-0A70 2 1000 PSC 23,900 28,000 32,200 36,300 40,500 44,600 3.0 3.7
SCWW/CCWW-34-30-0K-0A70 2 1200 PSC 25,300 29,600 33,900 38,300 42,700 47,100 3.0 3.7
SCWW/CCWW-35-30-0K-0A70 2 1200 PSC 25,400 29,800 34,000 38,500 42,900 47,300 3.0 3.7
SCWW/CCWW-36-32-0K-0A70 2 1200 PSC 27,200 31,800 36,500 41,200 45,900 50,600 3.0 4.2
SCWW/CCWW-37-32-01-0A70 2 1200 PSC 27,500 32,200 36,900 41,600 46,300 51,100 3.0 4.2
Model Number Coil
Rows
CFM Type Of
Blower
Motor
Heating Capacities
Entering Water Temperature
Heating
GPM
(2)
Max.
Fuse
130°F 140°F 150°F 160° F 170° F 180° F
SCWW/CCWW-18-21-0A-0A82 2 600 PSC 18,000 21,000 24,200 27,300 30,500 33,600 3.0 3.3
SCWW/CCWW-19-22-0E-0A82 2 600 PSC 19,200 22,500 25,800 29,100 32,400 35,800 3.0 3.3
SCWW/CCWW-23-21-09-0A82 2 800 PSC 19,300 22,700 26,000 29,400 32,700 36,100 3.0 3.3
SCWW/CCWW-25-23-09-0A83 2 800 PSC 19,300 22,700 26,000 29,400 32,700 36,100 3.0 3.3
SCWW/CCWW-30-27-0J-0A83 2 1000 PSC 23,700 27,800 32,000 36,000 40,100 44,300 3.0 3.7
SCWW/CCWW-31-28-05-0A83 2 1000 PSC 23,900 28,000 32,200 36,300 40,500 44,600 3.0 3.7
SCWW/CCWW-34-30-0K-0A83 2 1200 PSC 25,300 29,600 33,900 38,300 42,700 47,100 3.0 3.7
SCWW/CCWW-35-30-0K-0A83 2 1200 PSC 25,400 29,800 34,000 38,500 42,900 47,300 3.0 3.7
SCWW/CCWW-36-32-0K-0A83 2 1200 PSC 27,200 31,800 36,500 41,200 45,900 50,600 3.0 4.2
SCWW/CCWW-37-32-01-0A83 2 1200 PSC 27,500 32,200 36,900 41,600 46,300 51,100 3.0 4.2
MORTEX PRODUCTS INC. 501 TERMINAL RD FORT WORTH, TX 76106 Page 20
This manual suits for next models
44
Table of contents
Other Suntherm Air Handler manuals
Popular Air Handler manuals by other brands

Salda
Salda RIRS 5500HW EKO 3.0 Technical manual

Xvent
Xvent eLEMENTAIR B-MARK I Quick manual

Unitary products group
Unitary products group F2FV060 installation manual

INGENIA
INGENIA CAH Operation and maintenance

Airflow
Airflow Adroit DV50 instruction manual

Lennox
Lennox Signature CB31MV installation instructions

Salda
Salda RIRS 350PE EKO 3.0 Technical manual

Swegon
Swegon REACT V BMPa Instructions for use

Flexit
Flexit SPIRIT UNI 4 installation instructions

Swegon
Swegon LOCKZONE Wall installation instructions

Flexit
Flexit Albatros L14R Installation and Maintenance

Carrier
Carrier 40VMV012 Installation and maintenance instructions