10 | 11
M99 PRO – INSTALLATION BROSE
36 V
B
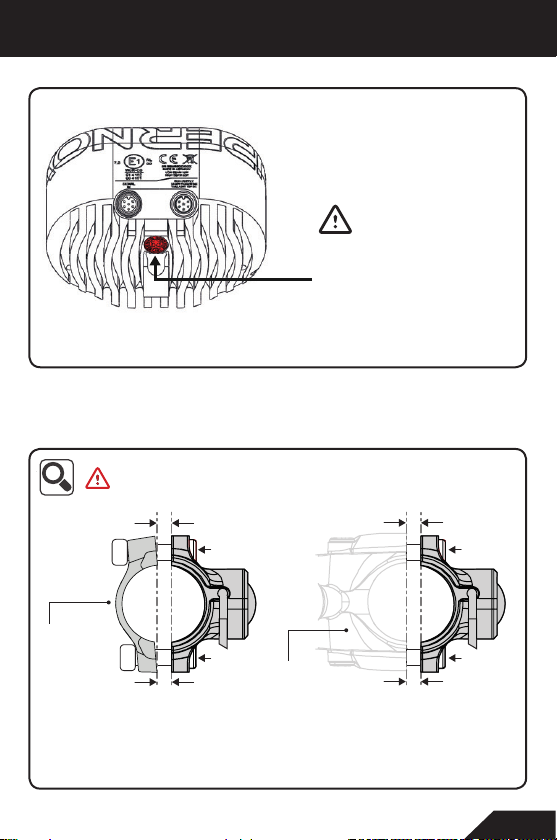
Installation Fernlichtschalter | High beam switch installation
Fernlichtschalterkabel |
High beam switch cable
Bitte die Pfeile auf den
Steckern aufeinander aus-
richten. | Please align the
arrows on the connectors.
Unteransicht | Bottom view
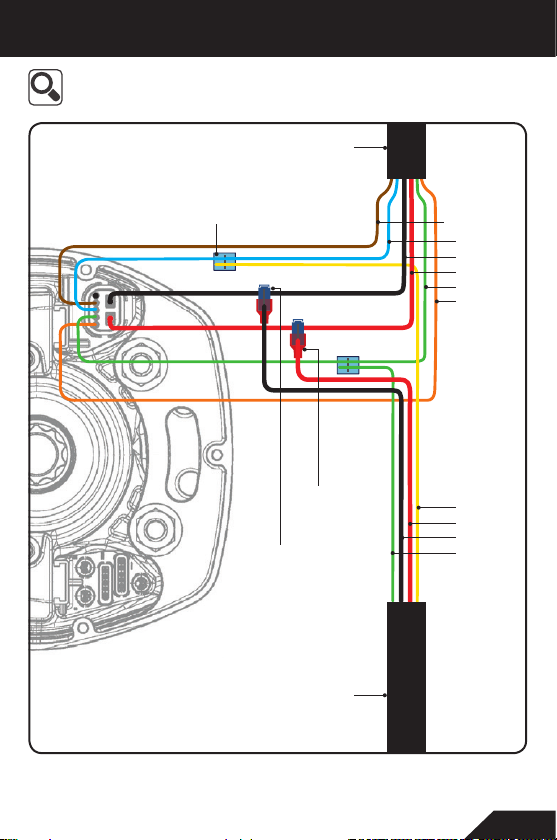
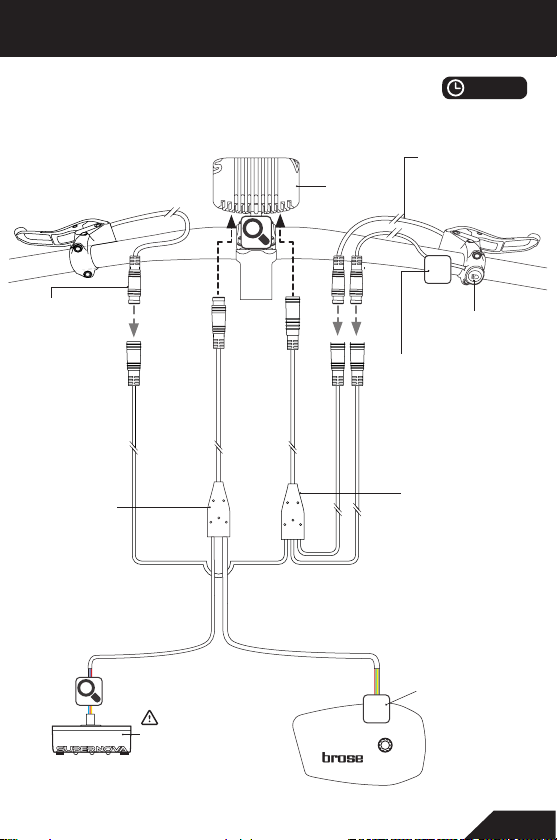
Universelles M99 PRO Anschlusskabel für Antriebe |
Universal M99 PRO connector cable for drives
M99 PRO Scheinwerfer Installation
am Brose Motor
1. E-Bike Akku herausnehmen.
2. Motorabdeckung abschrauben.
3. Universelles M99 PRO Anschlusskabel
für Antriebe durch den Rahmen führen.
4. Brose Motorkabel ausstecken und bei
Bedarf abmanteln, um Platz für die
Stromabzweigverbinder zu schaffen
(Abb.C1).
5. Litzen des Universellen M99 PRO
Anschlusskabel mithilfe der beigefügten
Stromabzweigverbinder an das Brose
Motorkabel koppeln (Abb. C2-C3).
6. Motorkabel wieder an den Motor
anschließen, alle Kabel ordentlich
verlegen und Motorabdeckung wieder
verschließen.
M99 PRO Front light installation
on Brose motor
1. Take out the battery of the e-bike.
2. Remove the motor cover.
3. Pass the Universal M99 PRO connector
cable through the bike frame.
4. Unplug the Brose motor cable and strip
the black shrinktube off the cable, if
needed, to get more space to install the
tap connectors (fig. C1).
5. Connect the wires of the Universal M99
PRO connector cable with the included
tap connectors to the Brose motor cable
(fig. C2-C3).
6. Reconnect motor cable, secure the
cables and close motor cover.