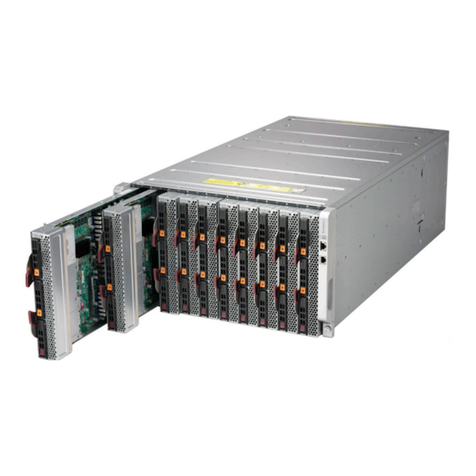
Supermicro 8U SuperBlade User manual

USER’S MANUAL
Revision 2.0d

The information in this User’s Manual has been carefully reviewed and is believed to be accurate. The vendor assumes
no responsibility for any inaccuracies that may be contained in this document, and makes no commitment to update
or to keep current the information in this manual, or to notify any person or organization of the updates. Please Note:
For the most up-to-date version of this manual, please see our website at www.supermicro.com.
Super Micro Computer, Inc. ("Supermicro") reserves the right to make changes to the product described in this manual
at any time and without notice. This product, including software and documentation, is the property of Supermicro and/
or its licensors, and is supplied only under a license. Any use or reproduction of this product is not allowed, except
as expressly permitted by the terms of said license.
Any disputes arising between manufacturer and customer shall be governed by the laws of Santa Clara County in the
State of California, USA. The State of California, County of Santa Clara shall be the exclusive venue for the resolution
of any such disputes. Supermicro's total liability for all claims will not exceed the price paid for the hardware product.
device pursuant to Part 15 of the FCC Rules. These limits are designed to provide reasonable protection against
harmful interference when the equipment is operated in industrial environment for Class A device or in residential
installed and used in accordance with the manufacturer’s instruction manual, may cause harmful interference with
radio communications. Operation of this equipment in a residential area is likely to cause harmful interference, in
which case you will be required to correct the interference at your own expense.
: This Perchlorate warning applies only
See www.dtsc.ca.gov/hazardouswaste/perchlorate”.
WARNING: This product can expose you to chemicals including
lead, known to the State of California to cause cancer and birth
defects or other reproductive harm. For more information, go
to www.P65Warnings.ca.gov.
!
The products sold by Supermicro are not intended for and will not be used in life support systems, medical equipment,
nuclear facilities or systems, aircraft, aircraft devices, aircraft/emergency communication devices or other critical
property damage. Accordingly, Supermicro disclaims any and all liability, and should buyer use or sell such products
for use in such ultra-hazardous applications, it does so entirely at its own risk. Furthermore, buyer agrees to fully
indemnify, defend and hold Supermicro harmless for and against any and all claims, demands, actions, litigation, and
proceedings of any kind arising out of or related to such ultra-hazardous use or sale.
Manual Revision 2.0d
mk
Unless you request and receive written permission from Super Micro Computer, Inc., you may not copy any part of this
to herein are trademarks or registered trademarks of their respective companies or mark holders.
All rights reserved.
Printed in the United States of America
Preface
Preface
About this Manual
This manual is written for professional system integrators and PC technicians. It provides
information for the installation and use of the enclosure. Installation and maintenance should
be performed by experienced technicians only.
processors and operating systems (www.supermicro.com).
Notes
For your system to work properly, please follow the links below to download all necessary
drivers/utilities and the user’s manual for your server.
• Supermicro product manuals: www.supermicro.com/support/manuals/
• Product safety info: www.supermicro.com/about/policies/safety_information.cfm
If you have any questions, please contact our support team at:
This manual may be periodically updated without notice. Please check the Supermicro website
for possible updates to the manual revision level.
Warnings
Special attention should be given to the following symbols used in this manual.
Warning! Indicates high voltage may be encountered when performing a procedure.
Warning! Indicates important information given to prevent equipment/property damage

Contents
Contents
Chapter 1 Introduction
1.1 Overview...............................................................................................................................7
..................................................................................................................7
1.2 Models and Features ...........................................................................................................
Models.................................................................................................................................
Front View ...........................................................................................................................9
Rear View..........................................................................................................................11
............................................................................................12
Capabilities........................................................................................................................12
Module Redundancy .........................................................................................................12
.............................................................................................................................
Switches Supported in each Enclosure Model .................................................................
Chapter 2 Rack Installation
2.1 Overview.............................................................................................................................15
2.2 Unpacking the System .......................................................................................................15
............................................................................................................15
Choosing a Setup Location...............................................................................................15
Rack Precautions ..............................................................................................................16
Enclosure Precautions ......................................................................................................16
Rack Mounting Considerations .........................................................................................16
Ambient Operating Temperature....................................................................................16
............................................................................................................................16
Mechanical Loading.......................................................................................................16
Circuit Overloading ........................................................................................................17
.............................................................................................................17
......................................................................................................
Chapter 3 Maintenance and Component Installation
...............................................................................................................20
........................................................................................................21
.........................................................................22
......................................................................................
.................................................................................

5
Contents
...................................................................................................27
...............................................................................................................27
.......................................................................
Chapter 4 Power and Cooling
.............................................................................................................
Power Cord .......................................................................................................................
...................................................................................................
Removing a Power Supply................................................................................................
.........................................................................................................
Redundant Power Supplies...............................................................................................
...........................................................................................................
............................................................................................
...............................................................................................................................
Auxiliary Fans....................................................................................................................
..............................................................................................
Chapter 5 Data Plane
.................................................................................................................
With Ethernet Switches ....................................................................................................
........................................................................................................
With Pass-Thru Modules...................................................................................................
With Ethernet Switches.....................................................................................................
.................................................
...............................................
..................................................................................................................
............................................................
......................................................................................................
................................................................
................................................................................................
Appendix A Standardized Warning Statements for AC Systems
Appendix B System Specications

6
Contents
Contacting Supermicro
Headquarters
Address: Super Micro Computer, Inc.
Tel:
Fax:
Email:
[email protected] (Webmaster)
Website: www.supermicro.com
Europe
Address:
Tel:
Fax:
Email: [email protected] (Sales Inquiries)
Website: www.supermicro.nl
Asia-Pacic
Address: Super Micro Computer, Inc.
Taiwan (R.O.C)
Tel:
Fax:
Email: [email protected] (Sales Inquiries)
Website: www.supermicro.com.tw

7
Chapter 1: Introduction
Chapter 1
Introduction
1.1 Overview
network functions for multiple blade servers. They can house up to 20 half-height blades, 10
double-width half-height blades, 10 full-height blades, or a combination.
to the enclosure, blades units, and various management and networking modules. "Modules"
refer to management, switch, network, or other specialized components.
Design Features
Status Indicators –
status.
Operating Systems – Microsoft Windows, VM Ware and Linux operating systems are
within the same enclosure.
Remote Management – The Chassis Management Module (CMM) manages the enclosure
and individual blades. A separate CMM manual provides instruction.
Ecient Power
limit energy consumption and heat.
Safety Models

Chapter 1: Introduction
1.2 Models and Features
sockets. The enclosure supports up to 20 half-height, 10 double-width, half-height, 10 full-
height, or a combination. The maximum may vary depending on the CPU wattages.
Models
8U Enclosure Capabilities
Model Power
Supplies Manage
Options Blades Switch Options
One CMM
20 half-height,
10 double-width,
10 full-height,
or a mixture
Eight 2200W
One CMM
20 half-height or
10 full-height
or a mixture
Six 2200W
Eight 2200W
One CMM
20 half-height or
10 full-height
or a mixture
speed support
Six 2200W
(plus two fans)
Four 2200W
(plus four fans)
One or two
CMMs
20 half-height,
10 double-width,
10 full-height,
or a mixture
Up to four Ethernet switch slots (hot-plug)
Eight 2200W
One or two
CMMs
20 half-height or
10 full-height
or a mixture
Up to four Ethernet switch slots (hot-plug)
Six 2200W
(plus two fans)
Four 2200W
(plus four fans)
Eight 2200W
One CMM
20 half-height or
10 full-height or
a mixture
Up to two Ethernet switch slots (hot-plug)
Six 2200W
(plus two fans)
Four 2200W
(plus four fans)
The enclosures also feature an extra management and COM port on the left handle. This
allows a system connection in the front of the enclosure for management and troubleshooting
purposes.

9
Chapter 1: Introduction
Figure 1-1. SBE-820C Front View, Ten Full-Height Blades with NVMe
Front Features
Feature Description
Status
Indicators
Red: Critical warning—some components or modules are not operating normally.
LAN Port Management of network port for the blade system
Console Port Serial console port for the CMM
If the master CMM fails, the front LAN port and Console port are connected to the slave CMM.
Status
Indicators
LAN Port
Console Port
Front View

10
Chapter 1: Introduction
Figure 1-2. SBE-820J2 Front View, Ten Half-Height, Double-Width Blades

11
Chapter 1: Introduction
Rear Features
Feature Description
1Eight power supply modules with fans
2Three pairs of auxiliary fans
Chassis Management Module (CMM)
5
Figure 1-3. SBE-820C-822 Rear View
3
1
2
1
1
1
1
1
1
1
4
22
Rear View
55
PA1 PA2 PA3 PA4
PB1 PB2 PB3 PB4

12
Chapter 1: Introduction
1.3 Chassis Management Module
The Chassis Management Module (CMM) is a "command” module that communicates with
Interface or IPMI View management software, the CMM provides administrator control over
individual blade units, power supplies, cooling fans and networking switches and monitors
onboard temperatures, power status, voltage levels and fan speeds. It is a required module
in a blade system.
Capabilities
The CMM provides a dedicated, local and remote KVM (keyboard/video/mouse) connection
over an out of band TCP/IP Ethernet network during any server state (functioning, blue-screen,
Module Redundancy
Since the CMM uses its own processor, all monitoring and control functions are carried out
regardless of the operation or power status of the blade units.
Figure 1-4. MBM-CMM-6 Module Interface

Chapter 1: Introduction
1.4 Switches
Several switch module and pass-thru module options facilitate networking.
Switch Modules
Model Description
Omni-Path Switch
Supermicro Pass-thru Switch
See also the .
These modules are further described in a separate manual.

Chapter 1: Introduction
Switches Supported in each Enclosure Model
Switch Modules per Enclosure
Switch Module 820H 820H2 820C 820J 820J2 820L
1 1
1
1
222
2222
2222
2222
2222
2222
2222

15
Chapter 2: Rack Installation
Chapter 2
Rack Installation
2.1 Overview
This chapter provides advice and instructions for mounting your system in a rack.
Caution:
2.2 Unpacking the System
Inspect the box in which the system was shipped, and note if it was damaged. If any equipment
in a clean, dust-free area that is well ventilated. Avoid areas where heat, electrical noise and
Appendix A.
2.3 Preparing for Setup
The box in which the system was shipped should include the rackmount hardware needed to
install it into the rack. Please read this section in its entirety before you begin the installation.
Choosing a Setup Location
• The system should be situated in a clean, dust-free area that is well ventilated. Avoid areas
• Leave enough clearance in front of the rack so that you can open the front door completely
• This product should be installed only in a Restricted Access Location (dedicated equipment
rooms, service closets, etc.).
• This product is not suitable for use with visual display workplace devices according to §2

16
Chapter 2: Rack Installation
Rack Precautions
•
the full weight of the rack rests on them.
• In single rack installations, stabilizers should be attached to the rack. In multiple rack in-
stallations, the racks should be coupled together.
• Always make sure the rack is stable before extending a server or other component from
the rack.
• -
taneously may cause the rack to become unstable.
Enclosure Precautions
• Review the electrical and general safety precautions in Appendix A.
• before you install the rails.
•
way up.
• Use a regulating uninterruptible power supply (UPS) to protect the server from power
surges and voltage spikes and to keep your system operating in case of a power failure.
• Allow any drives and power supply modules to cool before touching them.
• When not servicing, always keep the front door of the rack and all covers/panels on the
servers closed to maintain proper cooling.
Rack Mounting Considerations
Ambient Operating Temperature
If installed in a closed or multi-unit rack assembly, the ambient operating temperature of
the rack environment may be greater than the room's ambient temperature. Therefore,
consideration should be given to installing the equipment in an environment compatible with
the manufacturer’s maximum rated ambient temperature (TMRA).
Airow
operation is not compromised.
Mechanical Loading

17
Chapter 2: Rack Installation
Equipment should be mounted into a rack so that a hazardous condition does not arise due
to uneven mechanical loading.
Circuit Overloading
Consideration should be given to the connection of the equipment to the power supply circuitry
and power supply wiring. Appropriate consideration of equipment nameplate ratings should
be used when addressing this concern.
Reliable Ground
A reliable ground must be maintained at all times. To ensure this, the rack itself should be
grounded. Particular attention should be given to power supply connections other than the
direct connections to the branch circuit (i.e. the use of power strips, etc.).
special precautions to ensure that the system remains stable. The following guidelines
are provided to ensure your safety:
• This unit should be mounted at the bottom of the rack if it is the only unit in the rack.
•
with the heaviest component at the bottom of the rack.
• If the rack is provided with stabilizing devices, install the stabilizers before mounting or
servicing the unit in the rack.
• Slide rail mounted equipment is not to be used as a shelf or a work space.
• Stability hazard. The rack stabilizing mechanism must be in place, or the rack must be
can cause the rack to tip over.

Chapter 2: Rack Installation
2.4 Installing the Enclosure
Figure 2-1. Rack Rails
(Left Rail Assembly Shown)
When installing the enclosure, remove all blades, power supplies, switches and management
modules. Install these modules after the enclosure is mounted.
If desired, use the template to mark the position that the enclosure will occupy on the rack.
The chassis comes with two sets of rack rails, one set for the right side of the chassis and
one for the left.
1. For each rail, sections are screwed together to keep them immobile during shipping.
2. Slide the rails apart far enough to match the depth of the rack. Note the arrow on the
rail, which indicates the end that attaches to the front of the rack. Position each rail and
Lift the enclosure and slide it into the rack. Use two roundhead screws on each side of
the server to lock it into place.
1

19
Chapter 2: Rack Installation
Figure 2-3. Installing the Server into the Rack
Figure 2-2. Securing the Left Rail to the Rack
Note: The gure is for illustrative
purposes only. Always install enclosures
at the bottom of the rack rst.

20
Chapter 3: Maintenance and Component Installation
Chapter 3
Maintenance and Component Installation
This chapter provides instructions on installing and replacing main system components. To
numbers given.
3.1 Removing Power
Use the following procedure to ensure that power has been removed from the system. This
step is necessary when removing or installing non-hot-swap components, such as the only
CMM in an enclosure.
1. Use the operating systems to power down all blades.
2.
Other manuals for 8U SuperBlade
1
Table of contents
Other Supermicro Enclosure manuals

Supermicro
Supermicro MicroBlade MBE-628E-422 User manual

Supermicro
Supermicro SuperBlade 6U User manual

Supermicro
Supermicro SC846E1-R710B User manual

Supermicro
Supermicro SC216B JBOD Series User manual

Supermicro
Supermicro SC846B JBOD User manual

Supermicro
Supermicro SC847 JBOD User manual

Supermicro
Supermicro CSE-826BE1C-R609JBOD User manual

Supermicro
Supermicro SC417BE1C-R1K23JBOD User manual

Supermicro
Supermicro SC836B JBOD Series User manual

Supermicro
Supermicro SuperServer SYS-621BT-DNC8R User manual