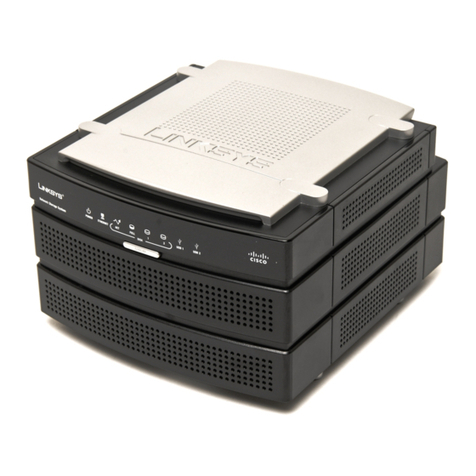
Surveon EonServ 5000 Series User manual

OS, Driver, and Software
Installation Guide for
EonServ Family
User Manual
Version 1.0
November 2018

Legal Information
2
Legal Information
All Infortrend products, including the product customers have purchased from Infortrend, will be subject to the
latest Standard Warranty Policy available on the Infortrend website:
https://www.infortrend.com/global/Support/terms_conditions
Infortrend may from time to time modify, update or upgrade the software, firmware or any accompanying user
documentation without any prior notice. Infortrend will provide access to these new software, firmware or
documentation releases from certain download sections of our website or through our service partners.
Customer will be responsible for maintaining updated version of the software, firmware or other documentation
by downloading or obtaining from Infortrend, and installing designated updated code, including but not limited
to firmware, microcode, basic input/out system code, utility programs, device drivers, and diagnostics delivered
with Infortrend product.
Before installing any software, applications or components provided by a third party, customer should ensure
that they are compatible and interoperable with Infortrend product by checking in advance with Infortrend.
Customer is solely responsible for ensuring the compatibility and interoperability of the third party’s products
with Infortrend product. Customer is further solely responsible for ensuring its systems, software, and data are
adequately backed up as a precaution against possible failures, alternation, or loss.
For any questions of hardware/ software compatibility, and the update/ upgrade code, customer should contact
Infortrend sales representative or technical support for assistance.
To the extent permitted by applicable laws, Infortrend will NOT be responsible for any interoperability or
compatibility issues that may arise when (1) products, software, or options not certified and supported by
Infortrend are used; (2) configurations not certified and supported by Infortrend are used; (3) parts intended for
one system are installed in another system of different make or model.
Trademarks
Infortrend, the Infortrend logo, SANWatch, EonOne, EonStor and EonServ are
registered trademarks of Infortrend Technology, Inc. Other names prefixed with “IFT”,
“DS”, “GS”, “GSa”, “GSc”, “GSi”, “GSe”, “GSe Pro” are trademarks of Infortrend
Technology, Inc.
All other names, brands, products or services are trademarks or registered trademarks
of their respective owners.

About This Manual
4
About This Manual
This manual details the installation of the operating system, required drivers, and software on Infortrend
EonServ storage server system.
Consult other references or information resources for the following topics:
For components that are not user-serviceable, contact our support staff or visit our support sites.
For EonOne Lite/SANWatch configurations, consult the corresponding Software Manual.
Version 1.0
Initial release

About This Manual
5
Table of Contents
Legal Information ...............................................................................................................................2
Contact Information...........................................................................................................................3
About This Manual.............................................................................................................................4
Prerequisites ......................................................................................................................................6
Supported Operating Systems ................................................................................................6
Notices...................................................................................................................................7
EonServ 5000 Series ...........................................................................................................................8
OS & Driver & Software Installation .......................................................................................8
Updating System .................................................................................................................. 15
Updating the firmware and BIOS................................................................................................ 15
Updating RAID Driver ................................................................................................................. 16
EonServ 7000 Series .........................................................................................................................19
OS & Driver & Software Installation ..................................................................................... 19
Updating System .................................................................................................................. 26
Updating Firmware & BIOS......................................................................................................... 26
Updating RAID Driver ................................................................................................................. 27
System Recovery ..............................................................................................................................29
Procedures........................................................................................................................... 30

Prerequisites
6
Prerequisites
Supported Operating Systems
EonServ 5000 supports the following operating systems:
Windows 7 Professional SP1, 64-bit
Windows 7 Embedded Standard SP1, 64-bit
Windows 8.1, 64-bit
Windows 10 Enterprise, 64-bit (Version 1803)
Windows Server 2012, 64-bit
Windows Server 2012R2, 64-bit
Ubuntu 13.04, 64-bit
EonServ 7000 supports the following operating systems:
Windows 10 Enterprise, 64-bit (Version 1803)
Windows Server 2012R2, 64-bit
CentOS 7, 64-bit
CentOS 7.2, 64-bit
REHL 6.7, 64-bit
For the latest OS support, check the Infortrend Compatibility Matrix.

Prerequisites
7
Notices
1. Ensure that the hardware setup is complete. For detailed instructions, refer to the
hardware's Quick Installation Guide in the installation disc that came with your EonServ
system.
2. Ensure that you have the installation package for OS and RAID driver (for Windows OS
installation) ready, stored in a separate DVD disc or a USB flash drive. If the installation
package is stored on a DVD disc, ensure that you have an external USB DVD-ROM* on
hand.
*External USB DVD-ROMs with names that start with "UEFI" are NOT supported by
EonServ.
3. For Linux kernel version 2.6.x, we strongly recommend you to disable VT-d and X2APIC
in BIOS before installing the OS to prevent error.
Disable VT-d
To disable VT-d, go to BIOS > Intel RCSetup > I/O Configuration > Intel VT for
Directed I/O (VT-d), then disable VTd Azalea VCp Optiml and Intel VT for Directed.
Disable X2APIC
To disable X2APIC, go to BIOS > Intel RCSetup > Processor > Processor
Configuration > X2APIC, then disable X2APIC.

EonServ 5000 Series
8
EonServ 5000 Series
OS & Driver & Software Installation
For this example, we use EonServ 5000 with Windows (RAID 1 mode). Ensure that the
system is powered off at the beginning.
Preparing OS installation package and RAID driver
To prepare OS installation package and RAID driver:
1. Insert the OS installation disc or flash drive that contains the OS installation package
into the external USB DVD-ROM* or the USB port of EonServ 5000.
2. Insert the other flash drive that contains Intel RAID drivers into the rear USB port. You
can download the files (Intel Drivers) from Infortrend’s official website.
*If you want to install the OS using a DVD disc, ensure that the external USB DVD-ROM is
already plugged to EonServ 5000's USB port.
Setting up BIOS
To set up the BIOS:
1. Turn on EonServ 5000, then hold and press F2 to enter BIOS.

EonServ 5000 Series
9
2. Go to BIOS > Boot > Hard Drive BBS Priorities.
3. Select the DVD-ROM or USB flash drive (whichever contains the OS installation
package) as the first OS boot option.

EonServ 5000 Series
10
Enabling VT-d feature (for Intel®Xeon®E3 processor only)
If your EonServ 5000 system comes with Intel® Xeon® E3 processor, you can utilize VT-d
feature, as it supports Intel Virtualization for Directed I/O (VT-d).
To enable VT-d feature:
1. From BIOS screen, go to Chipset > System Agent (SA) Configuration.
2. Enter VT-d then select Enable.

EonServ 5000 Series
11
Note: VT-d feature is enabled by default for firmware 133B and later versions.
Setting up RAID mode
Use this procedure if your system is not RAID-configured.
Note: If your system is already RAID-configured, or if you do not need RAID in your system,
press F4 to save the changes and do the steps in section Installing OS.
To set up RAID mode:
1. From BIOS screen, go to Advanced > SATA Configuration > SATA Mode Selection.

EonServ 5000 Series
12
2. Select RAID.
3. Press F4 on your keyboard to save the changes, then exit BIOS to reboot EonServ
5000.
Creating a RAID volume
To create a RAID volume:
1. When Intel Rapid Storage Technology screen appears after bootup, press Ctrl +I keys
to enter the storage configuration utility.

EonServ 5000 Series
13
2. Select 1. Create RAID Volume and press Enter.
3. Select RAID1 (Mirror) and press Enter to set up RAID volume. Wait until the volume is
created, then press ESC to save the changes and reboot EonServ 5000.
Installing OS
When installing Windows OS, Intel RAID driver is also included to obtain the RAID volume.
To install Windows OS:
1. In the Install Windows screen below, click Load Driver.

EonServ 5000 Series
14
2. Follow the path to load the driver: Flash drive >
Intel_RSTe_and_AHCI_Drivers_GUI_CLI_CIM_4.3.0.1223 > Drivers > x64 >
Win8_10_2K8R2_2K12 > AHCI.
The RAID volume is displayed on the list. Select the partition that you want to install the OS,
then restart the OS manually after it has been installed to boot up EonServ 5000 in a mode
that can communicate with the internal storage array. You must set up the OS drive as the
first boot device upon reboot. See section Setting up BIOS to change boot device.
Installing the system driver, Infortrend Virtual RAID driver, and management
software
After the operating system is installed, you can now install the drivers required by the
operating system and the hardware components, including the internal storage array. You
can download the related drivers and software from Infortrend official website.
1. Install the system drivers
For Windows: The system drivers include Intel chipset, LAN, VGA, and USB which
you can obtain and install from website or EonServ installation disc.
For Linux: Use the software update feature of your Linux operating system to
install the latest drivers.
2. Install Intel Virtual RAID drivers
After the system drivers are installed, you can now install the RAID driver that allows
you to access and manage the storage array of EonServ.
For Windows: Obtain and install Intel Virtual RAID driver from website or EonServ
installation disc.
For Linux:
a. On the EonServ’s installation disc, search for the following files:
vscsihba.ko
ift_driver_install.sh
b. Execute the sudo sh ift_driver_install.sh I command, where the "i" in the
name means "install":

EonServ 5000 Series
15
c. To remove the driver, execute the sudo sh ift_driver_install.sh r command,
where the "r" in the name means "remove".
Note: If driver removal or update fails, you may need to release the vscsihba
module by doing the following:
Ensure all vscsihba processes are stopped.
Ensure that all partitions created using the storage management tool have
been unmounted.
If the vscsihba module is not released even after the above steps are done,
restart EonServ.
3. Installing management software –EonOne Lite
When the operating system and all the necessary drivers are properly installed, you can
install EonOne Lite to get started with array management for EonServ 5000.
Updating System
Updating the firmware and BIOS
If you need to update the firmware and BIOS, use the management software. For the latest
firmware and BIOS, check Infortrend’s official website.
To update the firmware and BIOS:
1. From EonOne Lite tool, go to Settings > Download.
2. Tick Upload Firmware or Upload firmware and boot record and look for the firmware,
then click OK.

EonServ 5000 Series
16
Note: The BIOS reverts to default settings when updated. Ensure that the related steps in
sections Enabling VT-d feature and Setting up RAID mode are well set up again. If not
properly set, the system may not be able to boot up successfully.
Updating RAID Driver
This section contains information on updating the RAID driver when there is a
newly-updated version. You can download the latest RAID driver from Infortrend’s official
website.
To update RAID driver in Windows:
1. From Desktop, go to Device Manager then click Storage Controllers. Right click Virtual
RAID Adapter then select Update Driver Software.

EonServ 5000 Series
17
2. When Installation Wizard appears, click Browse my computer for driver software,
click Browse, look for the folder that contains the RAID driver, select the driver, then
click Next. Follow the onscreen instructions until you are done with the installation.
3. Check the RAID driver version. Go to Storage Controller, right-click Virtual RAID
Adapter, then click Properties. Click Driver tab to see the driver information such as
date, version, and others.
To update RAID driver in Linux:
1. Look for the extracted update files, then execute the command sudo sh
ift_driver_install.sh u, where umeans update.
2. If driver removal or update fails, you may need to release the vscsihba module by
doing the following:

EonServ 5000 Series
18
Ensure all processes using the vscsihba are stopped.
Ensure all partitions created using the storage management tool have been
unmounted.
If vscsihba module is not released even after the above steps are done, restart
EonServ system.

EonServ 7000 Series
19
EonServ 7000 Series
OS & Driver & Software Installation
For this example, we use EonServ 7000 with Windows (RAID 1 mode). Ensure that the
system is powered off at the beginning.
Preparing OS installation package and RAID driver
To prepare OS installation package and RAID driver:
1. Insert the OS installation disc or the flash drive that contains the OS installation
package into the external USB DVD-ROM* or EonServ 7000’s USB port.
2. Insert the other flash drive that contains Intel RAID drivers into the rear USB port. You
can download the files (Intel Drivers) from Infortrend’s official website.
*If you want to install the OS using a DVD disc, ensure that the external USB DVD-ROM is
already plugged to EonServ 5000's USB port.
Setting up BIOS
To set up the BIOS:
1. Turn on EonServ 7000, then hold and press F2 to enter BIOS.

EonServ 7000 Series
20
2. Go to BIOS > Boot > Hard Drive BBS Priorities.
3. Select the DVD-ROM or USB flash drive (whichever contains the OS installation
package) as the first OS boot option.
This manual suits for next models
1
Table of contents