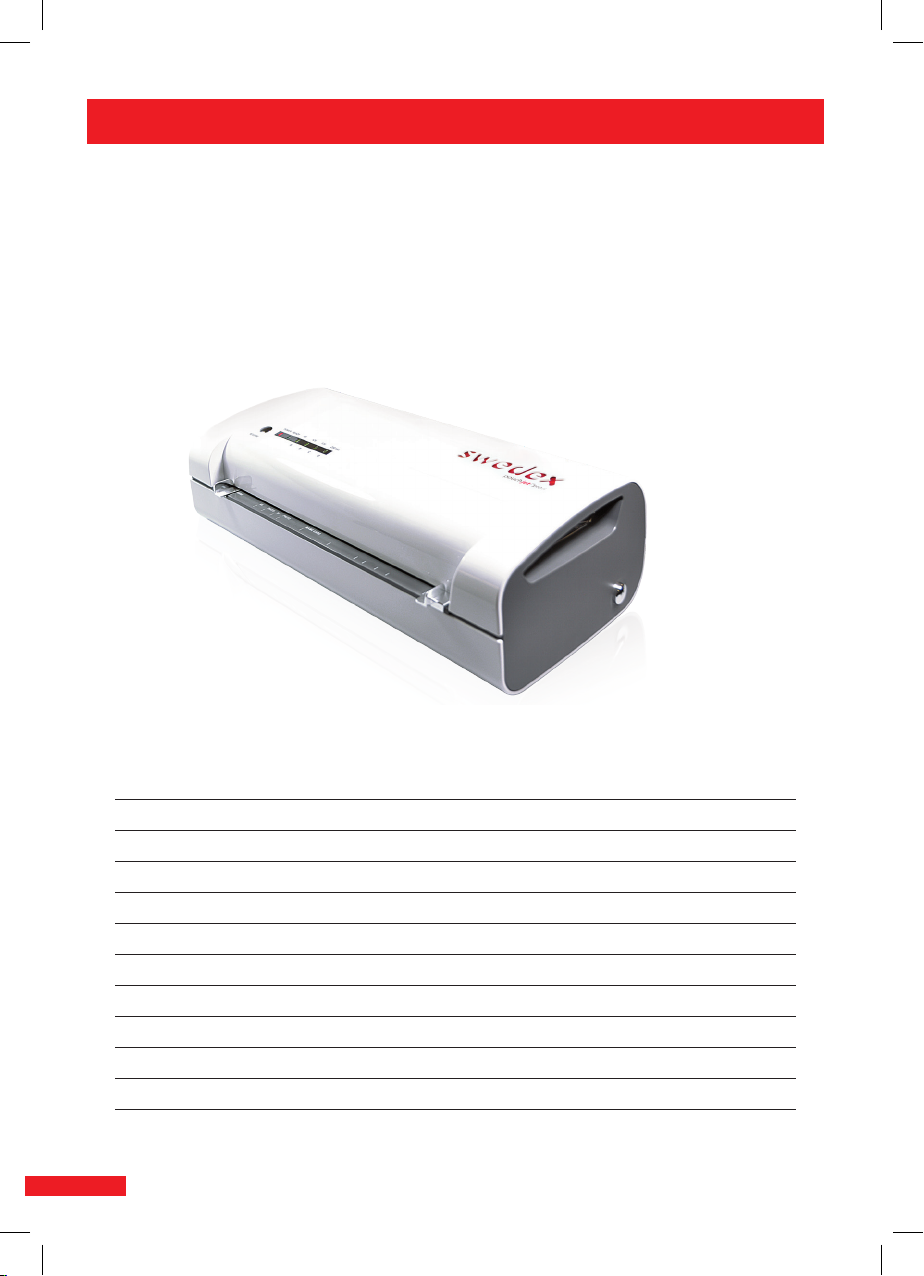
4. Starting the laminating process
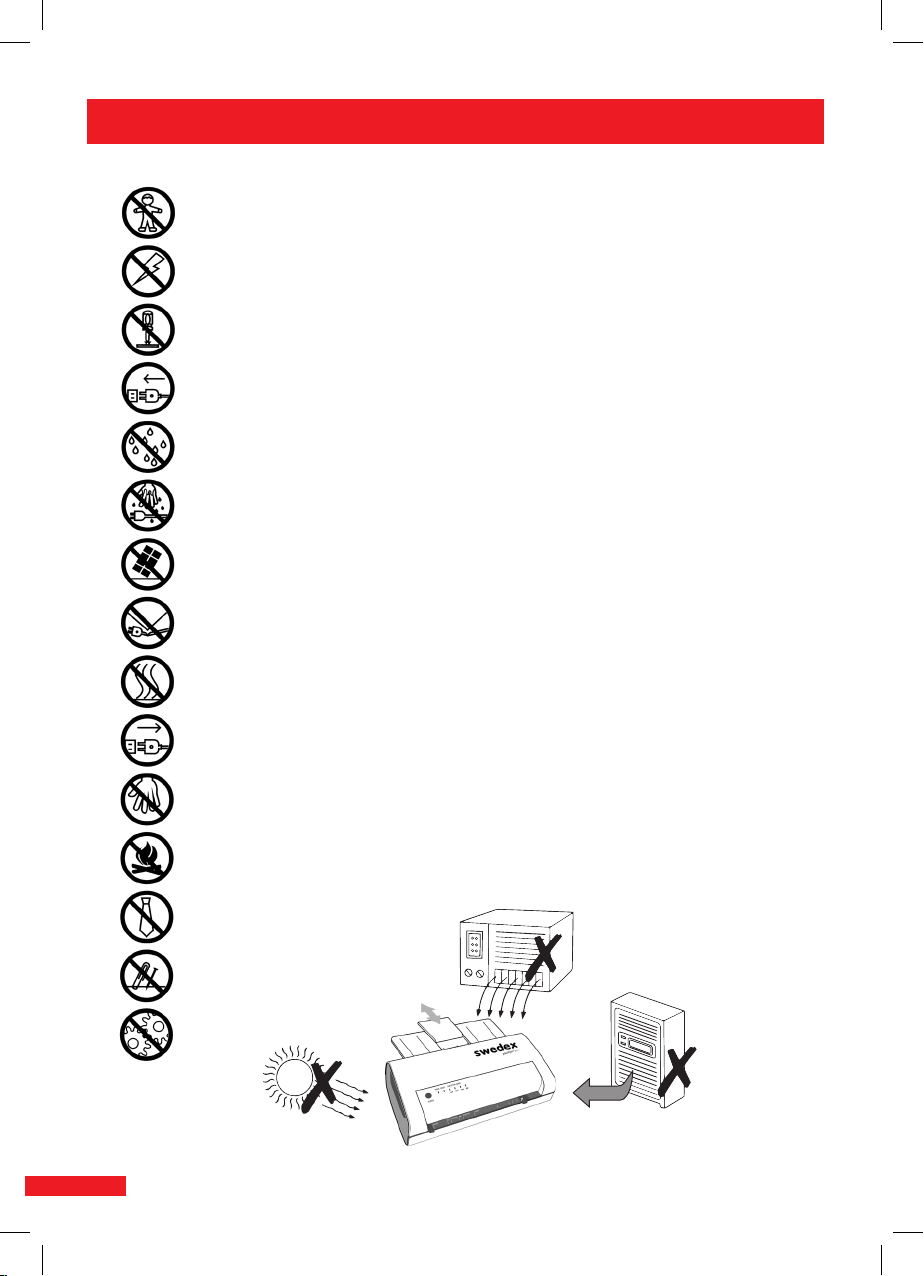
Important! Lamination will seal the material you want
to laminate permanently. If you are not sure, test the
process beforehand using a similar material.
Never attempt to pull the laminating pouch out of
the machine before the laminating process has been
completed.
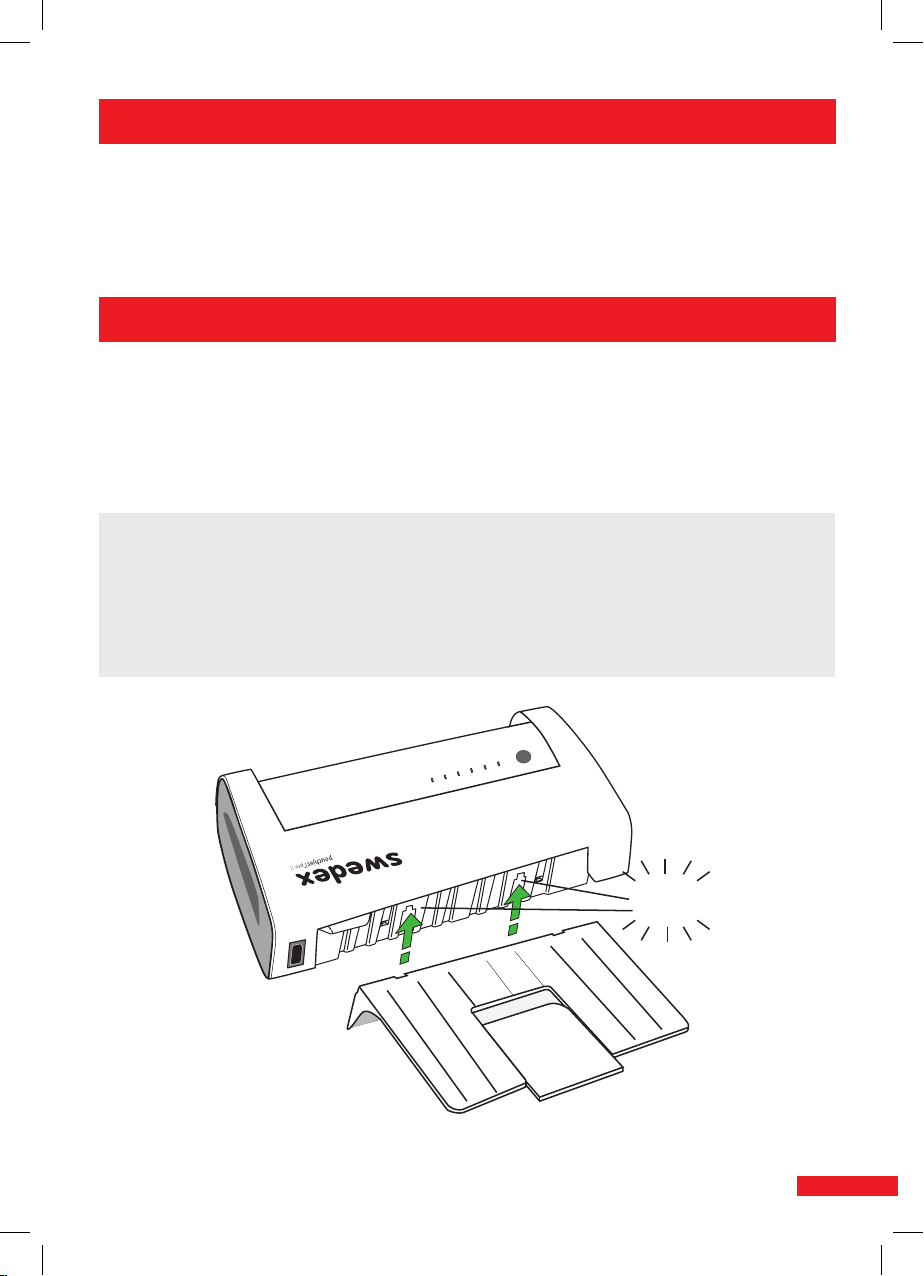
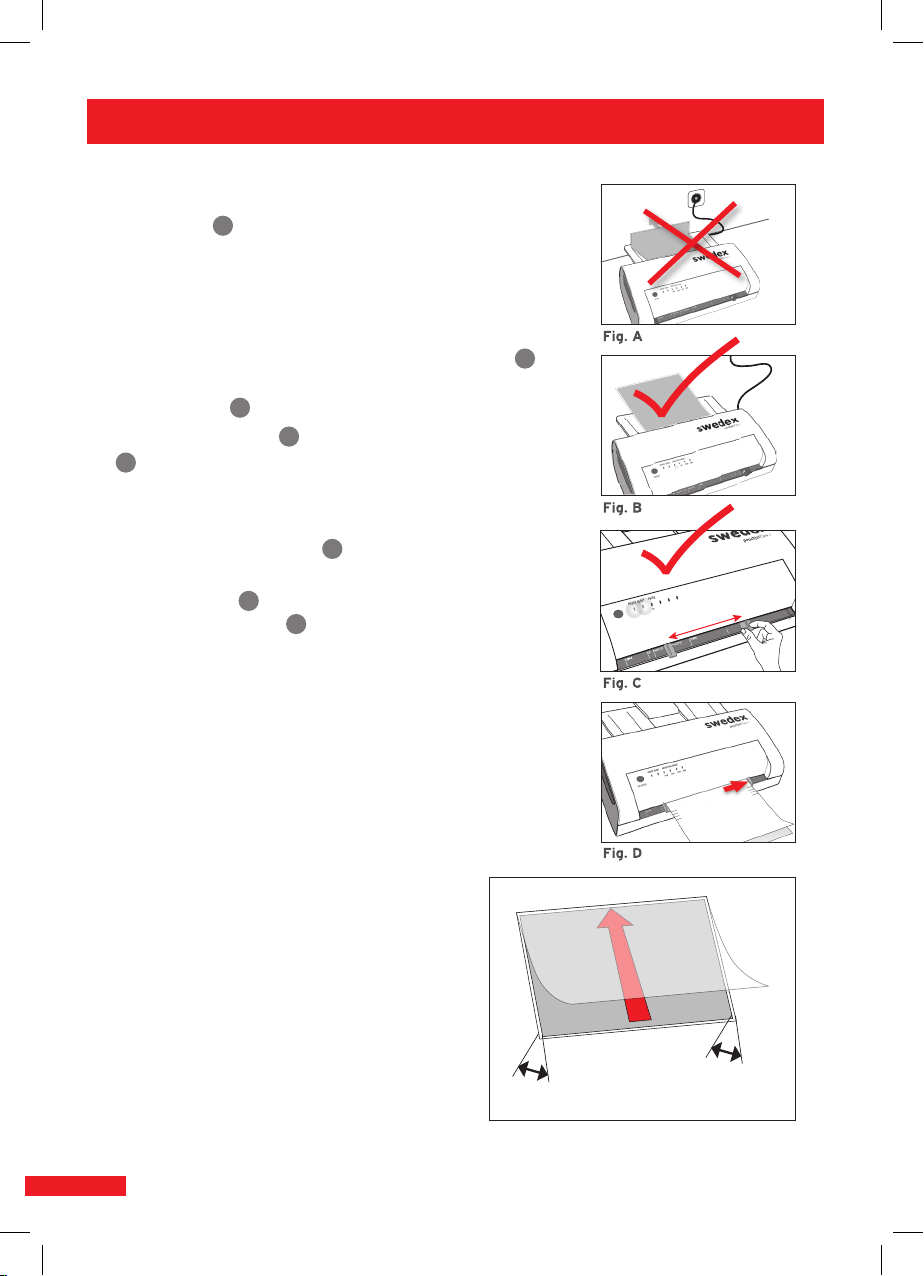
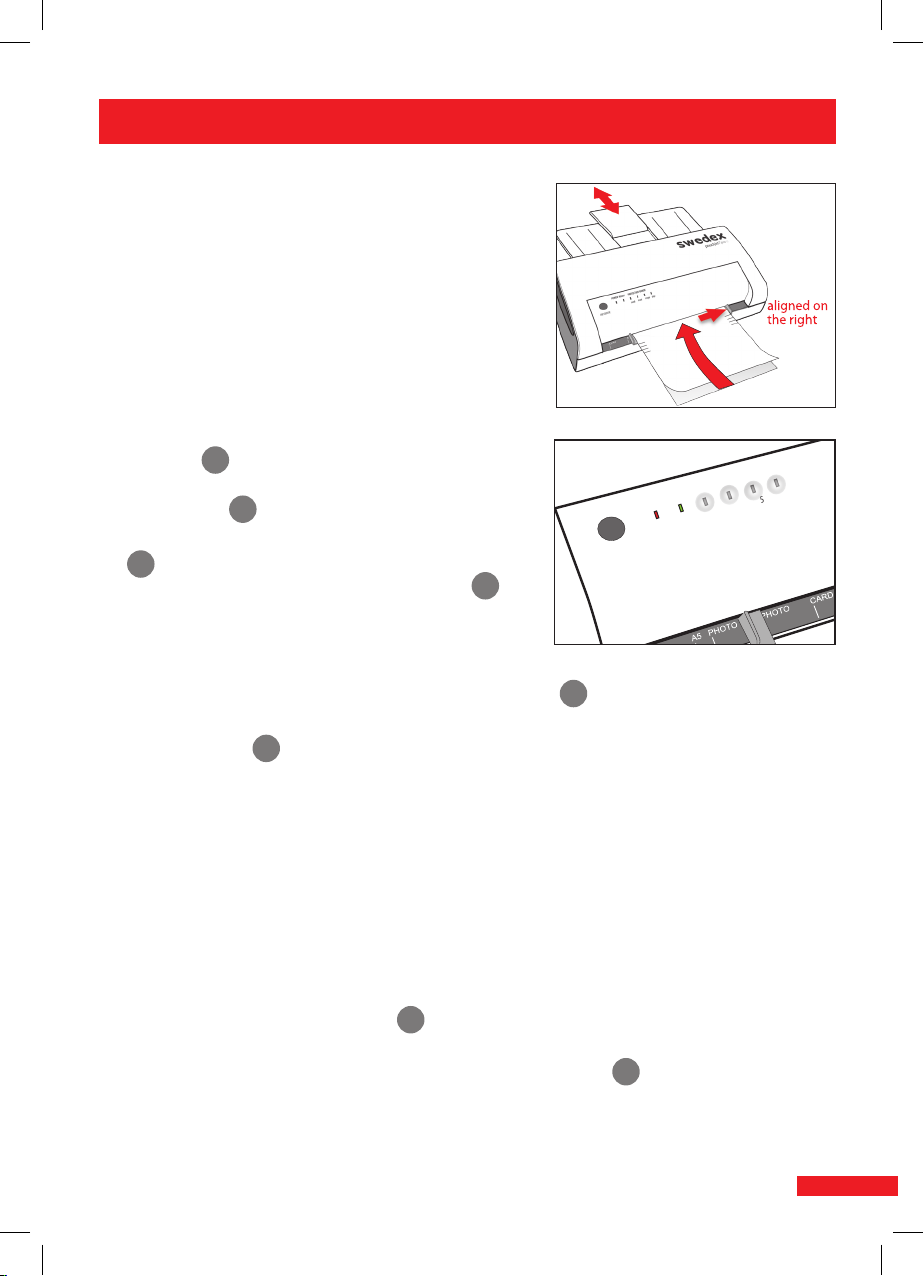
Important! Now guide the smartpouch starting
with the sealed side into the correctly adjusted
entry slot G . Be sure to use the slider on the right
side as a guide for alignment (see the arrow marking
on the slider) F! (Fig. F)
The
pouchjet|® pro
II
will detect the protection grade
E of the smartpouches and will automatically adjust
for the optimal settings. The automatic display E
shows the protection grade.
The pouches thickness will light up on the display.
If you choose a turbo pouch, all lights of protection grade Ewill light up (Fig. G). The
smartpouch is taken in through the laminator and is then automatically pushed on out of
the material exit Hon the back of the machine.
In the event that you are not using authentic smartpouches, your laminator will automatically
detect the unknown pouch and eject it. This is done to ensure that the document you have
already inserted is not damaged and that the functionality
of your
pouchjet|® pro
II
remains unimpaired.
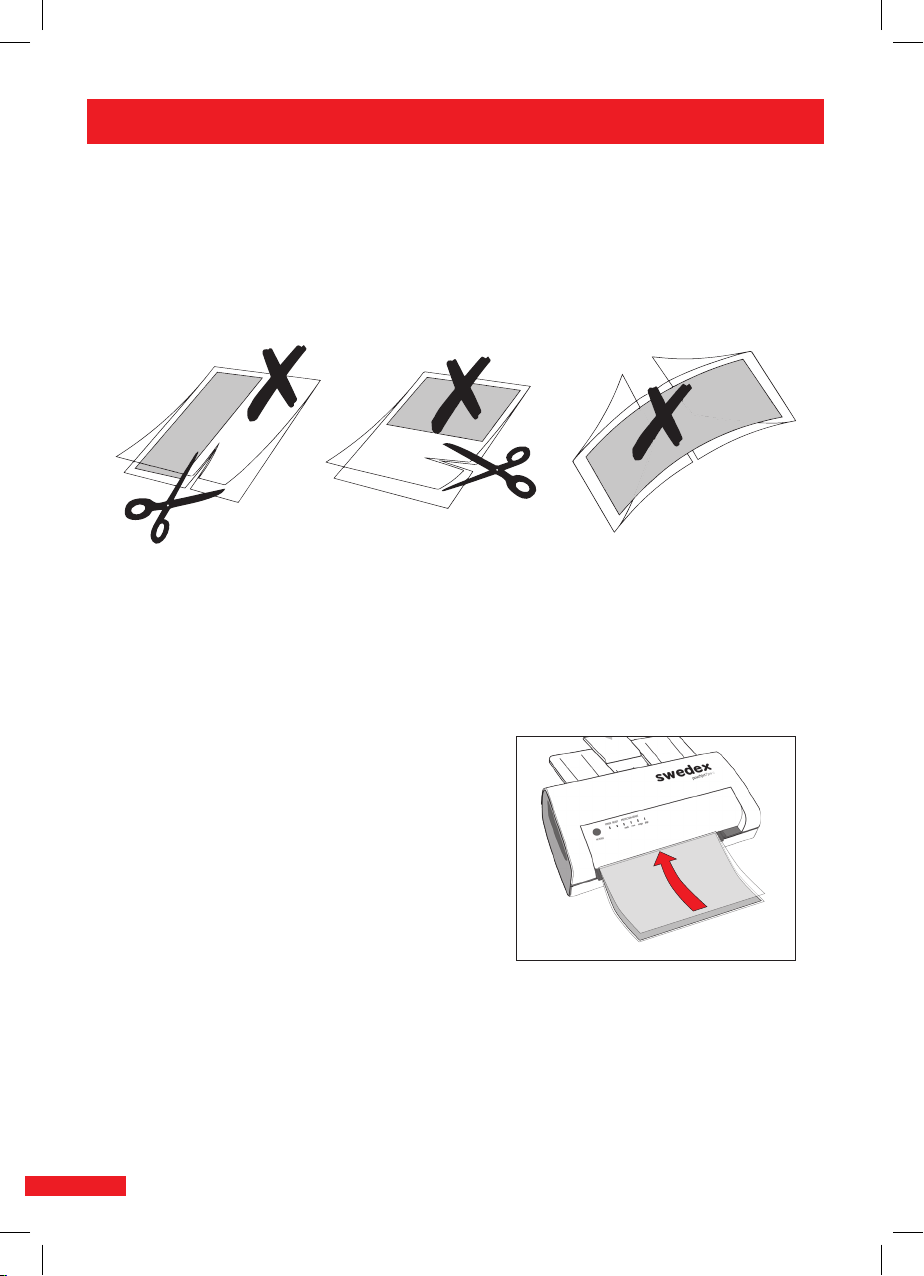
Now take the laminated document and allow it to cool by placing it on a table or other
smooth and cool surface for about a minute or so. If you do not wish to laminate any other
documents at this time, turn the machine o.
After 30 minutes of nonuse, the machine will turn o automatically.
Note!
It is possible that the READY display Dashes during the laminating process. This is
perfectly normal and will not inuence the quality of lamination. If you would like to
laminate further documents, simply wait until the READY display Dis lit constantly again.
REVERSE
POWER READY PROTECTION-GRADE
80 125 175 250
Fig. F
Fig. G
7
monolith_pjp-II_manual(GB)-ohneLogo_Tray_neu.indd 7 03.07.2018 06:40:26