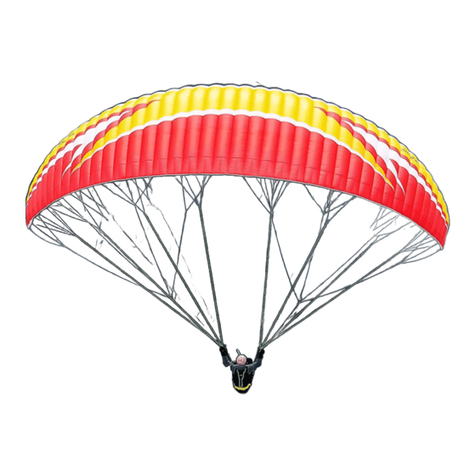
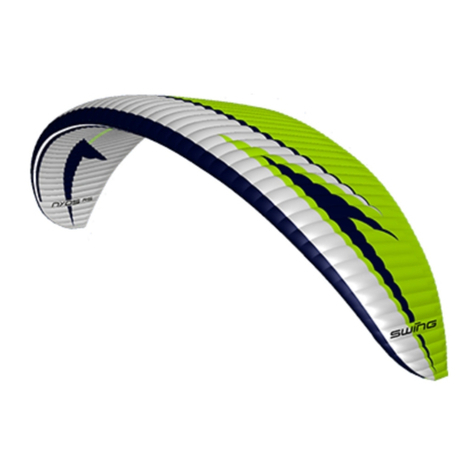
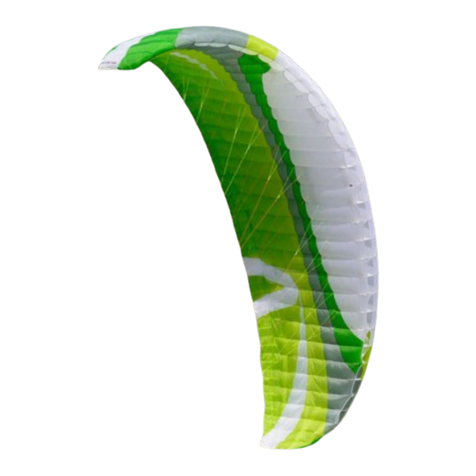
Swing ars Cirrus 2 User manual

1
Version 09/15/2000
Table of contents
Introduction........................................................2
Pre - flight Checks ............................................3
Suitable Harnesses ............................................3
Risers ................................................................4
Speedsystem ......................................................4
Arranging the canopy ......................................5
Take off ..............................................................5
Flight..................................................................5
1.Flying Characteristics ..................................6
Zero Position ..............................................6
Best glide....................................................6
Minimal descent ........................................6
Turning ......................................................6
Flying in turbulence ................................6-7
Accelerated Flight ......................................7
Parachutal stall ..........................................7
2. Rapid descent techniques............................8
Big ears ......................................................8
B-Stall ........................................................8
Spirals ........................................................8
3. Extrem flight manoeuvres ..........................9
Full Stall ....................................................9
Negativ turns (Flat spins) ........................10
Front tuck ................................................10
Front Stall ................................................10
Landing ............................................................11
Folding away....................................................11
Transport ..........................................................11
Storage ............................................................11
Servicing ..........................................................12
Gurantee and checking ....................................12
Checking Data ................................................12
Repairs ............................................................12
Cleaning ..........................................................13
Motorised flying ..............................................13
Compatibility with other harnesses ................13
Artistic display flying ......................................13
Winch starts ....................................................13
Contact ............................................................14
08681-45 329
www.ars-werbung.de
Layout & Illustration
Tony W. Richter
©2000
Cirrus2

The "SWING-CIRRUS 2" belongs to the latest generation of hight performance Paragliders. We
have placed as much emphasis as possible on maximising the potential performance without com-
promising the issue of safety. Consequently the "SWING-CIRRUS 2" is a perfect glider for both
recreational and ambitious cross country pilots.
With a few practice in hight performance gliders, the CIRRUS 2 gives you a new experience in
flying and this with calm flying caracteristics.
This manual is very detailed. It helps you to get to know your new glider. The descriptions of the
extreme flying situations acquaint you with the characteristics of the CIRRUS 2. However, we
recommend that you try the limits of your new equipment little by little and at a considerable
height. Certain extreme manoeuvres must only be performed above water and with appropriate
equipment (emergency parachute, buoyancy aid) and at first only under supervision.
Your CIRRUS 2 was test flown at the factory and/or by your dealer. Nevertheless you should
check it at a training site for correct working order. Choose light conditions for the first few
flights and a friendly take off site.
Remember: accident free and enjoyable flying is far more important than a few additional
moments in the air or showing off near the ground.
We hope you will have much fun and joy with your new "SWING-CIRRUS 2". Please do not
hesitate to contact us for further information.
Your SWING TEAM
2

"SWING-CIRRUS 2" is a paraglider and must therefore not be used as a para-
chute. The use of the equipment is at your own risk. The manufacturers accept
no liability for damage caused by or to the glider.
Pre-flight Checks
Apart from the usual checks, starting at any point and then working round the whole canopy, its
sewing, lines, knots and fabric, follow this checklist very carefully:
¥ Has any damage occurred due to ultraviolet rays? Though the
fabric has been UV treated, it is not UV resistant.
¥ Does the glider show signs of tearing/ripping or other damage?
¥Check each line individually. Is it in proper working order? Are the knots in the correct
position? The lines should not be tangled or show signs of wear and tear.
¥Check the brake lines are in proper working order, correctly adjusted, free running and
securely connected to the handle.
¥ Are all triangle locks properly screwed shut?
¥Are the canopy and the risers dry? Never fly with a wet canopy as this makes the take-
off more difficult and changes the way the glider behaves.
¥Check the seat and harness: Ensure the leg straps are taut and of equal length, that the
chest straps are taut and that all are in correct position.
¥ Check the brake handles, risers and seams for faults.
Suitable Harnesses
The CIRRUS 2 is certified in the DHV class 2-3 GH this means you need to fly a harness with a
GH classification. Almost all modern harnesses a classified with GH but to be sure you could
inform yourself at the DHV homepage ( www.dhv.de )
3
!

Cirrus
2
- Risers
The CIRRUS 2 has a divided A riser. This allows you to do big ears whilst pulling the two outer
Arisers ( A2 ) without searching for the right A-lines.
Speedsystem "SWING -Cirrus
2
"
The CIRRUS 2 is equipped with a foot-operated speed bar that is attached to the risers. Once you
have attached the foot bar you increase your speed by pressing it down. In the chapter on "Flying"
we will discuss this in more detail.
Pre - flight Checks
4
normal accelerated
D unchanged 550 mm
same lenght 550 mm
for accelerator

Arranging the Canopy
We recommend that you spread out the canopy in a semi-circle, open towards the way you are
going to run. Pull the lines until they are taut and start disentangling the lines, especially brake
lines.
Take off
In light winds use all the A risers. In stronger winds use only the inner As: this results in the midd-
le cells filling first and produces a slower launch.
In lighter conditions the wing rarely surges on take off, but in stronger conditions it may be neces-
sary to apply brakes to prevent over flying.
Flight
Your "SWING - CIRRUS 2" has excellent flight characteristics, yet we recommend that you get
to know your glider very thoroughly. In this handbook we have divided the flying instructions
into three chapters:
1. flight characteristics
2. rapid descent techniques
3. extreme flight manoeuvres
The latter deals with the special characteristics of your "SWING-CIRRUS 2" but its execution
demands some degree of experience. We strongly discourage acrobatic display flying. We stron-
gly recommend safety training, for which your dealer will provide information.
5

1. Flight Characteristics
Zero Position
The "SWING-CIRRUS 2" comes with a foot-operated speed bar. The canopy has been trimmed
in such a way that it is always in the zero position unless you have adjusted it. Zero position is
used as a starting point in describing all other positions.
Best glide
The best glide (lift/drag ratio) is achieved in calm air without using brakes or speed bar. Into wind,
the speed bar should be pressed down progressively. When flying downwind, applying a little
brake will improve the glide.
Minimal descent
This can be achieved with 15 % braking. The harder you brake the less you advance and the more
you descend. This is very useful when preparing to land. If you do a shallow turn in thermals,
brake "SWING-CIRRUS 2" on both sides and correct the radius of the circle by the outermost
side.
Turning
Weight shifting to the inside will produce a flatter, more efficient, turn. When performing tight
turns in thermals, brake your CIRRUS 2 on both sides and correct the radius of the circle by the
outside brake. When entering thermals or in order to achieve steeper bank angles only brake on
one side. Although the CIRRUS 2 has minimal negative tendencies, you should do this manoeu-
vre with "feeling".
When you loose the brake control you may use the D risers for steering. This is only in an emer-
gency situation and you should pull the risers very sensitive.
Flying in Turbulence
When flying in turbulent conditions you should apply slight brake pressure to both sides - around
20 % - to maintain a good angle of attack, thus reducing any tendency to collapse. Try to keep
the canopy above you by actively working with the brakes. This requires some training, but is
essential for safe flying in turbulence.
However, should a collapse occur, it is important to maintain your direction and if necessary steer
away from any obstacles. Do not attempt to re-inflate the canopy by "pumping" until you are once
6

again flying straight and stable on a safe course.
Note: If an asymmetric collapse occurs, use the opposite brake to maintain straight flight.
But better too little brake than too much - the heavier wing loading with a partially collap-
sed wing means the stall speed is higher. Too much counter steering with a partially collap-
sed wing could induce a stall.
Note: The canopy becomes more sensitive when the speed-bar is being used. We recommend
that in strong turbulence it is only used with great care. Should a collapse occur whilst the
bar is pressed down, release immediately. Steer a safe course and "pump" the collapse out
with the brake on the collapsed side.
Note: If the collapse has occurred, use the opposite brake until canopy is stabilised in
straight flight. Better to little brake than too much!
Accerlerated Flight
You need to practice using the foot-operated speed bar. To be able to control your glider with your
feet as well as with your hands is especially important when flying in turbulence. When changing
from lift to sink it is essential to take your feet off the accelerator in order to reduce the risk of
collapses
Remember: Flying accelerated the canopy has a lower angle of attack this means a collapse may
occur much easier ! So it is obvious that you should not use the accelerator flying with minimum
height.
Flying with big ears it is very useful to use the accelerator also: the angle of attack increases doing
the big ears, the glider is slower and the parachutal stall is not so far away. Accelerating decrea-
ses the angle of attack and the glider is faster.
Note: The canopy becomes more sensitive when the footbar is being used. We recommend
that in strong turbulence it is only used inter-mittently, when descending. Should a collap-
se occur whilst the bar is pressed down, release immediately. Steer into the wind and
"pump" as described above.
Parachutal Stall
Astable parachutal stall has not been achieved in test flights. Should your glider nevertheless
engage in continuous vertical descent, give the A risers a short downwards pull until the canopy
resumes its forward flight.
7

2. Rapid Descent Techniques
Big Ears
Using "big ears" with your CIRRUS 2 increases the descent rate to about 4 mps. To do this, grasp
the outer A risers as high up as possible and, without letting go of the brakes, pull the risers down
until the wing tips fold under. The speed decreases with big ears so please take care that you are
not blown back into a lee side. Big ears can also be useful in avoiding being sucked up into
clouds. To open up the ears "pump" the brakes steadily to encourage opening.
You can increase both your descent rate and forward speed when flying with big ears by fully
pressing the foot speed bar. This puts you into a very stable state of flight and allows limited stee-
ring with your body. NOTE: Big ears increases your angle of attack and therefore braking increa-
ses the chance of a parachutal stall. Using the speedbar counteracts this. Using big ears and acce-
lerator together increases your descent rate to around 6 mps.
NEVER ever attempt spirals with big ears or speed bar
Note: You can increase both your descent and forward speed when flying with big ears by fully
pressing the foot speed bar. This puts you into a very stable state of flight and allows limited stee-
ring with your body. Your descent rate can be increased to ca. 6 mps.
Never ever do spirals in this position!
B-line Stall
This is another method of descent giving an even greater rate of loss of height (up to 8m/s). Grip
the B lines above the B line triangle locks and pull both risers down evenly. Initially this requi-
res considerable effort, but resistance decreases once head height is reached, and the descent rate
increases noticeably. Pull the risers about 15cm and hold this position. If you pull too far the gli-
der may form a horseshoe. This is not a stable situation so if the glider starts getting an horses-
hoe please release the B-risers and do the B-stall again.
End the manoeuvre by releasing the risers simultaneously and quickly. If released too slowly you
might enter a parachutal stall. However, the canopy should automatically rectify this itself (see
parachutal stall).
Spirals
Using steep spirals increases your descent rate to above 10 m/s. Start by depressing one brake slo-
wly and continuously. Should you loose speed whilst spiralling, do not just give another pull.
Instead start the manoeuvre all over again. light pilots (below the average pilot's weight for their
wing) are advised to start off by swinging up and into the spiral. Weightshifting helps to start the
spiral. To finish, simply release the brake. Due to it's momentum it is possible that the canopy will
continue turning for a short while. To stop turning, gently apply the opposite brake.
8
!

3. Extreme Flight Manoeuvres
The following instructions describe in full the character of the "CIRRUS 2". They will enable you
to select the best way to manoeuvre the glider out of extreme situations.
Note: "CIRRUS 2" hardly ever shoots out of extreme manoeuvres, i.e. you need not stabi-
lise the following situations by hard braking. Instead braking might result that the "CIR-
RUS 2" returning to the extreme situation. It is more important to give the canopy suffi-
cient time to open up and only use the slightest brake action to supplement the canopy ope-
ning. In all these situations remember that less braking is far better than too much braking.
The "SWING-CIRRUS 2" very quickly returns to its normal flying position.
Full Stall
This may occur:
¥ if you fly head on into a thermal whilst braking hard.
¥when braking hard above 100 % (hands at seat height). Full stall is indicated when the
canopy softens in zero position and then falls backwards. The CIRRUS 2 then stabili
ses in full stall above the pilot. Do not open the brakes in this situation !
To achieve the full stall we recommend that you wrap the brake lines round your wrists at least
once. Press the brakes down slowly until your forward speed decreases markedly. As you keep
applying the brakes the canopy continues to fall backwards. It is most important that you DO
NOT RElEASE THE BRAKES during this phase. The canopy then contracts and stabilises itself
above you, its "wing tips" pointing forwards. The brake pressure in this condition is very high.
To exit from a full stall there are two methods:
Once the wing is stable overhead, fully release both brakes simultaneously over a period of 1-2
seconds. The wing will surge a little and resume normal flight. This method can lead to wing tip
tucks and even possibly cravating. The second method is preferred
Erase the brakes up slowly until the wing has inflated over its full width. The wing may pendu-
lum slightly. At the forwardmost point release the brakes quickly and the Astral2 will resume nor-
mal flight. It is important to give the canopy sufficient time to open up.
Note: Should your CIRRUS 2 develop a full stall during a previously described situation, do
not suddenly release the brakes, but guide the canopy back into its normal flying position.
This prevents the violent pendulum effect (sudden dynamic surge of canopy).
Note: Should your "SWING-CIRRUS 2" fall into a full stall during a previously described
situation, do not suddenly release the brakes, but guide the canopy back into its normal fly-
ing position. Thus you prevent the pendulum effect (sudden dynamic advance of canopy).
9

Negative Turns (Flat Spins)
These may occur:
whilst braking hard when one brake is either applied more or released faster than the other.
When braking hard to over 70 % on one side only from normal flying position. Flat spins usual-
ly occur during thermal flying; when initiating a new flying position too hastily.
Negative turns are indicated by the softening of the excessively pulled side of the canopy, which
recedes backwards. Should you encounter this state, RElEASE THE BRAKES immediately! The
canopy will automatically stabilise itself. Should an asymmetric collapse occur, counter as
described in "flying in turbulence".
Front Tuck
This may occur in strong turbulence. The CIRRUS 2 will automatically stabilise itself. You can
aid this by braking gently on both sides. Collapse of one wing and flying in turbulent conditions
were discussed above.
Front Stall
Start by pulling the front risers (A risers) down until the whole front collapses completely. This
way you can stabilise the canopy at a descent rate of 3 - 5 m/s. If you pull the risers further, the
canopy will collapse into a U shape, and the descent exceeds a speed of over 5 m/s. To open the
canopy, QUICKlY let go of the risers. The canopy will open up above you and resume flight at
the basic speed without surging forwards. Braking a little helps to open up the fronstall imme-
diately.
10

Landing
To reduce the forward speed when coming in to land, brake at about 50%. You achieve a soft lan-
ding if you further increase braking just before touch down. With brake lines with a lot of slack
it may help to take a turn around your hands.
Folding away
We recommend that you sort the lines before you fold up your canopy and loosely throw them on
top of it. Folding the canopy from both ends towards the middle has proven successful. You end
up with a strip approx. 60 cm wide. Roll this up from the trailing edge to the leading edge and
hold together with the strap provided. Using the enclosed inner rucksack offers additional pro-
tection against damage.
Transport
Paraglider equipment is best transported in its own rucksack or carrying case. Sunlight and too
much heat can affect the equipment adversely. If transporting your glider by car, please remem-
ber that the exhaust can substantially heat up some parts of the boot, which can be damaging to
both fabric and lines. For the same reason it is recommended that you do not leave your unpro-
tected equipment behind car windows, where it can be heated by the sun. leaving your wing open
on the ground, un-covered when not in use, will also cause premature UV degradation of the
cloth.
Storage
All the equipment should be stored away from light in a dry, well ventilated room, and protected
from temperature fluctuations. Rooms where petrol, solvents, or other chemically aggressive sub-
stances are stored are unsuitable. If you are unable to use your glider for any length of time, open
up the rucksack, release the strap and slightly unroll the canopy, so that air can circulate round it
and that there is no tension in the fabric. Should the canopy have become wet, spread it out so
that air can reach all parts. This is best achieved by pulling out the whole leading edge. Even if
the fabric feels dry, the canopy may not be. The fibres retain moisture and the water takes longer
to diffuse out of the fibres than it takes to evaporate on the surface. Thus your canopy may feel
11

dry in the evening, but may be wet again the following morning. It can take several days for the
canopy to dry out completely, yet this is an essential process because a wet glider could have a
much different flightbehaviour .
Servicing
Your equipment needs constant checking, i.e. especially the canopy material, the seams, lines and,
last but not least, the harness and straps.
Guarantee and checking
The glider must be checked every 100 hours or at the latest every 2 years. This airworthiness
check must be done at a Swing authorised workshop. The Swing guarantee and the airworthiness
become invalid if you miss those checks !
Checking
Your glider and especially the lines may become distorted by extreme weather conditions or
excessive use. Should you get the impression that your glider's performance has changed, please
return it to us or measure the lines as follows:
¥ Sort the lines.
¥ Using a spring balance adjust each line to at tension of 5 kilograms.
¥ Measure the individual lengths of the lines and compare with your handbook.
If your checks reveal considerable variations, please contact us. There is no need to swap parts of
your glider routinely. Should it be necessary to replace parts following damage or wear and tear,
only original parts, or those authorised by the producer may be used.
Repairs
Repairs to the glider should only be undertaken by the manufacturers, or experts recommended
by them. In places of minimal stress, small damages and tears up to 3 cm in the sail (but not the
seams) may be repaired using our own materials (Rip-Stop) available from us. Please follow the
enclosed instructions carefully. Do not replace lines or perform repairs using cellotape, masking
tape or similar products. Please remember that you must only use original "SWING" parts for
repairs.
12

Cleaning
Should your canopy ever become soiled, wipe it down with a soft sponge and clean water. If the
dirt is ingrained use tepid water and soap flakes. Ensure the canopy is completely dry before sto-
ring it away. Any cleaning with aggressive chemicals, or by pressurised or hot water or heat, wea-
kens the fabric, dissolves the surface finish and will render the canopy useless. If in doubt, put up
with a few blemishes on your canopy and thus ensure having a safe and secure glider.
Motorised Flying
The CIRRUS 2 was not tested or certified for use with motors. The use of any kind of engine in
conjunction with this glider is therefore not permitted. If you want to use a motor please contact
us.
Compatibility with other harnesses
The "CIRRUS 2" is fastened to two risers and can be used with any two-point harnesses certified
GH.
Artistic Display Flying
No artistic display flying of any kind is allowed using the SWING-CIRRUS 2.
Winch Starts
Winch-assisted take-offs are permitted as long as the usual rules are obeyed, i.e.
-The pilot must be in possession of a licence permitting the use a winch.
-The winch must be suitable for paragliders.
-The winch operator must be in possession of a licence that includes paragliders.
When taking off with a winch, steer the canopy gently and do not overbrake!
The ãluftsportgerŠtekennblattÒ is a part of this manual
13

Europa, Deutschland
SWING GmbH
Badfeldring 25
D-82290 Landsberied
Tel: +49 8141/ 32 77 888
Fax: +49 8141/ 32 77 870
Web: http://www.swing.de
Email: [email protected]
14

15

16
www.ars-werbung.de ©2000

17
Table of contents
Other Swing Aircraft manuals

Swing
Swing Protect III User manual

Swing
Swing RAST Mirage RS 2 User manual

Swing
Swing Nexus User manual

Swing
Swing Discus User manual

Swing
Swing CONNECT REVERSE 3 User manual

Swing
Swing ARCUS 2 RS User manual

Swing
Swing Powerplay Sting 2 User manual

Swing
Swing Spitfire 2 User manual

Swing
Swing Escape User manual

Swing
Swing Core 3 User manual

Swing
Swing Astral 6 User manual

Swing
Swing TWIN RS 2 Series User manual

Swing
Swing Stratus 8 User manual

Swing
Swing Mirage RS Plus User manual

Swing
Swing Astral 3 User manual

Swing
Swing ORANGE CROSS S User manual

Swing
Swing NYOS RS User manual

Swing
Swing Twin RS User manual

Swing
Swing MIURA RS User manual

Swing
Swing Mistral 5 User manual