ү
This Safety Alert Symbol indicates important messa es in this
manual. When you see this symbol, carefully read the messa e
that follows and be alert to the possibility of personal injury.
Read this manual completely. This machine can injure hands and le s, and throw objects.
Failure to observe the followin safety instructions could result in serious injury or death.
4
• Read the manual. Learn to operate thi machine afely.
• Keep all hield and guard in place.
• Under tand the peed, teering and tability of thi machine. Know the po ition and operation
of all control before you operate thi machine. Check all of the control in a afe area before
tarting to work with thi machine.
• Allow only re pon ible adult who are familiar with the e in truction to operate thi machine.
Never allow children to operate this machine.
• Be ure the area i clear of other people before preading. Stop the machine if anyone enter the
preading area. Children are often attracted to the machine and the preading activity.
Never assume that children will remain where you last saw them. Keep children under the
watchful care of another re pon ible adult.
•No riders!
• Do not put hand or feet near or under rotating part .
• Do not pread in rever e. Always look down and behind before and durin backin .
• Di connect Axle Pin when not preading material.
•Watch for traffic when operating near or cro ing roadway .
• Do not operate the Spreader if it ha been dropped or damaged in any manner or if the Spreader
vibrate exce ively. Excessive vibration is an indication of dama e. Repair Spreader a
nece ary.
• U e proper handling procedure for the material you are u ing. Obey all afety precaution
advi ed by the material manufacturer.
• Dre properly. Protect kin and body part from flying material and du t.
• Do not operate the machine while under the influence of alcohol or drug .
• Do not operate on lope greater than 15 de rees.
• Stop and in pect the equipment if you trike an object. Repair, if nece ary, before re uming.
• Volume of material and weight of material vary by the material’ den ity. Alway pay attention to
the amount of wei ht you are putting into the Hopper. Do no exceed the 600 lb capacity. Some
material will reach 600 lb before the Hopper i full.
• Do not exceed the recommended peed with towing. 5 MPH while preading/loaded and 15 MPH
while tran porting an empty unit.
• Alway remove the axle pin when tran porting the preader. Do not travel long di tance with a
fully loaded hopper a thi will cau e the material to compact and can re ult i poor operation or
equipment damage.
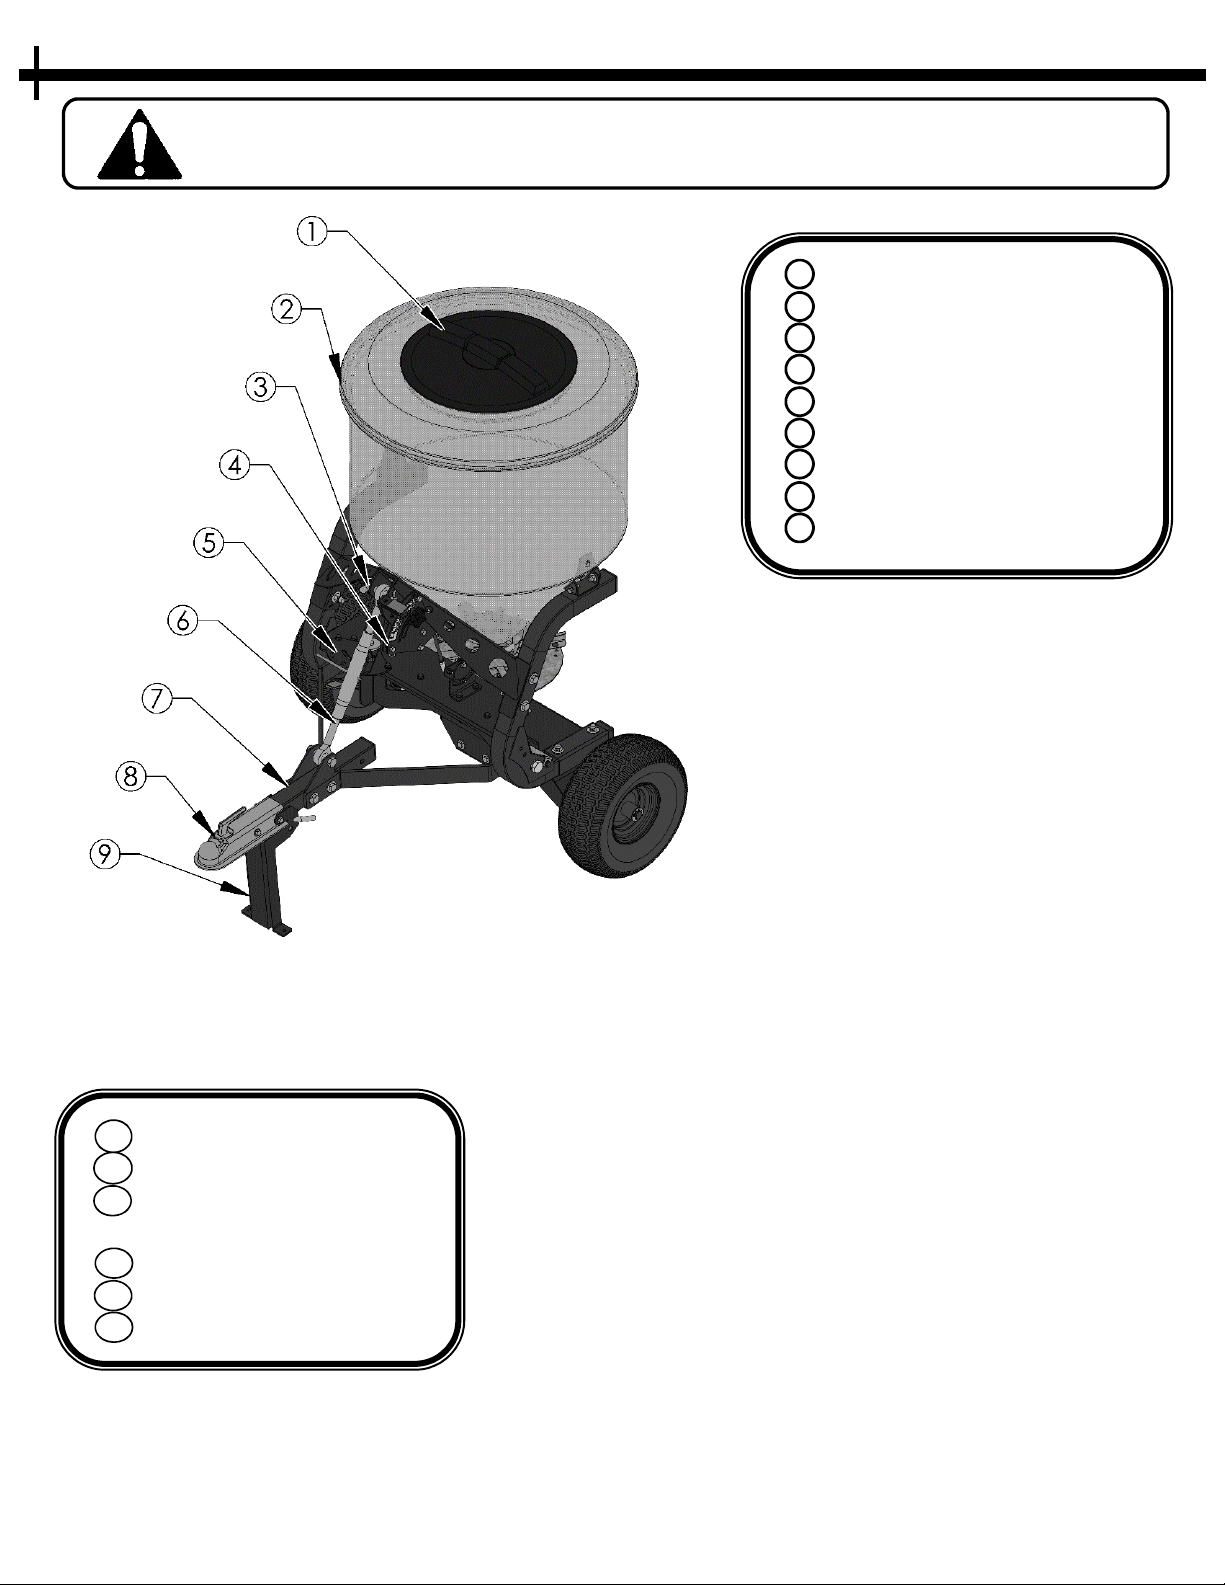
SAFETY PRECAUTIONS
Thank you for choo ing Swi her’ Tow-Behind Spreader. Before operating your
Spreader, plea e read, under tand and follow all of the afety precaution and
other in truction explained in thi manual. A with all power equipment
Spreader can be potentially dangerou if improperly u ed.