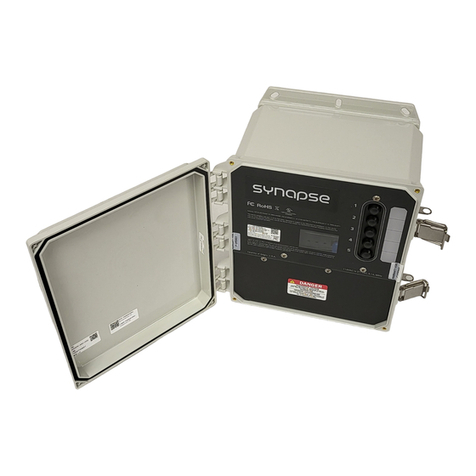
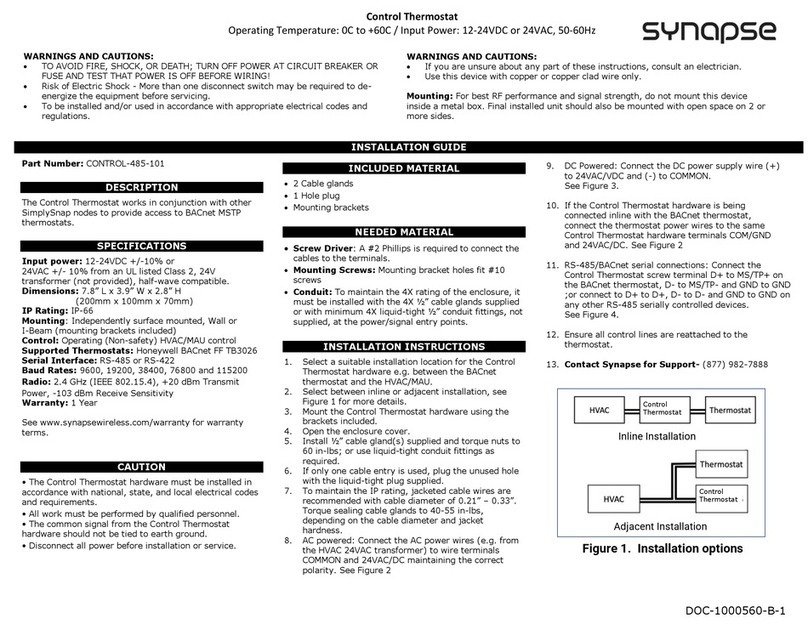
Synapse SE72 User manual

SYN-INT-E01
For further information or to consult this guide on line,
please visit our Web site.
www.synapseelectronique.com
“SE72”
Heating oor programmable
electronic thermostat
User’s guide

SYN-INT-E012
1. Description
The SE72 electronic thermostat can be used to control heat-
ing oors with electrical current − with a resistive load − rang-
ing from 0 A to 16 A at 120/208/240 VAC. It has an easy user
interface and can manage up to four programming periods a
day. It keeps the temperature of a room (Ambient mode) and a
oor (Floor mode) at a requested set point with a high degree
of accuracy.
Floor Mode
(factory setting): this control method is ideal in ar-
eas where you want a hot oor at any time and when the tem-
perature of the ambient air can be high without causing discom-
fort. For example, in a bathroom.
Before installing and operating this product, the
owner and/or installer must read, understand and
follow these instructions and keep them handy for
future reference. If these instructions are not fol-
lowed, the warranty will be considered null and void
and the manufacturer deems no further responsi-
bility for this product. Moreover, the following in-
structions must be adhered to in order to avoid
personal injuries or property damages, serious
injuries and potentially fatal electric shocks. All
electric connections must be made by a qualied
electrician, according to the electrical and building
codes effective in your region. Do NOT connect this
product to a supply source other than 120 VAC, 208
VAC or 240 VAC, and do not exceed the specied load
limits. Protect the heating system with the appropri-
ate circuit breaker or fuse. You must regularly clean
dirt accumulations on or in the thermostat. Do NOT
use uid to clean thermostat air vents. Do NOT use
where exposed to water. Suitable for insulated walls.
WARNING WARNING

SYN-INT-E01 3
Ambient Mode
(you only have to press down the A/F button to
switch from one mode to the other): this control method is ideal
when you want a stable ambient air temperature (without uc-
tuation). Usually, this mode is used in large and often occupied
rooms where temperature variations can be uncomfortable. For
example, in a kitchen, a living room or a bedroom.
Some factors cause variations in ambient air temperature. They
include large windows (heat losses or gains due to outside tem-
perature) and other heat sources such as a central heating sys-
tem, a replace, etc. In all these cases, the Ambient mode will
ensure a uniform temperature.
This Thermostat is not Compatible with the Following
Installations:
•electricalcurrenthigherthan16Awitharesistiveload(3840W
@240VAC,3475W@208VACand1920W@120VAC);
•inductiveload(presenceofacontactororrelay);and
•centralheatingsystem.
Parts Supplied:
•one(1)thermostat;
•two(2)mountingscrews;
•four(4)solderlessconnectorssuitableforcopperwires;and
•one(1)oorsensor.
2. Installation
Selection of Thermostat and Sensor Location
The thermostat must be mounted on a connection box, at
around 1.5 m (5 feet) above the oor level, on a section of the
wall exempt from pipes or air ducts.
Do not install the thermostat in a location where tempera-
ture measurements could be altered. For example:
•close to a window, on an external wall, or close to a door
leadingoutside;

SYN-INT-E014
•exposeddirectlytothelightorheatoftheSun,alamp,are
placeoranyotherheatsource;
•closeorinfrontofanairoutlet;
•closetoconcealedductsorachimney;and
•ina locationwithpoorairow(e.g. behinda door), orwith
frequentairdrafts(e.g.headofstairs).
Thermostat Mounting and Connection
1. Cut off power supply on lead wires at the electrical
panel in order to avoid any risk of electric shock.
2.Ensurethattheairventsofthethermostatarecleanandclear
ofanyobstruction.
3.Usingascrewdriver,loosenthescrewretainingthemounting
baseandfrontpartofthethermostat.Removethefrontpart
ofthethermostatfromthemountingbasebytiltingitupward.

SYN-INT-E01 5
4.Alignandsecurethemountingbasetotheconnectionbox4.
usingthetwoscrewssupplied.
5.Route wires coming from the wall through the hole of the
mountingbaseandmaketherequiredconnectionsusingthe
“Four-wireinstallation”gure,andusingthesuppliedsolder-
lessconnectors.Apairofwires(black)mustbeconnected
to the power source (120-208-240 VAC) and another pair
(yellow) must be connected to the heating cable (refer to
thedrawingsdisplayedonthebackofthethermostat).For
connections with aluminum wires, you must use CO/ALR
connectors.Pleasenotethatthermostatwiresdonothave
polarity,meaningthatanywirecanbeconnectedtotheother.
Then,installtheoortemperaturesensor.
Four-wire installation

SYN-INT-E016
6.Reinstall the front part of the thermostat on the mounting
baseandtightenthescrewatthebottomoftheunit.
7.Turnonthepower.
8.Setthethermostattothedesiredsetting(seethefollowing
section).

SYN-INT-E01 7
3. Operation
First Start-up
At the rst start-up, the thermostat is initially in the Man (man-
ual) and Floor modes. The temperature is displayed in degrees
Celsius and the standard factory set point adjustment is 21°C.
The hour displays – -:- – and must be adjusted before switch-
ing to the Auto or Pre Prog mode. The maximum oor temper-
ature is limited to 28°C.
Ambient and Floor Temperature
The gures displayed below the word “AMBIENT” indicate the
ambient temperature, ±1 degree. The gures displayed be-
low the word “FLOOR” indicate the oor temperature, ±1 de-
gree. Both temperatures can be displayed in degrees Celsius or
Fahrenheit (see “Display in degrees Celsius/Fahrenheit”).

SYN-INT-E018
Temperature Set Points
The gures displayed beside the word “SET” indicate the ambi-
ent or the oor temperature set points. They can be displayed in
degrees Celsius or Fahrenheit (see “Display in degrees Celsius/
Fahrenheit”).
Out of any adjustment mode, press down the + button to in-
crease the set point, or the – button to decrease it. Set points
can only be adjusted by increments of 1 degree. To quickly scroll
through the set point values, press and hold down the button.
Maximum Floor Temperature Limitation
At any time, the oor temperature (in Floor mode) is maintained
at less than 28°C (82°F) in order to avoid overheating caused by
an excessive heating request, which could damage some ma-
terials or be detrimental for health. It is however possible to in-
crease this limit to 35°C (95°F). To do so, you must press down
the A/F button for at least 20 seconds. After 20 seconds, the
new maximum temperature will be displayed in replacement of
the Floor mode set point and will blink during 5 seconds. Then,
you can release the A/F button. To return to a maximum temper-
ature of 28°C, you must repeat the operation. Regardless of the
maximum oor set point (Floor mode), the maximum Ambient
mode set point will always be 35°C.
Adjustment of the Hour and the Day of the Week
Adjustment procedure of the hour and the day of the week.
1.PressdowntheDay/Hrbutton,whetheritisinMan,Autoor
PreProgmode.
2.At this moment, the SET icon and the day of the week
blinksandyoucanadjustthedayof theweekusing the
+or-buttonandconrmyourchoicebypressingdown
theModeorDay/Hrbutton.Youcanalsopressdownthe
desired day of the week button without using the + or -
button and conrm your choice using the Mode or Day/
Hrbutton.
3.The two gures indicating the hour blink. You must adjust

SYN-INT-E01 9
them using the + or - button and conrm your choice by
pressingdowntheModeorDay/Hrbutton.
4.Thetwoguresindicatingtheminutesblink.Youmustadjust
them using the + or – button and conrm your choice by
pressingdowntheModeorDay/Hrbutton.Theadjustment
isthencompletedandthethermostatreturnstotheprevious
mode.
N.B.At any time, you can exit the adjustment mode of the day and
the hour by pressing down the Exit button or by not pressing
any button during 1 minute.
In case of a power failure, the thermostat is self-sufcient for 2
hours. If the failure lasts less than 2 hours, the thermostat saves
the adjustment of the hour and the day of the week. When the
power is restored after an extensive failure (more than 2 hours),
the hour and the day of the week are recovered, but you must
update them.
Display in Degrees Celsius/Fahrenheit
The thermostat can display the ambient temperature and the set
point in degrees Celsius (standard factory setting) or Fahrenheit.
Adjustment procedure for degrees Celsius/Fahrenheit display.
1.ToswitchfromthedegreesCelsiustothedegreesFahrenheit,
and conversely, simultaneously press down the + and -
buttonsformorethan3secondsuntiltheSETiconblinks.
2.Pressdownthe+buttontoswitchfromthedegreesCelsius
to the degrees Fahrenheit, and conversely. The degree
CelsiusorFahrenheitsymbolisdisplayed.
3.When the adjustment is completed, press down the Exit
buttonordonotpressdownanybuttonduring5secondsto
exittheadjustmentfunction.
N.B. This adjustment can be done from any of the three principal
modes.

SYN-INT-E0110
Manual Mode (Man)
From the Manual mode, you can manually adjust the thermostat
set point by pressing down the + or – buttons to increase the
value, or to decrease it. Please note that if the backlight is off,
the set point will not change when you press down these but-
tons for the rst time instead, the backlight will be activated. To
quickly scroll through the set point values, press and hold down
the button. From both modes (Ambient/Floor), the set points
can range between 1 and 35°C and can only be adjusted by in-
crements of 1°C (from 34 to 95°F; by increments of 1°F from the
Fahrenheit mode). The thermostat will turn off if the set point is
lowered below 1°C (34°F), and the set point value displayed will
be OF. The standard factory set point adjustment is 21°C (Floor
mode). From this mode, the screen displays the Ambient/Floor
mode temperature, the Ambient/Floor mode set point, the hour
and the day of the week.
This mode is initially activated when the power is turned on for
the rst time. You must adjust the hour (as described in the sec-
tion “Adjustment of the hour and the day of the week”) before
switching to other modes by pressing down the Mode or Pre
Prog button.
Automatic Mode (Auto)
To switch from the Manual mode to the Automatic mode, and
conversely, press down the Mode button. The Man or Auto icon
is displayed at the bottom of the screen as applicable.
From the Automatic mode, the thermostat adjusts the set points
according to the programmed periods. If no data is entered, the
thermostat acts as in Manual mode and the standard factory
set point adjustment is 21°C (Floor mode). It is always possible
to manually adjust the set point using the + or – button. The se-
lected set point will be effective until one period is programmed,
which represents an hour and a day of the week. Note that, if
the set point is lowered to OF, the programming will not be ef-
fective. It is possible to program 4 periods a day, meaning that
the set point can change automatically up to 4 times a day. The
period order is not important.

SYN-INT-E01 11
From this mode, the screen displays the temperature, the
set point, the hour, the day of the week and the current pro-
grammed period number (1 to 4; as applicable).
Programming Procedure of the Automatic Mode
After programming a day of the week, you can copy this setting;
see “Copy of the Programming”.
1.Toaccess the Programming mode,pressdownthe dayof
the week button that you want to program (Mon to Sun).
Onceyoureleasethebutton,theselecteddayoftheweek
isdisplayed,the SETicon blinks andthe period number 1
blinkstoo.
2.Selecttheperiodbutton(1to4)thatyouwanttoprogram
usingthe+or–button.Foreachperiod,thehourandtheset
pointaredisplayed.Thehourdisplays–-:-–andthesetpoint
displays– –if thereisnoprogrammingfortheperiod.You
mustconrmtheperiodbypressingdowntheModebutton.
3.Thetwoguresrepresentingthehourblinktoindicatethat
youcanadjustthem(from00to23)usingthe+or–button.
YoumustconrmtheadjustmentbypressingdowntheMode
button.
4.After conrmation, the gures representing the minutes
(thelast2gures)blink.Youcanadjustandconrmthemin
themannerdescribedinpoint3.Notethattheminutescan
onlybeadjustedbyincrementsof15minutes.
5.Theperiodsetpointblinksandyoucanadjustitusingthe
+or–button.Youmustconrmtheadjustmentbypressing
downtheModebutton.
6.Aftersetpointconrmation,theprogrammingiscompleted.
The following period number blinks. For example, if the
previously programmed period was 1, period 2 blinks. It is
thenpossibletocontinuetheprogrammingofthisperiodby
pressingdowntheModebutton.Youcanalsoselectanother
periodusingthe+or–button.
7.Attheendofperiod4programming,youautomaticallyexit
theProgrammingmode.

SYN-INT-E0112
At any time, you can exit the programming mode using one
of these 3 methods:
1-Pressdownthebuttonofthedayyouareadjusting.
2-Pressdownthebuttonofanotherdaytoprogramit.
3-PressdowntheExitbutton.
Moreover, if you do not press down any button for more than
1 minute, the thermostat will exit the Programming mode. In all
cases, the programming is saved.
Anticipated Start
This mode enables the room to reach the selected tempera-
ture at the programmed hour by starting or stopping the heat-
ing before this time. In fact, the thermostat estimates the delay
required to reach the set point of the next period at the pro-
grammed hour. This delay is obtained by the observation of the
temperature variations in the room and the results obtained dur-
ing the preceding anticipated starts. Therefore, results should
be increasingly precise day after day. From this mode, the ther-
mostat displays at any time the set point (SET) of the current pe-
riod. The “anticipated start” icon will blink when the anticipated
start of the next period begins.
For example, if the requested temperature between 8h00 am
and 10h00 pm is 22°C and between 10h00 pm and 8h00 am is
18°C, the set point (SET) will indicate 18°C until 7h59 am and
will switch to 22°C at 8h00 am. Thus, you will not see the pro-
gression carried out by the anticipated start, only the desired
result.
To activate or deactivate the anticipated start, the thermostat
must be in Auto or Pre Prog mode. Then, you must press down
the MODE button for at least 5 seconds. The anticipated start
icon ( ) is displayed or hidden to indicate the activation or the
deactivation of the mode. This modication will apply to the
Auto as well as the Pre Prog mode. If you modify the tempera-
ture set point manually when these modes are activated, the an-
ticipated start of the next period will be cancelled.
N.B. Please note that the anticipated start is initially activated when
you enter the Automatic or Preprogrammed mode. Thus, you
must deactivate it following the above procedure if needed.

SYN-INT-E01 13
Copy of the Programming
You can apply the programming of one day of the week to oth-
er days by copying the programming day by day or in block.
To copy the programming day by day, you must:
1.Pressdownthesourcedaybutton(daytobecopied).
2.Hold down this button and press down the destination
daysonebyone.Thescreendisplaystheselecteddays.If
anerroroccurswhenyouarechoosingaday,pressdownthe
erroneousdayagaintocanceltheselection.
3.Afterallselectionsarecompleted,releasethesourceday
button.Theselecteddayshavethesameprogramming as
thesourceday.
To copy the programming in block, you must:
1.Pressdownthesourcedaybutton,holditandpressdown
thelastdayoftheblockyouwanttocopy.
2.Hold down these two buttons for 3 seconds. After this
time,thedaysoftheblockaredisplayedindicatingthatthe
copyinblockisactivated.
3.Release the buttons. The days of the block are not
displayedanymoreandthecurrentdayisdisplayed.
N.B. The block order is always increasing. For example, if the
source day is Thursday and the destination day is Monday, the
copy will only include Friday, Saturday, Sunday and Monday.

SYN-INT-E0114
Erasing of the Programming
You must proceed as follows to erase a programming period.
1.Access the Programming mode as described previously
by pressing down the button corresponding to the day to
modify.Selecttheperiodtoeraseusingthe+or–button.
2.YoudonothavetopressdowntheModebuttontoconrm
the selection. However, doing so will not impact on the
erasing.
3.Simultaneously press down the + and – buttons to erase
theperiodprogramming.Thehourdisplays–-:-–andtheset
pointdisplays––toindicatethattheprogrammingiserased.
4.The erased period number blinks and you can select
anotherperiodtobeerasedorexittheProgrammingmode
followingoneofthe3methodsdescribedabove.
Preprogrammed Mode
The Preprogrammed mode allows an automatic programming
of the thermostat. 252 preprogrammings have been dened for
Ambient mode and 252, for Floor mode (A0 to Z1 and 0 to 9;
see appendix 1 to consult the corresponding tables). This mode
gives you the possibility to quickly program the thermostat us-
ing preprogrammings commonly used without having to do it
manually.
As from the Automatic mode, it is possible, at any time, to man-
ually adjust the set point. This set point will be effective until the
next set point change anticipated by the preprogramming. Note
that if the set point is lowered to OF, the programming will not
be effective.
From this mode, the screen displays the Ambient/Floor temper-
ature, the Ambient/Floor set point, the hour, the day of the week
and the letter and current number of the preprogramming
(A0 to Z1 and 0 to 9; alpha-numeric segment displayed on the
right-hand side of the hour; see appendix 1, p. 23).

SYN-INT-E01 15
Choice of the Preprogramming
You can only access the Preprogramming mode when the ther-
mostat is out of any programming or adjustment function. Make
sure to choose the preprogrammings corresponding to the right
mode (Ambient /Floor, according to the attached tables).
You must proceed as follows to access the Preprogramming
mode:
1.PressdownthePreProgbutton.
2.ThePreProgiconandsavedselectedpreprogrammingare
displayed. This preprogramming can range between 0 and
Z1.
3.From the Pre Prog mode, you can choose the rst 10
preprogrammings by pressing and releasing the Pre
Prog button. Each time you press down the button, the
preprogrammingswitches(from0to9).
4.Tochooseadvancedpreprogrammings,(seeappendix1),
pressdownthePreProgbuttonduring5seconds.Theletter
indicatorblinksandyoucanadjustitbypressingdownthe+
or–button.Oncetheletterischosen,youmustvalidateyour
choicebypressingdowntheModebutton.Theletterceases
toblinkandthegurestartstoblink.Thechoiceofthegure
ismadeinthesamewayasthatoftheletter(usingthe+or–
button).Oncethegureisselected,youmustvalidateyour
choicebypressingdowntheModebutton.
N.B. If you do not press down any button for more than one minute
or press the Exit button, the thermostat exits the adjustment
function and saves the current choice. Then, the icons cease
to blink and the letter and the gure corresponding to the
selected preprogramming blink alternately until you select
another preprogramming. If the Pre Prog mode is activated
and you successively press down the Pre Prog button, the
preprogramming comes back to 0 and increases normally, as
described above.

SYN-INT-E0116
View of the Preprogramming
The view of the selected preprogramming is made in a way sim-
ilar to the Auto mode programming. However, it is impossible to
modify the preprogramming.
You must proceed as follows:
1.Pressdownthe buttoncorrespondingto theday toview
(buttonsMontoSun).Whentheselecteddayisdisplayed,
theSETiconandperiodnumberblink.
2.Choosetheperiodnumber(1to2)toviewusingthe+or-
button.Foreachperiod,thehourandsetpointaredisplayed.
YoucanalsopressdowntheModebuttontoswitchtoperiod
2. If you press down the Mode button when period 2 is
displayed,youexittheViewmode.
At any time, you can exit the View mode using one of these
3 methods.
1-Pressdownthebuttonofthedayyouareviewing.
2-Pressdownanotherdaytoviewit.
3-PressdowntheExitbutton.
If you do not press down any button during 1 minute, the ther-
mostat quits the view mode. At any time, it is possible to change
the day to be viewed by pressing down the desired day button.
Ambient/Floor Mode
To switch from the Ambient mode to the Floor mode, or con-
versely, press down the A/F button (when you are not in any ad-
justment mode). Then, the temperature set point will become
the same as the Floor or Ambient mode temperature, as appli-
cable. However, if a set point is programmed for the current pe-
riod, it will take this value.

SYN-INT-E01 17
Sensor Selection
If you want to use the SE72 thermostat of Synapse Electronic
with a temperature sensor already installed in the oor (other
than the sensor supplied with this thermostat), you must con-
tact the Synapse Electronic customer service to validate the
compatibility between the sensor and the thermostat. You must
know the serial number and name of the installed sensor.
Temperature Control
The thermostat controls the oor/ambient temperature (accord-
ing to the Ambient/Floor mode) with a high degree of accura-
cy. When the heating starts or stops, it is normal to hear a “clic”
sound. It is the noise of the relay which opens or closes, as
applicable.
Backlighting
The screen lights up when you press down a button. If you
do not press down any button for more than 15 seconds, the
screen turns off.
N.B. If you press down the + or – button once when the backlight
is off, it will light up without changing the set point value. The
set point value will change only if you press down one of these
buttons again.
Heating Power Used
The level of heating power used to maintain the temperature at
the requested set point is expressed as a percentage indicat-
ed by the number of little vertical bars displayed in the bottom-
right hand corner of the screen. The heating power used is dis-
played as follows:
0 bar = no heat
1 bar = 1 % to 25 %
2 bars = 25 % to 50 %
3 bars = 50 % to 75 %
4 bars = 75 % to 100 %

SYN-INT-E0118
Ground-fault Circuit Interrupter (GFCI)
The GFCI is designed to reduce the risk of electric shock. It
can detect a leakage current of 5mA. If a defect is detected,
the GFCI device lights up, and both screen and heating system
circuit are deactivated. The GFCI can be reinitialized either by
pressing down the Test button or by disconnecting the thermo-
stat at the electrical panel.
Ground-fault Circuit Interrupter (GFCI) Verication
It is important to verify the ground-fault circuit interrupter instal-
lation and operation on a monthly basis.
GFCI verication procedure
1.Increase the temperature set point until the heating power
barsaredisplayed(displayedinthebottom-righthandcorner
ofthescreen).
2.PressdowntheTestbutton.
3.Thefollowingtwocasescanoccur:
a)Successfultest:Theredindicatorofthethermostatlights
up. In this case, press down once again the Test button
to reinitialize the ground-fault circuit interrupter, the red
indicatorturnsoff.
b)Failed test: The red indicator does not light up and the
entire display blinks during 5 seconds. In this case,
disconnecttheheatingsystemattheelectricalpaneland
callSynapse’scustomerservice.
Lock Option
This mode imposes a maximum temperature set point which
is impossible to exceed regardless of the mode in progress.
However, it is still possible to lower the set point at your discre-
tion. The programming of the Auto and Pre-Prog modes also re-
spects this maximum temperature set point. Please note that
when the lock option is activated, it is impossible to switch from
the Ambient mode to the Floor mode, and conversely.

SYN-INT-E01 19
Lock Activation
1.Exitanyadjustmentmodetomanuallyadjustthesetpoint
atthedesiredmaximumvalue.
2.Simultaneously press down the + and - buttons during
10seconds(notethatafter3seconds,theSETiconstarts
to blink and the software version and date are displayed.
Continuetopressdownthesebuttons).
3.After10seconds,theLockiconisdisplayedindicatingthat
theLockoptionisactivated.Then,releasethebuttons.
Lock Deactivation
1.Todeactivatethelockoption,cutoffthepowersupplyof
the thermostat at the electrical panel and wait at least 30
seconds.
2.Restorethepowersupplytothethermostat.TheLockicon
willblinkduringamaximumof5minutes,indicatingthatyou
candeactivatetheLockoption.
3.Simultaneously press down the + and - buttons for more
than10seconds.TheLockiconwillthenbehiddenindicating
thatthelockoptionisdeactivated.
Parameter Backup and Power Failures
The thermostat saves some parameters in its nonvolatile mem-
ory in order to recovered them when power is restored (e.g. af-
ter a power failure). These parameters are the current Man/Auto/
Pre-Prog mode, the hour and the day of the week, the Auto
mode programming (either from the Ambient or Floor mode), the
maximum oor temperature (28 or 35°C), the last selected pro-
gramming of the Pre-Prog mode, the Ambient/Floor mode, the
Celsius/Fahrenheit mode, the last effective set point, the lock
mode and the maximum lock set point.
As mentioned above, the thermostat can detect a power failure.
In such a case, the adjustments described are automatically

SYN-INT-E0120
saved in the volatile memory and recovered when power is re-
stored. Then, the thermostat enters a very low consumption
mode and only displays the hour and day of the week. All the
other functions are deactivated.
The thermostat is self-sufcient for 2 hours. If the power fail-
ure lasts less than 2 hours, the thermostat saves the adjustment
of the hour. However, when power is restored after an exten-
sive failure (more than 2 hours), it recovers the last mode (Man/
Auto/ Pre-Prog) as well as the various adjustments that were ef-
fective when the failure occurred (either from the Ambient or the
Floor mode). The hour and the day of the week are also recov-
ered, but you must update them. The set point will be the same
as what was active when the failure occurred.
N.B. During the rst half hour of the failure, the hour and day of the
week are displayed. After half an hour, the screen turns off in
order to ensure energy saving.
Table of contents
Other Synapse Thermostat manuals
Popular Thermostat manuals by other brands

Salus
Salus RT500 instruction manual

Worcester
Worcester Greenstar Comfort I RF Installation and operating instructions

Honeywell
Honeywell VisionPRO 8000 Smart installation guide

Hunter
Hunter 42122 Manual del propietario

Contemporary Controls
Contemporary Controls BASstat BAST-421C-B2 user manual

IHP
IHP H8864 Installation and operation instructions