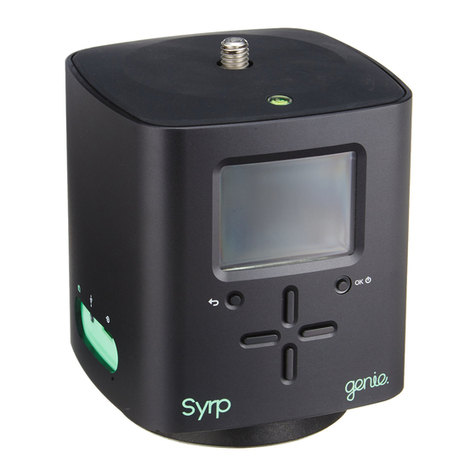
Syrp Slingshot User manual


Version: 1.0
Thanks for purchasing the Syrp Slingshot, we’re stoked to be helping you make better
films!
The Slingshot is a unique production tool for creating motion control time-lapse shots over
extended distances. Use the Genie for motorizing the Slingshot and fully customize your
motion control setup. For more information on the Genie, please refer to the Genie User
Manual.
In this Guide you’ll learn how to set up the Slingshot properly. Your safety is our top
priority so please make sure you read this entire Guide carefully to ensure proper set
up before use and that you use the Slingshot safely. We also suggest that you keep this
Guide for future reference. The information in this Guide relates to your safety and your
legal rights and responsibilities.
For more detailed setup tutorials please subcsribe to our Youtube Channel.
Contact:
Syrp Ltd
Auckland, New Zealand
+64 9 845 6319
www.syrp.co.nz
About this Guide

Disclaimer
Syrp has made every effort to provide clear and accurate information in this Guide, which is
provided solely for you, the user’s information. However to the maximum extent permitted by law
Syrp shall not be liable for any errors or discrepancies in this Guide.
Syrp reserves the right to revise the design and specifications of the Slingshot and this Guide
and make changes from time to time including, without limitation, as a result of changes in any
applicable laws or regulations. Syrp will upload any changes to this Guide on its website (https://
syrp.co.nz/).
By using the Slingshot, you agree that:
• you have read this Disclaimer, Product Warnings, Safety Instructions and full Guide
carefully, and
• you understand and agree to abide by all the terms and conditions in this Guide;
• you are solely responsible for your own conduct and safety while using the Slingshot;
• you will only use the Slingshot for the purpose that it was designed and safely and in
accordance with all applicable laws, rules and regulations, and all instructions, warnings,
practices, policies and guidelines that Syrp has or may make available from time to time
including, without limitation, by way of video tutorials and guides on Syrp’s website
(https://syrp.co.nz/) and Youtube / Vimeo channels.
Subject to any express warranty listed on the support page at www.syrp.co.nz, to the maximum
extent permitted by law, in no event shall Syrp, its directors, employees, contractors or authorised
agents be liable to you or anyone else for any loss, damage, fines, penalties, injury, solicitor-client
costs, loss of profits, loss of business or damage to goodwill, or any indirect or consequential or
special loss or damage arising under or in connection with:
• your use of the Slingshot; and
• the use of any technical or operational information contained in this Guide
Note that the illustrations in this Guide are illustrations only and differ slightly from the actual
product.
For full user manual and operating instructions refer to the user manual below and www.syrp.
co.nz/support
Subject to any express warranty given by Syrp at www.syrp.co.nz/support, to the fullest extent
possible at law, Syrp does not make any representations or give any express or implied
warranties of any kind in relation to the Slingshot.
If the Slingshot is being used by you for business purposes as that term is defined in the New
Zealand Consumer Guarantees Act 1993 then pursuant to the provisions of that Act the terms and
guarantees of that Act do not apply to your purchase of the Slingshot.

COPYRIGHT AND TRADEMARKS.
Copyright laws in your country may prohibit the use of recorded images of people, places or
other subjects for public or private enjoyment. Also be aware that certain public performances,
exhibitions or other events may prohibit recording images.
© 2016 Syrp Ltd. All rights reserved.
This Guide is protected under international copyright laws.
No part of this Guide may be reproduced, distributed, translated, or transmitted in any form or
by any means, electronic or mechanical, including photocopying, recording, or storing in any
information storage and retrieval system, without the prior written permission of Syrp.
Syrp, the Syrp logo and the Genie logo are trademarks or registered trademarks of Syrp Ltd
in New Zealand and/or other countries. All trademarks, trade names, icons, logos, written
material, images, code, and product names used in association with this product are copyrights,
trademarks, or other intellectual property exclusively owned and controlled by Syrp Ltd. Syrp Ltd
also holds patents in some countries and has patents pending.
All other company, brand and product names are trademarks or registered trademarks of their
respective holders.
Product Warnings
The Slingshot was manufactured and designed to be used for motion control time-lapse
photography and video. Never use the Slingshot without fully understanding the functions
and safety precautions. You must ensure that the Slingshot is only used for its purpose and in
accordance with this Guide. Please read the Product Warnings and Safety Instructions carefully
before using.
WARNING:
Always keep the Slingshot and all accessories (including Slingshot Carriage, Wheels, Slingshot
Linear Accessory, Ratchet Bar, Fixed Bar, Genie Rope, Slingshot Rope, Tie Down Straps, Camera
Safety Lanyard, Wheel Safety Hooks, Ratchet Wrench, Slingshot Carry Bag) and all packaging out
of reach of babies and infants.
WARNING:
Do not carry, jar, swing, or shake the unit by any attached accessories including the Genie,
Ballhead, Carriage, Ratchet Bar or Fixed Bar. Any strong jolt may damage the unit or result in
personal injury.
WARNING:
Do not use this product near water. The unit is not waterproof and cannot be used under water. If
you accidentally drop the device into water, promptly contact Syrp.

WARNING:
Never use any 3rd party accessories including 3rd party rope as a replacement for the Slingshot
Rope or the Genie Rope.
WARNING:
Never attempt to disassemble the Slingshot Components to repair, fix or replace parts.
WARNING:
The Slingshot needs to be attached to two fixing points. Always make sure that you have
permission to setup the Slingshot on the Fixing Points.
WARNING:
Never attach the Slingshot to unstable or fragile Fixing Points.
Important Safety Instructions
READ THESE INSTRUCTIONS.
KEEP THESE INSTRUCTIONS.
HEED ALL WARNINGS.
•
Syrp has carried out safety testing in respect of the Slingshot and the results of the tests show
that it is unsafe to use the Slingshot in storms, lightning and extreme weather conditions such as
in temperatures over 30 degrees Celsius or less than 0 degrees Celsius. Using the Slingshot in
these conditions could cause personal injury or damage to people, animals or property.
•
Do not use the Slingshot for anything other than creating motion control timelapse photography
and video.
Syrp advises you to follow the below instructions to ensure that the Slingshot is without risks
to health and safety to people or animals when used for creating motion control timelapse
photography and video:
•
• Never use the Slingshot at a length that exceeds 330ft / 100m.
• Syrp does not recommend you use the Slingshot at great heights as you could fall and suffer
serious injury or death. If you do operate at heights you will need to take extreme care and
use a spotter and safety equipment.
• Never use the Slingshot above people or animals or close to motor vehicles, railway stations,
highways, railway lines, schools, city centres or other public or sensitive areas. The Slingshot

could fall and cause personal injury or damage.
• Never operate the Slingshot without using the Camera Safety Lanyard and the Wheel Safety
Hooks.
• Always ensure the Genie is securely attached to the Slingshot Linear Accessory. No orange
should be visible on the release latch when properly attached.
• Never attach the Genie to the underside of the Slingshot Carriage.
• Always wear gloves when handling the setup of the Slingshot.
• Only use accessories and parts that are specified by Syrp.
• Never overtighten the Slingshot Rope (the Max Torque Rating is 20 ft/lb / 26 Nm). UNDER
NO CIRCUMSTANCES SHOULD YOU USE 3RD PARTY RATCHET WRENCHES FOR
TIGHTENING THE SLINGSHOT ROPE AS THERE IS A RISK YOU COULD OVERTIGHTEN
THE SLINGSHOT ROPE.
• Keep fingers and hair away from the Slingshot when in operation.
• Never put too much weight on the Slingshot carriage. The maximum payload is 17.6lbs / 8kg.
•
Contents
WHAT’S IN THE BOX
ATTACH THE BARS
ATTACH THE SLINGSHOT ROPE
ATTACH THE GENIE ROPE
ATTACH THE CARRIAGE
ATTACH THE GENIE AND CAMERA
SPECS

Items that are included in the box when
you purchase the Slingshot
1 Slingshot Carriage
2 4 x Wheels
3 Slingshot Linear Accessory
4Ratchet Bar
5Fixed Bar
682ft (25m) Genie Rope
72 x 82ft (25m) Slingshot Rope
82 x 19.7ft (6m) Tie Down Straps
9Camera Safety Lanyard
10 Wheel Safety Hooks
11 Ratchet Wrench
12 Slingshot Carry Bag
What’s in the Box
1
11 6 7
8
10
9
2
3
4
5
12
Note that the illustrations in this Guide are illustrations only and differ slightly from the actual product. 1

Attach the Ratchet Bar and
Fixed Bar to two anchor points
Attach the Bars
Hook one of the tie down straps
onto the Ratchet Bar loop. Make
sure that the hook is facing
outwards.
Wrap the tie down around your
anchor point and attach the other
end to the loop on the opposite
side of the Ratchet Bar. Be sure
to have the hook facing outwards
when attaching.
Tighten the ratchet so it’s secure
to the anchor point and be sure
to keep the Ratchet Bar as level
as possible.
Repeat the process for the fixed
bar at the other anchor point.
Again be sure to keep the bar as
level as possible when tightening.
1
2
3
4
Always wear gloves during setup and never install above people
If working at heights always use a spotter and safety equipment
Note that the illustrations in this Guide are illustrations only and differ slightly from the actual product. 2

Attaching the two 25m
Slingshot Ropes.
Attach the Slingshot Rope
Pull the two pins out of the fixed
bar by detaching the clips.
Thread the looped ends through
the rope guide on the fixed bar.
Drop the pins back in through the
rope loop to secure tightly.
Re-attach the clips.
Under-side
Showing Clip
1
2
3
Note that the illustrations in this Guide are illustrations only and differ slightly from the actual product. 3

Attaching the two 25m
Slingshot Ropes.
Attach the Slingshot Rope
Un-reel the 25m Rope to the other
anchor point ensuring to keep the
rope seperated from each other.
Make a loop at the other end and
thread the rope through the rope
guide on the Ratchet Bar.
Wrap the loop around the rope
screw inside.
Hand tighten the ratchet nut just
enough to bind the rope so it
doesn’t slip.
Repeat step 2 above for the other
side.
1
2
3
4
Note that the illustrations in this Guide are illustrations only and differ slightly from the actual product. 4

Attaching the two 25m
Slingshot Ropes.
Attach the Slingshot Rope
Take the Ratchet Wrench and
tighten each side, alternating
sides every 2 or 3 turns. Note
that it’s important that each side
is tightened evenly during this
process. Do not fully tighten one
side before tightening the other.
To tighten, rotate the Ratchet
Wrench in the + direction, to
loosen wind the Ratchet Wrench
in the - direction. Note that when
alternating sides you need to flip
the ratchet wrench over.
When tightening make sure to
stand behind the Ratchet Bar not
beside or underneath.
1
2
3
Never use 3rd Party Ratchet Wrenches for tightening
Never overtighten. Max Torque Rating 20 ft/lb / 26 Nm
Note that the illustrations in this Guide are illustrations only and differ slightly from the actual product. 5

Attaching the Genie
Rope to each end.
Attach the Genie Rope
Attach one end of the 25m
Genie Rope to the Ratchet Bar
by threading around the rope
accessory hook in the middle of
the bar. Note that the end where
you first attach the Genie Rope
will be the end that you start your
time-lapse.
Un-reel the 25m Genie rope to
the other anchor point and attach
to the Fixed Bar. Pull hand tight.
1
2
Note that the illustrations in this Guide are illustrations only and differ slightly from the actual product. 6

Slingshot Carriage Assembly
Assemble the Carriage
Loosen the arms by un-screwing
the arm-lock screw just enough
to loosen the bars. Be careful not
to take the screw all the way out.
Unfold the arms out and re-
tighten the arm-lock screw into
place. Ensure that the arm lock
screw locates securely back into
the hole.
Screw the four wheels onto the
arms.
1
2
3
Note that the illustrations in this Guide are illustrations only and differ slightly from the actual product. 7

Attaching the carriage
to the slingshot rope
Attach the Carriage
Orientate the Carriage so that the
cork is facing down towards the
ground. Also make sure that the
++ -- markings on the carriage
match the ++ -- markings on the
Slingshot Linear Accessory.
Lift the Carriage up through the
bottom of the Slingshot Rope and
line up the middle groove of each
wheel so that they slot on top of
the Slingshot Rope.
Ensure that the Slingshot Linear
Accessory is sitting on top of
the Carriage. Now screw in the
Slingshot Linear Accessory. Note
the Slingshot Linear Accessory
differs from the Genie Linear
acessory.
Attach the safety hooks around
each wheel by threading the
straight end through the inside
hole on the arm. Then wrap
around the bottom of the wheel
and pull the safety hook out,
slotting the hook end into the hole
on the wheel.
1
2
3
4
Note that the illustrations in this Guide are illustrations only and differ slightly from the actual product. 8

Attaching your Genie &
camera to the Slingshot
Attach the Genie & Camera
Click the Genie into the Slingshot
Linear Accessory. Make sure
that there is no orange showing
on the lock on the back of the
Genie.
Screw in a ballhead or tripod
head into the bottom of the
Slingshot Carriage.
Carefully attach your camera
to the ballhead or tripod head
making sure the camera is tightly
secured.
1
2
3
Never operate when orange is visible on the Genies release latch
Never attach the Genie hanging upside down on the Slingshot Carriage
Note that the illustrations in this Guide are illustrations only and differ slightly from the actual product. 9

Attach the caribenna end of the
safety lanyard to the hole on the
Slingshot Carriage. Then attach
the other end to the camera
strap hook.
Attach one end of the Link cable
to the camera port on the Genie
and connect the other end to
the shutter release port on your
camera to trigger the shutter for
time-lapse.
4
5
Never operate without using the Camera Safety Lanyard
Note that the illustrations in this Guide are illustrations only and differ slightly from the actual product. 10

Specs
GENERAL
SLINGSHOT CARRIAGE
SLINGSHOT ROPE
Bag Dimensions: W: 15” (38cm) x L: 22” (56cm) x H: 6.3” (16cm)
Weight: 17.6 lbs / 8kg (full kit including bag)
Dimensions: W: 21.6” (55cm) x L: 24.4” (62cm) x H: 4.7” (12cm)
Max Payload on carriage: 17.6lbs / 8kg
Mount Type: 3/8 UNC Thread (Top and Underside)
5mm Braided UHMwPE Core with HT Polyester Sheath
Max Distance: 330ft / 100m
Max Torque Rating: 20 ft / 26 Nm
1
2
3
Technical Specifications
of the Slingshot
538mm
498mm
550mm
25m86mm
498mm
11

Contact
Syrp Limited
43A Linwood Ave, Suite 7
Mt Albert 1025
Auckland
New Zealand
+64 9 845 6319
General enquiries:
www.syrp.co.nz
twitter.com/syrp_ vimeo.com/syrp
gplus.is/syrp
facebook.com/syrp.co.nz youtube.com/c/syrp
instagram.com/syrp_
12

Table of contents
Other Syrp Camera Accessories manuals