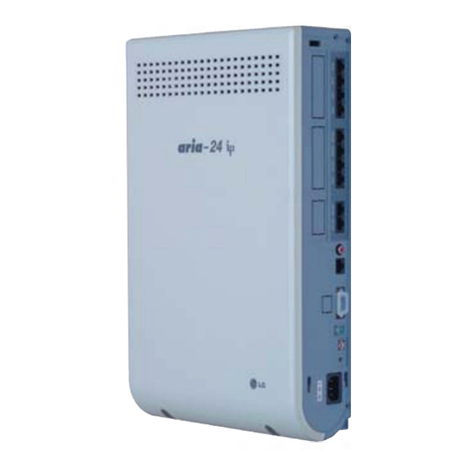
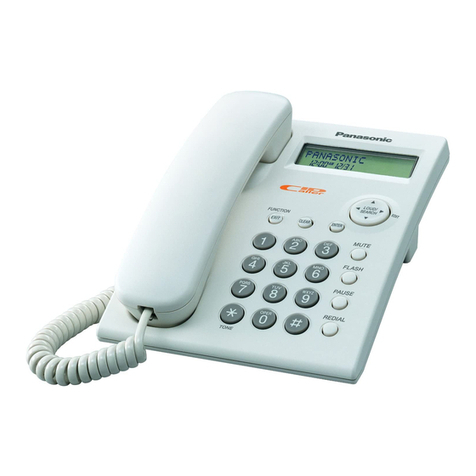
T-Comfort 930 DSL User manual

T-Comfort 930 DSL
Mounting and Commissioning


1
Contents
Features 9
Factory Settings on Delivery 14
Telephony Functions . . . . . . . . . . . . . . . . . . . . . . . . . . . . . . . . . . . . . . . . . . . . . . . . . . . . . . . . 14
Authorisations. . . . . . . . . . . . . . . . . . . . . . . . . . . . . . . . . . . . . . . . . . . . . . . . . . . . . . . . . . . . . . 14
Internet Functions . . . . . . . . . . . . . . . . . . . . . . . . . . . . . . . . . . . . . . . . . . . . . . . . . . . . . . . . . . 17
Installation 19
Scope of Delivery . . . . . . . . . . . . . . . . . . . . . . . . . . . . . . . . . . . . . . . . . . . . . . . . . . . . . . . . . . . 19
Safety Precautions . . . . . . . . . . . . . . . . . . . . . . . . . . . . . . . . . . . . . . . . . . . . . . . . . . . . . . . . . . 19
Mounting Location. . . . . . . . . . . . . . . . . . . . . . . . . . . . . . . . . . . . . . . . . . . . . . . . . . . . . . . . . . 21
Wall Mounting. . . . . . . . . . . . . . . . . . . . . . . . . . . . . . . . . . . . . . . . . . . . . . . . . . . . . . . . . . . . . . 21
Installing an Expansion Set . . . . . . . . . . . . . . . . . . . . . . . . . . . . . . . . . . . . . . . . . . . . . . . . . . 22
Installing Interface Cards . . . . . . . . . . . . . . . . . . . . . . . . . . . . . . . . . . . . . . . . . . . . . . . . . . . . 25
■V.24 and Doorstation Equipment Slots . . . . . . . . . . . . . . . . . . . . . . . . . . . . . . . . . . . . 25
■Slots for Additional Interface Cards . . . . . . . . . . . . . . . . . . . . . . . . . . . . . . . . . . . . . . . 26
Available Ports . . . . . . . . . . . . . . . . . . . . . . . . . . . . . . . . . . . . . . . . . . . . . . . . . . . . . . . . . . . . . 28
■T-Comfort 930 DSL Version 1 . . . . . . . . . . . . . . . . . . . . . . . . . . . . . . . . . . . . . . . . . . . . 28
■T-Comfort 930 DSL Version 2 . . . . . . . . . . . . . . . . . . . . . . . . . . . . . . . . . . . . . . . . . . . . 29
■Positions of the Ports. . . . . . . . . . . . . . . . . . . . . . . . . . . . . . . . . . . . . . . . . . . . . . . . . . . . 30
Interface Cards . . . . . . . . . . . . . . . . . . . . . . . . . . . . . . . . . . . . . . . . . . . . . . . . . . . . . . . . . . . . . 31
Port Assignment, Termination, Cable Lengths. . . . . . . . . . . . . . . . . . . . . . . . . . . . . . . . . . 34

2
■S0Ports . . . . . . . . . . . . . . . . . . . . . . . . . . . . . . . . . . . . . . . . . . . . . . . . . . . . . . . . . . . . . . . 34
■Upn Ports . . . . . . . . . . . . . . . . . . . . . . . . . . . . . . . . . . . . . . . . . . . . . . . . . . . . . . . . . . . . . . 36
■a/b Ports . . . . . . . . . . . . . . . . . . . . . . . . . . . . . . . . . . . . . . . . . . . . . . . . . . . . . . . . . . . . . . 36
■Actor/Sensor. . . . . . . . . . . . . . . . . . . . . . . . . . . . . . . . . . . . . . . . . . . . . . . . . . . . . . . . . . . 37
■LAN Port. . . . . . . . . . . . . . . . . . . . . . . . . . . . . . . . . . . . . . . . . . . . . . . . . . . . . . . . . . . . . . . 37
■T-DSL Port . . . . . . . . . . . . . . . . . . . . . . . . . . . . . . . . . . . . . . . . . . . . . . . . . . . . . . . . . . . . . 38
Power Failure. . . . . . . . . . . . . . . . . . . . . . . . . . . . . . . . . . . . . . . . . . . . . . . . . . . . . . . . . . . . . . . 39
Connectible Devices . . . . . . . . . . . . . . . . . . . . . . . . . . . . . . . . . . . . . . . . . . . . . . . . . . . . . . . . 40
■Internal/External S0Ports. . . . . . . . . . . . . . . . . . . . . . . . . . . . . . . . . . . . . . . . . . . . . . . . 40
■Upn Ports . . . . . . . . . . . . . . . . . . . . . . . . . . . . . . . . . . . . . . . . . . . . . . . . . . . . . . . . . . . . . . 41
■a/b Ports . . . . . . . . . . . . . . . . . . . . . . . . . . . . . . . . . . . . . . . . . . . . . . . . . . . . . . . . . . . . . . 41
■Actor/Sensor Ports . . . . . . . . . . . . . . . . . . . . . . . . . . . . . . . . . . . . . . . . . . . . . . . . . . . . . 43
■COM Port . . . . . . . . . . . . . . . . . . . . . . . . . . . . . . . . . . . . . . . . . . . . . . . . . . . . . . . . . . . . . . 45
■LAN Port. . . . . . . . . . . . . . . . . . . . . . . . . . . . . . . . . . . . . . . . . . . . . . . . . . . . . . . . . . . . . . . 45
Accessories and Adapters 46
Upn Adapter. . . . . . . . . . . . . . . . . . . . . . . . . . . . . . . . . . . . . . . . . . . . . . . . . . . . . . . . . . . . . . . . 46
Audio Adapter. . . . . . . . . . . . . . . . . . . . . . . . . . . . . . . . . . . . . . . . . . . . . . . . . . . . . . . . . . . . . . 47
Device Combinations . . . . . . . . . . . . . . . . . . . . . . . . . . . . . . . . . . . . . . . . . . . . . . . . . . . . . . . 49
■Configurations without Plug-in Power Supply (Range up to 500 m) . . . . . . . . . . . 49
■Configurations without Plug-in Power Supply (Range 500 to 1000 m). . . . . . . . . 51
■Configurations with Plug-in Power Supplies. . . . . . . . . . . . . . . . . . . . . . . . . . . . . . . . 52
Configuration 53
Brief Guide to Initial Configuration . . . . . . . . . . . . . . . . . . . . . . . . . . . . . . . . . . . . . . . . . . . . 54
■First Configuration via Serial Port . . . . . . . . . . . . . . . . . . . . . . . . . . . . . . . . . . . . . . . . . 56

3
Configuring the T-Comfort 930 DSL . . . . . . . . . . . . . . . . . . . . . . . . . . . . . . . . . . . . . . . . . . 56
■Preparing the Configuration . . . . . . . . . . . . . . . . . . . . . . . . . . . . . . . . . . . . . . . . . . . . . 56
■Starting the Web Console . . . . . . . . . . . . . . . . . . . . . . . . . . . . . . . . . . . . . . . . . . . . . . . 57
■Loading the Online Help. . . . . . . . . . . . . . . . . . . . . . . . . . . . . . . . . . . . . . . . . . . . . . . . . 59
■Finishing the Configuration . . . . . . . . . . . . . . . . . . . . . . . . . . . . . . . . . . . . . . . . . . . . . . 59
■Remote Configuration. . . . . . . . . . . . . . . . . . . . . . . . . . . . . . . . . . . . . . . . . . . . . . . . . . . 59
■Codes for IP Configuration. . . . . . . . . . . . . . . . . . . . . . . . . . . . . . . . . . . . . . . . . . . . . . . 59
■Saving and Loading the Configuration . . . . . . . . . . . . . . . . . . . . . . . . . . . . . . . . . . . . 60
■Receiving System Messages as E-Mail . . . . . . . . . . . . . . . . . . . . . . . . . . . . . . . . . . . . 61
■Loading SW Updates. . . . . . . . . . . . . . . . . . . . . . . . . . . . . . . . . . . . . . . . . . . . . . . . . . . . 61
■Resetting the System Data . . . . . . . . . . . . . . . . . . . . . . . . . . . . . . . . . . . . . . . . . . . . . . . 62
■Basic Hardware Settings Switch . . . . . . . . . . . . . . . . . . . . . . . . . . . . . . . . . . . . . . . . . . 62
■Generating Your Own MoH Files. . . . . . . . . . . . . . . . . . . . . . . . . . . . . . . . . . . . . . . . . . 63
Configuration Examples 65
T-Comfort 930 DSL in Computer Networks . . . . . . . . . . . . . . . . . . . . . . . . . . . . . . . . . . . . 65
Introduction to TCP/IP . . . . . . . . . . . . . . . . . . . . . . . . . . . . . . . . . . . . . . . . . . . . . . . . . . . . . . 66
T-Comfort 930 DSL in a Serverless LAN . . . . . . . . . . . . . . . . . . . . . . . . . . . . . . . . . . . . . . . 67
■DNS Name Resolution . . . . . . . . . . . . . . . . . . . . . . . . . . . . . . . . . . . . . . . . . . . . . . . . . . 68
■Internet Access. . . . . . . . . . . . . . . . . . . . . . . . . . . . . . . . . . . . . . . . . . . . . . . . . . . . . . . . . 68
■RAS Access. . . . . . . . . . . . . . . . . . . . . . . . . . . . . . . . . . . . . . . . . . . . . . . . . . . . . . . . . . . . 69
T-Comfort 930 DSL in a LAN with an IP-enabled Server . . . . . . . . . . . . . . . . . . . . . . . . . 70
■DNS Name Resolution . . . . . . . . . . . . . . . . . . . . . . . . . . . . . . . . . . . . . . . . . . . . . . . . . . 71
■Internet Access. . . . . . . . . . . . . . . . . . . . . . . . . . . . . . . . . . . . . . . . . . . . . . . . . . . . . . . . . 71
■RAS Access. . . . . . . . . . . . . . . . . . . . . . . . . . . . . . . . . . . . . . . . . . . . . . . . . . . . . . . . . . . . 72
Branch Link . . . . . . . . . . . . . . . . . . . . . . . . . . . . . . . . . . . . . . . . . . . . . . . . . . . . . . . . . . . . . . . . 73
Useful Information on Internet Access. . . . . . . . . . . . . . . . . . . . . . . . . . . . . . . . . . . . . . . . . 74

4
■Costs. . . . . . . . . . . . . . . . . . . . . . . . . . . . . . . . . . . . . . . . . . . . . . . . . . . . . . . . . . . . . . . . . . 74
■Using the Web. . . . . . . . . . . . . . . . . . . . . . . . . . . . . . . . . . . . . . . . . . . . . . . . . . . . . . . . . . 74
■E-mail . . . . . . . . . . . . . . . . . . . . . . . . . . . . . . . . . . . . . . . . . . . . . . . . . . . . . . . . . . . . . . . . . 75
■NAT . . . . . . . . . . . . . . . . . . . . . . . . . . . . . . . . . . . . . . . . . . . . . . . . . . . . . . . . . . . . . . . . . . . 75
PBX Cascading 77
Variants of PBX Cascading. . . . . . . . . . . . . . . . . . . . . . . . . . . . . . . . . . . . . . . . . . . . . . . . . . . 77
Functionality of PBX Cascading . . . . . . . . . . . . . . . . . . . . . . . . . . . . . . . . . . . . . . . . . . . . . . 77
Putting a Cascaded PBX into Operation . . . . . . . . . . . . . . . . . . . . . . . . . . . . . . . . . . . . . . . 78
■Notes. . . . . . . . . . . . . . . . . . . . . . . . . . . . . . . . . . . . . . . . . . . . . . . . . . . . . . . . . . . . . . . . . . 79
PBX Networking 81
Connections . . . . . . . . . . . . . . . . . . . . . . . . . . . . . . . . . . . . . . . . . . . . . . . . . . . . . . . . . . . . . . . 81
■Protocol: Q.SIG or DSS1. . . . . . . . . . . . . . . . . . . . . . . . . . . . . . . . . . . . . . . . . . . . . . . . . 82
■Master/Slave . . . . . . . . . . . . . . . . . . . . . . . . . . . . . . . . . . . . . . . . . . . . . . . . . . . . . . . . . . . 82
■L1 Clock. . . . . . . . . . . . . . . . . . . . . . . . . . . . . . . . . . . . . . . . . . . . . . . . . . . . . . . . . . . . . . . 83
Types of Point-to-Point Connections. . . . . . . . . . . . . . . . . . . . . . . . . . . . . . . . . . . . . . . . . . . 84
■Direct Connection . . . . . . . . . . . . . . . . . . . . . . . . . . . . . . . . . . . . . . . . . . . . . . . . . . . . . . 84
■Connection via an Active Transmission System. . . . . . . . . . . . . . . . . . . . . . . . . . . . . 85
■Connection via the Public Network . . . . . . . . . . . . . . . . . . . . . . . . . . . . . . . . . . . . . . . 85
Configuration . . . . . . . . . . . . . . . . . . . . . . . . . . . . . . . . . . . . . . . . . . . . . . . . . . . . . . . . . . . . . . 86
■Trunk groups. . . . . . . . . . . . . . . . . . . . . . . . . . . . . . . . . . . . . . . . . . . . . . . . . . . . . . . . . . . 86
■Routes . . . . . . . . . . . . . . . . . . . . . . . . . . . . . . . . . . . . . . . . . . . . . . . . . . . . . . . . . . . . . . . . 87
■Numbering . . . . . . . . . . . . . . . . . . . . . . . . . . . . . . . . . . . . . . . . . . . . . . . . . . . . . . . . . . . . 87
Technical Details . . . . . . . . . . . . . . . . . . . . . . . . . . . . . . . . . . . . . . . . . . . . . . . . . . . . . . . . . . . 88

5
Team Functions 90
Introduction. . . . . . . . . . . . . . . . . . . . . . . . . . . . . . . . . . . . . . . . . . . . . . . . . . . . . . . . . . . . . . . . 90
■Explanation of Keys . . . . . . . . . . . . . . . . . . . . . . . . . . . . . . . . . . . . . . . . . . . . . . . . . . . . . 90
■Team Configuration . . . . . . . . . . . . . . . . . . . . . . . . . . . . . . . . . . . . . . . . . . . . . . . . . . . . . 92
Examples of Use. . . . . . . . . . . . . . . . . . . . . . . . . . . . . . . . . . . . . . . . . . . . . . . . . . . . . . . . . . . . 92
■Executive/Secretary Team . . . . . . . . . . . . . . . . . . . . . . . . . . . . . . . . . . . . . . . . . . . . . . . 93
■Three-member Team . . . . . . . . . . . . . . . . . . . . . . . . . . . . . . . . . . . . . . . . . . . . . . . . . . . . 94
■Unified Team . . . . . . . . . . . . . . . . . . . . . . . . . . . . . . . . . . . . . . . . . . . . . . . . . . . . . . . . . . . 96
■Toggle Team . . . . . . . . . . . . . . . . . . . . . . . . . . . . . . . . . . . . . . . . . . . . . . . . . . . . . . . . . . . 97
Call Queue 99
Introduction. . . . . . . . . . . . . . . . . . . . . . . . . . . . . . . . . . . . . . . . . . . . . . . . . . . . . . . . . . . . . . . . 99
■Activation of Queues . . . . . . . . . . . . . . . . . . . . . . . . . . . . . . . . . . . . . . . . . . . . . . . . . . . 100
■Call Forwarding . . . . . . . . . . . . . . . . . . . . . . . . . . . . . . . . . . . . . . . . . . . . . . . . . . . . . . . 100
■Pickup . . . . . . . . . . . . . . . . . . . . . . . . . . . . . . . . . . . . . . . . . . . . . . . . . . . . . . . . . . . . . . . 101
■Hunt Groups . . . . . . . . . . . . . . . . . . . . . . . . . . . . . . . . . . . . . . . . . . . . . . . . . . . . . . . . . . 101
Examples of Use. . . . . . . . . . . . . . . . . . . . . . . . . . . . . . . . . . . . . . . . . . . . . . . . . . . . . . . . . . . 101
■Enquiry Station for an Operator with Two System Telephones . . . . . . . . . . . . . . . 101
■Group of Three Enquiry Stations. . . . . . . . . . . . . . . . . . . . . . . . . . . . . . . . . . . . . . . . . 103
Multi-Company Variant 105
Configuring the Multi-Company Variant . . . . . . . . . . . . . . . . . . . . . . . . . . . . . . . . . . . . . . 106
■Activating the Multi-Company Variant . . . . . . . . . . . . . . . . . . . . . . . . . . . . . . . . . . . . 106
■Configuring and Managing Companies . . . . . . . . . . . . . . . . . . . . . . . . . . . . . . . . . . 107
■Assigning Users . . . . . . . . . . . . . . . . . . . . . . . . . . . . . . . . . . . . . . . . . . . . . . . . . . . . . . . 107

6
■Assigning Trunk Groups . . . . . . . . . . . . . . . . . . . . . . . . . . . . . . . . . . . . . . . . . . . . . . . . 108
■Allocating Routing Codes . . . . . . . . . . . . . . . . . . . . . . . . . . . . . . . . . . . . . . . . . . . . . . 108
■Configuring the Company Exchange. . . . . . . . . . . . . . . . . . . . . . . . . . . . . . . . . . . . . 109
Working with the Multi-Company Variant . . . . . . . . . . . . . . . . . . . . . . . . . . . . . . . . . . . . . 109
■Company Telephone Book. . . . . . . . . . . . . . . . . . . . . . . . . . . . . . . . . . . . . . . . . . . . . . 109
■Making Calls Between Companies . . . . . . . . . . . . . . . . . . . . . . . . . . . . . . . . . . . . . . 110
■Billing Charges per Company . . . . . . . . . . . . . . . . . . . . . . . . . . . . . . . . . . . . . . . . . . . 110
Configuring the PC Software 111
Setting up TAPI. . . . . . . . . . . . . . . . . . . . . . . . . . . . . . . . . . . . . . . . . . . . . . . . . . . . . . . . . . . . 111
Setting up NET CAPI . . . . . . . . . . . . . . . . . . . . . . . . . . . . . . . . . . . . . . . . . . . . . . . . . . . . . . . 113
Using the Systray Display . . . . . . . . . . . . . . . . . . . . . . . . . . . . . . . . . . . . . . . . . . . . . . . . . . . 114
Browser for Telefonie-Assistent and Comfort Pro A Hotel . . . . . . . . . . . . . . . . . . . . . . . 115
Setting up Video Telephony. . . . . . . . . . . . . . . . . . . . . . . . . . . . . . . . . . . . . . . . . . . . . . . . . 116
Synchronising the PC Clock . . . . . . . . . . . . . . . . . . . . . . . . . . . . . . . . . . . . . . . . . . . . . . . . 117
Address Queries using LDAP . . . . . . . . . . . . . . . . . . . . . . . . . . . . . . . . . . . . . . . . . . . . . . . 118
T-Sinus 61data/T-Sinus 620data on the T-Comfort 930 DSL . . . . . . . . . . . . . . . . . . . 119
■General Information. . . . . . . . . . . . . . . . . . . . . . . . . . . . . . . . . . . . . . . . . . . . . . . . . . . . 119
■Installation and Configuration . . . . . . . . . . . . . . . . . . . . . . . . . . . . . . . . . . . . . . . . . . . 119
■Technical Data . . . . . . . . . . . . . . . . . . . . . . . . . . . . . . . . . . . . . . . . . . . . . . . . . . . . . . . . 120
Configuration Guide 121
Overview . . . . . . . . . . . . . . . . . . . . . . . . . . . . . . . . . . . . . . . . . . . . . . . . . . . . . . . . . . . . . . . . . 122
PBX Ports. . . . . . . . . . . . . . . . . . . . . . . . . . . . . . . . . . . . . . . . . . . . . . . . . . . . . . . . . . . . . . . . . 123
LAN. . . . . . . . . . . . . . . . . . . . . . . . . . . . . . . . . . . . . . . . . . . . . . . . . . . . . . . . . . . . . . . . . . . . . . 124
WAN Settings . . . . . . . . . . . . . . . . . . . . . . . . . . . . . . . . . . . . . . . . . . . . . . . . . . . . . . . . . . . . . 125

7
RAS Settings . . . . . . . . . . . . . . . . . . . . . . . . . . . . . . . . . . . . . . . . . . . . . . . . . . . . . . . . . . . . . . 126
Branch Settings . . . . . . . . . . . . . . . . . . . . . . . . . . . . . . . . . . . . . . . . . . . . . . . . . . . . . . . . . . . 127
E-mail Function . . . . . . . . . . . . . . . . . . . . . . . . . . . . . . . . . . . . . . . . . . . . . . . . . . . . . . . . . . . . 128
E-mail Access . . . . . . . . . . . . . . . . . . . . . . . . . . . . . . . . . . . . . . . . . . . . . . . . . . . . . . . . . . . . . 129
Frequently Asked Questions 130
General/Hardware . . . . . . . . . . . . . . . . . . . . . . . . . . . . . . . . . . . . . . . . . . . . . . . . . . . . . . . . . 131
Telephony . . . . . . . . . . . . . . . . . . . . . . . . . . . . . . . . . . . . . . . . . . . . . . . . . . . . . . . . . . . . . . . . 132
DECT . . . . . . . . . . . . . . . . . . . . . . . . . . . . . . . . . . . . . . . . . . . . . . . . . . . . . . . . . . . . . . . . . . . . 134
LAN. . . . . . . . . . . . . . . . . . . . . . . . . . . . . . . . . . . . . . . . . . . . . . . . . . . . . . . . . . . . . . . . . . . . . . 135
Internet . . . . . . . . . . . . . . . . . . . . . . . . . . . . . . . . . . . . . . . . . . . . . . . . . . . . . . . . . . . . . . . . . . . 136
More Questions? . . . . . . . . . . . . . . . . . . . . . . . . . . . . . . . . . . . . . . . . . . . . . . . . . . . . . . . . . . 138
Technical Specifications 139
Index 142

8

9
Features
Features
The T-Comfort 930 DSL is a communications system for integrated voice and data communication. The out-
standing feature of this communications system is its modular structure:
■Even with the smallest T-Comfort 930 DSL version, it is possible to use all the most important communi-
cations applications. The basic module enables telephony with system telephones, ISDN telephones and
analogue terminals, Internet / intranet data communication, CTI applications, sub-system operation and
system configuration using a standard Web browser.
The expansion module of the T-Comfort 930 DSL provides three slots for further interface cards. Using
different combinations of interface cards, the configuration of the T-Comfort 930 DSL can be tailored ex-
actly to your communications requirements. The need for additional Upn ports supporting DECT, further
S0ports or more a/b ports can be met using one or more interface cards without changing the system.
■The base module of the T-Comfort 930 DSL’s version 1can be expanded to connect an door entrance
intercom and a serial interface. For a T-Comfort 930 DSL version 2 we recommend to connect a Doorline
entrance intercom (see Intercom System (for a/b) starting on page 42).
■You can use an additional insertable memory card (CompactFlash) to operate further program packages.
■Another special interface card provides an internal U-R2 compatible T-DSL modem. Additional infor-
mation can be found in the corresponding user manual of the DSL modem.
Cascading
Using the expansion module, the T-Comfort 930 DSL can be cascaded with a second T-Comfort 930 DSL
communications system.
Telephony
The T-Comfort 930 DSL communications system is designed to be connected to an ISDN basic access using
the DSS1 protocol. System access (point-to-point) and multi-terminal access (point-to-multipoint) are both
supported. The two forms of access can be configured in parallel.
For this purpose
■the T-Comfort 930 DSL basic module includes two S0ports (one external one and one that can be
switched between internal/external),

10
Features
■the T-Comfort 930 DSL expansion module with additional interface cards provides up to eight further S0
ports (switchable between internal/external). An overview of the available cards can be found under
Interface Cards starting on page 31,
The firmware of the T-Comfort 930 DSL is designed for configuring up to 300 users.
You can connect the following devices to the T-Comfort 930 DSL:
■analogue terminals
■Euro-ISDN terminals
■T-Comfort 630, T-Comfort 730 and T-Comfort 830 system telephones
■Comfort Pro P 100, Comfort Pro P 300 and Comfort Pro P 500 system telephones
■T-Comfort 730 DECT base stations
■T-Comfort 830 handsets/Comfort Pro CM 300 handsets (via a T-Comfort 730 DECT base station on the
DECT-enabled Upn port of an interface card)
An S0port can be used by Euro-ISDN terminals working in accordance with DSS1.A Upn port is suitable for
the T-Comfort 630/730/830 Comfort Pro P100/300/500 system telephones. T-Comfort 730 DECT base sta-
tions can also be connected to the DECT-enabled Upn ports on interface cards. An analogue port is used by
standard analogue devices.
If the CNIP (calling name identification presentation) feature is supported by your network provider, the latter
will show you the name of callers in addition to their number for each incoming trunk call. The T-Comfort
930 DSL supports the display of the name on system telephones. However, if you have created an entry in the
telephone book of the T-Comfort 930 DSL under the number of the caller, this will be displayed instead.
The T-Comfort 930 DSL can be integrated into an existing network (LAN) and be used by all workstations as
an Internet access router and mail client.
Configuration and programming of the T-Comfort 930 DSL is performed by means of a special Web browser
(known as the “Web console”), which can be run on a connected PC.
The T-Comfort 930 DSL can be configured and maintained from the T-Com service centre via remote access.
A PC can be connected via a retrofitted V.24 module (only possible on the T-Comfort 930 DSL version 1) to
the COM port for the purpose of configuring the system or transferring connection data.

11
Features
To connect the T-Comfort 930 DSL to existing company hardware, two “actor” ports (output) and three
“sensor” ports (input) can be provided by retrofitting a doorstation module (only possible on the
T-Comfort 930 DSL version 1). For example, this can be used to operate a door opener and a doorbell via the
T-Comfort 930 DSL (this requires additional equipment).
The T-Comfort 930 DSL allows you to use CTI (Computer Telephony Integration) applications made by other
manufacturers. This requires installation of a TAPI driver on a Windows PC (see Setting up TAPI starting on
page 111). The T-Comfort 930 DSL also has an integrated dialling wizard: the Telefonie-Assistent. Via the
Telefonie-Assistent users can call up and use telephone functions on PCs without first having to install a
special TAPI driver.
The T-Comfort 930 DSL complies with the regulations for telecommunications equipment. The DSS1 pro-
tocol is implemented.
Packet data in the D channel
Some business applications, for instance POS terminals, cash registers or credit card terminals, require a per-
manent data connection over the X.25 packet data network. Packet data transfer through the ISDN D channel
(according to X.31 via SAPI 16) can also be established between several S0interfaces of the T-Comfort
930 DSL. Simultaneous connections are distinguished by means of a TEI (Terminal Endpoint Identifier).
X.31 packet data can be forwarded between two S0interfaces (for instance an internal and external S0
interface). Equally, data can be forwarded (“routed”) over permanent Q.SIG lines. It is possible to operate mul-
tiple terminals with the same TEI on different internal S0interfaces. A TEI mapping table allows these X.31
connections to be routed to the same external S0interface.
The routing table for X.31 packet data is set in the Configurator under PBX Configuration: X.31. Additional
information can be found in the Configurator online help files.
Internet Access
It is possible to connect individual PCs to the T-Comfort 930 DSL via the internal S0ports, or to connect an
entire LAN to the T-Comfort 930 DSL via the Ethernet port. These PCs can access the Internet via the
T-Comfort 930 DSL. If Internet access is already available from an Internet service provider, this can be con-
figured in the T-Comfort 930 DSL. If the client network is not IP-capable, the T-Comfort 930 DSL can admin-
ister the IP configuration necessary for Internet access. The T-Comfort 930 DSL has an integrated DHCP
server and a DNS server, which in this case take over IP address administration and name resolution for the
client PCs.

12
Features
The T-Comfort 930 DSL enables Internet access for all connected PCs by means of a common IP address.
Only this is externally visible. The local IP addresses of the client PCs are translated to the IP address of the
T-Comfort 930 DSL by network address translation (NAT). In this way the client PCs in the LAN cannot be
reached directly from the Internet. This protects them from direct external attack. The LAN is additionally pro-
tected by the T-Comfort 930 DSL filter lists, which can be customised individually (firewall function).
NNote: We recommend you to read through the explanations under Useful Information
on Internet Access starting on page 74.
DECT Data Communication
The T-Sinus 61data, T-Sinus 620data or the T-Comfort 830 handset enable PCs that are not connected to the
T-Comfort 930 DSL via the internal S0ports or the Ethernet interface to access the Internet. These PCs can
make full use of all the Internet and e-mail features of the T-Comfort 930 DSL.
Data is transmitted via the internal data interface of the T-Comfort 830 handset. For this the handset is con-
nected via a supplied adapter with the serial port of the PC. The Internet can then be accessed directly via the
remote data transfer (i.e. dial-up) network. The T-Comfort 830 handset sets up a data connection with the
T-Comfort 930 DSL via the DECT air interface. The remainder of the connection set-up is either direct -
through an ISDN B-channel - or indirect - through the internal RAS access of the T-Comfort 930 DSL. Indirect
RAS access is preferable. This uses the routing function of the T-Comfort 930 DSL and thus also the security
features of the shared Internet access.
Using the T-Sinus 61data/T-Sinus 620data a PC can set up an ISDN data connection via DECT. The
T-Sinus 61data/T-Sinus 620data is connected to the PC via the USB interface.
For detailed information on the installation of the required driver software and the various types of configu-
ration, refer to the chapter T-Sinus 61data/T-Sinus 620data on the T-Comfort 930 DSL starting on
page 119 and the user guide for the T-Comfort 830 handset. For information on configuration of the
T-Comfort 830 handset with a data interface, please refer to the online help documentation of the
T-Comfort 930 DSL.
E-mail
The T-Comfort 930 DSL has an integrated e-mail function that is able to use the POP3, APOP or IMAP4 pro-
tocols to check the Internet service provider for incoming mail. When configuring the T-Comfort 930 DSL, e-
mail account query can be configured for every member of staff. The T-Comfort 930 DSL then fetches the
incoming e-mail headers (subjects) and senders from the mail server at set intervals, and forwards them to
users’ system terminal.

13
Features
E-mail accounts for the sending e-mail can also can be configured for users. E-mails can then, for example, be
sent directly from the Telefonie-Assistent to other users. In addition, users who have had a voicebox con-
figured for themselves, can let themselves be notified of new voicebox messages via e-mail.
Important events and errors are kept by the T-Comfort 930 DSL in an internal log book: the error store. To
inform or alert the system administrators, entries in the log book (system messages) can be sent via e-mail.
Further Network Features
You can offer staff the possibility of dialling into the LAN by means of RAS access.
A LAN-to-LAN link can also be implemented by ISDN. In this way two T-Comfort 930 DSLs can connect their
LANs by dial-in on demand.
A NET-CAPI program (driver software on the system CD-ROM) allows you to use ISDN functions on those PCs
that do not possess a built-in ISDN card.
Further Telephony Features
Installing an extra memory card allows you to operate a digital voice memory and voice information system.
For more information, refer to the user guides called “Comfort Pro A IAB (integrated answering machine)”
and “Comfort Pro A IAM (interactive call manager)”.
You can optimise your telephone communication by using the team functions and the call-queuing function.
With an additional licence, the web application “Comfort Pro A IVE (integrated connection data recording)”
can be used. This web application enables you to register and store telephony connections and evaluate the
connections with user defined filters. Further information can be found in the online help of the web console.
You can connect two T-Comfort 930 DSL communications system with each other (cascading). Using PBX
cascading you can increase the number of connectible devices in a simple way.
As your company’s requirements grow, the T-Comfort 930 DSL can be networked with other telecom
systems. The T-Comfort 930 DSL can then operate as a sub-system or DECT server. To operate the system as
a DECT server the system’s Upn ports must be DECT-capable. It is also possible to create a telecom system
with several networked telecom installations.
Glossary
Refer to the explanations in the glossary (supplied as a PDF file on the system CD).

14
Factory Settings on Delivery Telephony Functions
Factory Settings on Delivery
The following basic settings and features are active on delivery. We recommend that you configure the
T-Comfort 930 DSL to your individual requirements before putting it into operation (see Configuration
starting on page 53).
The factory settings apply to smallest version of the T-Comfort 930 DSL (only with the basic module). If an
expansion module with interface cards exists, the additional interfaces are initially unconfigured. You must
therefore first configure the slots of the expansion module to commission the interfaces.
Telephony Functions
■The S01 port is configured as a multi-terminal connection, and the S02 port as a system port.
■System telephones with the telephone numbers 30 to 32 are configured on the three Upn ports.
■Analogue terminals with the telephone numbers 10 to 13 are configured on the four a/b ports.
■The T-Comfort 930 DSL is configured ready for operation in Germany.
■Analogue devices: The dialling mode (pulse dialling or DTMF) is automatically detected.
■All corded terminals connected to the basic module ring when there are incoming external calls.
■The system PIN, for example for remote-programmable call diversion, is set at “0000”.
Authorisations
The use of functions by a terminal on the T-Comfort 930 DSL is regulated by means of authorisations. Author-
isation is configured by means of user groups to which the users with their terminals are then assigned.
Three user groups are preset: “Administrators”, “Standard” and “Guests”. “Administrators” have access to all
functions of the T-Comfort 930 DSL and unrestricted configuration rights. Users in the “Guests” group cannot
configure the T-Comfort 930 DSL, are not able to make external calls, and have only restricted use of the ter-

15
Authorisations Factory Settings on Delivery
minal functions of the T-Comfort 930 DSL. The “Standard” user group, because of its default settings, is well
suited as a starting point for the creation of user groups for normal users of the system (e.g. the staff members
of a company).
NNote: When the T-Comfort 930 DSL is commissioned, all connected terminals are ini-
tially in the “Administrators” group until a user logs on to the Web console. Subse-
quently, all terminals are automatically in the “Guests” group (see also the chapter
entitled Configuring the T-Comfort 930 DSL starting on page 56). For more details on
the configuration of user groups, refer to the online help in the chapter entitled “User
Manager”.
The following terminal functions are factory preset to the “Administrators” group:
■External line access: international numbers can be dialled from all configured telephones. External lines
must be seized by entering a prefixed code.
■Least cost routing is not active. As soon as LCR is configured, users can make calls via individually
selected providers.
■“VIP call” is activated.
■Announcements to system telephones are possible.
■Baby calls can be configured.
■If a call key is configured for a user on more than one terminal, he can program this key for more than one
outgoing call, i.e. he can use his various terminals to make parallel calls from this telephone number.
■“Pick-up” and “Pick-up selective” of calls from other telephones are activated. Pick-up protection is deac-
tivated.
■“Call removal” is deactivated.
■Callback (on busy) can be activated.
■If more than one terminal is configured for a user under the same number, they can suppress the sig-
nalling of calls on the parallel terminals.
■Function “Reaction: Connection will be disconnected” is deactivated as callers trying to reach a terminal
that cannot be reached or is busy will hear a busy signal.

16
Factory Settings on Delivery Authorisations
■The “call queue” function is deactivated.
■Call forwarding to internal or external numbers can be activated. Call forwarding after delay is executed
after 20 seconds. Door calls and MSN groups can be forwarded. Call forwarding for other users and call
forwarding by other users are deactivated.
■It is possible to transfer an external call to an external subscriber.
■Three-party conferences can be set up.
■Connections can be parked.
■Call protection can be activated, call-waiting protection, announcement protection and pick-up protection
can not be activated.
■Transmission of one’s own phone number (MSN or system access number) can be suppressed on a per-
call basis.
■The telephone lock can be activated. The terminal PIN is “0000”.
■Interception of “malicious” callers is possible if this feature has been ordered from the network operator.
■The white list, black list and call filters are not preconfigured and thus not active. If these lists are con-
figured, they can be activated for the user groups. A special list with emergency telephone numbers is
preset and activated.
■Call lists on terminals list internal calls, external calls, calls from the door and calls that the user received
while they were telephoning.
■Function keys can be programmed on system telephones, no keys are locked.
■The evaluation of connection data by external cost-recording programs is deactivated.
■The cost multiplier is set to 100%, i.e. the costs are not multiplied by any factor. There are no preset basic
amounts for the charging of calls.
■Speed dialling is possible if this has been configured in the T-Comfort 930 DSL central telephone book.
■Keypad dialling can be used.
■The door opener can be activated from all terminals. Door calls can be forwarded.
■Time control is not active as there are no time groups configured.

17
Internet Functions Factory Settings on Delivery
■Call diversion for SMS calls in the fixed-line network is not activated.
■Calls can be marked with a booking number for the purpose of project based accounting.
■Users can use the Telefonie-Assistent to send short messages to other users.
■Every user can change the configuration of the T-Comfort 930 DSL.
■Every user can create a personal telephone book and edit entries in the central telephone book.
■Every user can read out the charges.
■Applications requiring a license (e.g. Comfort Pro A IVE) can be used after being activated.
■Access via RAS is not allowed.
■E-mail notification to system terminals is possible. There are no user accounts configured for the sending
of e-mails, the authorisation for sending e-mails is not deactivated.
■The multi-company variant is not activated.
Internet Functions
■RAS access (with or without callback) can be set up for every T-Comfort 930 DSL user. RAS access
requires activation of the RAS authorisation.
■More than one mail account query can be set up for every user.
■Every user with a system terminal can be informed automatically of the receipt of e-mails.
■Users can disconnect existing Internet connections (via the T-Comfort 930 DSL Web console and from a
system terminal if the function has been configured on that terminal).
The following IP addresses are preset for the network configuration:
■Host name: host
■IP address: 192.168.99.254
■Network mask: 255.255.255.0

18
Factory Settings on Delivery Internet Functions
The following addresses are transmitted to the client PCs in the LAN via DHCP or PPP:
■Gateway address: 192.168.99.254
■Domain name: domain
■Domain name server: 192.168.99.254
■PPP addresses: 192.168.100.0 to 192.168.100.10
■DHCP addresses: 192.168.99.129 to 192.168.99.148
You can change the IP settings in the Configurator. Check with the network administrator responsible for the
LAN if you wish to do this.
Table of contents
