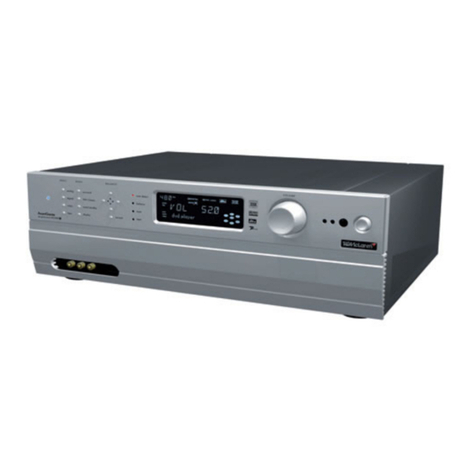
TAG MCLAREN AUDIO AV32R User manual

contents |1
4controls
6welcome
7safety first / when you need additional assistance
8preparing your remote control - installing batteries
9connectivity
analog audio inputs ................................................9
5.1 analog bypass..................................................9
digital audio inputs..................................................9
TAGtronic Sync Link...............................................10
AC-3 RF Laserdisc interface ....................................10
composite video inputs...........................................11
S-video inputs .......................................................11
audio outputs main zone........................................12
audio outputs zone 2.............................................12
speaker positioning ...............................................13
analog and digital tape outputs ..............................14
TAGtronic Bus routing ............................................15
DAB digital radio antenna......................................15
action switches......................................................16
external infrared receiver connections......................17
composite video outputs .........................................18
S-video outputs......................................................18
19 on screen display
19 video standard & signal conversion
20 basic system set-up: an example
21 switching on / standby
22 controlling remotely
22 front panel display in operation
23 status screen: all essential user settings at a glance
24 source selection
25 volume control - main & zone 2
changing volume...................................................25
changing between main and zone 2 .......................25
start volume ..........................................................25
maximum volume ..................................................25

2|contents
26 mute and partial mute (attenuation)
27 balance (front/rear, left/right)
28 surround modes & initial modes
29 THX post processing
31 THX Cinema, THX Ultra2 and THX Music
32 THX Surround EX
33 surround modes
mono, direct, bypass, HDCD ..................................33
stereo, Pro Logic, Pro Logic II ..................................34
DTS Neo:6, TAG McLaren Surround, party...............35
Dolby Digital, MPEG-2, DTS, DTS ES 6.1 .................36
DTS 96 / 24, Multi-channel....................................37
38 height channel
39 audio channel indicator: audio status
39 tuning the LFE or subwoofer level
40 cursor assigmenment
balance ...............................................................40
Pro Logic II Music ..................................................40
AV32R DAB digital radio tuning..............................40
T32R tuning via TAGtronic Bus................................40
quick settings .......................................................41
42 The AV32R set-up menu : introduction
44 first time set-up wizard
45 Change Set-up
night mode...........................................................45
front panel configuration ........................................46
front panel brightness ............................................47
on-screen configuration ..........................................48
radiotext display ...................................................48
video inputs configuration ......................................49
analog audio inputs configuration ...........................50
digital audio input configuration .............................52
TAGtronic Sync Link configuration ...........................53
When to Use Height Speaker..................................54
5.1 analog bypass configuration/trim .....................55
source input key assignments on remote...................56
loudspeaker definition and calibration .....................57
mode dependent speaker trims ...............................59
distance between back speakers .............................59

contents |3
subwoofer types....................................................60
LFE cut-off frequency ..............................................60
THX boundary gain compensation...........................60
bass redirection rules.............................................61
speaker calibration................................................62
alternative listening position....................................62
5.1 replay through 7.1 loudspeakers.......................63
64 TMREQ TAG McLaren Room EQ -
for details see separate TMREQ manual
main zone / zone 2 configuration...........................65
Dolby Headphone .................................................65
Dolby Pro Logic IIx configuration .............................66
NTSC/ PAL latency offset .......................................67
OSD on composite and S-video...............................67
PSM192: connections and settings ..........................68
DAB digital radio ..................................................71
action switches......................................................74
75 TAGtronic Bus
in and out of standby.............................................75
sending remote commands via AV32R .....................76
controlling (multiple) amplifiers................................77
corresponding with DVD32/DVD192 & T32R............78
81 hardware and software upgrades
how to enable a new software option ......................82
83 programming the remote
87 upgrading the AV32R’s software
89 running in, warming up, cleaning and service
90 acknowledgements

controls |54 |controls
1 power / standby indicator
2 input selection buttons
3 mode / standby buttons
4 function buttons
5 display
6 volume knob
7 remote command receiver window
8 power button
9 special status indicators
10 remote command acknowledge indicator
11 fuse carrier
12 (1)action switches
13 (1)external remote in/out
14 DAB Digital Radio antenna - option
15 composite video in/out sockets
16 (1)back channel output sockets
17 digital output socket(s)
18 analog output sockets (5.1)
19 5.1 analog bypass
20 ac supply socket
21 TAGtronic Communications Bus
22 S-Video in/out sockets
23 digital input sockets
24 TAGtronic Synchronisation Link T2L
25 digital output 2 - optional AC-3 RF
input for Laserdiscs
26 tape monitor
27 analog input sockets, incl. tape input
1. only a vailable if your AV32R ‘Dual Processor’ is equipped
with the ‘7.1’ option
Sp ecif ication shown may var y for different count ries

TAG McLaren Audio exists with one aim in mind: to
produce the very best audio and audio-visual equipment
in the world.
Like many people, I often have my best ideas when
relaxing to a piece of music or watching a movie. For
years, knowing the technical capabilities of TAG
McLaren, I have nurtured the ambition to push music
reproduction to the absolute limit; that’s why we formed
TAG McLaren Audio.
At the core of our development team are highly
experienced engineers whose heritage of award-winning
hi-fi and world-beating electronic control systems is
envied by many and equalled by few.
There are many immediate spin-offs into audio from our
expertise in automotive electronics, mechanical
engineering and the material science of Formula One
motor racing: multi-layer printed circuits, fast digital
signal processing, electronic noise suppression, radio
frequency technology and software expertise to name but
a few - all prerequisites of an outstanding audio product.
TAG McLaren Audio’s aim is perfection combined with
aesthetic delight and solid build quality – a rare
combination in hi-fi.
Enjoy ...
Dr. Udo Zucker
6|welcome
Dr. Udo Zucker
Chief Executive Officer
TAG McLaren Audio
welcome to
GRP00989.02-UK AV32R Dual.qxd 10/22/03 4:00 PM Page 6

before you start
Make sure that all components of your audio-visual system are disconnected from the AC supply
whenever you change any connections. The power button is a latching switch. One press will
hold it in; the next will release it. Check that the power button is out so that power is off.
The AV32R ‘Dual Processor’ is designed to run warm during normal operation. Please
ensure that there is adequate ventilation above and below the unit.
Do not place anything on top of your AV32R ‘Dual Processor’!
Do not place your AV32R ‘Dual Processor’ on top of any electronic product (or hot
surface), it will warm both products because of restricted ventilation.
We recommend that you do not place your AV32R ‘Dual Processor’ near any heat
sources such as radiators or in direct sunlight.
Do not expose your AV32R ‘Dual Processor’ to dripping or splashing liquids. Do not
place objects filled with liquid, such as vases, on or near it.
Do not connect the AC cable, supplied, until you have completed all connections.
safety first / when you need additional assistance |7
To maximize the performance from your AV32R ‘Dual Processor’, it is essential to configure it
correctly. This will ensure it performs its role at the heart of your home cinema system to its
optimum. Without this set-up you will significantly
reduce your system’s potential.
In case you need any support, remember:
• refer to the on screen help, available from
the on screen display
• ask your TAG McLaren Audio retailer for
assistance
by email, using either the English or
German language
• refer to the Discussion Forum at
www.tagmclaren.com to share your
specific issue with others
when you need additional assistance
1. Throughout the manual, bold print indicates the lettering that you will find on the panels of your AV32R ‘Dual Processor’ or the remote.
safety first
For on-line help select the ?using the
cursor keys, followed by ok(1).
GRP00989.02-UK AV32R Dual.qxd 10/22/03 4:00 PM Page 7

8|preparing the remote control
The AV32R ‘Dual Processor’ is supplied with a ‘learning’ remote.
This is supplied pre-programmed for TAG McLaren Audio home
cinema products, but may easily be re-programmed to control
other devices using an infra-red remote within your home audio
and audio-visual system. The remote uses four AAA 1.5 V
batteries. These are supplied with the AV32R ‘Dual Processor’.
To open the battery compartment, push the latch forward towards
the top of the remote, and lift the latch up. Make sure that
batteries are inserted in the correct orientation, with the + and –
markings on the batteries match those in the battery
compartment(1).
To close the battery cover, slide it straight back in (towards the top
of the remote) and push down until it clicks into place.
1. Make sure you do not press any keys on the remote during battery changing, as you will lose any user- programmed functions. For more
information about programming the remote, please refer to page 87 ‘programming the remote’.
installing batteries
GRP00989.02-UK AV32R Dual.qxd 10/22/03 4:10 PM Page 8

connectivity: audio sources |9
Please have a look at the rear panel of your AV32R ‘Dual Processor’ and you will see
many potential connections can be made to your AV32R ‘Dual Processor’. Fortunately
these connections can be separated in logical groups which are described in the
following paragraphs:
audio inputs
You can connect analog (stereo and 5.1) and digital audio signals.
stereo analog inputs
Your AV32R ‘Dual Processor’ has six, electrically identical
analog inputs at the rear, labelled for convenience TV, VCR,
SAT, TUNER, AUX, TAPE.
5.1 bypass
The AV32R ‘Dual Processor’ offers a 5.1 BYPASS, which is
also configurable as three stereo inputs. The 5.1 BYPASS is
a true 5.1 analog bypass with analog volume control,
allowing the direct connection of DVD Audio or multi-
channel SACD players.
ANALOG INPUT
TAPE AUX TUNER SAT VCR TV
L
RR
L
5.1
BYPASS
SR SL SUB C R L
DVD CD
DAB MD SYNC LD
DIGITAL INPUT
Signals connected to the 5.1 Bypass
will not be digitised, therefore no
processing beside analog volume
control will be possible.
All analog inputs use phono sockets and should be connected using
good-quality, screened, analog audio cable, such as our Cable
AvantGarde analog interconnect.
SPDIF digital audio inputs
Your AV32R ‘Dual Processor’ has five digital audio inputs using the
SPDIF interface standard. They are labelled for convenience DVD,
CD, LD, MD and DAB.
The inputs labelled DVD, CD, and LD use phono sockets and should
be connected using a digital cable. The inputs DAB and MD use
optical TOSLINK connectors.
Cable AvantGarde offers good-quality, screened, coaxial digital
interconnects with phono and BNC connectors or a combination of both.
GRP00989.02-UK AV32R Dual.qxd 10/22/03 4:00 PM Page 9

10 |connectivity: TAGtronic Sync Link / AC-3 RF Laserdisc
The stability of the timing of digital data has a dramatic effect on
sound quality. When designing digital to analog converters, it is
vital to have a stable digital clock as close to the converter
electronics as possible. The best place for an ultra-low-jitter clock is
within the audio-visual processor itself, but it is conventionally
located in the source from which the digital data is sent.
The AV32R ‘Dual Processor’ incorporates sophisticated electronics
which enable it to ‘drive’ the source clock of products equipped with
this technology to provide the correct data rate to the converters. By
a process called ‘re-clocking’, the jitter in the digital audio data is
dramatically reduced.
To enable this feature, the TAGtronic Sync Link SYNC connector must
be connected to the appropriate SYNC connector of the digital
audio source using a high-quality analog interconnect.
The sync output software must also be enabled using the on-screen
set-up menu system, for details see page 53.
If you want to play NTSC Laserdiscs encoded in Dolby Digital, you
will need the optional AC-3 RF interface. This interface converts the
Radio Frequency (RF)-encoded information stored on the Laserdisc
into an SPDIF-compatible Dolby Digital bitstream, allowing the
AV32R ‘Dual Processor’ then to decode this data in the same way
as if the signal had come from a DVD encoded with Dolby Digital.
If the AC-3 RF Laserdic interface option is installed, it uses the phono
connector COAXIAL OUTPUT(1) as the 2 (AC-3 RF) input.
1. When the interface is not fitted, this socket is available as a second coaxial COAX OUT 2/RF
SYNC
1
COAXIAL
OUTPUT
2
(AC-3 RF)
TAGtronic Sync Link(1)
AC-3 RF Laserdisc interface
GRP00989.02-UK AV32R Dual.qxd 10/22/03 4:00 PM Page 10

connectivity: video sources |11
The AV32R ‘Dual Processor’ can process analog Composite video and S-video signals.
Composite video
The AV32R ‘Dual Processor’ has four 75 Ohm Composite video inputs at
the rear, labelled for convenience TV-C, VCR-C, LD-C and SAT-C.
All inputs, except SAT-C are electrically identical - SAT-C has been modified
to accept video signals with high DC offset, a signal degradation found in
some satellite receivers.
S-video
The AV32R ‘Dual Processor’ has four 75 Ohm Mini-DIN S-video inputs at
the rear, labelled for convenience VCR-S, DVD-S, LD-S and SAT-S.
All inputs, except SAT-S are electrically identical - SAT-S has been modified
to accept video signals with high DC offset, a signal degradation found in
some satellite receivers.
video inputs
COMPOSITE
VCR-COUT TV-C
LD-C+ OSD SAT-C
SAT-SLD-S
DVD-SVCR-S
D BOX-S TV-S
S-VIDEO
OUT
OUT +OSD
GRP00989.02-UK AV32R Dual.qxd 10/22/03 4:00 PM Page 11

12 |headin12 |connectivity: main zone / zone 2
The AV32R ‘Dual Processor’ can offer up to 7.1 channels(1).
BACK
RIGHT
BACK
LEFT
SURR.
ANALOG OUTPUT
LEFTCENTRE
SURR. LEFT
RIGHTSUBSURR. RIGHT
audio outputs
main connections
The RIGHT, CENTRE, LEFT, SURR RIGHT, SURR LEFT, BACK
RIGHT, BACK LEFT and SUBwoofer phono outputs are low-
impedance line-level outputs, buffered to be able to drive
long cables or several inputs in parallel if required. These
should be connected to your amplifier(s) using good-
quality, screened, analog audio cable such as our Cable
AvantGarde F3-10-ANA analog interconnect.
zone 2
You can assign the left/right or surround left/right or surround back left/right outputs to a
second zone: zone 2. This is particularly interesting, if your AV32R ‘Dual Processor’ has
7.1 output channels but you currently only use a 5.1speaker set-up. See page 65 for more
details, how to make the assignment.
You can switch between main zone and zone 2 by pressing the shift key followed by VOL+
or VOL- . The AV32R ‘Dual Processor’ will indicate zone 2 in the front panel display by
replacing VOL with ZN2. More details to zone switching can be found on page 25.
The AV32R ‘Dual Processor’ will allow you to control power amplifiers, connected via the
TAGtronic Bus, for each zone differently, for more details, see page 77.
Potential applications for zone 2 are:
• connection of headphones to the surround back channels, using a 5.1 home cinema
set-up otherwise
• second listening position, used for listening to two-channel music at the other end
of a 7.1 cinema layout.
1. If your AV32R is equipped with the back channel option - otherwise there will only be 5.1 channels
GRP00989.02-UK AV32R Dual.qxd 10/22/03 4:00 PM Page 12

headin |13connectivity: loudspeakers|13
With the exception of the subwoofer and the
height channel speaker, all loudspeakers
should be arranged around your normal
viewing / listening position, forming an
approximate circle. Do not worry if you are
unable to position your loudspeakers at
equal distances from your preferred listening
position, the AV32R ‘Dual Processor’ can be
set up to take account of different distances.
The subwoofer can be placed almost
anywhere, but we recommend you
experiment to obtain the best results.
1. front left and right loudspeaker
Position your front loudspeakers so as to obtain a good stereo image for normal music reproduction as
well as good sound location for multi-channel modes
2. centre loudspeaker
A front centre loudspeaker allows more realistic reproduction of dialogue and central sounds and a
wider range of seating positions. The centre loudspeaker should ideally be placed at the same height
as the left and right loudspeakers, immediately above or below the television. Do not compromise on
the quality of the centre loudspeaker; it is most important to a good home cinema system as it carries
all the dialogue.
3. surround loudspeakers
‘5.1’ home cinema uses one or preferably two rear loudspeakers in addition to your existing front left,
right and centre loudspeakers to give excellent reproduction of ambient sound and cinema effects.
4. back channel loudspeaker(1)
Your AV32R ‘Dual Processor’ allows you to add one or two back channel loudspeakers for added
depth, spacious ambience and sound localization. You might need to move your standard left and
right surround loudspeakers forward in order to generate the most impressive surround sound. Place
the loudspeakers to have the sound perfectly surrounding you without ‘breaking up’ when moving from
one surround speaker to the other.
5. subwoofer
Bass performance will be improved by adding a subwoofer. This is useful for reproducing special
cinema effects, especially where a dedicated LFE (Low-Frequency Effects) channel is available, such as
with Dolby Digital or DTS Digital Surround-encoded discs.
6. height channel loudspeaker(1)
The AV32R ‘Dual Processor 7.1’ is one of the first processors offering a height channel, making sure
that sound intended to fly over you, will no longer fly through you.
Movies especially mixed with height channel information, and many mixed in THX Surround EX (Dolby
EX) or DTS-ES 6.1 will benefit from this enhancement(2).
Information, intended for the height channel, is matrix encoded in the surround back and centre
channel. If you activate the height channel, the BACK RIGHT SURR. output will be assigned to the
output of the height channel matrix decoder.
If you want to run two back channels in addition to the height channel, then you need to connect both
back channel loudspeakers via two power amplifier channels to BACK LEFT SURR.
21
1
6
3
5
4
4
3
speaker positioning
1. If your AV32R is equipped with the ‘7.1’ option - otherwise there will only be 5.1 channels
2. THX Surround EX (Dolby EX) and DTS-ES 6.1 recordings provide an additional back channel, which the AV32R ‘Dual Processor 7.1’ can
route to go to a left and right surround back speaker, if the height channel is not activated.
GRP00989.02-UK AV32R Dual.qxd 10/22/03 4:00 PM Page 13

14 |connectivity: analo and di ital tape connections
The TAPE OUTput contains a copy of the audio signals routed to the
RIGHT and LEFT front channel outputs, without applying volume control
or mute. Connect the recording input of an analog tape recorder to
TAPE OUT if you want to record the signal of the RIGHT and LEFT front
channels.
caution when pressing the tape key/button during recording
If you listen to an analog stereo input, pressing the tape key/button
will route the TAPE input to the ANALOG OUTPUTs without changing
the signal going to TAPE out, allowing for example, the recorded
signal to be compared with the original whilst recording using a three-
head tape recorder (if its output is connected to TAPE).
In this instance the front display will show TAPE (name of analog input
routed to TAPE out), e.g. TAPE(SAT). Pressing tape again will return to
the analog signal selected before tape was pressed the first time.
If however, you record the result of a digital audio input, e.g. CD, or
the 5.1 BYPASS then you should not press the tape key/button whilst
recording, as this will route the TAPE input to the ANALOG OUTPUTs
and TAPE OUT, spoiling your recording. This behaviour will be shown
in the front display by the word TAPE. Pressing tape again will return
to the digital input/5.1 BYPASS selected before pressing tape the first
time.
TAPE
OUT
L
R
1
COAXIAL
OUTPUT
2
(AC-3 RF)
analog tape output
digital (tape) output
The signal at COAX OUT 2/RF (if the optional AC-3 RF interface isn’t
installed- see page 10) and OPTICAL OUT is an unmodified copy of
the currently selected digital audio source, i.e. it is unaffected by the
volume control or processing mode.
The digital coaxial COAX OUT should normally be connected to
your digital recording device (such as a DAT or MD recorder).
It is not possible to route an analog source to the digital coaxial
outputs.
GRP00989.02-UK AV32R Dual.qxd 10/22/03 4:00 PM Page 14

headin |15connectivity: TAGtronic Bus / DAB di ital radio |15
The AV32R ‘Dual Processor’ features the TAGtronic Communications Bus. This allows TAG
McLaren Audio units to work together seamlessly to form an effective, fully integrated system.
It is highly recommended to connect products, featuring the TAGtronic Bus together, as many
additional features will become available.
Details are explained on page 75.
You can connect your AV32R ‘Dual Processor’ to the TAGtronic Bus using a ‘straight’ CAT5
cable with RJ45 connectors. Straight means pin 1 of the connector on one end, connects to
pin 1 of the connector on the other end. CAT5 cable is available from your local computer
shop at a reasonable price.
The sequence is in principle of no relevance as long as you connect an output to an input
and don’t close the Bus to be a ring. For example:
[AV32R] Out
In [DVD32] Out
In [100x5R 1st amplifier ] Out
In [100x5R 2nd amplifier ] Out
In [T32R] Do not close
back to AV32R
The AV32R ‘Dual Processor’can be equipped with an optional DAB
digital radio.
The DAB digital radio, uses as antenna input a 50 Ohm BNC
connector, labelled DAB OPTION 50 OHM. For details about the
operation of the DAB digital radio option see page 71.
DAB OPTION
50 OHM
TAGtronic Bus routing
DAB digital radio
GRP00989.02-UK AV32R Dual.qxd 10/22/03 4:00 PM Page 15

Action switches are used to activate
external events or to react to external
events, such as lowering a motorised
screen or showing a message on-screen
when the door bell rings.
The AV32R ‘Dual Processor’includes three
ACTION SWITCHES, A, Band C, which
are located within a 9 pin D-Sub
connector, making both contacts of each
internal switch available to the user.
Action Switches are controlled (opened/closed) by the AV32R ‘Dual Processor’when
selecting an input source or when switching the AV32R ‘Dual Processor’into standby.
A description of the AV32R’s Action Switch configuration menu can be found on page 74.
16 |connectivity: action switches
Motorised Screen
REMOTE
SWITCHES
IN
OUT
A.16
B.27
C.38
Relay controlled
by AV32R
internal circuitry
12
action switches
SWITCHES
A.1 6
B. 2 7
C.3 8
1
2
3
4
5
6
7
8
9
GRP00989.02-UK AV32R Dual.qxd 10/22/03 4:00 PM Page 16

headin |17connectivity: electrical ‘IR’ distribution system |17
The AV32R ‘THX Ultra2 Dual Processor 7.1’includes two sockets at the
rear panel, named REMOTE IN and REMOTE OUT. They can be used to
place the AV32R ‘THX Ultra2 Dual Processor 7.1’out of sight when
connected to a wired infra-red remote system.
REMOTE
IN
OUT
IN
AV32R
power
e. . DVD32R
IN
AB
IR
sensor
IR distribution system
IN
OUT AV32R
power
e. . DVD32R
IN
AB
IR
sensor
external IR receiver connections
Example Layout
Attention: Some IR distribution systems can only connect one product per sensor
output. In this instance use only the REMOTE IN connector.
Use this arrangement for IR distribution systems which allow product chaining, for
details contact your IR distribution system manufacturer.
GRP00989.02-UK AV32R Dual.qxd 10/22/03 4:00 PM Page 17

18 |connectivity: video outputs
The AV32R ‘Dual Processor’can route any
of its Composite video inputs to a pair of
COMPOSITE video outputs, labelled OUT
and +OSD.
COMPOSITE
VCR-COUT TV-C
LD-C+ OSD SAT-C
The AV32R ‘Dual Processor’can route any
of its S-video inputs to a pair of S-VIDEO
outputs, labelled OUT and +OSD.
S–VIDEO
VCR-SOUT DVD-S
LD-S+ OSD SAT-S
composite video
S-video
The outputs +OSD allows the AV32R ‘Dual
Processor’to insert text on your TV (On-Screen
Text = OSD) when required. This output should
be connected to your television. You should
use the output OUT where you will never want
to see the inserted text, such as on a VCR.
GRP00989.02-UK AV32R Dual.qxd 10/22/03 4:00 PM Page 18

headin |19on-screen display / video conversion |19
The AV32R’s on-screen display (OSD)
superimposes text on the picture for a few
seconds whenever a change occurs, such as
when you select a new input or change the
volume. You can change how long the text
remains for, as well as the position of the text
on the screen, or turn this function off
altogether, pressing menu, then select
Change Set-up, Displays, On- Screen
Display.
OSD is available
•for composite video sources on COMPOSITE +OSD
•for S-video sources on S-VIDEO +OSD
When text is not required, the OSD electronics are switched out of
circuit to maintain a ‘straight-though’video path, i.e. the video
signal quality is not affected.
For details on how to configure the OSD, see page 48.
on-screen display
video standard and signal conversion
The AV32R does not convert between composite and S-video.
If you want to use composite and S-video sources - you must connect
all signals to your television.
GRP00989.02-UK AV32R Dual.qxd 10/22/03 4:00 PM Page 19

20 |basic system set-up: an example
The following is a basic configuration, reflecting one of many configurations.
1. You need to connect both COMPOSITE +OSD and S-VIDEO +OSD to your display device if you connected source components via a
composite and S-Video connection.
digital audio source
connect the digital audio output
of a DVD player (probably
labelled ‘coaxial out’or ‘coaxial
digital out’) to the DIGITAL
INPUT DVD using a digital interconnect
analog audio source
connect the analog audio output
of a satellite receiver (probably
labelled ‘left’and ‘right’) to
the ANALOG INPUT SAT Land
SAT R
composite video
connect the composite video
output of a satellite receiver
(probably labelled ‘video’or
‘composite’) to the COMPOSITE
input SAT-C
S-video connection
connect the S-Video output of a
DVD player (probably labelled
‘S-Video’) to the S-VIDEO input
DVD-S
DVD
SAT
SAT-C
connection to the power amplifier(s)
this sample configuration is
limited to a stereo set-up only:
connect the AUDIO OUTPUT LEFT
(RIGHT) to the power amplifier
used for the left (right) front
loudspeaker
Connect the left and right front loudspeaker
to your power amplifier(s) as outlined in
your power amplifier's user manual
tv connection(1)
connect the
composite input
of your TV to the
AV32R ‘Dual
Processor’using the
COMPOSITE +OSD
and the TV’s S-
Video input to the S-
VIDEO +OSD socket
DVD-S
LEFT
RIGHT
OUT
+ OSD
OUT
+ OSD
There are many potential system set-ups.
Please refer to page 7 if you need any
assistance in achieving your dream system.
GRP00989.02-UK AV32R Dual.qxd 10/22/03 4:01 PM Page 20

headin |21switchin on / standby |21
The following assumes that you have connected all your sources, audio and video, your
loudspeakers and your display device to your AV32R ‘Dual Processor’.
1. AV32R ‘Dual Processor’-GB indicates that the AV32R ‘Dual Processor’uses the English language. The AV32R ‘Dual Processor’might also
be available with other languages. The necessary software will be made available from www.tagmclaren.com.
2. This text will be overwritten by your personalized startup message, for details see page 46.
3. If the AV32R ‘Dual Processor’is powered down using the front panel mounted on/off switch whilst in standby mode, it will go back into
standby when next switched on. In this event press the standby key to power up the unit.
power connection
Check that the power button is out so that power is off when you plug
in. The power button is a latching switch. One press will hold it in, the
next will release it. Using the cable supplied, connect the socket on the
back of your AV32R ‘Dual Processor’to an AC supply outlet.
switching on
standby
Press the power button in. The AV32R’s blue power LED will come on,
the display window will light up and a few seconds later will show
SELFTEST, above TAG McLaren, then the software version number such
as V4.10.00, above AV32R ‘Dual Processor’-GB(1, 2).
All outputs are muted when the power is switched on to allow all the
voltages to stabilize. This protects the internal components of the AV32R
‘Dual Processor’, amplifier and loudspeakers and prevents unpleasant
switching noises. You will hear the mute relays click, which is normal.
The AV32R ‘Dual Processor’has a standby mode, which can be entered using the standby
key on the remote or by pressing the mute/standby button on the front panel for more than
three seconds. The blue power LED will dim, the front panel display will show ‘going to
standby’then the AV32R ‘Dual Processor’will switch off(3).
All circuitry essential for sound quality remains powered up in standby, meaning the
AV32R ‘Dual Processor’will still maintain its operating temperature and will still
consume electricity. You should power the AV32R ‘Dual Processor’down using the
front panel mounted on/off switch if you want to switch the AV32R ‘Dual Processor’
off for a prolonged period(3). The video outputs are also kept active in standby mode,
allowing you to watch television even when the AV32R ‘Dual Processor’is in
standby.
Normal operation may be resumed by turning the volume knob (more than about 45
degrees) or pressing any front panel button or remote key (other than light) at any time.
GRP00989.02-UK AV32R Dual.qxd 10/22/03 4:01 PM Page 21
Other manuals for AV32R
1
Table of contents
Other TAG MCLAREN AUDIO Computer Hardware manuals