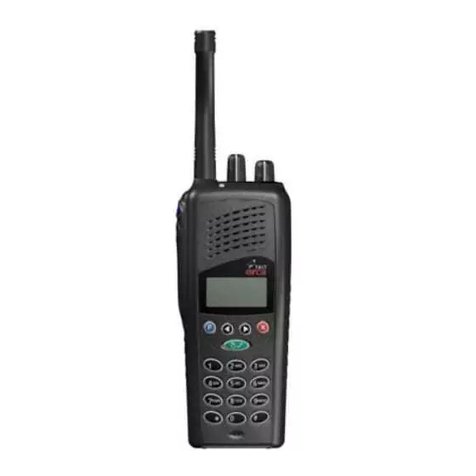
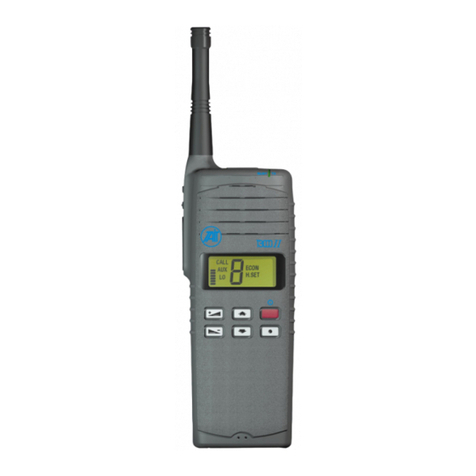
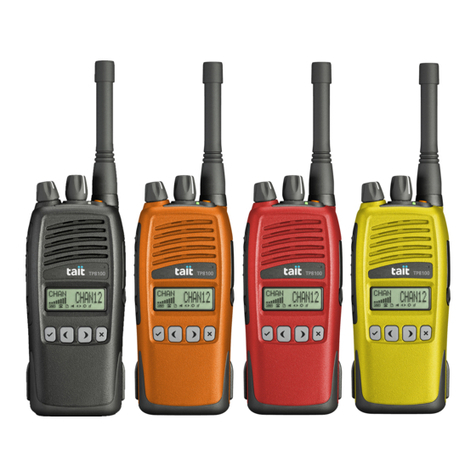
Tait T3040II User manual

Operator’s Manual
T3040II

1
Contents
Introduction .............................................................................. 3
Operating Modes ................................................................. 4
Warnings ............................................................................. 4
Features............................................................................... 5
Components ........................................................................ 5
Setup ................................................................................... 6
Basic Operations ...................................................................... 6
Controls .............................................................................. 7
Keypad .......................................................................... 7
Side Panel Keys ............................................................ 8
Display Window ............................................................ 9
Switching the Radio On and Off .......................................... 9
Switching On ................................................................ 9
Switching Off .............................................................. 10
Adjusting the Volume.................................................. 11
Normal and Handset Operation ......................................... 11
Normal Operation ....................................................... 11
Handset Operation ...................................................... 12
VOX Operation ............................................................ 12
Trunking Call Operations ........................................................ 13
Selecting a Network .......................................................... 14
Making a Call ..................................................................... 14
Dialling ........................................................................ 16
Receiving a Call ................................................................. 16
Normal Call ................................................................. 16
Group Call ................................................................... 17
Caller Identity Display ................................................. 17
Calling Procedure .............................................................. 18
Reestablishing a Call ......................................................... 19
Using Redial ............................................................... 19
Using Callback ............................................................ 20
Unanswered Calls .............................................................. 20
Emergency Operation ........................................................ 21
Conventional Radio Operations ............................................. 22
Selecting a Channel ........................................................... 22
Receiving .......................................................................... 23
Monitor Key ................................................................ 23
Transmitting ...................................................................... 24
CTCSS Calls ...................................................................... 24
Special Features .................................................................... 25
Alphanumeric Entry Mode ................................................. 25
Short-Dial Preset Numbers ............................................... 27

2
Status Calls ....................................................................... 27
Transmitting a Status Call ........................................... 27
Automatic Message/Number Selection ................. 28
Independent Message/Number Selection ............. 28
Manual Message/Number Entry ............................ 29
Receiving a Status Call ............................................... 29
Call Queuing ...................................................................... 30
DTMF Operation ................................................................ 32
Editing Group Membership ............................................... 32
Quiet Mode ........................................................................ 34
Low Power Transmission .................................................. 35
Scrambler Operation ......................................................... 35
Using the Menu ...................................................................... 36
Recharging the Battery .......................................................... 40
Mounting the Radio in the Charger ................................... 40
Mounting the Battery in the Charger ................................. 41
Recharging ........................................................................ 42
Maintenance and Troubleshooting ........................................ 43
Maintenance ...................................................................... 43
Care of Your T3040II .................................................. 43
To Preserve Battery Life .............................................. 43
Avoiding High Temperatures ....................................... 44
Troubleshooting ................................................................ 44
Appendix I Indications ............................................................ 45
Display Window Indicators ............................................... 45
LED Indicator .................................................................... 46
Appendix II Audible Indicators ............................................... 47
Appendix III Display Window Messages and Indicators ....... 48
Appendix IV Common Dialling Functions .............................. 50
Trunking Operation ............................................................ 51
Telephone Calls ................................................................. 52
Special Trunking Functions ............................................... 53
Conventional Operation ..................................................... 54
Appendix V Preset Options..................................................... 55
Appendix VI How to Care for Your Tait Rechargeable
Batteries ................................................................................. 58
Types of Batteries .............................................................. 58
New Batteries .................................................................... 58
Battery Use ........................................................................ 59
Battery Charging ............................................................... 59
Battery Problems .............................................................. 60
Battery Storage ................................................................. 61
Disposal of Used Nickel Cadmium Batteries ...................... 61
Optional Accessories for the T3000II range of radios ........ 62
3
Antenna
Function
keys
Speaker/
microphone
Display
window
Enter key
Status key
Menu key
Microphone
Busy/TX LED
Press to
Talk key
Volume keys
Not Used
Alpha key
Alphanumeric
keys
Hash / Right
Cursor key
Not Used
On/Off/
Clear key
Star / Left
Cursor key
Introduction
The Tait T3040II radio is a state-of-the
art handportable radio offering outstand-
ing communications flexibility in both
trunked and conventional mobile radio
systems. The T3040II is a compact, rug-
ged and reliable unit, with a wide range
of accessories available to meet any mo-
bile communications need. It is easy to
use, and provides a range of innovative
features that simplify your communica-
tions.
BUSY
TX
TAIT ELECTRONICS
T3040
123
456
78
0
9
DEFABCQZ-
MNOJKLGHI
WXYTUVPRS
STAT
DEFABCQZ-
α
CH
Accessory connector

4
Operating Modes
Your T3040II can be used either in Trunked Call mode, or as a
conventional radio. In Trunked Call mode, you communicate
with other radios, PABX systems and outside (PSTN) telephone
lines through the trunking network. In Conventional mode, ra-
dios communicate directly with each other over standard chan-
nels. To switch between Trunked Call and Conventional modes,
see "Conventional Radio Operations".
In Trunked Call mode, your radio may have the additional fea-
ture of DTMF tone dialling. This enables you to send telephone
tones once a call is established and is useful in accessing some
functions available on telephone networks.
A scrambler is also available to give you added privacy during
both trunking and conventional calls. The scrambler is of the
voice inversion type and offers a moderate level of security.
If your radio is set to operate in Conventional mode, it may
also have the CTCSS option fitted. CTCSS is a tone-based
system that isolates your calls so that you only talk with a sin-
gle group even though other users may be on the channel. It
does this by screening out radio traffic that does not carry the
correct CTCSS signal.
Warnings
WARNING
(EXPLOSIVE ENVIRONMENTS):
DANGER: SWITCH THE RADIO OFF AT
PETROL FILLING STATIONS
DANGER: SWITCH THE RADIO OFF IN THE
VICINITY OF EXPLOSIVE DEVICES (such
as in a quarry that uses blasting tech-
niques)
WARNING
(USERS IN THE UNITED KINGDOM):
DO NOT OPERATE RADIO WHILE DRIVING
Use of a handheld microphone or radio by
the driver while in the act of driving con-
travenes Section 3 of the Radio Traffic Act.
An offender could be charged under this
Act with driving without due care or rea-
sonable consideration to other road users.

5
Features
lSmall, rugged, reliable
lHandset operation
lEasy to use
lMPT1327 trunking
Components
When you receive your T3040II radio check the contents to
make sure that all the items you ordered are included. Typi-
cally, you should receive the following.
1. T3040II radio unit
2. Battery pack
3. Antenna
4. Belt clip
5. Charger
6. Plug pack (pins may vary to suit each country)
7. Quick assist card
8. Operator’s manual
If any parts are damaged or missing, report it to the delivery
company immediately.
T3040
II
Operators’ Manual

6
Setup
Before using the radio, insert the antenna as illus-
trated. The antenna should screw easily into the
socket at the top of the radio.
To ensure proper operation of your radio, you should
fully charge the battery prior to initial use. See “Re-
charging the Battery” for instructions.
To fit the battery pack, offer it up to the chassis,
locating the peg on its bottom edge in the slot at
the bottom of the radio's chassis. Hinge the bat-
tery up until the spring latch clicks into place.
The first time you switch the radio on,
factory settings are in effect. You may
want to change some of these settings
immediately, such as the volume level
and menu options. Review this manual
first, and make any necessary changes
after referring to the appropriate section.
Enter your current settings in the form
provided in Appendix V.
Basic Operations
BUSY
TX
123
456
78
0
9
MNOJKLGHI
WXYTUVPRS
DEFABCQZ-
STAT
α
CH
PTT key
Display window
Keypad

7
Controls
The T3040II controls include the keypad, side panel keys, LCD
window, and the LED operations indicator.
KEYPKEYP
KEYPKEYP
KEYPADAD
ADAD
AD
Keypad functions are as follows:
On/Off/Clear Use to turn the radio on and off, to
end calls and to exit from control op-
tions. The ON/OFF key also serves
as a clear key.
Enter Use to initiate a call and to select
items.
STAT
Status Use to display preprogrammed sta-
tus message labels.
Menu Use for customizing T3040II op-
tions.
α
Alpha Use to turn on alphanumeric mode.
Not Used.
Volume Use to decrease or increase volume.
CH
Not Used.
Star/Left Use for special operations and to
scroll through a displayed list.
Hash/Right Use at the end of dialling sequences,
to initiate a call and to scroll through
a displayed list.
0
9
0 - 9 / Use for dialling and (with the letters
printed above each key) for entering
alphanumeric data for labels.
A - Z

8
SIDE PANEL KEYSSIDE PANEL KEYS
SIDE PANEL KEYS
F1 Function key 1.
F2 Function key 2.

Use to initiate special preprogrammed functions.
PTT Press To Talk key. Use to make the
radio transmit each time you talk. This
key can also be preprogrammed to
initiate a call once you have a call
number displayed.
The function keys above the PTT key can be preprogrammed
by your dealer to perform any of the following functions:
lOperate as a Clear key
lEnter or leave Handset mode
lTurn on backlighting momentarily
lEnter or leave Low Transmit Power mode
lSwitch an auxiliary device on or off
lIn Conventional mode, switch the Monitor facility on or
off
lInitiate a preset call1(such as an emergency call)
Only two of these functions can be active in any radio; if you
are not sure which functions have been preprogrammed for
your radio, consult your fleet manager.
1It may be necessary to hold the key for one second for the call to be
initiated.

9
DISPLADISPLA
DISPLADISPLA
DISPLAY WINDOWY WINDOW
Y WINDOWY WINDOW
Y WINDOW
The LCD window is optimised to provide rapid access to infor-
mation and messages concerning the progress of your call and
the status of your radio.
Note: Your T3040II features the ability to display messages in
several languages.
Switching the Radio On and Off
SWITCHING ONSWITCHING ON
SWITCHING ON
Switch the radio on by pressing the ON/OFF (5) key and hold-
ing it briefly until you hear two short tones. If the radio was
last used in Trunking mode, this is followed by another two
tones as it enters Trunking mode and its electronic identity
appears, followed by a power-up message.
The current volume setting is displayed next. The number of
bars indicates the setting, with a maximum of ten. (To change
this setting, see “Adjusting the Volume.”)
STAT
α
CH

10
The final display shows the Received Signal Strength Indicator
(RSSI) in the upper right-hand corner, the last number dialled
(or the call queue, if there are entries), and the Service indica-
tor (SVC).
If the Service Indicator is on continuously, your radio has ac-
cess to a trunking network and is ready to make or accept
calls. If it is blinking, your radio does not currently have ac-
cess to a network. It may be attempting to find a site it is au-
thorised to use, or it may be out of range of a network signal.
If the Service Indicator does not appear at all, the radio is in
Conventional mode.
The Received Signal Strength Indicator (RSSI) shows one bar
for the weakest signal and five bars for the strongest. If the
display shows no bars, the signal may have become unreliable
and the SVC indicator may begin to flash. If the indication shows
you have a poor signal (none, one or two bars showing) it may
help if you move a few metres. You should also hold the
T3040II upright to maximise the received signal.
SWITCHING OFFSWITCHING OFF
SWITCHING OFF
Switch your radio off by pressing the ON/OFF (5) key and
holding it briefly, until the display goes blank. If Key Beeps is
enabled, a tone will sound before the radio shuts off.
Your T3040II retains its volume and some other settings when
it is turned off. When you next turn it on, it uses these settings.
Note: If you have a call in progress, the radio will not switch off
on the first press of the ON/OFF (5) key; the call will simply
be terminated. A second press is then required to switch the
radio off.
Received
Signal
Strength
Indicator

11
ADJUSTING THE VOLUMADJUSTING THE VOLUM
ADJUSTING THE VOLUME
The volume display shows the current setting as a series of
bars. If this is the first time you have used the radio, adjust the
volume level to about the middle of its range (5 bars showing)
using the Volume Adjustment (2, 1) keys.
You may need to adjust the volume level for speech when you
receive your first call. Note that the volume level of the confi-
dence tones is also affected by the volume control.
Normal and Handset Operation
Your T3040II is designed so that you may use it as a normal
two-way radio or like a telephone handset.
NORMAL OPERANORMAL OPERA
NORMAL OPERATIONTION
TIONTION
TION
To use the T3040II as a normal radio as shown in the dia-
gram, hold it with its microphone about 15 cm from your mouth.
Press the Press-To-Talk (PTT)
key and speak clearly, in a
normal voice. The Transmit
(Busy/TX) indicator illumi-
nates each time you operate
the key. When you have fin-
ished talking, release the key
to hear a reply and the indi-
cator will turn off.

12
HANDSET OPERAHANDSET OPERA
HANDSET OPERATIONTION
TIONTION
TION
To use the T3040II like a
telephone handset, select
handset mode from the
Menu options (see “Using
the Menu”) or use the pre-
programmed function key.
The handset (H.SET) indica-
tor appears in the display
window and the speaker vol-
ume is reduced; otherwise,
the radio operates normally. Lift it to about 15 cm from your
face with the speaker beside your ear and the bottom of the
radio beside your mouth as shown. Press and hold the PTT
key each time you speak, as described above.
CAUTION: DO NOT hold the radio with its antenna close to
or touching any part of your body, especially your face and
eyes, when transmitting. Always hold the radio upright and
approximately 15 cm from your head which will ensure that
the radio achieves maximum operating range.
VOX OPERAVOX OPERA
VOX OPERAVOX OPERA
VOX OPERATIONTION
TIONTION
TION
An option board may be fitted to your T3040II to provide auto-
matic transmission while you speak - Voice Operated Switch-
ing or VOX. With this option fitted you no longer need to oper-
ate the PTT key each time you speak.
If fitted, VOX operation may be selected from the Menu op-
tions (see “Using the Menu”) or with a preprogrammed func-
tion key. The AUX indicator appears in the display whenever it
is active. Once activated, automatic transmission will only oc-
cur once a trunking call has been established, and is not avail-
able in Conventional mode.
VOX operation can be affected by noise in the environment
around you; the more ambient noise, the more likely the radio
is to transmit even when you are not speaking. The most reli-
able operation will be obtained if VOX operation and handset
operation are used together.
To cancel VOX operation, alter your selection in the Menu op-
tions or press the preprogrammed function key once more.
The AUX indicator will disappear from the display.

13
BUSY
TX
123
456
78
0
9
DEFABCQZ-
MNOJKLGHI
WXYTUVPRS
STAT
DEFABCQZ-
α
CH
BUSY
TX
123
456
78
0
9
DEF
ABC
QZ-
MNO
JKL
GHI
WXY
TUV
PRS
STAT
DEF
ABC
QZ-
α
CH
BUSY
TX
123
456
78
0
9
DEF
ABC
QZ-
MNO
JKL
GHI
WXY
TUV
PRS
STAT
DEF
ABC
QZ-
α
CH
BUSY
TX
123
456
78
0
9
DEF
ABC
QZ-
MNO
JKL
GHI
WXY
TUV
PRS
STAT
DEF
ABC
QZ-
α
CH
Trunking Call Operations
Your T3040II may be configured to switch between Trunking
and Conventional calling mode. Trunking mode is the preferred
operating mode because it provides access to your radio’s most
advanced features.
In Trunking mode, all calls are through the trunked network.
You can make calls to other radios that have been assigned
numbers in your network, and you may also be able to make
calls to PABX and PSTN numbers, depending upon how
your network is configured. In Conventional mode, calls
are made directly to other radios over preassigned chan-
nels. Each channel is shared among a number of users,
and there is no caller privacy.

14
This section describes the operations you can perform in
Trunking mode. Note that there are two sets of confidence
tones available during preprogramming; the MPT set and
the Tait set. This manual describes only the Tait set, which
is the default.
Selecting a Network
Your radio may be preprogrammed with the ability to operate
on up to four networks, one at a time.
To display the name of the network currently in use and the
identity details of your radio, dial -700, then Enter (3).
Use the menu to change networks (see "Using the Menu").
Making a Call
Enter the number of the required party using the numeric key-
pad or by selecting a labelled preset number (see “Dialling,”
below).
After entering the number, press the Enter (3) or Hash (6)
keys to make the call. You will hear call setup tones, and the
WAIT message may be displayed.

15
2If the receiving radio can only hold one callback identity, yours may
be replaced with an intervening call if the recipient does not call you
back directly.
On some networks, a buzzing tone indicates that the called
unit is ringing, and the display message changes to WAIT-
RINGING.
When GO AHEAD is displayed you can begin speaking.
If your call is not connected, your radio will respond with one
of the following messages.
Display Tone Called Party Action
ENGAGED Broken, Already engaged Call again later.
low-pitched or does not
tone accept your call.
CALL QUEUED Steady Not available, Wait for call
whistle but their radio back2.
has stored your
callback identity.
WAIT-IN QUEUE Broken Tone Already engaged, Wait. Call will
or the network is be connected
unable to immed- as soon as the
iately connect network is able
your call. to do so.
NOT HOME Single Turned off, in Call again later.
low-pitched do-not-disturb
tone (Quiet) mode, or
out of range.
SYSTEM BUSY Single Network is busy. Call again later.
low-pitched
tone.
UNOBTAINABLE Single Dialled number Check the
low-pitched not supported by number you
tone the network. dialled.

16
DIALLINGDIALLING
DIALLINGDIALLING
DIALLING
Your radio can be configured to dial numbers in a variety of
ways, depending upon preprogrammed options and network
capabilities. You can dial other radios, groups of radios in your
fleet, and PSTN/PABX (telephone) numbers. The actual number
that you dial may be a direct access number, a label, or a pre-
set speed dial number set up at the network level. To review
your dialling options, see Appendix IV, "Common Dialling Func-
tions”. Note that the dialling sequences listed here are the most
common setups. Dialling on your network may differ some-
what. Check these sequences with your fleet manager.
For information on using labelled preset numbers, see “Alpha-
numeric Entry Mode” under “Special Features.”
Receiving a Call
Depending on your network and
how your T3040II is prepro-
grammed, the radio will indicate
that you are receiving a call by
a ringing tone. The incoming
call may be either a normal call
or a group call.
NORMAL CALLNORMAL CALL
NORMAL CALL
A ringing tone sounds from the
speaker and the display indi-
cates the caller’s identity.
Accept the call by momentarily
squeezing the PTT key. You may
then hear the call setup indica-
tor (three short tones), and see
the WAIT message briefly. On
most networks the GO AHEAD
message appears immediately.
If you do not want to accept the call, press the Clear (5) key.
The call is cancelled.

17
GROUP CALLGROUP CALL
GROUP CALL
Two short tones sound and the caller’s identity is displayed
followed by a GO AHEAD message. The caller will then broad-
cast a message to all members of your group. It is not nor-
mally necessary for you to reply. (You may select the groups
to which you belong; see "Editing Group Membership".)
CALLER IDENTITY DISPLACALLER IDENTITY DISPLA
CALLER IDENTITY DISPLAYY
YY
Y
The caller’s identity is shown in the middle line of the display
window in one of the following forms. A “G” is also displayed
if this is a group call, or an “E” if it is an emergency call.
Message Type Example Explanation
Label VEHICLE7 The calling party is
one of your preset
numbers with a label
preprogrammed into
your radio.
Preset Number 8 The calling party is
one of your network-
stored preset num-
bers without a label
preprogrammed into
your radio.
Call Number 23 The calling party is in
the same fleet as your
radio, but is not pre-
programmed.
System Message O-FLEET The calling party is not
in the same fleet as
your radio and is not
preprogrammed.

18
Message Type Example Explanation
System Message PHONE A call from the PSTN
(Public Switched Tel-
ephone Network).
System Message PABX A call from the PABX
(Private Automatic
Branch Exchange).
Calling Procedure
When you have established a connection, hold the radio with
its microphone about 15 cm from your mouth and press the
PTT key. Pause briefly3, then speak clearly and release the key
when you have finished talking. Remember to say “Over” when
you finish speaking, so that the other party knows that you
have finished. Similarly, wait for the other party to say “Over”
before you press the PTT and begin speaking.
When you have finished conversing, end the call by pressing
the Clear (5) key.
STAT
α
CH
3 Pausing for up to one second ensures your first word is not cut off.

19
The length of a call may be limited by the network, or by your
radio. Normally, your radio displays the time remaining for the
call, in seconds. Depending upon the network and call type,
the display may show time used, or there may be no time dis-
play at all.
The network (or your radio) may also end the call if neither you
nor the other party transmits for some time.
Your radio normally sounds a series of five quick tones just
before it ends the call.
Reestablishing a Call
When a call has been ended, and no other function is active,
your T3040II displays the identity of the last party with which
you were conversing. This enables you to easily reestablish
the call. If you initiated the last call, this is termed Redial. If the
other party initiated the call, and your radio is able to identify
its number, it is Callback.
USING REDIALUSING REDIAL
USING REDIAL
When an outgoing call is terminated, the called party’s identity
is stored and displayed.
To redial this party, you can press the Enter (3) key.
After dialling, the call proceeds normally.
Table of contents
Other Tait Two-way Radio manuals

Tait
Tait TM8100 mobiles User manual

Tait
Tait Orca 5020 User manual

Tait
Tait TM8100 mobiles User manual

Tait
Tait T2000 SERIES II User manual

Tait
Tait TP8000 Series Use and care manual

Tait
Tait Orca 5000 User manual

Tait
Tait P25 User manual

Tait
Tait TM9100 User manual

Tait
Tait Orca Excel User manual

Tait
Tait Orca Excel User manual