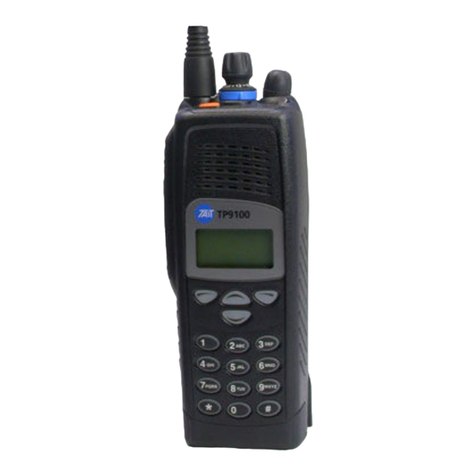
Tait Orca 5000 User manual

COMPL TING YOUR SOLUTION
5018 CONVENTIONAL
THE TAIT ORCA 5000
SERIES OF
POWERFUL,
SOPHISTICATED
PORTABLE RADIOS
ARE ESSENTIAL
FOR ORGANIZATIONS
SERIOUS ABOUT
MOBILE
COMMUNICATIONS.
USERS MANUAL
TAIT ORCA
5
000
SERIES

5
000
SERIES
Clear Key
Speaker
Display
Standard
Microphone
Right Arrow
Key
16-way Selector
Power/Vol me Control
PTT Key
(Press-To-Talk)
LED Indicator
Men Key
Left Arrow Key
F nction Key 1
F nction Key 2
F nction Key 3
Handset Microphone

1
1
Important Charging Information
■Turn your radio off before charging.
■New batteries must be fully charged before
first use.
■Replace or recharge your battery as soon
as the radio indicates the battery is low.
Tait Electronics Ltd has made every effort to ensure the accuracy
of the information in this manual. However, Tait Electronics Ltd
reserves the right to update the radio and/or this manual without
notice.
© Copyright Tait Electronics Limited January 2005. All rights
reserved.

2
2
Menu Map
Note: Some menu options may not be
available on your radio, depending on how it
has been programmed.
Queue
Select Channel
Select Bank
Send Selcall
Select Status
Alpha Symbols
User Settings
Low Pwr [Low Power Transmit]
Handset
Keylock
Economy
Squelch
Monitor
Sq Ovrd [Squelch Override]
Alert Settings
Level
Tones
Keytone
Display Settings
RSSI [Received Signal Strength Indicator]
Night
Adjust Contrast
Advanced Settings
Program Signal
Program FS-Group [Flexiscan]
HW Ver [Hardware Version]
FW Ver [Firmware Version]
Main DB
Version Info
Cal DB [Calibration Database]
Program Group
Main Menu

3
3
Contents
Contents
Menu Map ....................................................................... 2
Before Using Your Radio ........................................... 7
About Your Radio .............................................................. 8
For Your Safety .................................................................. 9
Preparing Your Radio for First Use .................................... 10
Installing and Removing the Battery Pack .................. 10
Installing a Belt Clip .................................................. 10
Removing a Belt Clip ................................................. 11
Getting Started ......................................................... 13
Using the Radio Controls ................................................. 14
Turning the Radio On and Off ................................... 14
Adjusting the Volume ............................................... 14
Using the 16-way Channel/Bank Selector .................. 15
Using the Press-To-Talk Key (PTT) .............................. 15
Using the Function Keys ............................................ 15
Using the Keypad ..................................................... 16
Understanding the Radio Indicators .................................. 17
LED Indicators ........................................................... 17
Audible Tones ........................................................... 18
Understanding Display Messages ..................................... 19
Active Modes ............................................................ 19
Current Operation .................................................... 19
Display Icons ............................................................. 19
Using the Menu ............................................................... 21
Entering Menu Mode ................................................ 22
Selecting and Exiting Menu Options .......................... 22
Scrolling through the Menu ...................................... 22
Changing Settings .................................................... 22
Exiting Menu Mode .................................................. 23
Making and Receiving Calls ..................................... 25
Accessing Channels and Channel Banking ....................... 26
About Channel Banking ............................................ 26
Selecting Channels and Channel Banks ..................... 26
Making a Call .................................................................. 29
Transmitting after Timing Out ................................... 29
Receiving a Call ................................................................ 30
Scanning for Channel Activity .......................................... 31
Scanning for a Busy Channel .................................... 31
Scanning Priority Channels ........................................ 31
Scanning for the Strongest Signal (Voting) ................ 32
Background Scanning (Flexiscan) ............................... 32
Deleting a Channel from a Scan Group ..................... 32
(Nuisance Delete)

4
4
Contents
Improving Your Radio’s Reception (Squelch) ..................... 33
Selecting a Factory Setting (City or Country) ............. 33
Hearing All Activity on a Channel (Squelch Override) . 34
Checking That a Channel Is Clear (Monitor) ..................... 35
Using the Menu ........................................................ 35
Using Other Ways to Activate/Deactivate Monitor ..... 36
Making and Receiving Different Types of Calls ..... 37
Making an Individual or Group Call (Selcall) ..................... 38
Making a Preset Call ................................................. 38
Receiving an Auto Acknowledge Message ................ 38
Resending Calls Automatically .......................................... 39
Deferred Calling ....................................................... 39
No Acknowledgement Retries ................................... 39
Receiving an Individual or Group Call ............................... 40
Responding to Missed Calls .............................................. 41
Using Immediate Callback ......................................... 41
Using Call Queuing ................................................... 41
Understanding How Calls Are Queued ...................... 42
Sending a Status Message ................................................ 44
About Status Messages ............................................. 44
Assigning a Status Message ...................................... 44
Calling a Telephone or a Remote Device (DTMF) .............. 46
Making a Preset Call ................................................. 46
Making an Emergency Call ............................................... 47
About Emergency calls .............................................. 47
Making an Emergency Call ....................................... 47
Activating the Automated Emergency Call Feature ..... 48
(Lone Worker)
Making Calls from a Predefined List (Alphanumeric Labels) 49
Using an Alphanumeric Sequence ............................. 49
Receiving Short Data Messages (SDMs) ................. 51
Reading Short Data Messages .......................................... 52
Exiting SDM Mode .................................................... 52
Changing Your Radio’s Settings ............................. 53
Changing Display Settings ................................................ 54
Activating Backlighting ............................................. 54
Adjusting Contrast .................................................... 54
Changing Operation Settings ........................................... 57
Extending Battery Life ............................................... 57
(Economy and Low Power Transmit Modes)
Choosing a Radio Microphone Setting ...................... 58
Locking the Keypad .................................................. 59
Bypassing Repeater Stations ...................................... 61
(Communicating Directly with Other Radios)
Changing Audible Tone Settings ...................................... 62
About Audible Tones ................................................ 62
Turning Key Tones On and Off .................................. 62
5
5
Contents
Turning Audible Tones On and Off ........................... 63
Adjusting the Level of Audible Tones ........................ 63
Changing Scanning and Voting Group Settings ............... 64
Configuring Scan Groups .......................................... 64
Changing Flexiscan Scan Group Settings .......................... 67
Configuring Flexiscan Scan Groups ........................... 67
Changing Subaudible Signalling Settings ......................... 69
Maintaining Your Radio .......................................... 71
Battery Charging and Conditioning .................................. 72

Using the Charger .................................................... 72
Charging the Battery ................................................ 73
Short Conditioning the Battery ................................. 74
Long Conditioning the Battery .................................. 75
Troubleshooting ....................................................... 75
Warning: Disposing of Used NiCd Batteries ............... 76
Preserving Battery Life ...................................................... 77
Caring for Your Radio ...................................................... 78
General Care ............................................................ 78
Troubleshooting ....................................................... 78
Options and Accessories .................................................. 79
Removing the Accessory Cover ................................. 79
D-Clip and Accessory Connectors ............................. 80
Specifications ................................................................... 81
Function Key Options ................................................... 83

6
6
Contents

8 Before Using Your Radio
8
Before Using Your Radio
About Your Radio
Your radio is programmed to suit your communication
needs. If you are unsure which features described in this
manual are available on your radio, consult your system
manager or the person who programmed your radio.
The custom features programmed for your radio can be
listed on the ‘Custom Settings’ page on the inside back
cover of this manual.
When you receive your radio, make sure all items you
ordered are included.
Typically, you should receive the following:
■Tait Orca portable radio unit.
■Battery pack.
■Antenna.
■User’s Manual (this document).
■Compliance Information (separate document).
Your Orca may also be supplied with accessory compo-
nents (see ‘Options and Accessories’ on page 79).
If any parts are damaged or missing, report this to your
local Tait dealer immediately.

Before Using Your Radio 9
9
Before Using Your Radio
For Your Safety
Please observe the following warnings and cautions to
ensure safe operation of your radio:
■When transmitting, do not hold the radio with its
antenna close to or touching any part of your body,
especially your face and eyes.
■Turn the radio off at petrol filling stations.
■Turn the radio off in the vicinity of explosive
devices, such as at a quarry that uses blasting
techniques.
■Do not use a handheld microphone or radio while
driving, or operating machinery.
■Only use Tait Orca battery chargers to charge the
radio’s battery.
■Avoid using unnecessarily high volume levels if
using the radio with an earphone or headset.
■Do not transmit within the frequency band 406 to
406.1 MHz. This band is reserved for use by distress
beacons.
■Do not immerse your Tait Orca radio in water.

10 Before Using Your Radio
10
Before Using Your Radio
Preparing Your Radio for
First Use
Before using your radio:
1Connect the antenna to the socket at the top of the
radio.
2Fully charge the battery (see ‘Using the Charger’ on
page 72).
Caution: It is highly recommended that the
battery also be put through a long condi-
tioning cycle after the initial charge and before
use.
3Install the battery pack (see ‘Installing and
Removing the Battery Pack’ on page 10).
4Install the belt clip if included with your radio (see
‘Installing a Belt Clip’ on page 10).
Installing and Removing the Battery Pack
To fit the battery pack to the radio:
1Insert the bottom edge of the battery pack into the
two slots at the back of the radio.
2Push the battery pack towards the radio. It should
snap into place.
To remove the battery pack:
1Push the battery catch down
2From the sides, pull the battery away from the radio.
Installing a Belt Clip
Most Tait Orca batteries are designed to be fitted with
belt clips.

Before Using Your Radio 11
11
Before Using Your Radio
Two types of belt clip are available:
■38 mm belt clip.
■55 mm spring-loaded belt clip.
For both types of belt clip, slide the belt clip into the two
slots on the top of the battery. Push down until the clip
snaps into place.
Removing a Belt Clip
Both belt clips have been designed so as to avoid
accidental removal. However, they can be replaced if
required.
To remove the 38 mm belt clip:
1Insert the end of a flat-blade
screwdriver under the edge of
the release tab (right) without
forcing it.
2Gently lift the release tab up,
then slide the belt clip away from the battery.
To remove the 55 mm belt clip:
1Lie the battery on a flat surface.
2Insert the end of a flat-blade screwdriver under the
release tab (shown below) and lift.
3Slide the belt clip away from the battery.
Battery Clip
Belt Clip
Battery
Slot
Slot
Release
Tab

12 Before Using Your Radio
12
Before Using Your Radio
Note: Should the small battery clip come
loose while removing either belt clip, it can
easily be refitted by sliding it into the slot at
the top of the battery until it snaps into place.
Belt Clip
Release Tab
Battery Clip
Battery

14 Getting Started
14
Getting Started
Using the Radio Controls
Your radio controls include the power/volume control,
16-way selector, function keys, keypad, menu, and
various radio indicators.
Some keys have more than one function assigned, which
can be accessed by a short or long keypress:
■A short keypress is defined as less than 1 second.
■A long keypress is defined as more than 1 second.
You may need to experiment to become familiar with
the duration of short and long keypresses.
Turning the Radio On and Off
To turn the radio on, rotate the power/volume control
clockwise. To turn the radio off, rotate the control
counter-clockwise.
Once the power-up sequence is complete, the LED
flashes red at fast flash rate twice, and the radio gives two
short, medium-pitched beeps.
Adjusting the Volume
Once the radio is on, rotate the power/volume control
clockwise to increase volume. To decrease volume,
rotate the control counter-clockwise. Turning the
power/volume control also adjusts the level of the
audible tones (see ‘Audible Tones’ on page 18).
The volume may also be able to be adjusted using the
function keys when in handset mode (see ‘Adjusting
Handset Volume’ on page 59).
Note: To preserve battery life, it is recom-
mended that you turn off the radio when it is
not in use.

Getting Started 15
15
Getting Started
Using the 16-way Channel/Bank Selector
The 16-way selector accesses channels, scan groups or
channel banks, depending on how the radio has been
programmed. See ‘Selecting Channels and Channel
Banks’ on page 26 for more information.
Note: The 16-way selector may have been
disabled when the radio was programmed. In
this case, channels can only be accessed using
the menu.
Using the Press-To-Talk Key (PTT)
The PTT (press-to-talk) key is located on the side panel.
Press this key to transmit each time you talk. To receive,
release the PTT key.
Using the Function Keys
The function keys provide quick access to selected
functions. The functions will have been assigned to a
function key when your radio was programmed (see
‘Function Key Options’ on page 83 for a list of features
that can be assigned to the function keys).
Each function key can have a function assigned to a short
and long press.
The function keys are:
■Function keys 1 and 2, located on the side panel.
■Function key 3, located on the front panel, under-
neath the display (far left).
■External keys 1 and 2, located on the external
microphone.
Use the panel provided in the back of this manual to
record the function that has been assigned to each
keypress on your radio’s function keys.
The F3 key may alternatively be programmed to provide
quick access to up to three user setting menu options. In
this case, the F3 key will not have a short and long press

16 Getting Started
16
Getting Started
option. See ‘Changing Operation Settings (User Settings
Menu)’ on page 57.
To access menu options using the F3 key:
■Press the F3 key. Pressing once accesses the last
selected option, while each subsequent press accesses
the next option, moving in a continuous loop.
Using the Keypad
The key functions for your radio are outlined in the
following table.
Symbol Key Name Function
FF3
(function
key)
Short and long press: Accesses
programmed functions.
Single press: Provides a ‘shortcut’
to up to three user setting menu
options (see ‘Using the Function
Keys’ on page 15 above).
Left arrow Short: Scroll left.
Long: Scroll left continuously.
Right
arrow
Short: Scroll right.
Long: Scroll right continuously.
Clear Short: Cancel or back (menu
mode); delete single character;
cancel call.
Long: Delete (menu mode); exit
without saving (menu mode);
cancel call.
Enter Short: Select a function, or toggle a
function on/off (menu mode); dial
or send a message.
Long: Enter/exit mode or menu.

Getting Started 17
17
Getting Started
Understanding the Radio
Indicators
The radio’s LED indicator and audible tones provide
you with information on the radio’s status.
The meaning of the radio indicators is summarised on
the ‘Radio Indicators’ page on the inside back cover of
this manual.
LED Indicators
The radio’s LED is the main indicator for displaying the
state the radio is in.
In this manual, one flash every 2 seconds is referred to as
‘slow flash rate’, one flash every second as ‘medium flash
rate’, and four flashes every second as ‘fast flash rate’.
Colour Flash Rate Meaning
Red Steady Transmitting.
Red Slow Battery low. Radio will also
emit low-pitched beeps.
Recharge or replace as soon
as possible.
Red Medium Low power transmit mode
active.
Red Fast Radio is stunned. Radio will
also emit high-pitched
beeps. Contact your
despatcher.
Red Two fast flashes The power-up sequence is
complete. Radio will also
emit two medium-pitched
beeps.
Green Steady Channel busy.
Green Slow Economy mode active.
Green Medium Monitor or squelch override
active.

18 Getting Started
18
Getting Started
Audible Tones
Your radio uses a variety of beeps and tones to
supplement the information provided by the LED.
The most common audible tones are summarised on the
‘Radio Indicators’ page on the inside back cover of this
manual.
Your radio may also have been programmed so that
whenever you press a key, the radio beeps to indicate
whether or not the action is permitted:
■Permitted: Short, medium-pitched beep.
■Not permitted: Long, low-pitched beep.
Note: Audible tones may have been disabled
when your radio was programmed, and a
function key assigned to turn audible tones on
and off.
Amber Steady Radio is scanning or voting a
group of channels for
activity or greatest signal
strength.
Amber Slow Repeater talkaround active.
Amber Medium Activity detected on one of a
group of channels being
scanned.
Amber Fast A Selcall call has been
received.
Red/
Green Slow Handset mode active.
Red/
Green Fast Radio programmed incor-
rectly or faulty. Contact your
Tait dealer.
Colour Flash Rate Meaning
Other manuals for Orca 5000
1
This manual suits for next models
1
Table of contents
Other Tait Two-way Radio manuals

Tait
Tait TM9100 User manual

Tait
Tait T2000 SERIES II User manual

Tait
Tait TP9310 User manual

Tait
Tait Orca Excel User manual

Tait
Tait T3010II User manual

Tait
Tait T525 User manual

Tait
Tait TM8100 mobiles User manual

Tait
Tait TP8000 Series Use and care manual

Tait
Tait Orca 5020 User manual

Tait
Tait TP7110 User manual