3
AU
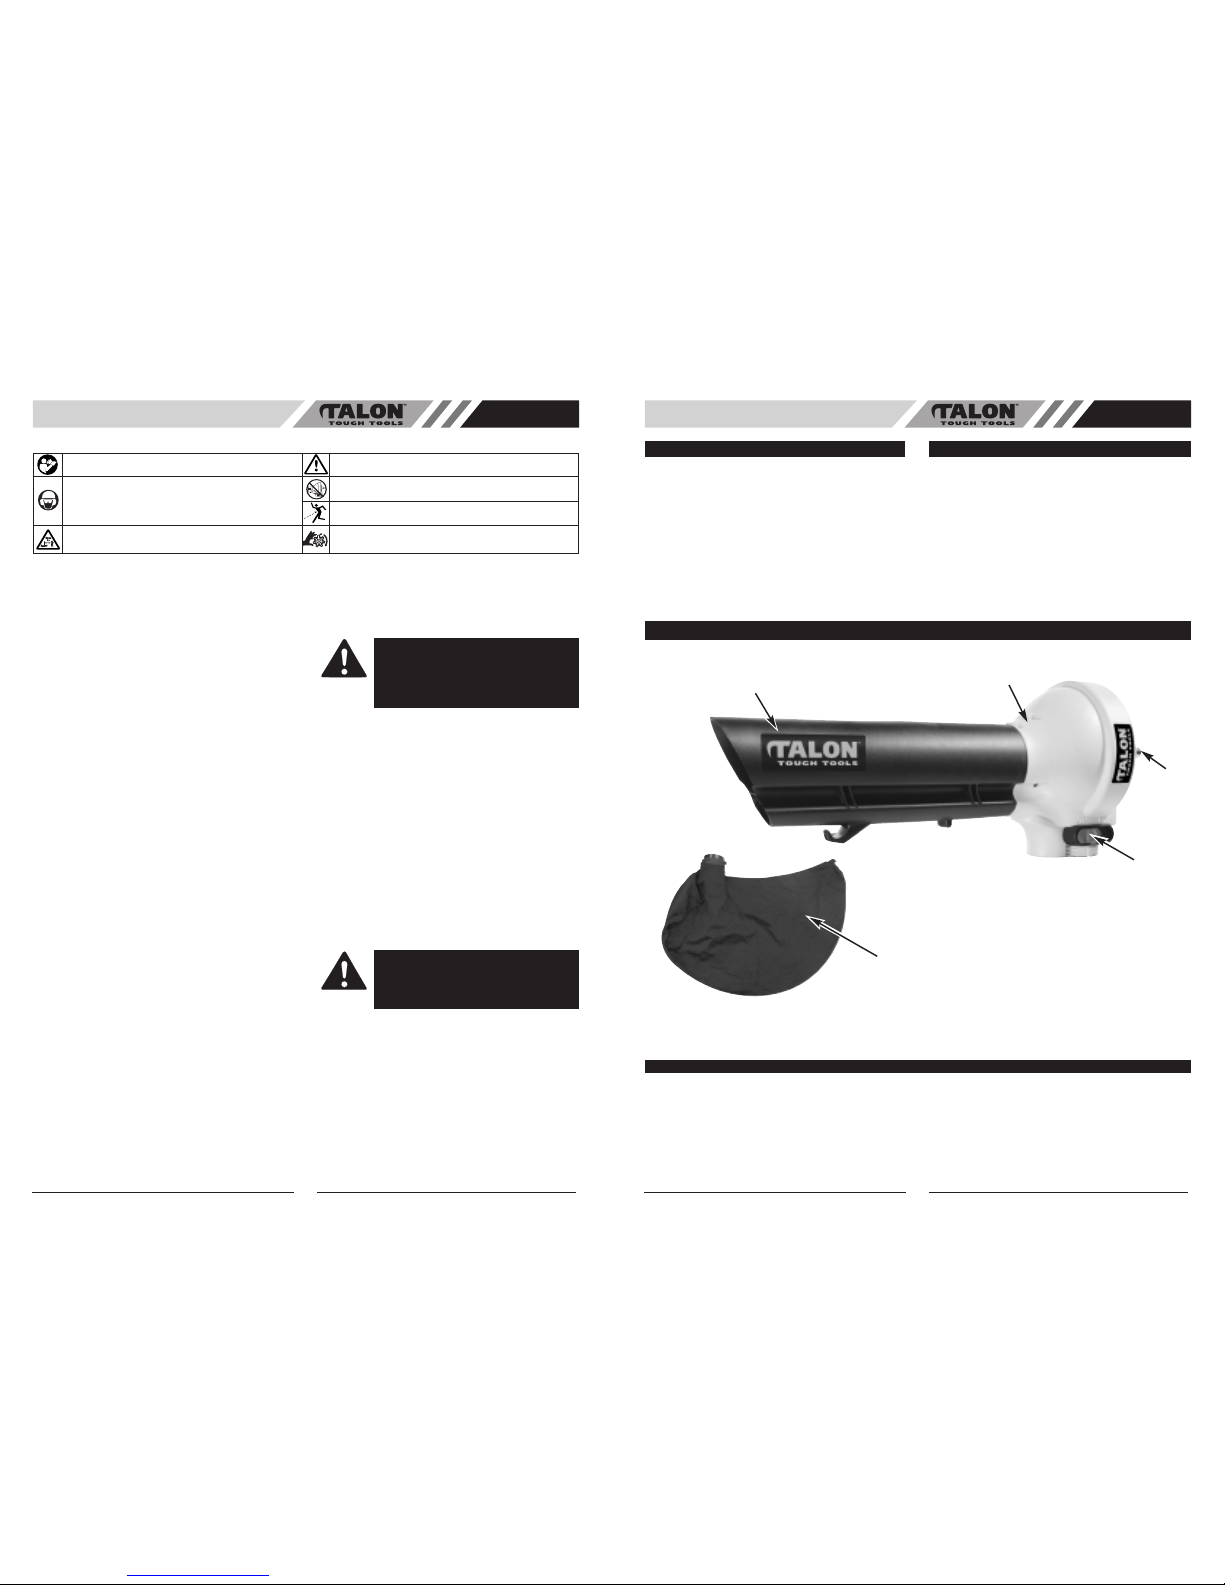
1. Vacuum/Blower Tube
2. Housing
3. Vacuum/Blower Button
4. Drive Shaft
5. Vacuum Bag
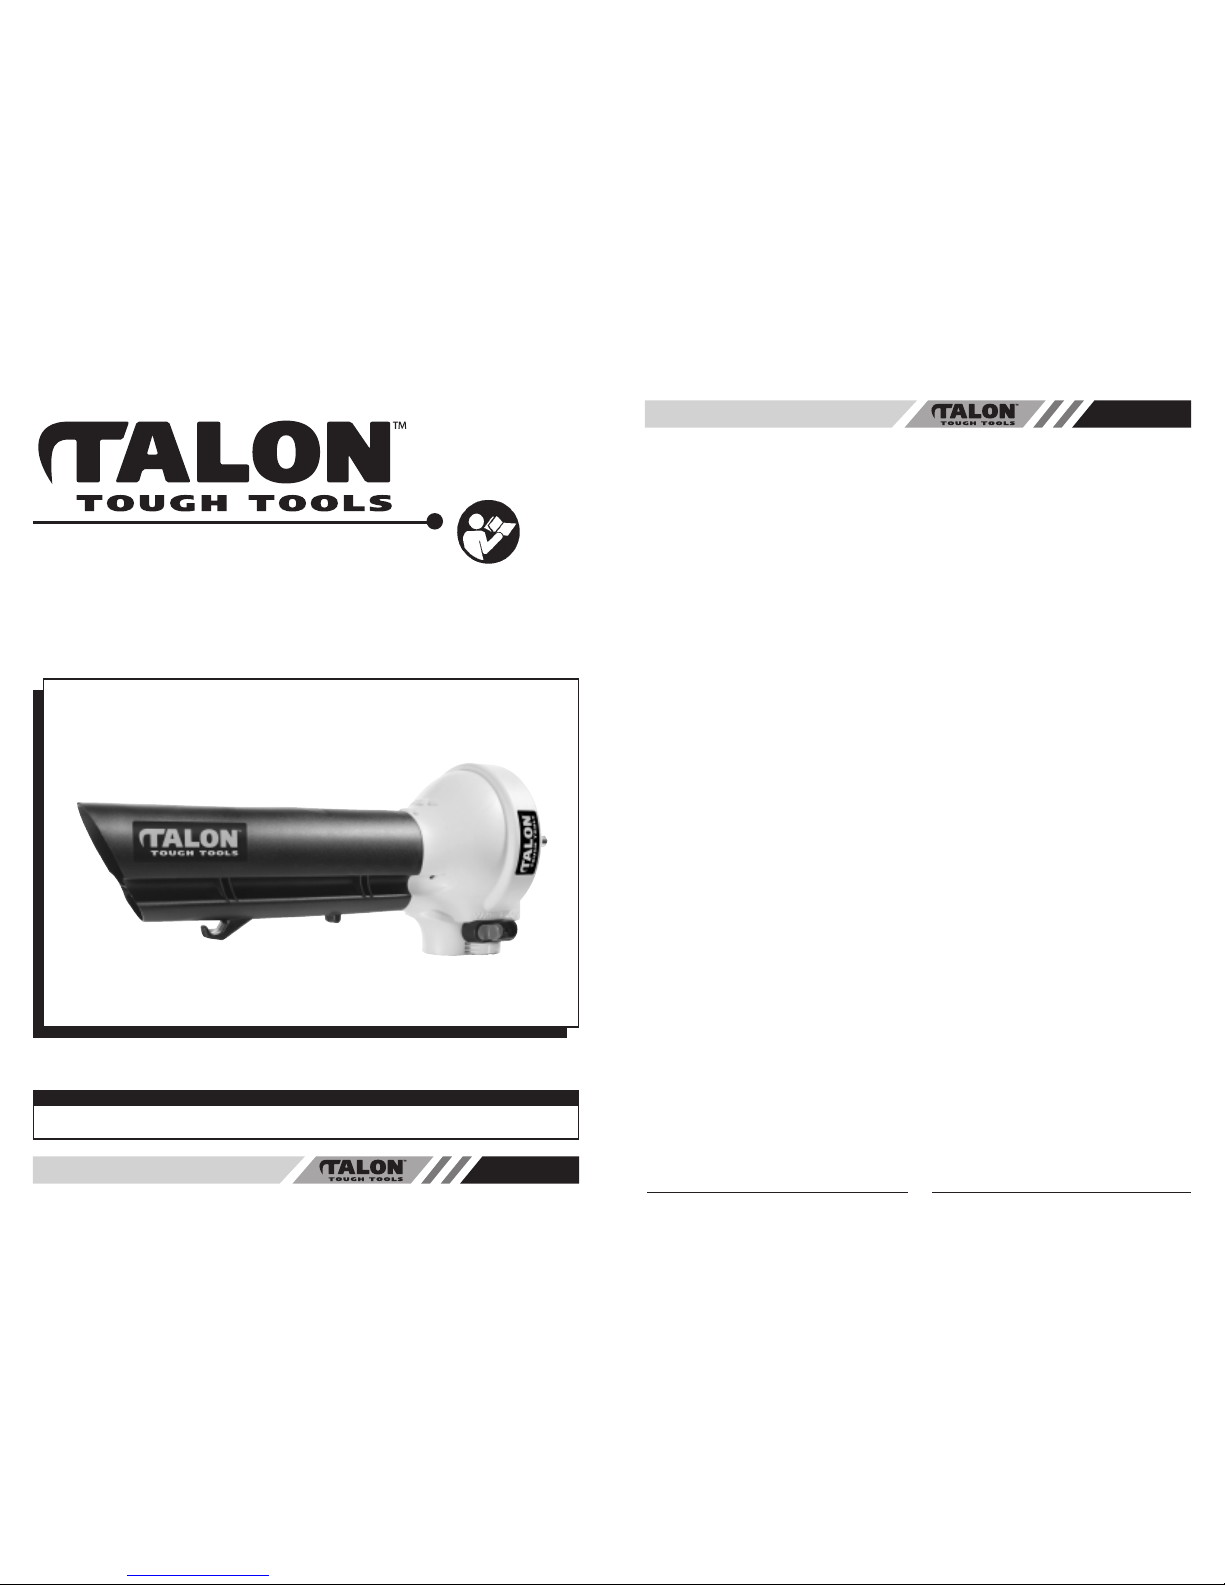
SPECIFICATIONS
Max. Air Velocity . . . . . . . . . . . . . . . . . . . . . . . . . . . . . . . . . . . . . . . . . . . . . . . . . . . . . . . . . . . . . . . . . . . . . . . . . . .195km/h
Max. Air Volume . . . . . . . . . . . . . . . . . . . . . . . . . . . . . . . . . . . . . . . . . . . . . . . . . . . . . . . . . . . . . . . . . . . . . . . . . .8.5cm/min
Bag Capacity . . . . . . . . . . . . . . . . . . . . . . . . . . . . . . . . . . . . . . . . . . . . . . . . . . . . . . . . . . . . . . . . . . . . . . . . . . . . . . .35 Litre
Mulching Ration . . . . . . . . . . . . . . . . . . . . . . . . . . . . . . . . . . . . . . . . . . . . . . . . . . . . . . . . . . . . . . . . . . . . . . . . . . . . . . . .8:1
Weight (Attachment) . . . . . . . . . . . . . . . . . . . . . . . . . . . . . . . . . . . . . . . . . . . . . . . . . . . . . . . . . . . . . . . . . . . . . . . . . . .1.5kg
GENERAL IDENTIFICATION
12
4
3
5
1. Avoid spilling the fuel when refueling.
2. Do not smoke while fueling the power unit.
3. Fuel the power unit in a well-ventilated area.
4. Move away from the fueling area when starting the
unit.
5. Do not wear rubber or other insulated gloves when
operating the unit to avoid static electricity shock.
6. Store in an area free of potential fuel vapor ignition
sources such as open flames (pilot lights) or electrical
sparking devices (switches electric motors).
7. Turn off the engine and let it cool before refueling or
before putting the unit in storage.
1. Do not use in rain.
2. Avoid dangerous environments, never operate power-
head in damp or wet conditions.
3. To reduce the risk of electric shock, do not expose the
unit to rain or operate powerhead on wet ground.
4. Always unplug the powerhead and allow it to cool
before putting it into storage. Store indoors.
5. Always unplug the unit when not in use, and before
performing any maintenance or repairs.
SAFETY WARNINGS FOR GAS BLOWER/VAC SAFETY WARNINGS FOR ELECTRIC BLOWER/VAC
2
GENERAL SAFETY RULES AU
WARNING! When using garden tools, basic safety precautions, including the following, should always be followed to
reduce the risk of serious personal injury and/or damage to the unit.
Read all these instructions before operating this product and save these instructions.
•WHAT TO DO
READ YOUR USER MANUAL AND ALL SUPPLE-
MENTS (IF ANY ENCLOSED) THOROUGHLY BEFORE
OPERATING YOUR UNIT.
1. WEAR CLOSE FITTING, TOUGH WORK CLOTHING
that will provide protection, such as long slacks or
trousers, safety work shoes, heavy duty work gloves,
hard hat, a safety face shield, or safety glasses for eye
protection and a good grade of ear plugs or other
sound barriers for hearing protection.
2. REFUEL IN A SAFE PLACE. Open fuel cap slowly to
release any pressure which may have formed in fuel
tank. Always wipe unit of fuel or oil spills before start-
ing. To prevent a fire hazard, move at least 10 feet (3
meters) from fueling area before starting.
3. TURN UNIT OFF before setting it down, and also
before installing or removing attachments.
4. KEEP ALL SCREWS AND FASTENERS TIGHT and
the unit in good operating condition. Never operate
this equipment if it is improperly adjusted or not com-
pletely and securely assembled.
5. KEEP HANDLES DRY, clean and free of fuel mixture.
6. STORE EQUIPMENT AWAY FROM POSSIBLE IGNI-
TION SOURCES, such as gas-powered water
heaters, clothes dryers, or oil-fired furnaces, portable
heaters, etc.
7. ALWAYS KEEP the engine free of debris build-up.
8. OPERATION OF EQUIPMENT should always be
restricted to mature and properly instructed
individuals.
9. ALL PERSONS WITH RESPIRATORY PROBLEMS
and persons operating blower in very dusty environ-
ments, should wear a dust particle mask at all times.
Paper dust masks are available at most paint and
hardware stores.
•WHAT NOT TO DO
1. DO NOT SMOKE while refueling or operating equip-
ment.
2. DO NOT OPERATE UNIT WITHOUT A MUFFLER
and properly installed muffler shield.
3. DO NOT TOUCH or let your hands or body come in
contact with a hot muffler or spark plug wire.
4. DUE TO THE DANGER of exhaust fumes, never oper-
ate blower in a confined or poorly ventilated area.
5. NEVER POINT BLOWER in the direction of people,
animals, buildings, automobiles, or windows, etc.
6. DO NOT operate unit without inlet cover installed to
prevent contact with impeller.
7. DO NOT set a hot engine down where flammable
material is present.
8. DO NOT OPERATE UNIT FOR PROLONGED PERI-
ODS.Rest periodically.
9. DO NOT OPERATE UNIT WHILE UNDER THE
INFLUENCE OF ALCOHOL OR DRUGS.
10. DO NOT operate your unit near or around flammable
liquids or gases whether in or out of doors. An explo-
sion and/or fire may result.
11. DO NOT WEAR loose clothing, scarfs, neck chains,
unconfined long hair, and the like. Doing so could
cause injury associated with objects being drawn into
the rotating parts.
12. DO NOT refuel a running engine or an engine that is
hot
WARNING: DO NOT USE ANY OTHER
FUEL than that recommended in your manu-
al. Never use gasoline unless it is properly
mixed with 2-cycle engine lubricant.
Permanent damage to engine will result,
voiding manufacturer’s warranty.
WARNING: DO NOT ADD, REMOVE OR
ALTER ANY COMPONENTS OF THIS
PRODUCT. Doing so could cause personal
injury and/or damage the unit voiding the
manufacturer’s warranty.
Meaning of symbols marked on the product
Read the user manual before using the machine
Whenever the machine is in use, safety goggles
must be worn to protect against flying objects. Ear
protection must be used to protect the operators
hearing
Warning! Danger
Never operate blower without tube installed
Keep people or animals at least 15m away from
the machine during operation
Do not operate unit without proper attachments
and guards in place
Keep hands away from blade