4
GB GB
5
1. Always work moving away from solid objects such as
walls, large stones, automobiles and fences.
2. Clean spaces with corners by starting in corners and
moving outward to straight areas to prevent an
accumulation of debris which could fly into face.
3. Be careful when working near plants. The force of air
could damage young plants.
4. Uses for your blower:
•Sweeping debris or grass clippings from
driveways, sidewalks, patios, parking lots.
•Gathering grass clippings, straw or leaves into
piles.
•Removing debris from corners, around joints and
between bricks.
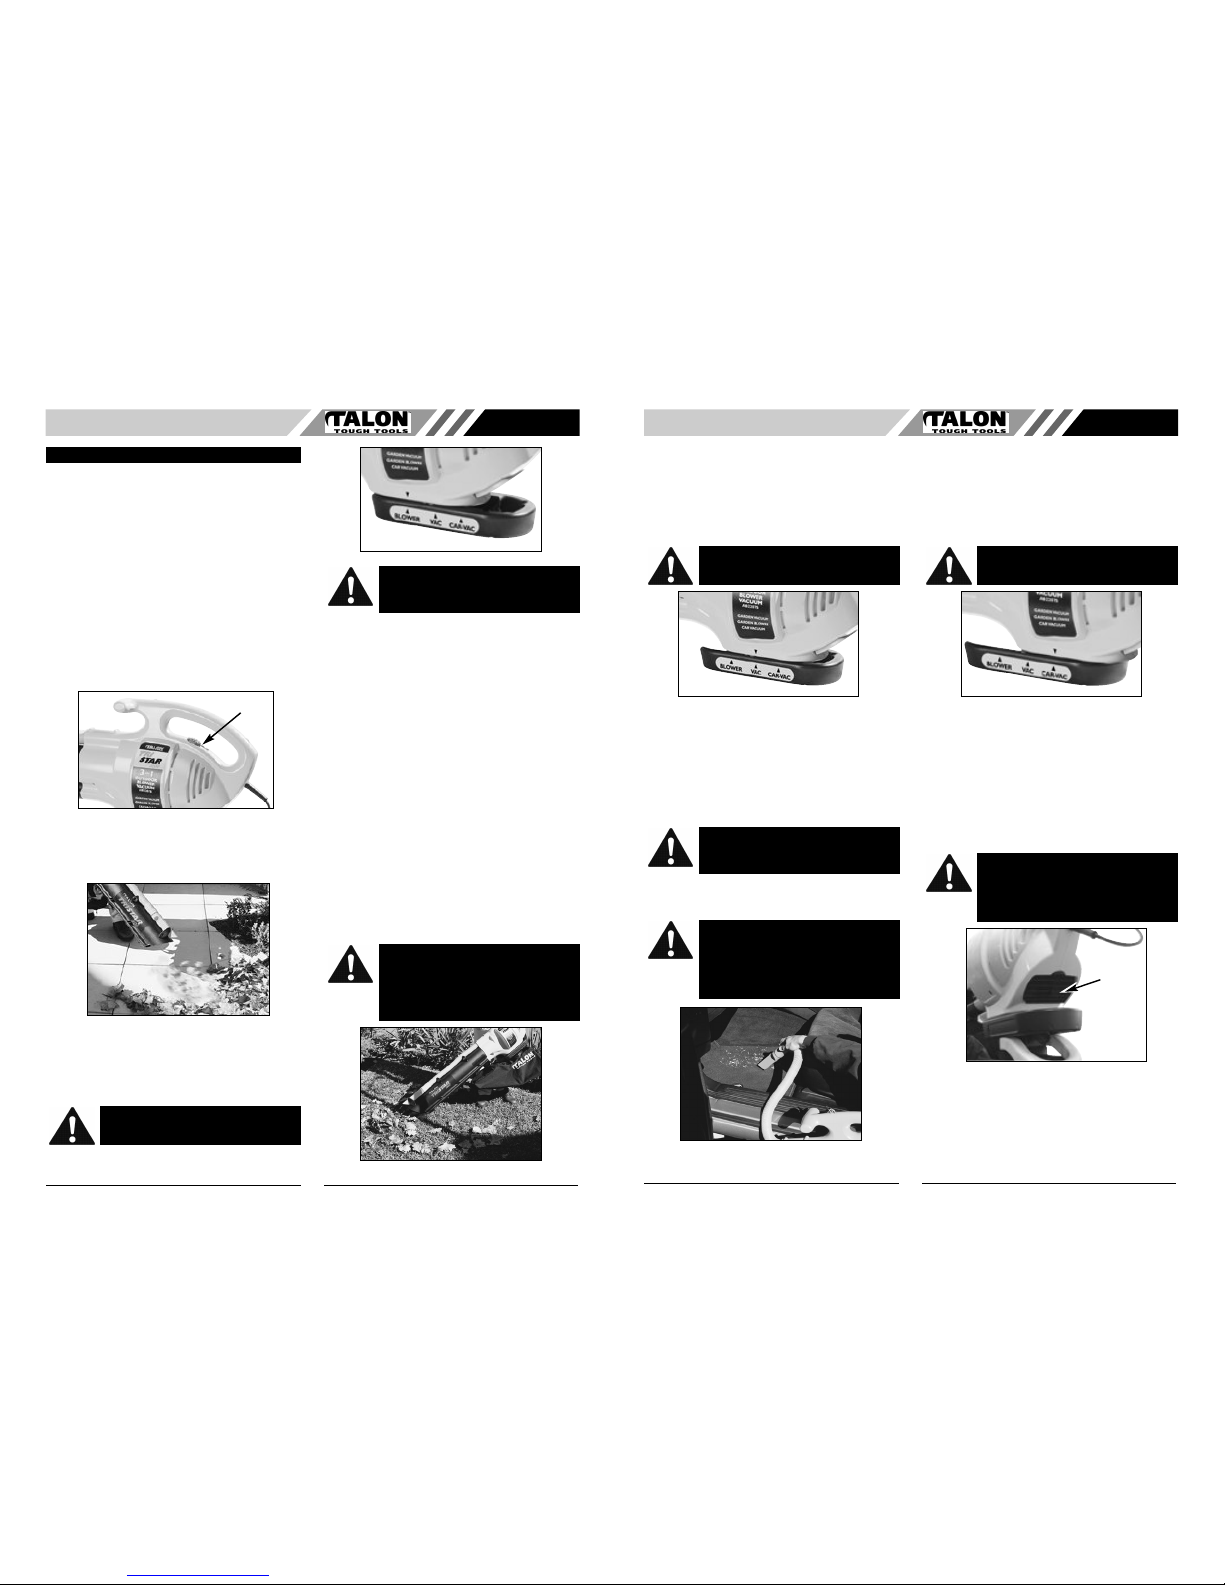
•SWITCH
To operate machine slide the two speed on/off switch for-
wards. Position “1” is low speed. Position “2” is high
speed. To stop, return switch to “OFF” position. (Fig. 4)
GARDEN BLOWER OPERATION
Your machine is designed to easily blow leaves and gar-
den debris from patios, driveways, paths, lawns and from
under hard to reach places where debris may accumulate.
1. Before using your tool review all safety instructions on
page 1 and 2 of this user manual.
2. To set your unit in garden blower mode, first switch
machine off, then move the mode control slide to
“BLOWER”. (Fig. 5A)
DO NOT operate the blower with other people or animals
in the immediate vicinity. Allow a minimum of 30 feet (9
meters) between operator and other people or animals.
3. Place left hand on front handle and right hand on rear
handle. Operate switch using fingers of right hand.
Switch unit on to begin blowing.
4. Wear a dust mask when operating in dry or dusty
areas.
5. Always work by moving away from solid objects such
as wails, large stones and fences. Never blow debris in
the direction of bystanders, plants, glass etc.
6. Avoid working into confined corners or spaces as the
force of air could cause debris to fly upwards into face.
7. Stand at a distance that will allow you to control the
direction of blown debris.
8. Your machine is fitted with a two speed switch to help
control air speed under different use situations. Low
speed can be used when blowing material off smooth
surfaces or in an enclosed area where more control is
required. High speed should be used when blowing
debris off grass or other rough surfaces.
GARDEN VACUUM OPERATION
Your machine will collect a wide variety of garden debris
including leaves, grass clippings and small twigs. Larger
material will be broken down to reduce its volume and
minimise bag emptying.
OPERATION
Fig. 4
Switch
Fig. 5
WARNING: Machine must be switched off
before mode change slide is adjusted.
Fig. 5A
WARNING: DO NOT OPERATE HIS TOOL
WITH VACUUM BAG REMOVED. Serious
injury from the fan or flying debris could
result.
WARNING: NEVER OPERATE IN VACUUM
FUNCTION WITHOUT VACUUM BAG
PROPERLY ATTACHED. FLYING DEBRIS
COULD CAUSE SERIOUS INJURY TO
OPERATOR OR BYSTANDERS. ALWAYS
ENSURE VACUUM BAG ZIPPER IS
CLOSED BEFORE OPERATING UNIT.
Fig. 6
DO NOT vacuum hot ash, cigarettes or cigars, rocks,
glass, tin cans or other hard or sharp objects. Damage to
your machine or personal injury may result.
1. Before using your tool review all safety instructions on
page 1 and 2 of this user manual.
2. To set your unit in garden vacuum mode, first switch
machine off, then move the mode control slide to
“VAC”. (Fig. 6A)
3. Wear a dust mask when collecting dry or dusty materi-
al.
4. Place your left hand on the front handle and your right
hand on the rear handle. Operate switch using fingers
of right hand. Switch unit on to begin vacuuming.
5. Always work by moving in from the edge of a pile of
debris. Keep the vacuum nozzle 50-100mm above the
material being collected to allow proper air flow. (Fig. 6)
6. Swing unit from side to side to vacuum debris.
CAR VACUUM OPERATION
The unique car vacuum function and nozzles will clean
inside cars and other vehicles quickly and easily.
DO NOT vacuum hot ash, cigarettes or cigars, rocks,
glass, tin cans or other hard or sharp objects. Damage to
your machine or personal injury may result.
1. Before using your tool review all safety instructions on
page 1 and 2 of this user manual.
2. To set your unit in car vacuum mode, first switch
machine off, then move the mode control slide to “CAR-
VAC”. (Fig. 7A)
3. Place machine on flat surface adjacent to car. (Fig. 7)
4. For best performance it is recommended that the car
vacuum function should only be used on high speed
(switch position 2).
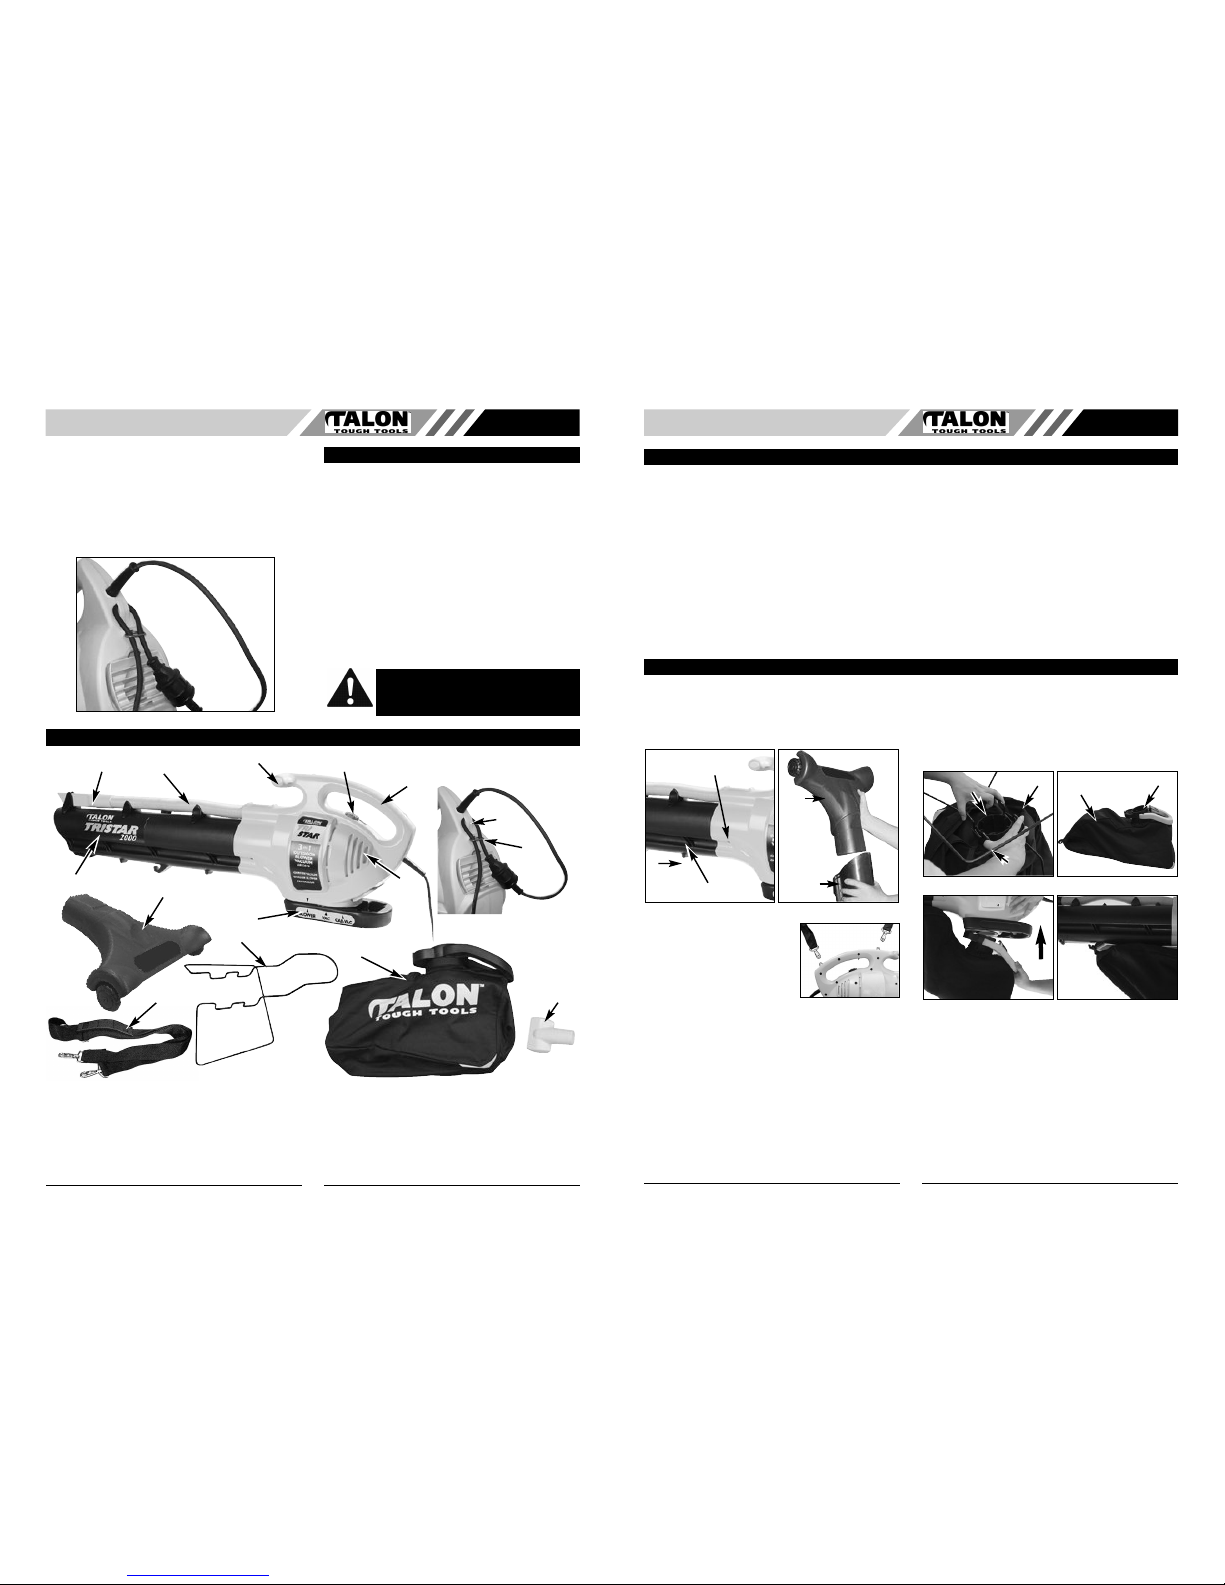
5. Un-clip crevice tool and flexible hose from
vacuum/blower tube.
6. Flexible tube will stretch to 2 times its stored length to
reach inside vehicles.
7. Use the T-nozzle (A) accessory (supplied) to clean
large flat surfaces such as floors or luggage areas.
(Fig. 7B)
• SPEED-CLEANER (Model AB2207S
Supplied) (Model AB2206 Optional)
Place Speed Cleaner Head into Vacuum/Blower tube as
outlined on page 3 (Fig. 1B).
The speed cleaner is designed to collect small pieces of
debris, such as grass clippings and small leaves, from flat
surfaces such as patios, decks and pathways.
Fig. 6A
CAUTION: To avoid clogging vacuum tube
DO NOT place end of tube into a pile of
debris. To clear blockage switch off machine,
unplug cord and clear blockage.
WARNING: NEVER OPERATE IN CAR
VACUUM MODE WITHOUT VACUUM BAG
PROPERLY ATTACHED. FLYING DEBRIS
COULD CAUSE SERIOUS INJURY TO
OPERATOR OR BYSTANDERS. ALWAYS
ENSURE VACUUM BAG ZIPPER IS
CLOSED BEFORE OPERATING UNIT.
Fig. 7
WARNING: Machine must be switched off
before mode change slide is adjusted.
Fig. 7A
Fig. 7B
WARNING: When the machine is operating
in the car vacuum function the mode change
slide cannot be moved with the switch on.
Attempting to move the mode change slide
with machine switched on will permanently
damage slide mechanism.
A
WARNING: Machine must be switched off
before mode change slide is adjusted.