manuals.online logo
Brands
  1. Home
  2. •
  3. Brands
  4. •
  5. Tamron
  6. •
  7. Camera Lens
  8. •
  9. Tamron A18 User manual

Tamron A18 User manual

TLM-EFDSINPC-A
18-U-0707
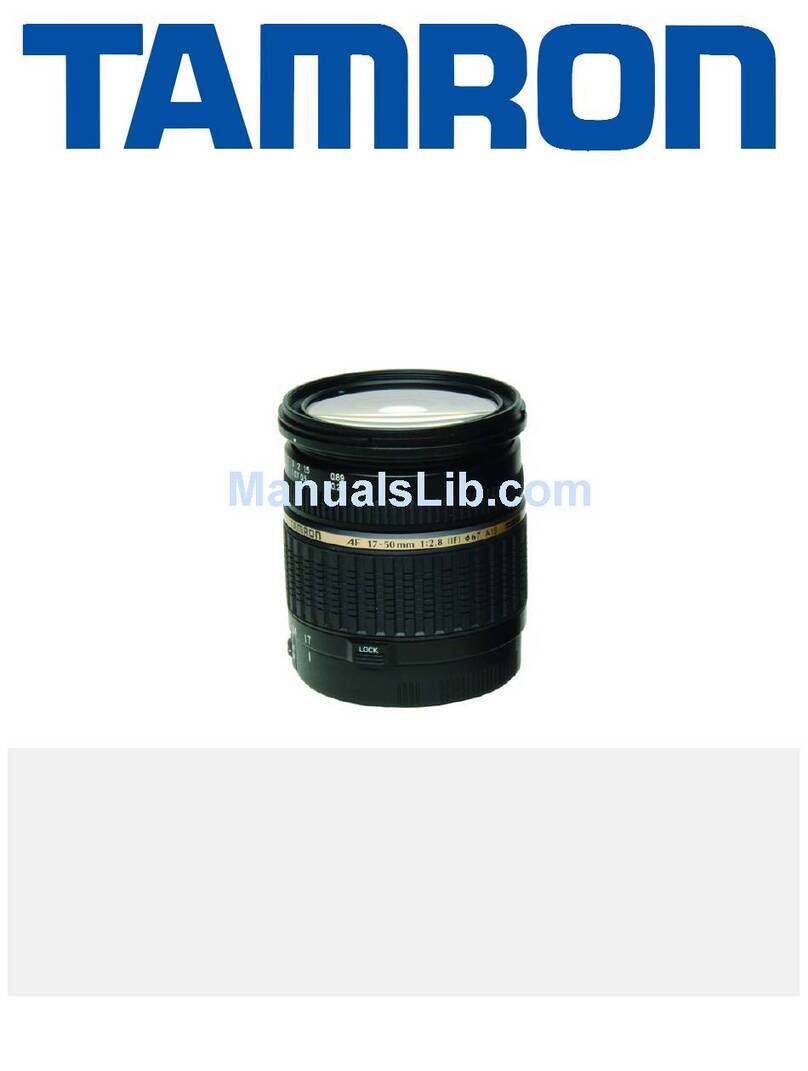
TAmROn
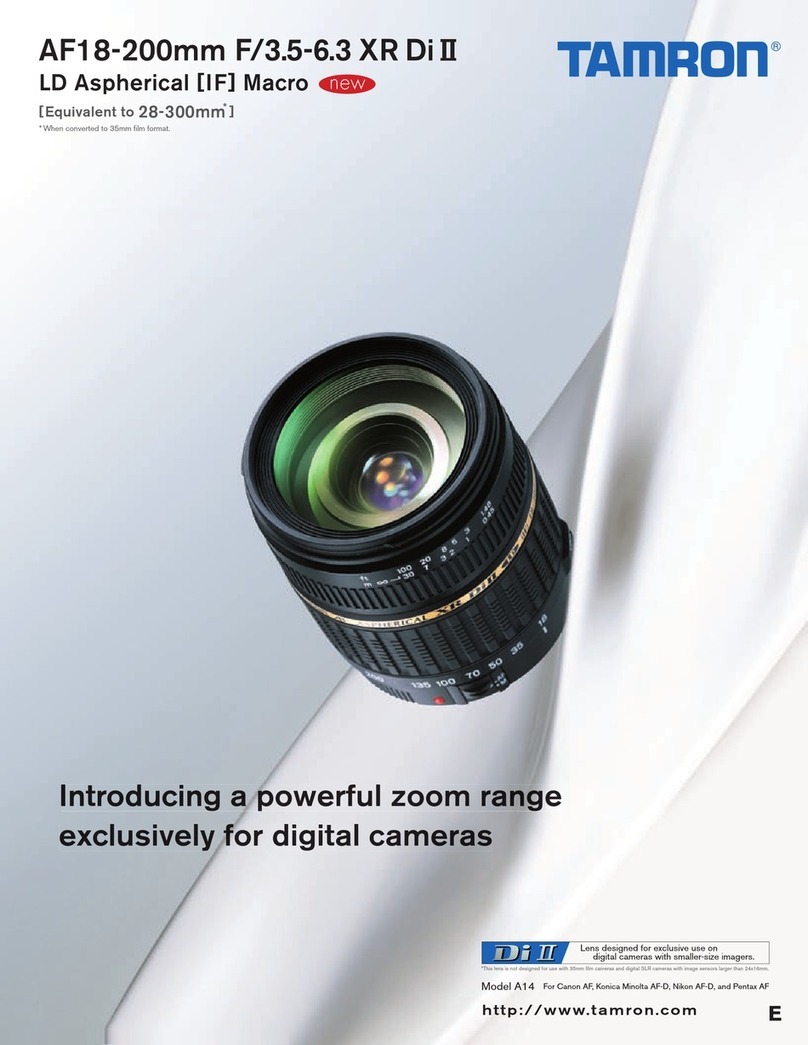
•AF18-2S0mm F/3.S-6.3
Din
LD Aspherical [IF] Macro (Model A18)
[JJ
Nikon
*A18Nn: Built-in
Motor
A!8Nn:
;Ajl"l,!!i;JJ~l
1111705035
18
Canon
~o~
~~
Focusing Zooming
~~'~
13
11
*
Konica
Minolta a
Pentax
•
100
71
511
35
18
Fig.13l
Ziehen
Sie
Zoom-Lock
rUckwarts,
urn
den
Zoom-Ring
zu
varriegeln.
Poussez
Ie
bouton
de-blocage
du
zoom
vers
Ie
boit/ef
pour
bloquer
la
bague
de
reglage
du
loom.
Tire
hacia
atnis
del
blOQueo
del
zoom
para
bloquear
el
aoilla
del
loom.
Trek
de
knop
naar
achteren
om
de
zoomring
te
vergrendelen.
Puxe
0
batao
de
travagem
do
zoom
para
travar
0
anal
de
loom.
Spostate
alnndietro
l'interruhore
di
blocco
delle
zoom
per
blaecare
'0
loom.
IlJI1J
~~~3~~.~~~~.~~~a.
Fig.
I!)
Driicken
Sie
Zoom-lock,
urn
den
Zoom-Ring
freizugeben.
Poussez
Ie
bouton
de
blocage
du
loom
pour
liberer
la
bague
de
(&glage
du
loom.
Empuje
el
bloqueo
del
loom
para
llberar
el
aoilla
del
zoom.
Duw
de
knop
naar
voren
om
de
zoomring
Ie
ontgrendelen.
Empurre
0
botiio
de
travagem
do
loom
para
libertar
0
anel
do
loom.
Spingele
in
avanti
l'interruttore
di
blocco
della
zoom
per
sbloccarlo.
Ilf(!l
IljJll!".,.>fl'<
..
"itll!",a.
Fig.
lSI
&
I6J
canoo
AF-umschahung
ON
Oinks),
OFF
(rechls).
canoo
AF
:
seiecteur
ON
[marche)
(gauche),
OFF
[arret]
(drolle).
Selector
AF
canon
ON
(izquierda),
OFF
(derecha).
Canon
AF-schakelaar
AAN
(links)
en
UIT
(rechts).
Canon
AF
batao
ON
(esquerda),
OFF
(direita).
Interruttore/commutaatore
AF
su
obiettivi
canon
EOS
~ON"
(sicistra),
"OFF"
(destra).
1Il1D,,[l]
Canon
"#J.~(AF}
jf~.
liff
(ON),
ti:X:
tOFt')
CE
•The «( Marking is adirective conformity mark
of
the European Community (EC).
•Das «-Zeichen entspricht der EC Norm.
•
La
marquage
«(
est
un
marquage de conformite
ala
direcive CEE (CE).
•
La
marca «(es marca de conformidad segun directiva de la Comunidad Europea (CE).
·11
marchio «(aUesta la conformila alia directtiva della
ComunM
Europea (CEE).
•«(
CE
ff:;I;.l1<;r-!'f{tI!J<I!i:ltFoli*(EC)
Iliff:
TAMRON CO., LTD.
<Overseas Sales Dept.>
1385, Hasunuma, Minuma-ku, Sailama-shi, Sallama 337-8556 JAPAN
Tel:
+81-48-684-9339
Fax:
+81-48-684-9349
The EEC Conformity Report applies to the
®Council Directive
9813361EEC,
92131/EEC,
~
931681EEC
and is used by Tamron Co., Ltd.,
manufacturer of this product.
ENGLISH
•
Lengths
and
weights
listed
in
lens
specifications
are
for
lenses
wJth
Nikon
mounts.
•
Features
and
cosmetic
designs
of
lenses
listed
in
this
owner's
manual
may
be
revised
without
notice.
Thank
you
for
purchasing
the
Tamron
lens
as
the
latest
addition
to
your
photographic
equipment.
Oi
II
lens
(Digitally
Integrated)
series
are
designed
for
digital
SLR
cameras
with
image
sensors
equivalent
to
APS-C
size.
Before
using
your
new
lens,
please
read
the
contents
of
this
Owner's
Manual
thoroughly
to
familiarize
yourself
with
your
lens
and
the
proper
techniques
for
creating
the
highest
quality
images
possible.
With
proper
handling
and
care,
your
Tamron
lens
will
give
you
many
years
of
photographing
beautiful
and
exciting
pictures.
" •
Explains
precautions
that
help
to
prevent
problems.
/;
•
Explains
things
you
should
know
in
addition
to
basic
operations.
iD
Lens hood
~Hood attaching alignment mark
@Hood attaching indicator
@Filter ring
@Hood attaching bayonet ring
@Distance index
(J)
Distance scale
@Focusing ring
@Zooming ring
lID>
Focal length scale
<lD
Zoom index mark
il2>
Zoom lock switch
(A1B:
Figs. ~
&~)
@Lens mount/Lens mount contacts (Nikon)
<H>
AF-MF altering switch (Canon, Nikon Fig.
15]
&
1llJ)
<l5>
Lens attachment mark
•
How
to mount the lens
Removing
the
rear
cap
of
the
lens.
Align
the
Lens
attachment
mark
<l5>
on
the
lens
barrel
with
its
counterpart
on
the
camera
mount
and
insert
the
lens.
Rotate
the
lens
clockwise
until
it
click-locks.
For
Nikon
models,
align
the
lens
attachment
mark
with
the
dot
on
the
camera
and
rotate
the
lens
counter-clockwise
until
it
click-locks.
•
How
to detach the lens
Pressing
the
lens
release
button
on
the
camera
down,
turn
the
lens
counter-clockwise
(in
case
of
Nikon
lens,
clockwise),
and
lift
the
lens
off
the
camera's
lens
mount.
& .
The
image
circles
of
Di
!I
lenses
are
designed
to
match
the
digital
SLR
cameras
using
the
Image
sensors
equivalent
to
APS-C
(approx.15.5x23.2mm).
Do
not
use
Di
II
lenses
with
cameras
using
image
sensors
larger
than
APS·C.
Using
01
II
lenses
with
such
cameras
may
cause
vignetting
on
the
image.
•
Some
Canon
digital
SLR
cameras
have
index
marks
for
attaching
both
EF
lenses
(red)
®
and
EF~S
lenses
(white)
@
on
the
bayonet
mount.
To
attach
Tamron
Dill
lenses,
align
the
lens
attachment
mark
on
the
lens
I15l
with
the
index
mark
for
EF
lenses
(red)
@.
Do
not
forcibly
align
the
indicator
on
the
lens
4Sl
with
the
index
mark
for
EF-S
lens
(white)
<Bl.
Doing
so
could
result
in
damage
to
the
lens
and/or
camera.
lJ
.
For
further
details,
please
read
the
instruction
manual
of
your
camera.
•
Avoid
touching
the
glass
element
surface.
Use
a
photographic
lens
cloth
or
blower
to
remove
dust
from
the
lens
element
surface.
When
not
using
the
lens,
always
place
a
lens
cap
on
it
for
protection.
•
Use
a
lens
cleaning
tissue
or
lint
cloth
with
a
drop
of
cleaning
solution
to
remove
fingerprints
or
dirt
on
the
glass
lens
surface
with
a
rotary
motion
from
the
center
to
the
edge.
•
Use
a
silicon
cloth
to
clean
your
lens
barrel
only.
•
Mildew
is
an
enemy
of
your
lens.
Clean
the
lens
after
shooting
near
water
or
in
any
humid
place.
Store
your
lens
in
a
clean,
cool
and
dry
place.when
storing
the
lens
in
an
lens
case,
store
it
with
commercially
available
drying
agent
such
as
silicagel,
and
change
the
agent
occasionally.
If
you
find
mildew
on
your
lens,
consult
an
authorized
repair
shop
or
nearby
photo-graphic
store.
•
Do
not
touch
the
lens-camera
interface
contacts
since
dust,
dirt
and/or
stains
may
cause
a
contact
failure
between
the
lens
and
camera.
•
When
using
your
equipment
[camera(s)
and
lens(es)]
in
an
environment
where
the
temperature
changes
from
one
extreme
to
the
other,
make
sure
to
put
your
equipment
temporarily
in
a
case
or
a
plastic
bag
for
a
length
of
time
in
order
for
the
equipment
to
go
through
a
gradual
temperature
shift.
This
will
reduce
potential
equipment
trouble.
1
..
_111
•
The
optical
design
for
Oi
II
takes
into
consideration
the
various
features
ot
digital
single
reflex
cameras.
However,
due
to
the
configuration
of
the
digital
single
reflex
cameras,
even
when
the
autofocus
accuracy
is
within
specifi-cations,
the
focal
point
may
be
a
little
forward
or
behind
the
optimum
point
when
shooting
with
auto
focus
under
some
conditions.
•
The
image
circles
of
Oi
II
lenses
are
designed
to
match
the
digital
SLR
cameras
using
the
image
sensors
equivalent
to
APS-C
(approx.
15.5
x
23.2mm).
Do
not
use
Oi
II
lenses
with
cameras
using
image
sensors
larger
than
APS-C.
Using
Oi
II
lenses
with
such
cameras
may
cause
vignetting
on
the
image.
•
(A1
B)
employ
an
internal
focusing
(IF)
system.
Because
of
the
characteristics
of
this
optical
design,
the
angles
of
view
at
distances
other
than
infinity
are
wider
than
that
of
the
lenses
applying
an
ordinary
focusing
system
.
•
When
the
built-in
tlash
on
the
camera
is
used,
adverse
photographic
phenomena
such
as
comer
illumination
fall-off
or
vignetting
at
the
bottom
part
of
the
image
may
be
observed,
especially
in
wide
angle
ranges.
This
is
due
to
the
inherent
limitation
of
the
coverage
of
the
built-in
flash,and/or
the
relative
position
of
the
flash
to
the
edge
of
the
lens
barrel
which
causes
shadows
on
the
image.
It
is
strongly
recommended
to
use
a
suitable
separate
flash
unit
provided
by
the
camera
manufacturer
for
all
flash
photography.
For
further
details,
please
read
the
"built-in
flash"
article
on
the
instruction
manual
of
your
camera.
•
When
using
the
lens
in
the
telephoto
focal
range,
please
be
careful
with
the
camera
shake.
Effective
way
to
avoid
the
camera
shake
is
using
an
ISO
setting
of
higher
numbers.
Using
a
tripod
or
monopod
is
also
effective.
•
When
set
on
AF
mode,
interfering
with
focusing
ring
may
cause
serious
damage
to
the
lens
mechanism.
•
Certain
camera
models
may
indicate
the
maximum
and
minimum
aperture
values
of
the
lens
appropriate
numbers.
This
is
inherent
to
the
design
of
the
camera
and
not
an
indication
of
an
error.'
•
When
using
a
special
filter
such
as
a
PL
filter
on
the
AlB,
use
low-profile
filter.
The
thick
rim
of
a
PL
filter
may
cause
Vignetting.
Model
A1B
is
eqUipped
with
zoom
lock
switch
mechanism
which
prevent
lens
barrel
from
extendting
towards
long
focal
length,
while
hanging
around
the
neck.
Activate
the
switch
at
the
shortest
setting
to
stop
the
lens
barrels
from
rotating
and
extending.
•
How
to activate the
zoom
lock switch mechanism
1)
Locking:
Set
the
zoom
ring
on
the
lens
to
the
shortest
position.
Move
the
zoom
lock
switch
il2>
toward
the
camera
for
locking
the
zooming
ring
@.
The
lens
barrel
is
locked
in
position
when
the
portion
beneath
"Lock"
is
shown
in
red
and
the
lens
barrel
does
not
rotate
or
extend
by
its
own
weight.
2)
Releasing:
Push
the
zoom
lock
switch
il2>
up.
The
zooming
ring
@
is
now
released
and
can
be
rotated.
•loom lock
switch
can
not
be
activated
unless
the
lens
is
set
to
the
shortest
position.
Do
not
force
the
lock switch
or
try
to
rotate
the
zooming
ring
while
locked,
doing
so
may
damage
the
lens.
•
The
zoom
lock
mechanism
is
made
to
prevent
the
lens
barrel
from
extending
While
carried
around
the
neck.
When
not
locked
and
the
zoom
lens
may
change
its
focal
length
during
a
long
exposure
used
in
a
low
or
high
angle
position.
A
bayonet-type
lens
hood
is
provided
as
standard
equipment.
We
recommend
shooting
with
the
hood
attached
whenever
possible
as
the
lens
hood
eliminates
stray
light
which
is
harmful
to
the
picture.
However,
please
be
aware
of
the
precautions
written
below
when
your
camera
is
equipped
with
a
built-in
tlash.
•Attaching the
Lens
Hood
(Ref.
Figs.
IZI
&
IBJ)
Align
the
index
mark
~
on
the
hOQd
with
the
corresponding
index
mark
@
or
the top
of
the
index
line
of
the
distance
scale)
on
the
lens.
Press
the
hood
lightly
onto
the
hood
attaching
bayonet
ring
(Fig.lZI,
No.
0)
and
then
rotate
it
clockwise
to
secure
(Fig.
IZI,
No.8).
The
lens
hood
will
be
securely
held
as
the
mark
"TAMRON
0"
comes
to
the top
(Fig.l!lJ,
No.
@).
When
attaching
the
lens
hood,
hold
the
focusing
and
zoom
control
rings
so
that
they
are
not
rotated
unintentionally.
I .
Pay
particular
attention
to
align
the
hood
attaching
indexes
when
using
zoom
lenses
including
wide·angle
(e.l.
35
mm
or
wider)
settings.
Improper
attachment
of a
hood
for
wide~angle
zoom
lens
may
cause
large
shadowed
areas
in
your
pictures.
•Stowing lens hood
on
the lens
(Ref.
Fig. Illi)
1)
Reverse
the
lens
hood.
Point
the
lens
toward
to
opening,
then
align
the
hood
attachment
mark
on
the
lens
with
the
(TAMRON
0)
alignment
on
the
hood
@.
2)
Turn
the
hood
clockwise
until
it
alignment
mark
(0)
is
at
the
top
to
set
rt.
(Fig.
1llJ,
8)
Switch
the
focusing
mode
switch
ot
the
camera
to
manual
focusing
mode
(MF)
in
case
of
Sony
or
Pentax.
In
case
of
a
Nikon,
Canon
camera,
switch
the
AF/MF
switch
<H>
on
the
lens
to
MF.
(Fig.lllJ)
In
case
of
Nikon
camera
with
the
focus
mode
selector
dial,
set
the
focus
mode
to
"M",
and
then
set
the
AF/MF
switch
on
the
lens
side
<l'li
to
"MF."
Focus
manually
rotating
the
focusing
ring
while
viewing
through
the
camera's
viewfinder.
The
main
subject
in
the
viewfinder
will
be
sharp
when
the
lens
is
tocused
correctly.
/;
•
Even
in
the
MF
mode,
turning
focusing
ring
(S)
while
pressing
the
shutter
button
halfway
the
focus
aid
function
lamp
lights
up
when
the
picture
is
in
focus.
•
At
infinity,
make
sure
the
image
in
the
viewfinder
appears
sharp.
The
infinity
position
on
A18
is
made
with
certain
allowances
to
insure
proper
focus
under
a
variety
of
conditions.
•
For
further
details,
please
read
the
instruction
manual
of
your
camera.
t; .
The
lens
can
be
used
at
the
shortest
setting
for
picture
taking
even
while
in
the
focused
position.
'-~lIIiI:DE!lElll
_
Please
follow
the
instruction
manual
of
your
camera.
Rotate
zooming
ring
@
of
the
lens
while
viewing
through
the
camera's
viewfinder
and
compose
your
image
at
the
chosen
focal
length.
tI
-If
using
the
A18,
when
aligning
the
250mm
zoom
ring,
please
align
it
with
the
zoom
index
mark@.
452g
OA18
A1S
13/16
62mm
74.4mm
84.3mm
F/3.5·6.3
18-250mm
O.45m
(throughout
the
entire
zoom
range)
Filter
Size
¢
Weight
Diameler¢
Angle
of
View
Minimum
Focusing
Maximum
Aperture
Focal
Length
Lens
Hood
LensConslruction
Length
Switch
the
focusing
mode
switch
of
the
camera
to
Auto
focusing
mode
(AF)
in
case
of
Sony
or
Pentax.
In
case
of
a
Nikon
and
Canon
camera,
switch
the
AF/MF
switch
<l'li
on
the
lens
to
AF.
(Fig.
15]).
In
case
of
Nikon
camera
with
the
focus
mode
selector
dial,
set
the
focus
mode
to
"S"
or
"C",
and
then
set
the
AF/MF
switch
on
the
lens
side
<l'li
to
"AF."
Press
the
shutter
button
lightly
while
viewing
through
the
camera's
viewfinder,
the
lens
focuses
automatically.
An
in-focus
mark
will
light
when
lens
focuses
on
the
main
subject
sharply.
Press
the
shutter
button
further
to
photograph.
•
When
set
on
AF
mode,
interfering with
focusing
ring
®
may
cause
serious
damage
to
the
lens
mechanism.
it .
For
further
details,
please
read
the
instruction
manual
of
your
camera.
.!
I
I
I
ei
I
I
I
I
e:I
I
I
I
e!
I
I
I
e'
I
el
I
I
el
Serial
No.
Model
(fv10Dtl
CautIOns
when
Usmg
Tamron
Lenses
For safe operation be sure to carefully read the manual
and the following cautions before using. After reading
them, store them in aplace
where
they can easily be
reviewed whenever needed.
In
this manual, caution instructions are divided into
the following two categories:
&
WARNING:
This
indicates instructions which
if
not
heeded
could
lead to death
or
serious injury.
&
CAUTION:
This
indicates instructions which
if
not heeded could
lead to bodily injury
or
physical damage.
&
WARNING
(I)
Do not look directly at the sun through the lens.
Doing so could result in blindness.
(2) Do not leave the lens within the reach
of
young children.
The
lens may fall and injure the child, and the
strap may get wrapped around the
child's
neck,
resulting in suffocation.
&
CAUTION
(I)
Do not leave the lens in places exposed
to
direct sunlight.
The
light reflected
off
the lens may focus
on
a
nearby object, and
cause
afire. Place the lens cap
of
the lens whenever
it
is not in use.
(2)When mounting the lens on the camera,
make
sure the lens and camera are properly set and
securely locked.
The
lens may get slUck if it is not properly
mounted, and
if
it
is not securely locked,
it
may
fall off, damaging the lens
or
camera
or
causing
bodily injury.
(3)Do not modify
or
alter the lens.
Doing so may result in damage to the lens
or
camera.
(4)Mount
the lens hood when taking photographs
in
order to eliminate harmful light rays.
*
The
hood cannot be mounted when certain filters
are installed.
*Remove the hood
if
it causes shadows at the
edges
of
the image when using aflash.
(5)00
not place excessive loads on the lens when it
is
mounted on the camera.
Such
loads may
damage
the mount section on the lens and the camera.
Large lenses tend to place astrong load on the
mount section. Always hold the lens when
operaling and moving the camera.
(6)The focus ring turns during the auto focus
operation. Do not keep Ihe focus ring from turning.
Also,
do
nOI
forcibly turn
the
focus ring by hand
when in the auto focus mode.
Doing so may
damage
the lens
or
the interior
of
the camera.
(7)
Do
not use the lens except for the purpose
of
photographing.
VorslchtsmalJnahmen
bel
der
Benutzung
von
TAMRON-OBjJEKTIVEN
Lesen Sie sich diese Bedienungsanleilung und die
nachfolgend aufgeflihnen VorsichtsmaBnahmen aus
Sicherheilsgrunden vor der Benutzung des Objektivs
sorgfaltig durch. Bewahren Sie die BedienungsanleilUng
anschlieBend an einem leicht zuganglichen
On
auf, damit
Sie
im
Bedarfsfall jederzeit darauf zurlickgreifen konnen.
Die VorsichtsmaBnahmen wurden
in
dieser
Bedienungsanleitung
in
zwei Kategorien unteneilt:
&
WARNUNG:
Hierbei handelt es sieh
urn
VorsichtsmaBnahmen, deren
Niehtbeachtung zum Tod
fUhren
oder ernsthafte
Verletzungen verursachen
Kanno
&
VORSICHT:
Hierbei handelt es sich
urn
VorsichtsmaBnahmen, deren
Nichtbeachtung Korperverletzungen oder physische
Schaden verursaehen
Kanno
&
WARNUNG
(I )Schauen Sie nieht durch das Objektiv hindureh
in
die
Sonne. Dies konnte zu Blindheit
fUhren.
(2) Bewahren Sie das Objektiv auBerhalb der Reichweite
von Kleinkindern auf.
Das Objektiv konnte herunterfallen
und
das Kind
verletzen. Der Riemen konnte sich
urn
den Hals des
Kindes wickeln und eine Erstickung
herbeifUhren.
&
VORSICHT
(I)Legen Sie das Objektiv niemals
an
Platze, an denen es
direktem Sonnenlieht ausgesetzt ware.
Das
Licht konnte sieh aufeinem
in
der Nalte befindlichen
Gegenstand blindeln
und
einen Brand verursachen.
Bringen Sie immer die Kappe
am
Objektiv an, wenn
dieses nieht
in
Benutzung ist.
(2) Oberprufen Sie vor dem Aufsetzen des Objektivs auf
die Kamera,
daB
das Objektiv und die Kamera richtig
zusammengesetzt
und
daB
das
Objektiv
fest
eingerastet
ist.
Das
Objektiv konnte sich festlaufen,
wenn
es
nieht
riehtig
aufgesetzt wurde. Wenn es nieht richtig eingerastet ist,
konnte es herunterfallen
und
sowohl die Kamera als aueh
das Objektiv besehadigen
und
darliberhinaus
Verletzungen verursaehen.
(3)Gestalten Sie das Objektiv nieht
urn
und verandern Sie
es
in
Keiner Weise.
Dies konnte das Objektiv oder die Kamera beschadigen.
(4)Setzen Sie beim Fotografieren die Gegenlichtblende
auf,
urn
schadliche Liehtstrahlen
zu
eliminieren.
*Die Gegenliehtblende kann nicht aufgesetzt werden,
wenn bestimmte Filter installien worden sind.
*Entfemen Sie die Gegenliehtblende, wenn sie bei
Benutzung eins Markierungsfensters Schatten auf
den Bildkanten verursaeht.
(5)Legen Sie keine schweren Gegenstande aufdas auf die
Kamera aufgesetzte Objektiv. Dies konnte
den
Aufsatzteil des Objektivs und die Kamera beschadigen.
GroBe
Objektive neigen dazu, den Aufsetzteil stark zu
belasten. Halten Sie das Objektiv wahrend der
Kamerabenutzung und dem Transport der Kamera
gut fest.
(6)Die Fokussierhlilse dreht sich wahrend der automatisehen
Seharfeinstellung. Behindem Sie dieses Drehen nieht.
Drehen Sie die Fokussierhlilse darliberhinaus nicht
gewaltsam mit der Hand, wenn der Modus
fUr
die
automatische Scharfeinstellung aktiviert ist.
Dies konnte das Objektiv oder die inneren Bauteile der
Kamera beschactigen.
(7)Benutzen Sie Objektiv nur
fUr
den Zweek des
Fotografierens.
Belangrtjk
bi]
het
gebrwk
van
Tamron
lenzen
Met het oog
op
een veilige bediening dient ualvorens de
lens te gebruiken de gebruiksaanwijzing en de volgende
instructies zorgvuldig door te lezen. Bewaar deze na
lezing op een plaats waar ze, zonodig, gemakkelijk
kunnen worden ingezien. [n deze gebruiksaanwijzing
zijn de veiligheidsinstructies ingedeeld in de volgende
twee eategorieen:
&
WAARSCHUWING:
Wanneer de aanwijzingen die
op
deze manier worden
aangegeven niet worden opgevolgd, kan dit leiden tot
ernstig letsel
of
de dood.
&
INSTRUCTlE:
Wanneer de aanwijzingen
die
op
deze
manier worden
aangegeven niet worden opgevolgd, kan dit leiden tot
liehamelijk letsel
of
fysieke schade.
&
WAARSCHUWING
(I)
Kijk met
de
lens niet direct in de zon.
Dit kan resulteren in blindheid.
(2) Houd de lens buiten het bereik van
jonge
kinderen.
De lens kan vallen, waardoor het kind mogelijk
letsel oploopt. De riem kan zich
om
de nek van het
kind wikkelen, met eventuele verstikking tot gevolg.
&
INSTRUCTIE
(I)
Laat de lens niet aehter
op
plaatsen die blootstaan
aan direct zonlieht.
Het lieht dat
door
de lens wordt gereflecteerd kan
zieh richten
op
een object dat zich in de
omgeving
bevindt, waardoor brand kan ontstaan. Haal de
lenskap van
de
lens
wanneer
hij niet in gebruik is.
(2)Zorg
ervoor dat ude lens goed bevestigt
en
vergrendelt wanneer uhem
op
de camera zet. Als
de
lens niet goed bevestigd is, kan hij vast komen te
zitten, en wanneer hij niet goed vergrendeld is, kan
hij van de camera vallen. Hierdoor kunnen de lens
en de
camera
beschadigd worden
of
kan
er
liehamelijk letsel ontstaan.
(3) Breng geen veranderingen
of
wijzigingen aan de
lens aan.
Hierdoor kan de lens
of
de camera beschadigd raken.
(4)Tijdens het maken van
foto's
dient de lenskap op
de lens bevestigd te zijn, zodat
deze
beschermd is
tegen schadelijke lichtstralen.
*De kap kan niet worden bevestigd wanneer
bepaalde filters
op
de lens zijn geplaatst.
*Verwijder
de
kap
wanneer
hij bij hel gebruik van
f1itslicht schaduwen aan de rand van het beeld
veroorzaakt.
(5)Belast de lens niet te zwaar wanneer hij op de camera
is
geplaatst. Hierdoor kan het bevestigingsgedeelte
van de lens
en
de
camera
beschadigd raken. Grote
lenzen kunnen een zware belasting vormen voor het
bevestigingsgedeelte.
Houd
de lens daarom altijd
vasIbij het bedienen
en
bewegen
van de camera.
(6)Tijdens de werking van de auto focus draait de
foeusring rond. Zorg
ervoor
dat hij vrij kan draaien
en forceer de ring niet
door
er
met de hand aan te
draaien wanneer
de
camera
in
de
auto focus modus
staat. Hierdoor kan de lens
of
het binnenwerk van
de
camera beschadigd raken.
(7)Gebruik de lens uitsluitend
om
te fotograferen.
Per
un
corretto
e
sicuro
impiego
degli
obiettivi
Tamron
AI
fine di garantire un corretto esicuro impiego dei
nostri obiettivi,
vi
raccomandiamo di leggere con
attenzione
il
libretto di iSlruzioni e
Ie
precauzioni qui
di
seguilo riponate, prima
di
utilizzare
Ie
apparecchialUre.
In
questa libretto
Ie
segnalazioni relative aile precauzioni
da adottare
sono
suddivise in due calegorie:
&A
TTENZIONE
La non osservanza
di
questa segnalazione di peri
colo
pub comportare grave rischio; ferite 0lesioni personali.
&
PRECAUZIONI
La non osservanza
di
questa segnalazione di pericolo
pub
comportare
danni alia persona 0all'apparecchio.
&A
TTENZIONE
(I)Non
guardate mai direttamente
il
sole attraverso
I'obiettivo: potreste rimanere accecati.
(2)Non
lasciate I'obiettivo
in
luoghi accessibili
ai
bambini piccoli.
L'obiettivo
PUQ
cadere causando Iesioni
al
bambino;
la
tracolla potrebbe attorcigliarsi
al
colla del piccolo,
causandone
il
soffocamento.
&
PRECAUZIONI
(I)Non
lasciate I'obiettivo esposto direttamente ai
raggi del sole.
Iraggi del sole, riflettendosi, potrebbero causare
un incendio. Mettete sempre
il
coperchio
dell'obiettivo quando non si usa
il
dispositivo.
(2)Quando
montale I'obiettivo sui corpo
macchina
controlJate che entrambi siano impostati correttamente
ebloccati
in
modo adeguato. L'obiettivo, in caso
di
montaggio non corretto, potrebbe infatti incepparsi
0,
qualora
non fosse adeguatamente bloccato,
potrebbe cadere rovinandosi col rischio di lesioni
al
fotografo eaile persone che gli sono accanto.
(3)Non
cercate
di
modificare 0alterare I'obiettivo:
potreste danneggiare sia I'obiettivo che
la
fotocamera.
(4)Montate
il
paraluce per eliminare
il
rischio
di
luce parassita.
*
II
paraluce non pub essere montato utilizzando
alcuni tipi di filtri.
*Rimuovete
il
paraluce se utilizzate un obiettivo
stroboscopico: scongiurerete cosi
il
rischio
di
ombreggiature ai bordi
dell'immagine.
(5)
on
gravate
di
pesi eccessivi I'obiettivo
quando
e
montato sulla fOlocamera: potreste
danneggiare
gli
attacchi sia dell'obiettivo
che
della fotocamera.
Gli obiettivi di maggiore dimensioni
gravano
sui
punti di attacco: sostenete I'obiettivo
con
la
mano
durante I'uso ementre
vi
spostate impugnando
la
fotocamera.
(6) La ghiera
di
messa afuoco ruota durante
Ie
operazioni
di
autofocus. Non ostacolatene
il
movimento. Non
forzate mai la ghiera
di
messa afuoco
quando
e
impostata sull'autofocus: I'obiettivo e
il
meccanismo
interno della fOlocamera pOlrebbero danneggiarsi.
(7) Non usate I'obiettivo se non per fo(ografare.
03U6U
>fJY
1*tFJ::-o<J1i:
3':
iii:
!.\!..
~J!jf',jl"jljii'i*£'WfilJ~Jtl'f
ffl~~Ttt~~~.~*ft~£,
fflW~ffl~frw~~
~k))J&f~B~:!t!rn
•
*~ffl'!'~I1~$~7t1JT9IJj!lj1'ml7t:
&1Ii!f:
*jf;n:f
i¥I
ftJlt~il7t,
jjJfj~~lliIiXA1il9Et:llX:F]:t
f9ii!l'.
&;':t.:
*~n:fi¥l~JIUM)-,
jjJfj~~llijjJ(;Af*51:fJJ'
&1Ii!f:
(I)
f/f7lJ~i:1:fjFkH1!\'.:t:IlI:l.
Q:i.flil:jjJfj~~.\'f·3&9<IYJ.
(2)
i1'l~J¥fffEk~l!'tfrr)Jfl!:~~J&j~Z!l.!:.
WEk
jjJ~~t-i!IMHill!f9iffi1l!:,
jffj
&:
'1Jr
0
fIiH:;IJ.HI:
ffi1l!:~JWT,
llilvt£.~
..
&;1'.:
(I)
i\'f'0¥ffjEk~fl*tEllIl:J'tJ'[MJd:.
~lJtljUt:±l*(t'J:J't!:l:,
jjJ~~~,!,
~!l!lttEJlffiliWtU:,
-'i'H&:Jti£;lO<.
:f~J!j
lJt:'kot,
iJ'iilflJt:'k
MiLlllUIU.
(~mm&~m:'kM,
••
~m:'kammm8~.1i:&
*$$fIi1~.
nlJt:'k*~
••
~,
~1Jt:'kjjJ~*~tt,
n*$
$~~,
m:'kjjJ~~~~,
lliMm:'kllX:mmm$
!iX5l':f9i
•
(3) m'0?J:&m:'k.
Q:i.flil:jjJ~~~l&m:'kJOCm~Lt91$.
(4)
1Jii'i~:J'ti!?,
frt8~!l~,
fII.flfmHiLt:i!E:J't'i'/..
.1i:&~~~:J'tmFc,
~£~~&~~:J't~.
•
~JllrA:J't:lTIlt,
n~f~a~itli:¥:±l~/lJj~,
iHJ&T:i!E:J't~.
(5)
-m:'kB&frmtJl~Ht.
m~frm:'kJ:.fjfihni:1:*~
mm.~~,
jjJ.*m$m:'k~mm.~~B7t.
*m:'k~mm.~~B7t.~~M.-~.
t\'d1%fj;ijlTf~VUlt,
i1'f*£'1J1\~m:'k.
(6)
§Z9Jx'l!'f.ot,
j(tf:i1~*!f7ij1J.
JltIl1il'ij)JWi~~x'I!*lf
"Z9J.tE8Z9J~
••
~~,
&'0m~.ff"Z9J~.~.
~~,
jjJ~*m.m:'kllX:ffim~mlm$.
(7)
HEf.~!l1l1,
fII~JflfJfJm:'k.
Precauciones
para
el
uso
de
los
Objetivos
Tamron
Por razones de seguridad, asegurese de leer
atentamente el manual ylas siguientes precauciones
antes del uso. Despues de leerlo. gwirdelo en
un
sitio
donde pueda ser consultado facilmente cuando sea
necesario.
En este manual, las instrucciones sobre las
precauciones se
di
viden en las siguientes dos
calegorfas:
&
ADVERTENCIA:
Esto indica instrucciones que de no ser seguidas
podrfan ocasionar graves lesiones eincluso muerte.
&
PRECAUCIDN:
Esto indica inslrucciones que de no ser seguidas
podrfan ocasionar danos fisicos.
&
ADVERTENCIA:
(I)
0mire directamente al sol atraves del objetivo.
De hacerlo podrfa provocar ceguera.
(2)
No
deje el objetivo
al
alcance de los ninos pequenos.
EI
objetivo podrfa caerse yherir alos ninos, yla
correa podrfa enrollarse en
el
cuello del nino y
provocar asfixia.
&
PRECAUCIDN:
(I)
No coloque el objetivo en lugares expuestos ala
luz solar directa.
La luz directa atraves de un objetivo produce un
efecto lupa aun objelO cercano ypodrfa provocar
un
incendio. Siempre ponga la tapa del objetivo
cuando el objetivo no esta en uso.
(2)Cuando monte el objetivo en la camara, verifique
que el objetivo y
la
camara estan bien colocados y
bloqueados con seguridad.
EI
objetivo podrfa
trabarse y
si
no esta bien monlado ybloqueado con
seguridad, podrfa caer, danandose el objetivo, la
camara 0provocando heridas.
(3)No
modifique
ni
altere el objetivo.
De hacerlo podrfa resultar danado el objetivo 0el
interior de la camara.
(4) Monte el parasol del objetivo al tomar fotograffas
con objeto de eliminar los reflejos de luz perjudiciales.
*
EI
parasol no se puede monlar cuando se instalan
ciertos fillros.
*Retire el parasol si provoca sombras en los
bordes de la imagen cuando se use
un
flash.
(5) 0coloque un peso excesivo en
el
objelivo cuando
este montado en la camara. Dicho peso podra
d311ar
la secci6n de monlaje enlre el objeti
vo
yla camara.
Los objetivos grandes tienden acargar
un
peso
importante en
la
secci6n de monlaje. Sostenga
siempre el objelivo cuando haga funcionar
la
camara.
(6)
EI
anillo de enfoque gira durante
la
operaci6n de
enfoque automatico. Sin embargo, no fuerce el
anillo con la mano para que gire mientras este en el
modo de enfoque autOlmitico. De hacerlo podrfa
resultar danado el objetivo 0el interior de la
cclmara.
(7) 0use
el
objetivo excepto para fotografiar.
Precautions
d'utilisation
des
Objectifs
Tamron
Pour des raisons de securite, lire attentivement
Ie
manuel et les precautions suivantes avant utilisation.
Apres la lecture. les conserver dans
un
endroit
facilement accessible atout moment.
Dans ce manuel, les instructions de precaution sont
classees en deux categories suivantes:
&
MISE
EN
GARDE:
Le non-respecl des instruclions peut entralner des
blessures graves voire des accidents mortels.
&
ATTENTION:
Le non-respect des instructions peul entralner des
lesions corporelles voire des blessures graves.
&
MISE
EN
GARDE
(I)
epas regarder directement
Ie
solei! atravers
l'objectif.
Yeus risquez de perdre la vue.
(2) epas laisser l'objectifala portee des
jeunes enfants.
L'objectif risque de tomber et de blesser I'enfant.
L'enfanl risque de s'etrangler avec la bandouliere.
&
ATTENTION
(I
)Ne
jamais laisser votre objectif en plein solei
I.
La lumiere risque de se focaliser sur
un
objet et de
provoquer
un
incendie.Placer imperativement
Ie
cache-objectifquand
l'objectif
n'est
pas utilise.
(2) Lors de la fixation de l'objeclif sur l'appareil.
verifier que l'objectifet l'appareil soient regles et
verrouilles correctement.
L'objectifrisque
de se bloquer
s'il
n'est pas monte
fermement.
II
risque de tomber en endommageant
I'objectifou l'appareil, ou en causant des blessures
s'il
n'est
pas verrouille correctement.
(3)Ne
pas modifier ou changer l'objectif.
L'objectif
ou l'appareil risque
d'etre
endommage.
(4)Monter
Ie
pare-soleillors de la prise de vues afin
d'eliminer les rayons de lumiere parasites.
*Le pare-soleil ne peut pas etre fixe lorsque
certains filtres sont en place.
*Retirer
Ie
pare-soleiIs'il cree des ombres sur les
bords de I'image vignetage quand on utilise
Ie
flash.
(5)Ne
pas placer des charges excessives sur l'objectif
lorsqu'il est monte sur l'appareil.
De gros objeclifs lourds ont lendance aforcer sur la
bai"onnette de montage. Lors de l'ulilisalion,
toujours lenir l'ensemble appareil/objectif
par l'objectif.
(6) La bague de mise au point tourne pendant
I'
operation de mise au poinl automatique. Ne pas
I'
empecher de lourner pendanl la mise au point.
Ne pas tourner la bague de mise au point ala main
en mode aUlOfocus.
L'objeclif
ou l'appareil risque
d'etre
endommage.
(7) epas utiliser l'objectifexcepte pour photographier.
Precauqaes
durante
a
utilizaqao
de
objectivas
Tamron
Para uma
uliliza~ao
segura. certifique-se que
Ie
0
manual eas
precau~6es
seguintes atentamente antes de
utilizar. Depois de 0ler, guarde-o num local onde possa
ser consultado facilmente, sempre que necessario.
Neste manual. as
instru~6es
de
precau~ao
estao
divididas nas duas categorias seguintes:
&
AVISO:
Sao apresentadas
instru~6es
que, se nao forem
respeitadas. podem provocar ferimentos graves ou
mesmo morte.
&ATENr;AO:
Sao apresentadas
instrUl;:6es
que, se nao forem
respeiladas. podem provocar danos fisicos.
&
AVISO
(I)
ao olhe directamente para 0
sol
atraves da objectiva.
Se 0fizer, isso pode causar cegueira.
(2)Nao deixe aobjectiva ao alcance das crianyas.
Aobjectiva pode cair eferir as
crian~as
e a lira
pode-se enrolar avolta
do
pesco~o
da
crian~a.
provocando asfixia.
&
ATENr;Ao
(I)
Nao coloque aobjectiva em locais expostos aluz
solar directa.
Aluz solar direcla reflectida alraveS de uma
objectiva pode incidir num objeclO pr6ximo e
provocar urn incendio. Coloque atampa dianteira na
objectiva sempre que estanao esteja aser utilizada.
(2)Ao colocar aobjectiva na maquina fotografica.
verifique se aobjectiva e a maquina fOlOgrafica
estao correctamente encaixadas ebloqueadas de
forma segura.
Aobjecliva pode encravar se nao estiver colocada
correClamente e, se nao eSliver bloqueada de forma
segura, pode cair danificando aobjectiva ou a
maquina fOlografica, ou causando danos ffsicos.
Cl)Nao modifique nem altere aobjecliva.
Se 0fizer. pode danificar aobjectiva ou amaquina
fotografica.
(-+)
Coloque 0protector contra 0sol quando estiver a
tirar fOlOgrafias, de modo aeliminar raios de
luz perigosos.
*0protector do sol nao pode ser colocado quando
determinados filtros estao instalados.
*Remova 0protector se este causar sombras nos
extremos da imagem, quando esta ausar
urn
flash.
(5) ao coloque
urn
peso excessive na objectiva quando
esta estiver colocada na maquina fOlografica. Esse
tipo de peso pode danificar a
sec~ao
de montagem
da objectiva eda maquina fotografica.
As
objectivas grandes tem tendencia acolocar um
grande peso sobre a
sec\ao
de montagem. Segure
sempre aobjectiva quando estiver autilizar e a
movimentar amaquina fotogrMica.
(6)0
anel de focagem roda durante 0funcionamento
em focagem automatica. Nao
impe~a
0anel de
focagem de rodar. Do mesmo modo. nao tente
rodar 0anel de focagem com amao quando esta
no modo de focagem automatica.
Se 0fizer. pode danificar aobjectiva ou 0interior
da maquina fotografica.
(7) Utilize aobjcctiva apenas para fOlografar.
TP-9-U-0603
TAmROn
v/A7-F,lll!I'l(/)~~
Shadow
cast
by
lens
hood
and
lens
barrel
Von
Gegenlichtblende
und
ObJektlvtubus
gewortener
Schanen
Ombre
creee
par
Ie
parasoleil
et
la
monfure
de
loblectlf
Sombra
proyectada
por
el
parasol
y
el
tubo
portalenles
Ombra
causala
da
paraluce
e
banlono
Sombra
provocada
pelo
para,sol
e
tubo
de
exlensao
Schaduw
die
door
lenskap
en
lenshuis
wordt
veroorza?kl
m*S19i:t~**,#pJi@"lCn<JII}jJ;!~
Jt.l~77::/oh'~8,F,'NEIEi
Flash
illuminated
area
Vom
Blitziichl
beleuchteter
Bereich
Zone
eclairee
par
Ie
flash
Alcance
del
flasi1
Area
IIluminata
dal
flast,
Area
i!urninada
pe!o
llasll
Door
flilsiicht
verlicht
gebied
1'J:i'dJ
81!ffi
AlHi;;(1'!
j!!~~;
'Ml!iill
'Photographing
area
i
Folograherberelch
I
Zone
de
prise
de
vues
I
Aic?ncc
de
!a
c?mara
i
Area
fotogratata
!
Area
de
lOlografa,
'
Fotografeergebled
1Jl
~~
rj~
Hi
eu
r*iiif7."o*~{£JtjL,l::lll13(/)Z';'U!.
Using
Camera's
Build,in
Flash
Verwendung
des
eingebauten
B/itzlichtes
der
Kamera
Utilisation
du
flash
integre
de
{'appareil
photo
Como
utililar
el
flash
incorporado
UtilillO
del
flash
incorporato
nella
fotocamera
Utililar
°
flash
incorporado
da
camara
Het
gebruik
van
hel
ingebouwde
fIilsapparaat
fie
fflfIIt
1£ffJtfLLtr:J,A7
ft:I:TM
.7J
)(
'7
,~(
n
0)
IJjilt
~i&1~IJO)H~*~<:"j:,
1J)(-7,~;tL(:::~~l:::;::'\i;~T~~
'0
1J;(7,~;hHl:J(f:.YJ
l:::(j:,
T:>)lJl,.1J;(7<:'(j:ISO~mz~f2\mt=~~JE,
71'Jl-b1J;(7<:,lj:ISO
~mO)~~
'71'
Jl-bz1~fflT
-Q.:::t<:',
<:'~U':'(-J
~~
':/t";;)l-)!m<:'H~*~
T-Qt~1J~a':J<:'T,
.=Jtn;tt.::'j:-~tM1~fflt,~;h~1:J1lJ::::fj~1J<:'T
0
¥gt)
<:'tJiH1~zT
-Qt~(:::(j:,
IE
~:t'L,I1;
If,[;1:-::>
9(':stt)
,fi!jj¥
T'jJ;(7Z
t~t),
fi!jjij~HW.YJ,
1J;(7ZV)tJ\f)~lH:::
-:)tt(:t2k~~it;t-r
_
~,U,
j--
7Jl-1J'
C
tJ'il0-Q±~pJT
<:'lj:,
-thSz
3t;t
l:::
L,
(:t2
JE~it
-Q
t
~1J~
a':J<:'T
0
~~
l:::¥t~t)T/-\",·;;)l-HJJ-Qt
~(:::
Ij:,
,\~H!
.Ll:..YJ-QJ:7l:::L,
(
,mO)~<:,ijf¥tJ\
t::::/t";;)l-*)l/~t!flL,
«t.:'~~
'.
.1J)C70)1*J~Ar-D*H~~m'9
.Q±JI,t;-
1J;(
70)
i*J~AI--D
*z1~ffl
L,
(t~Jjt~
eX:r.
-Q±~
-@;-(j:,
7 -
1"'1""
v
>:;z:t:::J:-Q
77v(:::'::::';i~""F~\",
77'/:/l}~*~zT-Q~-@;-lj:,
7-1"~'.JZ'9)7l-L,
«
tc.~~
,-,
;tt.:'71
H~IJO)}~~~'\9JEJ§~1~!J<:'O)t~lf~C'(j:,
v/
A7
-l'z1~n
t:J:(
(tv
/A/$:1;ftJ'::<'I--D*:Jth'!-,)'[
,li!TIim""F
§5l:::-'F
P:JJ'I;;
0)
77
v
Ji
:±J
-Q±~-g-1lil0f);1:9"
77:;:/.::L
t~~!~
Tlj:,
)7}§r)j\~dJi
:itO):WfflA
1--0
*0)
'::::'{~
ffl
zs
lJJ.YJ
L,;1:
'9
77
v0)
jf£
~
-Q
5~H*
C!iE.
,<tHe
~jL }~ *~
~§
~jt)
(J.'::::
1~ffl
0)1J
)C7(:::J:f
)~IJ'\)
:fT<7:n:',
-ttl'f:hO)~_\$,~Eiiltt,
j~!j!~
~§~c'(J)
77vO)tib5Ll:::
J~
'«(j:,
j-
AH~¥.!~I./
('::::~i'8~eX:tl-Q.:::tz
s'9?
.YJL,;1:T
:~,
8'i:L,(
(j.~U
8
~
pJT/'"
;f:i~dl~
'i~n-ti
""F~~'
Suggestions
for
Better
Pictures
with
Tamron
Zoom
Lenses
•How to Avoid Camera Shake
When
using
the
lens
in
the
telephoto
focal
range,
please
be
careful
with
the
camera
shake,
To
avoid
camera
shake,
for
the
digital
cameras.
use
an
ISO
setting
of
higher
numbers
and
for
the
film
cameras,
use
the
film
with
high
ISO
numbers
to
obtain
higher
shutter
speed.
Using
a
tripod
or
monopod
is
also
effective.
When
hand-holding
tile
camera
to
take
pictures,
stand
still
openlllg
your
legs
slightly a
part,
hold
your
elbows
in
firmly
against
your
chest,
and
110Id
the
camera
firmly
against
your
face,
If
possible.
lean
against
something
to
steady
yourself
or
place
the
camera
on
something
to
secure
the
hold,
Especially
when
hand-holding
your
camera.
you
will
be
steadier
if
you
hold
your
breath,
while
you
press
the
shutter
button
gently
and
firmly.
•Using camera's build-in flash
When
using
the
camera's
bullet-in
flash.
please
be
~ware
that
the
lens
hood
or
lens
barrel
may
block
the
liglll
to
cause
vignetting
on
the
image.
When
using
the
camera's
build-in
flash,
do
not
use
a
lens
hood.
Even
without a
lens
hood,
vignetting(arcll
sllaped
shadow)
may
appear
if
the
light
is
blocked
by
the
lens
barrel,
so
it
is
advisable
to
use
an
optical
f18sh
unit
(llOt
shoe
or
handle-mount
type).
The
conditions;
such
CiS.
the
focal
length
and
focusing
(Iistance
C8use
the
vignetting
vary
depending
on
the
camer8.
It
is
recommended
to
lest
for
vignetting
at
each
focal
length
and
focusing
distance,
So
machen
Sie
bessere
Bilder
mit
Tamron-Zoomobjektiven
•Vermeiden von verwackelten Aufnahmen
Wenn
das
Objektiv
im
Fokusbereich
des
Teleobjektivs
verwelldet
wird,
ist
die
Kamera
besonders
Um
ein
Verwackeln
der
Kamera
zu
vermeiden,
verwenden
Sie
bei
Digitalkameras
eine
hohere
ISO-Einstellung
und
fur
Filmkameras
einen
Film
mil
hbllerer
ISO-Zahl,
um
eine
schnellere
Blendenverschlusszeit
zu
erreichen.
Auch
die
Verwendung
eines
Einbein-
oder
Dreibeinstativs
kann
hilfreich
sein
Wenn
Sie
freihandig
fotografieren,
stehen
Sie
mit
!eicht
gespreizten
Beinen
still,
drucken
Sie
Ihre
Ellenbogen
fest
gegen
Ihre
Brust
und
drucken
Sie
die
Kamera
fest
an
Ihr
Gesicht.
Lehnen
Sie
sich,
falls
moglich,
an
einen
festen
Gegenstand
an,
um
sich
abzustutzen,
oder
selzen
Sie
die
Kamera
auf
einen
festen
Gegenstand,
um
die
Aufnahmeposition
zu
sichern.
Wenn
Sie
die
Kamera
mit
der
Hand
hallen,
stehen
Sie
ruhiger.
wenn
Sie
den
Atem
anhalten:
drucken
Sie
dann
langsam
und
fest
auf
den
Auslbser.
•Verwendung des eingebauten Blitzlichtes der Kamera
Beachlen
Sie
bei
del
Verwendung
des
eillgebauten
Blitzlichtes
der
Kamera.
dass
die
Gegenlichtblende
oder
der
Objektivtubus
nicllt
das
Licht
blockierl;
anderenfalls
kann
eine
Vignettierung
des
Bildes
eintreten,
Verwenden
Sie
keine
Gegenlichtblende,
wenn
Sie
das
eingebaute
Blitzlicht
der
Kamera
nutzen,
Selbst
ohne
Gegenlichtblende
kann
eine
Vignettierung
(Bildung
bogenformiger
Schatten)
eilltreten,
wenn
das
Licht
vom
Objektivtubus
blockiert
wird;
es
wird
Daher
empfohlen,
ein
optisches
Blitzgerat
(Blitzlichtadapter
oder
Aufbaublitzlicht
mit
Griff)
zu
verwenden.
Die
Umstande,
welche
die
Vignettierung
hervorrufen,
wie
z.
B.
die
Brennweite
und
der
Fokussierabstand,
hangen
von
der
Kamer~
abo
Es
wird
empfohlen
nie
Vignettierllng
Wr
jede
8rennweite
und
fUr
jeden
Fokussierabstand
zu
prufen.
Su
'!Jestions
pour
realiser
de
meilleures
photos
avec
les
opti
ves
zoom
Tamron
•Comment eviter les tremblements
de
I'appareil photo
Lorsque
vous
utilisez
Ie
teleobjectif,
veillez
a
ne
pas
secouer
I'apparei\.
Pour
eviter
les
tremblements
des
appareils
photos
numeriques,
utilisez
un
regl8ge
ISO
plus
eleve,
Pour
les
appareils
a
pellicule,
utilisez
un
film
de
valeur
ISO
elevee
pour
atteindre
une
vitesse
de
declenchement
superieure.
L'utilisation
d'un
trepied
ou
d'un
pied
est
egaleillent
d'une
grande
aide,
Lorsque
vous
tenez
I'appareil
dans
vos
mains
pour
prendre
des
photos,
ne
bougez
pas
et
ecartez
legereillent
les
jamlJes,
maintenez
vos
coudes
contre
votre
poitrine
et
positionnez
I"appareil
contre
votre
visage.
Si
vous
Ie
pouvez,
adossez-vous
ou
placez
I'appareil
sur
un
support.
Lorsque
vous
tenez
I'appareil
dans
les
mains,
retenez
votre
respiration tout
en
appLlyant
douceillent
mais
ferillement
sur
Ie
declencheur.
•Utilisation
du
flash integre
Lorsque
VOLIS
L1tilisez
Ie
flash
integre,
notez
que
Ie
parasoleil
ou
la
monture
de
I'objectif
risquent
de
bloqller
la
lumiine,
ce
qui
aura
pour
effet
Ie
vignetage
de
la
photo,
Lorsque
vous
lItilisez
Ie
flasll. n'utilisez
pas
de
parasolei\.
Meme
sans
parasoleil,
Ie
vignetage
(ombre
arquee)
risque
d'apparaitrc
sl
18
lumiere
est
bloquee
par
la
monture
de
I'objecti!.
II
est
donc
recornmande
d'utiliser
un
flash
optique
(griffe
ou
a
poignee)
Les
conditions
dll
vignetage,
telles
que
la
distance
focale
et
la
distance
de
mise
8U
point.
varient
selon
I'appareil
photo.
II
est
recomrnande
de
tester
Ie
vignetage
:'1
cllaque
distance
focale
et
distance
de
rnise
aLi
point.
Sugerencias
para
mejores
lolografias
con
e/objelivo
zoom
Tamron
•
Como
evitar
el
movimiento
de
la
camara
Cuando
utiliza
la
gama
focal
de
teleobjetivo,
debe
evitar
el
movimiento
de
la
camara.
Para
evitar
la
vibracion,
en
el
caso
de
las
camaras
digitales,
utilice
un
ajuste
ISO
de
numero
mas
altos
y
en
el
caso
de
las
camaras
de
pelicula,
uti
lice
la
pelicula
con
numeros
ISO
altos
para
aumentar
la
velocidad
del
obturador.
Tambien
se
recomienda
el
usa
de
un
trip
ode
0
un
monopode
Cuando
sostiene
la
camara
con
las
manos
para
tomar
una
fotografia,
parese
derecho
con
las
piernas
levemente
separadas,
apoye
los
codos
firmemente
contra
el
pecho
y
mantenga
la
camara
contra
la
cara
sin
realizar
movimientos.
Si
es
posible,
apoyese
contra
algo
para
mantenerse
firme
en
su
lugar
0
coloque
la
camara
sobre
algun
objeto
para
afirmarla.
Conservara
mejor
la
posicion
si
contiene
la
respiracion
cuando
presion
a
el
obturador
con
suavidad
y
firmeza.
•
Como
utilizar
el
flash
incorporado
Cuando
utilice
el
flash
incorporado,
tenga
en
cuenta
que
el
parasol
0
el
tubo
portalentes
pueden
obstaculizar
el
paso
de
la
luz
y
producir
un
efecto
de
viiieteado
en
la
imagen.
POI'
consiguiente,
es
aconsejable
no
utilizar
el
parasol
cuando
se
utiliza
el
flash.
EI
viiieteado
(sombra
en
forma
de
arco)
se
puede
producir
aun
en
ausencia
del
parasol
si
el
tubo
portalentes
impide
el
paso
de
la
luz;
POI'
consiguiente,
se
recomienda
utilizar
un
flash
optico
(con
zapata
de
contacto
0
soporte
de
montaje).
Las
condiciones
que
producen
el
viiieteado,
como
la
distancia
focal
y
la
distancia
de
enfoque,
varian
segun
la
camara.
Se
recomienda
probar
cad
a
distancia
focal
y
de
enfoque
para
evitar
este
efecto
indeseado.
Suggerimenli
per
1010
mig/iori
con
g/i
obieffivi
zoom
Tamron
•
Come
evitare
Ie
vibrazioni
nell'uso
della
fotocamera
Nell'impiego
di
obiettivi
a
lunga
distanza
focale
occorre
fare
attenzione
ad
evitare
Ie
vibrazioni
alia
fotocamera.
Per
eVltare
il
tremolio
nella
ripresa
in
fotocamere
digitali
utllizzare
un
settaggio
ISO
con
numeri
piu
elevati
e
per
fotocamere
tradizionali
utilizzare
pellicola
con
numeri
ISO
elevati
per
ottenere
una
maggiore
velocita
dell'otturatore
Quando
la
fotocamera
viene
impiegata
senza
altra
sostegno
che
la
mana,
adottare
una
posizione
stabile
a
gambe
leggermente
divaricate,
mantenendo
i
gomiti
pogglati
al
corpo
e
la
fotocamera
ben
poggiata
contra
il
viso.
Se
possibile,
appoggiare
il
corpo
ad
un
sostegno
solido
0
appoggiare
la
fotocamera
su
una
superficie
ben
ferma,
per
mantenere
una
posa
piu
stabile.
Se
la
fotocamera
viene
tenuta
in
mana,
si
ottiene
una
posa
piu
ferma
lrattenendo
il
respiro
al
momento
della
pressione
sui
pulsante
di
scatto,
che
deve
avvenire
in
modo
delicato
ma
sicuro.
•
Utilizzo
del
flash
incorporato
nella
fotocamera
Quando
si
utilizza
il
flash
incorporato
nella
fotocamera,
tenere
in
considerazione
che
il
\.i3raluce
0
il
barilotto
dell'obiettivo
possono
bloccare
la
luce
e
causare
la
vignettatura
dell'immagine.
Quando
si
utilizza
il
flash
incorporato,
non
utilizzare
un
paraluce.
La
vignettatura
(ombre
ad
arco)
puo
verificarsi
anche
senza
paraluce,
se
la
luce
viene
bloccata
dal
barilotto,
e
quindi
si
consiglia
di
utilizzare
un
Ilasll
attica
del
tipo
monlato
su
slitta
0
stafla.
Altre
condizioni,
variabili
a
seconda
del
tipo
di
fotocamera,
possono
inlluenzare
I'entita
della
vignettatura,
per
esempio
la
lunghezza
della
focale
e
la
distanza
di
messa
a
luoco.
Si
raccomanda
di
eHettuare
prave
apposite
per
ciascuna
lunghezza
focale
e
distanza
di
messa
a
luoco.
Sugesloes
para
obler
me/hores
imagens
com
as
objeclives
Tamron
•
Como
evitar
tremer
a
camara
Ao
utilizar
as
objectivas
no
alcance
local
telelotogralico,
tenha
aten~ao
para
nao
tremer
a
camara.
Para
evitar
que
a
Iota
saia
tremida,
em
cameras
digitais,
utilize
urn
ISO
de
numeros
mais
altos
e
em
cameras
de
filme,
utilize
urn
lilme
com
numeros
de
ISO
altos
para
se
obter
uma
velocidade
de
abertura
mais
rapida.
A
utiliza~ao
de
urn
tripe
ou
monope
tambem
e
eficaz.
Sempre
que
seguraI'
na
camara
com
a
mao
para
capturar
fotografias,
abra
as
pernas
mantendo-se
quieto,
lixe
os
seus
cotovelos
contra
0
peito
e
segure
na
camara
contra
a
sua
lace.
Se
possivel,
encoste-se
a
algo
para
manter
0
equilibrio
ou
coloque
a
camara
sobre
qualquer
coisa
para
fixar
0
suporte
Em
especial,
sempre
que
seguraI'
na
camara
com
as
maos,
licara
mais
lirme
se
suster
a
respira~ao
quando
prime
0
obturador.
•
Utilizar
0
flash
incorporado
da
camara
Sempre
que
utilizar 0
flash
incorporado
da
camara,
tenha
aten~ao
que
0
para-
sol
ou
0
tubo
de
extensao
podem
estar
a
bloquear
a
luz
causando
sombras
na
imagens
Sempre
que
utilizar 0
flash
incorporado
da
camara,
nao
utilize
0
para-
sol.
Mesmo
sem
0
para-sol,
podem
aparecer
sombras
(sombra
em
forma
de
arco)
se
a
luz
lor
bloqueada
pelo
tubo
de
extensao;
POl'
esta
razao
aconselhamos
a
utiliza~ao
de
uma
unidade
de
flash
optico
(tipo
hot
shoe
ou
POl'
manipulo).
As
condi~6es
que,
como
0
comprimento
e
distancia
de
focaliza~ao,
causam
sombras
poderao
variaI'
dependendo
da
camara.
Recomendamos
que
efectue
urn
teste
para
confirmar
se
nao
existem
sombras
ern
cad
a
comprimento
e
distancia
de
focaliza~ao.
Su
eslies
voor
belere
1010'S
mel
Tamron
zoom/enzen
•
HOE
VERMIJD
IK
HET
BEWEGEN
VAN
DE
CAMERA
Wanneer
uIllet
de
telelens
fotograleert,
dient
u
ervoor
te
zorgen
dat
de
camera
niet
wordt
bewogen.
Om
het
bewegen
van
de
camera
te
vermijden,
stelt
u
hogere
ISO-waarden
in
bij
digitale
fotocamera's,
en
bij
filmcamera's
gelJruikt
u
film
met
ilogere
ISO·waarden
om
een
hogere
sluitersneilleid
te
klljg81L
Het
gebruik
van
een
stalief
is
ook
doeltreffend.
Wanneer
u
met
de
camera
vanuit
de
hand
lotograleert,
sta
dan
stil
en
zet
de
benen
enigszins
uit
elkaar,
houdt
de
ellebogen
stevig
tegen
de
borst
en
de
camera
stevig
tegen
het
gezicht.
Indien
mogelijk,
leun
ergens
tegenaan
om
ulell
te
stcuncn
nf
~!nntn
de
GJmera
ergens
op
om
b(;tcr
houvant
Ie
iuijgcn. U
rr:Jtograreert
oak
lJekr
v<lnuil
(Ie
Ilall(!
wanneer
u
uw
adem
inlloudt, terwijl u
de
s!uitr.r
I,Hlgzaalll
en
stcvig
indrukt.
•
HET
GEBRUIK
VAN
HET
INGEBOUWDE
FLiTSAPPARAAT
Wanneer
u
de
ingebouwde
flits
van
de
camera
gebruikl,
realiseer
u
dan
dat
de
lenskap
01
het
lenshuis
het
licht
kan
blokkeren
en
vignetteren
van
het
beeld
tot
gevolg
hebben.
Gebruik
geen
lenskap
wanneer
u
de
ingebOllwde
flits
gebruikt.
Zclfs
zonder
een
lenskap
kan
vignettp.ren
(boogvormige
scha(!uw)
plaatsvindcn
wanneer
Ilel Ilcht
geblokkeerd
wordt
door
l18t
lenslluis.
Het
is
dus
aan
te
raden
een
optiscll flitsapparaat
te
gebruikcn
(bevestiging
op
voet
01
beugel
op
camera)
De
condities,
zoals
de
brandpuntsafstand
en
de
scherpstelling,
die
vignettering
veroorzaken
varieren
afhankelijk
van
Ilet
type
camera.
Het
is
aanbevolen
Olll
dit uit
Ie
proberen
voor
elke
lJrandpunlsafstand
en
scherpstelling.
•
PD
{iiI
~
~:tEl
tJl
B1
ffN
iJ.J
'/,(;,,)'.)IJ
I
lUtf(J}Jx1({:
A\I
WI"!.
ii!l
/J\/LAI1~)1.~1:jJiFJJ
0
)~:r
Iljj
lU£ltJl
:,,'jJJ.
Ji
!;p;(fI'W
I+JL!1t]j!J;!~j
Isom~t~j;'.ii:ZE:-Ti%!\'&J1UH9..
Jf:!$x~ftHJlQi
i,'j
J!
11',"II')O,>{1((:117)\
;;)j:Js.~i'IJh
r;,i({I'l:k
n
)*~JJto
19im=Jjtll~§t~Jjtl]
.'\")[,111
)IJj
JeH
+lliJLUJ
:;:
il).
iPi
;1'j
XX.)lt.IJ:ff~i1ii'x~LUr
MI!J::
i~t
xxll,J,f,zjJjt.!J,
'if;
;ft-
II~~
IjiJ.
J:J:i"j
t'llillfcH~;lijtJv18I"i
ML-e[l,
1'11
..
j
pHit~
i~~~
W/J
[tI8
/
'.!D1i'lo/II;.J-
e\
\lM:.:
YE&
i'j
il
i
,tJL
'''it
+
),',1
[1,1
(lJ
i\'jJ
'liJL~
U)JI~,
J
H~\
j:i~
G
)2Jt
ll')iJ
+
Jlli,
tH!lilLlI,] :{;.(f
II
?~{Jth;tHJlJ9;lthj1i:'!:-R!
J
lI~~l:i:j:Jtp'FU)J.H
fill
1~j
IIJ
U
..
•
{~m
l!111:E:tElfJLtB1IAJ
:7C~TS1
3
19iH1
Ili1
tHO
tJlLS11A]
Yt:J:l
Ai.
i.f]
it£.,
f~~
;~~!!Y,
HI.
)',
*'
n-;
IJ
(iUi'\,
..
j.11
tlJ
:)ttt
rm).;~J')(':;f;1i¥j
U1
;fh.J.{
lJiUR
0It]
ILL
~lj
ijJ~
rn
rliUi-!!
I
+JL
r
(I'~
IAI
jUJ
n,j,
i.i!f0J1j[iJIH1{:y,
~;,,,
Un1~!7j'1j[iJfHJ't)'<
~;'o'.
yeIITUCUI1h[J,/!,
1',1
I.';~
:fMIJiJ.\
i'iJlm,'±',IY/,;·\Hf':IJ,l,M{
(c:;
)T';;f(JBJHt),
J
iff
I,l..
W~JfJ
(':'91'
i~~I'I"J.:,'(,'?
It
IAl
:)'UJ
,tHv:
A
il]
~t
81"
'J
I
il.~
;fJi
:f.t'
IJi~
g{
S<J
ltdl
VI!
fHJ.:i
..
1,)
x')
i~Uilj
it;.
1J\i:t\lifii.ft
Jtj
R<HII
iJl,rm
h'"
~
J}r1&:\:St'F
/f\
r,~j
Ili
'tJx'!ft
~r'
i~\
,inll
i
IUJi
';;'f"
lJiU~'-!.
((J
ti"v
TAmRon*
USA
SIX
YEAR
LIMITED
WARRANTY
(Six-Year
Warranty
Valid
in
USA
only.)
Model
--------"'lsp"'e<:i"'M--------
Serial
No.
_
o
Mr.
0
Mrs.
0
Ms.
Address
_
City
State
Zip
_
May
we
send
you
product
updates
and
news
from
Tamron
and
/
or
Tamron
partners
bye-mail
or
postal
mail?
Postal
Mail
0
yes
/ 0
no
E-mail
0
yes
/ 0
no
If
yes,
your
e-mail
Address
_
Date
of
Purchase-,I""'ea;;>n--'-------;;;;lmC;;;ont"'hl--'------;;ldCiliate"l
_
Store
Name
~
City
State
_
u
Please
visit
us
at
www.tamron.com
or
call
1-800-827-8880
for
an
Authorized
Tamron
Repair
Center.
This
slIp,
along
wIth
your
sales
receipt,
IS
your
valid
proof
of
purchase.
It
must
be
submItted
wIth
any
servIce
request.
It
Will
be
returned
to
you
with
your
lens.
WARRANTY SERVICE
SLIP
About
your
new
Tamron Lens:
Model
o
store
clerk
o
in-store
flyer
(name
of
store)
o
celebrations
&
holidays
o
journalism
&
documentary
o
outdoor
activities
o
vacation/travel
o
poor
o
poor
o
poor
o
poor
o
poor
o
price
05
or
more
o
mail-order
Dover
55
02-3
yrs
Dover
10
yrs
o
internet
o
internet
045-54
o
average
o
average
o
average
o
average
o
average
o
Sony
o
Canon
0
Nikon
0
Pentax
Did
you
buy
this
lens
with
an
SLR
camera
body?
o
yes*
0
no
*if
yes,
what
brand
&model?
What
was
the
primary
reason(s)
for
choosing
this
lens
(select
up
to
3)
?
o
focal
length
0
overall
size
0
weight
0
cosmetic
design
o
image
quality
0
other
Where
did
you
buy
this
lens?
o
store
0
electronics
mass
retailer
With
what
camera
will
you
be
using
this lens?
o
DSLR
(name)
0
SLR(name)
How
did
you
find
out
about
this
lens
(select
only
one)
?
o
product
brochure
0
editorial
(name
of
magazine)
o
internet
0
magazine
ad
(name
of
magazine)
_
o
friend/relative
0
in-store
display
0
store
catalog
o
newspaper
ad
0
www.tamron.com
0
show/event
o
mail-order
0
other
website
o
other
_
When
you
purchased
this
lens,
did
you
consider
buying
other manufacturer's lens?
*if
yes,
name
manufacturer
and
lens
_
What
is
your
impression
of
the
lens
after
purchase?
1.
Image
Quality
0
excellent
0
good
2.
Weight
0
excellent
0
good
3.
Compactness
0
excellent
0
good
4.
Cosmetic
Design
0
excellent
0
good
5.
Price
0
excellent
0
good
About
yourself
and
your
involvement in
photography:
Age
o
under
24
0
24-34
0
35-44
How
long
have
you
been
using
an
SLR
camera?
o
this
is
my
first
SLR
0
less
than
1
year
o
4-6
yrs
0
7-10
yrs
How
many
interchangeable
lenses
do
you
own
including this
new
lens?
o
just
this
lens
0 2 0 3 0 4
What
other
types
of
lenses
are
you
interested
in
purchasing
in
the
future?
o
ultrawide
fixed
(e.g.
14mm)
0
ultra
wide
zoom
01:1
macro
(e.g.
180mm)
o
fast
aperture
0
ultra
tele
zoom
(e.g.
200-500mm)
0
none
for
now
What
kind
of
subjects
do
you
shoot
most
often
(select
up
to
3)
?
o
architecture
0
family
o
fashion
&
glamour
0
flowers,
gardens
&
insects
o
medical
&
scientific
0
nature
&
wildlife
o
wedding
&
portraits
0
sports
o
other
Where
do
you
bUy
your
photo
equipment
most
often
(select
only
one)
?
o
local
specialty
photo
store
0
mail
order
o
mass
merchandiser
0
other
Name
your
favorite
imaging
magazine:
Name
your
favorite
general
magazine:
Do
you
have
any
other
Tamron
lens?
*if
yes,
name
Tell us
about
your
dream
lens(es), please
print
legibly:
,------------,,-------------,
Focal
length
(e.g.,
28-200,
200-500)
Aperture
(e.g.,
FI2.8,
F/4-5.6,
F/3.5)
1-----------
-------11------------1
Price
Range
~
Other
comments/ideas
Thank
you
for
completing
this
consumer
survey.
You
valuable
feedback
will
be
used
to
help
us
serve
our
customers
better
as
well
as
help
us
to
develop
future
products.
For
more
information
on
our
products,
please
visit
www.tamron.com
to
download
a
PDF
brochure.
DSLR
with
APS-C
Size
Imager
•Wide Angle Zoom
•Standard Zoom
•Telephoto Zoom
•Single-Focal Length
•Macro
DSLR
with
full
Size
Imager
•Wide Angle Zoom
•Standard Zoom
•Telephoto Zoom
•Single-Focal Length
•Macro
•Manual Focus
•Teleconverters
•General Tamron Catalog
Sl;L
J. J.
AN '>I:)YIIIIIIIIO:)
OUYI'::nnos
NI~SnY
0
J.
(11eMeH
pue
e>jsel\f
'slelS
p8l!Un
lelU8U!lUOJ
84l
UI
pie,,)
A~NVHHVM
a3~11N1l
HV3A
XIS
Please
take
a
moment
to
complete
this
consumer
survey. You
valuable
feedback
will
be
used
to
help
us
serve
our
customers
better
as
well
as
help
us
to
develop
future
products.
If
applying
for
a
rebate,
form
must
be
completely
filled
out.
Thank
you.
Please
Tape
Here
U-0704

Other manuals for A18

1

Other Tamron Camera Lens manuals

Tamron F013 User manual

Tamron

Tamron F013 User manual

Tamron A061 User manual

Tamron

Tamron A061 User manual

Tamron SPECIFICATIONS User manual

Tamron

Tamron SPECIFICATIONS User manual

Tamron 69E User manual

Tamron

Tamron 69E User manual

Tamron B060 User manual

Tamron

Tamron B060 User manual

Tamron A08 User manual

Tamron

Tamron A08 User manual

Tamron F017 User manual

Tamron

Tamron F017 User manual

Tamron A037 User manual

Tamron

Tamron A037 User manual

Tamron A031 User manual

Tamron

Tamron A031 User manual

Tamron B001 User manual

Tamron

Tamron B001 User manual

Tamron A14 User manual

Tamron

Tamron A14 User manual

Tamron SP AF70-200mm F/2.8 Di LD [IF] Macro User manual

Tamron

Tamron SP AF70-200mm F/2.8 Di LD [IF] Macro User manual

Tamron 272E User manual

Tamron

Tamron 272E User manual

Tamron B008 User manual

Tamron

Tamron B008 User manual

Tamron A035 User manual

Tamron

Tamron A035 User manual

Tamron A09 Manual

Tamron

Tamron A09 Manual

Tamron A061 User manual

Tamron

Tamron A061 User manual

Tamron SP AF10-24mm F/3.5-4.5 Di II LD Aspherical (IF)... User manual

Tamron

Tamron SP AF10-24mm F/3.5-4.5 Di II LD Aspherical (IF)... User manual

Tamron A13 User manual

Tamron

Tamron A13 User manual

Tamron SP AF 17-50mm F/2.8 User manual

Tamron

Tamron SP AF 17-50mm F/2.8 User manual

Tamron A06 User manual

Tamron

Tamron A06 User manual

Tamron B005 User manual

Tamron

Tamron B005 User manual

Tamron F050 User manual

Tamron

Tamron F050 User manual

Tamron F004 User manual

Tamron

Tamron F004 User manual

Popular Camera Lens manuals by other brands

Panasonic H-HS030 owner's manual

Panasonic

Panasonic H-HS030 owner's manual

FujiFilm FUJINON GF63mmF2.8 R WR owner's manual

FujiFilm

FujiFilm FUJINON GF63mmF2.8 R WR owner's manual

Sony E 30mm F3.5 Macro operating instructions

Sony

Sony E 30mm F3.5 Macro operating instructions

Sigma 24-105mm F4 DG OS HSM Specifications

Sigma

Sigma 24-105mm F4 DG OS HSM Specifications

Sony VCL-DEH17V Notes

Sony

Sony VCL-DEH17V Notes

Olympus ED75-300mm f4.8-6.7 ? instructions

Olympus

Olympus ED75-300mm f4.8-6.7 ? instructions

Lifetrons Pro Travel Premium user guide

Lifetrons

Lifetrons Pro Travel Premium user guide

Sony VCL-HG0737 operating instructions

Sony

Sony VCL-HG0737 operating instructions

Canon CN8x15 Operation manual

Canon

Canon CN8x15 Operation manual

Sony FE 600mm F4 GM OSS operating instructions

Sony

Sony FE 600mm F4 GM OSS operating instructions

Angenieux OPTIMO 28-340 user manual

Angenieux

Angenieux OPTIMO 28-340 user manual

Swann SW-C-LM358 Manual Vari Focal specification

Swann

Swann SW-C-LM358 Manual Vari Focal specification

VOIGTLANDER NOKTON 35mm F1.2 Z-mount instruction manual

VOIGTLANDER

VOIGTLANDER NOKTON 35mm F1.2 Z-mount instruction manual

Sony VCL-ECF1 operating instructions

Sony

Sony VCL-ECF1 operating instructions

Sony SAL1855 - 18-55mm f/3.5-5.6 SAM DT Standard Zoom... operating instructions

Sony

Sony SAL1855 - 18-55mm f/3.5-5.6 SAM DT Standard Zoom... operating instructions

Sigma APO50-150mm F2.8 EX DC OS HSM instructions

Sigma

Sigma APO50-150mm F2.8 EX DC OS HSM instructions

Canon EF 35~350 mm f/3,5-5,6 L instructions

Canon

Canon EF 35~350 mm f/3,5-5,6 L instructions

William Optics DCL-52 Connection guide

William Optics

William Optics DCL-52 Connection guide

manuals.online logo
manuals.online logoBrands
  • About & Mission
  • Contact us
  • Privacy Policy
  • Terms and Conditions

Copyright 2025 Manuals.Online. All Rights Reserved.