P.19
P.18
1918
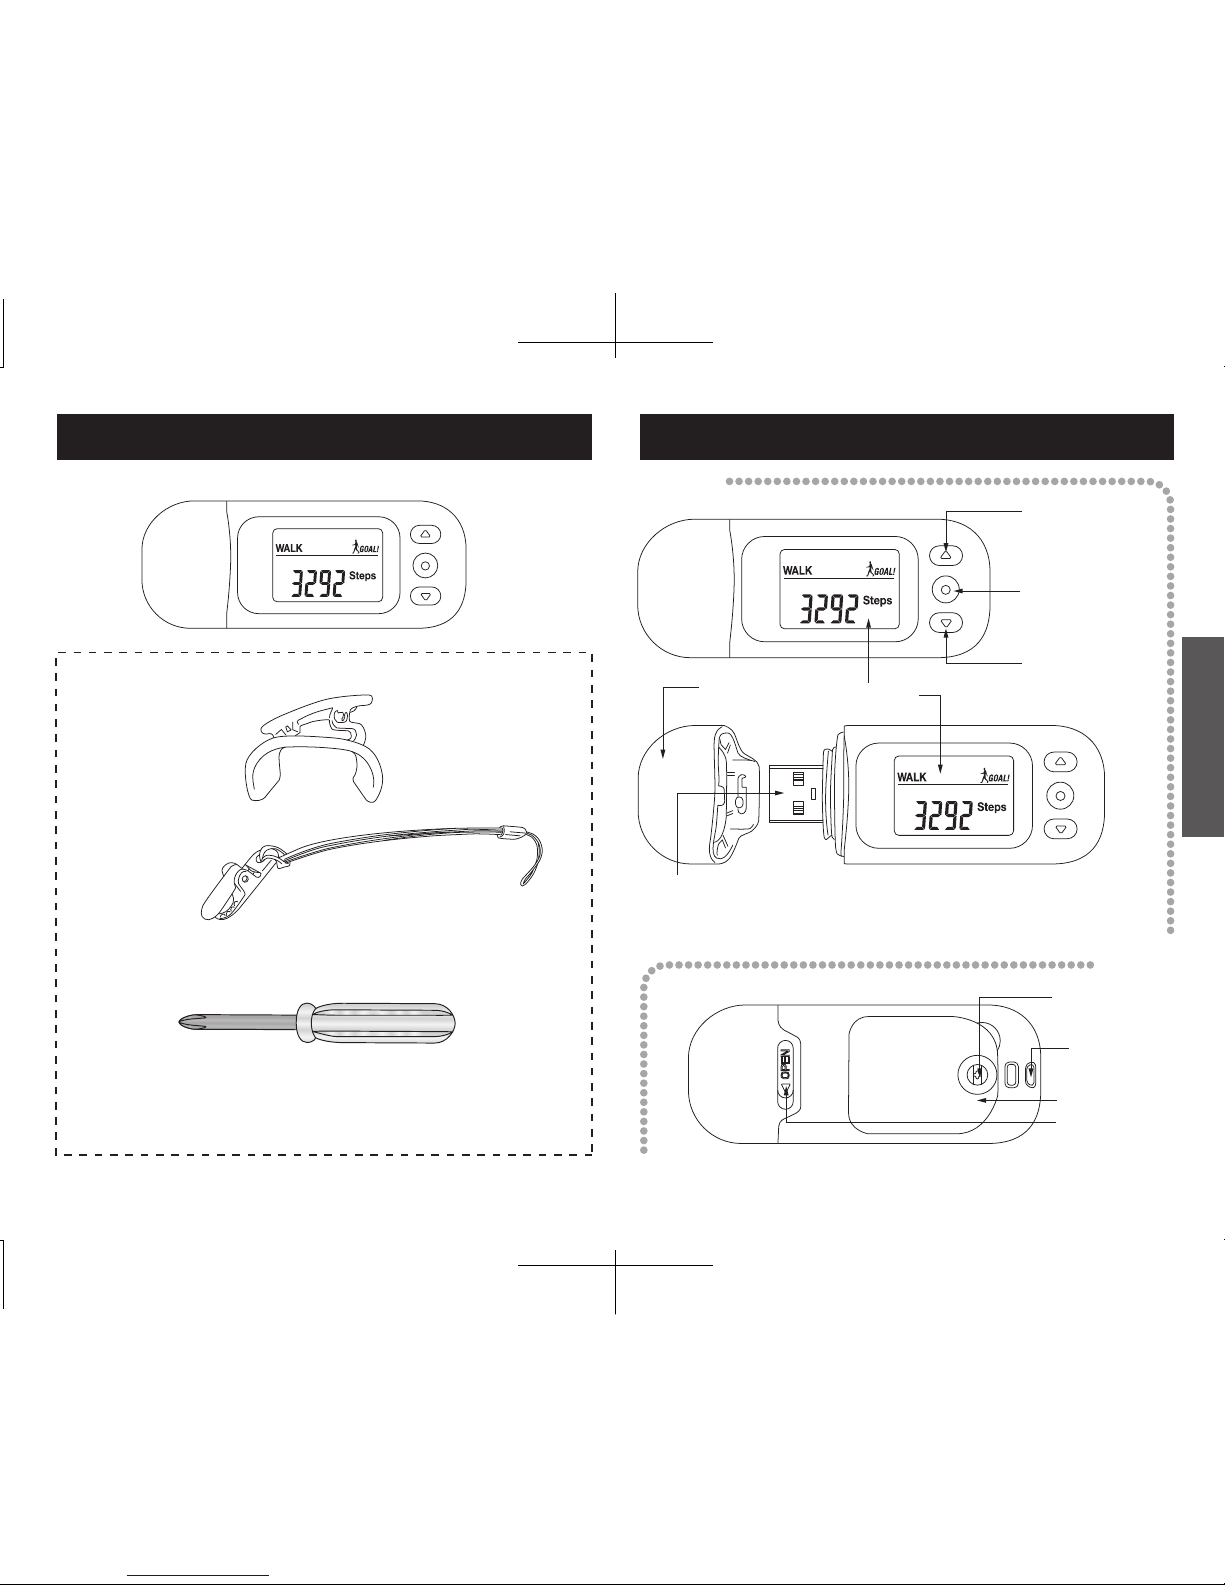
Initial Setup
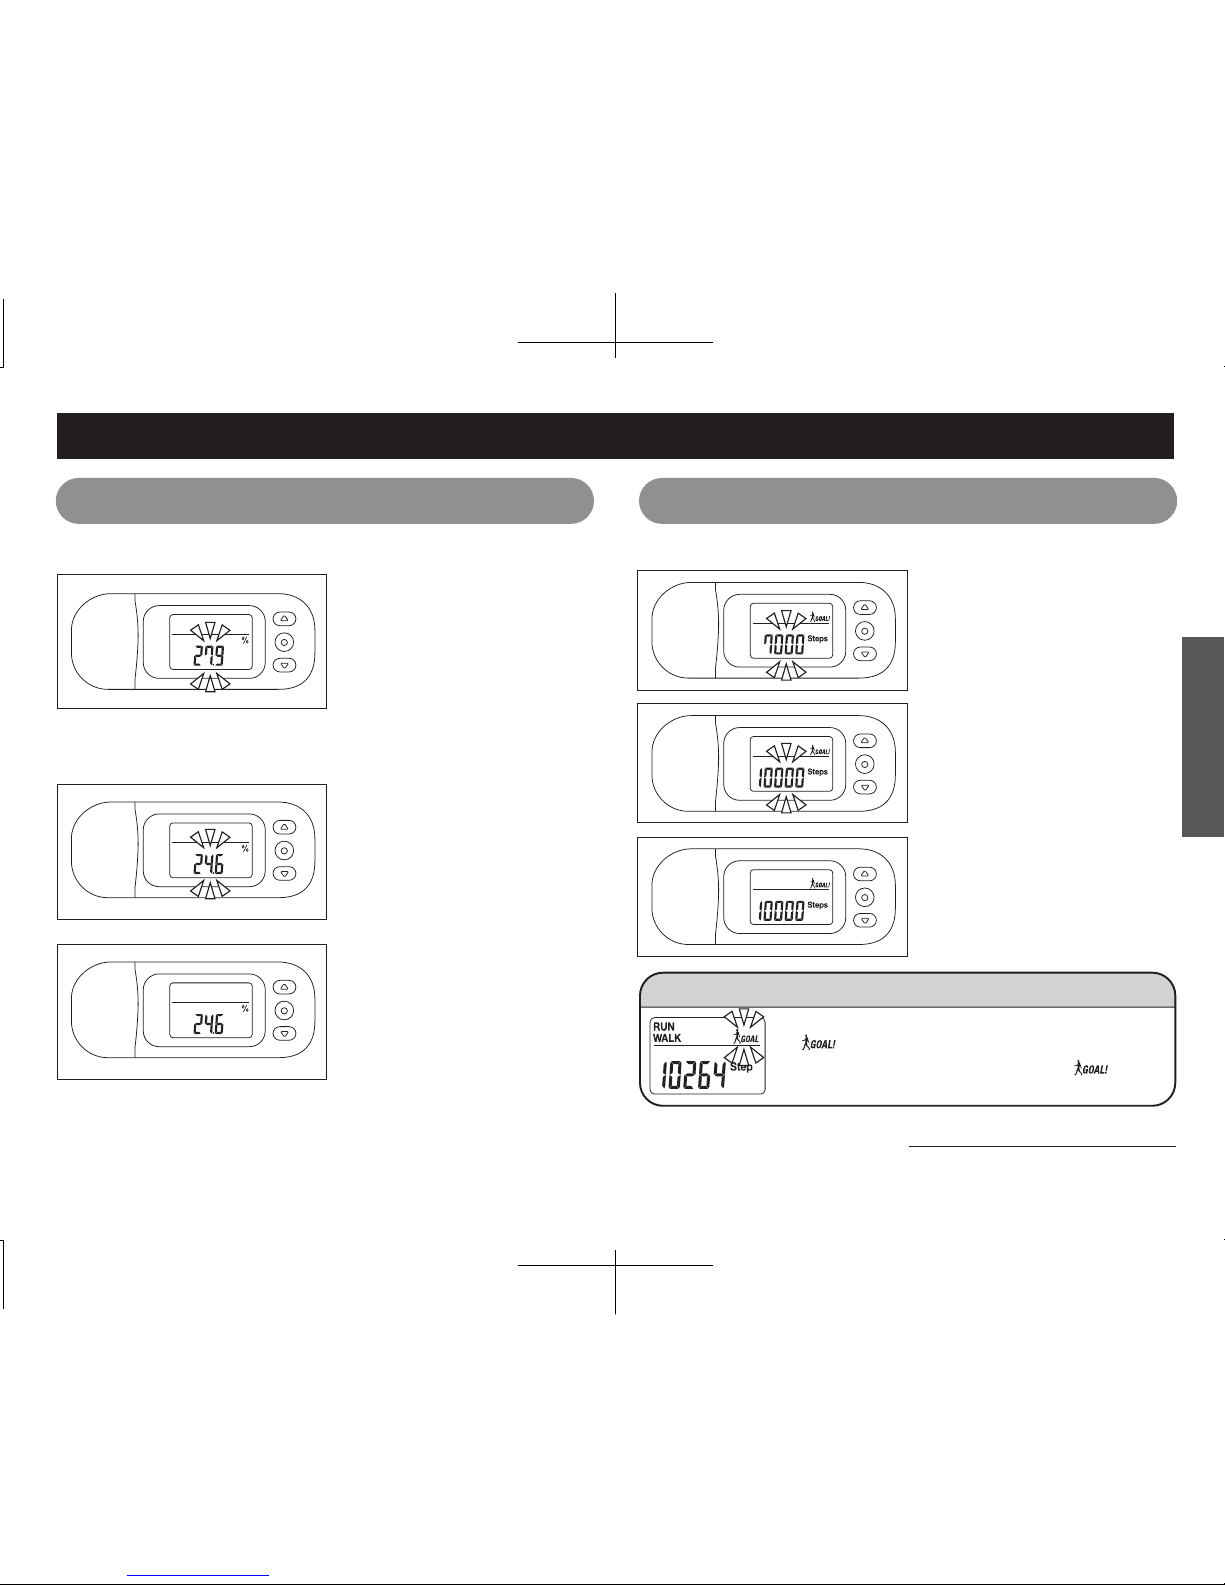
Next, set the "target number
of steps".
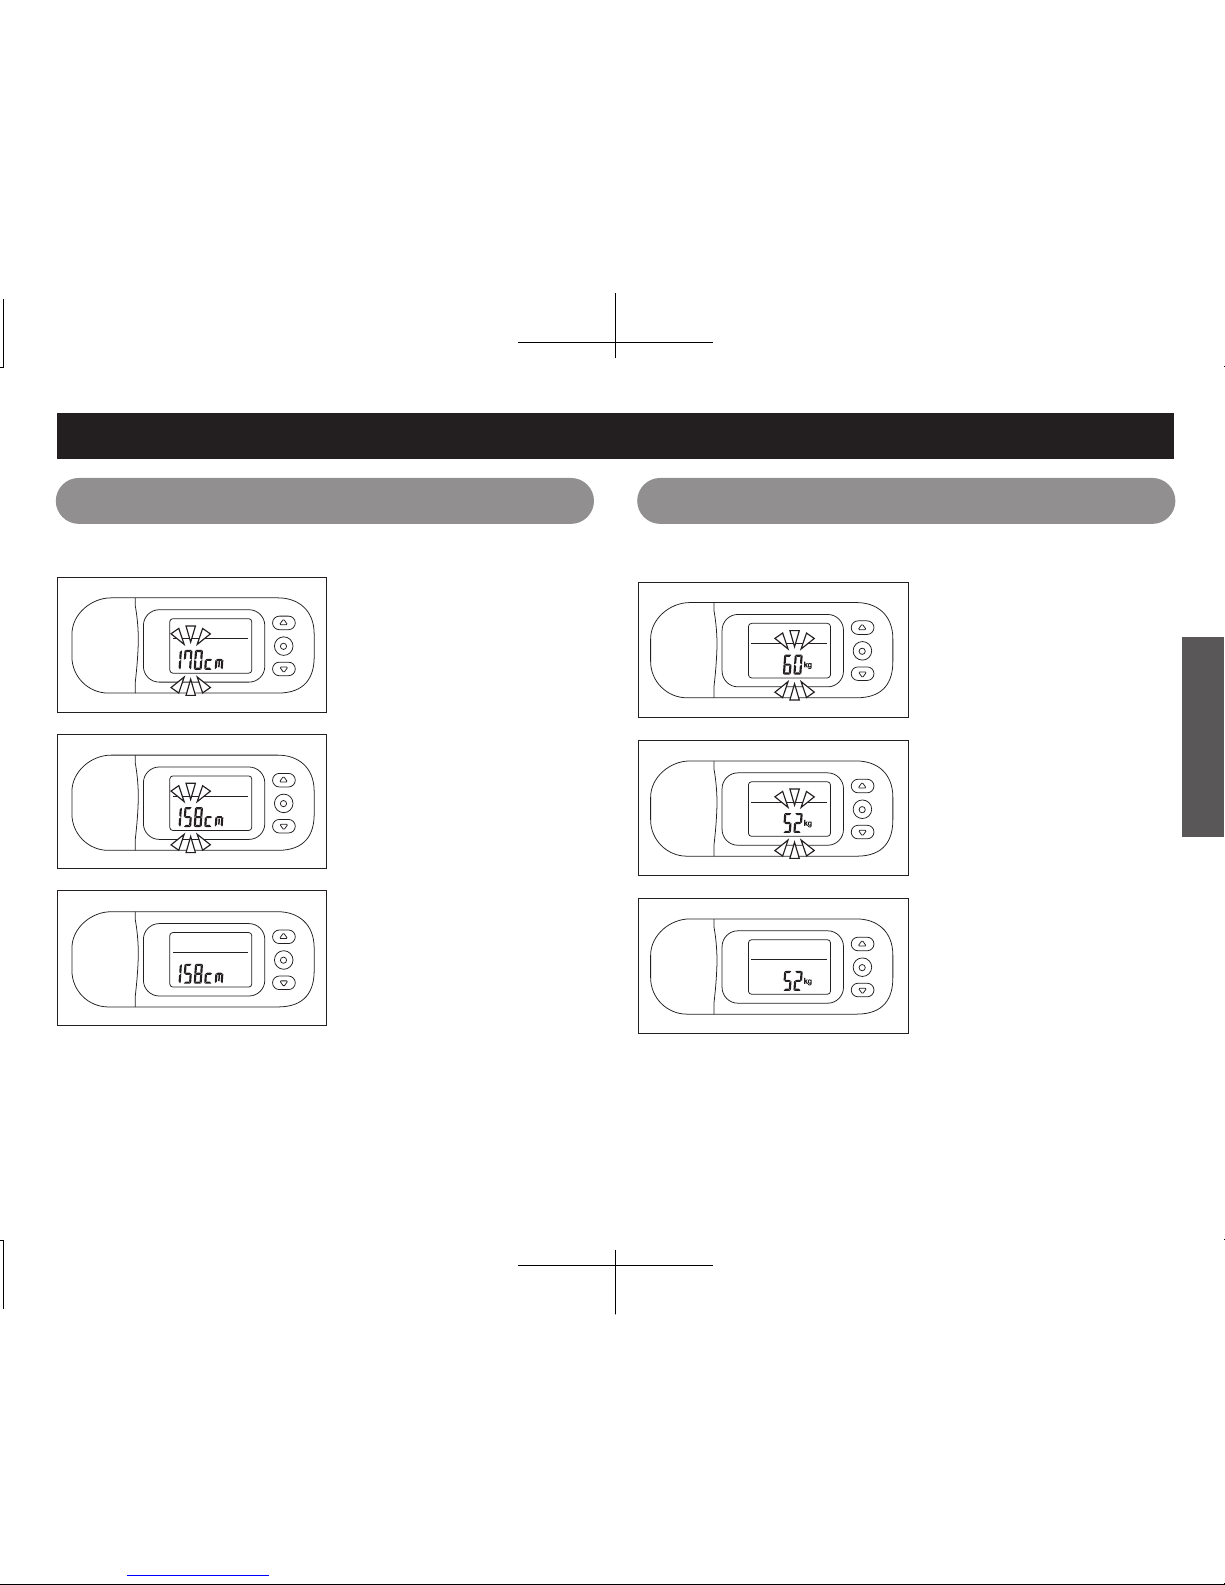
①
After setting your weight,
your "body fat (%)" blinks.
※
The displayed body fat (%) is estimated from your
height and weight. If you do not exactly know
your body fat (%), please leave this setting as it
is. From the second measurement onwards, the
previous set value will be displayed and will not
be recalculated.
Setting Your Body Fat (%)
②Press ▲or ▼to select
your "body fat (%)".
Holding down these buttons fast feeds the year
(setting range: 5.0% to 75.0%).
③
Press the
●
button to
set your "body fat (%)".
Example: To set your body fat (%) to 24.6%
AM-180E
This completes the initial setup.
①
After setting your body fat (%), the
"target number of daily steps" blinks.
Setting the Target Number of Steps
②
Press
▲
or
▼
to select the
"target number of steps".
Holding down these buttons fast feeds the target
number of steps (setting range: 1000 to 59000,
setting increment: 1000 steps).
③
Press the
●
button to apply
the "target number of steps".
※
If you make a mistake with the setting, remove
and re-inser t the batter y and repea t the
procedure from the beginning.
Example: To set the target to 10,000 steps
When number of steps has reached within 1,000 steps of the target number,
the " " mark will blink, and will light when the target number is reached.
※
If the target number of steps is 1,000, until 999 steps the "
" mark will
not be displayed, but will light when the 1,000 step target is reached.
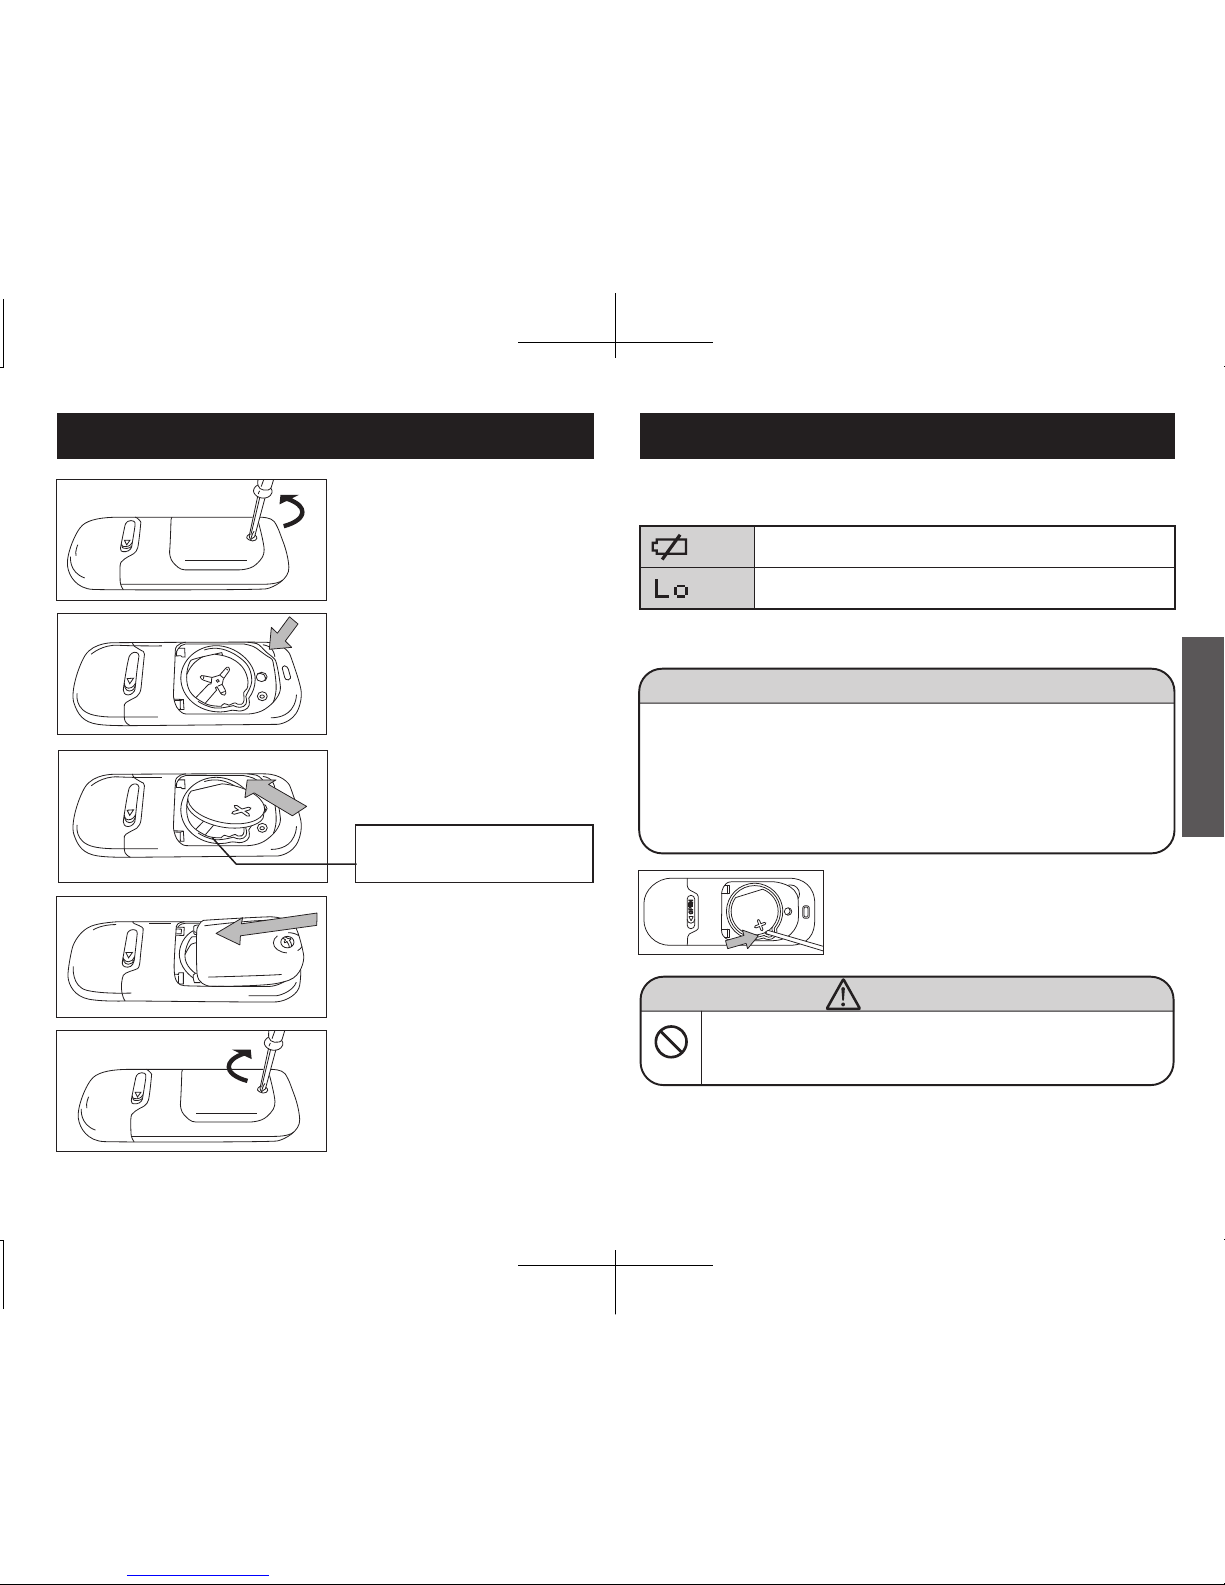
NOTE
Before Using