Targa W730-P4 User manual

Notebook PC
User's Guide
Model: W730-P4/ W730-K8/ W730-K7
First Edition: January 2004

User's Guide
Page II
Specifications and information found in this guide are subject to change
without notice. Any changes therefore will be incorporated in future
editions. The manufacturer assumes no responsibility for errors or
omissions in this document.
Windows® XP is the trademark of Microsoft Corporation.
Intel® is the trademark of Intel Corporation.
AMD® is the trademark of AMD Corporation.
Other trademarks are properties of their respective owners.
NOTICE
TRADEMARKS

User's Guide
Page III
The following standards are adopted throughout this guide:
Notebook in boldface (with or without capitalization) refers to the notebook
computer that you have purchased.
Boldface type is also used to highlight important information in this
document.
The messages that appear on the Notebook screen will be boxed when they
are referenced.
Whenever extra caution is called for, the information will be boxed in a dark
frame preceded by "Note:" or "Warning:"
Usually after performing a step-by-step instruction, you will be asked to:
Press the Esc key
Which means you should press the key located at the upper left-hand
corner of the keyboard.
Standards


User’s Guide Contents
Page V
CHAPTER 1 BEFORE YOU BEGIN .................................................. 1-1
1.1 CHECKING WHAT YOU RECEIVED .......................................................................1-1
1.2 EXAMINING YOUR COMPUTER .............................................................................1-2
1.3 THE FIVE STATUS LEDS.......................................................................................1-6
1.4 THE TWO POWER LEDS........................................................................................1-7
1.5 THE SEVEN SYSTEM BUTTONS ............................................................................1-8
1.6 ATTENTION ON HANDLES AND SOCKET DOORS ................................................1-9
1.7 THE <FN> KEY ....................................................................................................1-10
CHAPTER 2 BATTERY ........................................................................ 2-1
2.1 BATTERY PACK......................................................................................................2-1
2.2 RECHARGING THE BATTERY PACK ......................................................................2-1
2.3 QUESTIONS AND ANSWERS...................................................................................2-2
2.4 BATTERY MAINTENANCE .....................................................................................2-3
2.5 POWER CONSUMPTION..........................................................................................2-3
2.6 REDUCING POWER CONSUMPTION.......................................................................2-4
2.7 REMOVING THE BATTERY PACK..........................................................................2-5
CHAPTER 3 MEMORY ........................................................................ 3-1
3.1 REMOVING MEMORY MODULE ............................................................................3-2
CHAPTER 4 MINI-PCI MODULE...................................................... 4-1
4.1 REMOVING MINI-PCI MODULE ...........................................................................4-1
CHAPTER 5 THE HDD DRIVE........................................................... 5-1
5.1 REMOVING THE HARD DISK DRIVE.....................................................................5-1
APPENDIX A- AGENCY REGULATORY NOTICES ................... A-1
APPENDIX B- ENVIRONMENT........................................................ B-1
CONTENTS


User's Guide Before You Begin
Page 1-1
Chapter 1 Before You Begin
Please read this section before you start using your computer.
1.1 Checking What You Received
Your notebook package should contain the following items:
Note: You should keep the original factory carton and packing materials in case you
need to ship the unit back for servicing.
• The Notebook.
• AC Adapter.
• AC Power Cord.
• CD Disc (Including Drivers and
User’s Guide).
• Battery Pack.

Before You Begin User's Guide
Page 1-2
1.2 Examining Your Computer
Before you start using your computer, you need to get acquainted with your notebook's
main features and interfaces:
Panoramic View
Optical Drive
Ventilation Grills
Keyboard
Touch Pad
LCD
Screen
Speaker
Speaker
Cover Latch
Five Status
LEDs
Seven
S
y
stem Buttons
Two Power LEDs
User's Guide Before You Begin
Page 1-3
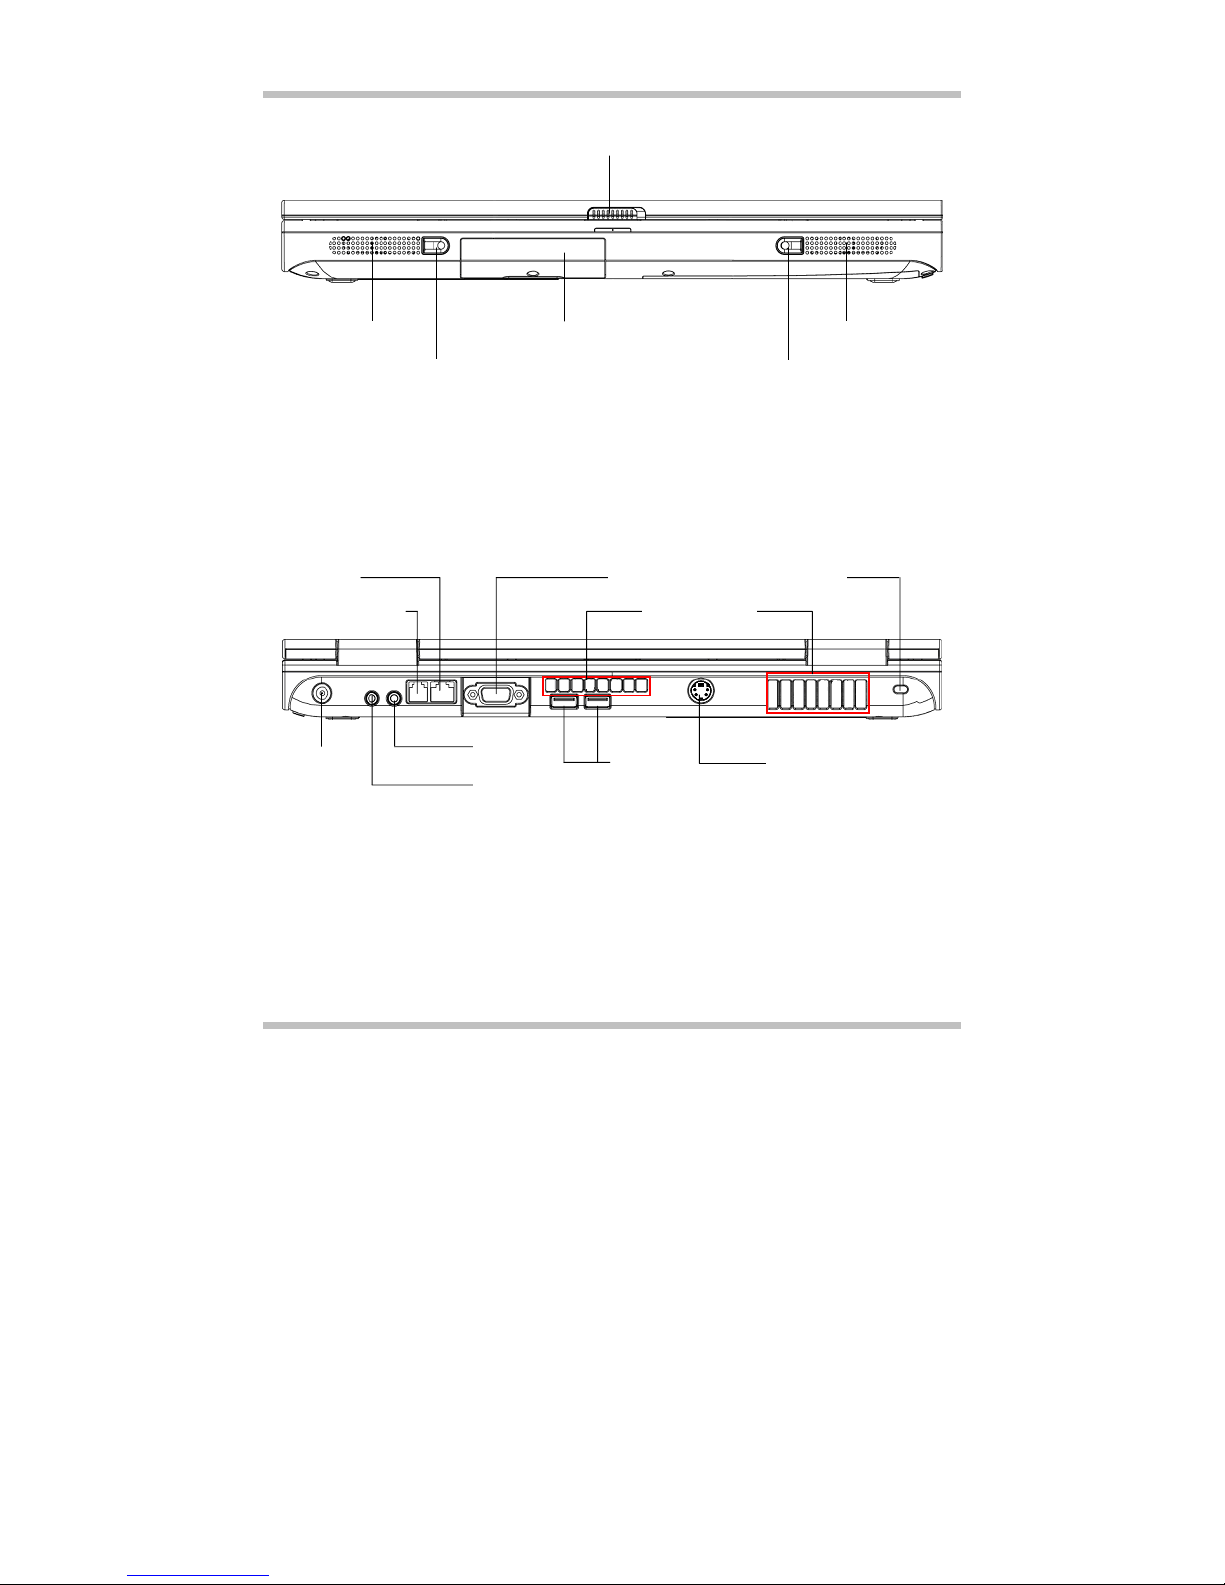
Front View
Rear View
Cover Latch
Speaker
DC-In
Microphone
Headphone USB Ports
RJ11 Fax/Modem
Connecto
r
RJ45 LAN
Connecto
r
VGA Port
S-Video Connector
(Optional)
Kensington
Lock
Ventilation Grills
Speaker
HDD Drive
Woofer Woofer

Before You Begin User's Guide
Page 1-4
Left View
Right View
Ventilation Grills
IEEE1394 Connector (Optional) USB Ports PCMCIA
Eject Handle
PCMCIA
Socket Door
CF Card Socket Door
CF Card Eject Handle 4-in-1 Socket Door
(
for MMC/MS/SD/CF Cards
)
Optical Drive
Eject Button
Emergency Hole
ODD LED

User's Guide Before You Begin
Page 1-5
Bottom View
Two Types for Audio Jet
Mono Connector:
Your microphone jet should
have this type of connecto
r
as shown here.
Stereo Connector:
Your headphone jet should
have this type of connector
as shown here
Two Battery
Latches
Battery
Pack
Mini-PCI
Doo
r
DDR Memory
Doo
r
HDD Door
Ventilation
Grills
Before You Begin User's Guide
Page 1-6
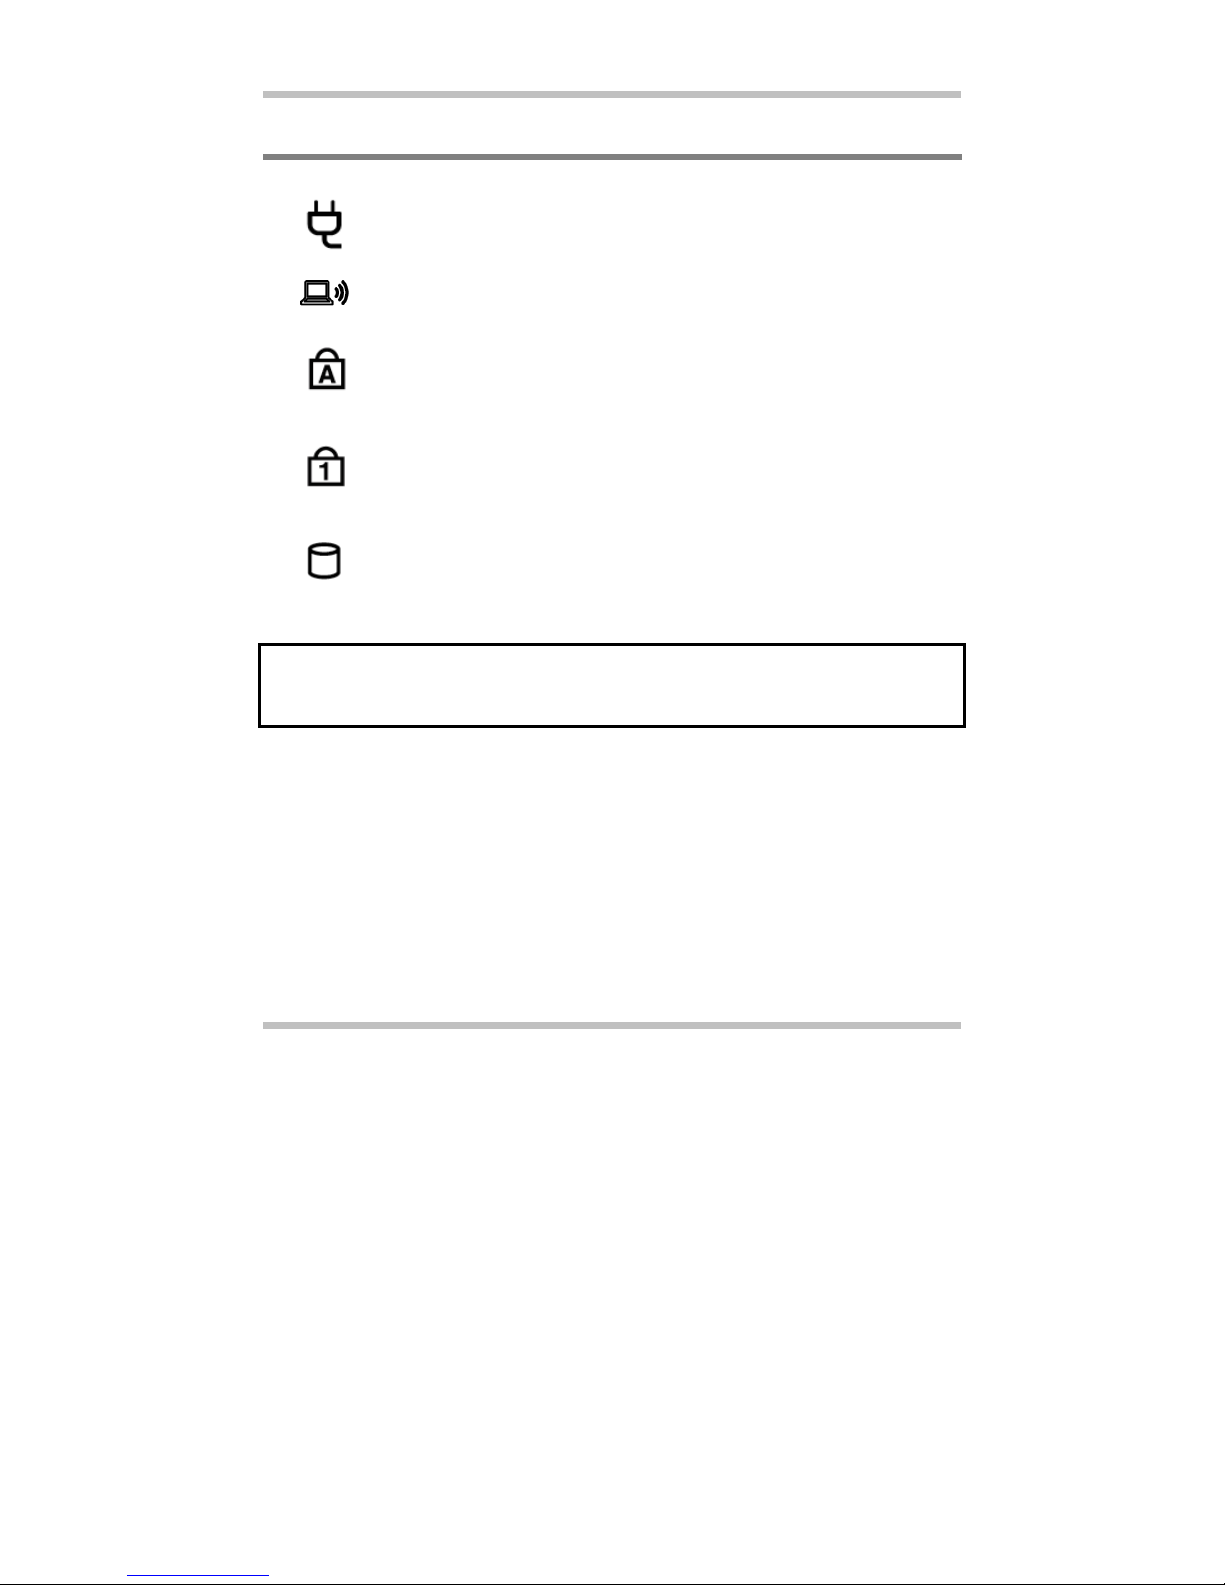
1.3 The Five Status LEDs
The AC Adapter LED
This LED would be lit when system is connected to an AC adapter.
The Wireless LED
This LED would be lit when the wireless function is activated.
The Caps Lock LED
The LED would be lit when the keyboard is in Caps Lock mode. In this mode,
all characters you type are in uppercase.
The Num Lock LED
This LED would be lit when the keyboard is in Num Lock mode. In this mode,
the embedded numeric keypads can be used.
The HDD Access LED
This LED would be lit when system is accessing the HDD.
Note: The Five Status LEDs are located near the two click buttons of the touch pad.
For exact location, please refer to the Panoramic View diagram in Chapter 1.2.

User's Guide Before You Begin
Page 1-7
1.4 The Two Power LEDs
The Power On LED
Below is how the LED would behave in different situations:
Off System is powered off, or in Hibernate mode.
On • System is powered by AC adapter, and/or
• System is in full operation.
Blinking System is in Standby mode.
The Battery Pack LED
Below is how the LED would behave in different situations:
On Battery pack is being recharged: fast-charge or pre-charge.
Blinking • Battery pack is consuming down to 10% level.
• Battery pack is waiting for recharge when battery
temperature is too high after discharge.
• Battery pack error.
Off Battery pack is not under recharge.
Note: The Two Power LEDs are located near the Five Status LEDs. For exact
location, please refer to the Panoramic View diagram in Chapter 1.2.
For more details on Standby and Hibernate, please refer to Power Options (for
Windows Systems) in the Control Panel of your Microsoft Windows operating
system.

Before You Begin User's Guide
Page 1-8
1.5 The Seven System Buttons
The Power Button
This Power Button is programmable by user. For detail on how to program this
button, please refer to the Power Options of Control Panel in Windows
System.
Search Button
Press this button to activate the search function.
Internet Button
Press this button to activate the internet function.
Email Button
Press this button to activate the email function.
Volume Up Button
Press this button to increase volume.
CD Play Button
Press this button to playback audio CD.
Volume Down Button
Press this button to decease volume.
Note: When the two system buttons, Volume Up Button and Volume Down Button,
are pressed together, the sound volume would be muted.
Note: The Seven System Buttons are located near top right of keyboard. For exact
location, please refer to the Panoramic View diagram in Chapter 1.2.
User's Guide Before You Begin
Page 1-9
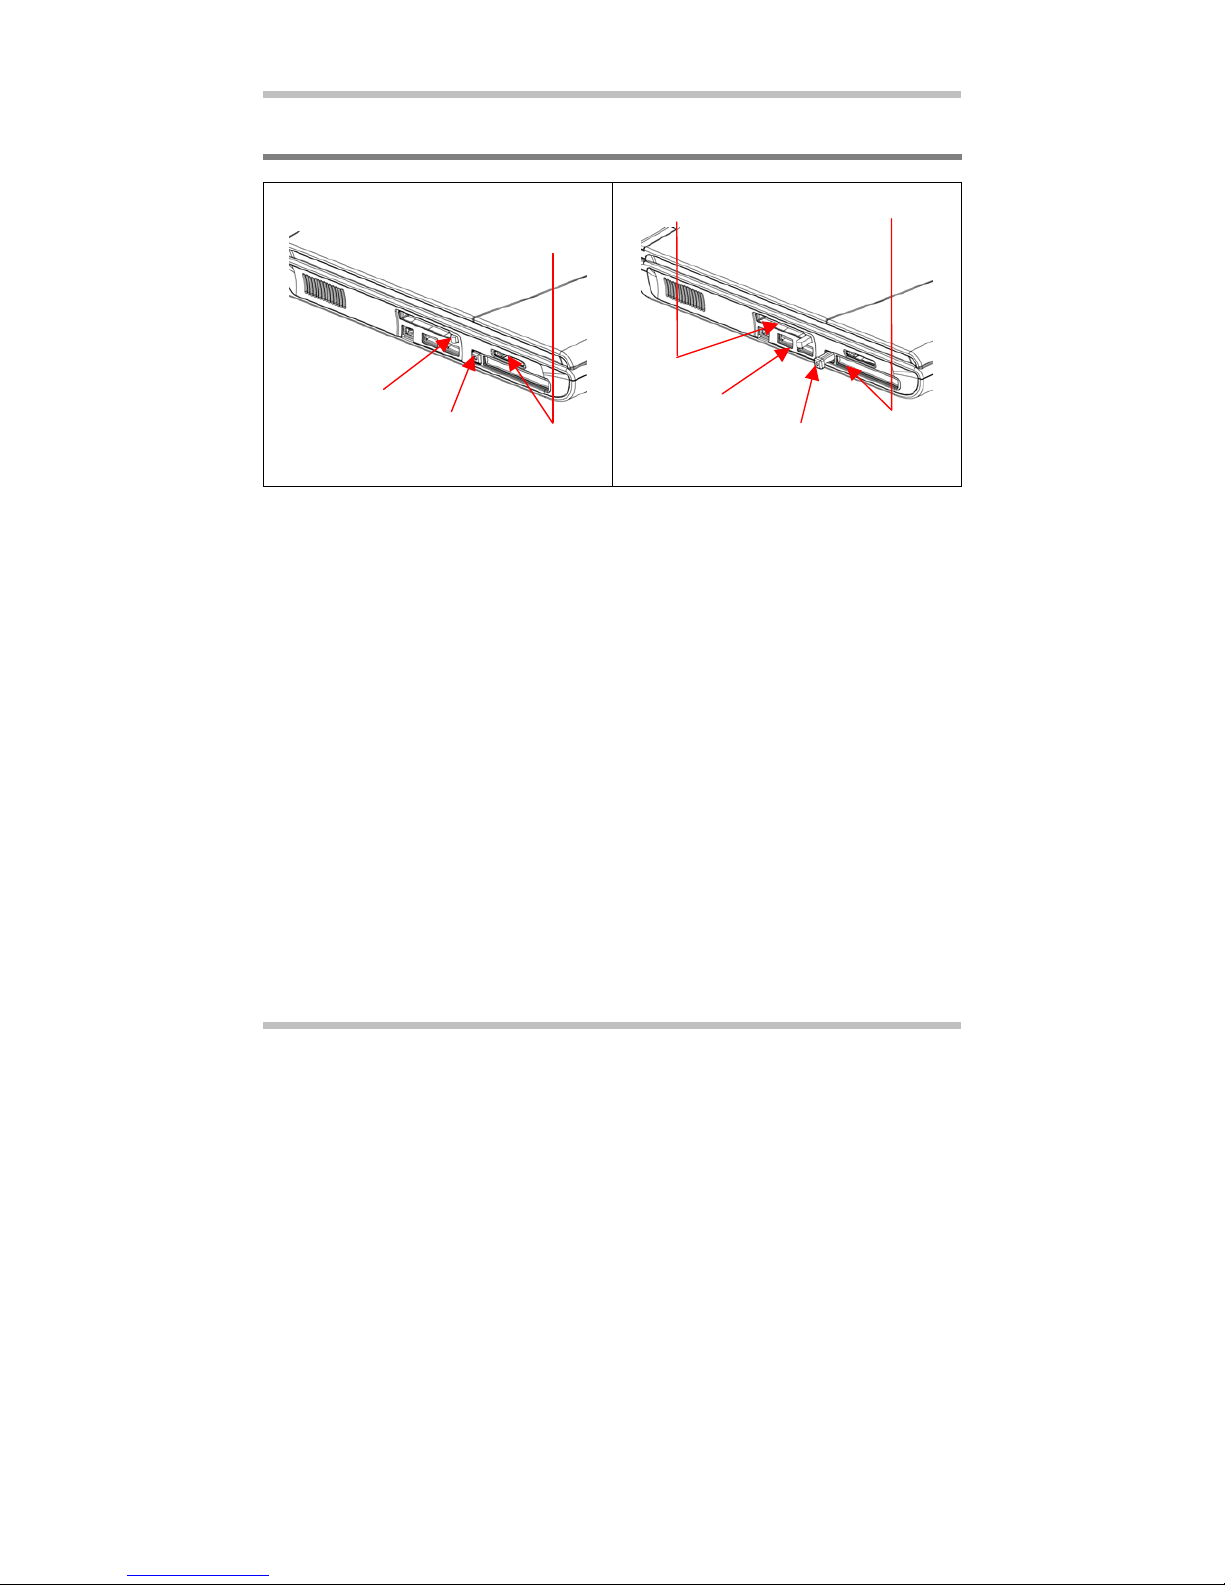
1.6 Attention On Handles And Socket Doors
Please observe below safety measures:
• Make sure the PCMCIA eject handle does not protrude out at all the time, unless you
are using the handle to eject PCMCIA card. A protruded handle is prone to external
interference; such as ramming by an inkjet printer or external keyboard.
• When PCMCIA card is not inserted into the PCMCIA socket, make sure this socket is
covered by the “PCMCIA socket door” as supplied together with this notebook. The
purpose of this “PCMCIA socket door” is to prevent foreign matters from entering into
the system unit through this socket, when PCMCIA card is not inserted.
• Make sure the CF card eject handle does not protrude out at all the time, unless you are
using the handle to eject CF card. A protruded handle is prone to external interference;
such as ramming by an inkjet printer or external keyboard.
• When CF card is not inserted into the CF card socket, make sure this socket is covered
by the “CF card socket door” as supplied together with this notebook. The purpose of
this “CF card socket door” is to prevent foreign matters from entering into the system
unit through this socket, when CF card is not inserted.
• When no card (Multi-Media Card/Memory Stick/SD Card/CF Card) is not inserted
into this 4-in-1 socket, make sure this socket is covered by the “4-in-1 socket door” as
supplied together with this notebook. The purpose of this “4-in-1 socket door” is to
prevent foreign matters from entering into the system unit through this socket, when no
card is inserted.
The CF card handle
is retracted The PCMCIA
handle is retracted
The CF card handle
is
p
rotruded out The PCMCIA handle is
p
rotruded out.
4-in-1- Slot for
MMC/MS/SD/CF cards
PCMCIA Slot
CF Card Slot

Before You Begin User's Guide
Page 1-10
1.7 The <Fn> Key
The <Fn> Function Key is located near the bottom-left corner of the keyboard. This key is
used together with other keys to activate certain pre-defined functions. To activate these
functions, press and hold down <Fn> together with the keys described below:
LED Toggle
Press this key combination (Fn+F1) would toggle on and toggle off all LED
lights. To minimize visual distractions, you may like to toggle off all LED
lights during DVD software playback.
Wireless LAN
Press this key combination (Fn+F2) to activate the wireless LAN function.
Suspend
Press this key combination (Fn+F3) to have system enter the Suspend mode.
In Suspend mode, the black light of the display panel would be turned off and
a host of internal devices would enter into a stage of lower power
consumption. Press any keycap on the keyboard to resume normal operation.
LCD/CRT Switch
Press this key combination (Fn+F4) to switch between LCD only, CRT only,
and LCD/CRT simultaneously.
Brightness Decrease
Press this key combination (Fn+F7) to decrease the brightness of the LCD
display.
Brightness Increase
Press this key combination (Fn+F8) to increase the brightness of the LCD
display.

User's Guide Before You Begin
Page 1-11
Play/Pause
This hot-key is for audio CD disc playback. Press this key combination
(Fn+F9) to play or pause audio play back.
Stop
This hot-key is for audio CD disc playback. Press this key combination
(Fn+F10) to stop audio playback.
Previous Track
This hot-key is for audio CD disc playback. Press this key combination
(Fn+F11) to skip to the previous track.
Next Track
This hot-key is for audio CD disc playback. Press this key combination
(Fn+F12) to skip to the next track.


User's Guide Battery
Page 2-1
Chapter 2 Battery
2.1 Battery Pack
Your notebook is equipped with a high energy rechargeable Lithium Ion (Li-Ion) battery
pack. In general, a fully charged battery pack can support around 2.0~3.0 hours of
operation, with Windows’ Power Management option enabled. However, difference in
configuration (CPU, HDD, Memory etc.) and system utilization (especially I/O activities)
can affect the operation time greatly.
2.2 Recharging the Battery Pack
Your notebook supports both on-line and off-line recharge. Follow the procedure below to
recharge battery:
• Make sure the battery pack is installed in the notebook.
• Connect the AC adapter to the notebook and to an electrical outlet.
When a battery pack is being recharged, its battery LED (located near the Five Status
LEDs) would be lit up. For details on the LEDs, please refer to Chapter 1.3. When the
notebook is OFF, a depleted Li-Ion battery will take three hours to recharge.

Battery User's Guide
Page 2-2
2.3 Questions and Answers
Q: I can feel the heat next to the Touch Pad during recharge. Is it normal?
A: The battery will generate heat during recharging and discharging. There is a
protection circuit inside the notebook to prevent overheating. User needs not to
worry.
Q: My battery operation time is not as long as it should be. Why?
A: The battery is heat sensitive and can only be charged to its maximum if the battery
and its environmental temperature remain within 15-25°C (59-77°F). The more the
temperature deviates from this range during recharging, the less chance there is for
the battery to be fully charged. In order to recharge the pack to its full capacity,
users are requested to cool down the unit by unplugging the AC Adapter. Wait until
it is cooled down. Then plug in the AC Adapter to start recharging again.
Q: I did not use my spare battery for a few days. Even though it was fully recharged,
there wasn't as much power left as a newly charged one. Why?
A: The batteries will self-discharge (1% per day for Li-Ion) when they are not being
recharged. To make sure a battery pack is fully charged, recharge before use.
Always keep the battery inside the notebook and have the AC adapter connected
whenever possible.
Q: I did not use my spare battery for months. I have problem in recharging it.
A: If you happen to leave your battery pack to go through an extended period of self-
discharge, say more than three months, the battery voltage level will become too
low and needs to be Pre-Charged (to bring the battery voltage level high enough)
before it automatically (for Li-Ion only) resumes its normal Fast Charge. Pre-
Charge may take 30 minutes. Fast Charge usually takes 2~3 hours.
This manual suits for next models
2
Table of contents
Other Targa Laptop manuals


 user guide")


