Target SYSTEM TB 1000 Setup guide

SYSTEM TB 1000
BULK ADHESIVE
APPLICATOR
INSTRUCTION FOR SET UP
AND
OPERATION
SYSTEM TB1000
Congratulations on your purchase of the TARGET SYSTEM TB 1000 Bulk Adhesive
Applicator. This high quality spray system is designed to operate continuously providing
years of trouble free service, requiring only minimal maintenance. When used with
TEKBOND TB-10 water based adhesive it is the perfect, safe and environmentally
responsible replacement for aerosol spray tack.

The pump unit is extremely durable and once in use, will only cycle periodically. The
only required maintenance for the system is regular cleaning. This is outlined in the
operation section of this manual. The biggest single cause of premature failure of this
system results from insufficient cleaning of the pump, so please pay extra attention to
this section.
As with all TARGET or TEKMAR products, should you experience any difficulties with
this product please call our customer service line at
800/564-1096
ASSEMBLY INSTRUCTIONS
The pump and spray gun come fully assembled and ready to operate. The stand requires
some minimal assembly which is outlined below.
1.0 Attach the stiffening strap to the bottom of the stand using the supplied
four(4) # 8 screws.
1.1 Place the pump on the top of the stand over the four (4) 1/4” studs. The pump
should be orientated so that the back of the pump (end with 36” suction hose) is
almost flush with the stand, and the front of the pump (end with air connection
and regulator) is set back approx. 2” from the front of the stand.
1.2 Place one each of the supplied washers and 1/4” nuts on each of the studs and
tighten.
The TARGET SYSTEM TB 1000 is now assembled and ready for air hook up.
AIR HOOK UP
The air requirements for the SYSTEM TB 1000 are very minimal. An input pressure of
40-60 PSI is all that is required. The MAXIMUM input pressure for the system is 100
PSI.
2.0 It is highly recommended that the air be attached to the unit using a quick
release connector. This allows the air to be easily disconnected for maintenance
or in the event of an emergency.
2.1 Before connecting the air, turn the regulator adjustment knob fully counter
clockwise. This will effectively shut the pump system down.
2.2 The air supply to the gun is regulated by the main unit. The pump
will function on an air pressure of 20-120 PSI, the regulator is primarily used to

adjust the air flow through the gun.
ADJUSTMENT
3.0 Place a five gallon pail of TEKBOND TB-10 adhesive under the stand with
the opening at the back of the stand. Insert the clear suction hose through the
opening, ensure that sufficient hose is lowered in so as to reach the bottom of the
bucket. Hose extensions are available to allow direct suction from larger cont-
ainers such as 15 gallon buckets and 55 gallon drums.
3.1 Connect the air and slowly turn the regulator clockwise until the gauge
registers 40 PSI. The pump should now be cycling making a clicking sound.
Please note that once primed the pump will stop cycling.
3.2 The spray gun has two adjustment controls. The smaller knob is the spray
adjustment control, while the larger knob controls the flow. Open up the larger
knob 2 or 3 turns (counter-clockwise) to allow the system to prime. Directing the
gun into a trash can or old cardboard box, squeeze the trigger all the way in and
hold it until adhesive starts to come out of the nozzle.
3.3 Once adhesive is spraying out of the nozzle slowly rotate the knob back in
(clockwise) until a fine spray is achieved. The desired setting should produce an
extremely fine spray pattern that is almost invisible. If necessary increase air
pressure, not exceeding 60PSI
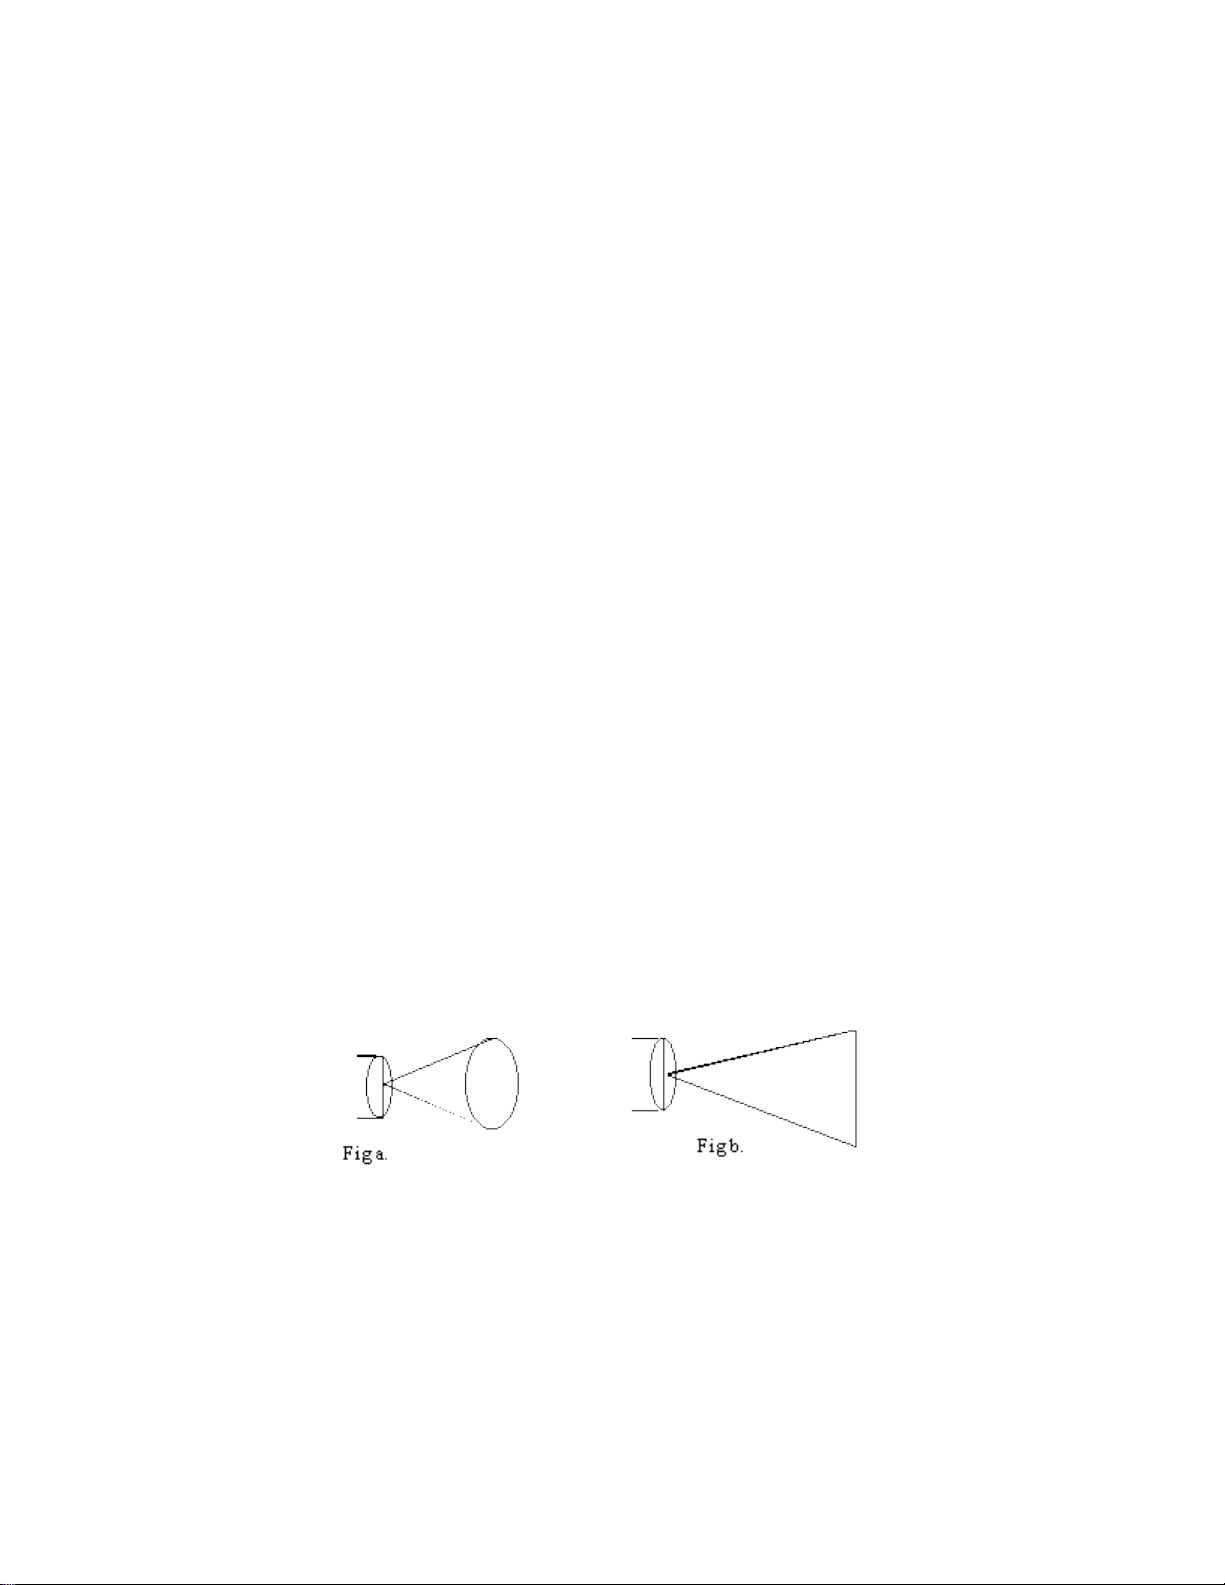
3.4 The smaller silver knob on the gun is used to adjust the spray pattern. With
the knob all the way in a circular spray pattern is achieved (see fig a). By slowly
rotating it counter clockwise a flatter fan type spray pattern can be achieved (see
fig b). The flat fan spray pattern is more suitable for the application of adhesive.
The nozzle should be positioned vertically to produce a horizontal flat fan or
reversed for a vertical spray.
3.5 If more adhesive is required then slowly turn the lower, larger silver knob
counter-clockwise. Once the desired spray has been set, practice spraying on
some scrap cardboard.
3.5 The unit should located as near to the press as possible. Should it be desired
to locate the system away from the press then extension hoses are available for a
maximum extension of 20 ft. Make sure that the unit and hoses are not placed in
such a way so as to present a hazard to anyone. If necessary tape hoses down to
avoid any risk of someone tripping or falling.

OPERATION
The success of the TARGET SYSTEM TB 1000 and TEKBOND TB-10 is dependent
upon the minimal use of the adhesive. To maximize adhesive usage it is essential to
follow the operating procedures outlined below.
4.0 Initially when starting with clean pallets it is necessary to apply a “build” of
adhesive before printing, this is a very quick operation. Simply apply a very light
application of adhesive, 2 or 3 fast passes moving from the front to the
back or from side to side of the pallet is all it takes. Rotate through each pallet
twice. This will only take a few minutes and will allow a good base for the
adhesive to “build” on.
4.1 Start printing as usual, apply a fine mist of adhesive as required. If lint starts
to gather on the pallet, it can quickly be removed using a slightly damp
sponge. Often it is not necessary to re-apply adhesive after this lint removal
procedure. When sprayed in the above manor, TEKBOND TB-10 should tack
almost instantly allowing high speed loading and unloading of textiles.
4.2 As printing continues re-apply adhesive as necessary. Do not over apply adhesive as
it will start lay down too thick and will then have potential to start transferring onto the
garment.
4.3 On fleece goods adhesive will need to be applied more
frequently due to the transfer of fleece onto the pallet.
4.4 It is highly recommended that pallet mask be used to
eliminate unnecessary clean-up
CARE AND MAINTENANCE
CLEANING
The biggest single cause for premature failure of the TB1000 is as a result of insufficient
or non cleaning of the pump and spray gun. If the following steps are taken then the unit
will provide years of trouble free maintenance.
If the unit is to be inactive for any period of time (2 or more days) or at least once a
month the unit should be flushed in the following manner.
NOTE : Wet adhesive can be washed off the system using hot water. Should it be
allowed to dry then an adhesive remover such as TB-AR will have to be used.

5.0 Once a day, at the end of the shift the nozzle on the spray gun should be wiped
clean of adhesive using TEKBOND TB-AR adhesive remover. Special care
should be taken to ensure that the small air holes are not blocked as the will effect
the atomization of the adhesive. If they are heavily clogged with adhesive then
the nozzle should be removed and allowed to soak in TB-AR remover.
5.1 To flush the pump, hose and spray gun assembly, remove the suction hose
from the adhesive. While the adhesive is still wet (white in appearance) place the
tube in about 1/2 gallon of hot water. Open up the fluid control knob on the gun
and hold the trigger wide open and direct the spray into a trash can or box. As
soon as clear liquid can be seen coming out of the nozzle, the suction tube can be
removed from the water. A small amount of TB-AR
(denatured alcohol can be substituted) should then be run through the system to displace
the water. The system is then flushed and ready for re-priming with TB-10 adhesive.
MAINTENANCE
Please note that the unit should never be disassembled in any
way without having first been flushed as described above. If this
is not done then exposed adhesive can dry in the pump, hoses or
spray gun and invalidate the warranty.
6.0 Needle wear is not unusual. To identify this problem, look for wear of the tip
and wear between the needle and the point of contact with the packing. To replace
needle, remove adjusting screw. Be careful when removing adjusting screw as it
is spring loaded. Pull trigger back all the way and grasp end of needle. Let trigger
go without letting needle loose. Pull needle from gun. Re-assemble needle cap
and lock nut with replacement needle. Re-insert into gun and adjusting screw.
Lubrication
Lubrication procedures should be initiated on a regular basis, at least weekly, using a
non-silicon spray gun lube.
7.0 Lubricate the exposed parts of the needle (591-20) in front of and behind the
trigger (591-43).
7.1 Lube the trigger screw (591-44) so that it moves freely.
7.2 Remove the adjusting screw (591-25) and lubricate the threads.
© 2000 by Tekmar-Technical Marketing, Ltd.
Table of contents