1
2
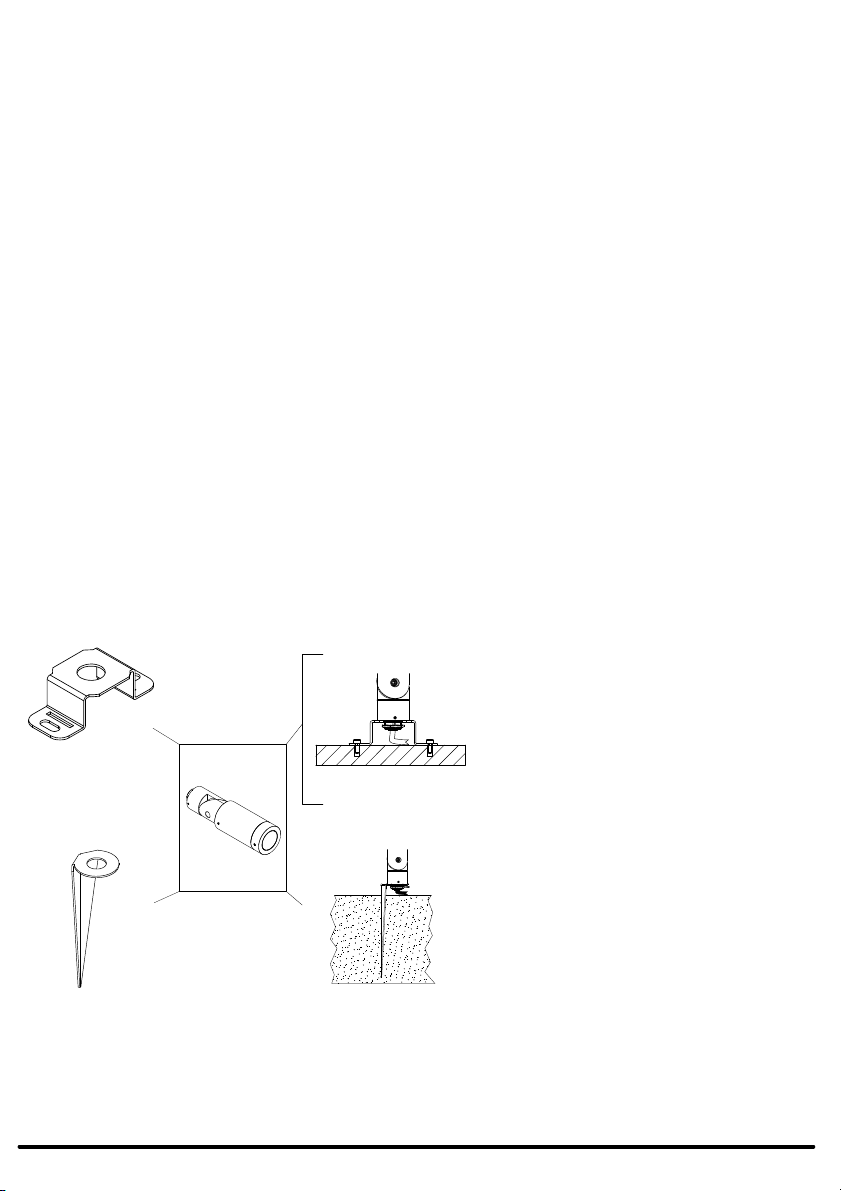
Accessories Installation
1. The Bulletto and Bulletto mini fixture has a
wide range of accessories to customize.
To change the accessories, first remove
the fixture asymmetric screen by loosening
the 1.5 mm hex screw using a Allen key
(not included). Once the hex screws is
removed, remove the asymmetric screen
to access the inside to add the filter that
the user prefers.
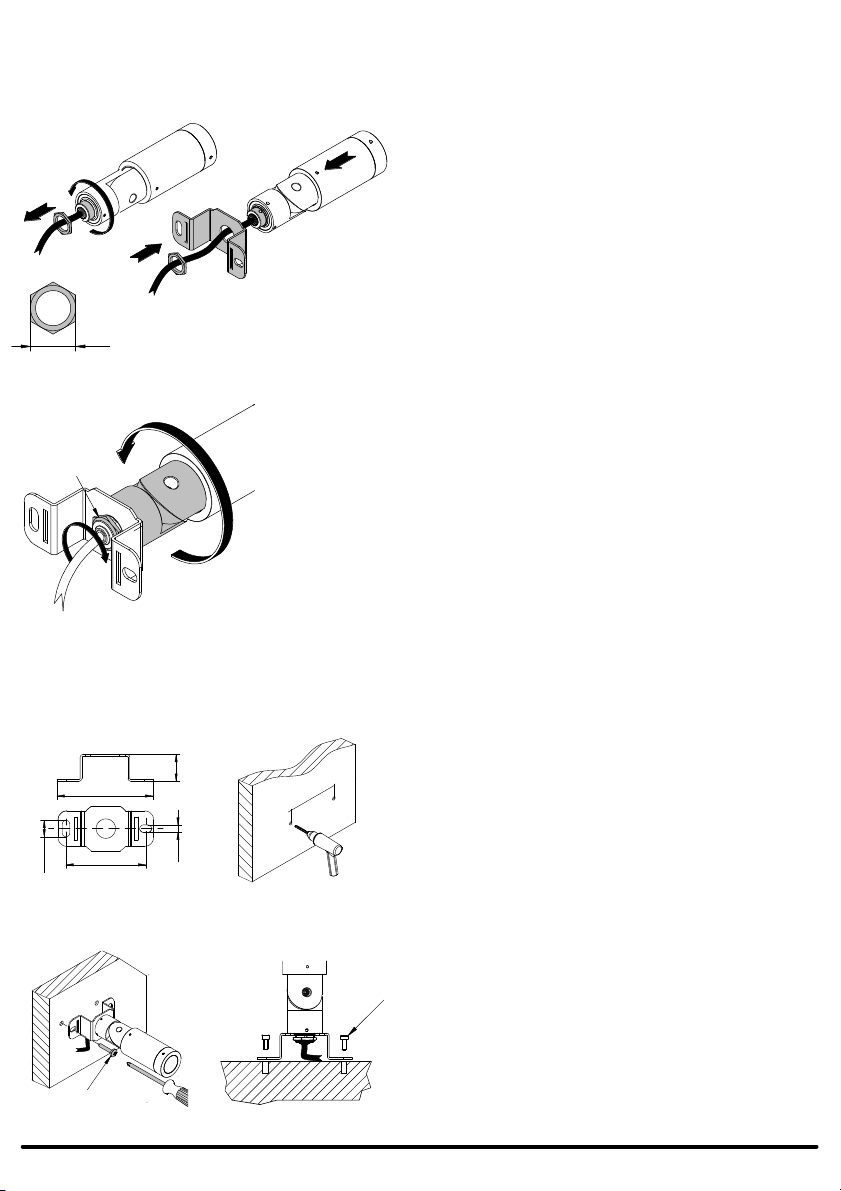
2. Unscrew the head cap to access the
internal optical components inside (a).
Remove the cap (b) and the lens (c) to
access the optical reflector and filter holder
(d). Remove the optical reflector from the
filter holder (e) to switch the optic type.
Then choose the desired filter(s) you wish
to add in the filter holder. The filter holder
can hold up to three max filters per fixture
(g). For the blade of light filter, pick the
desired position you want to add the blade
of light and attach the filter in the same
order as any other filter. See chart below
for different types of filters available.
3. Once the filter(s) have been set, put back
the fixture pieces together starting in
reverse order with the filter holder (a), the
lens (b), and then the cap (c) and screw
the cap back on tight clockwise (d). Then
reattach the asymmetric screen back on
and secure it with the 1.5 mm Allen key (e).
Targetti USA - A Targetti Group Company - 750-A W 17th St. Costa Mesa, CA 92627 - Phone (714) 513-1991
11,5mm
Lock
BLM COD. 1E3787 / 1E3788
BLT COD. 1E3805 / 1E3806
Asymmetric screen
a
b
c
d
e
SP
d
b
a
c
ANTI-GLARE LOUVER
COD. 1E3791 / 1E3792
f
g
NFL / FL / WFL
1E3793
BLM
1E3798
1E3799
1E3800
1E3801
1E3802
CHROMATIC FILTERS
BLT
1E3794
1E3795
1E3796
1E3797
COD.
COD.
COD.
COD.
COD.
1E3789
BLM
1E3790
ELLIPTICAL FILTER
BLT
COD.
Luminous
effect
3
1,5mm
Lock
e