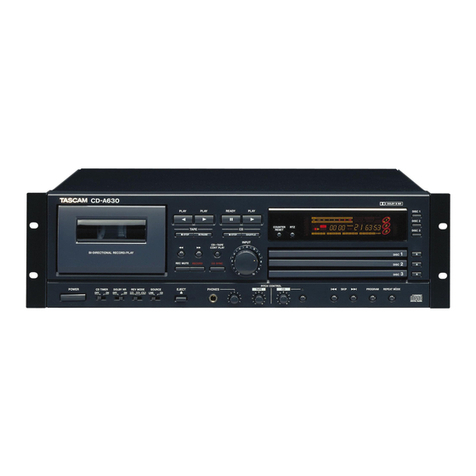
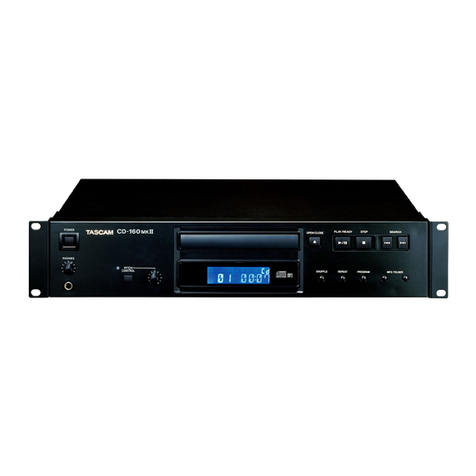
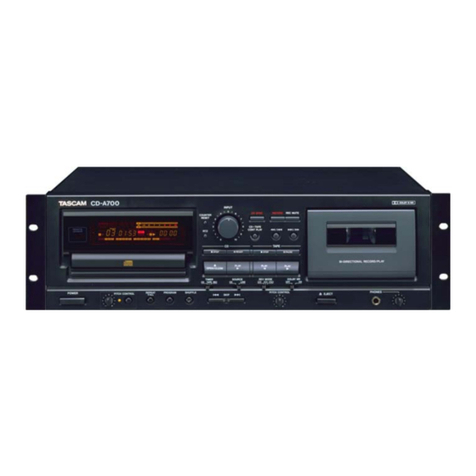
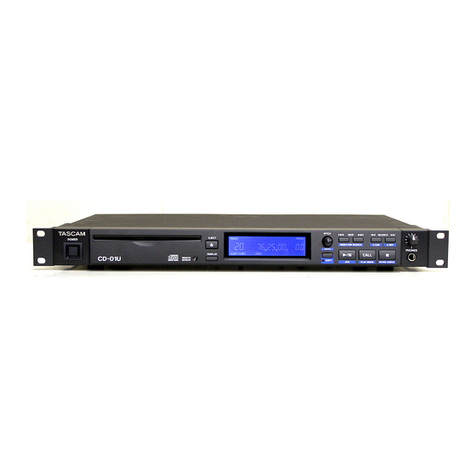
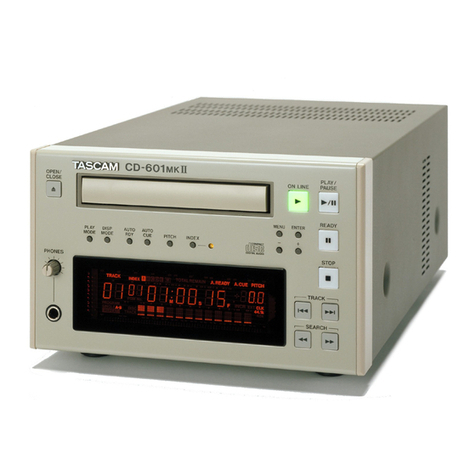
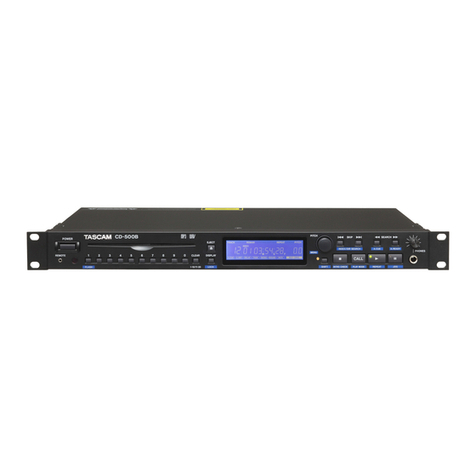
Tascam CD-A630 User manual

»
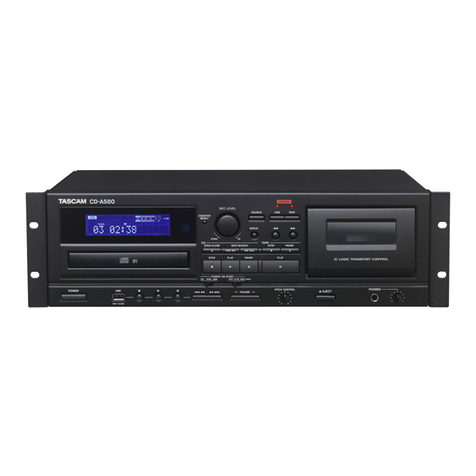
CD-A630
Compact Disc Player / Reverse Cassette Deck
3D0044700A
OWNER’S MANUAL
MANUEL DU PROPRIETAIRE
BEDIENUNGSANLEITUNG
MANUALE DI ISTRUZIONI
MANUAL DEL USUARIO
?

2
WARNING: TO PREVENT FIRE OR SHOCK HAZARD, DO NOT EXPOSE THIS APPLIANCE TO RAIN OR MOISTURE.
CAUTION: TO REDUCE THE RISK OF ELECTRIC SHOCK, DO NOT REMOVE COVER (OR BACK). NO USER-
SERVICEABLE PARTS INSIDE. REFER SERVICING TO QUALIFIED SERVICE PERSONNEL.
Y
E
RTHE EXCLAMATION POINT WITHIN AN EQUILATERAL TRIANGLE IS INTENDED TO ALERT THE USER TO THE PRESENCE OF IMPORTANT
OPERATING AND MAINTENANCE (SERVICING) INSTRUCTIONS IN THE LITERATURE ACCOMPANYING THE APPLIANCE.
THE LIGHTNING FLASH WITH ARROWHEAD SYMBOL, WITHIN AN EQUILATERAL TRIANGLE, IS INTENDED TO ALERT THE USER TO THE
PRESENCE OF UNINSULATED "DANGEROUS VOLTAGE" WITHIN THE PRODUCT’S ENCLOSURE THAT MAY BE OF SUFFICIENT MAGNITUDE TO
CONSTITUTE A RISK OF ELECTRIC SHOCK TO PERSONS.
AC POWER CORD CONNECTION
CAUTION:
TO PREVENT ELECTRIC SHOCK, MATCH WIDE BLADE OF PLUG TO
WIDE SLOT, FULLY INSERT.
CORDE DE CONNEXION CA
ATTENTION:
POUR ÉVITER LES CHOCS ÉLECTRIQUES, INTRODUIRE LA LAME
LA PLUS LARGE DE LA FICHE DANS LA BORNE
CORRESPONDANTE DE LA PRISE ET POUSSER JUSQU’AU FOND.
For CANADA Pour le CANADA
Optical pickup :
Type : LTOH96MK or GH5C105A1APK
Manufacturer : SHARP Corporation
Laser output : Less than 0.5 mW on the objective lens
Wavelength : 770 - 795 nm
CAUTION
<DO NOT REMOVE THE PROTECTIVE HOUSING USING
SCREWDRIVER.
<USE OF CONTROLS OR ADJUSTMENTS OR PERFORMANCE OF
PROCEDURES OTHER THAN THOSE SPECIFIED HEREIN MAY
RESULT IN HAZARDOUS RADIATION EXPOSURE.
<IF THIS PRODUCT DEVELOPS TROUBLE, MAKE A CONTACT
WITH OUR SERVICEMAN, AND DO NOT USE THE PRODUCT IN A
TROUBLED STATE.
TO THE USER
This equipment has been tested and found to comply with the limits for a Class B digital device, pursuant to Part 15 of the FCC Rules. These
limits are designed to provide reasonable protection against interference in a residential area. This device generates and uses radio
frequency energy and if not installed and used in accordance with the instructions, it may cause interference to radio or TV reception. If
this unit does cause interference with TV or radio reception you can try to correct the interference by one or more of the following
measures :
a) Reorient or relocate the receiving antenna.
b) Increase the separation between the equipment and the receiver.
c) Plug the equipment into a different outlet so that it is not on the same circuit as the receiver. If necessary, consult the dealer or an
experienced radio/TV technician for additional suggestions.
CAUTION
Changes or modifications to this equipment not expressly approved by TEAC CORPORATION for compliance could void the user's authority
to operate this equipment.
For U.S.A.
Important Safety Instructions
This product has been designed and manufactured according to
FDA regulations “title 21, CFR, chapter 1, subchapter J, based on the
Radiation Control for Health and Safety Act of 1968“, and is
classified as class 1 laser product. There is not hazardous invisible
laser radiation during operation because invisible laser radiation
emitted inside of this product is completely confined in the
protective housings.
The label required in this regulation is shown ①.
For U.S.A.
①

3
CAUTION
<Read all of these Instructions.
<Save these Instructions for later use.
<Follow all Warnings and Instructions marked on the audio equipment.
1) Read Instructions — All the safety and operating instructions should
be read before the product is operated.
2) Retain Instructions — The safety and operating instructions should
be retained for future reference.
3) Heed Warnings — All warnings on the product and in the operating
instructions should be adhered to.
4) Follow Instructions — All operating and use instructions should be
followed.
5) Cleaning — Unplug this product from the wall outlet before cleaning.
Do not use liquid cleaners or aerosol cleaners. Use a damp cloth for
cleaning.
6) Attachments — Do not use attachments not recommended by the
product manufacturer as they may cause hazards.
7) Water and Moisture — Do not use this product near water — for
example, near a bath tub, wash bowl, kitchen sink, or laundry tub; in a
wet basement; or near a swimming pool; and the like.
8) Accessories — Do not place this product on an unstable cart, stand,
tripod, bracket, or table. The product may fall, causing serious injury to
a child or adult, and serious damage to the product. Use only with a
cart, stand, tripod, bracket, or table recommended by the manufacturer,
or sold with the product. Any mounting of the product should follow the
manufacturer’s instructions, and should use a mounting accessory
recommended by the manufacturer.
9) A product and cart combination should be moved
with care. Quick stops, excessive force, and uneven
surfaces may cause the product and cart combination
to overturn.
10) Ventilation — Slots and openings in the cabinet
are provided for ventilation and to ensure reliable operation of the
product and to protect it from overheating, and these openings must not
be blocked or covered. The openings should never be blocked by
placing the product on a bed, sofa, rug, or other similar surface. This
product should not be placed in a built-in installation such as a
bookcase or rack unless proper ventilation is provided or the
manufacturer’s instructions have been adhered to.
11) Power Sources — This product should be operated only from the
type of power source indicated on the marking label. If you are not sure
of the type of power supply to your home, consult your product dealer
or local power company. For products intended to operate from battery
power, or other sources, refer to the operating instructions.
12) Grounding or Polarization — This product may be equipped with a
polarized alternating-current line plug (a plug having one blade wider
than the other). This plug will fit into the power outlet only one way. This
is a safety feature. If you are unable to insert the plug fully into the
outlet, try reversing the plug. If the plug should still fail to fit, contact
your electrician to replace your obsolete outlet. Do not defeat the safety
purpose of the polarized plug.
13) Power-Cord Protection — Power-supply cords should be routed so
that they are not likely to be walked on or pinched by items placed upon
or against them, paying particular attention to cords at plugs,
convenience receptacles, and the point where they exit from the
product.
14) Outdoor Antenna Grounding — If an outside antenna or cable
system is connected to the product, be sure the antenna or cable
system is grounded so as to provide some protection against voltage
surges and built-up static charges. Article 810 of the National Electrical
Code, ANSI/NFPA 70, provides information with regard to proper
grounding of the mast and supporting structure, grounding of the lead-
in wire to an antenna discharge unit, size of grounding conductors,
location of antenna-discharge unit, connection to grounding electrodes,
and requirements for the grounding electrode.
Note to CATV system installer:
This reminder is provided to call the CATV system installer’s attention to
Section 820-40 of the NEC which provides guidelines for proper
grounding and, in particular, specifies that the cable ground shall be
connected to the grounding system of the building, as close to the point
of cable entry as practical."
15) Lightning — For added protection for this product during a lightning
storm, or when it is left unattended and unused for long periods of time,
unplug it from the wall outlet and disconnect the antenna or cable
system. This will prevent damage to the product due to lightning and
power-line surges.
16) Power Lines — An outside antenna system should not be located in
the vicinity of overhead power lines or other electric light or power
circuits, or where it can fall into such power lines or circuits. When
installing an outside antenna system, extreme care should be taken to
keep from touching such power lines or circuits as contact with them
might be fatal.
17) Overloading — Do not overload wall outlets, extension cords, or
integral convenience receptacles as this can result in risk of fire or
electric shock.
18) Object and Liquid Entry — Never push objects of any kind into this
product through openings as they may touch dangerous voltage points
or short-out parts that could result in a fire or electric shock. Never spill
liquid of any kind on the product.
19) Servicing — Do not attempt to service this product yourself as
opening or removing covers may expose you to dangerous voltage or
other hazards. Refer all servicing to qualified service personnel.
20) Damage Requiring Service — Unplug this product from the wall
outlet and refer servicing to qualified service personnel under the
following conditions:
a ) when the power-supply cord or plug is damaged.
b ) if liquid has been spilled, or objects have fallen into the product.
c ) if the product has been exposed to rain or water.
d)if the product does not operate normally by following the operating
instructions. Adjust only those controls that are covered by the
operating instructions as an improper adjustment of other controls may
result in damage and will often require extensive work by a qualified
technician to restore the product to its normal operation.
e) if the product has been dropped or damaged in any way.
f)when the product exhibits a distinct change in performance _ this
indicates a need for service.
21) Replacement Parts — When replacement parts are required, be
sure the service technician has used replacement parts specified by
the manufacturer or have the same characteristics as the original part.
Unauthorized substitutions may result in fire, electric shock, or other
hazards.
22) Safety Check — Upon completion of any service or repairs to this
product, ask the service technician to perform safety checks to
determine that the product is in proper operating condition.
23) Wall or Ceiling Mounting — The product should be mounted to a
wall or ceiling only as recommended by the manufacturer.
24) Heat — The product should be situated away from heat sources
such as radiators, heat registers, stoves, or other products (including
amplifiers) that produce heat.
ANTENNA
LEAD IN
WIRE
ANTENNA
DISCHARGE UNIT
(NEC SECTION 810-20)
GROUNDING CONDUCTORS
(NEC SECTION 810-21)
GROUND CLAMPS
POWER SERVICE GROUNDING
ELECTRODE SYSTEM
(NEC ART 250. PART H)
NEC - NATIONAL ELECTRICAL CODE
ELECTRIC
SERVICE
EQUIPMENT
Example of Antenna Grounding
as per National Electrical
Code, ANSI/NFPA 70
GROUND
CLAMP
Important Safety Instructions

ENGLISH FRANÇAIS
Contents Sommaire
4
Thanks for buying a TASCAM. Read this
manual carefully to get the best
performance from this unit.
Nous vous remercions pour l’achat d’un
appareil TASCAM. Lire ce manuel avec
attention pour obtenir les meilleures
performances possibles de cet appareil.
If you need to re-attach the feet and
screws to the unit, make sure that
you use the same feet and screws that
you removed for rack mounting.
Use of any other feet or screws may
cause damage to the unit.
Si vous avez besoin de réattacher les
pieds et les vis à l’appareil, assurez-vous
d’utiliser les mêmes pieds et vis que vous
avez démontés du bâti.
L’utilisation d’autres pieds ou vis pourrait
endommager l’appareil.
Voltage Conversion
(General export models only)
Be sure to remove the power cord from
the AC outlet before repositioning the
voltage converter switch.
1. Locate the voltage selector on the rear
panel.
2. Using a flat-bladed screwdriver, set to
the appropriate 230V or 120V position
according to your area.
IN NORTH AMERICA USE ONLY ON 120 V
SUPPLY.
Changement de tension
(Modèles s'exportation générale
seulement)
Bien débrancher le cordon d'alimentation
de la prise secteur avant de repositionner
le sélecteur de changement de tension.
1. Localiser le sélecteur de tension par le
arrièle du appareil.
2. En utilisant un tournevis à lame plate,
régler sur la position appropriée 230V
ou 120V en fonction de la tension
locale.
DANS L'AMÉRIQUE DU NORD:
UTILISABLE SUR 120 V D'ALIMENTATION
UNIQUEMENT.
Before Use.................................................... 6
Compact Disc............................................... 8
Cassette Tape ............................................ 12
Dolby NR ..................................................... 14
Maintenance.............................................. 14
Connections................................................ 16
Remote Control Unit.................................. 18
Name of Each Control............................... 20
CD
Playback...................................................... 30
Intro Check ................................................. 36
Repeat Playback........................................ 38
Shuffle Playback........................................ 42
Single Playback ......................................... 44
Programmed Playback ............................. 46
Timer Playback .......................................... 50
Time Display ............................................... 52
TAPE
Playback...................................................... 54
Recording.................................................... 58
CD Synchronous Recording..................... 64
Continuous Playback ................................ 68
Troubleshooting......................................... 70
Specifications ............................................ 70
Avant Utilisation .......................................... 6
Disques Compacts....................................... 8
Bandes ........................................................ 12
Dolby NR ..................................................... 14
Entretien...................................................... 14
Connexions................................................. 16
Boîtier de télécommande......................... 18
Nomenclature ............................................ 22
CD
Lecture ........................................................ 30
Examen du début
de chaque plage musicale................. 36
Répétition de la lecture ............................ 38
Lecture au hasard ..................................... 42
Lecture d'une seule plage musicale ...... 44
Lecture programmée ................................ 46
Lecture commandée
par programmateur............................. 50
Affichage du temps................................... 52
TAPE
Lecture ........................................................ 54
Enregistrement........................................... 58
Enregistrement synchronisé d'un CD..... 64
Lecture enchaînée .................................... 68
Dépannage ................................................. 71
Caractéristiques ........................................ 71
MISE EN GARDE:
Le réenregistrement d’oeuvres
enregistrées sur cassette ou sur disque,
ou diffusées sur les ondes peut
contrevenir à la législation sur les droits
d’auteur. Renseignez-vous avant
d’effectuer un tel enregistrement.
CAUTION:
Recording pre-recorded tapes, records, or
other published or broadcast material may
infringe copyright laws. Check before
recording.

DEUTSCH ESPAÑOL
IndiceInhalt Indice
5
ITALIANO
Vielen Dank für den Kauf dieses TASCAM -
Geräts. Bitte lesen Sie diese Anleitung
sorgfältig durch, um die Leistungs-fähigkeit
dieses Geräts optimal nutzen zu können.
Grazie per aver acquistato un prodotto
TASCAM. Leggere attentamente questo
manuale per ottenere le migliori prestazioni
da questo apparecchio.
Enhorabuena por la adquisición de un
TASCAM. Lea detenidamente este manual a
fin de obtener el mejor rendimiento de esta
unidad.
Previo al empleo.......................................... 7
Manipulación de discos............................. 9
Cintas........................................................... 13
Dolby NR ..................................................... 15
Mantenimiento........................................... 15
Conexión ..................................................... 17
Contador de tiempo................................... 19
Nombre de los controles.......................... 28
CD
Reproducción............................................. 31
Comprobación de preludio....................... 37
Reproducción repetida............................. 39
Reproducción aleatoria............................ 43
Reproducción simple................................ 45
Reproducción programada...................... 47
Reproducción por el temporizador......... 51
Visualización del tiempo........................... 53
TAPE
Reproducción............................................. 55
Grabación ................................................... 59
Grabación sincronizada de CD................ 65
Reproducción continua............................ 69
Solución de problemas............................. 74
Especificaciones ....................................... 74
Vor Inbetriebnahme .................................... 7
Handhabung von Compact Discs.............. 9
Kassette ...................................................... 13
Dolby NR ..................................................... 15
Pflege und Wartung.................................. 15
Anschluß..................................................... 17
Betrieb mit der Fernbedienung ............... 19
Bezeichnung der Bedienelemente......... 24
CD
Wiedergabe................................................ 31
Anspielfunktion.......................................... 37
Wiederholwiedergabe.............................. 39
Zufallsgesteuerte Wiedergabe ............... 43
Einzelwiedergabe...................................... 45
Programmgesteuerte Wiedergabe......... 47
Timergesteuerte Wiedergabe................. 51
Zeitanzeige ................................................. 53
TAPE
Wiedergabe ............................................... 55
Kassettenaufnahme.................................. 59
CD Synchron-Kopierfunktion................... 65
Fortlaufende Wiedergabe........................ 69
Fehlerbeseitigung ..................................... 72
Technische Daten ..................................... 72
Prima dell'uso............................................... 7
Come tenere i CD......................................... 9
Cassette ...................................................... 13
Dolby NR ..................................................... 15
Manutenzione ............................................ 15
Collegamento ............................................. 17
Funzionamento col telecomando............ 19
Ubicazione e denominazione dei camandi
................................................................ 26
CD
Riproduzione............................................... 31
Controllo delle introduzioni...................... 37
Riproduzione ripetuta................................ 39
Riproduzione in ordine casuale............... 43
Riproduzione singola................................. 45
Riproduzione Programmata..................... 47
Riproduzione con timer............................. 51
Visualizzazione dei tempi ......................... 53
TAPE
Riproduzione............................................... 55
Registrazione.............................................. 59
Registrazione sincronizzata da CD......... 65
Riproduzione ininterrotta.......................... 69
Ricerca guasti............................................ 73
Specifica..................................................... 73
Zum Wiederanbringen der Füße und
Schrauben müssen Sie unbedingt
dieselben Füße und Schrauben
verwenden, die bei der Gestellmontage
abgenommen worden sind.
Durch den Gebrauch anderer Füße oder
Schrauben kann die Einheit beschädigt
werden.
Se si avesse bisogno di reinstallare
piedini e viti all'unità, si raccomanda di
utilizzare gli stessi piedini e le stesse viti
rimosse al tempo di montaggio del rack.
Usare piedini e viti diversi potrebbero
danneggiare l'unità.
Se você precisar reinstalar os pés e
parafusos na unidade, certifique-se de
utilizar os mesmos pés e parafusos que
retirou para a montagem da estante.
O uso de quaisquer outros pés e
parafusos pode causar danos à unidade.
ATTENZIONE:
La registrazione di nastri preregistrati,
dischi o di altro materiale pubblicato o
trasmesso può violare le leggi relative al
copyright. Verificare prima di registrare.
PRECAUCIÓN:
La grabación de cintas y discos
pregrabados así como de otros materiales
publicados o emitidos puede infringir las
leyes sobre derechos de autor.
Compruébelo antes de proceder a la
grabación.
HINWEIS:
Durch Aufzeichnen bespielter Cassetten,
Schallplatten oder von anderweitig
veröffentlichtem oder ausgestrahltem
Material werden u.U. Urheberrechte
verletzt. Prüfen Sie dies vor der
Aufnahme.

ENGLISH FRANÇAIS
Before Use Avant Utilisation
6
Lire ceci avant de faire fonctionner
l'appareil
<L'appareil pouvant dégager de la chaleur
lorsqu'il fonctionne, laisser un
dégagement suffisant au-dessus de
l'appareil afin de permettre une
ventilation naturelle.
<La tension d'alimentation de l'appareil
doit être celle indiquée à l'arrière de
l'appareil. En cas de doute, contacter un
électricien.
<Choisir avec soin l'endroit où vous
placerez votre appareil. Eviter de le
placer directement au soleil ou près
d'une source de chaleur. Eviter aussi les
endroits sujets à des vibrations, à de la
poussière excessive, à la chaleur, au
froid ou à l'humidité.
<Ne pas placer CD-A630 sur le dessus de
l’amplificateur/récepteur.
<Ne pas ouvrir le coffret car ceci
risquerait de provoquer des dommages
aux circuits ou des chocs électriques. Si
un objet rentre dans l'appareil, contacter
votre revendeur.
<Lors du débranchement du cordon
d'alimentation de la prise murale,
toujours tirer sur la fiche et non sur le
cordon.
<Pour garder le capteur laser propre, ne
pas y toucher et ne pas oublier de fermer
le tiroir du disque.
<Ne pas essayer de nettoyer l'appareil
avec des solvants chimiques car ceci
pourrait endommager le fini de l'appareil.
Utiliser un chiffon propre et sec.
<Garder soigneusement ce manuel
d'instructions pour une référence
ultérieure.
Read this before operation
<As the unit may become hot during
operation, always leave sufficient space
above the unit for ventilation.
<The voltage supplied to the unit should
match the voltage as printed on the rear
panel. If you are in any doubt regarding
this matter, consult an electrician.
<Choose the installation location of your
unit carefully. Avoid placing it in direct
sunlight or close to a source of heat. Also
avoid locations subject to vibrations and
excessive dust, heat, cold or moisture.
<Do not place the unit on the
amplifier/receiver.
<Do not open the cabinet as this might
result in damage to the circuitry or
electrical shock. If a foreign object
should get into the set, contact your
dealer.
<When removing the power plug from the
wall outlet, always pull directly on the
plug, never yank the cord.
<To keep the laser pickup clean, do not
touch it, and do not forget to close the
disc tray.
<Do not attempt to clean the unit with
chemical solvents as this might damage
the finish. Use a clean, dry cloth.
<Keep this manual in a safe place for
future reference.
IMPORTANT(for U.K.Customers)
DO NOT cut off the mains plug from this
equipment. If the plug fitted is not suitable
for the power points in your home or the
cable is too short to reach a power point,
then obtain an appropriate safety approved
extension lead or consult your dealer.
If nonetheless the mains plug is cut off,
remove the fuse and dispose of the plug
immediately, to avoid a possible shock
hazard by inadvertent connection to the
mains supply.
If this product is not provided with a mains
plug, or one has to be fitted, then follow the
instructions given below:
IMPORTANT. DO NOT make any
connection to the larger terminal which is
marked with the letter E or by the safety
earth symbol |or coloured GREEN or
GREEN-and-YELLOW.
The wires in the mains lead on this product
are coloured in accordance with the
following code:
BLUE : NEUTRAL
BROWN : LIVE
As these colours may not correspond with
the coloured markings identifying the
terminals in your plug proceed as follows:
The wire which is coloured BLUE must be
connected to the terminal which is marked
with the letter N or coloured BLACK.
The wire which is coloured BROWN must
be connected to the terminal which is
marked with the letter L or coloured RED.
When replacing the fuse only a correctly
rated approved type should be used and be
sure to re-fit the fuse cover.
IF IN DOUBT — CONSULT A COMPETENT
ELECTRICIAN.
When the unit is turned on, it will take
some time for the unit to initialize. The
noise during initialization doesn't indicate
a problem with the unit.
Never turn the unit off while the red disc
mark or "--:--" is blinking, namely while
initializing the unit, loading a disc, or
opening a disc tray. Or the unit might be
damaged.
Un certain temps est nécessaire pour
effectuer l'initialisation de l'appareil après
sa mise en service. Au cours de cette
opération, l'appareil émet des bruits mais
cela n'a rien d'anormal.
Ne jamais éteindre l'appareil quand le
voyant rouge ou "--:--" clignote, c'est à
dire lors de l'initialisation de la machine,
du chargement du disque ou de
l'ouverture du tiroir.
Ceci peut endomager l'appareil.

DEUTSCH ESPAÑOL
Prima dell'usoVor Inbetriebnahme Previo al empleo
7
ITALIANO
Bitte vor Inbetriebnahme lesen
<Da sich das Gerät während des Betriebs
erwärmt, sollten Sie bei der Aufstellung
stets auf genügenden Platz achten, so
daß eine ausreichende Luftzirkulation
gewährleistet ist.
<Achten Sie stets darauf, daß die
Spannung Ihres Stromnetzes mit dem auf
der Geräterückseite angegebenen Wert
übereinstimmt. Sollten Sie dazu Fragen
haben oder im Zweifel sein, wenden Sie
sich bitte an einen Elektrofachmann.
<Wählen Sie einen geeigneten Standort
für den Receiver. Nicht geeignet sind
Standorte, die direkter
Sonneneinstrahlung, Heizquellen,
Vibrationen, Staubeinwirkung, starken
Temperaturschwankungen oder
Feuchtigkeit ausgesetzt sind.
<Stellen Sie das Gerät nicht auf einen
Verstärker oder Receiver.
<Niemals das Gehäuse öffnen, da
hierdurch Schäden an der Elektronik
und/oder elektrische Schläge verursacht
werden können. Falls ein Fremdkörper in
das Geräteinnere gelangen sollte,
wenden Sie sich bitte an Ihren
Fachhändler.
<Bei Abziehen des Netzkabels darauf
achten, das Kabel am Stecker zu halten.
Niemals am Kabel ziehen.
<Um den Laser-Tonabnehmer
sauberzuhalten, diesen nicht berühren
und den CD-Halter stets einfahren.
<Zur Gehäusereinigung niemals
Lösungsmittel verwenden, da hierdurch
die Gehäuseoberfläche beschädigt
werden kann. Ein sauberes trockenes
Tuch verwenden.
<Bewahren Sie diese
Bedienungsanleitung auf, um bei
eventuell später auftauchenden Fragen
darin nachschlagen zu können.
Leggere questo manuale prima di procedere
all'uso
<Dato che l’apparecchio può diventare
caldo durante il funzionamento,
raccomandiamo di garantire adeguate
condizioni di ventilazione, lasciando
sempre sopra di esso sufficiente spazio
libero.
<La tensione d'alimentazione c.a.
applicata all’apparecchio deve
corrispondere alla tensione stampata sul
pannello posteriore. In caso di dubbio,
chiedere consiglio a un elettricista.
<Scegliere con cura il luogo in cui
installare l'apparecchio. Evitare di
esporlo alla diretta luce del sole o ad una
sorgente di calore. Evitare inoltre luoghi
soggetti a vibrazioni o ad eccessive
accumulazioni di polvere, calore, freddo
od umidità.
<Non posare CD-A630 direttamente
sull'amplificatore /sintomizzatore.
<Non aprire la cassa dell'apparecchio. Ciò
potrebbe danneggiarne la circuitazione o
causare scariche elettriche. Se un
qualche oggetto estraneo dovesse
essere entrato nell'apparecchio stesso,
rivolgersi al rivenditore.
<Per staccare la spina dalla presa di rete,
agire direttamente sulla spina stessa,
evitando di tirare il cavo.
<Per mantenere pulito il lettore laser,
evitare di toccarlo e chiudere sempre il
vano CD.
<Evitare di pulire l'apparecchio con
solventi chimici poichè ciò potrebbe
danneggiare la rifinitura esterna. Fare
semplicemente uso di un panno pulito ed
asciuto.
<Tenere questo manuale in un luogo di
facile accesso, per ogni eventuale futuro
riferimento.
Lea lo siguiente antes de poner en
funcionamiento el aparato
<La unidad puede calentarse durante su
funcionamiento, por lo que siempre
deberá dejar espacio suficiente por
encima de ella para la ventilación.
<La tensión suministrada a la unidad
deberá coincidir con la tensión rotulada
en el panel posterior. En caso de duda,
consulte a un electricista.
<Elija con cuidado el lugar de instalación
para su aparato. No lo coloque a la luz
solar directa o cerca de fuentes que
generen calor. Evite también lugares
expuestos a vibraciones y muy
polvorientos, calurosos, fríos o húmedos.
<No coloque el CD-A630 sobre el
amplificador/receptor.
<No abra el gabinete ya que esto podría
producir daños en los circuitos o
electrochoques. Si entrara algún objeto
en el interior del aparato, póngase en
contacto con su concesionario.
<Al desenchufar el cordón del
tomacorriente, tire siempre de la clavija,
nunca del cordón.
<Para mantener limpio el fonocaptor laser,
no lo toque y no olvide cerrar la bandeja
portadisco.
<No utilice solventes químicos para
limpiar el aparato ya que podría dañar el
acabado. Use un paño seco y limpio.
<Guarde este manual en un lugar seguro
para usarlo como referencia en el futuro.
Der Initialisierungsprozeß nach dem
Einschalten des Geräts nimmt einige Zeit
in Anspruch. Das während der
Initialisierung zu vernehmende Geräusch
ist normal und kein Anzeichen für eine
Betriebsstörung.
Um Beschädigungen des Geräts zu
vermeiden, schalten Sie es nie ab, wenn
das rote CD-Zeichen oder „--:--„ blinkt.
Dies gilt insbesondere während der
Initialisierung des Geräts, beim Einlegen
einer CD oder während Sie die CD-Lade
öffnen.
Quando l'unità viene accesa, bisogna
aspettare un po' che l'inizializzazione
dell'unità venga completata. Durante
l'inizializzazione si sente un rumore
dovuta a quest'operazione, non a un
malfunzionamento.
Per evitare di danneggiare questo
apparecchio non spegnerlo mai se sul
display il simbolo rosso del disco oppure
l'indicazione "--:--" stanno lampeggiando;
in altre parole quando si stanno
compiendo le operazioni di
inizializzazione dell'apparecchio, o si sta
inserendo un disco o si sta aprendo il
vassoio di un disco.
Cuando la unidad es activada, tardará
cierto tiempo para su inicialización. El
ruido que ocurre durante la inicialización
no significa una falla.
No apague nunca la unidad mientras
parpadea el indicador rojo de disco o la
indicación "--:--", es decir, mientras se
inicializa la unidad, se carga un disco o
se abre la bandeja.
Si lo hace, la unidad podría resultar
dañada.
ENGLISH FRANÇAIS
A
8
<Always place the disc on the disc tray
with the label side uppermost. (Compact
discs can be played or recorded only on
one side.)
<To remove a disc from its storage case,
press down on the center of the case and
lift the disc out, holding it carefully by the
edges.
How to remove the disc
How to hold the disc
<Should the disc become dirty, wipe the
surface radially with a soft, dry cloth : C
B
A
Compact Disc 1 Disques Compacts 1
C
B
<Placer toujours le disque sur le plateau,
la face imprimée sur le dessus (les
disques compacts ne sont enregistrés
que sur une seule face.)
<Pour sortir un disque de son emballage,
appuyer sur la partie centrale de l'étui et
sortir le disque en veillant à bien le tenir
par les bords.
Comment sortir un disque de son
emballage
Comment tenir le disque.
<Si la surface du disque est sale, l'essuyer
soigneusement à l'aide d'un chiffon doux
et sec : C
B
A
Discs which can be used with this unit:
Conventional audio CDs
Properly finalized CD-R and CD-RW discs
Note:
CD-R/CD-RW discs can be played with
this unit, provided that they have been
properly finalized.
The discs that have been recorded in the
CD-R drive of a computer may be played
on this unit, provided that they have been
properly finalized in accordance with
audio IEC 958.
Disques compatibles avec cet appareil:
Compact Disc (CD) audio conventionnel
CD-R et CD-RW qui ont été
convenablement finalisés.
Note:
Les disques CD-R et CD-RW peuvent être
joués par l'appareil sous réserve qu'ils
aient été convenablement finalisés.
Les disques qui portent des
enregistrements réalisés au moyen de
l'unité CD-R d'un ordinateur, peuvent être
joués par cet appareil sous réserve qu'ils
aient été finalisés conformément à la
norme CEI 958.
Before Use 2 Avant Utilisation 2
DO NOT MOVE THE UNIT DURING PLAYBACK
During playback, the disc rotates at high
speed. Do NOT lift or move the unit during
playback. Doing so may damage the disc.
WHEN MOVING THIS UNIT
When changing places of installation or
packing the unit for moving, be sure to
remove the disc and return the disc table
to its original position in the player. Then,
press the power switch to turn the power
off, and disconnect the power cord.
Moving this unit with the disc loaded may
result in damage to this unit.
NE DEPLACEZ PAS CET APPAREIL
PENDANT L'ECOUTE D'UN DISQUE
Pendant une écoute, le disque tourne à
grande vitesse. Ne soulevez pas cet
appareil et ne le déplacez pas pendant
l'écoute d'un disque. En effet, vous
risqueriez d'endommager ce disque.
CONSIGNES DE DEPLACEMENT DE CET
APPAREIL
Lorsque vous changez de lieu
d'installation ou lorsque vous emballez
cet appareil pour le déplacer, n'oubliez
pas de retirer le disque et de ramener le
plateau à disque à sa position d'origine
dans ce lecteur. Ensuite, appuyez sur le
bouton POWER pour couper la chaîne.
Débranchez le câble électrique. Si vous
déplacez cet appareil alors qu'il contient
un disque, vous risquez d'endommager
cet appareil.

DEUTSCH ESPAÑOL
9
ITALIANO
Come tenere i CD 1
Handhabung von Compact Discs 1
Manipulación de discos 1
<Appoggiare il disco nell’apposito
cassetto sempre con l’etichetta rivolta
verso l’alto. (i CD si possono leggere o
registrare soltanto su un lato).
<Per estrarre un disco dalla custodia
protettiva, premere al centro
dell’astuccio e sollevare il disco
afferrandolo accuratamente solo per i
bordi
Come togliere il disco
Come afferrare il disco
<Se il disco dovesse comunque sporcarsi,
pulirlo con un panno soffice asciutto,
strofinando con movimento radiale dal
centro verso la periferia : C
B
A
<Legen Sie die CD stets mit der Labelseite
nach oben in die CD-Schublade.
(Compact Discs können nur auf einer
Seite beschrieben und wiedergegeben
werden.)
<Um eine CD aus der CD-Hülle zu nehmen,
drücken Sie auf den mittleren Haltering
und nehmen Sie die CD vorsichtig aus
ihrer Halterung, wobei Sie diese lediglich
am Rand berühren sollten.
Entnehmen einer CD
Anfassen einer CD
<Sollte eine CD einmal verschmutzt sein,
wischen Sie diese von innen nach außen
mit einem weichen, trockenen Tuch
ab: C
B
A
<Coloque siempre el disco en la bandeja
con la cara de la etiqueta hacia arriba.
(Los discos compactos sólo se
reproducen y graban por una cara).
<Para extraer un disco de su estuche,
presione el centro de la caja y levante
con cuidado el disco sosteniéndolo por
los bordes.
Extracción del disco
Así se sostiene el disco
<Si se ensucia el disco, pase un paño seco
y suave por la superficie, en sentido
radial : C
B
A
Discs, die mit diesem Gerät verwendet
werden können:
konventionelle Audio-CDs
richtig verarbeitete CD-Rs und CD-RWs
Hinweis:
CD-R/CD-RW-Discs können mit diesem
Gerät abgespielt werden, vorausgesetzt,
daß sie richtig verarbeitet worden sind.
Discs, die mit dem CD-R-Laufwerk eines
Computers bespielt worden sind, können
mit diesem Gerät wiedergegeben
werden, vorausgesetzt, sie sind gemäß
Audio-IEC 958 richtig verarbeitet.
Dischi utilizzabili con questa unità:
CD audio tradizionali
CD-R e CD-RW correttamente completati
Nota:
I dischi CD-R/CD-RW possono essere
riprodotti utilizzando questa unità a patto
che siano stati correttamente completati.
I dischi che sono stati registrati nel
lettore CD-R di un computer possono
essere riprodotti su questa unità, a patto
che siano stati correttamente completati
in conformità con IEC 958 audio.
Discos que pueden utilizarse con esta
unidad:
Discos compactos de audio convencionales
CD-R y CD-RW adecuadamente terminados
Nota:
Los discos CD-R/CD-RW pueden
reproducirse con esta unidad, siempre
que estén debidamente terminados.
Los discos que han sido grabados en la
unidad de mando de CD-R de una
computadora pueden reproducirse en
esta unidad, siempre que hayan sido
adecuadamente terminados de acuerdo
con IEC 958 de audio.
Prima dell'uso 2Vor Inbetriebnahme 2 Previo al empleo 2
DAS GERÄT BEIM ABSPIELEN NICHT
BEWEGEN
Beim Abspielen dreht sich die Disc mit
Hochgeschwindigkeit. Das Gerät beim
Abspielen NICHT hochheben oder
bewegen. Ansonsten kann die Disc
beschädigt werden.
ZUM BEWEGEN DIESES GERÄTS
Wird der Einbauort des Geräts
gewechselt oder das Gerät für einen
Umzug verpackt, sicherstellen, dass die
Disc herausgenommen wurde. Den Disc-
Teller in seine Originalstellung im Player
zurückbringen. Schalten Sie das Gerät
ab. Dann das Netzkabel abziehen. Wird
das Gerät mit einer Disc darin bewegt,
kann das Gerät beschädigt werden.
EVITARE LO SPOSTAMENTO DELL’UNITÀ
DURANTE L’USO
Durante la riproduzione, il disco ruota a
una velocità elevata. NON sollevare o
spostare l’unità durante la riproduzione
per evitare di danneggiare il disco.
SPOSTAMENTO DELL’UNITÀ
Durante lo spostamento dell’installazione
o l’imballaggio dell’unità per il
trasferimento, assicurarsi che il disco sia
stato rimosso dall’unità e che il ripiano
del disco sia rientrato nella posizione
originale all’interno del lettore. Quindi,
premere l’interruttore POWER per
disattivare l'apparecchio. Quindi
scollegare il cavo di alimentazione. Lo
spostamento dell’unità quando il disco si
trova ancora all’interno può provocare
danni all’unità.
NO MUEVA LA UNIDAD DURANTE LA
REPRODUCCIÓN
Durante la reproducción, el disco gira a
gran velocidad. No levante ni mueva la
unidad durante la reproducción; si lo
hace, puede dañarse el disco.
AL TRASLADAR LA UNIDAD
Cuando cambie el lugar de instalación o
embale la unidad para su envío,
asegúrese de extraer el disco y volver a
colocar la bandeja del disco en su
posición original en el reproductor. A
continuación, pulse POWER para
desconectar la alimentación del sistema.
Desconecte el cable de alimentación.
La unidad puede resultar dañada si se
traslada con el disco cargado.

ENGLISH FRANÇAIS
10
D
<Never use such chemicals as record
sprays, antistatic sprays or fluid, benzine
or thinner to clean the discs. Such
chemicals will do irreparable damage to
the disc's plastic surface.
<Discs should be returned to their cases
after use to avoid dust and scratches
that could cause the laser pickup to
"skip."
<Do not expose discs to direct sunlight or
high humidity and temperature for
extended periods. Long exposure to high
temperatures will warp the disc.
<CD-R and CD-RW discs are more
sensitive to the effects of heat and
ultraviolet rays than ordinary CDs. It is
important that they are not stored in a
location where direct sunlight will fall on
them, and which is away from sources of
heat such as radiators or heat-generating
electrical devices.
<Printable CD-R and CD-RW discs aren't
recommended, as the label side might be
sticky and damage the unit.
<Do not stick papers or protective sheets
on the discs and do not use any
protective coating spray.
<Use a soft oil-based felt-tipped pen to
write the information on the label side.
Never use a ball-point or hard-tipped
pen, as this may cause damage to the
recorded side.
<Never use a stabilizer. Using
commercially available CD stabilizers
with this unit will damage the
mechanisms and cause them to
malfunction.
<Do not use irregular shape CDs
(octagonal, heart-shape, etc.). CDs of
this sort can damage the unit:
<If you are in any doubt as to the care and
handling of a CD-R/CD-RW disc, read the
precautions supplied with the disc, or
contact the disc manufacturer directly.
D
<Ne jamais utiliser de produits chimiques,
tels que des sprays, des liquides
antistatiques, de l'essence ou des
diluants pour nettoyer les disques. Ces
produits chimiques risquent de provoquer
des dégâts irréparables sur la surface en
plastique du disque.
<Ranger les disques dans leur étui après
utilisation afin d'éviter de les rayer ou
que de la poussière ne se dépose, ceci
pouvant compromettre la lecture par la
tête laser
<Ne pas exposer les disques à la lumière
directe du soleil, à une température
élevée ou à une humidité excessive
pendant une période prolongée. De telles
expositions risquent de provoquer une
déformation du disque.
<Les disques CD-R et CD-RW sont plus
sensibles aux effets de la chaleur et aux
rayons ultraviolets que les disques
compacts ordinaires. Il est donc
particulièrement important de les ranger
dans un endroit à l'abri de la lumière
directe du soleil et de toute source de
chaleur, telle que des radiateurs ou des
appareils électriques, susceptibles de
dégager de la chaleur.
<Il est déconseillé d'utiliser des disques
CD-R et CD-RW inscriptibles, la face
portant l'étiquette risquant d'être collante
et d'endommager l'appareil.
<Ne jamais coller d'étiquette ou de feuille
de protection sur le disque; ne pas
utiliser de spray destiné à déposer sur le
disque une couche de protection.
<Utiliser, pour écrire des informations sur
la face portant l'étiquette, un feutre
utilisant une encre à base d'huile. Ne
jamais utiliser de stylo bille ou de stylo à
pointe dure, qui risquerait d'abîmer la
surface enregistrée du disque.
<Ne jamais utiliser de stabilisateurs.
L'utilisation, avec cet appareil, de
stabilisateurs pour CD disponibles dans
le commerce, pourrait endommager les
mécanismes de l'appareil et provoquer
son dysfonctionnement.
<Ne pas utiliser de CD ayant une forme
irrégulière (octogonale, en forme de
coeur, etc.), ceux-ci risquant
d'endommager l'appareil :
<En cas de doute quant à la manipulation
des CD-R ou CD-RW, lire les instructions
fournies avec le disque ou contacter
directement le fabricant du disque.
D
Compact Disc 2 Disques Compacts 2

DEUTSCH ESPAÑOL
11
ITALIANO
<Verwenden Sie zur Reinigung einer CD
niemals chemische Reinigungsmittel, wie
Record-Sprays, Antistatic-Sprays oder
Flüssigkeiten wie Benzin oder Verdünner,
da diese Substanzen irreparable
Schäden an einer CD anrichten.
<Zur Vermeidung von Kratzern und Staub,
die den Laser-Pickup “aus seiner Bahn
werfen” könnten, sollten CDs nach
Gebrauch stets in die jeweilige CD-Hülle
zurückgelegt werden.
<Setzen Sie Ihre CDs nicht über längere
Zeit direkter Sonneneinstrahlung,
anderen Wärmequellen sowie extrem
hoher Luftfeuchtigkeit aus, da dies zu
Verformungen führen kann.
<CD-R und CD-RW Discs sind
empfindlicher gegenüber Hitze und
ultravioletter Lichteinstrahlung als
vorbespielte CDs. Daher ist es wichtig,
daß sie nicht an einem Ort aufbewahrt
werden, an dem sie direkter
Sonneneinstrahlung, der Einwirkung von
Heizkörpern oder elektrischen Geräten
mit erhöhter Wärmeentwicklung
ausgesetzt sind.
<Bedruckbare CD-R sowie CD-RW Discs
sind nicht zu empfehlen, da deren
Labelseite mit einem Film überzogen ist,
der den Recorder beschädigen kann.
<Kleben Sie keine Papiere oder
Schutzfolien auf die CDs, und verwenden
Sie keine Sprays zum Aufbringen einer
Schutzschicht.
<Verwenden Sie einen weichen
Filzschreiber, dessen Tinte auf einer Öl-
Emulsion basiert, um die Labelseite Ihrer
CDs zu beschriften. Verwenden Sie
niemals einen Kugelschreiber oder Ball-
Penn Stift (Roller).
<Verwenden Sie keinen CD-Stabilisator.
Die Verwendung von handelsüblichen
CD-Stabilisatoren in diesem Recorder
beschädigt das Laufwerk und führt daher
zu Fehlfunktionen.
<Ungewöhnlich geformte CDs (achteckig,
herzförmig, usw.) eignen sich nicht zur
Verwendung mit diesem Recorder. Sie
können erheblichen Schaden am Gerät
verursachent:
<Falls Sie nicht sicher sind und weitere
Fragen bezüglich der Handhabung und
Umgang mit CD-R/CD-RW Discs haben,
lesen Sie bitte die Vorsichtsmaßnahmen,
die meist auf der Innenseite der CD-Hülle
abgedruckt sind oder wenden Sie sich an
den Hersteller der entsprechenden CD.
D
<Per pulire i CD non usare mai prodotti
chimici ,come spray per dischi analogici,
fluidi o spray antistatici, benzina o
solventi, che potrebbero tutti
danneggiare irreparabilmente la
superficie plastica registrata.
<Dopo l’uso, conservare sempre i dischi
entro le relative custodie, per evitare che
eventuali graffi costringano il pickup
laser a compiere spiacevoli “salti”.
<Non conservare i dischi per lunghi
periodi esposti alla luce solare diretta o
in condizioni di eccessiva umidità e
temperatura. Il calore troppo elevato può
addirittura incurvare la superficie del
disco.
<Rispetto ai normali CD, i dischi CD-R e
CD-RW sono inoltre molto più sensibili
agli effetti del calore e delle radiazioni
ultraviolette. Importante perciò non
conservarli in luoghi esposti alle luce
solare diretta e tenerli lontano da
sorgenti di calore, come radiatori o
apparecchiature elettriche in grado di
generare calore.
<Non sono consigliabili dischi CD-R e CD-
RW con etichette personalizzabili, che
possono diventare vischiose e
danneggiare il registratore.
<Non attaccare pezzi di carta sui dischi e
non spruzzarvi rivestimenti protettivi.
<Per scrivere informazioni sul lato con
l’etichetta usare solo pennarelli morbidi
non a base acquosa, evitando le penne a
sfera che possono danneggiare i dati
registrati.
<Non usare mai uno stabilizzatore. I
normali stabilizzatori per CD disponibili in
commercio potrebbero danneggiare le
parti meccaniche causando
malfunzionamenti dell’apparecchio.
<Non utilizzare CD di forma irregolare
(ottagonale, a cuore, eccetera) perché
possono danneggiare il registratore :
<In caso di dubbi sul modo di conservare e
maneggiare un disco CD-R e CD-RW,
attenersi alle istruzioni allegate al disco
stesso, oppure rivolgersi direttamente al
fabbricante.
D
<No utilice nunca productos químicos
como los aerosoles para discos de vinilo
o antiestáticos, bencina o aguarrás para
limpiar los discos. Tales sustancias
causarán daños irreparables en la
superficie de plástico del disco.
<Los discos deberán devolverse a sus
estuches después de usarlos para evitar
la acumulación de polvo y los rayados,
que podrían producir "saltos" en el lector
láser.
<No exponga los discos a la luz solar
directa ni a niveles elevados de
temperatura o humedad durante períodos
prolongados. Las altas temperaturas
deforman los discos con el tiempo.
<Los discos CD-R y CD-RW son más
sensibles a los efectos del calor y los
rayos ultravioleta que los CD normales.
No conviene guardarlos en lugares
donde puedan quedar expuestos a la luz
solar directa, y deberán mantenerse
alejados de fuentes de calor como los
radiadores o los aparatos eléctricos que
desprendan calor.
<No se recomiendan los CD-R y CD-RW
imprimibles, ya que el lado de la etiqueta
puede tener restos de adhesivo y dañar
la unidad.
<No adhiera papeles ni láminas de
protección a los discos, ni aplique ningún
tipo de aerosol de revestimiento.
<Utilice un rotulador de punta blanda para
escribir en el lado de la etiqueta. No
emplee nunca bolígrafos ni lápices de
punta dura, ya que podría dañar la cara
grabada del disco.
<No utilice nunca estabilizadores. Los
estabilizadores de CD existentes en el
mercado producirán daños en los
mecanismos y anomalías en su
funcionamiento.
<No utilice discos de diseño irregular
(octogonales, forma de corazón, etc.), ya
que pueden dañar la unidad :
<Si tiene alguna duda sobre el cuidado y
manipulación de un disco CD-R/CD-RW,
lea las instrucciones facilitadas con el
disco o póngase directamente en
contacto con el fabricante.
D
Come tenere i CD 2
Handhabung von Compact Discs 2
Manipulación de discos 2

ENGLISH FRANÇAIS
Cassette Tape Bandes
12
Tape Handling
Use your finger or a pencil to turn the
cassette's hub and take up any slack
tape.
<Avoid touching the tape. Fingerprints
attract dust and dirt.
Do not store tapes in the following places:
<On top of heaters, exposed to direct
sunlight or in any other places with high
temperatures.
<Near speakers, on TV sets or amplifiers or
where they would be exposed to strong
magnetic fields.
<Where humidity is high and in dirty, dusty
places.
<Avoid dropping or subjecting cassettes to
excessive shocks.
<As C-120 tapes are physically weak and
could become entangled in the transport
mechanism, do not use them.
B
b
c
a
Ne pas entreposer des bandes dans les
endroits suivants:
<Sur des radiateurs, au soleil ou dans un
endroit où la température est élevée.
<Près de haut-parleurs, sur des
téléviseurs ou amplificateurs ou encore
près de champs magnétiques puissants.
<Dans des endroits où l'humidité est
élevée ou poussiéreux et sales.
<Eviter d’échapper ou soumettre les
cassettes à des chocs excessifs.
<Comme les bandes des cassettes C120
sont physiquement faibles et peuvent
facilement se coincer dans le mécanisme
de transport, ne pas les utiliser.
Choix de bande
Pour que le choix automatique de bande
fonctionne correctement, les bandes
métals ou chromes (cobalt) doivent
posséder des trous d’identification.
<Par ailleurs, cet appareil accepte les
cassettes de type "normal"(type!),
"chrome"(type@) ou "métal"(type!%).
Pour l'enregistrement, utilisez des
cassettes de type "normal"(type!) ou
"chrome"(type@).
A
Manipulation des bandes
Utiliser un doigt ou un crayon pour
tourner le moyeu de la cassette et
rattraper le jeu de la bande.
<Eviter de toucher la bande. Les
empreintes digitales attirent la poussière
et les saletés.
B
Normal(Type!)
CrO2(Type@)
Metal(Type!%)
c
b
a
Normale(Type!)
CrO2(Type@)
Métal(Type!%)
c
b
a
Tape Selection
Metal and chrome (cobalt) tapes have
identification holes.
<Normal, chrome and metal tapes can be
played with this unit.
For recording, please use normal(Type!)
or CrO2(Type@) tape.
A

DEUTSCH ESPAÑOL
CassetteKassette Cintas
13
ITALIANO
Selección de cinta:
Las cintas metal y cromo (cobalto) tienen
orificios de identificación.
<Las cintas normales(tipo!), de
cromo(tipo@) y metal(tipo!%) pueden
reproducirse con esta unidad. Para la
grabación, sírvase utilizar una cinta
normal(tipo!) o de cromo(tipo@).
Normales(Type!)
CrO2(Type@)
Metal(Type!%)
c
b
a
A
Bandsortenwahl
Metall und Chromdioxid (Kobalt)
Kassetten verfügen über
Identifikationsöffnungen.
<Normal(Typs!)-, Chrom(Typs@)- und
Reineisenbänder(Typs!%) können mit
diesem Gerät abgespielt werden.
Zum Aufnehmen verwenden Sie bitte
Normal(Typs!)- oder Chrombänder(Typs@).
Normalbänder(Typs!)
CrO2(Typs@)
Metalbänder(Typs!%)
c
b
a
ASelezione della cassetta
Le cassette con nastro Metal e Cromo
(Cobalto) sono dotate di apposite tacche
di identificazione.
<I nastri Normal(tipo!), Chrome(tipo@) e
Metal(tipo!%). possono essere riprodotti
con questa unità.
Per registrare, usare un nastro
Normal(tipo!) o Chrome(tipo@).
Normale(Tipo!)
CrO2(Tipo@)
Metallo(Tipo!%)
c
b
a
A
Manejo de cinta:
Utilice un dedo o un lapicero para girar el
carrete de la cinta y tensarla si es
necesario.
<Procure no tocar la cinta. Las huellas
atraen polvo y suciedad.
No guarde cintas en los siguientes lugares:
<Encima de radiadores, expuestas a la luz
solar directa o a temperaturas elevadas.
<Cerca de altavoces, televisores o
amplificadores, o en lugares expuestos a
campos magnéticos intensos.
<Lugares con un alto grado de humedad o
de suciedad.
<Evite las caídas y los impactos.
<No utilice cintas C-120, ya que podrían
atascar el mecanismo de transporte
debido a su fragilidad.
B
Maneggio delle cassette
Recuperare qualsiasi eventuale
allentamento del nastro ruotando il foro
della cassetta con un dito o una matita.
<Evitare di toccare con le mani la
superficie del nastro perché le impronte
digitali attraggono polvere e sporcizia.
Non conservare le cassette sopra
apparecchi di riscaldamento;
<in luoghi esposti alla luce solare diretta o
comunque soggetti a temperature
elevate;
<vicino ad altoparlanti, televisori,
amplificatori o dovunque possano subire
l’influsso di forti campi magnetici;
<in locali molto umidi, sporchi o polverosi.
<Evitare di far cadere le cassette o
sottoporle a violenti scosse.
<Non è consigliabile l’uso delle cassette
C-120 perché contengono nastro molto
sottile che può facilmente aggrovigliarsi
sui componenti meccanici.
B
Umgang mit Compact Cassetten
Wenn das Kassettenband nicht fest auf
dem Wickelkern aufgespult ist,
verwenden Sie einen Bleistift oder einen
Finger, um den Bandwickel wieder zu
straffen.
<Vermeiden Sie bitte grundsätzlich jede
Berührung des Kassettenbandes, da
Fingerabdrücke Staubpartikel anziehen
und dadurch die Aufnahme- und
Wiedergabequalität beeinflussen.
Vermeiden Sie das Lagern von Compact
Kassetten an den folgenden Orten:
<Auf Heizkörpern, an Orten, an denen sie
direkter Sonneneinstrahlung oder
anderen Wärmequellen ausgesetzt sind.
<In der Nähe von Lautsprecherboxen,
Fernsehgeräten, Verstärkern oder
anderen Orten, an denen sie starken
Magnetfeldern ausgesetzt sind.
<An Orten mit hoher Luftfeuchtigkeit oder
solchen, die schmutzig oder sehr staubig
sind.
<Vermeiden Sie, wenn irgend möglich,
extreme mechanische Belastungen der
Kassette; z. B. Fallenlassen, Verbiegen,
usw.
<Da das Bandmaterial von C-120 Compact
Kassetten sehr dünn ist und sich daher
leicht im Laufwerksmechanismus
verfängt, sollten Sie deren Verwendung
vermeiden.
B

ENGLISH FRANÇAIS
Dolby NR Dolby NR
14
Les têtes et le chemin de la bande
doivent être nettoyés et démagnétisés
périodiquement.
Nettoyage du chemin de bande
<Appliquer un liquide de nettoyage de tête
sur le cotontige spécial ou sur un chiffon
doux et frotter légèrement les têtes ,
cabestans et toutes les pièces de
métal du chemin de bande.
<Nettoyer aussi le galet presseur avec
un liquide de nettoyage pour caoutchouc.
Démagnétisation des têtes
S'assurer que l’alimentation est coupée,
puis démagnétiser les têtes avec le
démagnétiseur.
Pour plus de détails sur son utilisation,
lire son manuel d’instructions.
Attention
Si la surface de l'appareil devient sale,
nettoyer celle-ci à l'aide d'un chiffon
doux ou utiliser un liquide de nettoyage
neutre. La nettoyer entièrement. Ne pas
utiliser de diluant, de benzine ou d'alcool
car ils risquent d'endommager la surface
de l'appareil.
C
B
A
The heads and tape path should be
cleaned and demagnetized periodically.
Cleaning Tape Path
<Apply head cleaning fluid to a cotton
swab or soft cloth, and lightly rub the
heads , capstan and all metal parts
in the tape path.
<Also clean the pinch roller using
rubber cleaning fluid.
Demagnetizing Heads
Be sure that the power is off, then
demagnetize the heads using a
demagnetizer. For details of its use, read
its instructions.
Caution:
If the surface of the unit gets dirty, wipe
with a soft cloth or use diluted neutral
cleaning liquid. Be sure to remove any
fluid completely. Do not use thinner,
benzine or alcohol as they may damage
the surface of the unit.
C
BA
A
B
C C
B
Basic description of Dolby NR
During low-level program material, Dolby NR
acts to boost high-frequency signals. During
playback, these signals are restored to their
original level. Any noise introduced in
between these processes (during recording)
will be reduced in playback. Dolby NR also
employs the principle of least treatment,
leaving high-level signals unprocessed
since the louder program material serves to
effectively mask any tape hiss.
Principe de fonctionnement du Dolby NR
Le dispositif de réduction de bruit Dolby NR
fonctionne en renforçant les signaux de
fréquence élevée lorsque le programme est
à un niveau faible. A la lecture, ces signaux
sont ramenés à leur niveau d’origine. Tout
bruit introduit entre ces deux processus,
c’est-à-dire pendant l’enregistrement, sera
réduit à la lecture. Le dispositif Dolby NR
obéit également au principe de traitement
minimum, c’est à dire en ne traitant pas les
signaux de niveau élevé puisqu’un niveau
sonore plus élevé a pour effet de masquer
suffisamment tout sifflement sur la bande.
Dolby noise reduction manufactured
under license from Dolby Laboratories
Licensing Corporation.
"DOLBY" and the double-D symbol Uare
trademarks of Dolby Laboratories
Licensing Corporation.
Réduction de bruit Dolby fabriquée sous
licence de Dolby Laboratories Licensing
Corporation.
DOLBY et le symbole double-D Usont
des marques de Dolby Laboratories
Licensing Corporation.
Maintenance Entretien

DEUTSCH ESPAÑOL
Dolby NRDolby NR Dolby NR
15
ITALIANO
Köpfe und Bandpfad sollten in
regelmäßigen Abständen gereinigt und
entmagnetisiert werden.
Reinigung des Bandpfades
<Auf ein Wattestäbchen oder weiches Tuch
Kopfreinigungsflüssigkeit auftragen und
Köpfe , Capstan und alle Metallteile
des Bandpfades leicht abreiben.
<Die Andruckrolle mit
Gummireinigungsflüssigkeit reinigen.
C
BA
Entmagnetisieren der Tonköpfe
Vergewissern Sie sich, daß das Gerät
ausgeschaltet ist. Verwenden Sie zum
Entmagnetisieren der Köpfe einen Compact
Kassetten Entmagnetisierungsstab
oder eine entsprechende
EntmagnetisierungsKassette.
Einzelheiten bezüglich der korrekten
Anwendung dieser Geräte entnehmen Sie
bitte der jeweils beiliegenden
Bedienungsanleitung.
Warnung:
Wenn die Geräteoberfläche verschmutzt
sein sollte, wischen Sie diese mit einem
weichen Tuch ab oder verwenden Sie eine
verdünnte, neutrale Reinigungsflüssigkeit.
Reinigen Sie sie gründlich. Verwenden Sie
keinen Verdünner, Benzin oder Alkohol, da
dies die Geräteoberfläche beschädigen
kann.
Le testine e il percorso del nastro devono
essere puliti regolarmente.
Pulizia del percorso del nastro
<Applicare alcool denaturato su un
apposito bastoncino ovattato o su una
pezzuola soffice e pulire quindi le
testine , i cabestani e tutte le parti
metalliche sul percorso del nastro.
<Pulire pure i rulli pressori , usando un
apposito liquido per parti di gomma.
Smagnetizzazione delle testine
Quando si è sicuri che l’apparecchio sia
spento, eliminare eventuali tracce di
magnetismo dalle testine con l’apposito
smagnetizzatore; per maggiori particolari
su questa operazione, consultare il
manuale dello strumento.
Attenzione:
Se la superficie dell'apparecchio
dovesse sporcarsi, pulirla strofinandola
con uno straccio morbido, oppure usare
una soluzione blanda di detergente.
Pulire a fondo. Non usare diluenti,
benzina o alcool, in quanto potrrebbero
rovinare la superficie del mobile.
C
BA
Las cabezas y la trayectoria de la cinta
deben limpiarse y desmagnetizarse
periódicamente.
Limpieza de la trayectoria de la cinta
<Aplique el líquido de limpieza de cabezas
a un hisopo especial o paño suave y frote
ligeramente las cabezas ,
cabrestantes y todas las partes
metálicas de la trayectoria de la cinta.
<Limpie también los rodillos de presión
usando el líquido de limpieza para goma.
Desmagnetización de cabezales
Asegúrese de que la unidad está
apagada y proceda a desmagnetizar los
cabezales. Para más información,
consulte las instrucciones del
desmagnetizador.
Precaución:
Cuando la superficie de la unidad se
ensucia, límpiela con un trozo de tela
suave o use un líquido de limpieza diluido
y neutro. Límpiela por completo. No se
debe usar diluente, bencina o alcohol
pues podrían dañar la superficie de la
unidad.
C
B
A
Dolby Rauschunterdrückung ist hergestellt
unter Lizenz von Dolby Laboratories
Licensing Corporation. DOLBY und das
Doppel-D-Symbol Usind Warenzeichen
der dolby Laboratories Licensing
Corporation.
Das grundlegende Funktionsprinzip der
DOLBY Rauschunterdrückung
Das Dolby NR System hebt während der
Aufnahme den Pegel hoher Frequenzen des
Audiosignals in sehr leisen Musikpassagen an.
Bei der Wiedergabe werden die Pegel dieser
hohen Frequenzen, zusammen mit dem
Rauschpegel der sich unumgänglich bei der
Aufnahme ergibt, wieder auf ihr normales
Niveau abgesenkt, wodurch der gerade bei
leisen Passagen störende Rauschanteil stark
reduziert wird. Das Dolby-Verfahren zeichnet
sich weiterhin dadurch aus, daß es nach dem
Prinzip der geringstmöglichen Beeinflussung
arbeitet. Das heißt, laute Passagen mit hohen
Pegeln bleiben unbeeinflußt, da das Rauschen
vom menschlichen Gehör hier aus psycho-
akustischen Gründen nicht wahrgenommen
werden kann.
Dispositivo Dolby di riduzione del rumore
fabbricato su licenza della Dolby
Laboratories Licensing Corporation.
DOLBY e il simbolo della doppia D U
sono marchi di fabbrica della Dolby
Laboratories Licensing Corporation.
Reducción de ruido Dollby fabricado bajo
licencia de Dolby Laboratories Licensing
Corporation.
DOLBY, el símbolo de la D doble Uson
marcas de Dolby Laboratories Licensing
Corporation.
Descripción básica del sistema de
reducción de ruido DOLBY
Con el material de programa de nivel
reducido, Dolby interviene para realzar las
señales de alta frecuencia. Durante la
reproducción, estas señales recuperan su
nivel original. Cualquier ruido que incida
entre ambos procesos (durante la
grabación), se reducirán en la reproducción.
Dolby también aplica el principio del mínimo
tratamiento dejando sin procesar las señales
de alto nivel, ya que el material de mayor
nivel sirve para enmascarar eficazmente
cualquier siseo de cinta.
A che cosa serve il sistema Dolby di
riduzione del rumore
Nel corso della registrazione il sistema
Dolby NR rende più profonde dei normale le
parti musicali di bassa intensità laddove è
più facile che emerga il rumore di fondo del
nastro. Quando poi il nastro cosi codificato
viene riprodotto, il circuito Dolby NR
provvede a diminuire le parti enfatizzate in
fase di registrazione. Questo processo di
codifica/decodifica svolge due
funzioni:abbassa qualsiasi rumore indotto
dal processo di registrazione e ripristina la
musica nella Sua forma originale in modo
che non risulti perso o modificato nulla,
tranne il rumore.
ManutenzionePflege und Wartung Mantenimiento

LLRR
PLAYREC
TAPE
LR
IN
CD
ENGLISH FRANÇAIS
Connexions
16
Connections
B
LINE INPUT/OUT jacks
Connect the LINE INPUT/OUT jacks to the
amplifier with audio signal connection
cords.
LINE INPUT wTAPE REC
LINE OUTPUT wTAPE PLAY
CD LINE OUTPUT wCD IN
<Make sure to connect :
white plug wwhite jack(L:left)
red plug wred jack(R:right)
<Be sure to insert each plug securely. To
prevent hum and noise, do not bundle the
connection cords with the power cord or
speaker cord.
A
A
Connecteurs LINE INPUT/OUTPUT
Branchez ces prises sur l’Amplificateur à
l’aide du câble àfiches coaxiales.
LINE INPUT wTAPE REC
LINE OUTPUT wTAPE PLAY
CD LINE OUTPUT wCD IN
<Assurez vous de connecter :
Fiche blanche
wconnecteur blanc (L:gauche)
Fiche rouge
wconnecteur rouge (R:droit)
<Assurez-vous que chaque fiche est
enfoncée bien àfond. Pour éviter le
ronflement, éloignez les câbles de
raccordement du cordon d’alimentation
et des câbles des haut-parleurs.
A
AC Power Cord
Plug this AC power cord into an AC wall
socket.
BCordon d’alimentation (CA)
Branchez ce cordon d’alimentation CA
sur une prise de courant CA murale.
B
Amplifier
Amplificateur
Verstärker
Amplificatore
Amplificador
<Turn off the power of all the equipment
before making connections.
<Read instructions of each component you
intend to use with CD-A630.
<Coupez l’alimentation électrique de tout
l’équipement avant de faire les
branchements.
<Lisez les instructions de chaque appareil
que vous avez l’intention d’utiliser avec
votre lecteur-enregistreur CD-A630.
CD-A630

DEUTSCH ESPAÑOL
CollegamentoAnschluß Conexión
17
ITALIANO
LINE INPUT/OUTPUT Buchsen
Verbinden Sie diese Buchsen mit dem
Verstärker mit Hilfe des Audio Kabels.
LINE INPUT wTAPE REC
LINE OUTPUT wTAPE PLAY
CD LINE OUTPUT wCD IN
<Stellen Sie die Verbindung sicher :
Weißer Stecker wWeiße Buchse (links)
Roter Stecker wRote Buchse (rechts)
<Stellen Sie sicher, daßalle Stecker fest
eingesteckt sind. Um Brummen und
Geräusche zu verhindern, dürfen die
Anschlußkabel nicht mit dem Strom- oder
Lautsprecherkabel gebündelt werden.
APrese LINE INPUT/OUTPUT
Vanno collegate, con gli appositi cavetti,
alle prese TAPE REC/PLAY e CD IN
sull'amplificatore con cavo di
connessione segnale audio.
LINE INPUT wTAPE REC
LINE OUTPUT wTAPE PLAY
CD LINE OUTPUT wCD IN
<Accertatevi che le connessioni siano
esatte:
Spinotto biancowpresa bianca(a sinistra)
Spinotto rosso wpresa rossa (a destra)
<Controllare che ogni spina sia inserita a
fondo. Per evitare ronzii e rumore non
avvolgere insieme i cordoni di
collegamento con il cavo di
alimentazione o dell’altoparlante.
ASalidas LINE INPUT/OUTPUT
Conecte estas salidas a las entradas
TAPE REC/PLAY y CD IN del amplificador
con el cable de conexión para señales de
audio.
LINE INPUT wTAPE REC
LINE OUTPUT wTAPE PLAY
CD LINE OUTPUT wCD IN
<Asegúrese conectar
Clavija blanca
wterminal blanco (izquierda)
Clavija roja
wterminal rojo (derecha)
<Compruebe que enchufa firmemente
todos los enchufes. Para evitar
interferencias y ruidos, no entrelace los
cables de conexión con el cable de
alimentación o los cables de los
altavoces.
A
Netzsteckdose
Stecken Sie den Netzstecker in eine
Netzsteckdose.
BUscita potenza
Inserire questo cavo in una presa di rete,
oppure nella presa AC OUTLETS.
BToma de corriente
Conecte este cable a una toma mural.
B
<Schalten Sie alle Geräte ab, bevor Sie
Anschlüsse vornehmen.
<Lesen Sie die Bedienungsanleitungen zu
allen Geräten, die Sie zusammen mit dem
CD-A630 verwenden wollen.
<Prima di effettuare le connessione
spegnere l’alimentazione elettrica a tutta
l’apparecchiatura.
<Leggere le istruzioni relative ad ogni
componente che si desidera usare con il
del CD-A630.
<Apague todos los equipos antes de
realizar las conexiones.
<Lea las instrucciones de todos los
componentes que prevéutilizar junto con
la pletina para CD-A630.

ENGLISH FRANÇAIS
Remote Control Unit Boîtier de télécommande
18
Battery Installation
Remove the battery compartment cover.
Insert two “AA“(R6, SUM-3) dry batteries.
Make sure that the batteries are inserted
with their positive “+“and negative “_“
poles positioned correctly.
Close the cover.
Battery Replacement
If the distance required between the remote
control unit and main unit decreases, the
batteries are exhausted. In this case replace
the batteries with new ones.
Precautions concerning batteries
<Be sure to insert the batteries with
correct positive “+“and negative “_“
polarities.
<Use batteries of the same type. Never use
different types of batteries together.
<Rechargeable and non-rechargeable
batteries can be used. Refer to the
precautions on their labels.
<When the remote control unit is not to be
used for a long time (more than a month),
remove the batteries from the remote
control unit to prevent them from leaking.
If they leak, wipe away the liquid inside
the battery compartment and replace the
batteries with new ones.
<Do not heat or disassemble batteries and
never dispose of old batteries by throwing
them in a fire.
3
2
1
The provided Remote Control Unit allows the
unit to be operated from a distance.
When operating the remote control unit,
point it towards the REMOTE SENSOR on the
front panel of the unit.
<Even if the remote control unit is operated
within the effective range, remote control
operation may be impossible if there are
any obstacles between the unit and the
remote control.
<If the remote control unit is operated near
other appliances which generate infrared
rays, or if other remote control devices
using infrared rays are used near the unit,
it may operate incorrectly. Conversely, the
other appliances may operate incorrectly.
Mise en place des piles
Retirer le couvercle du compartiment des
piles.
Introduire deux piles “AA“(R6, SUM-3).
S'assurer que les piles sont correctement
mises en respectant les polarités plus +
et moins _.
Fermer le couvercle jusqu'au déclic.
Remplacement des piles
Si vous remarquez que la distance entre le
boîtier de télécommande et le lecteur
devient plus courte pour un fonctionnement
correct, ceci indique que les piles sont
usées. Dans ce cas, remplacer les piles par
des nouvelles.
Précautions àobserver concernant les piles
<Bien placer les piles en respectant les
polarités plus +et moins _.
<Utiliser des piles du même type. Ne
jamais essayer d'utiliser des types de pile
différents ensemble.
<Des piles ou des batteries peuvent être
utilisées. Se référer àleurs étiquettes
pour les précautions àrespecter.
<Si le boîtier de télécommande n'est pas
utilisépendant une longue période (pluss
d'un mois), retirer les piles du boîtier de
télécommande pour éviter des fuites de
pile. Si elles coulent, essuyer le liquide
dans le compartiment des piles et
remplacer les piles par des neuves.
<Ne pas chauffer, démonter les piles ni les
mettre au feu.
3
2
1
Le boîtier de télécommande fourni permet la
commande àdistance defourni permet la
commande àdistance de l'appareil. Pour
l'utilisation du boîtier de télécommande, le
diriger vers le détecteusation du boîtier de
télécommande, le diriger vers le détecteur
de télécommande du panneau avant de
l'appareil.
<Même si le boîtier de télécommande est
activédans la zone de fonctionnement, la
commande àdistance peut être
impossible s'il y a des obstacles entre le
lecteur et le boîtier de télécommande.
<Si le boîtier de télécommande fonctionne
dans le voisinage d'autres appareils
générant des rayons infrarouges, ou si
d'autres télécommandes utilisant des
rayons infrarouges sont utilisées près du
lecteur, le lecteur peut de ne pas bien
fonctionner. Dans la situation inverse, les
autres apaareils peuvent ne pas bien
fonctionner.

DEUTSCH ESPAÑOL
Funzionamento col telecomando
Betrieb mit der Fernbedienung Contador de tiempo
19
ITALIANO
Die mitgelieferte Fernbedienungseinheit
ermöglicht die Bedienung des Gerät bequem
vom Sitzplatz aus.
Die Fernbedienung auf den Fern-
bedienungs-Empfangssensor am Gerät
richten.
<Innerhalb des zulässigen
Entfernungsbereichs kann der
Signalempfang durch zwischen
Fernbedienung und Empfangssensor
befindliche Gegenstände behindert
werden.
<Bei Fernbedienbetrieb kann der Gerät
Fehlfunktionen zeigen, wenn er in der
Nähe eines Infrarotstrahlen
ausstrahlenden Geräts betrieben wird
oder wenn im gleichen Raum Infrarot-
Fernbedienungen anderer Geräte
verwendet werden. Umgekehrt kann die
Fernbedienung dieses Geräts
Fehlfunktionen bei anderen mit
Infrarotsignalen zu bedienenden Geräten
verursachen.
Einlegen der Batterien
Die Batteriefach-Abdeckung entfernen.
Zwei Batterien “AA“(R6, SUM-3) unter
Beachtung der Polarität (+/_) einlegen.
Die Abdeckung wieder anbringen.
Batteriewechsel
Sollte es erforderlich werden, den Abstand
zwischen Gerät und Fernbedienung zur
Funktionsauslösung zu verringern, wird ein
Batteriewechsel notwendig. Stets zwei neue
Batterien einlegen.
Batterie-Vorsichtsmaßnahmen
<Die Batterien unter Beachtung der
korrekten Polarität ( +und _) einlegen.
<Stets zwei Batterien des gleichen Typs
verwenden, niemals eine gebrauchte und
eine frische Batterie zusammen
verwenden.
<Sowohl Einweg- als auch
wiederaufladbare Batterien können
verwendet werden.
Die Sicherheitshinweise auf den
Batterien beachten.
<Bei längerem Nichtgebrauch (über einen
Monat) sollten die Batterien entnommen
werden, um ein Auslaufen im
Batteriefach zu verhindern. Ausgelaufene
Batterien entnehmen und nach Säubern
des Batteriefachs gegen frische
auswechseln.
<Batterien nicht erhitzen, zerlegen oder
verbrennen.
3
2
1
Installazione batterie
Rimuovere il coperchio del vano batterie.
Inserire due batterie “AA“(R6, SUM-3).
Accertarsi che le batterie siano inserite
con i poli positivo +e negativo _nelle
posizioni corrette.
Chiudere il coperchio fino a sentire uno
scatto.
Sostituzione batterie
Se si notasse che la distanza di
funzionamento diminuisce, ciòindica che le
batterie sono scariche. In tale caso
sostituire le batterie con altre di nuove.
Precauzioni riguardanti le batterie
<Accertarsi di inserire le batterie con le
polarità+e _nella posizione corretta.
<Usare batterie dello stesso tipo. Non
usare mai tipi diversi di batterie assieme.
<Possono essere usate sia batterie
ricaricabili che batterie non ricaricabili.
Fare riferimento alle indicazioni
sull'etichetta.
<Quanddo si prevede di non utilizzare il
telecomando per un lungo periodo (piùdi
un mese), rimuovere le batterie per
prevenire perdite. Se si verificassero
delle perdite, pulire il vano batterie e
sostituire le batterie con altre di nuove.
<Non riscaldare o disassemblare le
batterie e non gettarle nel fuoco.
3
2
1
L'unitàdi telecomando in dotazione pemette
di comandare a distanza l'apparecchio.
Quando si utilizza l'unitàdi telecomando,
puntarla verso il sensore sul pannello
anteriore dell'apparecchio.
<Anche se l'unitàdi telecomando viene
utilizzata entro il campo efficace, il
comando a distanza potrebbe essere
impossibile se vi sono degli ostacoli tra il
telecomando ed il lettore.
<Se l'unitàdi telecomando viene utilizzata
in prossimitàdi altri apparecchi che
generano raggi infrarossi oppure se altri
dispositivi di comando a distanza
utilizzanti raggi infrarossi vengono
utilizzati in prossimitàdel lettore, esso
potrebbe funzionare in modo scorretto.
Dal punto di vista opposto anche gli altri
apparecchi potrebbero funzionare in
modo scorretto.
Instalación de las pilas
Abra la tapa del compartimiento de las
pilas.
Coloque dos pilas “AA“(R6, SUM-3).
Asegúrese de que las pilas queden
ubicadas con sus polos positivo +y
negativo _correctamente posicionados.
Cierre la tapa hasta que se trabe.
Cambio de pilas
Si nota que ha disminuido la distancia
necesaria para un control correcto entre el
control remoto y el reproductor, significa
que las pilas están gastadas. En este caso,
reemplácelas por nuevas.
Precauciones con las pilas
<Asegúrese de insertar las pilas con sus
polaridades positiva +y negativa _
correctas.
<Utilice el mismo tipo de pilas. Nunca
utilice diferentes tipos de pilas juntas.
<Pueden utilizarse pilas recargables y no
recargables. Refiérase a las
precauciones en sus rótulos.
<Si no va a utilizar el control remoto por
mucho tiempo (más de un mes), retire las
pilas para evitar pérdidas. Si se produce
pérdidas, limpie el líquido en el interior
del compartimiento y cambie las pilas por
nuevas.
<No caliente ni desarme las pilas y nunca
arroje pilas gastadas al fuego.
3
2
1
La unidad de control remoto suministrada le
permite controlar el aparato a distancia.
Cuando opere con el control remoto, diríjalo
hacia el sensor remoto en el panel frontal
del aparato.
<Aunque se utilice la unidad dentro del
margen de funcionamiento efectivo, es
imposible el control a distancia si hay
obstáculos entre el reproductor y el
control remoto.
<Si se utiliza la unidad cerca de otros
aparatos que generen rayos infrarrojos o
si se emplean otros aparatos de control
remoto por rayos infrarrojos cerca del
reproductor, es posible que éste no
funcione correctamente. Del mismo
modo, es posible que los otros aparatos
tampoco funcionen correctamente.

Name of Each Control
20
AGF H I J K L M
ECB
A D
B C
D
ENGLISH
POWER switch
Press this switch to turn the unit on and
off.
CD-TAPE CONT PLAY button
This button is used for continuous
playback of a cassette tape and discs.
PHONES/Level
Insert the headphones plug into the
PHONES jack, and adjust the volume.
Display
CD
READY button
Use this button to pause playback.
STOP button
Use this button to stop playback or
synchronized recording.
SHUFFLE button
Use this button for shuffle playback.
PLAY button
Use this button to start playback of the
selected disc.
When no disc is selected, this button
won't work.
DISC 1, 2, 3 buttons
Use these buttons to select a disc.
CD TIMER switch
When an optional audio timer is
connected, timer playback of CD is
possible.
F
E
D
C
B
A
D
C
B
A
E
N
K
Q
S
B
C
O
P
R
I
A
D
f
g
b
e
c
d
m
l
Other manuals for CD-A630
1
Table of contents
Other Tascam CD Player manuals

Tascam
Tascam CD-400U User manual

Tascam
Tascam CD-01U Professional User manual

Tascam
Tascam CD-01U Professional User manual

Tascam
Tascam CD-450 CD-450 User manual

Tascam
Tascam CD-A700 User manual

Tascam
Tascam W-860R/TAS Guide

Tascam
Tascam RC-601mkII User manual

Tascam
Tascam CD-A500 User manual

Tascam
Tascam CD-6010 How to use

Tascam
Tascam CD-9010CF User manual

Tascam
Tascam CD-9010 User manual

Tascam
Tascam CD-X1500 User manual

Tascam
Tascam CD-A580 User manual

Tascam
Tascam CD-450 CD-450 Guide

Tascam
Tascam CD-VT1 User manual

Tascam
Tascam CD-355 User manual

Tascam
Tascam LA-MC1 User manual

Tascam
Tascam CD-601MKII User manual

Tascam
Tascam CD-200 User manual

Tascam
Tascam CD-6010 User manual