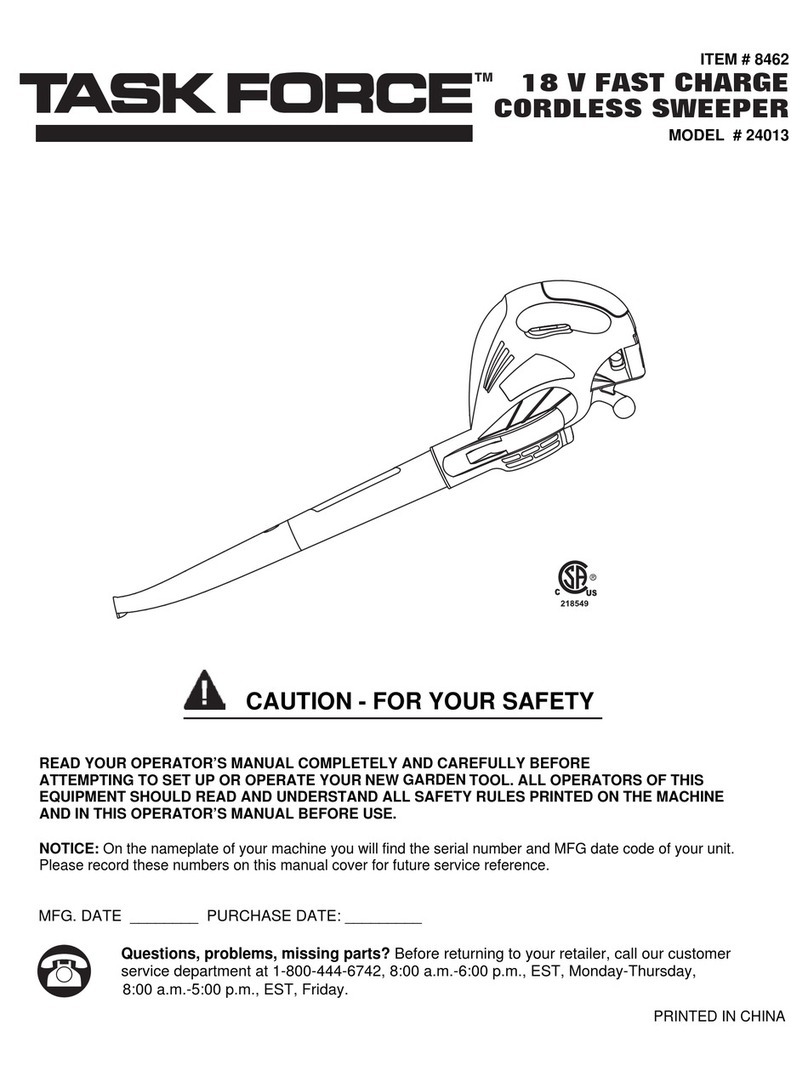
Task Force 24083 User manual

Electric Blower/Vac with Bag
- 1 -
ITEM #241481
READ YOUR OPERATOR’S MANUAL COMPLETELY AND CAREFULLY BEFORE
ATTEMPTING TO SET UP OR OPERATE YOUR NEW TOOL. ALL OPERATORS OF THIS
EQUIPMENT SHOULD READ AND UNDERSTAND ALL SAFETY RULES PRINTED ON THE MACHINE
AND IN THIS OPERATOR’S MANUAL BEFORE USE.
CAUTION - FOR YOUR SAFETY
NOTICE: On the nameplate of your machine you will find the serial number and MFG date code of your unit.
Please record these numbers on this manual cover for future service reference.
MFG. DATE ________ PURCHASE DATE: _________
PRINTED IN CHINA
Questions, problems, missing parts? Before returning to your retailer, call our customer
service department at 1-800-444-6742, 8:00 a.m.-6:00 p.m., EST, Monday-Thursday,
8:00 a.m.-5:00 p.m., EST, Friday.
MODEL #24083
GARDEN

PRODUCT SPECIFICATIONS
- 2 -
Specification...................................................................................................................................2
Contents of carton..........................................................................................................................7
Safety information..........................................................................................................................3
Assembly instructions ...................................................................................................................8
Operating instructions ....................................................................................................................9
Maintenance and repair instructions .............................................................................................12
Troubleshooting.............................................................................................................................13
Warranty........................................................................................................................................14
Parts list ..........................................................................................................................................15
Model No. ................................................................................................................................24083
Motor:.......................................................................................................................120V~60Hz,10A
Air volume: .....................................................................................................................300-405CFM
Air velocity: ............................................................................................Two Speeds: 150-200MPH
Mulch ratio: .................................................................................................................................10:1
Collection bag capacity: ....................................................................................... 1 Bushel (35.2 L)
Operating weight: ............................................................................................................8 Ib(3.6 kg)
TABLE OF CONTENTS
Know your blower .........................................................................................................................7

SAFETY INFORMATION
Please read and understand the entire manual before attempting to assemble, operate or install the
product. These safety instructions are not meant to cover every possible condition that could occur. If
you have any questions regarding the product please call customer service at 1-800-444-6742,
8:00 a.m.-6:00 p.m., EST, Monday-Thursday, 8:00 a.m.-5:00 p.m., EST, Friday.
-3-
The purpose of safety signal statements and symbols is to attract your attention to possible danger. Read them
carefully to understand and practice proper accident prevention.
Signals an EXTREME hazard.
Failure to obey a safety DANGER signal WILL result in serious injury or death to yourself or to others.
Always follow the safety precautions to reduce the risk of fire, electric shock, and personal injury.
Signals a serious hazard.
Failure to obey a safety WARNING signal CAN result in serious injury to yourself and to others. Always
follow the safety precautions to reduce the risk of fire, electric shock, and personal injury.
Signals a moderate hazard.
Failure to obey a safety CAUTION signal MAY result in property damage or personal injury to yourself or to others.
Always follow the safety precautions to reduce the risk of fire, electric shock, and personal injury.
IMPORTANT! Signals special mechanical information.
NOTE: Signals additional important general information.
Safety Tool Symbols
IMPORTANT! Some of the following symbols may be used on your tool. Please study them and learn their meanings.
Proper interpretation of these symbols will allow you to operate the tool properly and safely.
~
CAUTION
WARNING
DANGER
Safety Signals
SYMBO NAME EXPLANATION
Alternating Type or a characteristic of
current current
- - - Direct current Type or a characteristic of
current
Class II Designates double insulation
Ni-Cad Battery Designates that this tool is in
Recycling accordance with Ni-Cad
battery recycling program
SYMBOL NAME EXPLANATION
V Volt Potential voltage
A Amperes Current
Hz Hertz Frequency (cycles per
second)
n0No load speed Rotational speed at no load
.../min Movements Revolutions, strokes, surface
per minute speed, orbits, etc. per minute

- 4 -
SAFETY INFORMATION
IMPORTANT SAFETY INSTRUCTIONS
READ ALL INSTRUCTIONS BEFORE USING
For houshould use only.
Install only on a nominal 120 V supply protected by a maximum 20 A overcurrent protective
device.
Do not use near bystanders.
Do not use with damaged cord or plug. If appliance is not working as it should,
has been dropped, damaged, or dropped into water, bring it to a service center.
Use extra care when using on stairs.
Do not use to pick up flammable or combustible liquids, such as gasoline,
or use in areas where they may be present.
EXTENSION CORDS: Make sure the extension cord is in good condition and that is heavy
enough to carry the current your unit will draw. An undersized extension cord will cause a
drop in line voltage resulting in a loss of power as well as overheating. The table shown
above illustrates the correct size to use depending on the cord length and nameplate
amperage rating. If in doubt, use the next heavier size wire gauge. The smaller the gauge
number, the heavier the cord. To prevent the cord from disconnecting from the unit, use
the cord hook shown in the Operating Instructions.
Ground Fault Circuit Interrupter (GFCI) protection should be provided on the circuit(s) or
outlet(s) that will be used for the unit. Receptacles with built-in GFCI protection should be
used as an added safety measure.
A nameplate on Blower/Vac indicates the voltage used. Never connect the unit to an AC
voltage that differs from this voltage.
Inspect all extension cords and the unit power connection periodically. Look closely for
deterioration, cuts or cracks in the insulation. Also inspect the connections for damage.
Repair or replace the cords if any defects appear.
Avoid dangerous environments. Never operate the Blower/Vac in damp or wet conditions.
Moisture is a shock hazard.
Do not use the unit in the rain.
Do not handle the plug or the unit with wet hands.

WHILE OPERATING
Wear safety glasses or goggles that are marked as meeting ANSI Z87.1-1989 standards.
Also wear ear/hearing protection when operating this unit. Wear a face or dust mask
when operating in dusty environments. Long-sleeved shirts are recommended.
Wear heavy, long pants, boots and gloves. Do not wear loose clothing, jewelry, short
pants, and sandals or go barefoot. Tie hair back.
Avoid accidental starting. Do not carry a unit that is plugged in with your finger on the
trigger switch. Be sure the switch is in the OFF position when plugging in the unit.
Do not set the unit on any surface except a clean, hard area while the motor is running.
Debris such as gravel, sand, dust, grass, etc.,could be picked up by the air intake and
thrown out by the discharge opening, damaging the Blower/Vac, property, or causing
serious injury to bystanders or operator.
Use this product for only its intended purpose
Do not overreach. Always keep proper footing and balance. Do not operate from unstable
surfaces like ladders, trees, slopes or rooftops.
Do not abuse the power cord. Do not pull or carry the unit by the cord, use the cord as a
handle, close a door on the cord, or pull the cord around sharp edges or corners. Keep
the cord away from heated surfaces, oil and sharp edges.
Do not unplug by pulling on the cord. To unplug, grasp the plug, not the cord.
Always remain alert. Use common sense. To prevent injury to yourself and others, do not
operate this unit if you are fatigued.
Do not operate the unit while under the influence of drugs, alcohol or medication.
Do not leave the Blower/Vac plugged in when not in use, changing attachments, or while
being serviced.
-5-
SAFETY INFORMATION
Do not put any objects into any of the openings. Do not use with any of the air openings
blocked; keep the air openings free of dirt, debris and anything that may reduce the air
flow.
Keep hair, loose clothing, fingers, and all parts of body away from openings and moving
parts.
When servicing this unit use only the replacement parts identical to those listed in this
manual. These parts are available from your authorized service dealer. Use of parts that
do not meet the original equipment specifications may lead to improper performance,
compromised safety and void the Blower/Vac warranty.
Do not force unit. It will do the job better and with less likelihood of injury at the rate for
which it was designed.
Never use the Blower/Vac without the blower tube or the vac tubes and bag attached.
Turn off all controls before unplugging.
The Blower/Vac must be unplugged before attempting to install or remove the blower tube
or the vac tubes and bag.

WHILE OPERATING UNIT AS A BLOWER
Never point the blower in the direction of people or pets or in the direction of windows.
Use extra caution when blowing debris near solid objects such as trees, automobiles and
walls.
WHILE OPERATING UNIT AS A VAC
Avoid situations that could catch the bag on fire. Do not operate near an open flame. Do
not vacuum warm ash from fireplaces, barbecue pits, brush piles, etc. Do not vac
discarded cigars or cigarettes unless the cinders are completely cool.
The unit is designed to pick up dry material such as leaves, grass, small twigs, and bits of
paper. Do not attempt to vacuum wet debris and/or standing water as this may result in
damage to the Blower/Vac. To avoid severe damage to the impeller, do not vacuum metal,
rocks or broken glass.
OTHER SAFETY WARNINGS
Be sure to secure the unit while transporting.
Store the unit in a dry area, locked up to prevent unauthorized use or damage, and stored
in a high place out of the reach of children.
Never douse or squirt the unit with water or any other liquid. Keep handles dry, clean and
free from debris. Clean after each use. See the Cleaning and Storage instructions.
Keep these instructions. Refer to them often and use them to instruct other users. If you
loan someone this unit, also loan them these instructions.
- 6 -
SAFETY INFORMATION
SAVE THESE INSTRUCTIONS

Fig.1
Co
Bag
rd
Blower tube
Auxiliary handle
Lock button
Switch
-7 -
Vac tubes
This unit includes the following:
Electric blower
Blower tube
Vac tubes
Shoulder strap
Bag
Operator’s manual
Examine all parts to make certain that nothing is missing and no breakage has occurred during shipping.
Damaged or missing parts must be replaced before using this unit.
For parts or service, please call toll free helpline at 1-800-444-6742.
CONTENTS OF CARTON
KNOW YOUR BLOWER/VAC
TM


CONNECTING THE POWER CORD
Use a minimum 25’ (7.6 m.) long, 16AWG, outdoor electrical cord when using this unit. Other
sizes include:
MINIMUM WIRE SIZE FOR EXTENSION CORDS FOR
120 VOLT APPLIANCES USING 0-12 AMPS*
Cord length (ft.) 25 50 100 150
Wire size (AWG)* 16 14 12 10
To reduce the risk of electrical shock, this appliance has a polarized plug(one
blade is wider than the other). This plug will fit in a polarized outlet only one way. If the plug
does not fit fully in the outlet, reverse the plug. If it still does not fit, contact a qualified electrician
to install the proper outlet. Do not change the plug in any way. This unit has a polarized plug
(one blade is wider than the other) and will require the use of a polarized extension cord.
This unit plug will only fit into a polarized extension cord in one orientation. If the plug does not
fully fit into the extension cord, reverse the plug. If the plug still does not fit, obtain a correct
polarized extension cord.
A polarized extension cord will require the use of a polarized wall outlet. This plug will only fit
into a polarized wall outlet in a specific orientation. If the plug does not fit fully into the wall
outlet, reverse the plug. If the plug still does not fit, contact a qualified electrician to install the
proper wall outlet. Do not change the unit plug, extension cord receptacle, or extension cord
plug in any way.
1. Secure the extension cord to the motor housing using the notch above the handle.
This prevents accidental removal of the electrical cord.
2. Plug the female end of the electrical cord into the receptacle at the back of the unit.
STARTING/STOPPING INSTRUCTIONS
This unit is equipped with a three-way (OFF/ LOW/ HIGH) switch
Slide the switch all the way down for OFF.
Slide the switch up to the first position for LOW speeds up to 150 MPH.
Slide the switch up to the second position for HIGH speeds up to 200 MPH.
Once the unit is plugged in, stand in the operating position. Slide the power/speed switch to
LOW or HIGH to start the unit. To stop the unit, slide the switch to OFF.
HOLDING THE BLOWER/VAC
Before operating the unit, stand in the operating position. Check for the following:
Operator is wearing proper clothing, such as boots, safety glasses or goggles,
ear/hearing protection, gloves, long pants and a long sleeve shirt.
If the conditions are dusty, the operator is wearing adust mask or face mask.
The unit is in good working condition.
The tubes and the bag are in place and secure.
- 9 -
OPERATING INSTRUCTIONS
WARNING
WARNING
To avoid serious personal injury, wear goggles or safety glasses at all times
when operating this unit. Wear a face mask or dust mask in dusty locations
WARNING
To prevent serious personal injury or damage to the unit, make sure the blower
tube or the vac tubes and the bag are in place before operating the unit.

The bag is installed and zipped closed (when used as a vac).
OPERATING TIPS
Be sure the bag is zipped closed before operating the unit.
Assure the unit is not directed at anybody or any loose debris before starting the unit.
Verify that the unit is in good working condition. Make sure the tubes and guards are in
place and secure.
Always hold the unit with both hands when operating.
Keep a firm grip on both the front and rear handle or grips.
To reduce the risk of hearing loss associated with sound level(s), hearing protection is
required.
Use the shoulder strap when using unit as a vac.
Operate power equipment only at reasonable hours—not early in the morning or late at
night when people might be disturbed. Comply with times listed in local ordinances. Usual
recommendations are 9:00 am to 5:00 pm, Monday through Saturday.
To reduce noise levels, limit the number of pieces of equipment used at anyone time.
To reduce noise levels, operate power blowers at the lowest possible speed to do the job.
Use rakes and brooms to loosen debris before blowing.
In dusty conditions, slightly dampen surfaces.
Conserve water by using power blowers instead of hoses for many lawn and garden
applications, including areas such as gutters, screens, patios, grills, porches, and
gardens.
Watch out for children, pets, open windows or freshly washed cars, and blow debris safely
away.
Clean up after using blowers and other equipment. Dispose of debris appropriately.
- 10 -
OPERATING INSTRUCTIONS

CLEARING A BLOCKED TUBE / IMPELLER
1. Slide the Power/Speed switch down in the OFF position until the unit comes to a complete
stop.
2. Unplug the unit.
3. Remove the blower tube or vac tubes and the bag.
4. Carefully remove material blocking the tube or impeller. Inspect the blades to assure no
damage has occurred. Rotate the impeller blades by hand to assure the blockage is
completely cleared.
5. Reinstall the blower tube or vac tubes and the bag.
6. Plug the unit back into the power supply.
OPERATING INSTRUCTIONS
WARNING
To avoid serious personal injury, be sure the unit is OFF and unplugged before
clearing the impeller.
To avoid serious personal injury, always wear gloves to protect yourself from
the impeller blades or other sharp objects.
WARNING
AIR VENTS
Never cover air vents. Keep them free from obstructions and debris. They must always remain
clear for proper motor cooling .
OPERATING AS A BLOWER
Hold the blower firmly. Sweep from side to side with the nozzle several inches above the
ground or floor. Slowly advance the unit, keeping the accumulated pile of debris in front of
you. Most dry blowing operations are better suited to low speeds, rather than high. High
speed blowing is a better way to move heavier items like large debris or gravel.
OPERATING AS A VACUUM
Hold the vac firmly, tilting the suction tube (2-4"or 5-10 cm), and use a sweeping action to
collect light debris. The debris will flow into the bag. Items such as small leaves
and twigs will be mulched as they pass through the fan housing.For longer bag life and
increased performance empty the bag often.
To avoid serious personal injury, do not wear loose fitting clothing or articles
such as scarves, strings, chains, ties, etc.,that could get drawn into the air vents. To make sure
long hair does not get drawn into the air vents, tie back long hair.
WARNING
- 11-

SERVICING DOUBLE-INSULATED UNITS
This unit is double insulated. In a double-insulated unit, two systems of insulation are provided
instead of grounding. There is no grounding provided and no means of grounding should be
added to this unit. Extreme care and knowledge of the system is required when servicing a
double-insulated unit. Service should be performed by qualified service personnel only.
Replacement parts for a double-insulated unit must be identical to the parts they replace.
Refer any repairs to an authorized service dealer. A double-insulated unit is marked with the
words “double insulation” or “double insulated.”
CLEANING THE UNIT
Use a small brush to clean off the outside of the unit. Do not use strong detergents, household
cleaners that contain aromatic oils such as pine and lemon, and solvents such as kerosene as
they can damage plastic housing or handle. Wipe off any moisture with a soft, dry cloth.
CLEANING THE BAG
1. Empty the bag after each use to avoid deterioration and obstructing air flow, which will reduce
the performance of the vac.
2. Wearing eye protection and a dust mask, clean the bag as needed. Turn the bag inside out
after initial emptying and vigorously shake out dust and debris.
3. Wash the bag once a year, or more often if needed:
a) Remove the bag.
- 12 -
WARNING
To avoid serious personal injury, always turn the unit off and unplug it before
cleaning or servicing.
MAINTENANCE AND REPAIR INSTRUCTIONS
b) Turn bag inside out.
c) Hang it up.
d) Hose it down thoroughly.
e) Leave it hanging to dry.
f ) Turn bag right-side out and reinstall.
STORAGE
Store the unit locked up to prevent unauthorized use or damage.
Store the unit in a dry, well-ventilated area.
Store the unit out of the reach of children
INSPECT EXTENSION CORDS
Inspect all extension cords periodically. Look closely for deterioration, cuts or cracks in the
insulation. Inspect the connectors for damage. Replace cords if defective or damaged.

TROUBLE SHOOTING
UNIT WILL NOT BLOW OR VACUUM
PROBLEM CORRECTIVE ACTION
Bag full Empty bag.
Blocked tube Clear the blockage as described on page 10.
Blocked impeller Clear the blockage as described on page 10.
Damaged impeller Take the unit to an authorized service dealer.
Dirty bag Clean the bag.
Torn bag Replace the bag.
Bag unzipped Zip up the bag.
Unit unplugged Plug into an outlet or an extension cord.
UNIT WILL NOT START
PROBLEM CORRECTIVE ACTION
Unit is unplugged. Check cord to make sure it is plugged into an
electrical outlet.
Power/speed switch is in the OFF position. Slide switch to high or low.
Defective power switch. Return to place of purchase or return the unit to
a repair center.
Vac tubes are not correctly installed. Check vac tubes to ensure that they are
allowing the switch to be engaged when
correctly installed.
Intake gate/cover is not closed. Ensure that gate/cover is fully closed and
locked.
- 13-

LIMITED TWO-YEAR WARRANTY
The manufacturer warrants to the original purchaser that each new product and service part is free from
defects in material and workmanship and agrees to repair or replace under this warranty any defective
product or part as follows from the original date of purchase.
2-Year Limited Warranty
THIS WARRANTY IS NOT TRANSFERABLE AND DOES NOT COVER:
1. Products sold damaged or incomplete, sold “as is”, sold reconditioned or used as rental equipment.
2. Delivery, installation or normal adjustments explained in the owner’s manual.
3. Damage or liability caused by shipping, improper handling, improper installation, incorrect voltage or
improper wiring, improper maintenance, improper modification, or the use of accessories and /or attachments
not specifically recommended.
4. Repairs necessary because of operator abuse or negligence, or the failure to install, operate, maintain
and store the product according to the instructions in the owner’s manual.
5. Damage caused by cold, heat, rain, excessive humidity, corrosive environments and materials, or other
contaminants.
6. Expendable items that become worn during normal use. Cosmetic defects that do not interfere with tool
functionality. Freight costs from customer to vendor.
ANY INCIDENTAL, INDIRECT OR CONSEQUENTIAL LOSS, DAMAGE, OR EXPENSE THAT MAY RESULT
FROM ANY DEFECT, FAILURE OR MALFUNCTION OF THE PRODUCT.
Some states do not allow the exclusion or limitations on how long an implied warranty lasts, so the above
limitations may not apply to you.
WARRANTY REPLACEMENT PARTS are available by calling the toll free number, 1-800-444-6742,
8:00am – 6:00pm EST, Monday-Thursday, 8:00 a.m.-5:00 p.m., EST, Friday.
-14 -

PARTS LIST
- 15 -

20 2 Shrink tube for wire
21 1
22 1 Switch button
23 1 Spring of switch button
24 1 Shaft sleeve
25 1 Fan
26 1 Small cap
27 1 Intake cover
28 1
Shaft of bag
29 1 Rear vac tube
30 1
Front vac tube
31 1 Bag
Item No. Part No. Qty Description
1 1 Front blower tube
2 1 Rear blower tube
3 1 Spring
4 1 Lock button
5 1
6 1 Motor
7 2 Diode
8 1 Capacitance
9 1 Variable speed switch
10 1 Switch sliding button
11 1 Machine housing
12 16 Screw ST3.5x16-F
13 1 Wire connector
14 1 Cord holder
15 1
16 1 Cord guard
17 1 Cord with plug
18 1 Spring
19 1
PARTS LIST
-16-
32
33
34
35
3411527
3411627
3340227-1
3410727-2
3411727
36101141
3690128
3690228
3630128
3410527-2
3130127-2
3220105
3650401
3410801
3420102
3640127
3340327
3050228
3050103
3550352
3630111
3410627
3340127
3320128
3410779
3410427
3410927
3411227-1
3411027-1
3411427-1
37901141
3340427
3412028
3420106
3490552
1
2
2
Blower cover
Shake resistant washer
Nylon belt
Washer
Slipcover
Red wire
Black wire
2
Micro switch
Table of contents
Other Task Force Blower manuals
