taurus wellness TW-MC-L User manual
TWMCL.01.01
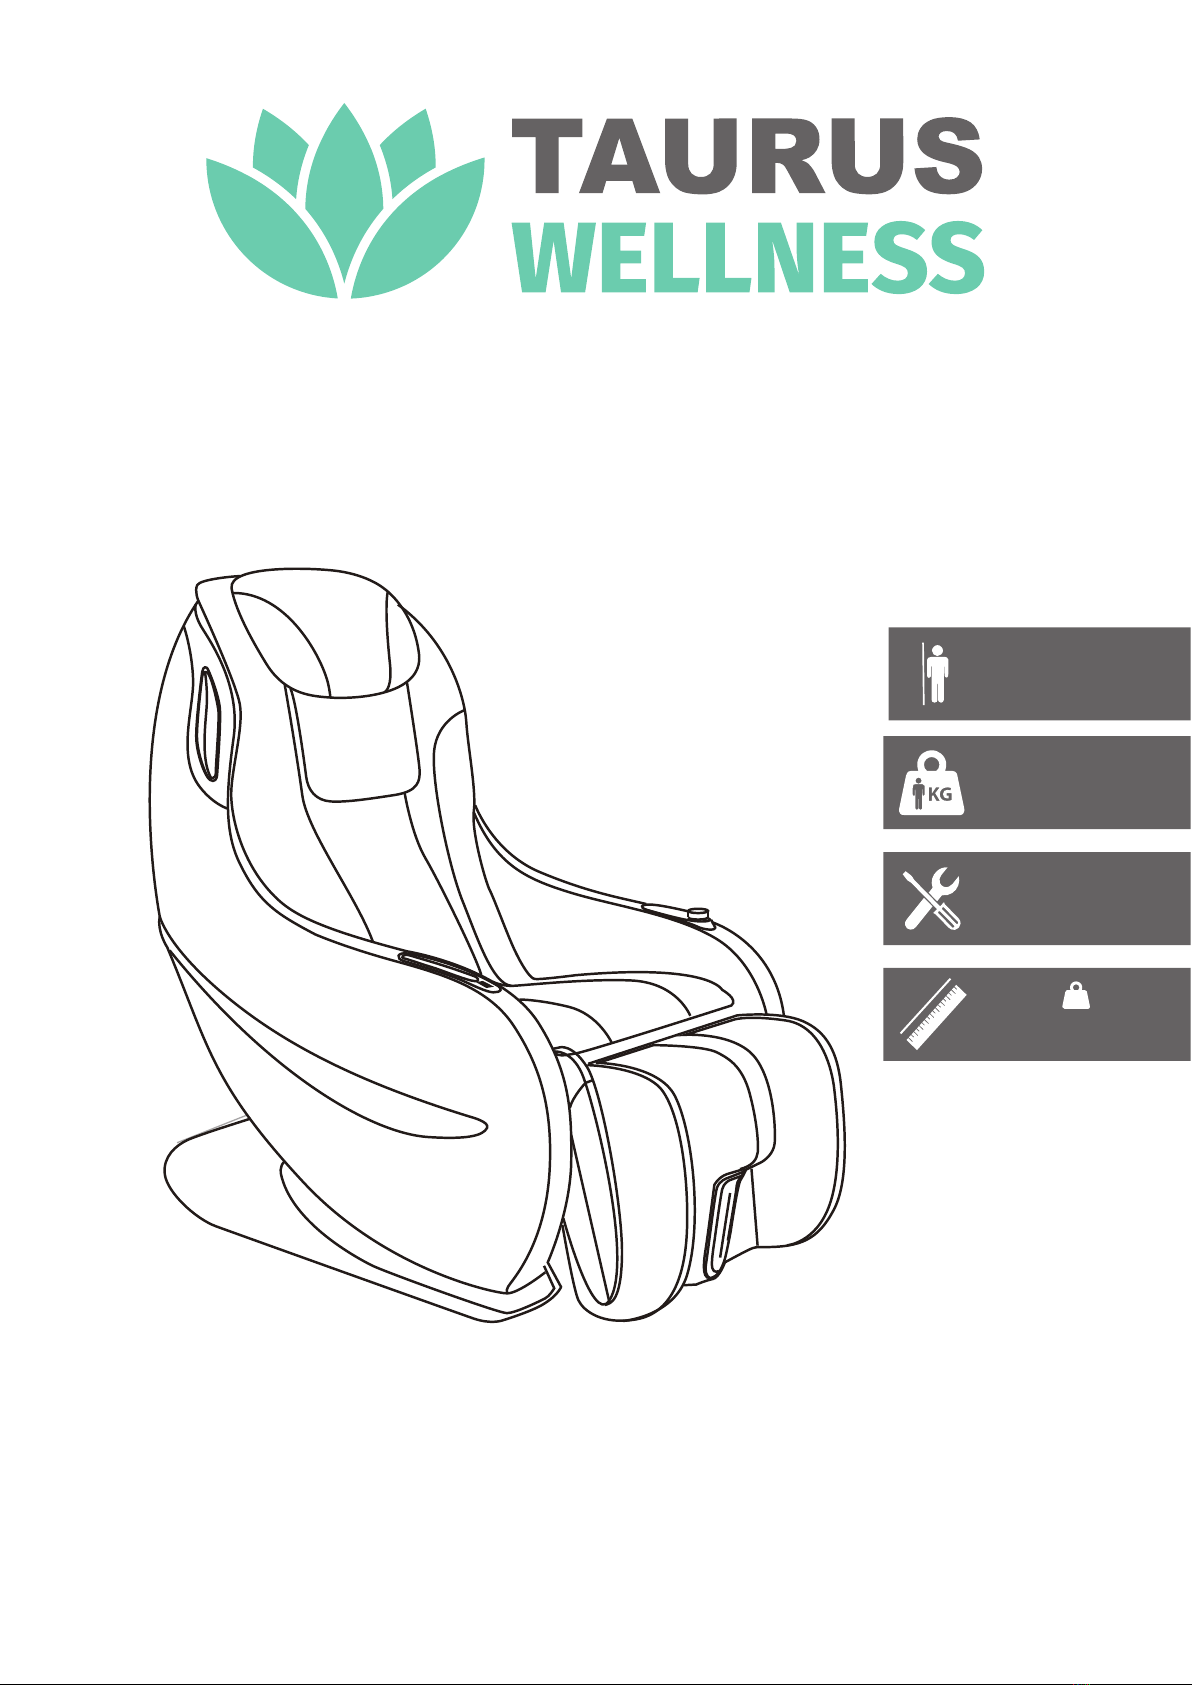
max. 120 kg
L 108 | B 56 | H 139
~ 30 - 60 Min.
33 kg
CM
CM
max. 230 cm
max. 120 kg
~ 20 Min.
Assembly and Operating Instructions
Art. No. TW-MC-L
L 123 | W 64 | H 103.5
62.5 kg

2

3
Content
1 GENERAL INFORMATION 6
1.1 Technical Data 6
1.2 Personal Safety 7
1.3 Electrical Safety 8
1.4 Set-Up Place 8
2 ASSEMBLY 9
2.1 General Instructions 9
2.2 Scope of Delivery 9
2.3 Assembly 10
2.4 Overview 11
2.5 Optional Cradle Function 12
2.6 Turning around the Footrest 13
3 OPERATING INSTRUCTIONS 14
3.1 Button and Function Description 14
4 STORAGE AND TRANSPORT 17
4.1 General Instructions 17
4.2 Transportation Wheels 17
5 TROUBLESHOOTING, CARE AND MAINTENANCE 18
5.1 General Instructions 18
5.2 Faults and Fault Diagnosis 18
5.3 Maintenance and Inspection Calendar 19
6 DISPOSAL 19
7 SERIAL NUMBER AND MODEL NAME 20
8 WARRANTY 21
9 CONTACT 23

4
Dear customer,
Thank you for choosing a Taurus brand wellness product. With the Taurus Wellness Line we oer you
relaxation, regeneration and massage at home. The Taurus Wellness Line can thus enhance your
health and well-being. We wish you a relaxed time. If you have any questions about these or other
Taurus brand products, please feel free to contact us.
Your team from Taurus and the Sport-Tiedje Group
Further information can be found at www.sport-tiedje.com
Legal Notice
Sport-Tiedje GmbH
Europe’s No. 1 for home tness
International Headquarters
Flensburger Straße 55
24837 Schleswig
Germany
Management:
Christian Grau
Sebastian Campmann
Dr. Bernhard Schenkel
No. HRB 1000 SL
Local Court Flensburg
European VAT Number: DE813211547
Disclaimer
©2020 Taurus Wellness® is a registered brand of the company SportTiedje GmbH. All
rights reserved. Any use of this trademark without the explicit written permission of
Sport-Tiedje is prohibited.
Product and manual are subject to change. Technical data can be changed without
advance notice.
Intended Use
The equipment may only be used for its intended purpose.
The equipment is only suitable for home use. The equipment is not suitable for semi-professional
(e.g. hospitals, associations, hotels, schools, etc.) and commercial or professional use (e.g. tness
studios).

5
ABOUT THIS MANUAL
Please carefully read the entire manual before installation and rst use. The manual will help you to
quickly set up the system and explains how to safely use it. Make sure that all persons exercising with
the equipment (especially children and persons with physical, sensory, mental or motor disabilities)
are informed about this manual and its contents in advance. In case of doubt, responsible persons
must supervise the use of the equipment.
This equipment has been manufactured according to the latest safety knowledge.
As far as possible, potential safety hazards which could cause injury have been
eliminated. Make sure to carefully follow the instructions and that all parts are
securely in place. If required, read through the instructions again to correct any
mistakes.
Please pay close attention to the safety and maintenance instructions given here. The contract
partner cannot be held liable for damage to health, accidents or damage to the equipment when it
is not used in accordance with these instructions.
The following safety instructions may appear in this manual:
࣑ATTENTION
This notice indicates potentially hazardous situations which, if not avoided, may result in property
damage.
⚠CAUTION
This notice indicates potentially hazardous situations which, if not avoided, may result in slight
or minor injuries!
⚠WARNING
This notice indicates potentially hazardous situations which, if not avoided, may result in death
or serious injuries!
⚠DANGER
This notice indicates potentially hazardous situations which, if not avoided, will result in death
or serious injuries!
LNOTICE
This notice indicates further useful information.
Retain these instructions in a safe place for future reference, maintenance or when ordering
replacement parts.

6
1 GENERAL INFORMATION
1.1 Technical Data
Programmes in total: 7
Automatic programmes: 3
Manual programmes: 4
Automatic timer: 15 Minutes
Power input: 220 V, 50 Hz
Power consumption: 100 W
Amount of motors: 3
Dimensions and Weight
Package dimensions (L x W x H) approx.: 157 cm x 74 cm x 78 cm
Set-up dimensions (L x W x H) approx.: 123 cm x 64 cm x 103.5 cm
Reclined dimensions (L x W x H) approx.: 145.5 cm x 64 cm x 77.2 cm
Article weight (gross, incl. packaging) approx.: 75 kg
Article weight (net, excl. packaging) approx.: 62.5 kg
Maximum user weight: 120 kg
Maximum user height: 230 cm

7
1.2 Personal Safety
⚠WARNING
+ Before you start using the product, you should clarify with your physician whether its use is
suitable for you from a health point of view. Aected by this are above all
+ Persons with a pacemaker or other medical devices that can cause
electromagnetic interference.
+ Persons with cardiovascular diseases.
+ Pregnant or sick persons or persons in poor physical condition.
+ Persons who are advised against massages due to previous illnesses (e.g.
vascular diseases or dermatitis).
+ Persons suering from osteoporosis, a fractured vertebra or other acute diseases.
+ Persons with an irregular deformation of the spine.
+ Persons suering from a perceptual disorder due to a peripheral circulation
disorder (e.g. diabetes).
+ This equipment may not be used by children under the age of 14.
+ Children should not be allowed unsupervised access to the equipment.
+ Persons with disabilities must have a medical license and must be under strict observation
when using the equipment.
+ The equipment is strictly for use by one person at a time.
+ Do not use the product with a blanket or pillow. Overheating of the product and resulting
electric shock, re and/or personal injury may result.
+ Do not use the product in rooms where aerosol sprays or oxygen are administered.
+ Keep your hands, feet and other body parts, hair, clothing, jewellery and other objects well
clear of moving parts.
+ Do not use the product on swollen and/or inamed body parts or on irritated skin areas.
+ Do not use the product on painful areas of the body where the cause of the pain is unclear.
+ If you experience any unusual discomfort during use, turn the device o and do not use it
any further. Contact your physician.
+ Use a light massage programme the rst time you use the product. Avoid massage sessions
longer than 15 minutes and do not massage any part of the body for more than 5 minutes at
a time. Excessive massage may cause over-stimulation of muscles and nerves and may result
in injury.
⚠CAUTION
+ Only use the product in a sitting position.
+ Only use the product in a relaxed position. Do not apply punctual pressure to any part of the
body when the rollers are in motion.
࣑ATTENTION
+ Do not insert any objects of any kind into the openings of the device.

8
1.3 Electrical Safety
⚠DANGER
+ In order to reduce the risk of an electric shock, always unplug the equipment from the mains
socket before assembly or dismantling, and before maintenance or cleaning. Do not pull on
the cable.
⚠WARNING
+ Do not leave the equipment unattended while the mains cable is plugged into the mains
socket. During your absence, the mains cable must be removed from the mains socket to
prevent improper use by third parties or children.
+ If the mains cable or plug is damaged or defective, contact your contract partner. Until repair,
the equipment must not be used.
࣑ATTENTION
+ The equipment requires a mains connection of 220-230V with 50Hz mains voltage.
+ The equipment may only be connected directly to an earthed socket using the supplied
mains cable. Extension cables must conform to VDE guidelines. Always completely unwind
the mains cable.
+ The socket must be protected by a fuse with a minimum fuse rating of "16A, slow blow".
+ Do not make any changes to the mains cable or the mains plug.
+ Keep the mains cable away from water, heat, oil and sharp edges. Do not route the mains
cable underneath the equipment or under a carpet or rug, and do not place any objects on
top of it.
+ Do not unplug the mains cable until the product is turned o.
1.4 Set-Up Place
⚠WARNING
+ Do not place the equipment in main corridors or escape routes.
+ To prevent re, do not place the product near or in areas with high heat (e.g. near a heater).
⚠CAUTION
+ Choose the set-up place so that there is sucient space around the product. Please note that
the product requires sucient space to the rear when in the reclined position.
࣑ATTENTION
+ The device may only be used in one building, in suciently tempered and dry rooms (ambient
temperatures between 10°C and 35°C). The equipment should not be used outdoors or in
rooms with high humidity (over 70%) like swimming pools.
+ A oor protective mat/equipment underlay can help to protect high-quality oor coverings
(parquet, laminate, cork, carpets) from dents and sweat and can help to level out slight
unevenness.
+ To avoid fading or faster wear of the cover, do not place the product in places with direct
sunlight and/or high heat.
9
2 ASSEMBLY
2.1 General Instructions
⚠DANGER
+ Do not leave any tools, packaging materials such as foils or small parts lying around,
as otherwise there is a danger of suocation for children. Keep children away from the
equipment during assembly.
⚠WARNING
+ Pay attention to the instructions attached to the equipment in order to reduce the risk of
injuries.
⚠CAUTION
+ Ensure to have sucient room for movement in each direction during assembly.
+ The assembly of the equipment must be carried out by at least two adults. If in doubt, seek
the help of a third technically skilled person.
࣑ATTENTION
+ To prevent damage to the equipment and the oor, assemble the equipment on a mat or
packaging board.
LNOTICE
+ Ideally, assemble the equipment at its later set-up place.
2.2 Scope of Delivery
The scope of delivery consist of the following parts. At the beginning, check whether all parts
and tools belonging to the device are included in the scope of delivery and whether damage has
occurred. In the event of complaints, the contractual partner must be contacted directly.
⚠CAUTION
If parts of the scope of delivery are missing or damaged, the assembly must not be carried out.
10
2.3 Assembly
Before assembly, take a close look at the individual assembly steps shown and carry out the assembly
in the order given.
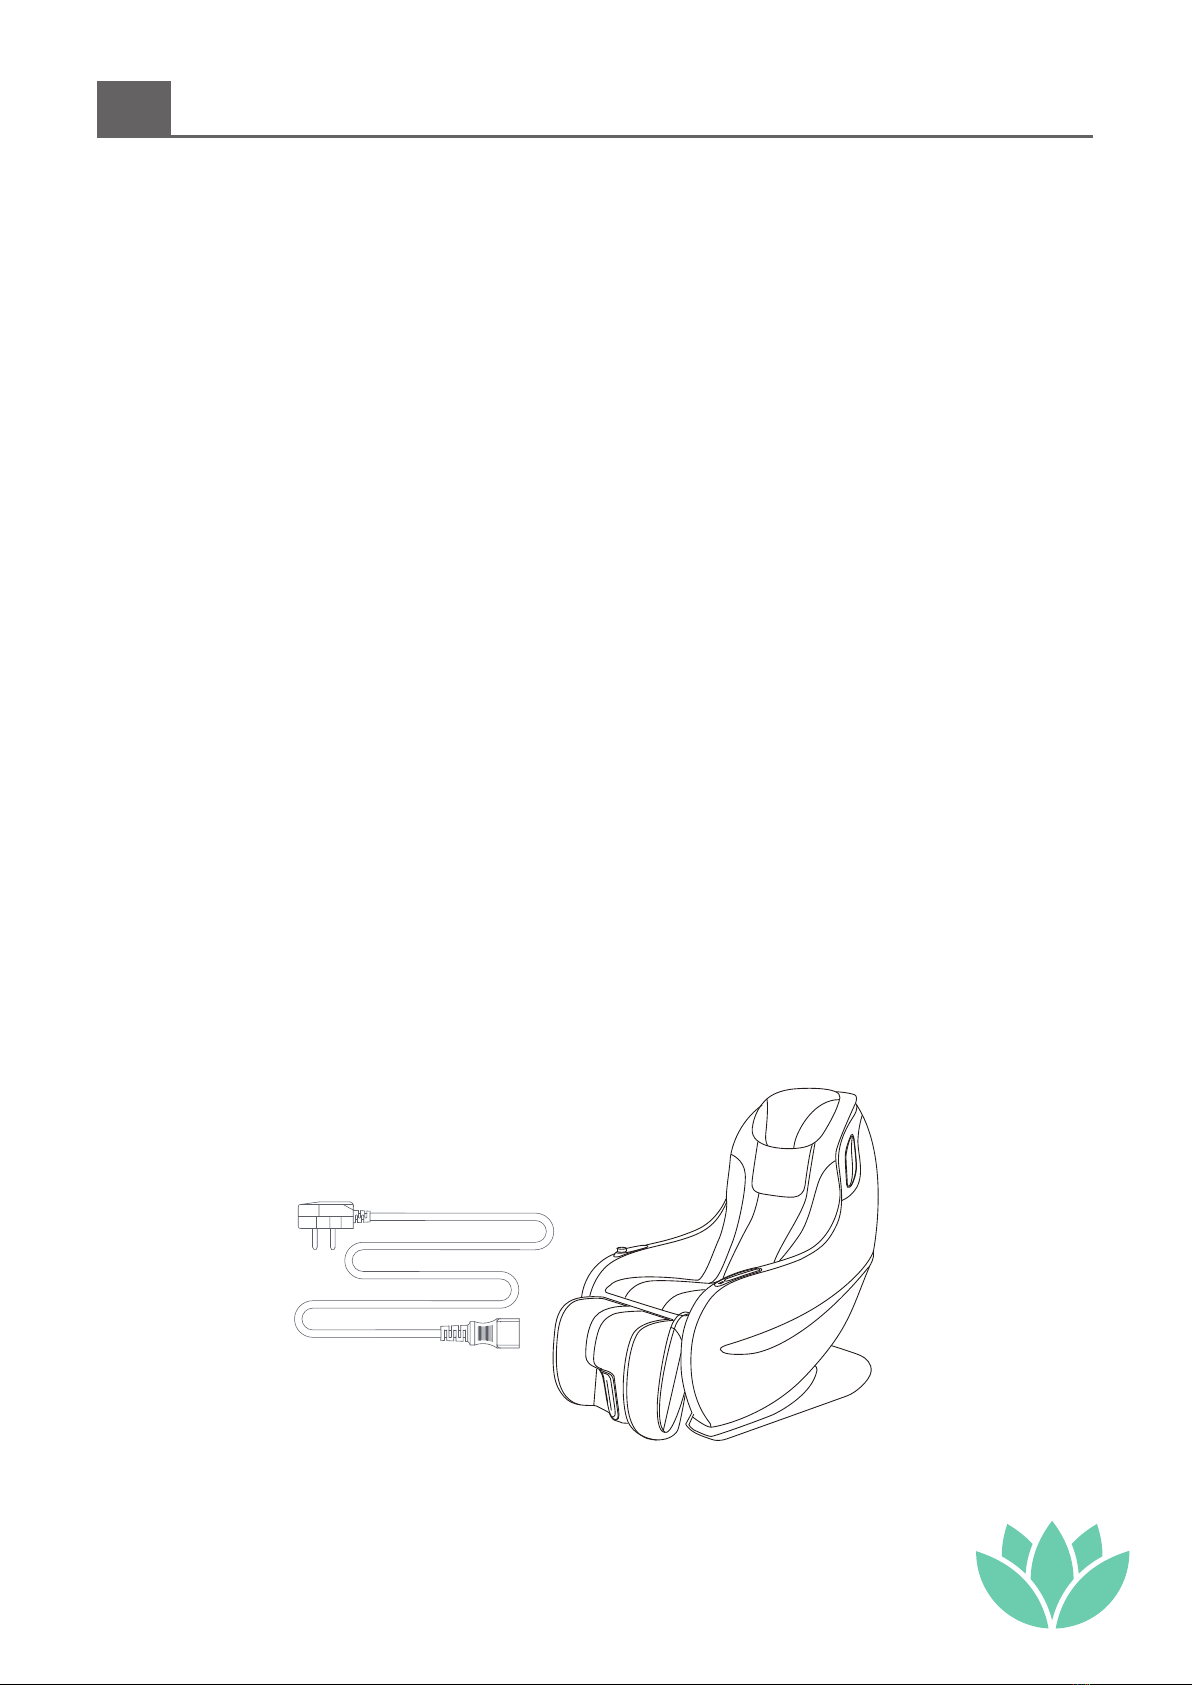
1. Carefully remove the upper carton cover from
the product.
2. Place the cover for the backrest and the pillow
on the massage chair.
3. Fold down the sides of the bottom carton.
4. Move the product to the desired position using the
transportation wheels. Please take notice of the instructions
given in section 1.4 and chapter 4.
5. Plug the power plug into a wall outlet that complies with the
instructions in the chapter on electrical safety.
࣑ATTENTION
+ The equipment must not be connected to a multiple
socket, otherwise it cannot be guaranteed that the
equipment will be supplied with sucient power.
Technical errors can result.
+ Make sure that the power cord is not pinched under the
product to prevent damage to the power cord.
6. Set the power switch on the back of the massage chair to “I” to switch on
the massage chair.
࣑ATTENTION
Make sure that you switch o the massage chair via the control panel and
set the power switch to “O” after each use.

Pillow
Backrest Cover
Seat
Control Panel
Phone Holder with USB Charger
Footrest
Power Cord
Power Switch
Main Power Socket
Castor Wheels
11
2.4 Overview
Side View
Pillow
Backrest Cover
Seat
Footrest
Power Plug
Power Switch
Mains Socket
Transportation Wheels
Control Panel
Smartphone Holder with USB Charger
Rear View

L-Massage Track
Massage Ball
Calf Airbag
3D Massage Mechanism
12
Internal Parts
Massage Rollers
L-Shaped Massage Track
Air Bag (Calf Area)
3D Massage Function
2.5 Optional Cradle Function
1. Loosen the screws on the rear
cover and remove the cover.
2. To enable the cradle function,
remove the small safety pin rst,
then the large one.
LNOTICE
If you no longer wish to use the
cradle function, attach the safety
pins to the massage chair again.
(a)
(b)
180
180
13
2.6 Turning around the Footrest
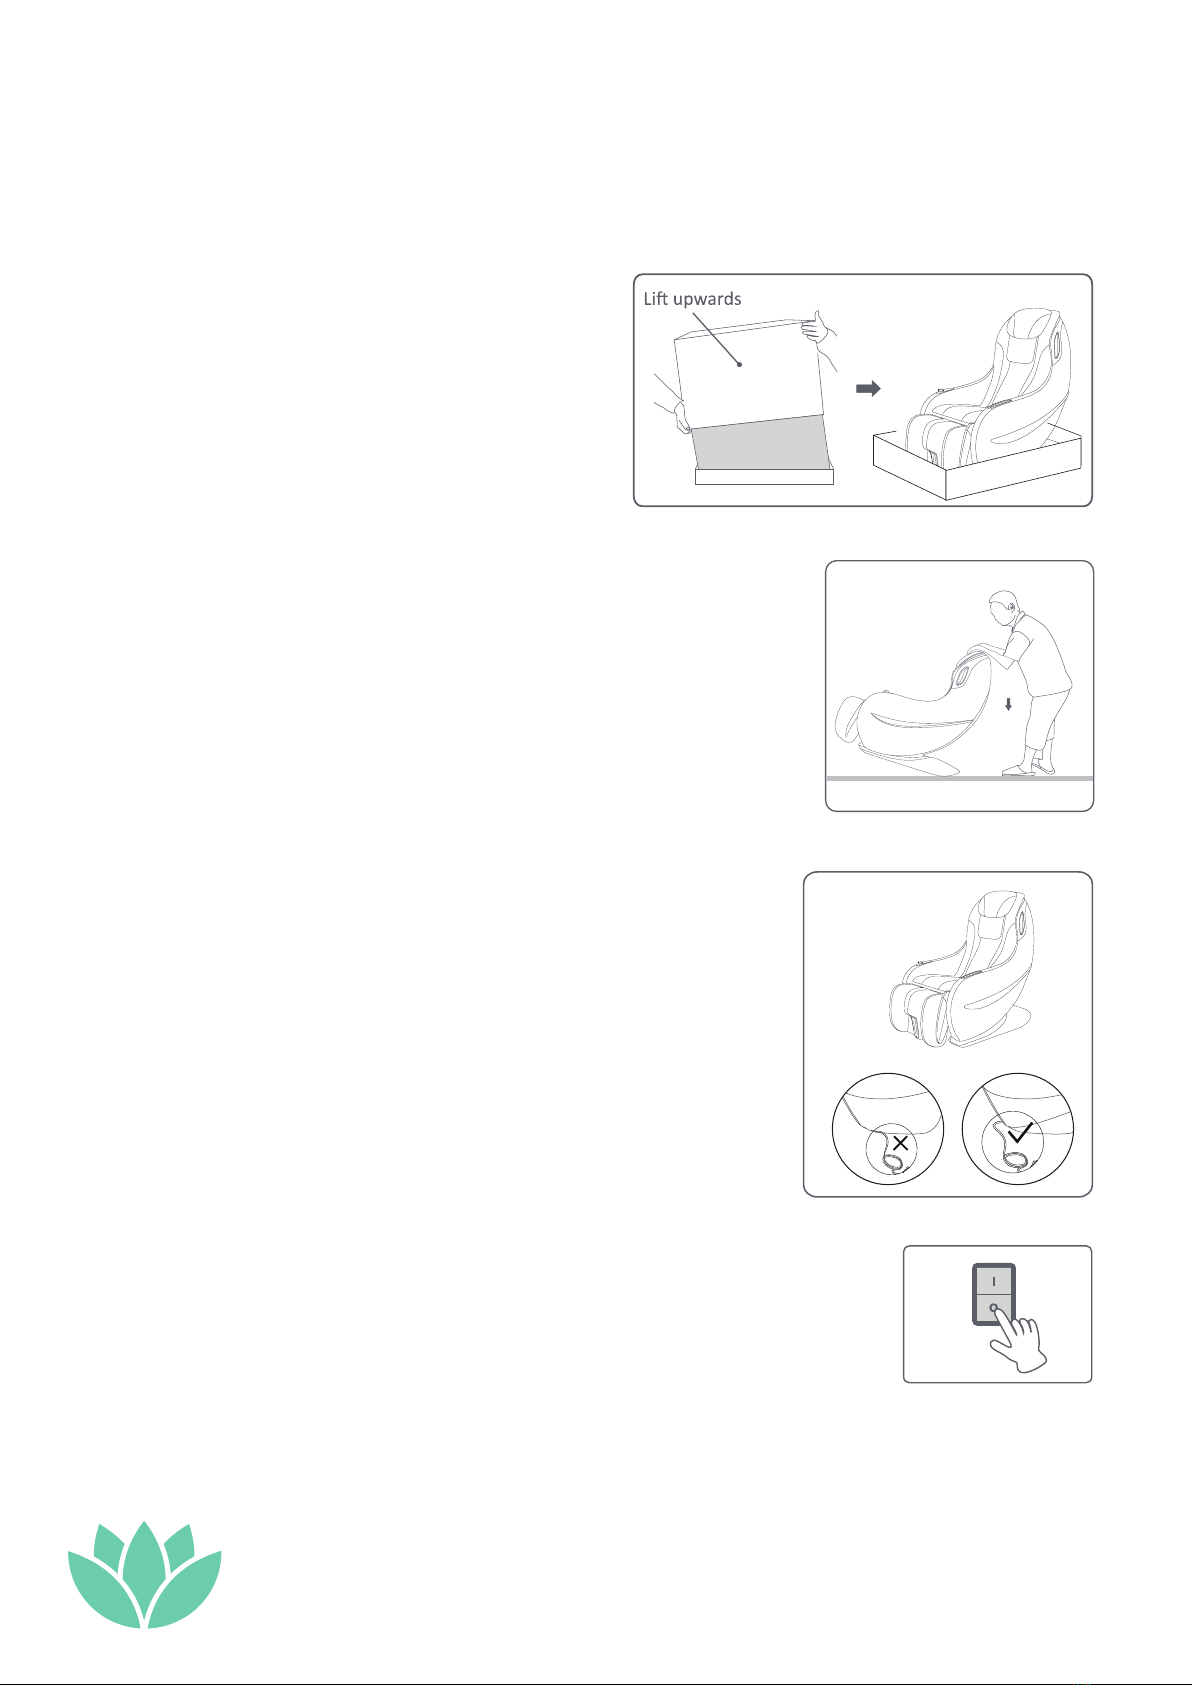
The foot section can be used as a simple footrest or for calf massage.
1. To unlatch the footrest, pull the upper end of the footrest towards
you (g. a).
2. Turn the footrest 180° down and towards you.
3. After turning, pull the strap just above to lock the footrest (g. b).
4. To use the calf massage again, pull the lower end of the strap
towards you to unlatch the footrest.
5. Turn the footrest 180° upwards and away from you.
6. After turning, pull just below the foot rest to lock the foot rest in
place.

7
8
9
10
11
12
14
13
6
3
2
1
5
4
Note: Bluetooth Name “MusicStation”
14
3 OPERATING INSTRUCTIONS
LNOTICE
Familiarise yourself with all the functions and setting options of the device before starting
training. Have the proper use of this product explained to you by a specialist.
3.1 Button and Function Description
15
No. Button Description
1Rotary Wheel + Turn to raise or lower the backrest.
2Calf Massage + Press to start or stop the calf massage.
3Heat Function/Bluetooth
+ Press to activate/deactivate the heat function on the
lower back.
+ Press and hold to activate/deactivate Bluetooth.
LNOTICE
To connect your device to the massage chair, open the
Bluetooth settings on your device and connect it to
“Music Station”.
4Air Pressure Massage
+ Press to activate the air pressure massage and adjust
the intensity.
LNOTICE
Three intensity adjustments are available:
+ light - key lights up permanently
+ medium - key ashes slowly (standard)
+ strong - key ashes quickly
5Massage Position (Up)
LNOTICE
Only available when using the massage zone.
+ Press and hold to adjust the massage position
upwards.
6Massage Zone
LNOTICE
Only available when using the manual programme.
+ Press to select the massage zone.
7On/O
+ Press to start the device and select a massage function.
+ Press again to stop the massage function and return
to standby mode.
8Indicator Light (Automatic
Programmes) + Displays the selected automatic programme.

16
9Automatic Programmes
+ A choice of three automatic programmes:
+ Sport
+ Recovery
+ Sleep
LNOTICE
+ The selected programme is indicated by an
indicator light (8) on the control panel.
+ The programme stops after 15 minutes
automatically.
10 Massage Speed
+ Press and hold to adjust the massage speed.
LNOTICE
Three speed adjustments are available:
+ slow - key lights up permanently
+ medium - key ashes slowly (standard)
+ fast - key ashes quickly
11 Manual Programmes
+ A choice of four manual programmes:
+ Kneading
+ Tapping
+ Dual (Kneading and Tapping)
+ Roller Massage
LNOTICE
The programme stops after 15 minutes automatically.
12 3D Massage Function
+ Press to activate the 3D massage function.
LNOTICE
With this function, the massage rollers can also
be moved back and forth for better adaptation to
the body shape, in addition to the up and down
movement.
13 Massage Position (Down)
LNOTICE
Only available when using the massage zone.
+ Press and hold to adjust the massage position
downwards.
14 Pause + Press to pause the massage function.
+ Press again to resume the massage function.

17
4 STORAGE AND TRANSPORT
4.1 General Instructions
⚠WARNING
+ The storage location should be chosen so that improper use by third parties or children can
be prevented.
࣑ATTENTION
+ Make sure that the equipment is protected from moisture, dust and dirt in the selected
storage location. The storage location should be dry and well ventilated and have a constant
ambient temperature between 10°C and 35°C.
4.2 Transportation Wheels
࣑ATTENTION
If you want to transport your equipment over particularly sensitive and soft oor coverings, such
as parquet, planks or laminate, lay out the transport route with cardboard or similar to avoid
possible oor damage.
1. Stand behind the equipment and pull it towards you until the weight is transferred to the
transportation wheels. After that, you easily can move the equipment to a new position. For
long transport distances the equipment should safely packed.
2. Select the new location by following the instructions in the section 1.4 of this manual.

18
5 TROUBLESHOOTING, CARE AND MAINTENANCE
5.1 General Instructions
⚠WARNING
+ Do not make any improper changes to the equipment.
⚠CAUTION
+ Damaged or worn components may aect your safety and the life of the equipment.
Therefore, immediately replace damaged or worn components. In such a case, contact the
contract partner. The equipment must not be used until it has been repaired. If necessary, use
only original spare parts.
࣑ATTENTION
+ In addition to the instructions and recommendations for maintenance and care given here,
additional service and/or repair work may be necessary; this must only be carried out by
authorised service technicians.
5.2 Faults and Fault Diagnosis
The equipment undergoes regular quality controls during production. Nevertheless, faults or
malfunctions may occur. Frequently, individual parts are responsible for these disturbances, an
exchange is usually sucient. Please refer to the following overview for the most common errors and
how to correct them. If the equipment still does not function properly, contact your contract partner.
Fault Cause Solution
The device does not
work
Interrupted power
connection
+ Check cable connection
+ Power switch to on
The automatic timer has
expired
To switch the device on again, press the
On/O button
Excessive use of the device
Disconnect the device from the mains
socket and allow the device to cool
down for at least 60 minutes before
using it again.
Heavy load on the device Reduce the load on the device
The device is
unusually warm Excessive use of the device
Disconnect the device from the mains
socket and allow the device to cool
down for at least 60 minutes before
using it again.
The device makes
noise
Noise caused by the
mechanical parts of the
device
Noise during use of the device is normal.
If the noises sound unusual (crackling,
squeaking etc.), contact your contract
partner.

19
5.3 Maintenance and Inspection Calendar
To avoid damage from body sweat, the equipment must be cleaned with a damp towel (no solvents!)
after each training session.
The following routine tasks must be performed at the specied intervals:
Part Weekly Monthly Quarterly Half-yearly Yearly
Cushion C I
Plastic covers C I
Cable connections I
Legend: C = clean; I = inspect
6 DISPOSAL
At the end of its operational life, this equipment cannot be disposed of in normal household waste.
Instead, it must be disposed of via an electricals recycling centre. Further information can be
obtained from your local authority‘s recycling service.
The materials can be recycled as per their symbols. Through the reuse, recycling
of materials or other forms of recovery of old equipment, you make an important
contribution to the protection of the environment.

20
7 SERIAL NUMBER AND MODEL NAME
In order to provide you with the best possible service, please have the model name, article number,
serial number, exploded drawing and parts list ready. The corresponding contact options can be
found in chapter 9 of this operating manual.
LNOTICE
The serial number of your equipment is unique. It's located on a white
sticker. The exact position of this sticker is shown in the following
illustration.
Enter the serial number in the appropriate eld.
Serial number:
Brand / Category:
Taurus Wellness / Massage Chair
Model Name:
Taurus Wellness Massage Chair Large
Article Number:
TW-MC-L
Table of contents
Other taurus wellness Massager manuals


Popular Massager manuals by other brands


THERAGUN
THERAGUN G2PRO owner's manual

Vitalcare
Vitalcare WE568H instruction manual

ReAthlete
ReAthlete DEEP4s Tips for use

HoMedics
HoMedics SBM-600H-EU instruction manual

Human Touch
Human Touch ThermoStretch HT-7120 quick start guide

HoMedics
HoMedics Body Revitalizer VM-180 Instruction manual and warranty information