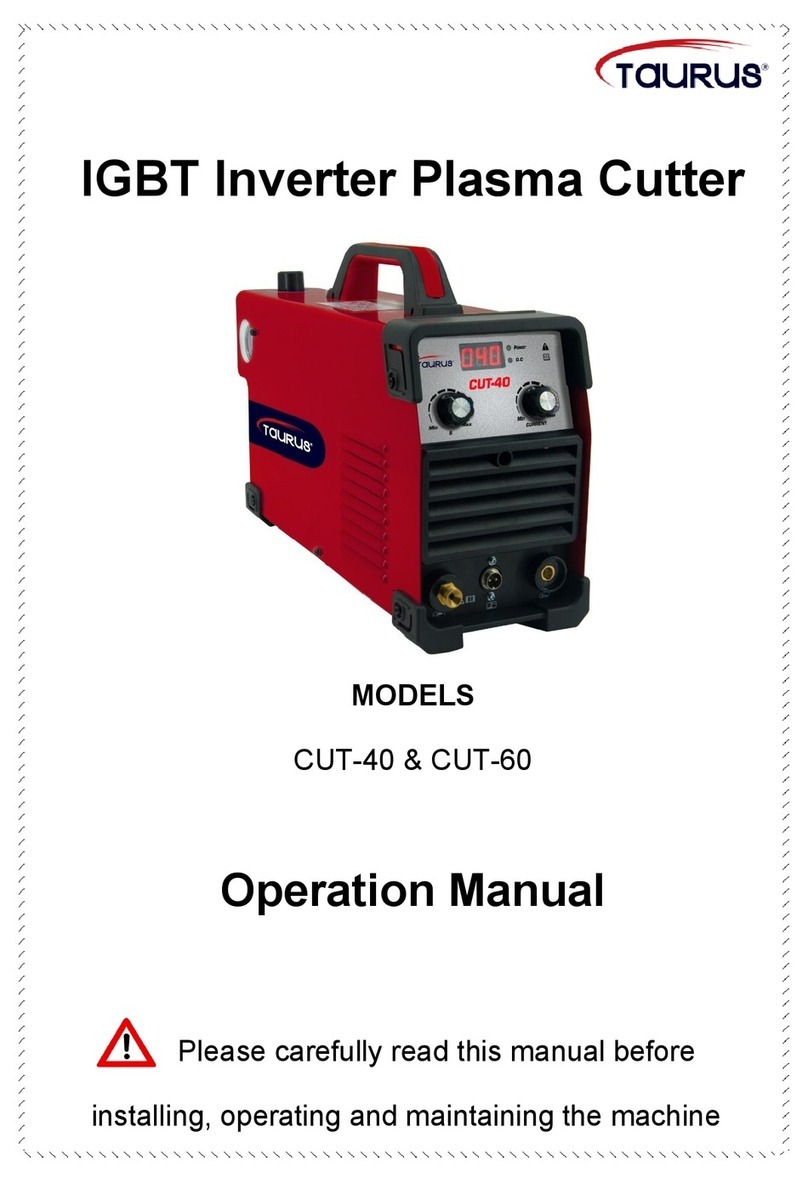
Taurus BT-EW 150 User manual

AFTER SALES SUPPORT
1
N26704
ELECTRIC WELDER
USER GUIDE
AFTER SALES SUPPORT
TEL: 1300 922 271
EMAIL: [email protected]
MODEL NUMBER BT-EW 150

AFTER SALES SUPPORT
2
Electric Welder
What your 1year warranty means
Great care has gone into the manufacture of this product and it should therefore provide you with years
of good service when used properly. In the event of product failure within its intended use over the
course of the rst 1 year after the date of purchase, we will remedy the problem as quickly as possible
once it has been brought to our attention. In the unlikely event of such an occurrence, or if you require
any information about the product, please contact us via our after sales support services, details of
which can be found in this manual and on the product itself.
Welcome Section
Congratulations on choosing to buy a TAURUS® product.
All products brought to you by TAURUS® are manufactured to the highest standards of performance and
safety, and, as part of our philosophy of customer service and satisfaction, are backed by our
comprehensive 1Year Warranty.
We hope you will enjoy using your purchase for many years to come.
Table of Contents
1. General safety rules Pg. 5
2. Layout Pg. 6
3. Items supplied Pg. 6
4. Important information Pg. 6
5. Symbols and technical data Pg. 8
6. Assembling the welding screen Pg. 8
7. Welding preparations Pg. 8
8. Welding Pg. 9
9. Overheating guard Pg. 9
10. Maintenance Pg. 9
11. Ordering spare parts Pg. 9
12. Disposal and recycling Pg. 9

AFTER SALES SUPPORT
3
8e
3
2
1
8
5
3
1
7
6
4
2
8
11
9
10
8
9

AFTER SALES SUPPORT
5
1. General Safety Rules
WARNING! Read all safety warnings and all
instructions. Failure to follow the warnings and
instructions may result in electric shock, re and/or
serious injury. Save all warnings and instructions
for future reference.
The term “power tool” in the warnings refers to your
mains-operated (corded) power tool or battery-operated
(cordless) power tool.
1. Work area safety
a. Keep work area clean and well lit. Cluttered
and dark areas invite accidents.
b. Do not operate power tools in explosive
atmospheres, such as in the presence of
ammable liquids, gases or dust. Power tools
create sparks which may ignite the dust or fumes.
c. Keep children and bystanders away while
operating a power tool. Distractions can cause
you to lose control.
2. Electrical safety
a. Power tool plugs must match the outlet.
Never modify the plug in any way. Do not use
any adapter plugs with earthed (grounded)
power tools. Unmodied plugs and matching
outlets will reduce risk of electric shock.
b. Avoid body contact with earthed or grounded
surfaces such as pipes, radiators, ranges and
refrigerators. There is an increased risk of electric
shock if your body is earthed or grounded.
c. Do not expose power tools to rain or wet
conditions. Water entering a power tool will
increase the risk of electric shock.
d. Do not abuse the cord. Never use the cord
for carrying, pulling or unplugging the power
tool. Keep cord away from heat, oil, sharp
edges or moving parts. Damaged or entangled
cords increase the risk of electric shock.
e. When operating a power tool outdoors, use an
extension cord suitable for outdoor use. Use
of a cord suitable for outdoor use reduces the risk
of electric shock.
f. If operating a power tool in a damp location
is unavoidable, use a residual current device
(RCD) protected supply. Use of an RCD reduces
the risk of electric shock.
3. Personal safety
a. Stay alert, watch what you are doing and
use common sense when operating a power
tool. Do not use a power tool while you are
tired or under the inuence of drugs, alcohol
or medication. A moment of inattention while
operating power tools may result in serious personal
injury.
b. Use personal protective equipment. Always
wear eye protection. Protective equipment such
as dust mask, non-skid safety shoes, hard hat, or
hearing protection used for appropriate conditions
will reduce personal injuries.
c. Prevent unintentional starting. Ensure the
switch is in the off-position before connecting
to power source and/or battery pack, picking
up or carrying the tool. Carrying power tools with
your nger on the switch or energising power tools
that have the switch on invites accidents.
d. Remove any adjusting key or wrench before
turning the power tool on. A wrench or a key
left attached to rotating part of the power tool may
result in personal injury.
e. Do not overreach. Keep proper footing and
balance at all times. This enables better control
of the power tool in unexpected situations.
f. Dress properly. Do not wear loose clothing
or jewellery. Keep your hair, clothing and
gloves away from moving parts. Loose clothes,
jewellery or long hair can be caught in moving parts.
g. If devices are provided for the connection
of dust extraction and collection facilities,
ensure these are connected and properly
used. Use of these devices can reduce dust-related
hazards.
4. Power tool use and care
a. Do not force the power tool. Use the correct
power tool for your application. The correct
power tool will do the job better and safer at the
rate for which it was designed.
b. Do not use the power tool if the switch does
not turn it on and off. Any power tool that cannot
be controlled with the switch is dangerous and
must be repaired.
c. Disconnect the plug from the power source
and/or the battery pack from the power tool
before making any adjustments, changing
accessories, or storing power tools. Such
preventive safety measures reduce the risk of
starting the power tool accidentally.
d. Store idle power tools out of the reach of
children and do not allow persons unfamiliar
with the power tool or these instructions
to operate the power tool. Power tools are
dangerous in the hands of untrained users.
e. Maintain power tools. Check for misalignment
or binding of moving parts, breakage of parts
and any other condition that may affect the
power tools operation. If damaged, have the
power tool repaired before use. Many accidents
are caused by poorly maintained power tools.
f. Keep cutting tools sharp and clean. Properly
maintained cutting tools with sharp cutting edges
are less likely to bind and are easier to control.
g. Use the power tool, accessories and tool bits
etc. in accordance with these instructions
and in the manner intended for the particular
type of power tool, taking into account
the working conditions and the work to be
performed. Use of the power tool for operations
different from those intended could result in a
hazardous situation.

AFTER SALES SUPPORT
6
5. Service
a. Have your power tool serviced by a
qualied repair person using only identical
replacement parts. This will ensure that the safety
of the power tool is maintained.
6. Recommendation
We recommend that the tool always be supplied via
residual current device with a rated residual current of
30 mA or less.
Important!
When using equipment, a few safety precautions must
be observed to avoid injuries and damage. Please read
the complete operating manual with due care. Keep
this manual in a safe place, so that the information is
available at all times. If you give the equipment to any
other person, give them these operating instructions
as well. We accept no liability for damage or accidents
which arise due to non-observance of these instructions
and the safety information.
2. Layout (Fig. 1)
1. Electrode holder
2. Earth terminal
3. Adjustment wheel for welding current
4. ON/OFF switch
5. Control lamp for overheating
6. Welding current scale
7. Carrying handle
8. Welding screen
3. Items Supplied
• Welding set
• Welding screen
• Steel wire brush
4. Important information
Please read the directions for use carefully and observe
the information provided. It is important to consult
these instructions in order to acquaint yourself with the
machine, its proper use and safety precautions.
Important!
Only use this appliance for the purpose for which it is
designed and as described in these instructions:
Manual arc welding with coated electrodes.
Handling this system incorrectly may be hazardous for
persons, animals and property. The user of this system
is responsible for his/her own safety and for the safety
of others.
Read these operating instructions and follow all the
regulations.
• Repairs and/or maintenance work may only be
carried out by qualied personnel.
• Use only the power cables and welding cables
supplied.
• Ensure that the appliance is looked after properly.
• To ensure that sufcient air can be drawn in
through the ventilation slits, the appliance should
not be constricted or placed next to a wall while
it is operating. Make sure that the appliance is
correctly connected to the mains supply (see 5).
• Do not subject the mains lead to any tensile
stress. Unplug the appliance before you change
its position.
• Check the condition of the welding cables, the
electrode tongs and the earth terminals (-); wear
on the insulation and the live parts may result in
dangerous conditions and reduce the quality of the
welding work.
• Arc welding generates sparks, molten metal
particles and smoke, so the following is required:
• Remove all inammable substances and/or
materials from the working area.
• Ensure that there is adequate ventilation.
• Do not weld on tanks, vessels or pipes that have
contained inammable liquids or gases. Avoid all
direct contact with the welding circuit; the idling
voltage between the electrode tongs and the earth
terminal (-) may be dangerous.
• Do not store or use the appliance in wet or damp
conditions or in the rain.
• Protect your eyes with specially designed goggles
(DIN level 9-10), which you can attach to the
supplied safety shield. Wear gloves and dry safety
clothing that are not contaminated by any oil or
grease to ensure that your skin is not exposed to
ultraviolet radiation from the arc.
Note!
• The radiation from the arc can damage your eyes
and cause burns on skin.
• Arc welding generates sparks and droplets of
molten metal; the welded workpiece may start to
glow and will remain very hot for a relatively long
period of time.
• Arc welding releases vapors that may be harmful.
• Every electric shock is potentially fatal.
• Do not approach the arc within a radius of 15 m
unprotected.
• Protect yourself (and others around you) against
the possible hazardous effects of the arc.
• Warning! Depending on the mains connection
conditions at the connection point of the welding
set, other appliances connected to the mains may
suffer faults.
Important!
If the supply mains and circuits are overloaded, other
appliances may suffer interference during the welding
work. If you have any doubts, contact your electricity
supply company.

AFTER SALES SUPPORT
7
m
Proper use
The machine is to be used only for its prescribed
purpose. Any other use is deemed to be a case of
misuse. The user / operator and not the manufacturer
will be liable for any damage or injuries of any kind
caused as a result of this.
Please note that our equipment has not been designed
for use in commercial, trade or industrial applications.
Our warranty will be voided if the machine is used
in commercial, trade or industrial businesses or for
equivalent purposes.
Sources of danger during arc welding
Arc welding results in a number of sources of danger.
It is therefore particularly important for the welder to
comply with the following rules so as not to place
himself or others in danger and to avoid endangering
people and equipment.
1. Have all work on the mains voltage system, for
example on cables, plugs, sockets, etc., performed
only by trained electricians. This particularly
applies to conguring intermediate cables.
2. If an accident occurs, disconnect the welding
power source from the mains immediately.
3. If electric touch voltages occur, switch off the
welding set immediately and have it checked by
an expert.
4. Always check for good electrical contacts on the
welding current side.
5. Wear insulating gloves on both hands for welding.
These offer protection from electric shocks (idling
voltage in the welding circuit), harmful radiation
(Heat and UV radiation) and from glowing metal
and slag spatter.
6. Wear rm, insulated footwear. Open-toed footwear
is not suitable since falling droplets of glowing
metal will cause burns.
7. Wear suitable clothing, do not wear synthetic
clothes.
8. Do not look into the arc with unprotected eyes, use
only a welding safety shield with the proper safety
glass in compliance with DIN standards. In addition
to light and heat, which may cause dazzling and
burns, the arc also gives off UV radiation. Without
proper protection, this invisible ultraviolet radiation
causes very painful conjunctivitis, which will only
be noticeable several hours later. In addition, UV
radiation will cause sunburn-type symptoms on
unprotected parts of the body.
9. Personnel or assistants in the vicinity of the arc
must also be notied of the dangers and provided
with the required protection; if necessary install
safety walls.
10. Ensure adequate ventilation for welding,
particularly in small rooms since the process
causes smoke and harmful gases.
11. Do not carry out any welding work on tanks that
have been used to store gases, fuels, mineral oil or
the like, even if they have been empty for a lengthy
period of time, since any residue will result in a
danger of explosion.
12. Special regulations apply in areas where there is a
potential risk of re and/or explosion.
13. Welds that are exposed to large stresses and
must comply with safety requirements may only
be completed by specially trained and approved
welders. Examples of such welds include pressure
vessels, rails, trailer hitches, etc.
14. Note: It must be noted that the protective
conductor in electrical systems of appliances may
be destroyed by the welding current in the event of
negligence, for example if the earth terminal is
placed on the welding set casing to which
the protective conductor of the electrical system
is connected. The welding work is completed on
a machine with a protective conductor connection.
It is therefore possible to weld on the machine
without having connected the earth terminal to
it. In this case the welding current will ow from
the earth terminal through the protective conductor
to the machine. The high welding current may
cause the protective conductor to melt.
15. The fuses on the supply cables to the mains
sockets must comply with the relevant regulations
(VDE 0100). To comply with these regulations, only
fuses or circuit breakers suitable for the cross-
section of the cables may be used (for earthing
contact sockets max. 16 A fuses or 16 A circuit
breakers). The use of too high a fuse may result in
the cable burning and re damage to the building.
Constricted areas
When working in constricted or hot areas, use insulating
supports and intermediate layers as well as
slip-on gloves made of leather or other non-conductive
materials to insulate your body against the oor, walls,
conductive parts of the machine and the like.
If you use small welding transformers for welding in
places with an increase electrical risk, for example in
constricted areas with conductive walls, (tanks, pipes,
etc.), and in hot areas (perspiration on work clothes), the
output voltage of the welding set when idling must not
exceed 42 V (effective value). Therefore, the appliance
may not be used for these purposes because its output
voltage is higher than this.

AFTER SALES SUPPORT
8
Safety clothing
1. While working, the welder must protect his entire
body from radiation and burns by wearing suitable
clothing and a face guard.
2. Slip-on gloves made of a suitable material (leather)
must be worn on both hands. They must be in
perfect condition.
3. Suitable aprons must be worn to protect clothing
from sparks and burns. A safety suit and, if
necessary, head protection must be worn if
required by the type of work in question, e.g.
overhead welding.
4. The protective clothing used as well as all
accessories must be in compliance with the
“Personal safety equipment” EU Directive.
Protection from radiation and burns
1. Provide information about the risk to eyes at
the working site in the form of a poster with the
wording “Caution – do not look at the ames”.
Workplaces are to be screened off wherever
possible so that personnel in the vicinity are
protected. Unauthorized persons are to be kept
away from the welding work.
2. The walls in the immediate vicinity of stationary
workplaces should not have a light color or a
sheen. Windows up to head height are to be
protected against radiation passing through them
or reecting off them, for example by coating them
with a suitable paint.
3. Please note this equipment must not be used for
commercial, trade or industrial applications.
Do not store or use the equipment in wet
conditions or in the rain. Use the equipment
only in dry condition indoors.
5. Symbols and Technical Data
EN 60974-6 European standard for arc welding
sets and welding power supplies
with limited on time (Part 6).
SSymbol for welding power supplies
which are suitable for welding in
environments with increased
electrical danger.
~ 50 Hz Alternating current and rated
frequency value [Hz]
U0Rated idling voltage [V]
80 A/ 21.2 V Maximum welding current and the
corresponding standardized
operating voltage [A/V]
ØElectrode diameter [mm]
I2Welding current [A]
twAverage load time [s]
trAverage reset time [s]
1 ~ 50 Hz
Line input; number of phases, the
alternating current symbol and the
rated frequency value
U1Line voltage [V]
I1max Highest rated value of the line
current [A]
I1eff Effective value of the highest line
current [A]
IP 21 S Protection type
H Insulation class
Mains connection: 240 V ~ 50 Hz
Welding current (A) at cos ϕ= 0.73: 40 - 80
Ø(mm) 1.6 2.0 2.5
l240 55 80
tw (s) 224 120 69
tr (s) 918 1119 1310
Idling voltage (V): 48
Power input: 4 kVA at 80 A cos ϕ= 0.73
Fuse (A): 16
6. Assembling the welding screen
(Fig. 2-5)
Insert the safety glass (9) and then the welding glass
(10) in the welding screen (8). Now fasten the welding
screen holder (11) to the welding screen, as shown in
Fig. 5.
7. Welding preparations (Fig.1)
Important! Extension leads must not be used
with the welder.
Connect the earth terminal (-) (2) direct to the part to be
welded or to the support on which the part is resting.
Ensure that the earth terminal (-) is in direct contact with
the part to be welded. You should therefore avoid coated
surfaces and/or insulated materials. The electrode
holder (1) cable has a special clamp at one end, which

AFTER SALES SUPPORT
9
is used to secure the electrode. The welding screen
(8) must be used at all times for welding. It protects
your eyes from the radiation emitted by the arc and
nevertheless enables you to watch the welding process.
8. Welding (Fig. 1)
After you have made all the electrical connections for
the power supply and for the welding circuit, you can
proceed as follows:
Insert the unsheathed end of the electrode into the
electrode holder (1) and connect the earth terminal (-) (2)
to the part you wish to weld. Ensure that a good electric
contact is made. Switch on the welding set at the
ON/OFF switch (4) and set the welding current using the
adjustment wheel (3) to suit the electrode you wish to
use. Hold the welding screen (8) in front of your face and
rub the tip of the electrode on the part you wish to weld
as if you were striking a match. This is the best method
of igniting the arc. Check that you have the correct
electrode and current strength on a test part.
Electrode (Ø mm): Welding current (A)
1.6 40 A
2 40 - 80 A
2.5 60 - 80 A
Important!
Do not dab the workpiece with the electrode since it
could be damaged, making it more difcult to ignite the
arc.
As soon as the arc has ignited, keep it a distance
from the workpiece equivalent to the diameter of the
electrode.
This distance should be kept as constant as possible
during the welding process. The angle of the electrode
in the direction in which you are working should be
20–30°C.
Important!
Always use tongs to remove spent electrodes and to
move parts that you have just welded. Please note that
the electrode holder (Fig. 1/Item 1) must always be put
down so that it is insulated after you have completed the
welding work.
Do not remove the slag until the weld has cooled. If you
want to continue a weld after an interruption, the slag
from your initial attempt must rst be removed.
9. Overheating guard
The welding set is tted with an overheating guard that
protects the welding transformer from overheating. If the
overheating guard trips, the control lamp (Fig. 1/Item 5)
on your set will be lit. Allow the welding set to cool for
some time.
10. Maintenance
Remove dust and dirt from the machine at regular
intervals. Cleaning is best carried out with a ne brush
or a cloth.
11. Ordering spare parts
Please quote the following data when ordering
replacement parts: (information can be found on the
warranty certicate of the product)
• Type of machine
• Model number of the machine
• Product number of the machine
Please call our After Sales Support Number on 1300 922
271.
12. Disposal and recycling
The unit is supplied in packaging to prevent it from being
damaged in transit. This packaging is raw material and
can therefore be reused or recycled.
The unit and its accessories are made of various
types of material, such as metal and plastic. Defective
components must be disposed of as special waste.
Please contact your local council for further guidance on
how to dispose of this material correctly.

AFTER SALES SUPPORT
12
TAURUS®is a registered trademark of ALDI Stores.
ALDI Guarantee
Specially made for ALDI Stores to our stringent quality specications. If you are not entirely satised with this
product, please return it to your nearest ALDI store, within 60 days from the date of purchase, for a full refund or
replacement, or take advantage of our after sales support by calling the Customer Service Hotline.
ALDI STORES
1 SARGENTS ROAD
MINCHINBURY NSW 2770
AUSTRALIA
www.aldi.com.au
10/2012(01)
Art.Nr: 15.440.58_11022
Table of contents
Other Taurus Welding System manuals
Popular Welding System manuals by other brands

voestalpine
voestalpine bohler TERRA 180 instruction manual

LORCH
LORCH MX 350 EU Operation manual

Lincoln Electric
Lincoln Electric POWER WAVE455M Operator's manual

Lincoln Electric
Lincoln Electric 180C Operator's manual

Weco
Weco Discovery 200 S instruction manual

Lincoln Electric
Lincoln Electric PRO-CORE 125 Specifications