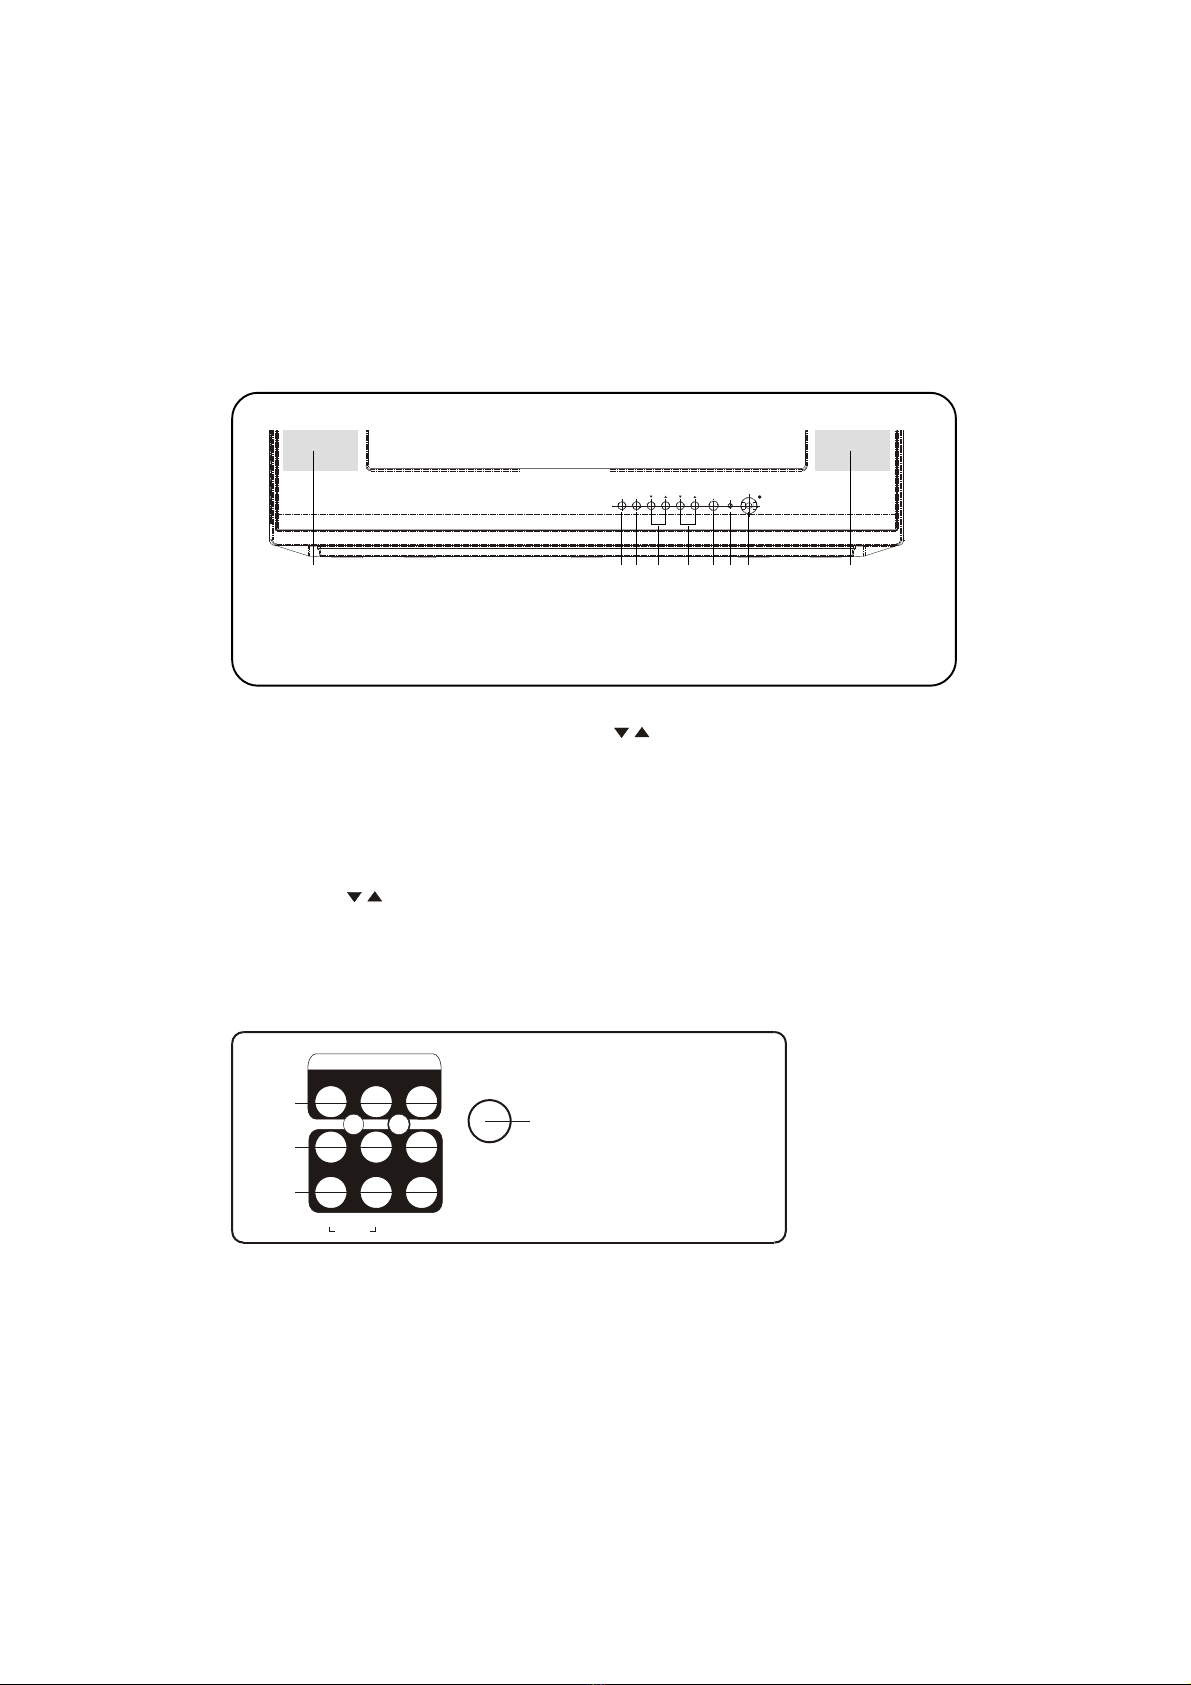
1.4.2 BATTERY INSTALLATION
7
1. Open the battery compartment cover.
2. Install two size AA batteries in the correct
direction.
3.Close the battery cover.
Notes:
1.4.3 EFFECTIVELY USING THE
REMOTE CONTROL
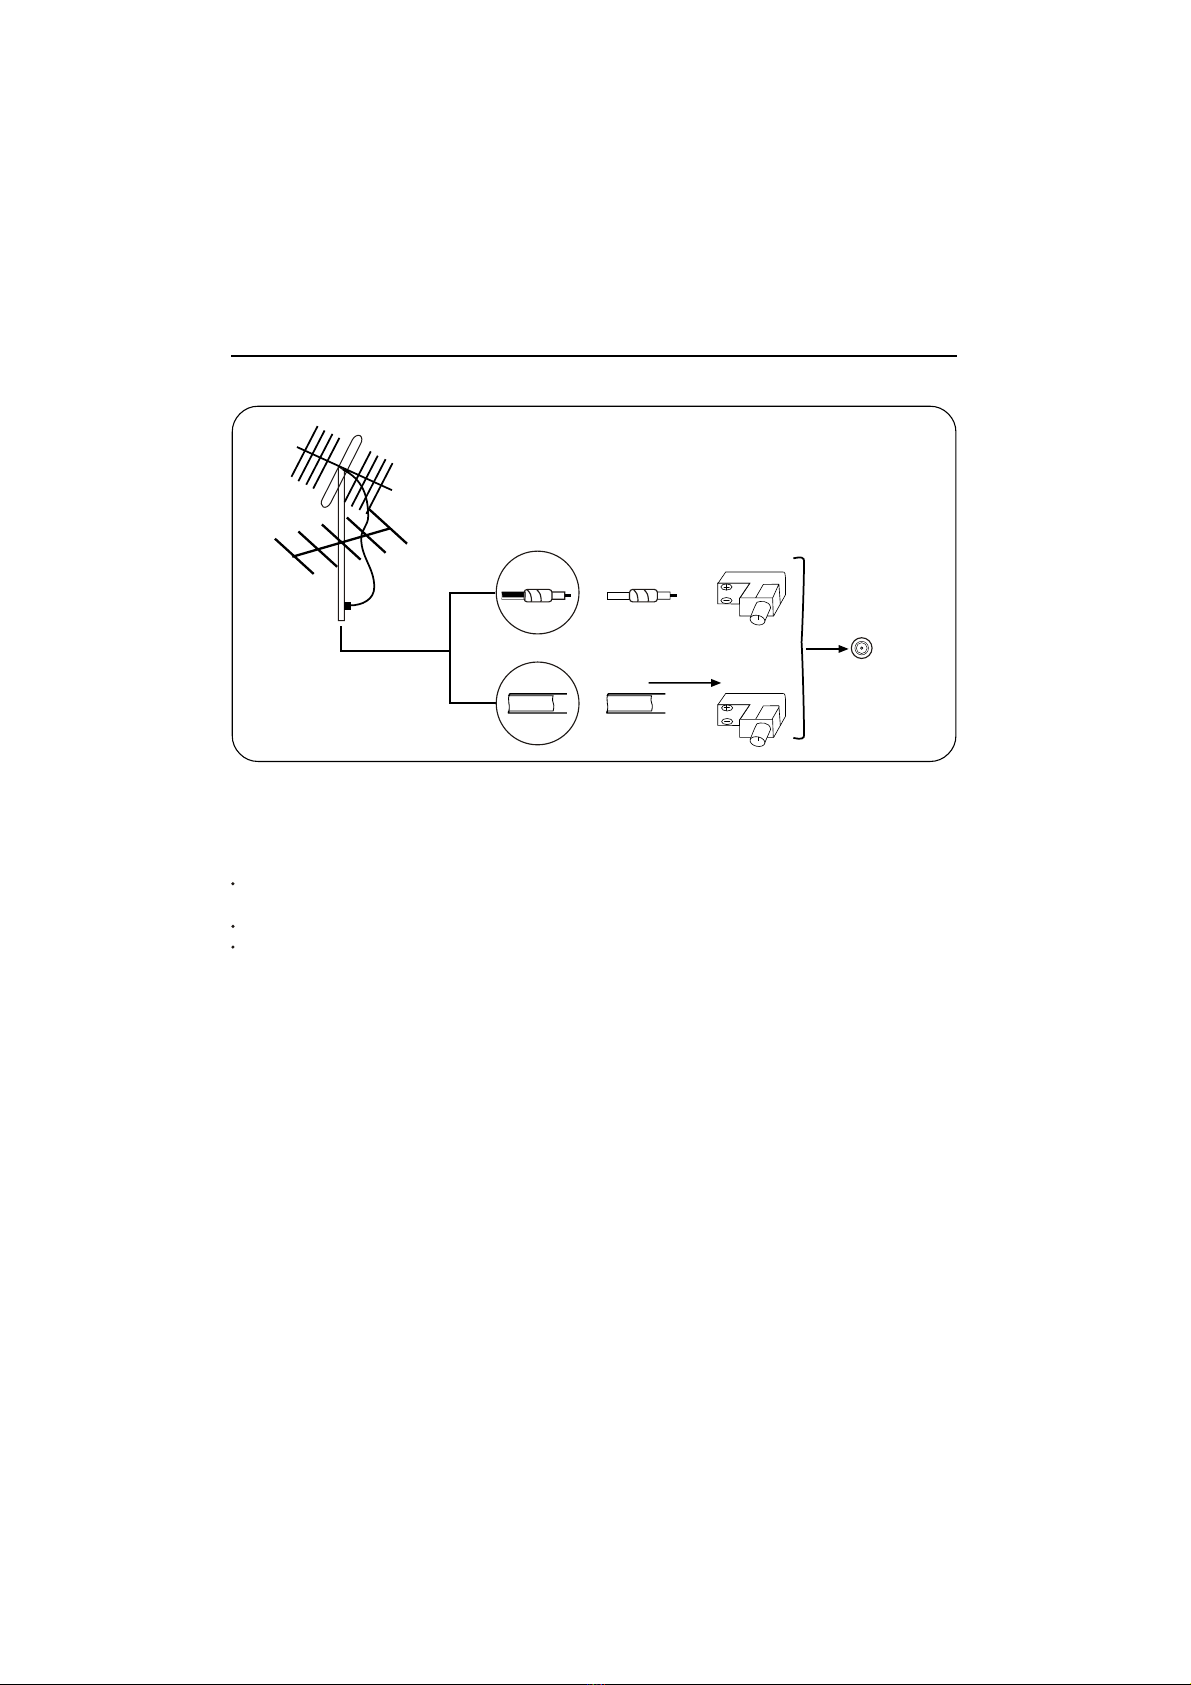
Point the remote toward the infra-red remote sensor
on the main unit.
Notes:
If direct sunlight, incandescent light, or any
other strong light sources hit the remote
control sensor,the remote control may not
operate properly.
If there is an obstacle between the main
unit and the remote control, the remote
control signal may not be received.
Do not mix new and old batteries or batteries
of different types.
Leakage may occur to old batteries and
cause damage to the remote, so please remove
batteries as soon as they become weak.
When the remote control will not be used for a
long period of time, remove batteries to prevent
leakage.
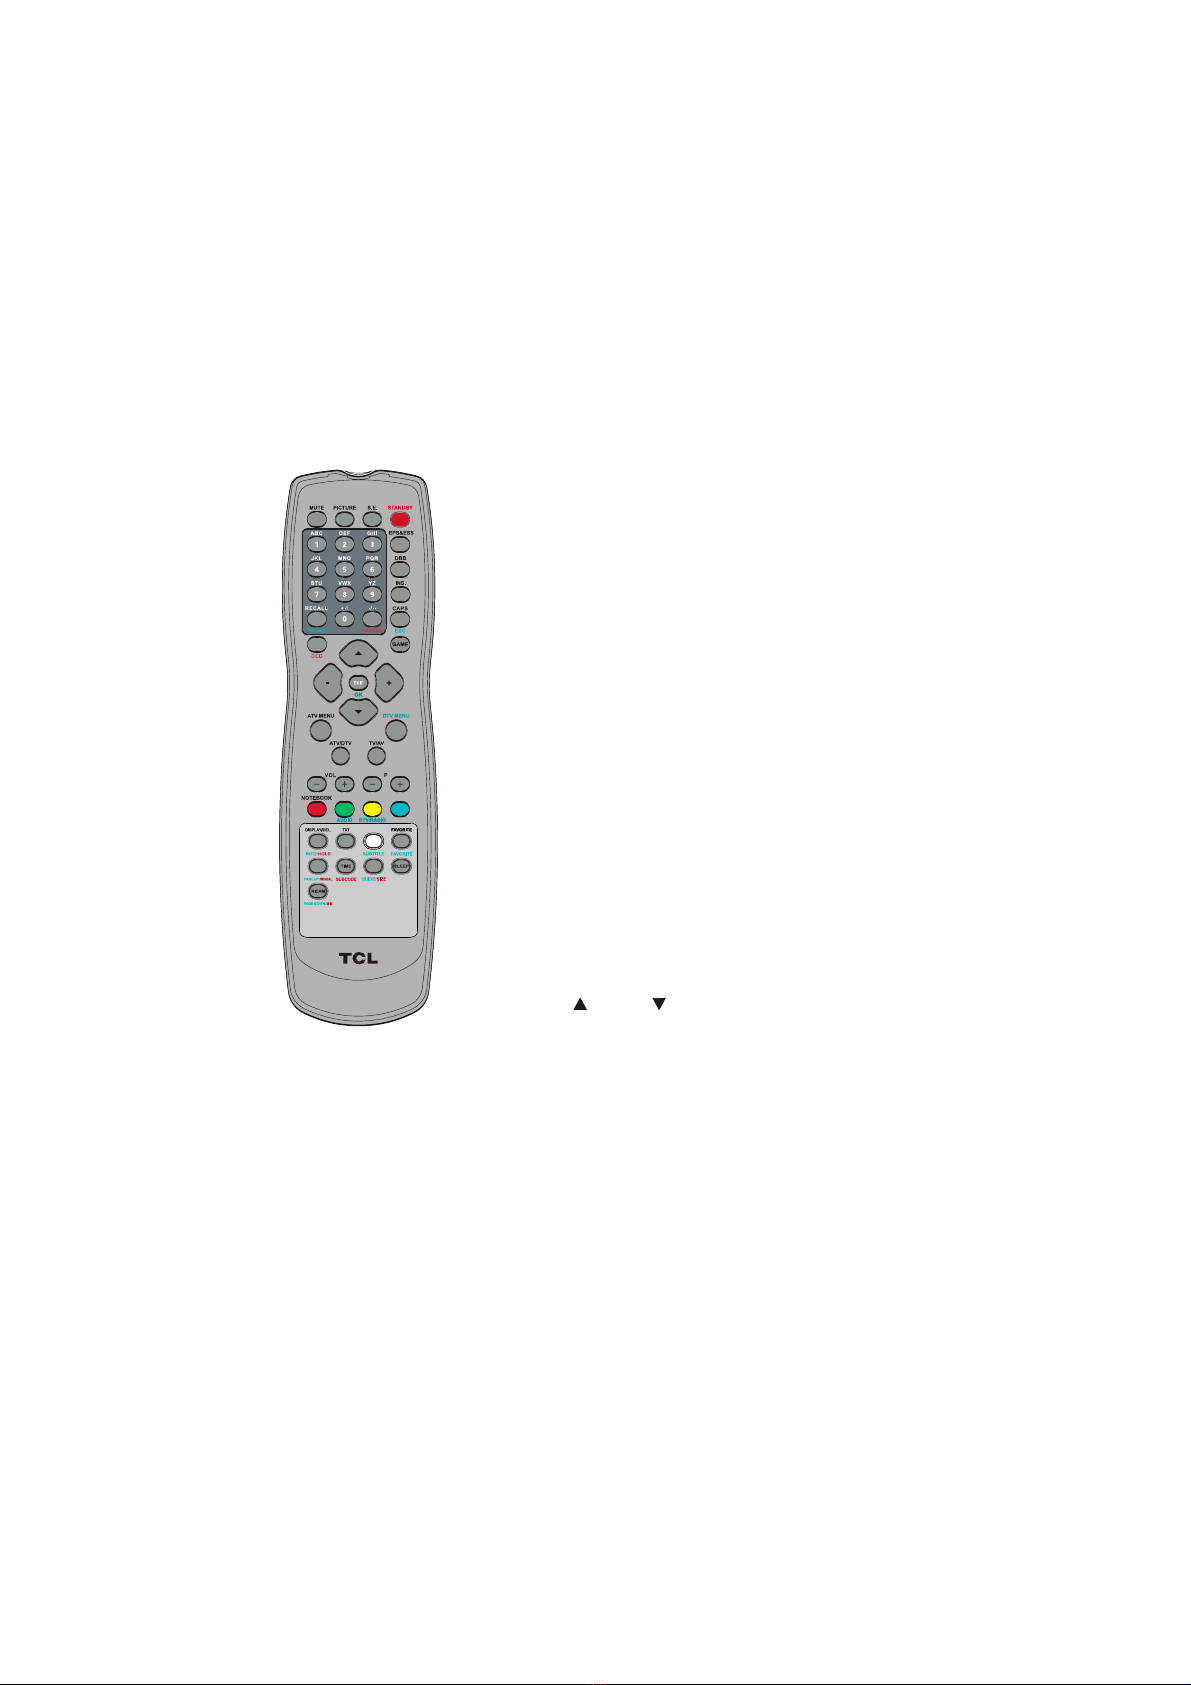
20.TV/AV
Press to switch amongst DTV program, (A)TV
program, AV and DVD input sources.
21.-VOL+ (VOLUME DOWN/UP)
Press to decrease or increase the TV sound level.
22.-P+(PROGRAM DOWN/UP) button
Scans down or up through the current channel list.
23.NOTEBOOK/*RED button
Press to active the notebook function.
*To access aTELETEXT page corresponding to the
RED key.
24.*GREEN/*AUDIO button
*To access TELETEXT page corresponding
to the GREEN key.
*In DTV mode, press to display Audio Channel
menu, then press UP/DOWN and LEFT/RIGHT
to select an audio mode amongst LL(left), RR(right)
and LR(stereo).
25.*YELLOW/*DTV/RADIO button
*To access the TELETEXT page corresponding
to the YELLOW key.
*IN DTV mode, press to switch between DTV and
RADIO channels.
26.*CYAN button
*
To access the TELETEXT page corresponding to CYAN
key.
27.DISPLAY/ DEL./*INFO/*HOLD button
Press to display the current channel number & name,
and color mode, press again to display the current
time on the screen.
Within the notebook window, press to delete the
unwanted text.
*In DTV mode, press to display the current status
information.
28.*TXT button
*Press to activate TELETEXT and P100 will be
displayed on the screen first. Press again to go
back to TV mode.
button
button
*with this toggle command, the hold function can
be switched on or off. When HOLD is switched on,
HOLD will be displayed on the top left corner of
the screen instead of the current page number or
subcode, and the page searching will stop.
29.*SUBTITLE button
30.FAVORITE/ *FAVORITE button
Both in ATV & DTV mode, press to browse the
favourite channels preset in the Favourite Channel
List. This function will not work if you have not set
any favourite channels.
31.*PAGE UP /*REVEAL button
*Press to scroll one page up in DTV menu displays
(only when necessary).
*
32.TIME/* SUBCODE button
33.*GUIDE/*SIZE button
*In DTV mode, press to enter guide submenu.
You can press OK to switch to the selected
channel or press DTV MENU or ESC to return to the
the current channel.
*Press to toggle amongst 3 different sizes under
TELETEXT mode: single height full page, double
height top of page and double height bottom of
page.
34.SLEEP button
To set the sleep timer from 15 to 240 minutes by
pressing the SLEEP button repeatedly.
To display the remaining time, press the button
once.
NICAM /*PAGE DOWN/*MIX button
Press to select the mode amongst
*Press to scroll one page down in DTV menu
displays(only when necessary).
*The MIX mode results in a combined display
of TV picture and 10 pages of FAST TELETEXT
information.
*Press to enter subtitle mode.
*In teletext mode ,Press to return the content page.
This function also reveals or conceals the
hidden 10 pages of FAST TELETEXT information.
Most other commands will conceal the information
again.
Press to display the current time and press again
to exit in TELETEXT status.
*You can also scan through 10 pages of FAST
TELETEXT information by normal PAGE mode
and subcode mode.
MONO, STEREO,
Dual I or Dual II.
To cancel the sleep timer, press SLEEP
button repeatedly until Sleep 0 appears.
35.