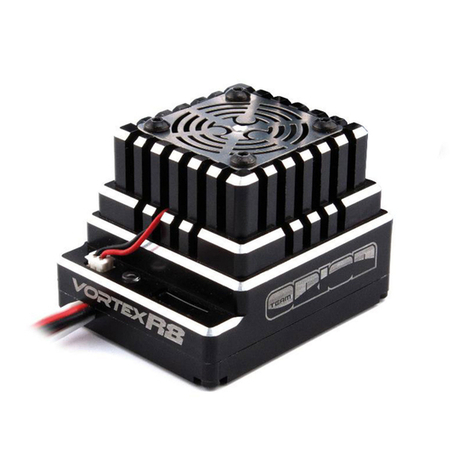
Team Orion Vortex R10 One User manual

INSTRUCTION MANUAL
MODE D’EMPLOI
BEDIENUNGSANLEITUNG

2 Copyright Team Orion © 2014
CALIBRATION STEP 1
1) CONNECTIONS
Motor
Servo
Receiver
Vortex R10 ONE
Switch
+ (red)
SET
ST/CH1
TH/CH2
ON/OFF
- (black)
Battery
ON/OFF
Press and
hold the
SET button
1
3
Switch ON Keep
pressing
the SET
button
LED
2
Release as
soon as soon as
the red LED
starts to blink

ww.teamorion.com 3
CALIBRATION STEP 2
LED
Press
once
Press
once
Press
once
1 2
LED
3
LED

4 Copyright Team Orion © 2014
PROGRAMMING YOUR ESC
Connect the battery
Enter Program Mode
Choose the parameter you want to change
OR Reset all programmable items
Press the
SET button
for 1s
2
Press the
SET button
for 5s
2
Press the SET button
1 time to select the
1st parameter...
3...press the SET button
2 times to select the
2nd parameter etc.
3 3
Switch ON
1
Switch OFF
ESC to complete
the procedure
7
LED
blinks
LED blinks 1 time
LED blinks
1 time
LED blinks 2 times
Press the SET button
for 3s to modify
the setting of the
parameter
4
Press the SET button
for 3s to save the
new setting
6
Use the SET button
to change the setting
of the parameter.
Press 1 time
LED blinks
2 times
Press 2 times etc.
5

ww.teamorion.com 5
AVAILABLE AND DEFAULT SETTINGS
Parameter
Setting
12345678
1. Running Mode Forward
with
Brake
Forward/
Reverse
with
Brake
2. Drag Brake Force 0% 5% 10% 15% 20% 25% 30% 40%
3. Low Voltage
Cut-Off Threshold
No
Cut-Off 2.6V/Cell 2.8V/Cell 3.0V/Cell 3.2V/Cell 3.4V/Cell
4. Start Mode(Punch) Level1 Level2 Level3 Level4
5. Max Brake Force 25% 50% 75% 100%
NIMH WARNING
For NIMH batteries, it is recommended to set the n°3
parameter, low voltage cut-o threshold, to the n°1 setting,
no cut-o. If you don’t do this, the ESC cut-o system will
activate before the battery is empty and result in short
running times.
Pour les batteries NIMH, il est recommandé de régler le
paramètre n°3, low voltage cut-o threshold, sur le réglage
n°1, no cut-o. Si vous ne le faites pas, le système de
protection du variateur s’activera avant que la batterie ne
soit vide, ce qui peut réduire drastiquement l’autonomie.
Bei NiMH Akkus müssen Sie den Parameter 3, Low Voltage
Cut-O Threshold, auf die Einstellung 1 setzen (No Cut-O).
Wenn Sie dies nicht tun, schaltet der Regler aus, bevor der
Akku leer ist und die Fahrzeit wird verkürzt.
NIMH WARNUNG
AVERTISSEMENT NIMH

6 Copyright Team Orion © 2014
Thank you for purchasing a Team Orion Brushless ESC.
This ESC features some of the latest brushless technologies
developed by our world Championship winning team. Please
read these instructions thoroughly before using the ESC.
WARNINGS
• Do not let children use this product without the
supervision of an adult.
• Never leave the ESC unsupervised while it is powered on.
• The ESC might get hot during use, be careful when
handling it.
• Always disconnect the battery after use, do not store with
the battery connected.
• Do not use near ammable materials.
• If the ESC has suspicious reactions, immediately
disconnect the battery and discontinue use.
WARRANTY
Team Orion guarantees this product to be free from
manufacturing and workmanship defects. The warranty
does not cover incorrect installation, components worn by
use, or any other problem resulting from incorrect use or
handling of the product. No liability will be accepted for any
damage resulting from the use of this product. By the act of
connecting and operating this product, the user accepts all
resulting liability. Is considered incorrect use:
INSTRUCTION MANUAL · ENGLISH

ww.teamorion.com 7
• Failure to follow instructions.
• Improper use of the product (abusive use, out of spec,
etc.).
• Failure to adapt settings for proper function (improper
connections, wrong gearing, installation, setup, etc.).
• Overload, overheating (desoldering, melting, etc.).
• Running in inadequate conditions (damage or rust from
rain, humidity, etc.).
• Improper maintenance (presence of dirt, etc.).
• Disassembly, modication by the user (modifying original
connectors, wires, components, etc.).
• Mechanical damage due to external causes.
FEATURES
• Designed for on-road and o-road use
• Waterproof
• High precision speed and power control
• High power built-in BEC system for stable receiver and
servo power supply
• Easy set-up via the setup button located on the switch
• Forward and reverse function
• Several adjustable parameters
• Multiple protection systems: battery low voltage cut-o,
overheating, radio signal loss, stuck motor
ESC AND MOTOR CONNECTION
The ESC is designed to be used with sensorless brushless
motors using 3.5mm gold plug connectors. Follow the wires
order/color coding (ABC-blue/orange/yellow). If the motor

8 Copyright Team Orion © 2014
spins in the wrong direction, you can simply reverse two of
the wires.The ESC must be powered by a high grade 6-cell
NiMH battery or a 2S LiPo battery equipped with a Tamiya
type battery connector. Using low grade batteries, adapters
or modifying the ESC battery connector, might cause loss
of performance, damage, or void the warranty. Connect the
ESC to the channel 2 of your receiver.
ESC CALIBRATION
In order to ensure proper function, the ESC must be
calibrated to your transmitter inputs. It is recommended to
center the trims and reset all settings inside the transmitter
before proceeding to the calibration. Follow the procedure
below to calibrate your ESC
A. Switch o the ESC and switch the transmitter on,
B. Press and hold the SET button (located on the ESC’s
switch), then switch on the ESC. Release the SET button as
soon as the red LED starts to ash.
C. Calibrate the throttle points by pressing the SET button
once after each step.
1. neutral point (1 green ash)
2. full throttle (2 green ashes)
3. full brakes/reverse (3 green ashes)
D. The motor will run 3 seconds after the last step is
completed.

ww.teamorion.com 9
STATUS LED FUNCTION
• In the neutral position, no LED are lit.
• The red LED lights when the car is moving forward,
backwards or when braking.
• At full throttle the green LED is lit.
AUDIO WARNING TONES
1. Input voltage problem: ESC checks the input voltage as
it is switched on, if a problem is detected, the ESC emits
repeatedly two beeps with a 1 second pause and the
green LED ashes simultaneously (xx-xx-xx).
2. Radio signal problem: ESC checks the radio signal input as
it is switched on, if a problem is detected, the ESC emits
repeatedly a beep with a 2 second pause and the green
LED ashes simultaneously (x-x-x).
ESC ADVANCED SETUP
You can adjust certain parameters by using the SET button
located on the ESC’s switch. To adjust the parameters, follow
the procedure below.
A. Switch on the ESC.
B. Press the SET button and release it when the green LED
starts ashing.
C. Use the SET button to cycle between the various
adjustable parameters. The number of green ashes
indicates the parameter, one ash = running mode, two
ashes = drag brake force and so on. The ESC will loop
through all the adjustable parameters.
D. Once the green LED is ashing the number of times

10 Copyright Team Orion © 2014
relative to the parameter you wish to modify, press the
SET button until the red LED starts ashing, indicating the
current setting for that parameter, one ash = setting one,
two ashes = setting two, etc.
E. Press the SET button to change the current setting value,
the ESC will loop through all the available values.
F. Once the red LED is ashing the number of times relative
to the setting you wish to use, press the SET button for 3
seconds. The setting is saved.
G. Switch o the ESC to exit programming mode
ADJUSTABLE PARAMETERS
Running Mode
“Forward Only with Brake” this mode is meant for
competition use. In this mode the car can go forward and
brake, there is no reverse.
“Forward/Reverse with Brake” this is the basic all-around
mode. In this mode the car can go forward and reverse
and can also brake. When you move the throttle to the
reverse position while the car is moving forward, brakes
are applied until the car is fully stopped, reverse cannot
engage while the car is moving. To engage reverse, once the
car has stopped, release the brakes and move the throttle
to the reverse position again. While braking or in reverse,
if the throttle is moved to the forward position, the car will
immediately accelerate forward.
Drag Brake Force
Sets the amount of brake automatically applied when the
throttle is returned to the neutral position. This simulates

ww.teamorion.com 11
the engine breaking eect of a real car; it can help improve
turn-in and the general feeling of the car.
Low Voltage Cut-o
This function helps to prevent battery over-discharge. The
ESC continuously monitors the battery’s voltage. If the
voltage becomes lower than the threshold for 2 seconds,
the output power is shut o and the red LED ashes twice
repeatedly.
Start mode “punch”
This parameter sets the initial throttle punch when the car
accelerates. Level1 gives a very soft initial acceleration and
level 4 gives a stronger initial acceleration.
Max Brake Force
This parameter adjusts the maximum breaking force. A
higher value provides stronger braking, but it can also
cause the wheels to lock causing loss of control of the car.
Stronger brakes make the ESC work harder and run hotter,
overloading the ESC can cause the overheat protection to
activate.
Restore Default Settings
With the throttle in the neutral position, press and hold the
SET button for 5 seconds, the red and green LED will ash
simultaneously indicating that the parameters have been
reset to the factory default values.

12 Copyright Team Orion © 2014
Nous vous félicitons pour l’achat d’un régulateur brushless
Team Orion. Ce régulateur est équipé des technologies les
plus récentes développées par notre team champion du
monde.Veuillez lire attentivement ce mode d’emploi avant
d’utiliser le régulateur.
MISES EN GARDE
• Ne laissez pas les enfants utiliser ce produit sans la
supervision d’un adulte.
• Ne laissez pas un régulateur enclenché sans surveillance.
• Le régulateur peut chauer pendant l’utilisation, faites
attention lorsque vous le manipulez.
• Débranchez toujours la batterie après l’emploi. Ne stockez
pas le régulateur avec la batterie branchée.
• N’utilisez pas le régulateur à proximité de matières
inammables.
• Si le régulateur réagit de façon suspecte, débranchez-le et
arrêtez immédiatement son utilisation.
GARANTIE
Team Orion garanti que ce produit ne comporte pas de
défauts de fabrication. Cette garantie n’est pas valable
lors d’une mauvaise utilisation, d’usure due à l’utilisation
ou tout autre problème résultant d’une utilisation ou
d’une manipulation inappropriée du produit. Aucune
MODE D‘EMPLOI · FRANCAIS

ww.teamorion.com 13
responsabilité ne sera assumée pour un quelconque
dommage résultant de l’utilisation du produit. Du fait
de connecter et d’utiliser ce produit, l’utilisateur accepte
toutes les responsabilités découlant de son utilisation. Sont
considérés comme mauvaise utilisation:
• Ne pas suivre les instructions.
• Utilisation inadaptée (abus, utilisation extrême, etc.) :
• Réglages inadaptés (mauvaises connexions, rapport
inadapté, mauvaise installation, etc.).
• Surcharge, surchaue (éléments dessoudés, brûlés, etc.).
• Conditions d’utilisation inappropriées (humidité, pluie,
etc.).
• Mauvais entretien (présence de saleté, etc.).
• Démontage, modications par l’utilisateur (modication
des connecteurs, câbles, composants, etc.).
• Dommage dus aux chocs
CARACTERISTIQUES
• Conçu pour un usage sur piste ou tout-terrain
• Etanche à l’eau
• Gestion de la puissance précise et performante
• Système BEC haute-puissance intégré pour une
alimentation ecace du récepteur et des servos
• Réglage facile grâce au bouton de réglage
• Marche avant et marche arrière
• Divers paramétrages disponibles
• Systèmes de sécurité : coupure tension batterie faible,
surchaue, perte de signal radio, blocage moteur

14 Copyright Team Orion © 2014
CONNECTION DU REGULATEUR ET DU MOTEUR
Ce régulateur est conçu pour être utilisé avec des moteurs
brushless sensorless équipés de ches dorées 3.5mm. Lors
du branchement, suivez l’ordre des ls/code des couleurs
(ABC-bleu/orange/jaune). Si le moteur tourne à l’envers, vous
pouvez simplement inverser 2 des 3 ls.
Le régulateur doit être alimenté par une batterie NiMH 6
éléments de qualité ou une batterie LiPo 2S équipée d’une
che type Tamiya. Utiliser des batteries de mauvaise qualité,
des adaptateurs ou modier le connecteur peut provoquer
une baisse des performances, des dommages ou une perte
de la garantie.
Branchez le régulateur au canal 2 de votre récepteur.
CALIBRAGE DU REGULATEUR
An d’assurer un fonctionnement optimal, vous devez
calibrer le régulateur au signal de l’émetteur. Avant de
procéder au calibrage, centrez les trim et désactivez les
fonctions spéciales qui pourraient être actives.
Suivez cette procédure pour calibrer le régulateur
A. Eteignez le régulateur et enclenchez l’émetteur
B. Enclenchez le régulateur tout en pressant le bouton SET
situé sur l’interrupteur. Relâchez le bouton dès que la LED
rouge clignote.
C. Calibrez les gaz en appuyant une fois sur le bouton à
chaque étape.
1. Neutre (1 ash)
2. Plein gaz (2 ashs)
3. Freins/marche arrière (3 ashs)

ww.teamorion.com 15
D. Le régulateur est fonctionnel 3 secondes après que le
calibrage ait été eectué.
FONCTIONNEMENT DES LED D’ETAT
• Au neutre aucune LED ne s’allume.
• La LED rouge s’allume lorsque la voiture avance, recule
ou freine.
• La LED verte s’allume lorsque les gaz sont à fond.
SIGNAUX SONORES
1. Problème d’alimentation: le régulateur contrôle la tension
de la batterie lorsqu’il est enclenché. Si un problème est
détecté, le régulateur émet deux signaux sonores avec 2
secondes de pause entre les répétitions (xx-xx-xx).
2. Problème de signal radio: le régulateur contrôle le signal
radio lorsqu’il est enclenché. Si un problème est détecté,
le régulateur émet un signal sonore avec 2 secondes de
pause entre les répétitions (x-x-x).
PARAMETRAGE AVANCE DU REGULATEUR
Divers paramètres du régulateur peuvent être modiés en
utilisant le bouton de réglage situé sur l’interrupteur.
Pour modier les paramètres en utilisant le bouton de
réglage, suivez la procédure ci-dessous.
A. Enclenchez le régulateur.
B. Pressez sur le bouton de réglage et relâchez-le lorsque la
LED verte clignote.
C. Pressez à nouveau sur le bouton pour passer d’un
paramètre à l’autre. Le nombre de ash indique le

16 Copyright Team Orion © 2014
paramètre actuellement sélectionné, 1 ash= mode de
fonctionnement, 2 ash = frein moteur et ainsi de suite.
Le régulateur cycle en boucle entre les paramètres.
D. Lorsque la LED verte clignote le nombre de fois indiquant
le paramètre que vous désirez modier, pressez sur le
bouton jusqu’à ce que la LED rouge clignote, indiquant le
réglage actuel. Un ash veut dire réglage n°1, deux ash
réglage n°2 et ainsi de suite.
E. Pressez sur le bouton pour modier le réglage actuel, le
régulateur cycle en boucle entre les réglages disponibles.
F. Une fois que la LED clignote le nombre de fois relatives au
réglage désiré, appuyez sur le bouton pendant 3 secondes
pour sauvegarder la modication.
G. Eteignez le régulateur pour sortir du mode
programmation.
NB : Vous ne pouvez modier qu’un paramètre à la fois.
Pour sauvegarder une modication et pouvoir modier un
autre paramètre, il faut éteindre et rallumer le régulateur.
PARAMETRES
Mode de fonctionnement (running mode)
1)“Marche avant avec frein” ce mode est destiné à la
compétition. Dans ce mode il n’y a pas de marche arrière.
2)“Marche avant/arrière avec frein” ce mode est le mode
basique passe partout. Dans ce mode, la voiture peut
avancer, reculer et freiner. Lorsque vous tirez/poussez le
manche des gaz en position marche arrière pendant que
la voiture avance, le régulateur freine la voiture jusqu’à ce
qu’elle soit totalement arrêtée. Une fois la voiture à l’arrêt,

ww.teamorion.com 17
relâchez le manche des gaz puis tirez/poussez le en position
marche arrière à nouveau pour enclencher la marche
arrière. Lorsque la voiture recule ou pendant que vous
freinez, si vous tirez/poussez le manche des gaz en position
marche avant, la voiture repart en avant instantanément.
Frein Moteur (drag brake)
Ce paramètre règle la quantité de frein appliqué lorsque
les gaz sont au neutre. Ceci permet d’améliorer le feeling
général ainsi que l’entrée en courbe.
Coupure en cas de tension de batterie faible
(low voltage Cut-o)
Avec cette système, le régulateur contrôle constamment la
tension de la batterie. Si la tension de la batterie passe en-
dessous du seuil prédéni pendant 2 secondes, le régulateur
coupe l’alimentation et la LED rouge clignote deux fois à
répétition.
Force d’accélération (start mode “punch”)
Ce paramètre déni la puissance de l’accélération. Le niveau
1 donne une accélération peu puissante et le niveau 4 donne
l’accélération la plus puissante.
Puissance de freinage (max brake force)
Ce paramètre déni la puissance du freinage. Une valeur
plus élevée donne un freinage plus puissant mais peut
causer des blocages de roues et des pertes de maîtrise.

18 Copyright Team Orion © 2014
Remise à zéro, conguration d’usine
(restore default settings)
Pour remettre le régulateur en conguration d’usine, avec
les gaz au neutre, appuyez sur le bouton de réglage pendant
5 secondes. Les LED verte et rouge clignotent, indiquant la
remise à zéro.

ww.teamorion.com 19
Vielen Dank für den Kauf dieses elektronischen Team Orion
Brushless Fahrtenreglers. Dieses Gerät ist mit der neusten
Technologie ausgestattet und wurde von einem Team
entwickelt, das zahlreiche Weltmeistertitel gewonnen hat.
WARNUNGEN
• Lassen Sie Kinder beim Gebrauch dieses Produkts nie
unbeaufsichtigt.
• Lassen Sie den Regler nie unbeaufsichtigt, whrend er
eingeschaltet ist.
• Der Regler kann während des Gebrauchs warm werden.
Seien Sie vorsichtig!
• Stecken Sie den Akku nach dem Gebrauch IMMER aus!
• Verwenden Sie den Regler nicht im Bereich von
brennbaren Materialien.
• Wenn der Regler aullige Reaktionen zeigt, ziehen Sie
den Akku sofort aus und suchen im Fachhandel Hilfe.
GARANTIE
Team Orion garantiert, dass dieses Produkt frei ist von
Herstellungs- und Bearbeitungsfehlern. Die Garantie deckt
nicht inkorrekte Installation, Gebrauchsabnützung oder
jegliche andere Probleme, die durch inkorrekte Anwendung
des Produkts entstanden sind. Jegliche Haftung für Schden,
die durch den Gebrauch dieses Produkts entstehen,
wird abgelehnt. Mit dem Gebrauch dieses Produkts
übernimmt der Anwender jegliche Haftung. Nicht korrekte
BEDIENUNGSANLEITUNG · DEUTSCH

20 Copyright Team Orion © 2014
Anwendungen sind:
• Nicht befolgen der Anleitung.
• Nicht korrekter Gebrauch des Produkts (Missbrauch,
Überlastung etc)
• Falsche Einstellungen für korrekte Funktion (falscher
Anschluss, falsche Übersetzung, Installation etc.)
• Überlastung, Überhitzung (schmelzen, ablöten etc)
• Anwendung bei nicht adquaten Bedingungen
(Beschdigung oder Rost durch Schmutz, Feuchtigkeit etc.)
• Falsche Pege (Anwesenheit von Schmutz etc.)
• Demontage/Modikation des Produkts durch den
Anwender (Ändern der Originalstecker, Kabel,
Komponenten etc.)
• Mechanische Beschädigung von aussen
HIGHLIGHTS
• Entwickelt für den On-Road und O-Road Einsatz
• Wasserdicht
• Przise Kontrolle über Gas und Bremse
• Eingebautes Hochleistungs-BEC System für eine stabile
Stromversorgung von Empfnger und Servo
• Einfaches Setup über die Taste am Ein/Aus-Schalter
• Vorwärts und rückwärts Funktion
• Zahlreiche Einstellungsmöglichkeiten
• Verschiedene Schutzvorrichtungen: Auto-Abschaltung
bei zu tiefer Akkuspannung, Überhitzungsschutz,
Signalverlust, blockierter Motor
Table of contents
Languages:
Other Team Orion Controllers manuals
Popular Controllers manuals by other brands
ATWELL
ATWELL VG OSG Operation and installation manual
Vent-Axia
Vent-Axia 563531A Fitting and wiring instructions

Rotem
Rotem SuperGuard Installation manual and user's guide

WEIGL
WEIGL ProCommander ES instruction manual

Omron
Omron CK3W-AX1313 Series Startup guide
Allen-Bradley
Allen-Bradley PowerFlex 700H Hardware Service Manual
