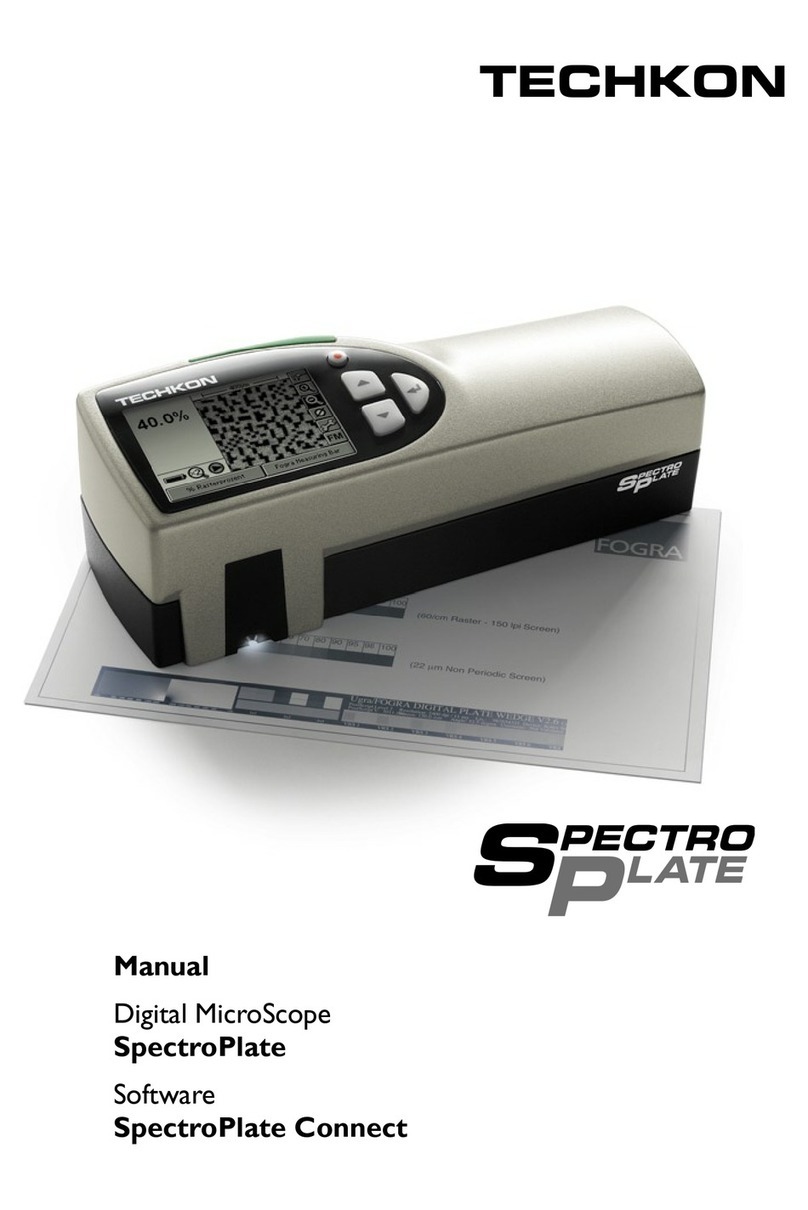
Techkon SpectroPlate User manual

Manual
Digital MicroScope
SpectroPlate
Software
SpectroConnect
TECHKON

TECHKON manuals, technical documentation and programs are copyrighted. Reproduction,
translation or transfer to an electronic medium – in whole or in parts – is prohibited.
TECHKON software is the intellectual property of TECHKON GmbH. Purchase of the
software grants the user a license for the use on one computer only. Programs may only be
copied for back-up purposes.
TECHKON can not be held liable for any damages that may occur by the use of TECHKON
products.
The TECHKON team takes great care in producing this manual. Nevertheless, we can not
fully guarantee the complete absence of errors. TECHKON GmbH and the authors can not
be held liable neither for any possibly incorrect statements nor their consequences.
Product that are not made by TECHKON GmbH are mentioned for information purposes
only and such statements do not represent trademark infringement. All registered trade-
marks are recognized.
TECHKON products and product names are registered internationally under several intel-
lectual patents and trademarks.
Specifications can be subject to change without notice.
Version 1.5, May 2011
You can reach us at the following address:
TECHKON GmbH
Wiesbadener Str. 27 • D-61462 Königstein/Germany
Telephone: +49 (0)6174 92 44 50 • Telefax: +49 (0)6174 92 44 99
E-mail: info@techkon.com • http://www.techkon.com

Welcome
We welcome you among the worldwide community of users of TECHKON
products. We are happy that you have selected this high-quality measurement
instrument. It will be a valuable tool for your day-to-day quality control tasks.
With this manual we invite you to learn how to use SpectroPlate.
The manual is divided into three chapters:
Chapter 1: How to use TECHKON SpectroPlate
Chapter 2: Description of measurement functions
Chapter 3: How to use the Windows software SpectroConnect
For the first steps we recommend to read chapter I; in particular paragraph 1.4.
You will be fascinated that after only ten minutes you will know how to work with
SpectroPlate. The second chapter will show you detailed insight into the measure-
ment functions and chapter 3 is about the Windows software SpectroConnect,
which is part of the package.
Please get the device registered by using the detachable registration card, which
is the last page of this manual. That way we can keep you updated about product
news.
Please visit us as well on the internet at http://www.techkon.com.
You will find useful information about the complete product range and new soft-
ware versions.
Do you have any suggestions for improvements or do you require information that
goes beyond the contents of this manual? We will be glad to hear from you. Your
suggestions or questions make an important contribution to the continuous optimi-
zation of our documentation and products.
Your TECHKON Team

Content
Chapter 1: How to use TECHKON SpectroPlate
1.1 Product description ....................................................................... 5
1.2 Performance packages and packing list ..................................... 8
1.3 Design of SpectroPlate .................................................................. 9
1.4 Working with SpectroPlate ......................................................... 10
1.5 Care and maintenance ................................................................... 18
Chapter 2: Description of measurement functions
2.1 Measurement functions of SpectroPlate Start ........................ 21
2.2 Additional functions of SpectroPlate Expert ........................... 22
2.3 Additional functions of SpectroPlate All-Vision ..................... 29
Chapter 3: How to use the Windows software SpectroConnect
3.1 Software description ..................................................................... 31
3.2 Installation ........................................................................................ 31
3.3 Overview .......................................................................................... 32
3.4 Software module “SpectroPlate settings” ............................... 33
3.5 Software module “Transfer curve” ............................................ 35
3.6 Software module “Export” .......................................................... 36
3.7 Software module “Digital Microscope” .................................... 37
Appendix:
Technical specifications
Manufacturer certificate
EC-Declaration of Conformity
Registration card

Manual TECHKON SpectroPlate Chapter 1 – How to use SpectroPlate Page 5
Chapter 1
How to use TECHKON SpectroPlate
1.1 Product description
TECHKON SpectroPlate – printing plate measurement right on the spot !
Today in the age of Computer-to-Plate it is obvious: Without quality control in pre-
press, there is no guarantee for quality in print. Thus the measurement of the right
dot transfer on offset printing plates is a key segment of comprehensive process
control in the printing industry.
However, measurement is only useful if the appropriate measurement technology
is applied. Some years ago using densitometers on printing plates was common
practice. But densitometers are designed for measuring on printed papers leading
to limits when reading on plates. At present, plate measurement devices based on
microscopic image capture and processing are the established standard.
SpectroPlate unifies all advantages of this modern measurement technology in
a compact, hand-held instrument. This product series and all other TECHKON
products are the result of many years of expertise in designing and manufacturing
high-quality measurement devices for the printing industry. Our four TECHKON
guidelines for perfect measurement technology are consequently applied:
1. Easy and quick operation
2. High measurement accuracy
3. Robust engineering and reliability
4. Ergonomic and functional design
The measurement accuracy of a plate measuring device is determined by the quality
of the optical system and the performance of the image processing algorithms.
SpectroPlate meets the highest standards in this respect. The sample is illuminated
uniformly with spectral broadband light. The microscopic image is captured by a
precision optical lens system and a high resolution CMOS color matrix sensor with
high dynamic range. The processing of the detailed color image is performed by a
powerful graphic signal processor and sophisticated imaging algorithms. All relevant
quality parameters for correctly manufactured printing plates are shown on the
LCD display.

Manual TECHKON SpectroPlate Chapter 1 – How to use SpectroPlatePage 6
Thanks to the excellent image capture quality and the ingenious graphic calculations,
SpectroPlate can read precisely any screen size and screen technology: FM, AM
or Hybrid screen. The spectrally white illumination and dynamic color evaluation
permits reading all kinds of plate types and coated surfaces.
SpectroPlate lets you see things normally hidden to the human eye. It shows the
raster dots on a film or a printing plate in large magnification on the device display
or optionally on a computer screen. It lets you visually judge printing plates and
discover any soiling or exposure errors now that the structure of the raster dots is
visible.
A specific strength is the image transfer of uncompressed high-resolution files to
the PC where they can be stored, edited or sent over the internet. Geometric sizes
of dots or lines can be retrieved in micrometer- or mils dimensions.
The supplied Windows software connects the device to a PC. Measured values and
transfer curves are displayed and stored. The display of comparisons to target val-
ues, the data export to Microsoft Excel™ and the compatibility to RIP applications
are additionally useful functions of SpectroConnect. An exceptional feature is the
enlarged view of the microscopic images.
All devices are factory-made calibrated to the official reference Fogra Measuring Bar
FMB resulting in high long-term absolute accuracy and an excellent inter-instrument
agreement. Additionally, time-consuming calibration procedures prior to measure-
ments are obsolete.
The technical specifications are listed on the last pages of this manual.

Manual TECHKON SpectroPlate Chapter 1 – How to use SpectroPlate Page 7
• Accurate measurements on all popular offset plate types
• For AM, FM, Hybrid, from low- to high-res screening
• Measures film in reflection and transmission
• Can be used as „Digital Microscope“
• Measurement on CMYK-print
• With digital ruler
• Measurement time
approximately 1 second !
• Immediately ready to
use after switching on
• Highest absolute accuracy thanks
to direct reference to absolute
standard Fogra Measuring Bar FMB
• Devices are factory-made calibrated
permanently to accredited reference FMB
• No time-consuming calibration necessary
• High-resolution CMOS color matrix sensor
• High-precision optical system “Made in Germany”
• Homogeneous, spectral-broadband LED illumination
• Sophisticated image calculation and powerful signal
processing
• Mobile, portable unit, also for remote use without PC
• Quickly rechargeable high-capacity batteries, with charging console
• Upgrade from Start- to Expert-version via firmware upload from the PC
• USB port for the speedy transfer of measurement data to the PC
• Comprehensive software SpectroConnect included
All advantages at a glance
• Operation self explanatory
• Several menu languages selectable
• Aesthetically appealing and ergonomic,
functional design
• Lightweight and compact; fits like a glove
• Direct, secure positioning on the sample
• Solid, rugged design; works well in
harsh industrial environments
• No mechanically moving parts;
therefore no wear and tear,
i. e. maintenance free

Manual TECHKON SpectroPlate Chapter 1 – How to use SpectroPlatePage 8
1.2 Performance packages and packing list
Three different performance packages
SpectroPlate is available in three different types of performance packages:
The entry-level model Start is for dot percentage measurements on all popular
types of printing plates, film and CMYK-print.
The Expert-version additionally features the recording of complete transfer curves
and the possibility to analyze geometric objects within the device.
The Start-version can easily be upgraded to the Expert-model by a post-purchase
upload from the PC. The All-Vision version measures precisely on low-visible, pro-
cessless offset printing plates.
SpectroPlate Start
• % dot measurement
• Screen angle in °
• Screen frequency in l/cm and lpi
SpectroPlate All-Vision
same as Expert and additionally:
• Measurement of chemistry-free,
processless plates with very low visible
contrast
Contents of delivery:
• Measurement device SpectroPlate
• Carrying case
• Charging console with white standard
• AC adapter with universal plugs for
Europe, UK and USA
• This manual with ISO 9000 compliant
certificate
• USB cable for PC connection
• CD with software SpectroConnect
Accessories:
• Software upgrade from SpectroPlate Start to Expert; Hardware upgrade to All-Vision
• Replacement parts: charging console with white standard, rechargeable battery
• Offset printing plate reference Fogra Measuring Bar FMB; (can be purchased at
Fogra Forschungsgesellschaft, www.fogra.org)
The carrying case protects SpectroPlate and
parts
SpectroPlate Expert
same as Start and additionally:
• Dot transfer curve
• Dot gain curve
• Geometrical analysis: diameter,
distance in micrometer and mils
• Memory for 100 data sets
• Average measurement

Manual TECHKON SpectroPlate Chapter 1 – How to use SpectroPlate Page 9
1.3 Design of SpectroPlate
SpectroPlate is a solidly designed measurement device which is very functional and
easy to use. It is compact in size; the buttons can be reached with the right index
finger when the device is held with the right hand. The LCD display is inclined
towards the user, so the display information can be read clearly. SpectroPlate can be
easily positioned on the measurement sample.
The measurement sample is illuminated uniformly by spectrally white LEDs.
The viewfinder helps selecting the right positioning of the measurement aperture.
Additionally, the magnified live-image in the LCD display verifies the validity of the
right spot to measure.
Connect the plug of the AC adapter (1.)
with the charging console (2.). The AC
adapter can be used universally for 100 –
240 V and 47 – 63 Hz. Use only the original
TECHKON SpectroPlate AC adapter. The
use of other power sources is hazardous !
There are three adapter plugs for different
countries. To change an adapter plug, just
pull it off the AC adapter and push in the
new one. Make sure it is connected firmly !
Charging contacts
Device base
Battery case
USB-connector
for PC connection
Navigation buttons
Right hand grip
zone
Device label
with serial number
Visible
measurement
aperture
Green
measurement
button (also for
switching on)
Backlit device
display
UK USA
2.
1.
Europe
Ceramic
white standard

Manual TECHKON SpectroPlate Chapter 1 – How to use SpectroPlatePage 10
1.4 Working with SpectroPlate
Switching on and off
SpectroPlate is switched on by pressing the green measurement button. It is imme-
diately ready to measure.
If no button is pressed within two minutes, the device will switch off automatically.
Switching it on again with the green measurement button will show on the display
the last measurement done. There is no button to turn SpectroPlate off.
Charging
The battery status is displayed as a battery symbol in the lower left corner of the
LCD screen, when the unit is turned on.
When the battery turns empty, the battery symbol starts to flash. In this state
several measurements still can be obtained; but it is time to put it on the charging
console. Charging starts automatically by placing the device on the charging console.
Please keep the charging contacts at the bottom of the device and on the charging
console clean. To avoid scratches, always use a soft cloth or a similar soft material. If
oxidized, we recommend to use a cotton bud soaked with metal contact spray.
Five seconds after placing the device on the console the display will show a clock
and an animated battery symbol. When the symbol displays a full battery, the charg-
ing is completed and the battery is fully charged. Completely charging an empty
battery will take approximately four hours.
SpectroPlate has a regulated charging management. This means it will power-charge
an empty battery, so the device can be used again after a few minutes. On the
other hand, there is no overcharging of full batteries. You can park the device on
the charging console when not in use. This way it is guaranteed to have always an
operational measurement instrument at hand.
Up to 10.000 measurements can be carried out with one battery charge.

Manual TECHKON SpectroPlate Chapter 1 – How to use SpectroPlate Page 11
How to measure
After switching on SpectroPlate, it is
instantly ready to measure. No calibra-
tion is to be carried out. Just position
the measurement aperture above the
area to be measured and press the
green button shortly with your right
index finger. Within one second the
resulting measurement value will appear
on the display of the device.
Please make sure to perform measurements on flat surfaces only. The measurement
aperture has to be directly on the sample without any distance in order to ensure
the correct field of depth of the optical system. On the bottom of the device there
are anti-slip rubbers which prevent the device from being moved during a measure-
ment.
Device settings with the display menu
The SpectroPlate display is divided logically into a section where the measurement
results are displayed and a frame of “soft keys”.
Notice: In the Start-version of SpectroPlate certain “soft keys” will be not select-
able and are shaded in gray. These are the functions which are only available for the
Expert- and All-Vision-model.
Pressing shortly on one of the Arrow buttons (1.) will move an active cursor from
“soft key” to “soft key” around the frame. An active “soft key” is indicated by
inverse appearance. By pressing the Enter button (2.) a function behind a “soft key”
is selected and a selectable menu appears. Within such a menu again the navigation
is done via the Arrow buttons and the selections are made with the Enter but-
ton. The red Escape button (3.) is for canceling any procedure and for closing open
menu windows in order to return to the measurement mode.
1. Arrow buttons
2. Enter button
3. Escape button
3.
1. 2.

Manual TECHKON SpectroPlate Chapter 1 – How to use SpectroPlatePage 12
Notice: The following instruction describes the use of the Start-version of Spectro-
Plate. It applies to the Expert- and All-Vision-model as well. Supplementary func-
tions of Expert and All-Vision will be explained in the following chapter in detail.
Thanks to the interactive device menu, settings are very easy to adjust. The display
is divided logically into the following segments:
Menu: Device settings
The “soft key” with the tool symbol (see picture above, 7.) opens the window for
the device settings. Within this window you can navigate with the Arrow buttons
and select with the Enter button. The red Escape button brings you back to the
measurement mode.
The left side shows the measurement results:
1. Dot percentage
2. Screen ruling (= screen frequency)
3. Screen angle
4. Battery status, zoom factor, image mode
The center displays the captured
microscopic image (5.).
The right and lower corner contains the
interactive “soft keys”:
6. Zoom function
7. Device settings
8. Setting of the screen type
9. Measurement function
10. Plate type / measurement conditions
9. 10.
6.
7.
8.
1.
2.
3.
4.
5.
1.
2.
3.
4.
5.
6.
7.
8.
* only SpectroPlate Expert and All-Vision
*
*

Manual TECHKON SpectroPlate Chapter 1 – How to use SpectroPlate Page 13
Description of the device settings:
1. The SpectroPlate INFO screen shows
the type of device (Start, Expert, All-Vision),
the software- and hardware version as well
as the serial number.
2. Performing a calibration is described on
the next page.
3. Displays a grid array.
4. Sound will activate an acoustic signal
after each measurement.
5. The LCD display contrast can be turned
darker or brighter.
6. Sets the menu language of the device.
7. All measurement values get a time- and
date stamp. This information will be visible
when the data is transmitted to the PC
software SpectroConnect.
8. A reset puts the device to factory set-
tings. Attention ! All stored measurement
values and recently made calibrations will
be deleted. Only the factory-set calibration
values are still valid.
Menu: Measurement functions
When the “soft key” in the left section of the lower bar of the display is activated,
a windows opens where you can select the measurement functions. The measure-
ment functions listed below are describe in chapter 2.
Index of the measurement functions:
1. % dot measurement p. 21
2. Dot transfer curve p. 23
3. Dot gain curve p. 26
4. Geometrical analysis p. 27
1.
8.
1.
2.
3.
4.

Manual TECHKON SpectroPlate Chapter 1 – How to use SpectroPlatePage 14
Calibration
SpectroPlate is factory-side calibrated. A white calibration adjusts the digital camera
module. The screen calibration is for exact adjustment of dot percentage mea-
surements towards the reference plate Fogra Measuring Bar FMB. The calibration
remains permanently and the devices are long-term stable. This means that there
are no time intervals for re-calibration necessary.
To ensure the correct operation of the device, we recommend to perform check-up
measurements once a month. Before measuring make sure that the measurement
aperture is free of dust. In case it has to be cleaned use oil-free, clean compressed
air or an optics brush.
The suitable reference for check-up measurements is the offset sample plate Fogra
Measuring Bar FMB from the research institute Forschungsgesellschaft Druck, Fogra
e.V., München.
It includes two percentage wedges, one periodic AM screen, one non periodic FM
screen and a documentation with a protocol listing reference values taken with a
laboratory instrument by the institute.
Fogra Measuring Bar can be ordered
over the internet at:
www.fogra.org.
Fogra Forschungsgesellschaft Druck e.V.
Streitfeldstr. 19
D-81673 München / Germany
Phone: +49 (0)89 43182-160
Fax: +49 (0)89 43182-100
www.fogra.org
We recommend to make five measurements per measurement patch and take the
average value in order to level out measurement deviations caused by inhomoge-
neous percentage patches due to the production process of the FMB. The averaged
measurement results of SpectroPlate have to be within the following tolerances:
AM screen (periodic): ± 0,5 %
FM screen (non periodic): ± 1,0 %
If the measurement results are out of tolerance, make a white calibration and try
again. If the values are still out of range, it is necessary to perform a screen calibra-
tion on a Fogra Measuring Bar FMB.

Manual TECHKON SpectroPlate Chapter 1 – How to use SpectroPlate Page 15
Sample offset plate Fogra FMB
The 0 % (1.) and 100 % (2.) patches are not
measured.
Protocol with list of measurement values
White calibration:
To carry out a white calibration, place the
measurement device on the clean white
standard, which is part of the charging con-
sole (see picture on page 9).
Select “Calibration” and then “White Cali-
bration” from the menu “device settings”
and follow the instructions on the device
display.
The calibration is confirmed by an acoustic
signal.
1. 2.
1. 2.

Manual TECHKON SpectroPlate Chapter 1 – How to use SpectroPlatePage 16
Calibration procedures for AM screen and
FM screen are carried out separately.
By selecting “Calibration” and then “Target
Values FMB AM 60/cm” or “Target values
FMB FM 22/µm” from the menu “device set-
tings” you get a window where you can edit
the reference values
Edit the reference values from the list of the
FMB protocol into the table in SpectroPlate.
Now perform the AM or FM measurements
on the FMB plate.
Select “Calibration” and then “Screen Cali-
bration AM or FM” from the menu “device
settings”.
Place the measurement device on the clean
white standard, which is part of the charging
console (see picture on page 9) to carry out
a white calibration.
Edit the reference values from the list of the
FMB protocol into the table in SpectroPlate.
Now perform the AM or FM measurements
on the FMB plate.

Manual TECHKON SpectroPlate Chapter 1 – How to use SpectroPlate Page 17
Setting the plate type
SpectroPlate will carry out optimized image calculations depending on the type of
offset printing plate used. Therefore the type of printing plate has to be selected.
Also for measurements on film or printed paper the right setting has to be made
first.
1. Select wether the plate has positive or
negative processing properties. The dot per-
centage value will be shown as dot increase
or decrease accordingly.
Select the type of printing plate you use.
2. Fogra Measuring Bar:
This setting is to be used for the check-up
measurements on the Fogra Measuring Bar
FMB only.
3. Aluminium plates:
Should the exact type of printing plate not
be listed, then select here the type which
describes best.
4. Measurements on paper:
Geometric dot percentage measurements
on paper are only useful for a few specific
applications. The geometric dot percentage
measured precisely by SpectroPlate is not
comparable to the dot percentage value
based on the Murray-Davies formula mea-
sured with a densitometer.
Please note that the standards for measure-
ments on printed paper describe the use of
densitometers and spectrophotometers.
5. Film measurement reflection:
Simply place the film on a white backing and
perform the measurement. For gradations
higher than 80 % we recommend the mea-
surement on film in transmission mode.
6. Film measurement transmission:
If a light table or light plate is available, this
is the method of choice. Just place the film
on the light table and perform the measure-
ment.
1.
2.
3.
4.
5.
6.
Your plate is not in the list ?
Please contact us ! This list is permanently
updated when new plates appear on the
market.
Plate type is shaded ?
Upgrade to the All-Vision model !
See chapter 2.3 for details.

Manual TECHKON SpectroPlate Chapter 1 – How to use SpectroPlatePage 18
1.5 Care and maintenance
SpectroPlate is a highly-precise optical instrument. It is designed to work in harsh,
industrial environments. However, it should be handled with care. Avoid mechani-
cal shocks, heat, dusty or humid environments. Keep it always at a safe place, for
example in the carrying case.
Cleaning
The measurement head with the optical system is sealed against dust and dirt. Take
care that the visible, open measurement aperture is always free of dust. You can
clean the measurement aperture with oil-free, clean compressed air and a brush
used for cleaning photographic equipment.
Clean the device casing and the display window only with a soft cloth and a non-
aggressive plastic cleaner. Never use alcohol or chemically aggressive solvent-based
cleaners which can destroy the surfaces. The same procedure is valid for the white
standard which is integrated in the charging console. If the white standard should be
defective, it has to be replaced completely.
Should the display window show small scratches, these can be polished out with
special display polish greases as they are available for mobile phones and other elec-
tronic equipment as well.
The charging contacts at the bottom of the device and on the charging console can
be kept clean with a soft cloth or a cotton bud soaked with metal contact spray.
Please do not stick any labels at the bottom of the device. This could lead to faulty
measurements, because the direct contact – which is important for the correct
optical field of depth – might not be maintained

Manual TECHKON SpectroPlate Chapter 1 – How to use SpectroPlate Page 19
Error handling
Should SpectroPlate do not work properly, first check, if all instrument settings and
measurement conditions are set correctly.
Next perform a white calibration on the white standard which is integrated in the
charging console and try again to perform measurements.
A device reset sets the device back to factory settings. Stored measurement values,
reference-, target-, and tolerance values will be deleted. If you have made a specific
calibration the data will be lost as well. After a reset the device will work with the
factory set calibration values which reference to the Fogra FMB.
If the reset procedure in the settings window is not possible, a hardware reset has
to be carried out. The battery plug has to be unplugged for a couple of seconds an
then to be connected again. How to unplug the battery is described on the next
page.
Warranty
The warranty for TECHKON products is 24 months starting with the date of
purchase. The invoice is the certificate of warranty. The warranty is invalid if the
damage is caused by inadequate use of the device.
Should a TECHKON product do not work according to the specification, please
contact us before sending us the device. In most cases we can solve the problem
over the phone or via E-mail.
Inspection intervals
TECHKON SpectroPlate is maintenance free. We recommend to validate the
complete functionality of the devices in a 24 months time interval in the TECHKON
service center. We offer a complete device check as a service package. Please con-
tact us for details.
For a flat fee the device will be cleaned, checked and recalibrated. In case a repair
or exchange of components should be necessary we will inform you. Please send
the device always securely in the carrying case with complete accessories.

Manual TECHKON SpectroPlate Chapter 1 – How to use SpectroPlatePage 20
1. Unscrew the battery
casing and remove it.
2. Later when reassem-
bling do not tighten the
screw too much other-
wise it might break.
3. Remove the battery and pull the plug.
4. When reassembling the new battery, the black cable has to
point into the direction towards the charging contacts. The plug
has to clip into the socket. You should be able to close the bat-
tery case easily. Otherwise please check the wire.
5. The image on the battery case door shows how the battery
should be positioned.
Replacement of the rechargeable battery
The rechargeable Ni-MH battery has a high lifespan. However, after a certain time
– depending how it was used – it will loose its capacity and it will make sense to
replace it.
Only use original TECHKON SpectroPlate replacement batteries.
The use of other
batteries is hazardous !
For opening the battery case you will need a Philips screwdriver type 1.
Place the instrument upside down. Put a soft cloth underneath the display to avoid
any scratches.
Other manuals for SpectroPlate
1
Table of contents
Other Techkon Microscope manuals
