SUMMARY OF THE PROGRAMMING FUNCTIONS OF THE XS1200
CONTROL PANEL OF THE XS 1200
To control the fixture, to setup it, to check the DMX line and the lamp, on the front panel of the fixture there are a graphic 128x64pixel
lcd display, 3 led BCD display, 4 led and 4 keys.
The keys are used into dynamic menus. Their functions change with the working contest and their options are displayed in the
external rows of the lcd display.
About some seconds after the switching on, the Studio Due’s logo be shown on the display. Afterwards the standard specifications
will appear:
Version 1.00 the release of the firmware
Serial 10001 the serial number of the fixture
DMX 001 Next 021 the start DMX address of the fixture and the next DMX free address
Lamp TENT 0 1200W 92V the tents to strikes the lamp and the working parameter of the lamp
press any key press any key to select one of the available menus
to reset the fixtures press simultaneously the two keys between the LCD display and the led BCD
AVAILABLE MENUS
• ADDRESS to assign the DMX-512 address
• PAN-TILT to control the pan and tilt parametres
• DIMM/SHUTT dimmer/shutter values
• HRS COUNT lamp and fixtures counters
• DISPLAY brightness and flip controls
• UTILITY DMX values controls/language selections/reset
• DMX SPEC remote reset/remote lamp switch off/ramp
• SERVICE initialization of the fixture/calibration of the wheels
• BALLAST parameters of the lamp/strikes control
To select any of the given options, press any key. The dynamic keys have the OK, ESC, Up and Down options.
Press the ESC key to go back to the main options without making any change; press OK to select the showed option, press Up or
Down keys up to when the required one is shown
ADDRESS (to assign the first channel used by the fixture)
To select the DMX address press OK.
To modify the address press Down and Up buttons and, once the required address has been selected, press and press OKto confirm
the inserted value. To go back to the options without making any change, press the ESC button.
PAN-TILT (to select pan and tilt inversion, resolution 8/16 bit, feedback)
To select the pan and tilt options press OK.
It is possible to select the pan inversion, the tilt inversion, the bit of resolution (8/16 bit), the degrees of the pan revolution (MIN/MED/
MAX) , the degrees of the tilt revolution (MIN/MAX), the ramp (SLOW/FAST) and the swap between pan and tilt.
It is possible to set 20 (16 bit) or 18 channels (8 bit).
It is also possible possible to set the speed of the ramp. You can set SLOW RAMP and FAST RAMP. The slow ramp
is used when you want an extreme uniformity of the movements (live and television use), the fast ramp is used
when the very fast movement is the most important thing (disco use or with a particularly music).To go back to the
options without making any change, press the ESC button.
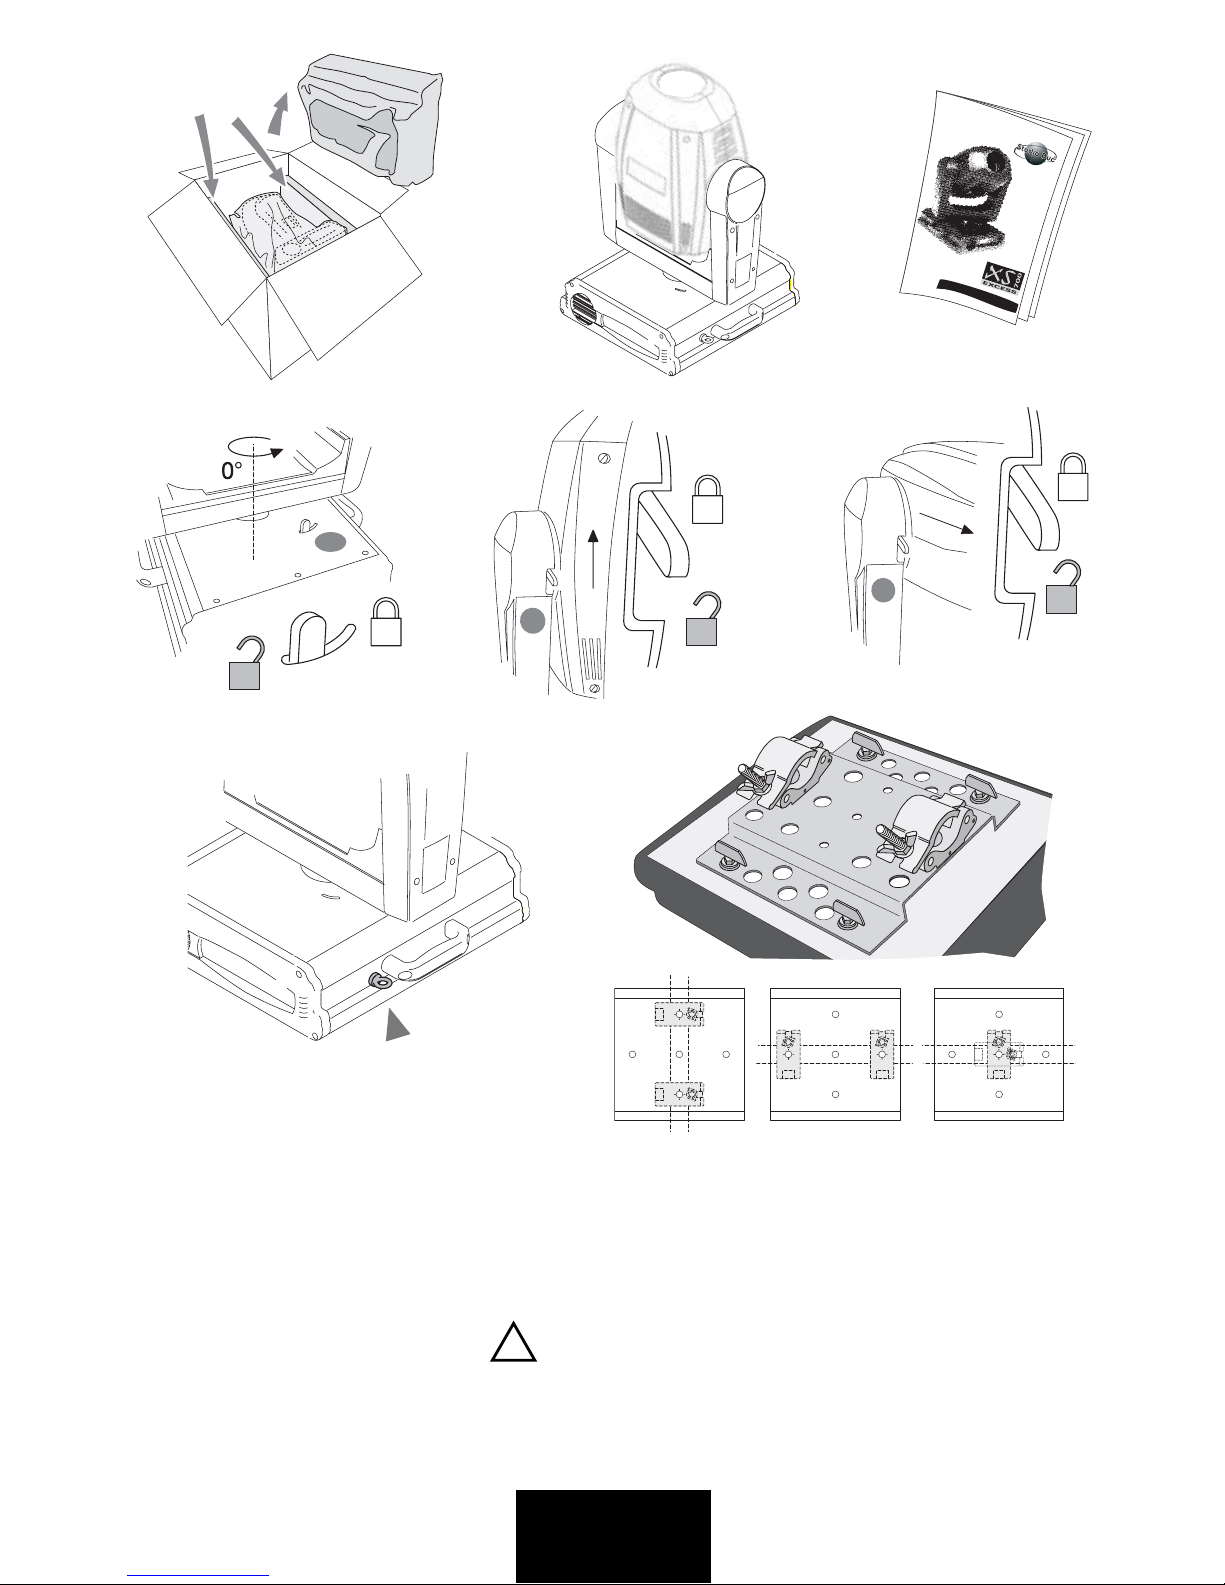
pict. 5
PRESS SIMULTANEOUSLY TO RESET THE FIXTURES
... 8 ...