manuals.online logo
Brands
  1. Home
  2. •
  3. Brands
  4. •
  5. Technics
  6. •
  7. CD Player
  8. •
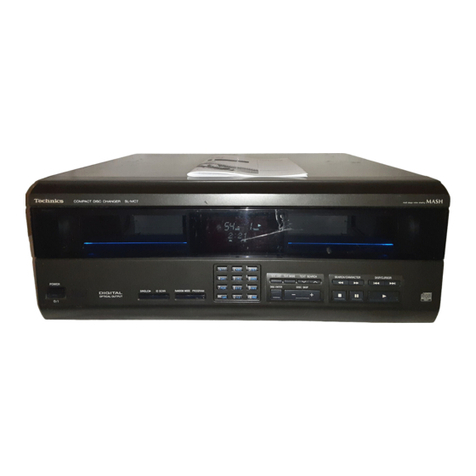
  9. Technics SL-MC6 User manual

Technics SL-MC6 User manual

Other manuals for SL-MC6

1

Other Technics CD Player manuals

Technics SL-DV290EE User manual

Technics

Technics SL-DV290EE User manual

Technics SL-P250 User manual

Technics

Technics SL-P250 User manual

Technics SL-P999 User manual

Technics

Technics SL-P999 User manual

Technics SL-G700M User manual

Technics

Technics SL-G700M User manual

Technics S-PG340 User manual

Technics

Technics S-PG340 User manual

Technics SL-PD687 User manual

Technics

Technics SL-PD687 User manual

Technics SL-PD688 User manual

Technics

Technics SL-PD688 User manual

Technics SL-PD988 User manual

Technics

Technics SL-PD988 User manual

Technics SLMC60 - COMPACT DISC CHANGER User manual

Technics

Technics SLMC60 - COMPACT DISC CHANGER User manual

Technics SL-PS670D User manual

Technics

Technics SL-PS670D User manual

Technics SL-PG440A User manual

Technics

Technics SL-PG440A User manual

Technics SLPD8 - COMPACT DISC CHANGER User manual

Technics

Technics SLPD8 - COMPACT DISC CHANGER User manual

Technics SL-PD987 User manual

Technics

Technics SL-PD987 User manual

Technics SL-PG480A - schematics User manual

Technics

Technics SL-PG480A - schematics User manual

Technics CQ-DP5EU/EC User manual

Technics

Technics CQ-DP5EU/EC User manual

Technics SL-C700E User manual

Technics

Technics SL-C700E User manual

Technics SL-CH505 User manual

Technics

Technics SL-CH505 User manual
Technics SL-G700 User manual

Technics

Technics SL-G700 User manual
Technics SL-PG200A - SERVICE User manual

Technics

Technics SL-PG200A - SERVICE User manual

Technics SL-P1000 User manual

Technics

Technics SL-P1000 User manual

Technics SLPD8 - COMPACT DISC CHANGER User manual

Technics

Technics SLPD8 - COMPACT DISC CHANGER User manual

Technics SL-PS840 User manual

Technics

Technics SL-PS840 User manual
Technics SL-HD301 User manual

Technics

Technics SL-HD301 User manual

Technics SL-PG350 User manual

Technics

Technics SL-PG350 User manual

Popular CD Player manuals by other brands

Arcam CD23 Handbook

Arcam

Arcam CD23 Handbook

Sanyo MCD-Z1F Service manual

Sanyo

Sanyo MCD-Z1F Service manual

JVC RC-ST3SL instructions

JVC

JVC RC-ST3SL instructions

Marantz HD-CD1 quick start guide

Marantz

Marantz HD-CD1 quick start guide

Sony DVP-FX850 Service manual

Sony

Sony DVP-FX850 Service manual

Philips AZ1140 Instrukcja obs?ugi

Philips

Philips AZ1140 Instrukcja obs?ugi

Alpine 7909 owner's manual

Alpine

Alpine 7909 owner's manual

JVC CH-X350 instructions

JVC

JVC CH-X350 instructions

RCA RP-7923 instruction manual

RCA

RCA RP-7923 instruction manual

Pioneer DEH-P3550MP XM Operation manual

Pioneer

Pioneer DEH-P3550MP XM Operation manual

Philips Shockproof AX2102 brochure

Philips

Philips Shockproof AX2102 brochure

Philips CD582 user manual

Philips

Philips CD582 user manual

Philips AZ 6821 operating manual

Philips

Philips AZ 6821 operating manual

Lasonic MSU-2020 user manual

Lasonic

Lasonic MSU-2020 user manual

Denon DCD-1420 Service manual

Denon

Denon DCD-1420 Service manual

Panasonic SJ-MR100 operating instructions

Panasonic

Panasonic SJ-MR100 operating instructions

Onkyo DX-7210 instruction manual

Onkyo

Onkyo DX-7210 instruction manual

Cambridge Audio SONATA CD30 manual 

Cambridge Audio

Cambridge Audio SONATA CD30 manual 

manuals.online logo
manuals.online logoBrands
  • About & Mission
  • Contact us
  • Privacy Policy
  • Terms and Conditions

Copyright 2025 Manuals.Online. All Rights Reserved.

Compact
Disc
Changer
|
Technics
SL-MC6
Operating
Instructions
Note:
The
“EB”
indication
shown
on
the
packing
case
indicates
United
Kingdom.
COMPACT
:
:
DIGITAL
AUDIO
of
TEXT}
Before
connecting,
operating
or
adjusting
this
prod-
uct,
please
read
these
instructions
carefully.
Please
save
this
manual.
RQT4457-B
Dear
Customer
Thank
you
for
purchasing
this
Technics
product.
For
optimum
performance
and
safety,
please
read
these
instruc-
tions
carefully.
Table
of
confents
Safety
regulations..............
cdnrateanien
Caution
for
AC
mains
$
lead
(For
‘United
Kingdom)..
Suggestions
for
safety
Connections.............
Preparing
the
remote
contro!
Controls.
Setting/Removing
discs.
The
liner
notes
organize
Sequential
play
.
Direct
play
.....
Single
disc
play.
Program
play.
Random
play
.
Repeat
function.
1D
scan
function
Disc
grouping
pia’
CD-TEXT
function
Time
mode
selection
SARBONSHLOAINNAaH
aw
A
note
on
compact
dise:
Troubleshooting
guide..
Technical
specifications
Disc
index...
Back
cover
Supplied
accessories
Please
check
and
identify
the
supplied
accessories.
{For
United
Kingdom)
(For
Australia
and
N.Z.)
AC
mains
lead
AC
power
supply
cord
feats
RJA0035-K)
Noteboot-like
binder
[Liner
notes
organizer]
(RFA0623-K1)....
Numbered
stickers
(RQLA0326)...
ie
Ss
Use
numbers
indicated
in
parentheses
when
asking
for
replacement
parts.
Safety
regulations
CAUTION!
THIS
PRODUCT
UTILIZES
A
LASER.
USE
OF
CONTROLS
OR
ADJUSTMENTS
OR
PER-
FORMANCE
OF
PROCEDURES
OTHER
THAN
THOSE
SPECIFIED
HEREIN
MAY
RESULT
IN
HAZARDOUS
RADIA-
TION
EXPOSURE.
DO
NOT
OPEN
COVERS
AND
DO
NOT
REPAIR
YOURSELF.
REFER
SERVICING
TO
QUALIFIED
PERSONNEL.
CAUTION!
DO
NOT
INSTALL
OR
PLACE
THIS UNIT
IN
A
BOOKCASE,
BUILT
IN
CABINET
OR
IN
ANOTHER
CONFINED
SPACE
IN
ORDER
TO
KEEP
WELL
VENTILATED
CONDITION.
ENSURE
THAT
CURTAINS
AND
ANY
OTHER
MATERIALS
DO
NOT
OBSTRUCT
THE
VENTILATION
CONDITION
TO
PREVENT
.
RISK
OF
ELECTRIC
SHOCK
OR
FIRE
HAZARD
DUE
TO
OVERHEATING.
DANGER
Lec
erate
(Inside
of
product)
a
SERS]
Undrien
eae)
wn
ASRS
EAT
|
Tuco
sel
i
SRE
ATR
IM
Apart
in)
roving,
USIUEUSEReTANG
ARTIS.
ARES
OEEMEREDSIS
|
(Produ
tats
innside)
vonstont
‘SIATRAE
UISESTRALING
HEWN
ARDEKUNE
EOFRET.
|
(1m
Inngren
deg
Gerdtes)
CLASS
1
LASER
PRODUCT
|
(Back
of
product)
Caution
for
AC
mains
lead
(For
United
Kingdom)
(“EB”
area
code
modei
only)
For
your
safety,
please
read
the
following
text
carefully.
This
appliance
is
supplied
with
a
moulded
three
pin
mains
plug
for
your
safety
and
convenience.
A
S-ampere
fuse
is
fitted
in
this
plug.
Should
the
fuse
need
to
be
replaced
please
ensure
that
the
replace-
ment
fuse
has
a
rating
of
5-ampere
and
that
it
is
approved
by
ASTA
or
BSI
to
BS
1362.
Check
for
the
ASTA
mark
«=>
or
the
BSI
mark
‘°
on
the
body
of
the
fuse.
If
the
plug
contains
a
removable
fuse
cover
you
must
ensure
that
it
is
refitted
when
the
fuse
is
replaced.
If
you
lose
the
fuse
cover
the
plug
must
not
be
used
until
a
replacement
cover
is
obtained.
A
replacement
fuse
cover
can
be
purchased
from your
local
dealer.
CAUTION!
IF
THE
FITTED
MOULDED
PLUG
IS
UNSUITABLE
FOR
THE
SOCKET
OUTLET
IN
YOUR
HOME
THEN
THE
FUSE
SHOULD
BE
REMOVED
AND
THE
PLUG
CUT
OFF
AND
DISPOSED
OF
SAFE-
LY.
THERE
IS
A
DANGER
OF
SEVERE
ELECTRICAL
SHOCK
IF
THE
CUT
OFF
PLUG
IS
INSERTED
INTO
ANY
13-AMPERE
SOCKET.
{f
a
new
plug
is
to
be
fitted
please
observe
the
wiring
code
as
shown
below.
if
in
any
doubt
please
consult
a
qualified
electrician.
IMPORTANT
The
wires
in
this
mains
lead
are
coloured
in
accordance
with
the
follow-
ing
code:
Blue:
Neutral,
Brown:
Live.
As
these
colours
may
not
correspond
with
the
coloured
markings
identifying
the
terminals
in
your
plug,
proceed
as
follows:
The
wire
which
is
coloured
Blue
must
be
connected
to
the
terminal
which
is
marked
with
the
letter
N
or
coloured
Black
or
Blue,
The
wire
which
is
coloured
Brown
must
be
connected
to
the
terminal
which
is
marked
with
the
letter
L
or
coloured
Brown
or
Red.
WARNING:
DO
NOT
CONNECT
EITHER
WIRE
TO
THE
EARTH
TERMINAL
WHICH
IS
MARKED
WITH
THE
LETTER
E,
BY
THE
EARTH
SYMBOL
+
OR
COLOURED
GREEN
OR
GREEN/YEL-
Low.
THIS
PLUG
IS
NOT
WATERPROOF-KEEP
DRY.
Before
use
Remove
the
connector
cover.
How
to
replace
the
fuse
The
location
of
the
fuse
differ
according
to
the
type
of
AC
mains
plug
(figures
A
and
B).
Confirm
the
AC
mains
plug
fitted
and
follow
the
instructions
below.
lilustrations
may
differ
from
actual
AC
mains
plug.
1,
Open
the
fuse
cover
with
a
screwdriver.
Figure
A
Figure
B
2,
Replace
the
fuse
and
close
or
attach
the
fuse
cover.
<a
Figure
A
Fuse
{5
ampere)
Figure
B
Fuse
g
/
(S
ampere)
Before
use
Suggestions
for
safety
Avoid
placing
the
unit
In
areas
of:
©
direct
suntight
@
high
temperature
#
high
humidity
®
excessive
vibration
®
uneven
surfaces
(Place
the
unit
on
a
flat
level
surface.)
Such
conditions
might
damage
the
cabinet
and/or
other
component
parts
and
thereby
shorten
the
unit's
service
life.
Never
place
heavy
items
on
top
of
the
unit
or
the
AC
power
cord.
elt
is
very
dangerous
to
use
an
AC
power
source
of
high
voltage
such
as
for
an
air
conditioner.
A
fire
might
be
caused
by
such
a
connection.
#
A
DC
power
source
can
not
be
used.
Be
sure
to
check
the
power
source
carefully,
especially
if
on
a
ship
or
other
place
where
DC
is
used.
®
Avoid
cuts,
scratches
or
poor
connection
of
the
AC
power
cord,
as
this
may
result
in
fire
or
electric
shock.
Excessive
bending,
pulling
or
slicing
of
the
cord
should
also
be
avoided.
¢
Do
not
pull
on
the
cord
when
you
are
disconnecting
the
power,
as
this
could
cause
an
electric
shock.
Grasp
the
plug
firmly
when
you
disconnect
the
power
supply.
Never
touch
the
plug
with
wet
hands
or
a
serious
electric
shock
could
result.
Ensure
that
no
foreign
objects,
such
as
needles,
coins,
screw-
drivers
etc.,
accidentally
fall
into
the
unit.
Otherwise,
a
serious
electric
shock
or
malfunction
could
occur.
©
Be
extremely
careful
about
spilling
water
or
liquid
on/into
the
unit,
as
a
fire
or
electric
shock
could
occur,
(Disconnect
the
power
plug
and
contact
your
dealer
immediately
if
this
occurs.)
Avoid
spraying
insecticides
onto
the
unit
as
they
contain
flamma-
ble
gases
which
can
be
ignited.
¢
Insecticides,
alcohol,
paint
thinner
and
similar
chemicals
should
never
be
used
to
clean
the
unit
as
they
can
cause
flaking
or
cloudiness
to
the
cabinet
finish.
Never
attempt
to
repair,
disassemble
or
reconstruct
the
unit
if
there
seems
to
be
a
problem.
A
serious
electric
shock
could
result
if
you
ignore
this
precaution-
ary
measure.
eif
a
problem
occurs
during
operation
(the
sound
is
interrupted,
indicators
faii
to
light
up,
smoke
is
detected,
etc.)
contact
your
dealer
or
Authorized
Service
Center
immediately.
@
Disconnect
the
power
supply
if
the
unit
will
not
be
used
for
a
long
time.
Otherwise
the
operation
life
could
be
shortened.
Cautions
on
moving
this unit
Before
moving
the
changer
to
another
focation,
be
sure
to
remove
all
discs
from
the
slots
and
turn
off
the
changer.
Failure
to
do
so
will
expose
the
compact
discs
and
the
changer
to
the
risk
of
severe
damage.
CAUTION
The
changer
mechanism
automatically
locks
when
power
is
turned
off,
to
protect
it
against
damage
in
transport.
Therefore,
always
press
POWER
and
make
sure
“OFF”
appears
on
the
display
before
you
unplug
the
changer.
Other
cautions
Outside
light
or
noise
may
sometimes
cause
the
changer
to
detect
a
disc
when
there
isn't
one.
However,
the
changer
always
|.
correctly
detects
the
disc
when
in
the
play
made
no
matter
what.
Do
not
leave
the
front
panel
open.
Infiltrating
dust
or
other
mat-
ter
may
lead
to
damage
or
malfunctions.
y
9
Receiver
or
amplifier
@®@
faegeneg
Red
(A)
<i
:
To
household
les
ouilet
SS)!
~
R6/LRG,
AA,
UM-3
‘Check
the
(+)
and
(~)
|
sides.
remeron
af
Connections
®
Set
the
changer
on
a
flat,
level
surface.
©
Before
connecting
the
changer
to
your
audio
system,
make
sure
that
the
power
of
the
changer
and
all
other
system
components
is
turned
off.
(For
United
Kingdom
onty)
BE
SURE
TO
READ
THE
CAUTION
FOR
THE
AC
MAINS
LEAD
ON
PAGE
3
BEFORE
THE
FOLLOWING
CONNECTIONS.
Insertion
of
Connector:
Even
when
the
connector
is
per-
fectly
inserted,
depending
on
the
type
of
inlet
used,
the
front
part
of
the
connector
may
jut
out
as
shown
in
the
drawing.
However
there
is
no
problem
using
the
unit.
Approx.
6
mm
Memory
retention
The
information
and
presetting
you
enter
is
retained
in
the
unit's
memory
even
if
the
unit
is
disconnected
from
the
AC
power
source.
The
period
of
retention
for
each
type
of
information
is
as
follows:
®
program
play
(mp
page
10)
and
disc
grouping
play
(m
page
14);
approximately
one
week
@
text
editing
(mp
page
19);
unlimited.
Preparing
the
remote
control
¢Do
not
mix
old
and
new
batteries,
or
batteries
of
different
types
(carbon
and
alkaline,
etc.).
*
Never
subject
batteries
to
excessive
heat
or
flame;
do
not
attempt
to
disassemble
them;
and
be
sure
they
are
not
short-circuited.
@
If
the
remote
control
is
not
to
be
used
for
a
long
period
of
time,
remove
the
batteries
and
store
them
in
a
cool,
dark
place.
@
Do
not
attempt
to
recharge
alkaline
or
carbon
batteries.
©
Do
not
use
rechargeable
type
batteries.
Use
the
remote
control
within
60
degrees
and
within
7
meters
facing
toward
the
unit.
Operation
notes
@
Aim
the
remote
control’s
transmission
window
toward
the
unit’s
sensor.
Avoid
any
obstacles.
©
Be
sure
the
transmission
window
and
the
unit's
sensor
are
free
from
dust.
Excessive
dust
might
affect
performance.
©
Do
not
expose
the
remote
cotrol
signal
sensor
to
direct
suntight
or
to
the
bright
light
of
an
inverter
fluorescent
light.
To
prevent
damage
@
Never
place
heavy
items
on
top
of
the
unit.
#
Do
not
disassemble
or
reconstruct
the
unit.
*
Do
not
spilt
water
or
other
liquids
into
the
unit.
Before
use
FE
:
Main
unit
Disc
slot
for
single
disc
play
Controls
@
Power
“STANDBY
(/ON”
switch
(POWER,
STANDBY
¢b/ON)
Press
to
switch
the
unit
from
on
to
standby
mode
or
vice
versa.
In
standby
mode,
the
unit
is
still
consuming
a
smali
amount
o'
power.
@
Windows
@
“STANDBY”
indicator
(STANDBY)
When
the
unit
is
connected
to
the
AC
mains
supply,
this
indica-
tor
lights
up
in
standby
mode
and
goes
out
when
the
unit
is
turned
on.
@
Display
©
Text
mode
button
(TEXT
MODE)
©
Text
search
buttons
(V,
A,
TEXT
SEARCH)
@
Search/Text
character
select
buttons
(44,
PP
|
SEARCH/CHARACTER)
®
Track
skip/Text
cursor
buttons
(44,
>
|
SKIP/CURSOR)
©
Remote
control
signal
sensor
@
Single
disc
play
button
(SINGLE
>)
@
1D
scan
button
(ID
SCAN)
(@
Random
mode
button
(RANDOM
MODE)
@
Programming
button
(PROGRAM)
@
Disc/Caps
button
(DISC,
CAPS)
@
Numeric
buttons
@
Text
edit
button
(TEXT
EDIT)
@
Disc
enter
button
(DISC
ENTER)
@
Disc
skip
buttons
(DISC
SKIP,
-,
+)
@
Stop
button
(@)
@
Pause
button
(#)
@
Play
button
(>)
|
Disc
slot
section
For
an
explanation
on
how
to
open
the
front
panel,
see
page
7
“How
to
set
discs”.
@
Disc
slots
@
Disc
slot
for
single
disc
play
(SINGLE)
@
Loader
carriage
@Slot
numbers
Remote
conirol
Buttons
(1),
©),
@,
@
to
@,
and
4?
to
@))
have
the
same
functions
as
the
corresponding
buttons
on
the
main
unit.
@
Search
buttons
(<<
SEARCH
>>
)
@®
Track
skip
buttons
(<4
SKIP
>>!)
@
Dise
selector
button
(DISC)
©
Numeric/group
select
buttons
@
Group
button
(GROUP)
@
Group
enter
button
(GROUP
ENTER)
@
Repeat
button
(REPEAT)
@
Direct
programming
button
(DIRECT
PROGRAM)
@
Recall
button
(RECALL)
@
Clear
button
(CLEAR)
@
Time
mode
button
(TIME
MODE)
:
7
;
Disc
slots
f
Label
side
Eject
button
Loader
carriage
Put
two
liners
back-to-back
inside
each
pocket,
as
shown
above.
Adhesive
number
Setting/Removing
discs
Pulting
gently
from
both
ends,
open
the
front
panel.
®Unless
setting
or
removing
discs,
keep
hands
out
of
the
changer
while
open.
You
could
injure
yourself
if
you
get
entangled
in
the
internal
mechanism.
©
Keep
cassette
tapes
away
from
the
magnetic
latches.
Slide
the
loader
carriage
to
the
slot
where
the
disc
is
to
be
inserted.
~
Slot
No.
0
(SINGLE)
is
reserved
for
single
disc
play.
{=
page
9)
Set the
disc
on
the
loader
and
flip
the
loader
upwards.
©
Do
not
use
8
cm
discs
fitted
with
expander
rings.
Expander
rings
could
damage
the
disc
slots.
@Do
not
use
cleaning
discs
or
warped
discs.
These
could
damage
your
changer.
©Do
not
use
discs
with
poorly
attached
labels
or
stickers.
Adhesive
protruding
from
peeled
off
stickers
can
cause
the
changer
to
malfunction.
©
Do
not
put
anything
other
than
discs
in
the
changer.
©
Do
not
use
irregular
shaped
CDs.
Close
the
front
panel
gently.
If
you
leave
the
front
panel
open
while
a
disc
is
in
play
the
changer
will
stop
when
the
disc
is
finished.
1.
Open
the
front
panel.
2.
Slide
the
loader
carriage
to
the
slot
you
want.
3.
Press
the
eject
button
on
the
loader
carriage.
You
can
set
and
remove
discs
while
another
discs
is
playing.
*
Do
not
set
a
disc
in
the
slot
of
the
disc
being
played
(slot
flashes).
The
disc
in
play
is
returned
to
its
slot
when
finished.
If
two
discs
somehow
jam
in
a
slot,
they
could
be
damaged.
When
this
hap-
pens,
the
message
“TAKE
OUT”
will
appear
on
the
display.
Remove
the
disc
that
doesn't
belong
in
the
slot
and
press
the
stop
button.
*
Do
not
open
the
CD
front
panel
and
press
the
eject
button
when
“CHECKING
DISCS”
appears
in
the
display.
The
CD
mechanism
will
be
damaged
if
the
eject
button
is
pressed
at
this
time.
*
Sometimes
the
front
panel
cannot
be
opened
while
a
disc
is
play-
ing.
In
this
case,
wait
until
you
can
open
it.
The
liner
notes
organizer
Your
changer
comes
with
a
notebook-like
binder
(liner
notes
orga-
nizer)
in
which
you
can
keep
your
CD
finers.
There
are
also
num-
bered
stickers
to
indicate
slot
numbers
in
the
binder.
This
is
a
con-
venient
way
to
keep
track
of
what
disc
is
in
what
slot.
Before
use
eee)
Operations
4
4
y
SEARCH:CHARACTER
SKIPCURSOR
.
§
b
;
ig
eee
neal
a
(aon
ae
;
:
f
Oo
vz
DISC
ENTER
Pea
‘4
Pe
‘
Mh
fd
Ise
x
Sequential
play
The
changer
plays
all
the
tracks
on
all
the
dises
in
order
and
stops
automatically
when
the
last
track
on
the
last
disc
finishes
playing.
Before
starting,
load
your
discs.
Press
POWER.
The
unit
will
switch
on.
First,
the
message
CHECKING
DISCS
will
be
displayed
and
then
the
number
of
the
disc
previously
played.
If
it
was
a
CD-
TEXT
disc
then
the
name
of
the
album
will
also
be
displayed
(=
page
17.).
Steps
2
and
3
are
not
necessary
if
you
want
to
begin
play
from
this
disc.
Press
DISC/CAPS.
Press.the
numeric
button(s)
to
select
the
disc,
To
select
a
disc
numbered
over
10:
For
example:
“11”
ij
For
your
reference
You
can
also
select
a
disc
with
DISC
SKIP
(—
or
+)
instead
of
doing
steps
2
and
3.
Press
DISC
ENTER.
Press
>.
The
changer
plays
all
the
loaded
discs,
from
the
selected
disc,
all
the
way
through
to
the
disc
before
it.
Text
information
will
be
displayed
in
place
of
the
time
if
itis
a
CD-TEXT
disc
(mp
page
17.).
To
stop
play
Press
Mf.
The
display
showing
the
number
of
tracks
and
the
total
playing
time
is
cleared
if
the
front
panel
is
opened.
To
temporarily
stop
play
Press
1.
To
search
for
a
position
Press
and
hold
either
<4
(backward)
or
®P
(forward)
during
play.
In
program
or
random
play
modes,
searching
can
only
be
done
on
the
current
track,
To
skip
tracks
Press
either
id
(backward)
or
Pi
(forward)
during
play.
In
pro-
gram
play,
skipping
goes
in
the
programmed
order.
You
cannot
skip
backwards
in
random
mode.
To
skip
discs
Press
either
-
(backward)
or
+
(forward)
either
while
a
disc
is
play-
ing
or
stopped.
This
does
not
work
during
full
disc
random
play
mode
or
program
play.
Direct
play
©
*
You
can
start
play
from
the
disc
and
track
of
your
choice.
Press
DISC/CAPS.
Press
the
numeric
button(s)
to
select
the
disc.
(=
step
3
on
page
8)
Press
DISC
ENTER.
Press
the
numeric
button(s)
to
select
the
track.
Wevubansdeaadndslsckddaassnseunctsadatvensatheteavaapesseneves
seersensoeeh
».
Play
starts
at
the
selected
track
and
continues
through
to
the
T_<':)(2
asc}(3
ver
¢
end
of
that
CD.
rors
Spy
:
;
To
select
a
track
numbered
higher
than
10:
For
example:
“11”
210)-[4
-L1J
Operations
ee
I
Oo
vz
i
ok
?
Single
disc
play
B
DISC
ENTER
dhe
Single
disc
play
is
convenient
when
wanting
to
playback
a
specific
fo
bepge
4
disc
right
away,
without
going
through
the
usual
selection
proce-
&
dure,
for
example,
to
listen
to
a
disc
you
just
bought.
Set
a
disc
in
siot
No.
0.
Press
SINGLE
>.
The
changer
plays
ail
the
tracks
on
the
disc
in
slot
0
and
then
stops
automatically.
Single
disc
play
is
canceled
if
you
skip
dises.
if
Operations
PROGRAM
a
DISC
ENTER
7
PROGRAM
©
""}
seed
080
malar
wot
Program
play
Program
play
fets
you
playback
your
favorite
tracks
in
the
sequence
you
want
to
hear
them.
The
program
can
hold
up
to
32
item,
[In
the
stop
mode]
Press
PROGRAM.
Press
DISC/CAPS.
Press
the
numeric
button(s)
to
select
the
disc(s).
Press
DISC
ENTER.
The
“AL”
indication
shows
that
all
the
tracks
on
the
disc
are
selected.
To
program
disc
numbers
only,
repeat
step
2-4.
Slot
No.
0
can
also
be
programmed.
Press
the
numeric
button(s)
to
select
the
track.
Repeat
this
step
if
you
want
to
enter
tracks
from
the
same
disc.
Repeat
steps
2-5
unti!
you
have
completed
all
entries.
¢
PGM
FULL
is
displayed
if
you
try
to
enter
a
33rd
item.
*
Empty
slots
and
track
numbers
that
don’t
exist
on
the
discs
can
be
programmed
but
clear
when
play
starts.
6
|
Press
DP.
The
changer
plays
the
tracks
in
the
programmed
order
and
then
stops
automatically.
To
enter
additional
selections
during
play,
repeat
steps
2-5.
(Only
available
from
the
remote
control.)
If,
while
listening
to
a
certain
track,
you
decide
that
you
want
to
pro-
gram
that
track
to
your
program,
you
can
with
direct
programming.
[While
the
track
you
want
to
program
is
playing]
Press
DIRECT
PROGRAM.
When
you
make
a
program
as
explained
under
“Program
play”
above,
and
then
perform
this
procedure
without
clearing
the
pro-
gram
first,
the
selected
track
is
added
to
the
end
of
the
program.
To
listen
to
programmed
tracks,
press
PROGRAM
and
check
“PROGRAM”
appears
on
the
display,
then
press
>.
elf
you
press
DIRECT
PROGRAM
and
there
are
already
32
items
in
the
program,
“PGM
FULL"
is
displayed
and
the
track
cannot
be
added.
¢
During
program
piay,
DIRECT
PROGRAM
does
not
respond
to
touch.