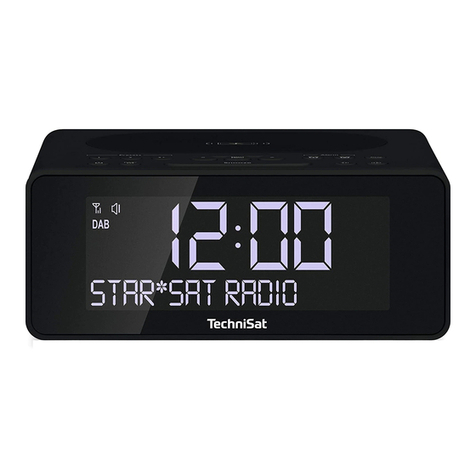
TechniSat DigitRadio 50 User manual

Manual
DAB/DAB+ UKW radio clock
DigitRadio 50

2
Contents
Pictures 4
Safety of the appliance 5
Security 5
Setting up the device 5
Disposal 6
Guidelines and standards 6
Properties of the device 7
Preparing the device for operation 7
Improve antenna reception 7
Usage of headphones 7
Switching the device on/off 8
Initial use 8
Volume adjustment 8
Set display brightness 8
Select DAB-/FM-Operation 8
DAB mode 9
What is DAB? 9
Automatic Search 10
Channel sequence 10
Select radio program 11
Save Favorites 11
Choose Favorites 11
DRC ( data compression) 12
Remove inactive channels 12
Display 13
FM mode 13
Automatic Tuning 13
Manual Tuning 14
Save favorites 14

3
Call Favorites 14
Display 15
Scan Settings 15
Audio Setup 15
Sleep Timer 16
Alarm Clock 16
Configure Alarm clock 16
Snooze current alarm 19
Switch running alarm clock off 19
Time 19
Set time / date manually 19
Automatic update of time-/date 20
Setting the Clock Format 20
Setting the date format 20
Language 21
Factory setting 21
Software version 22
Specifications 22

4
12 3 4
56 7 8
Pictures
1 2 3 4 5 6 7 8 1 2 display mode / menu Volume 3 / Standby 4 Tune / Select 5 6 DC
jack 3.5mm stereo headphone jack 7 Snooze / Dimmer wire antenna 8 4

5
Safety of the appliance
Please read all the safety instructions carefully and save this manual for future refer-
ence. Always follow all warnings and instructions in this manual and on the back of the
device.
Security
The device should be connected only through the AC adapter to a mains voltage of•
230V,50Hzpower.Neverattempttooperatetheunitwithadierentvoltage.
If the power supply of the device is defective or if the device has other damage, it•
should not be put into operation.
Do not touch the AC adapter with wet hands, an electric shock can cause!•
Never allow unsupervised children to use this unit.•
Toavoidrehazardandtheriskofelectricshock,donotexposetheunittorainor•
moisture.
Do not use the appliance near a bathtub, etc. or splash water during operation.•
If you move the unit from a cold to a warm location, moisture may condense inside•
the unit. You should wait in this case, for about an hour before you take operate it
again.
Should any solid object or liquid fall into the unit, unplug the AC adapter from the•
outlet.Havetheunitcheckedbyqualiedpersonnelbeforeyouuseitagain.Other-
wise there is a risk of electric shock.
Never attempt to repair a defective product yourself.•
Donotopenthehousing.Otherwisethereisariskofelectricshock.•
Do not insert any foreign objects inside the machine.•
Thedeviceremainsconnectedtothemainsevenwhenswitchedo(standby).•
UnplugtheACadapterfromthewalloutletwhennotusingtheunitforanextend-•
ed period of time.
Do not touch the terminals on the rear panel with metal objects.•
High volume, especially when using headphones can cause hearing loss.•
Setting up the device
Set the equipment on a solid, secure and horizontal ground•
Ensure good ventilation.•
Place the unit on a soft surfaces like carpets, blankets, or near curtains, draperies.•
The device should not be concealed by curtains, blankets or newspapers•
Do not install the unit near heat sources such as radiators. Avoid direct sunlight•
andplaceswithexcessivedust.
Do not place heavy objects on the device.•
Donotplacetheunitneardevicesthatgeneratestrongmagneticelds.•
6
Disposal
Risk of suocation
RiskofsuocationduetothePackaginganditspartsforchildren.•
Disposal of packaging
The packaging of your device consists entirely of recyclable materials. Please follow•
these sorted according to the “Dual System”.
About current means of disposal contact your dealer or at your community waste•
facility.
Disposal of the appliance
Oldappliancesarenotworthlessrubbish.Byrecyclingvaluablerawmaterialscan•
be recovered. Check with your municipal or local government options for environ-
mentally - friendly disposal of the device.
This appliance is marked according to the Directive 2002/96/EC on Waste Electri-•
calandElectronicEquipment(WEEE).
This product may not, at the end of his life be disposed via the normal household•
waste, but should be taken to a collection point for recycling of electrical and elec-
tronic equipment.
The symbol on the product, user manual or packaging indicates the recycling of•
the product. The materials are recyclable according to their labeling. With the reuse,
recycling or other forms of utilizing old devices, you are making an important contri-
bution to protecting our environment.
Guidelines and standards
This product meets guidelines and standards•
theLowVoltageDirective(2006/95/EC),-
theEMCDirective(2004/108/EC)andthe-
CE Mark Directive. Your unit carries the CE mark and complies with all relevant EU-
standards.

7
Package Contents Please make sure that all items shown below are available :
DAB/DABFMClockRadiowithwireantenna,•
Power Supply, 6V, 500 mA,•
Manual.•
Properties of the device
TheDAB+digitalradioisanewdigitalformat,throughwhichyoucanhearcrystal
clear sound in CD quality.
TheradioreceivesonFMfrequencies87.5-108MHz(analogue)174.9to239.2MHz
andDAB(digital).
Youcansave10stationonfavoriteprogramplacestheDABorFMmode.
Thedisplayhasalight.Thiscanbeactivatedatdierentstages(seedisplayillumina-
tion).
Preparing the device for operation
ConnectthedevicewiththesuppliedACadaptertothemains(230V~/50Hz).
>Tobringpowertothedevice,thecableoftheACadapterneedsrstbeconnected
intotheDC6V(page5#5)ontheunitandthenplugthepoweradapterintothe
socket230V~/50Hzplug.
>After the initial installation of the network connection temporarily “ Welcome to
digital radio “ appears.
Please unplug the AC adapter from the outlet when not in use, prolonged absence or
thunderstorms.
Improve antenna reception
The number and quality of received stations depends on the reception conditions at
theinstallationsite.Withthewiredantennaanexcellentreceptioncanbeachieved.
This antenna must be aligned in full to get the best reception. Use the small loop at
theendofthewiredantennatoxthisintherequiredpositionforabetterreception.
Usage of headphones
Using headphones may damage your hearing!
Do not listen to the radio at high volume through headphones. This can lead to per-
manenthearingdamage.Beforeusingheadphonesadjustthesoundvolumetothe
minimumlevelifyou(notsupplied)toconnectapairofheadphones,theinternal
speaker is muted.
>Use only headphones with 3.5mm stereo plug.
>Plugtheheadphonesintotheheadphonejack(page5#6)ofthedevice.Thesound
reproductionisnowdoneexclusivelythroughtheheadphones.

8
>If you want to listen through the speakers again, unplug the headphones from the
headphone jack of the device.
Switching the device on/off
>Youturnthedeviceturnonorobypressingvolume/standby(3).
Initial use
Whenyouusethedeviceforthersttime,aswellasaftercallingthefactorysetting
andswitchingonagain,thechannelsearchforDABradiostationsstartsautomatically.
During scanning, the display shows the progress of information and the number of
radio stations found.
Aftercompletionofthestationsearch,therststationisdisplayedinalphanumeric
order and played back automatically.
Note :
If no stations are found, no signal could be received. In this case change the location of
the device and / or the position of the wire antenna and run the scan channels again.
Volume adjustment
>Rotatetoadjustvolumeon/standby(3)thedesiredvolume.
- clockwise ->louder
- counterclockwise -> lower
Set display brightness
>Selectbypressingthesnooze/dimmerbutton(7),thedesireddisplaybrightness
(o,dimorbright)from.Duringthestandbyyouadjustthebrightnesswiththeunit
shut and the radio is operating at power on.
Select DAB-/FM-Operation
>Turn on the dial Mode / Menu (2)toswitchbetweenDABmodeandFMmode.Dur-
ing the change from one mode to the newly selected mode will appear below the big
time.

9
AfterchangingonlythesmallDABortheFMlogoisdisplayedrightnexttothetime.
DAB mode
What is DAB?
DABisanewdigitalformat,throughwhichyoucanhearcrystalclearsoundinCD
quality.DABBroadcastahigh-speeddatastreamintheradiochannel.Indierenceto
conventionalanalogradioDABtransmitsmultiplechannelsonthesametransmitter.
Thisiscalledensembleormultiplexes.Anensembleconsistsoftheradiostationas
well as several service components or data services, which are sent individually by the
radio stations. Learn e.g. under www.digitalradio.de or www.digitalradio.ch.
Data compression
Digital radio uses the of advantages of human hearing. The human ear does not
perceive sounds that are below a certain minimum level. Data which are under the
so-calledthresholdinquietcanbelteredout.Thisispossiblebecauseinadigital
data stream for each information unit, the corresponding relative volume is also saved
for other units. In addition in a sound signal, the quieter portions are overlapped by
the louder for a given threshold. All the sound information in a piece of music that are
belowtheso-calledhearingthresholdcanbelteredoutofthesignaltobetransmit-
ted. This leads to a reduction of the transmitted data stream, without any noticeable
dierenceinsoundtothelistener(MUSICAM)process.
Audio Stream
Audiostreamsarecontinuousdataows,MPEG1AudioLayer2framescontainand
thus represent acoustic information in digital radio. Thus, familiar radio programs can
betransferredandlistenatthereceiverside.ForDigitalradiotheMUSICAMformat
isused,whichprovidestwoMPEGcompliantPADs.ThisisreferredtoasPADdata
services.DigitalRadiobringsyounotonlyradiowitforadditionaldata.Theexcellent

10
Digitalradiodoesnotonlyoerperfectsoundqualitybutalsoadditionalinformation.
Thismayrelatetothecurrentprogram(e.g.title,artist)ormightbeindependent(e.g.,
news,weather,tractips).
Automatic Search
Asdescribedintheinitialinstallationtheunitrestartsautomaticallyattherststart
tosearchforDABprograms.Thisautomaticsearchcanalsoberestartedmanually
without having to revert to the factory setting.
>To open the menu, press Mode / Menu (2).
>Turn Tune / Select (4) until you have reached the menu point Full Scan.
>Now press Tune/ Select ( 4) to start the search.
After completion of the station search the last played radio station will be played.
Channel sequence
>OpenthemenubypressingtheMode / Menu (2).
>Turn Tune / Select (4) until you have reached the point Channel sequence.
>Press Tune/ select ( 4).
>Selectthedesiredcriteria(Alphanumeric or ensemble)correspondingtowhichthe
channel list will be sorted.

11
Select radio program
>Rotate Tune / Select ( 4) until the desired radio station is displayed.
>Press Tune/ Select ( 4) to switch to the selected radio station.
Save Favorites
>To open the menu, press Mode / Menu (2).
>Turn Tune / Select (4) until you have reached the point to save Progr.
>Now press Tune/ select ( 4).
>Choose a free or the desired favorite place by turning Tune / Select ( 4)
>ConrmthisbypressingTune / Select ( 4).
After saving a message appears on the display.
Choose Favorites
>To open the menu, press Mode / Menu (2).
>Turn Tune / Select (4) until you have reached the point choose Progr..

12
>Now press Tune / Select ( 4).
>Select the desired favorite place by turning Tune / Select (4).
>Start the playback of favorites by pressing Tune / Select (4).
DRC ( data compression)
The compression rate compensates varying dynamics and the associated volume varia-
tions.
>OpenthemenubypressingtheMode / Menu (2).
>Turn Tune / Select (4) until you have reached the point DRC.
>Press Tune / Select ( 4).
>SelectthedesiredDRCmode(o,loworhigh)-RotateTune / Select (4).
DRC High - High compression
DRC deep - low compression
DRC o - no compression
>ConrmbypressingTune/ Select (4).
Remove inactive channels
You can remove inactive I/ not available stations that appear in your channel list.
>To open the menu, press Mode / Menu (2).
>Turn Tune / Select (4) until you have reached the point inactive stations.

13
>Now press Tune/ Select ( 4).
>Select by rotating Tune / Select (4 ):
Yes, if you remove the transmitter•
No if you want to cancel.•
>ConrmyourselectionbypressingTune/ Select (4).
Display
>OpenthemenubypressingtheMode / Menu (2).
>Turn Tune / Select (4) until you have reached the point display.
>Press Tune/ Select ( 4).
>Select by rotating Tune / Select (4) the display, which will be shown in the bottom
lineandpresstoconrmTune / Select (4).
Signal strength - Signal strength•
Program type - PTY•
Ensemble - Ensemble, to which the radio belongs•
Frequency-Frequencyatwhichtheradiostationistransmitted•
Signal quality - signal quality at•
Codec and bit rate - bit rate and encoding of the data transmission•
Date - the current date•
Scrollingtext-texttransmittedbytheradiostation,suchasTitle/Artist•
FM mode
Automatic Tuning
>Press Tune/ Select ( 4)tosearchautomaticallyforthenextstationandplay.
Please refer to the setting in the point - search settings. Depending on the setting
and reception quality at the site either stations may be skipped or very poorly repro-
duced.Inthiscasetrytoalignthewiredantennadierentlyand/orchangethesearch

14
setting.
Manual Tuning
>Turn Tune / Select (4) until the frequency of the desired station appears.
After a moment, the station will be played and the channel and program information
will appear in the display in case of transmission from the station.
Save favorites
>To open the menu, press Mode / Menu (2).
>Turn Tune / Select (4) you have reached the point to save Progr.
>Now press Tune/ Select ( 4).
>Choose a free or the desired favorite place by turning Tune / Select ( 4).
>ConrmthisbypressingTune / Select ( 4).
After saving a message appears on the display.
Call Favorites
>To open the menu, press Mode / Menu (2).
>Turn Tune / Select (4) until you have reached the point choose programs.
>Now press Tune/ Select ( 4).

15
>Select the desired favorite place by turning Tune / Select (4).
>Start a playback of favorites by pressing Tune / Select (4).
Display
>OpenthemenubypressingtheMode / Menu (2).
>Turn until you have reached the point display Tune / Select (4).
>Press Tune/ Select ( 4).
>Select by rotating Tune / Select (4) the display, which will be shown in the bottom
lineandpressEntertoconrmTune / Select (4).
Ps - Station name•
Radiotext-texttransmittedbytheradiostation,suchasTitle/Artist•
Program type - PTY•
Date - the current date•
Audio info - Stereo/Mono•
Scan Settings
>To open the menu stereo / mono, press Mode / Menu (2).
>Turn Tune / Select (4) until you have reached the point scan setting.
>Now press Tune/ Select ( 4).
>Rotate Tune / Select ( 4) for choosing whether the automatic channel selection
should stop for each channel ( all channels) or only for stations with strong signal
level (Only strong stations).
Note, very poorly reproduced that occur depending on the setting, either transmitter
or skipped that.
Audio Setup
>OpenthemenubypressingtheMode / Menu (2).
>Turn Tune / Select (4) until you have reached the point audio setting.

16
>Now press Tune/ Select ( 4).
>Rotate Tune / Select ( 4)tochoosewhetherthesoundshouldbeplayedexclusively
inmono(monoonly)or,ifavailable,alsoinstereo(StereoAudio).Ifthesoundis
reproduced noisy, so the selection of mono only lead to a reduction of the noise.
Sleep Timer
The sleep timer can set the rest time for shutdown of your device.
>OpenthemenubypressingtheMode / Menu (2).
>Turn Tune / Select (4) until you have reached the point of sleep.
>Now press Tune/ Select ( 4).
>Rotate Tune / Select ( 4)tothedesiredlengthoftime(15,30,45,60or90minutes),
afterwhichthedevicewillturno,ortoadjustthefunctionOFF.
>ConrmyourselectionbypressingTune/ Select (4).
Inactivesleeptimeronthedisplaythetimericonisdisplayednexttothetime.
Alarm Clock
Configure Alarm clock
>Press and hold Mode / Menu (2) for about 3 seconds to go directly to the alarm set-
ting.

17
Then proceed with selecting Alarm Clock.
Alternatively
>OpenthemenubypressingtheMode / Menu (2) button.
>Turn Tune / Select ( 4) until you have reached the point alarm clock.
>Now press Tune/ Select ( 4).
>Choose by rotating Tune / Select ( 4) the alarm clock, you like to enable or disable,
create or edit.
>ConrmbypressingTune/ Select (4).
Duringconguration,thedisplayashesthesymbolofcurrentthealarmclock.
> Turn the alarm by turning Tune / Select (4)OnorOandconrmbypushingTune /
Select (4).
IfyouarewanttoenableordisableanexistingalarmpushTune / Select (4) until the
Memoryconrmationappears.
Afteractivatingthealarm,thehourofthestarttimeashesinthedisplay.
>ByturningTune / Select (4)yousetthetime(hour)atwhichthedeviceshould
switchonandandconrmbypushingTune / Select (4).
>ByrotatingTune / Select (4)yousetthetime(min)atwhichthedeviceshould
switchonandconrmbypushingTune / Select (4).

18
>ByturningTune / Select (4)youselecttheduration(15,30,45,60or90mins)for
whichtheDevicewillbeturnedon,ifnotswitchedofmanuallybeforeandconrmby
pushing Tune / Select (4).
>ByrotatingTune / Select (4) youcannowselectthesource(Buzzer,DABorFM),
whichshouldbereproducedafterswitchingonthedeviceandconrmthisbypushing
Tune / Select (4).
>IfyouhavechosenDABorFMinthepreviousstep,choosenowtheradiostationby
turning Tune / Select (4) which should be played out after switching on the device
andconrmbypushingTune / Select (4).
Note that you can only choose those previously served as favorite or last one played.
> Now select by rotating Tune / Select (4), if the alarm should be activate just once,
daily,onweekdaysorontheweekendandconrmbypushingTune / Select (4).
NotethatincaseofselectingOncethedate(day,month,Year)atwhichthealarm
should start must be chosen additionally by rotating Tune/ Select (4)conrmby
pushing Tune / Select (4) to set.
> Set the volume by turning Tune / Select (4) which should be used for the alarm
clockwithforWake-uptimeandconrmbypushingTune / Select (4).

19
In the display the message that the alarm is stored appears.
Withanactivealarminthedisplayyouseetherespectivealarmiconnexttothetime
displayed.
Snooze current alarm
Does the alarm clock switch on to set selected time, you have the possibility to let it
snoozeforadditionalveminutesbeforeitrestarts.
>PushSnooze/Dimmer(7)toletthealarmclocksnooze.
Thescreennowdisplaysthetimeuntilthedisplayedthenexttimethealarm
Switch running alarm clock off
> Push Volume on / standby (3), to disable a running clock.
Ifyouhaveprogrammedarepeat(Daily,Workingdaysorweekends)alarm,startsthis
itwillstartagaintothecertaintimesetatthenextday.
Time
>OpenthemenubypressingtheMode / Menu (2).
>Turn Tune / Select (4) until you have reached the point of time.
>Now press Tune/ Select ( 4).
Set time / date manually
>Turn Tune / Select (4) until you have reached the point set time / date.
>Now press Tune/ Select ( 4).

20
Thehourswillstarttoash.
> Choose now by turning and pressing Tune / Select (4) the hour and minute of the
current time and the date, month and year of the current date.
The message of saving the time appears in the display.
Automatic update of time-/date
>Turn Tune / Select (4) until you have reached the point Auto Update.
>Now press Tune/ Select ( 4).
>Rotate Tune / Select ( 4) to whether the automatic update of time and date on all
sources(updateall),onlyonDABstations(UpdatefromDAB),onlyonFMstations
(updatefromFM)ornot(NoUpdate)shouldtakeplace,andconrmbypressing
Tune/ Select (4).
Setting the Clock Format
>Rotate Tune / Select (4) up to the point set 12/24 hrs.
>Now press Tune/ Select ( 4).
>Rotate Tune / Select ( 4)betweenthe(set12hours)12andthe24-hourformat(24
hours)tochoosetheoneyouprefer.
>ConrmbypressingTune/ Select (4).
Setting the date format
>Rotate Tune / Select (4) until you have reached the point to set the date format.
Table of contents
Other TechniSat Clock Radio manuals

TechniSat
TechniSat DigiClock Radio User manual

TechniSat
TechniSat DigiClock Radio User manual

TechniSat
TechniSat DIGITRADIO 51 User manual

TechniSat
TechniSat DIGITRADIO 52 CD User manual

TechniSat
TechniSat DIGITRADIO 51 User manual

TechniSat
TechniSat DIGITRADIO 52 User manual

TechniSat
TechniSat TECHNIRADIO 40 User manual

TechniSat
TechniSat CE DIGICLOCK 2 User manual