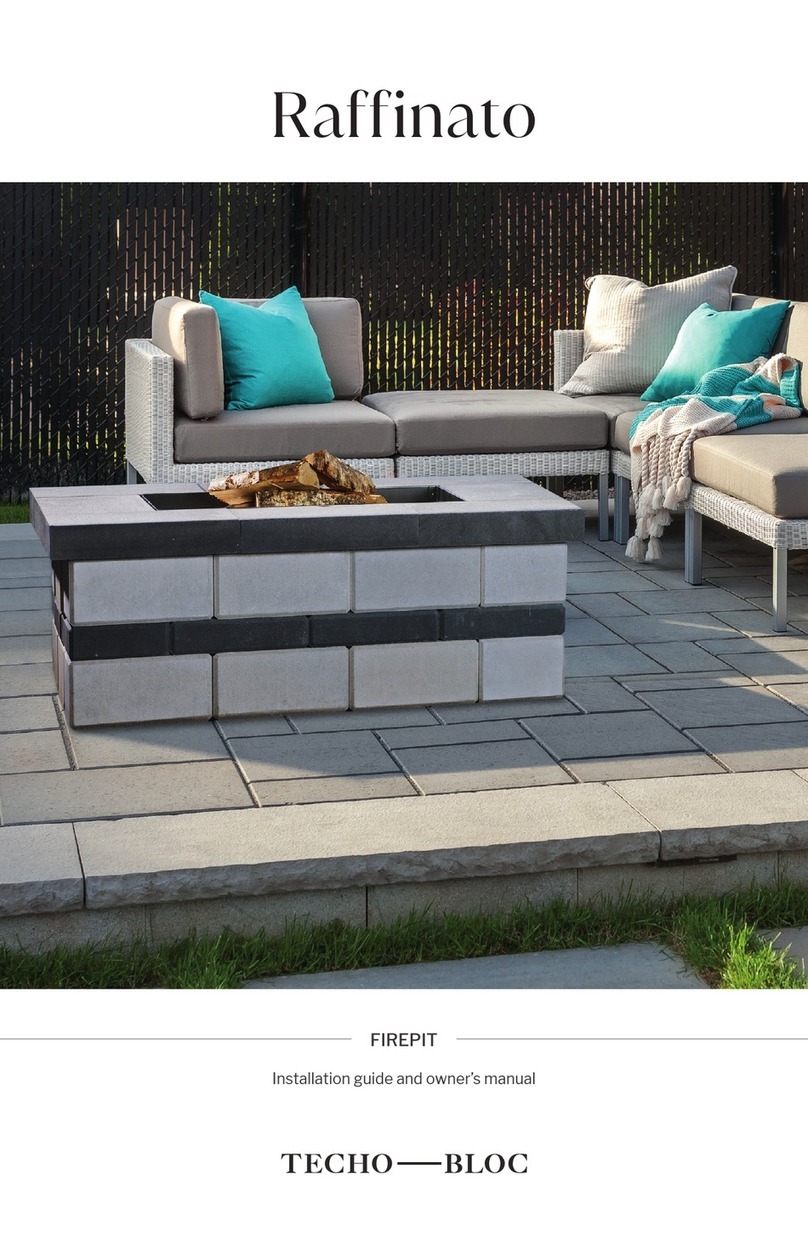
techo-bloc FOYER Brandon Rectangle User manual

Installation guide and owner’s manual
Brandon
Rectangle
FOYER

Table
of contents
Components.......................................................................................3
Overall Dimensions ................................................................................4
Positioning reference per layer ...................................................................5
Foundation preparation
Paver surface or Concrete slab ................................................................5
Compacted gravel base ........................................................................5
Installation of blocks ............................................................................5-6
Operation and maintenance ......................................................................7
Warranty...........................................................................................7
General information
PLEASE SAVE THIS OWNER’S MANUAL FOR FUTURE REFERENCE
Check with your municipality for regulations on the installation and use of outdoor re pits. We also
recommend that you contact your home insurance company and advise them of the acquisition of
your new Techo-Bloc re pit.

3
IMPORTANT
This re pit is for OUTDOOR USE ONLY. NEVER build a re pit for use in a house, warehouse, gazebo,
garage, or any other indoor setting.
Check with your municipality for minimum clearance distances. Make sure that there is nothing directly
above the re pit area that can be a potential re and/or injury hazard (e.g. tree branches, awnings, patio
umbrellas, electrical wires, transformers, cantilevered roof structures, etc.).
When selecting the location of your re pit, make sure that it is located at least 20 feet away from any
structure or building unless indicated otherwise by the gas re pit (if applicable) manufacturer.
WE RECOMMEND THAT GAS FIRE PIT PRODUCTS ARE INSTALLED BY PROFESSIONALS LOCALLY
LICENSED BY THE AUTHORITY HAVING JURISDICTION IN GAS PIPING. REFER TO MANUFACTURER'S
INSTALLATION AND OPERATION INSTRUCTIONS.
Components
A Brandon 90 mm C
(x20)
B. Brandon 90 mm corner
(x30)
C. Rafnato Cap 60 mm 12" x 19"
(Pre-cut) (x8)
D. Steel Insert for Wood re pit.
(sold separately)
E. Gas kit - Natural Gas or Liquid
Propane (sold separately)

4
TOP VIEW
C
C
C
C
C
C
C
C
C
C
D
E
F
G
B
A
57"
(+/-1449 mm)
19"
(+/-483 mm)
19"
(+/-483 mm)
A
A
B B
43"
(+/-1092 mm)
54 1/8"
(+/-1375 mm)
20 1/16"
(+/-510 mm)
H
12"
(+/-305 mm)
12"
(+/-305 mm)
19"
(+/-483 mm)
19"
(+/-483 mm)
9 13/16"
(250 mm)
17 3/4"
(+/-450 mm)
1 1
12"
(+/-305 mm)
ELEVATION A
TOP
SECTION 1-1
NOTE : Secure the blocks using a heat resistant
concrete adhesive. The installer must ensure that
the installation and use of the fire pit comply with
local regulations and code requirements.
Consult our Installation Guide in our website for a detail step by step installation.
www.techo-bloc.com
02/2020
TB-TS-DET_FP_BRANDON_1_EN
BRANDON
FIRE PIT-RECTANGLE (KIT)
QUANTITY OF MATERIALS REQUIRED
- RAFFINATO CAP 60 mm: 8
- BRANDON 90 mm BLOCK C : 20
- BRANDON 90 mm CORNER BLOCK: 30
A. STEEL BOX INSERT
B. CLEAN STONE 3/4'' (20 mm), 4'' (100 mm) THICK
C. RAFFINATO CAP 60 mm (PRE-CUT)
D. BRANDON 90 mm BLOCK
E. TECHO-BLOC PAVERS OR SLABS
F. SETTING BED 1'' (25 mm)
G. COMPACTED GRANULAR BASE 0-3/4'' (0-20 mm)
H. BRANDON 90 mm CORNER BLOCK
ELEVATION B
39 15/16"
(+/-1015 mm)
57"
(+/-1449 mm)
C
RECOMMENDED LOCATION FOR
VENT ACCESSORY (GAS KIT);
RECOMMENDED LOCATION FOR
IGNITION CONTROL (GAS KIT);
PRE-CUT BRANDON 90 mm
BLOCK (GAS KIT)
ELEVATION A
C
C
C
C
C
C
C
C
C
C
D
E
F
G
B
A
57"
(+/-1449 mm)
19"
(+/-483 mm)
19"
(+/-483 mm)
A
A
B B
43"
(+/-1092 mm)
54 1/8"
(+/-1375 mm)
20 1/16"
(+/-510 mm)
H
12"
(+/-305 mm)
12"
(+/-305 mm)
19"
(+/-483 mm)
19"
(+/-483 mm)
9 13/16"
(250 mm)
17 3/4"
(+/-450 mm)
1 1
12"
(+/-305 mm)
ELEVATION A
TOP
SECTION 1-1
NOTE : Secure the blocks using a heat resistant
concrete adhesive. The installer must ensure that
the installation and use of the fire pit comply with
local regulations and code requirements.
Consult our Installation Guide in our website for a detail step by step installation.
www.techo-bloc.com
02/2020
TB-TS-DET_FP_BRANDON_1_EN
BRANDON
FIRE PIT-RECTANGLE (KIT)
QUANTITY OF MATERIALS REQUIRED
- RAFFINATO CAP 60 mm: 8
- BRANDON 90 mm BLOCK C : 20
- BRANDON 90 mm CORNER BLOCK: 30
A. STEEL BOX INSERT
B. CLEAN STONE 3/4'' (20 mm), 4'' (100 mm) THICK
C. RAFFINATO CAP 60 mm (PRE-CUT)
D. BRANDON 90 mm BLOCK
E. TECHO-BLOC PAVERS OR SLABS
F. SETTING BED 1'' (25 mm)
G. COMPACTED GRANULAR BASE 0-3/4'' (0-20 mm)
H. BRANDON 90 mm CORNER BLOCK
ELEVATION B
39 15/16"
(+/-1015 mm)
57"
(+/-1449 mm)
C
RECOMMENDED LOCATION FOR
VENT ACCESSORY (GAS KIT);
RECOMMENDED LOCATION FOR
IGNITION CONTROL (GAS KIT);
PRE-CUT BRANDON 90 mm
BLOCK (GAS KIT)
C
C
C
C
C
C
C
C
C
C
D
E
F
G
B
A
57"
(+/-1449 mm)
19"
(+/-483 mm)
19"
(+/-483 mm)
A
A
B B
43"
(+/-1092 mm)
54 1/8"
(+/-1375 mm)
20 1/16"
(+/-510 mm)
H
12"
(+/-305 mm)
12"
(+/-305 mm)
19"
(+/-483 mm)
19"
(+/-483 mm)
9 13/16"
(250 mm)
17 3/4"
(+/-450 mm)
1 1
12"
(+/-305 mm)
ELEVATION A
TOP
SECTION 1-1
NOTE : Secure the blocks using a heat resistant
concrete adhesive. The installer must ensure that
the installation and use of the fire pit comply with
local regulations and code requirements.
Consult our Installation Guide in our website for a detail step by step installation.
www.techo-bloc.com
02/2020
TB-TS-DET_FP_BRANDON_1_EN
BRANDON
FIRE PIT-RECTANGLE (KIT)
QUANTITY OF MATERIALS REQUIRED
- RAFFINATO CAP 60 mm: 8
- BRANDON 90 mm BLOCK C : 20
- BRANDON 90 mm CORNER BLOCK: 30
A. STEEL BOX INSERT
B. CLEAN STONE 3/4'' (20 mm), 4'' (100 mm) THICK
C. RAFFINATO CAP 60 mm (PRE-CUT)
D. BRANDON 90 mm BLOCK
E. TECHO-BLOC PAVERS OR SLABS
F. SETTING BED 1'' (25 mm)
G. COMPACTED GRANULAR BASE 0-3/4'' (0-20 mm)
H. BRANDON 90 mm CORNER BLOCK
ELEVATION B
39 15/16"
(+/-1015 mm)
57"
(+/-1449 mm)
C
RECOMMENDED LOCATION FOR
VENT ACCESSORY (GAS KIT);
RECOMMENDED LOCATION FOR
IGNITION CONTROL (GAS KIT);
PRE-CUT BRANDON 90 mm
BLOCK (GAS KIT)
Overall Dimensions
Below are the overall dimensions of the re pit (inserts not shown). The height shown is the total height
(including buried portion). Unless installed directly on a paver surface or concrete slab, the re pit should
be buried about 2" or 3" below nished grade.
ELEVATION B

5
Positioning reference per layer
Foundation preparation
PAVER SURFACE OR CONCRETE SLAB
If you are building the re pit on an existing paver surface
or concrete slab, drill through the pavement to provide a
2"diameter drain hole at the lowest point. This will allow the
rainwater to inltrate into the ground. Fill the drain hole with
clean stone. Go to step Installation of blocks.
COMPACTED GRAVEL BASE
Mark out the area of the re pit and excavate to accommodate 6" of well compacted, dense-graded
aggregate base, a 1" layer of sand setting bed, and about 2" or 3" of re pit wall that will be buried below
ground. The aggregate base should extend at least 6"on all the sides of the re pit walls.
It is recommended that a geotextile be laid on the top of the soil surface and up the sides of the
excavated area.
Place and uniformly compact the aggregate base. The aggregate base should be compacted, for best
results, using a vibratory plate compactor, or hand tamper.
Spread 1” concrete sand setting bed and level using two 1” diameter pipes and a straight edge (such as a
2"x4"). Keep in mind that the 1” setting bed will be reduced to 5/8" once the wall blocks will be set into the
sand setting bed with a mallet.
Note: if the re pit is being installed along with a paver installation, the aggregate base course and
setting bed of pavers can be extended to be used for the re pit installation.
FOR A GAS FIRE PIT,
PLAN THE INSTALLATION
(GAS LINE, RISER) ACCORDINGLY
WITH A PROFESSIONAL LOCALLY
LICENSED BY THE AUTHORITY
HAVING JURISDICTION
IN GAS PIPING. REFER TO
MANUFACTURER'S INSTALLATION
AND OPERATION INSTRUCTIONS.

6
Installation of blocks
LAYER 1
Place the rst course of blocks with the narrower side of the block facing towards the center of the re
pit. Verify that no gaps are left at the outer face of the blocks. Once the rst course has been aligned, use
a soft-head mallet to set the blocks into the sand setting bed. Make sure that the blocks are leveled from
front to back, side to side, and from block to block.
LAYER 2 TO 5
Install the next courses as shown on the drawings and using the insert as a template (when possible)
taking into consideration the requirements of the specic insert selected.
Use a heat resistant concrete adhesive to glue every course to the blocks beneath it. All units should be
dry and dust free before applying adhesives. Any alignment adjustments should be done quickly as the
adhesive will set up in a short amount of time and the block will set in place.
LAYER 6
(Cap installation) - make sure the inserts (wood or gas) t before xing the coping units.
Dry lay the cap units and place the insert (wood or gas) in the center of the opening as required. Make
sure that the insert ange (if applicable, e.g. for the wood inserts) rests evenly on top of the cap units and
that the cap units overhang the re pit wall in a uniform way.
Take out the insert (wood or gas) and lift up each cap unit individually leaving the others in place to act as
a guide. Apply adhesive to glue every cap unit to the blocks beneath it. Put the insert back with the ange
resting on top of the cap units (if applicable, e.g. for the wood inserts).
Fill the inside of the pit with 3/4" (20 mm) clean stone to a depth of 4" (100 mm). This will allow the
ltration of any water that may evacuate through the walls of the re pit following a rainstorm.
Do not light a re for at least 48 hours to allow any adhesive to cure properly and for potentially
ammable fumes to dissipate.
Insert options
DATE :
SHEET:
TECHO-BLOC OUTDOOR FEATURES
I.G.
THESE GRAPHICAL REPRESENTATIONS ARE INTENDED
FOR PRELIMINARY DESIGN PURPOSES ONLY AND
SHOULD NOT BE USED FOR CONSTRUCTION.
FINAL DESIGN SHOULD BE APPROVED BY A QUALIFIED,
LICENSED PROFESSIONAL ENGINEER.
TYPICAL DETAILS
DRAWN BY :
SCALE: NONE
FILE:
2022-12-20
1-877-832-4625
www.techo-bloc.com
BRANDON RECTANGULAR FIREPIT
WOOD FIRE PIT
SLEEVE INSERT INSTALLATION USE STEEL INSERT AS TEMPLATE
3/4
DATE :
SHEET:
TECHO-BLOC OUTDOOR FEATURES
I.G.
THESE GRAPHICAL REPRESENTATIONS ARE INTENDED
FOR PRELIMINARY DESIGN PURPOSES ONLY AND
SHOULD NOT BE USED FOR CONSTRUCTION.
FINAL DESIGN SHOULD BE APPROVED BY A QUALIFIED,
LICENSED PROFESSIONAL ENGINEER.
TYPICAL DETAILS
DRAWN BY :
SCALE: NONE
FILE:
2022-12-20
1-877-832-4625
www.techo-bloc.com
BRANDON RECTANGULAR FIREPIT
GAS KIT INSTALLATION
4/4
GAS KIT INSTALLATIONWOOD FIRE PIT SLEEVE INSERT
INSTALLATION
BRANDON PRESCOTT
RAFFINATO VALENCIA
RECOMMENDED LOCATION
FOR SUPPORTS ANGLE
RECOMMENDED LOCATION
FOR SUPPORTS ANGLE
RECOMMENDED LOCATION
FOR SUPPORTS ANGLE
RECOMMENDED LOCATION
FOR SUPPORTS ANGLE
DATE :
SHEET:
TECHO-BLOC OUTDOOR FEATURES
I.G.
THESE GRAPHICAL REPRESENTATIONS ARE INTENDED
FOR PRELIMINARY DESIGN PURPOSES ONLY AND
SHOULD NOT BE USED FOR CONSTRUCTION.
FINAL DESIGN SHOULD BE APPROVED BY A QUALIFIED,
LICENSED PROFESSIONAL ENGINEER.
TYPICAL DETAILS
DRAWN BY :
SCALE: NONE
FILE:
2022-12-19
1-877-832-4625
www.techo-bloc.com

7
LAYER 1, 3 & 5
LAYER 2 & 4
DATE :
SHEET:
TECHO-BLOC OUTDOOR FEATURES
I.G.
THESE GRAPHICAL REPRESENTATIONS ARE INTENDED
FOR PRELIMINARY DESIGN PURPOSES ONLY AND
SHOULD NOT BE USED FOR CONSTRUCTION.
FINAL DESIGN SHOULD BE APPROVED BY A QUALIFIED,
LICENSED PROFESSIONAL ENGINEER.
TYPICAL DETAILS
DRAWN BY :
SCALE: NONE
FILE:
2022-12-20
1-877-832-4625
www.techo-bloc.com
BRANDON RECTANGULAR FIREPIT
2ST, 4TH LAYER
LAYER 2 & 4
BRANDON 90 mm CORNER
BRANDON 90 mm C
BRANDON 90 mm CORNER
2/4
DATE :
SHEET:
TECHO-BLOC OUTDOOR FEATURES
I.G.
THESE GRAPHICAL REPRESENTATIONS ARE INTENDED
FOR PRELIMINARY DESIGN PURPOSES ONLY AND
SHOULD NOT BE USED FOR CONSTRUCTION.
FINAL DESIGN SHOULD BE APPROVED BY A QUALIFIED,
LICENSED PROFESSIONAL ENGINEER.
TYPICAL DETAILS
DRAWN BY :
SCALE: NONE
FILE:
2022-12-20
1-877-832-4625
www.techo-bloc.com
BRANDON RECTANGULAR FIREPIT
1ST, 3RD & 5TH LAYER
BRANDON 90 mm CORNER
RECOMMENDED LOCATION ON LAYER 3
FOR VENT ACCESSORY (GAS KIT)
LAYER 1, 3 & 5
RECOMMENDED LOCATION ON LAYER 3
FOR IGNITION CONTROL (GAS KIT)
RECOMMENDED LOCATION ON LAYER 3
FOR VENT ACCESSORY (GAS KIT)
BRANDON 90 mm C
1/4
Operation
and maintenance
› The repit is not designed for large res. Fire should be contained at least 6” away from the repit wall
blocks. Overheating could lead to heat damage to the repit components. Use only a small amount of dry
and clean hardwood for burning.
› Allow the re to burn out on its own unless it is an emergency case. Extinguishing an active re with
water or any other liquid may cause the metal components of the accessory kit to warp and will
encourage the formation of rust.
FOR A GAS FIRE PIT,
CONSULT ALSO THE MANUFACTURER
OPERATION AND MAINTENANCE MANUAL.

8
› Do not burn charcoals, leaves, trash, paper, cardboard, and softwoods such as pine, cedar and plywood.
› Do not use lighter uid, gasoline, or other re accelerants to start or maintain res.
› Never touch the steel insert and ange while a re is lit. The steel insert and ange will become
extremely hot and burn the skin on contact. Wear re resistant gloves when maintaining the re.
› The re pit area must always be clear and free from any combustible materials such as gasoline, propane
tanks and/or any other ammable vapors and/or liquids.
› Always have a re extinguisher or garden hose nearby for any potential emergency.
› Avoid using the re pit in windy conditions.
› At each use, before starting a re, remove all accumulation of ashes, wood and debris from the re bowl
and inspect the overall re pit and accessories to ensure that it is in safe operational condition.
› Children and pets should NEVER be left unsupervised when the re pit is in use. We highly recommend
that good re safety measures are practiced and that you and your guests maintain a minimum distance
of 3 feet away from the re pit to avoid potential injury.
› Do not sit, lean on or stand on the re pit wall.
› Ensure that the re pit area is always clear of toys, clothing, etc.
› Do not use the re pit for cooking purposes unless otherwise permitted by the manufacturer.
› Never leave an active re unattended.
› It is recommended to replace the clean stone at the bottom of the re pit annually to maintain proper
water ltration.

9
*HPC / TECHO-BLOC PARTNERSHIP WARRANTY
OUTDOOR FIRE PIT COMPONENTS RESIDENTIAL COMMERCIAL
Fire Pit Stainless Steel Burner Lifetime Lifetime
Outdoor Fireplace Burner Lifetime Lifetime
Electronic Ignition Components 3 Years 1 Year
Pilot Assemblies 2 Years 1 Year
Stainless Steel Components 5 Years 1 Year
Flex Lines 5 Years 1 Year
Regulators 3 Years 1 Year
Outdoor Log Sets 3 Years 3 Years
Fire Pit Cover 3 Years 1 Year
*Warranty is for parts only and does not include any labor charges that may be incurred.
Available in wood, natural gas & liquid propane burning options.
Visit techo-bloc.com to discover more.
Rafnato 14" × 28" caps included. Metal re pit insert sold separately.
The installation of a sleeve or accessory kit will prevent damages to your re pit.

TOLL FREE:
1.877.832.4625
WWW.TECHO-BLOC.COM
CINCINNATI
9950 Farr CT, Cincinnati, OH 45246
DETROIT
2210 Scott Lake Rd., Waterford, MI 48328
ILLINOIS
8201 31st St. W, Rock Island, IL 61201
ILLINOIS
24312 W. Riverside Dr., Channahon, IL 60410
INDIANA
2397 County Rd 27, Waterloo, IN 46793
MARYLAND
6710 Binder Ln., Elkridge, MD 21075
MASSACHUSETTS
70 East Brookeld Rd., North Brookeld, MA 01535
MINNESOTA
4372 170th St. W, Farmington, MN 55024
NASHVILLE
160 Center Point Rd. S, Hendersonville, TN 37077
NEW YORK
55-65 South 4th Street., Bay Shore, NY 11706
NORTH CAROLINA
5135 Surrett Dr., Archdale, NC 27263
OHIO
97 Industrial St., Rittman, OH 44270
PENNSYLVANIA
852 W. Pennsylvania Ave., Pen Argyl, PA 18072
PENNSYLVANIA
23 Quarry Rd., Douglassville, PA 19518
MONTREAL
5255 Albert-Millichamp Street, Saint-Hubert,
QC J3Y 8Z8
CHAMBLY
7800 Samuel-Hatt Street, Chambly, QC J3L 6W4
OTTAWA
581 Somme Street, Gloucester, ON K1G 6Y7
TORONTO
10 Freshway Dr., Vaughan, ON L4K 1S3
TORONTO
2852 Cedar Creek Road, Ayr, ON N0B 1E0
USA
CANADA
CONTACT US
PROUD MEMBER OF
Table of contents
Other techo-bloc Outdoor Fireplace manuals
Popular Outdoor Fireplace manuals by other brands

Better Homes and Gardens
Better Homes and Gardens BH16-093-999-02 instruction manual

England's Stove Works
England's Stove Works TRANQUILITY 12-TTFP owner's manual

GRAND EFFECTS
GRAND EFFECTS 48" Essex Operating and Maintenance Intructions

Astria
Astria CAT36P2 Installation and operation instructions
Mirpol
Mirpol BBQ Line MIR-FP58/6 Assembly instructions
PEAKTOP
PEAKTOP HF42191AA owner's manual


