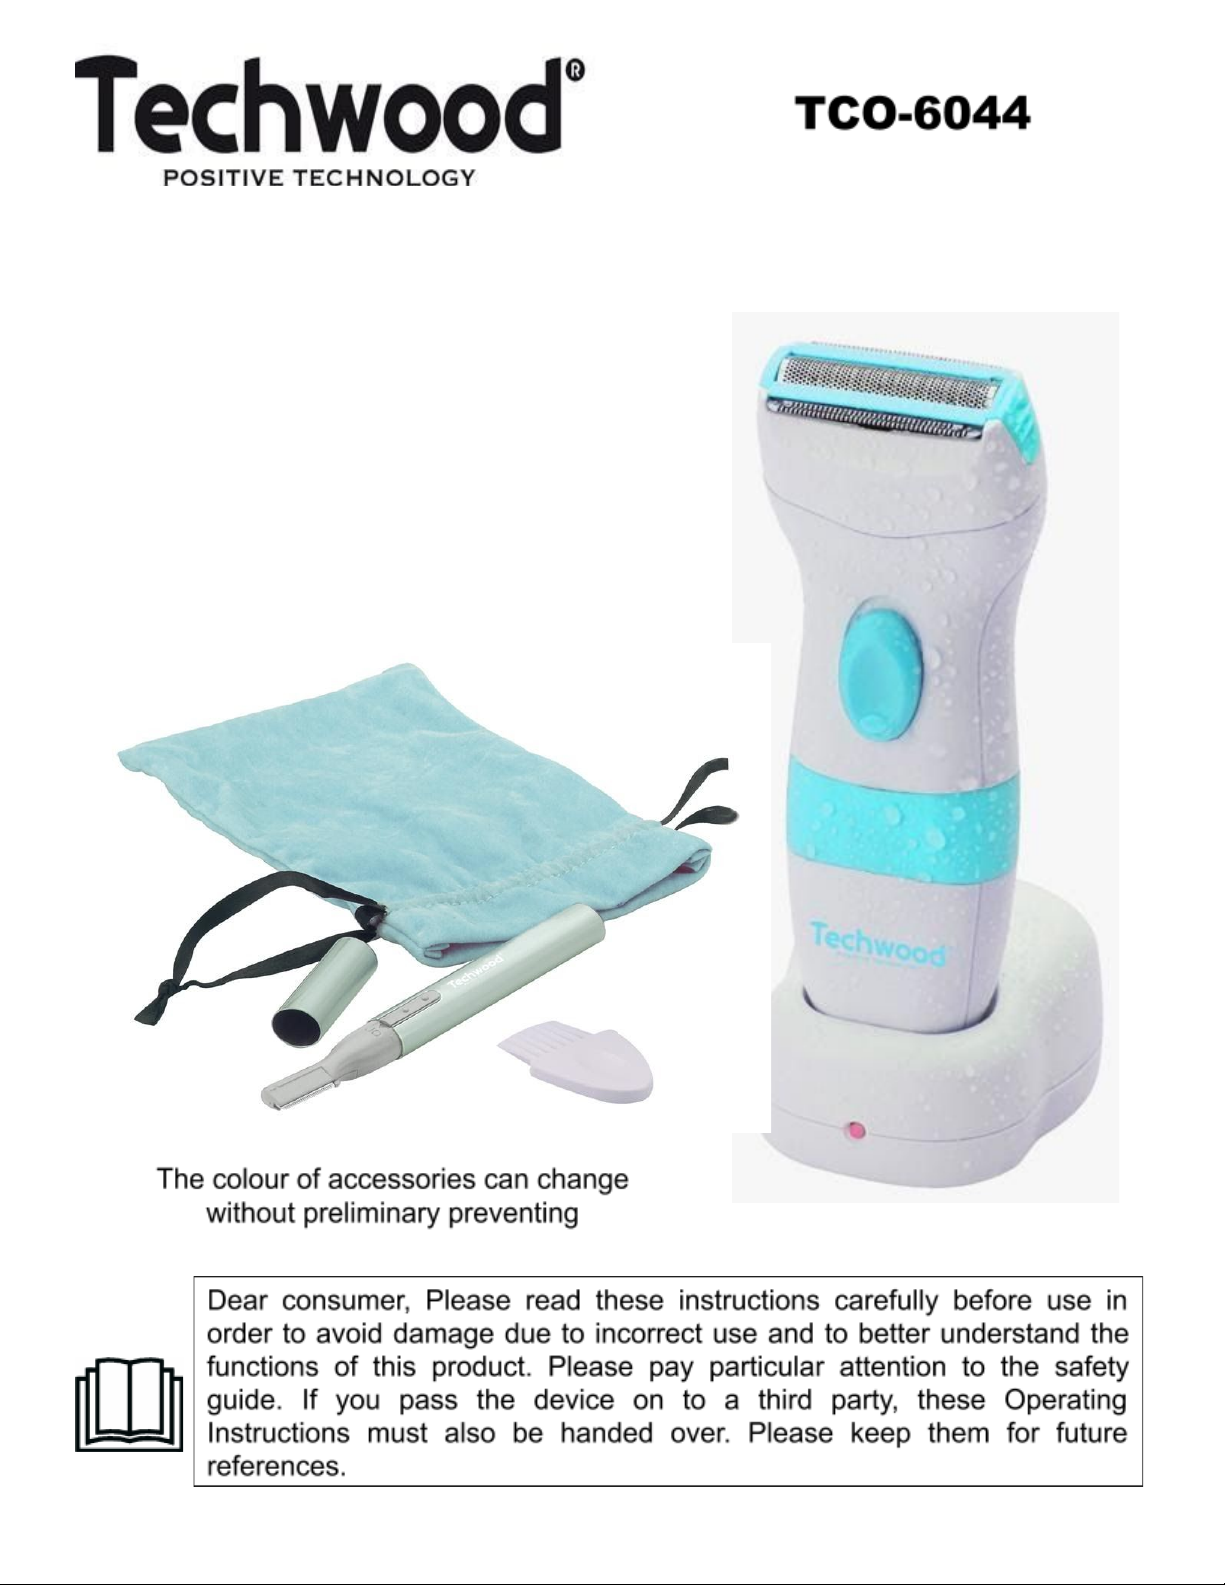
TECHWOOD TCO-6044 User manual

“WET & DRY” RECHARGEABLE RAZOR
+ small Trimmer + Pouch
INSTRUCTION MANUAL
1

IMPORTANT SAFEGUARDS
❑Please read these instructions carefully before use.
❑Keep present instructions for future references.
❑Check that your mains voltage corresponds to that stated on
the appliance.
❑Only use the appliance for domestic purposes and household
or similar applications such as:
-staff kitchen areas, in shops, offices and other working
environments;
-by clients in hotels, motels and other residential type
environments;
- Environment type like : • Farm Houses • Bed and Breakfast.
❑Only use the appliance in the way indicated in these
instructions.
❑Never use this unit near bathtub, shower, wash-hand basins or
other containers with water.
❑Never use this apparatus near water projections.
❑Never use this apparatus with the wet hands.
❑If, unfortunately the apparatus is wet, immediately withdraw the
cord of the socket-outlet.
❑Inform potential users of these instructions.
❑Never leave the appliance unsupervised when in use.
❑The appliance must be used only for its intended purpose. No
responsibility can be taken for any possible damage caused by
incorrect use or improper handling.
❑Children and persons with disabilities are not always aware of
the danger posed by the use of appliances.
❑This appliance can be used by children aged from 8 years and
above and persons with reduced physical, sensory or mental
capabilities or lack of experience and knowledge if they have
2

been given supervision or instruction concerning use of the
appliance in a safe way and understand the hazards involved.
Children shall not play with the appliance.
❑Cleaning and user maintenance shall not be made by children
without supervision.
❑This device is not a toy , do not leave small children or people
with disabilities to play with.
❑In order to ensure your children‘s safety, please keep all
packaging (plastic bags, boxes, polystyrene etc.) out of their
reach.
❑Caution ! Do not allow small children to play with the foil :
THERE IS A DANGER OF SUFFOCATION !
❑From time to time check the cord for damages. Never use the
appliance if cord or appliance shows any signs of damage.
❑Never immerse the appliance in water or any other liquid for
any reason whatsoever.
❑Never place it into the dishwasher.
❑Never use the appliance near hot surfaces.
❑Disconnect the power source cable before any operation of
cleaning of maintenance and accessories assembly.
❑Never use the appliance outside and always place it in a dry
environment.
❑Never use accessories, which are not recommended by the
producer. They could constitute a danger to the user and risk
to damage the appliance.
❑Never use any other connector than the one provided.
❑Never move the appliance by pulling the cord. Make sure the
cord cannot get caught in any way.
❑Never wind the cord around the appliance and do not bend it
❑Ensure that the power cord does not come into contact with hot
parts of this unit.
3

❑Make sure the appliance has cooled down before cleaning and
storing it.
❑The temperature of accessible surfaces may be very high when
the appliance is operating. Never touch these parts, of
apparatus, to avoid burning itself.
❑Make sure the appliance never comes into contact with
flammable materials, such as curtains, cloth, etc...& the power
cord and plug do not come in contact with water.
❑Before cleaning, always unplug the appliance from the power
supply and let it cool down.
❑This appliance is not intended to be operated by means of an
external timer or separate remote-control system.
❑Always place the unit on a flat surface. Ensure, also, not to
cover the device and not to put anything on it.
❑Always remove the plug from the wall socket when the
appliance is not in use.
❑When using an extension lead always make sure that the entire
cable is unwound from the reel. Use solely CE approved
extension leads. Input power must be at least 16A, 250V,
3000W.
❑Incorrect operation and improper use can damage the appliance
and cause injury to the user.
❑This device, designed for home use, complies with standards
relating to this type of product.
❑This appliance is only intended for household use.
❑Regarding the instructions for cleaning, thanks to refer to the
below paragraph of the manual.
4

USE
● Unroll the power cord completely for charging.
● Check that the tension in force in the country where you are corresponds to that
indicated on the apparatus.
● Disconnect the power source cable before any operation of cleaning of
maintenance and accessories assembly.
● Stand the appliance on a table or flat surface.
● Never modify the appliance in anyway.
How to use
Dry ? Under the shower ? In the tub ?
With your new Lady Shave you cue remove unwanted hair quickly, simply
andcomfortably, at home or "on the move".
According to your own preference, you can use the appliance either "dry" orwhile
taking a shower !
Many users like to lather the skin with shampoo, soap or shaving foam before
use.When ready, you can simply rinse the appliance, clean under the shower or tap.
Charging:fig.1
The appliance is designed for cordless use only and is
charged via the charge unit.
Before using the appliance for the first time, or if it has not
been used for aconsiderable time, it should be charged for at
least 8 h.
A full charge is sufficient 30 minutes, if normally used.
• The charge unit can be placed on a horizontal surface. Select
a spot close tou well socket where the charge unit cannot fall
into water.
A shaver outlet is suitablefor this appliance.
• Keep the charge unit connected to mains power and always replace the
applianceinto it after use to recharge.
Note: Always switch off before placing the appliance into thecharge unit,
The built-in rechargeable battery contains substances which maypollute the
environment. Don’t throw it away anywhere.
When discarding your appliance in due course, please ensure that the
built-inrechargeable battery is separated from the normal household refuse and that
it isdisposed of an officially assigned place.
5

• How to use : fig. 2-5
• Switch on fig.2.
• Place the trimmers and the shaving foil gently on the skin.
Move the lady shave slowly and with light pressure over the skin.
For best results direct the shaver head against the direction of the hair growth.
• After use: fig. 6-8.
• Cleaning: fig. 9-14.
6

- Detach the hand-held part from the supply cord before cleaning it under the shower
or in the water.
- Ensure that the appliance is switched off.
- Avoid damaging the shaver toil : do not apply any pressure.
- Do not use alcohol, acetone, gasoline, abrasives, etc. for cleaning the plastic parts.
- Clean the appliance after each use. Do not use water warmer than
showertemperature (approx. 35 C/95' F).
• If you wish, you can alternatively dry clean the hair chamber and shaving head
bygently shaking appliance and shaving head, and brushing out the hairs.
• Remove the mains plug from the wall socket before cleaning the charge unit.
• Youcan use a damp cloth for cleaning. Ensure that your hand is dry when inserting
themains plug into the wall socket again.
Maintenance:fig.15
• Twice a year, spread a drop of light machine oil
(sewing machine oil) on the shavertoil and the two
trimmers.
• Replacement: fig. 16-20
• It you use the appliance twice a week or more, it is admissible to replace the
shavingtoil and coffer unit every one or two years.
• A worn-out or damaged shaving toil can be replaced only with the original
shavingtoil unit type.
CLEANING AND MAINTENANCE
Before cleaning switch off the appliance, Always disconnect the apparatus and to let
it cool before cleaning.
Clean the outside of the apparatus with a sponge or slightly wet linen.
Do not use abrasive cleaners, gritting, or metal brush or another cutting object.
7

8

STORAGE
-Ensure the unit is completely cool and dry.
-Do not wrap the cord around the appliance, as this will cause damage.
-Keep the appliance in a cool, dry place.
GUARANTEE
Before being delivered, all our products are subjected to a rigorous control.
This apparatus is guaranteed 12 months starting from the date of purchase.
The documents in proof of guarantee are :
• The invoice and
• The filled and stamped warrantee plate (located on side or bottom of the gift box).
Without these documents in proof, no free replacement, nor no free repair, can be
carried out.
During the warranty period, we deal for free, the defects of the apparatus or the
accessories, rising from a defect of materials or manufacture by repair or,
replacement. The services within the framework of the guarantee do not involve any
extension of the warranty period and does not give right to a new guarantee !
In the event of recourse to the guarantee, bring back the complete apparatus to
your retailer, in its original packing, accompanied by the proofs of purchase.
The breakage of parts out of glass or plastic is, in all the cases, not warranted.
Defects on the accessories or the wearing parts (for example: coals of engines,
hooks, drive belts, remote control of replacement, teeth brushes of replacement,
webs etc) as well as cleaning, maintenance or it replacement of wearing parts are
not guaranteed and are thus to pay !
In the event of foreign intervention, the guarantee becomes null and void.
After flow of the warranty period, repairs can be carried out, against payment, by a
specialized trade or a repair service.
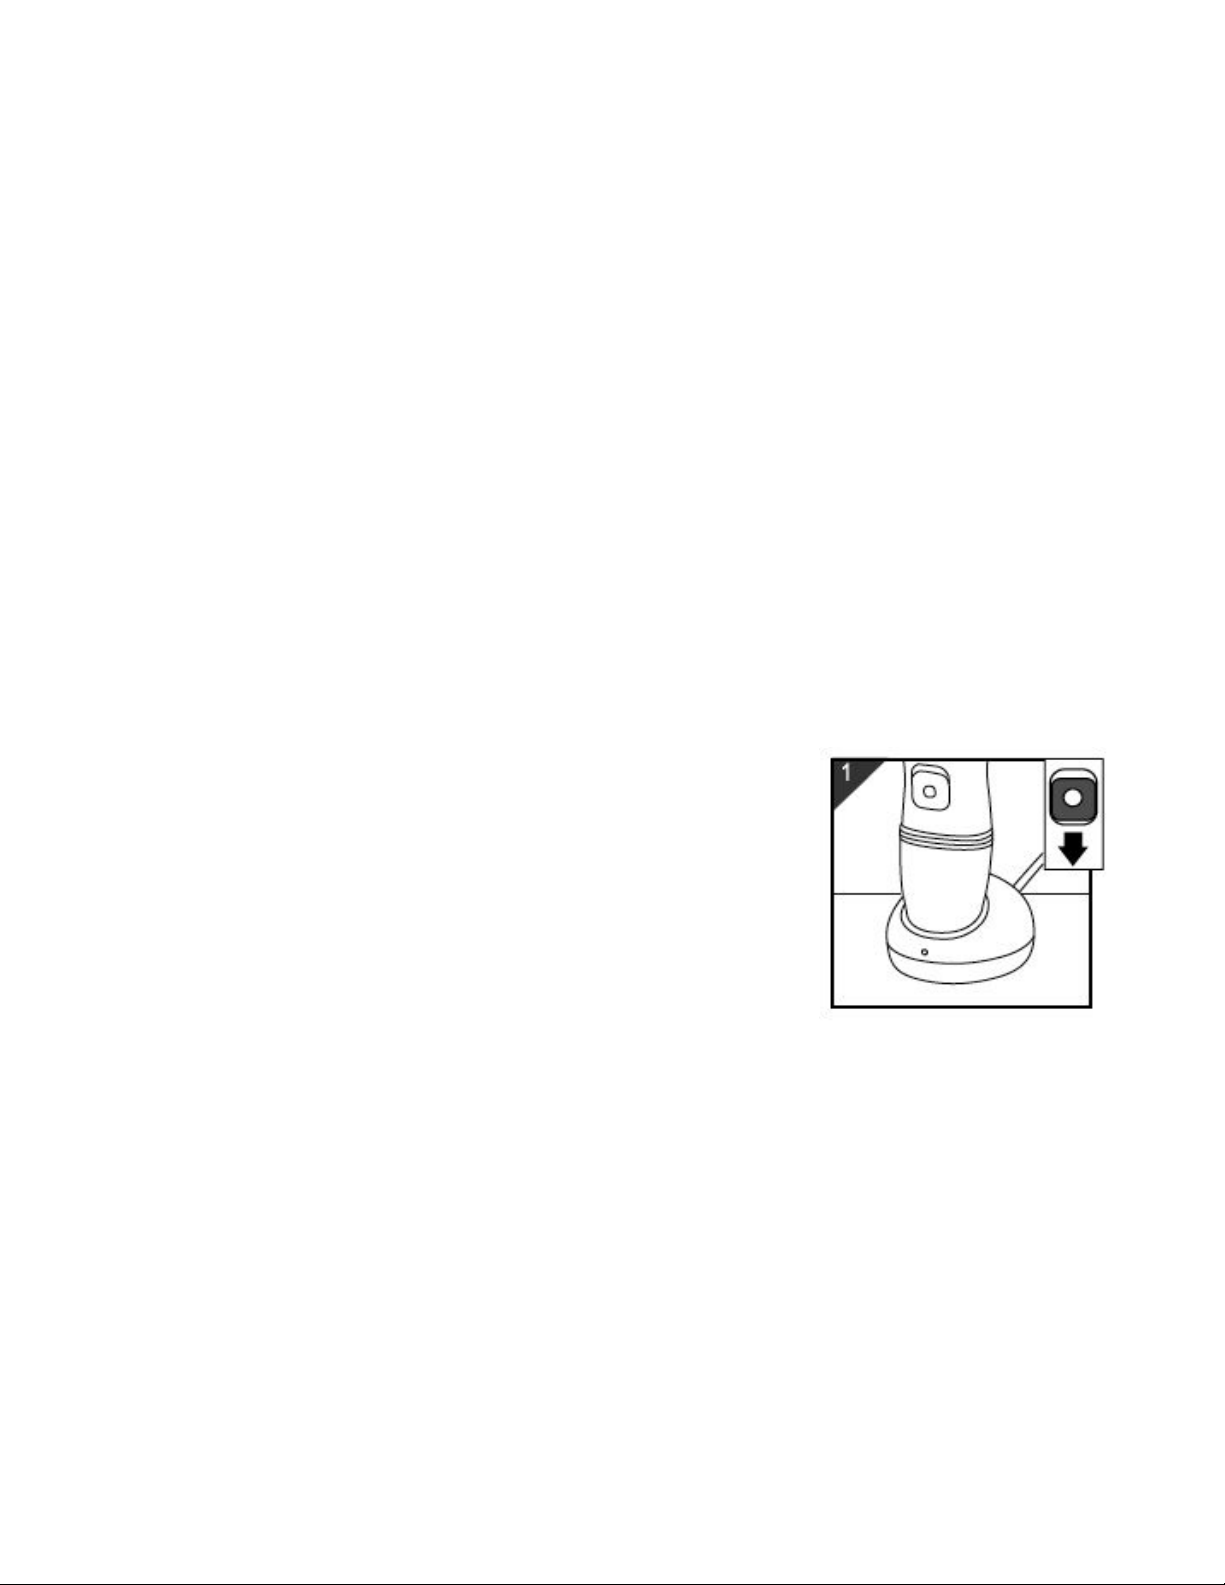
Troubleshooting
Reduced shaving performance
Cause 1: The shaving heed in dirty.
a remove the foil b remove the cutter unit c rinse both under the tap d Make
sure that no hairs are stuck under the trimmer !
Cause 2: Shaving heed works rather slowly (shaver sounds "weak")
a charge the shaver b clean the shaving heed c lubricate the shaving head
with some drupe of sewing machine oil More skin irritation than usual d Replace the
shaving foil, as it is damaged or worn.
9

10

Appliance doesn't work
Cause 1: The rechargeable battery in empty. a Recharge the buttery
Appliance doesn't charge
Cause 1: Charging unit in not plugged in
Cause 2: Appliance has not been placed properly in the charging unit.
a Put the appliance in the charging unit in such a way that you hear a click (to
indicatethat the shaver has been placed properly in the charging unit) and the red
pilot lightgoes on (to indicate that the appliance in charging)
Cause 3: The red pilot light in on, but the appliance in still not charging.
a Switch the appliance off by setting the slide to off and charge theappliance.
SPECIFICATIONS
AC ADAPTER
INPUT 230V~50Hz
OUTPUT 2,4V DC / 60mA
NORM Class II
LADY SHAVER
POWER SUPPLY 1 rechargeable Battery AA
1,2V DC / 600mA
NORM Class III
OPERATING 10H CHARGE
USING +/- 30 Minutes
The characteristics can change without preliminary preventing
For additional protection, the installation of a residual current device with a rated
residual operating current not exceeding 30 mA is advisable in the electrical circuit
supplying the bathroom. Ask your installer for advice.
CAUTION: In order to minimize the risks of electric shock, In the event of
breakdown, not to open the case but to call upon a qualified technician for
repairs.
This apparatus satisfied EC directives, it was controlled according to all the
European current directives, like: electromagnetic compatibility (EMC) and low
tension (LVD).
11

This apparatus was designed and manufactured in respect of the last safety
regulations and technical specifications.
ENVIRONMENTAL PROTECTION
(Destruction of Ni-MH or Ni-Cd batteries)
The appliance must be disconnected from the main power, when the battery is
removed.
To remove the battery:
• Disassemble the two parts of the unit and remove the battery.
- THE BATTERY MUST BE REMOVED BEFORE THE UNIT IS GIVEN TO REBUS.
- THE BATTERY MUST BE ELIMINATED IN A SAFE WAY.
DO NOT THROW IN A TRASH CAN, BUT GIVE IN CENTRE OF WASTE.
12

GENERAL INFORMATION
The symbol "OPEN BOOK" means a recommendation to read important
things contained in the record.
The symbol "FLASH" is intended to alert the user to the presence of
current within the device. Do not open it, it could constitute a risk of electric
shock.
The symbol "QUESTION MARK" warns the user that important operating
and maintenance are contained in the record.
The symbol "TUB / SHOWER" crossed out means to never use the unit in
a bathroom, a shower in or near water spray. (IP20 Minimum distance 3M.)
The symbol "BIN" crossed out, abbreviation WEEE (Waste of Electrical
and Electronic Equipment) means that at the end of life, it should not be
discarded with household waste, but filed to the sorting of the locality.
Waste recovery can help preserve our environment.
The symbol "STEAM" warns the user that steam can escape from the unit
and to take all necessary precautions. (Risk of burns)
The symbol "CE" is the guarantee of compliance with harmonized
European standards, voluntary, reflecting the essential requirements into
technical specifications. These standards are not mandatory but are
guarantees of compliance with essential requirements.
The symbol "RECYCLING" raise consumer awareness on the need to
recycle its waste. Recycling is a process by which materials that compose
a product in end of life (industrial or household waste) are reused in whole
or part and will be returned to the initial production cycle.
The symbol "GLASS / FORK" means that the device is compatible and can
come into contact with foodstuffs.
The symbol ROHS (Restriction of use of some Hazardous Substances) on
the Environmental Protection, certifies that for each of the five hazardous
substances • Lead • Mercury • (hexavalent) chromium • products for
protection against flames PBB and PBDE, the peak concentration is equal
13

to or less than 0.1% of the weight of homogeneous material, and 0.01% for
the 6th • cadmium.
The symbol "HOT WALL" warns the user that the walls of the unit can
become very hot, and to take precautions as required.
The symbol "DOUBLE SQUARE" means a double insulated. A basic
insulation and supplementary insulation. This device requires no
connection to the mass of a protective conductor grounded. The
materials are said : double insulation class II.
The symbol "MAN" means that the device can be used on the skin or
human orifices. (Example: Thermometer).
The symbol "TRIMAN" indicates that the consumer is invited to
dispose the product as part of a separate collection (eg recycling bin,
waste, voluntary intake point).
For more information : http://www.quefairedemesdechets.fr
Imported by Sotech International
" LE PERIPOLE " N°C111 à 115
33, Avenue du Marechal de Lattre de Tassigny
94120 Fontenay sous bois - France
14

FACIAL TRIMMER
IDEAL FOR Bikini area Neck Eyebrows Feet Chin hair Toes Hands KneesFingers
Ankles
Not meant to be used as a shaver.
When cleaning heads make sure switch is on OFF position.
Be careful not to over trim.
Use caution when near eyes. Do not use on eyelashes.
For external use only.
PARTS
1 CLEANING BRUSH
2 MAIN UNIT
3 HEAD CAP
4 BATTERY COVER
5 EYEBROWS PROTECTION
BATTERY
Use 1 x AAA" or LR3 battery. (Not provided)
I. Remove cap
Note : Make sure unitis in the OFF position
2 Remove the aluminium casing
3 Insert the battery (respect negative & positive position)
4 Once battery is in place, replacealuminium casing
WARNING: Unit will not workif battery is inserted incorrectly.
Using unit with main head
I. Turn unit on by pushing the ON/OFF switch upward in the direction of arrow
2. Gently, Place the head against the hair to be removed.
3. Move in an upward direction against the growth ofhair to be removed.
Note: Use for all designated areasof the body
Attaching Eyebrow Trimming Guard
Note: Try long side first to determineappropriate side of attachment. If the long side
is not performing then try the short side. We recommend always testing the long side
first.
I. Make sure the unit is in the OFF position.
2. Race fingers on the neck of the main unit
3. Attach guard over main bead, push downand snap into place.
15

Note: Use larger opening when attaching guard.
Using The Eyebrow Trimmer Guard:
I. Attach guard to unit as shown using appropriate side.
2. Turn unit ON.
3. Comb, following the natural shape of the eyebrowstarting at the widest end to the
thinnest.
Important For thick and bushy eyebrows you mayhave a to repeat step 3 until
desired result is achieved.
CARE AND MAINTENANCE
To Clean Eyebrow Trimming Guard
I. Remove guard end use cleaning brush to remove hairsfrom the teeth.
2. Wash with soapy water if necessary
3. Make sure guard is completely dry before attaching tomain unit
To Clean Main Head Attachment
Use cleaning brush provided to remove any hairs
To Remove Hairs From Inside of Main Unit Head
I. Make sure unit is in the OFF position.
2. Turn to the backside of the unit (This side is the opposite side of thepower switch).
3. Push lock down to unlock main head
Note: Main headshould pop off from main unit.
4. Pull head down and remove from main unit
5. Remove hairs with cleaning brush
6. Replace head by inserting theprotruding edge into the opening on the top of the
head
Note: Do not force head into place.
7. Snap into place and secure by pushing the lock button up until it clicks and
lockshead in place.
Power supply : 1 x 1,5V LR3 or AAA battery (not provided)
16
This manual suits for next models
1
Table of contents
Other TECHWOOD Electric Shaver manuals