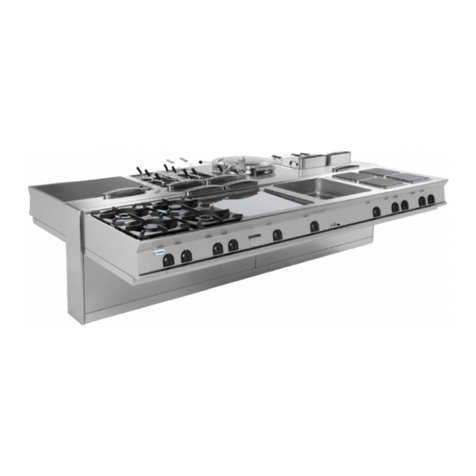
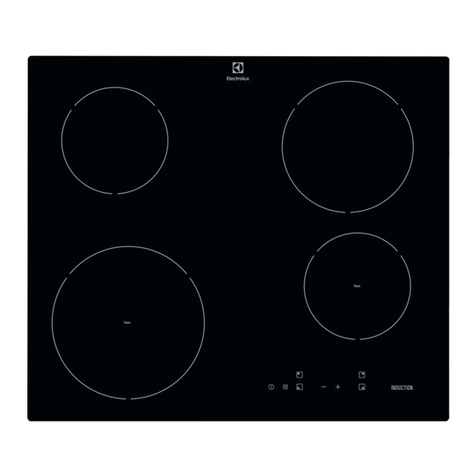
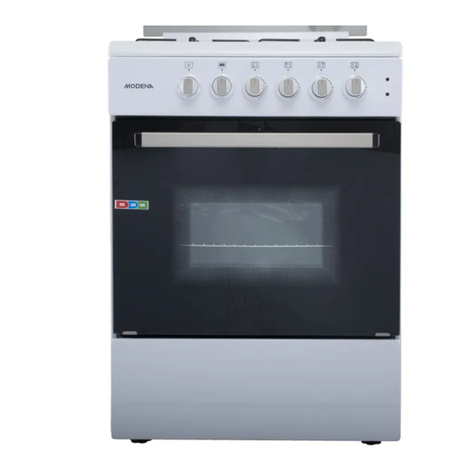
Tecnoinox PIN35E7 Reference manual

10/2007 5410.424.00
IT PIANI COTTURA VETROCERAMICA AD INDUZIONE
Libretto d’istruzione per l’uso e la manutenzione
GB-IE CERAMIC INDUCTION HOB
Instruction manual for installation and use
DE-AT-CH GLASKERAMIKKOCHFELD MIT INDUKTION
Gebrauchs-und Installationsanleitung
FR PLAQUE EN VITROCERAMIQUE A INDUCTION
Notice d'emploi et de maintenance
ES PLANCHA DE INDUCCIÒN EN VITROCERÁMICA
Manual de instrucciones para el uso y manteniminto
Mod.
PIN35E7 – PIN70E7

10/2007 II 5410.424.00
IT
DICHIARAZIONE DI CONFORMITÀ
AI SENSI DELLA DIRETTIVA 73/23/CEE > 93/68/CEE "BASSA TENSIONE"
DIRETTIVA "COMPATIBILITÀ ELETTROMAGNETICA" 89/336/CEE > 92/31/CEE
Con la presente l'azienda dichiara, sotto la propria responsabilità, che le apparecchiature appartenenti a questa documentazione, soddisfano
per progettazione e costruzione i requisiti della direttiva "Bassa tensione" e "Compatibilità elettromagnetica".
La conformità è stata verificata con l'ausilio delle seguenti Norme Armonizzate.
GB
IE
DECLARATION OF CONFORMITY
TO THE DIRECTIVE 73/23/EEC > 93/68/EEC “LOW VOLTAGE”
"DIRECTIVE EMC" 89/336/EEC > 92/31/EEC
We, the company, declare herewith on our own responsibility that the above-mentioned product meets the requirements of the low voltage
directive for what concerns engineering and constructions and “EMC”.
Conformity has been controlled with the aid of the following Harmonized Standards.
DE
AT
CH
KONFORMITÄTSERKLÄRUNG
GEMÄSS DER RICHTLINIE 73/23/EWG > 93/68/EWG „NIEDERSPANNUNGSRICHTLINIE“
„EMV RICHTLINIE“ 89/336/EWG > 92/31/EWG
Hiermit bestätigt die Firma unter eigener Verantwortung, dass das o.a. Produkt in Bezug auf Entwurf und Fertigung den Anforderungen der
"Niederspannungsrichtlinie" und "EMV" entspricht.
Die Konformität wurde auf Grundlage u.a. Harmonisierten Normen geprüft.
РУ
ДЕКЛАРАЦИЯ СООТВЕТСТВИЯ
ВСООТВЕТСТВИИ СНОРМАТИВАМИ 73/23/СЕЕ 93/68/СЕЕ «НИЗКОЕ НАПРЯЖЕНИЕ»
СНОРМАТИВАМИ «ЭЛЕКТРОМАГНИТНОГО СООТВЕТСТВИЯ» 89/336/СЕЕ 92/31/СЕЕ
Внастоящем документе фабрики заявляет, под собственную ответственность, что оборудование принадлежащее кэтой доментации
удовлетворяют впроектировании иреализации реквизитам предписания « Низкого Напряжения» и« Электромагнитного
Соответствия».
Соответствия было подтверждено спомощью следующих Гармонизированных Норм.
FR
DECLARATION DE CONFORMITE
AUX DIRECTIVES 73/23/CEE > 93/68/CEE “BASSE TENTION”
ET AUX DIRECTIVES 89/336/CEE > 92/31/CEE “COMPATIBILITE ELECTROMAGNETIQUE”
La société déclare, sous sa propre responsabilité, que les appareils figurant dans cette docomentation, aussi bien en ce qui concerne leur projet
que leur fabrication, sont conformes aux directives “Basse Tention” et “Compatibilité électromagnétique”.
La conformité a été vérifiée avec l’aide des Normes Harmonisées suivantes.
ES
DECLARACIÓN DE CONFORMIDAD
CON ARREGLO A LA DIRECTIVA 73/23/CEE > 93/68/CEE “BAJA TENSIÓN”
DIRECTIVA “COMPATIBILIDAD ELECTROMAGNÉTICA” 89/336/CEE > 92/31/CEE
Por medio de la presente la sociedad declara, bajo su responsabilidad, que los equipos incluidos en esta documentación, por lo que a proyecto
y construcción se refiere, cumplen con los requisitos de la directiva “Baja tensión” y “Compatibilidad electromagnética”.
La conformidad se ha comprobado con el auxilio de las siguientes Normas estandarizadas.
EN60335-1 EN60335-2-36 EN55014-1
TI, via Torricelli 1
33080 PORCIA (PN) Amministratore delegato
Dario Colonnello

10/2007 5410.424.00
PIN35E7 PIN70E7
Dime. esterne - External dim. - Außenmaße - Внешние разм. - Dimensions extérieures - Dimensiones externas mm
L 350 700
P 700 700
H 280 280
Tensione - Voltage - Spannung - Напряжение - Tension - Tensión 400V ~ 3 (+6/-10%) 400V ~ 3 (+6/-10%)
Frequenza - Frequency - Частота - Frequenz - Fréquence - Frecuencia 50/60Hz 50/60Hz
Potenza installata - Installed power - Nennleistung - Устан. мощность - Puissance installée - Potencia instalada 7kW 14kW
Piastre piano cottura - Hotplates - Kochplatten - Плитки поверх. Готовки - Plaques plan de cuisson - Placas plano de cocción 2 × 3.5kW 4 × 3.5kW
Sez.minima cavo alim. - Supply cable min.cross sec. - Mindestquerschnitt Speisungkabel, Мин. Разрез эл. провода - Sect. mini
câble alim. - Sección mín. cable de alim. 5 × 1.5mm25 × 2.5mm2
Umidità rel.ambiente - Relative humidity environment. 30-90% 30-90%
Temp. ambiente - Room temperature. +5/+40°C +5/+40°C
Entrata cavo, Power supply cable inlet, Netzkabeleingang, Вход эл. провода, Entrée câble électrique, Entrada cable eléctrico
Fig.1 – Abb.1 - рис.1
Fig.2 - Abb.2 - рис.2

IT - 1 5410.424.00
Parte 1 Installazione
PIANI COTTURA VETROCERAMICA AD INDUZIONE
Avvertenze generali
L’apparecchio, al quale si riferisce il presente libretto d’istruzione, è
costruito nel rispetto dei requisiti delle Direttive: ”Bassa Tensione”
73/23/CEE, 93/68/CEE; “Compatibilità elettromagnetica” 89/336/CEE,
92/31/CEE, 93/68/CEE e EN55014.
L’installazione deve essere eseguita a cura di personale qualificato,
secondo le norme e le prescrizioni vigenti nel paese ed in conformità
alle presenti istruzioni. Quest’apparecchiatura è concepita unicamente
per la cottura degli alimenti. Togliere l’imballo dall’apparecchio,
rimuovere la pellicola protettiva, se necessario, eliminare le tracce di
colla con l’ausilio di un solvente idoneo. Si raccomanda di smaltire
l’imballo secondo le prescrizioni vigenti.
Durante l’installazione é indispensabile osservare e rispettare le
seguenti norme:
Norme di Legge vigenti in materia;
Norme regionali e/o locali quali regolamento edilizio;
Prescrizioni e norme dell’azienda erogatrice dell’energia elettrica;
Norme antinfortunistiche vigenti;
Prescrizioni antincendio;
Relative Norme CEI.
Per un corretto uso rispettare sempre le seguenti avvertenze:
L’apparecchio dev’essere utilizzato esclusivamente sotto
sorveglianza,
Destinato ad uso professionale è limitato a personale qualificato.
Prestare attenzione durante il funzionamento perché le superfici di
cottura sono molto calde
Si consiglia di installare l’apparecchio sotto ad una cappa aspirante
per permettere l’evacuazione dei vapori prodotti durante la cottura.
Se l’apparecchio è installato in batteria:
Rispettare la distanza minima di 80mm tra apparecchiatura ed
eventuali pareti in materiale infiammabile, divisori, mobili da cucina
o apparecchiature adiacenti.
Le superfici a contatto con l’apparecchiatura dovranno essere
rivestite in materiale isolante termico di tipo non combustibile.
L’apparecchiatura, e in particolar modo il cavo d’alimentazione, non
deve essere sistemata vicino a fonti di calore
L’ambiente circostante e l’apparecchiatura non devono superare la
temperatura di 50°C.
Disattivare l’apparecchiatura in caso di guasto o malfunzionamento.
Collegamento alla rete
Prima di procedere al collegamento rilevare i dati tecnici necessari di
all’installazione: tensione, frequenza, n° fasi e potenza, sulla targhetta
caratteristiche dell’apparecchiatura.
La targhetta matricola “T” fig.2 in poliestere adesivo si trova
dietro al pannello porta comandi.
L’installatore deve provvedere al collegamento previa interposizione di
un interruttore principale, facilmente accessibile che deve interrompere
l’erogazione d’energia in modo onnipolare. I contatti in apertura devono
avere tra loro una distanza minima di almeno 3mm per polo.
IL CAVO:
Non deve essere posizionato vicino a fonti di calore e l’ambiente
circostante non deve superare la temperatura di 50°C.
Deve essere protetto da un tubo metallico o di plastica rigida.
Dovrà avere caratteristiche non inferiori a H07 RN-F.
Dovrà avere una sezione minima come specificato in tabella fig.1.
Per accedere alla morsettiera “M” fig.2 rimuovere il cruscotto svitando le
viti poste nella parte inferiore del pannello stesso. Seguendo le
indicazioni sullo schema elettrico, collegare i conduttori del cavo
d’alimentazione alla morsettiera.
È indispensabile collegare l’apparecchiatura ad un’efficace presa di
terra e a tale scopo in prossimità della morsettiera d’allacciamento, vi è
una vite con il simbolo al quale va allacciato il conduttore di terra.
Tenere inoltre il cavo in appoggio sul fondo bloccandolo con l’apposito
pressacavo fig.1. È indispensabile collegare l’apparecchiatura ad
un’efficace presa di terra. L’apparecchiatura deve inoltre essere inclusa
in un sistema equipotenziale, tale collegamento viene effettuato
mediante una vite contrassegnata dal simbolo posta sul retro
dell’apparecchio. Il filo equipotenziale deve avere una sezione di
10mm2.

IT - 2 5410.424.00
Parte 2 Uso
Avvertenze Generali
Le piastre sono munite di limitatore di temperatura che intercetta
l’alimentazione elettrica quando la temperatura raggiunge il valore
massimo consentito. Il limitatore si riattiva automaticamente.
Si consiglia di usare SOLO pentole con fondo piatto e non ruvido
onde evitare di graffiare il vetroceramica.
Evitare di posizionare le pentole troppo vicine le une alle altre, ed
evitare il contatto tra le stesse.
Non interporre nessun oggetto fra il fondo della pentola e la zona di
cottura.
Non appoggiare nessun oggetto sulla zona di cottura, in particolare
oggetti metallici (posate, orologi, ecc.) o smagnetizzabili (carte di
credito, bancomat,ecc).
In caso di rottura del piano in vetroceramica, spegnere
l'apparecchiatura, scollegare l'alimentazione elettrica e contattare il
servizio assistenza.
Nel locale dove è installata l'apparecchiatura, devono essere
presenti delle prese d'aria per garantire il corretto funzionamento
dell'apparecchiatura e per il ricambio d'aria del locale stesso. Le
prese d'aria devono avere dimensioni adeguate, devono essere
protette da griglie e collocate in modo da non poter essere ostruite.
Accensione e spegnimento delle piastre elettriche
Attivare l’interruttore posto a monte dell’apparecchiatura.
Ruotare la manopola “A” fig.2 corrispondente alla piastra
desiderata, facendo collimare l’indice del cruscotto con la posizione
scelta; si accenderà la rispettiva spia verde “B” fig.2 sul cruscotto e
l’indice “F” fig.1 sul piano. La massima potenza corrisponde alla
posizione “6” e la minima a “1”.
All’avvio è consigliabile posizionare la manopola sul “6”; raggiunto il
valore massimo di cottura, ruotare la manopola in posizione
inferiore.
Ruotare la manopola sulla posizione di spegnimento “0”.
Disinserire l’interruttore elettrico installato a monte
dell’apparecchiatura.
Parte 3 Pulizia e cura
Pulizia generale
La pulizia deve essere effettuata solamente ad apparecchio
raffreddato e disinserito elettricamente. In qualsiasi caso in
cui si sospetta un funzionamento anormale staccare sempre
l’alimentazione elettrica ed avvisare il servizio assistenza
autorizzato.
Non improvvisatevi manutentori, una manomissione
dell’apparecchio implica il decadimento della garanzia!
Le parti amovibili sono da lavare separatamente con acqua calda e
detergente e da sciacquare poi con acqua corrente.
Le parti d’acciaio si possono pulire con un panno umido e del
detergente assolutamente non abrasivo, si possono infine ripassare con
un panno morbido e asciutto; per macchie molto resistenti usare acqua
calda e aceto. Per la pulizia delle parti d’acciaio inossidabile non sono
da impiegare sostanze aggressive o comunque detergenti abrasivi.
L’uso di paglietta di ferro è sconsigliato poiché può provocare
formazione di ruggine. Per lo stesso motivo evitare il contatto con
materiali ferrosi, stracci pesanti o ruvidi, o con lana d’acciaio.
Durante la pulizia evitare anche l’utilizzo di carta o tela vetrata; in
sostituzione e solo per casi particolari si può usare pietra pomice in
polvere; nel caso di sporco tenace si consiglia l’ausilio di spugne (p. es.
Scotch).
Pulizia del piano in vetroceramica
La pulizia del piano in vetroceramica si esegue utilizzando un raschietto
con lama ben affilata per togliere i residui alimentari. Diluire poi il piano
con un prodotto detergente, lavare ed asciugare. Per evitare di rovinare
il piano eliminare immediatamente con il raschietto qualsiasi traccia di
zucchero, carta d’alluminio o oggetti di plastica; non utilizzare prodotti
abrasivi o corrosivi, la lama deve essere a contatto per tutta la
larghezza; non usare lo spigolo del raschietto.
Allo scopo di ridurre l’emissione in ambiente di sostanze inquinanti, si
consiglia di pulire l’apparecchiatura con prodotti aventi una
biodegradabilità superiore al 90%. Comportamento in caso di guasti
I guasti non sempre dipendono dalla qualità dei componenti, che nel
nostro caso è d’ottima fattura, essi possono essere causati anche da
sbalzi di tensione, da polvere e/o sporco che penetra nei componenti
funzionali.
Manutenzione
L’apparecchiatura non necessita di particolare manutenzione oltre alla normale pulizia; si consiglia comunque un controllo annuale dal centro
d’assistenza e a tale scopo si raccomanda la stipula di un contratto di manutenzione.
Ecologia e ambiente
Le nostre apparecchiature sono studiate ed ottimizzate, con Le nostre
apparecchiature sono studiate ed ottimizzate, con test di laboratorio, al
fine di ottenere prestazioni e rendimenti elevati. In ogni caso, al fine di
contenere i consumi energetici (elettricità, gas ed acqua), si consiglia di
evitare l’utilizzo dell’apparecchiatura per lungo tempo a vuoto o in
condizioni che compromettano il rendimento ottimale. Tutti i materiali
utilizzati per l’imballo sono compatibili con l’ambiente. Essi possono
essere conservati senza pericolo o bruciati in un apposito impianto di
combustione per rifiuti. I componenti in materiale plastico soggetti ad
eventuale smaltimento con riciclaggio sono:
Polietilene: pellicola esterna dell’imballo e/o pluribol
Polipropilene: reggette
Polistirolo espanso: angolari, lastre e cubi di protezione
Alla fine del ciclo di vita del prodotto evitare che l’apparecchiatura sia
dispersa nell’ambiente. Le nostre apparecchiature sono realizzate con
materiali metallici (acciaio inox, ferro, lamiera alluminata, ecc.) in
percentuale superiore al 90% ed è quindi possibile un riciclaggio degli
stessi, per mezzo delle strutture tradizionali di recupero, nel rispetto
delle normative vigenti nel proprio paese.
Rendere inutilizzabile l’apparecchiatura per lo smaltimento rimuovendo il cavo di alimentazione.

GB / IE - 1 5410.424.00
Part 1 Installation
PYROCERAMIC INDUCTION HOB
General Instructions
The appliance referred to in this manual has been manufactured in
conformity to the following Directives: 73/23/EEC, 93/68/EEC “Low
Voltage”; 89/336/EEC, 92/31/EEC, 93/68/EEC and EN55014
“Electromagnetic Compatibility.
The appliance must be installed by a qualified technician according to
the regulations and directives in force in the country where it is installed,
as well as the instructions in this manual. This appliance has been
designed exclusively for cooking food. Remove the packaging from the
appliance as well as the protective plastic sheet, and, if necessary,
remove traces of glue with a suitable solvent. To dispose of the
packaging, follow local directives.
When installing the appliance, the following regulations must be
observed:
Applicable national laws in force;
Regional and/or local regulations, such as building codes;
Directives and regulations of the local electricity board;
Accident prevention regulations in force;
Fire prevention regulations;
Applicable I.E.C. regulations.
To use the appliance correctly follow the warnings below:
The appliance must never be left unattended when it is being used!
The appliance is designed for professional use and therefore should
only be used by qualified personnel.
Care must be taken when using the appliance because the cooking
surfaces are very hot.
The appliance should be installed under an extractor fan for
removing cooking fumes.
If the appliance is installed in line:
Respect a minimum distance of 80mm between the appliance and
any walls made of flammable material, partitions, kitchen furniture or
nearby equipment.
The surfaces in contact with the appliance must be covered with
non-combustible heat insulating material.
The appliance, and especially the power lead, must not be installed
anywhere near heat sources.
The temperature of the environment in which the appliance is
installed must not rise above 50°C.
Switch the appliance off in the case of a failure or malfunction.
Connection to the distribution network
Before connecting the appliance note the specifications necessary for
the installation: voltage, frequency, number of phases and power on the
data plate of the appliance.
The adhesive polyester data plate is behind the control panel
“T” fig.2.
The installer must make the connection after having installed a main
switch, which is easy to reach and disconnects every pole supplying
electrical power to the appliance. The switch supplying electrical energy
to the appliance must have a minimum distance of at least 3mm
between the poles when the contacts are open.
THE CABLE:
Must not be installed near heat sources, the ambient temperature of
the surrounding environment must not rise to over 50°C.
Must be protected by a rigid metal or plastic tube
Must at least meet H07 RN-F standards.
Must have the minimum section indicated in the table fig.1.
To reach terminal board “M” fig.2, remove the control panel by loosening
the screws on the lower part of the panel. Following the indications in
the wiring diagram, connect the wires of the power cable to the terminal
board. The appliance must be connected to a good earth. There is a
screw marked with the symbol near the terminal board where the
earth conductor should be connected. Hold the cable in place until you
can block it with cable clamp fig.1. The appliance must be connected
to a good earth. The appliance must also be connected to an
equipotential earth. Connect the earth with the screw marked on the
rear panel of the. The equipotential wire must have a section of 10mm2.

GB / IE - 2 5410.424.00
Part 2 Use
General Instructions
The hot plates are equipped with a temperature limiting device
which cuts off the electric power supply when the temperature
reaches the maximum value allowed. The limiting device is
automatically reactivated.
We recommend using ONLY pots with smooth flat bottoms to avoid
scratching the pyroceramic cook top.
Never place pans too close together and do not allow them to touch
each other.
Never place anything between the pan bottom and the cooking
zone.
Never place anything in the cooking zone, and especially not metal
items (cutlery, watches, etc) or items which may be demagnetized
(credit cards, ATM cards, etc.).
In case of a breakage of the ceramic hob, switch the appliance off,
disconnect the electricity supply and contact after-sales service.
The room where the appliance is installed must have air inlets to
ensure that the appliance can operate correctly and provide the
necessary air exchange in the room itself. The air inlets must be of
appropriate size and must be protected by gratings and placed so
that they cannot be obstructed.
Turning the hot plates on & off
Switch the power on using the switch upstream of the appliance.
Turn knob “A” fig.2 of the desired plate, until it corresponds with the
dial on the panel in the chosen position; the relevant green
luminous indicator green “B” fig.2 on the control panel and index
“F” fig.1 on the cooktop will light. The maximum heating power is
produced with the knob in position “6”, the minimum power is
produced in position “1”.
When you turn the appliance on, you should turn the knob to
position “6”; when the maximum heating temperature for cooking is
reached, turn the knob to a lower position.
Turn the knob to position “0”.
Switch the power off using the switch upstream of the appliance.
Part 3 Cleaning and care of the appliance
General cleaning
The appliance must be cold and the electrical power turned
off to clean it. In any case, if anomalies are noticed or
suspected, turn the appliance off and disconnect it from the
mains. Call the authorised repair service.
Unauthorised persons should never attempt to repair the
appliance, or carry out maintenance. Tampering with the
appliance voids the warranty!
The removable parts should be washed separately with warm water and
detergent, then rinsed in running water. The steel parts can be cleaned
with a damp cloth and with a non-abrasive detergent and then dried by
using a soft, dry cloth; for stubborn deposits use hot water and vinegar.
Do not use harsh or abrasive detergents to clean the stainless steel
parts. Iron cleaning pads should not be used as they cause the
formation of rust. For the same reason, avoid contact with ferrous
materials. When cleaning, avoid using abrasive paper or cloth; instead
and only in special cases you can use pumice stone powder; we
recommend using sponges (ex. Scotch) to remove stubborn deposits.
Cleaning the pyroceramic cooktop
The pyroceramic cooktop can be cleaned using a scraper with a sharp
blade to remove the residues of food. Clean the cooktop with a
detergent, wash and dry. To avoid damaging the cooktop remove any
traces of sugar, aluminium foil plastics immediately with the scaper;
don't use abrasive or corrosive products, the blade of the scraper must
be in contact with the cooktop along the entire length of the blade; don't
use the corner of the scraper. To minimise the emission of polluting
substances in the environment we suggest cleaning the appliance with
products that are at least 90% biodegradable. Malfunctions do not
always depend on the quality of the components used. These
appliances are manufactured using top quality components.
Malfunctions may be caused by voltage surges, dust and/or dirt getting
into the components.
Maintenance
The appliance needs no specific maintenance besides normal cleaning; we do however suggest having it checked once a year by the assistance
centre for which, we recommend drawing up a maintenance contract.
Ecology and environment
Our appliances are studied and optimised, with lab tests, to provide high
performance and yields. However, in order to reduce energy
consumption (electricity, gas and water), we suggest not using the
appliance for any length of time if it is empty or under conditions that
compromise optimum yield. All packaging materials are environment-
friendly. They can be kept without creating problems or burnt in a waste
incinerator plant. The following plastic components can be recycled:
Polyethylene: external packaging material and/or pluribol film
Polypropylene: straps
Polystyrene foam: corner pieces, sheets and protection blocks
At the end of the appliance’s useful life, dispose of it properly. 90% of
each appliance is made of metal (stainless steel, iron, aluminated sheet,
etc.) hence it can be recycled by the relative recycling organisations in
compliance with the standards in force in your country.

GB / IE - 1 5410.424.00
Part 1 Installation
PYROCERAMIC INDUCTION HOB
General Instructions
The appliance referred to in this manual has been manufactured in
conformity to the following Directives: 73/23/EEC, 93/68/EEC “Low
Voltage”; 89/336/EEC, 92/31/EEC, 93/68/EEC and EN55014
“Electromagnetic Compatibility.
The appliance must be installed by a qualified technician according to
the regulations and directives in force in the country where it is installed,
as well as the instructions in this manual. This appliance has been
designed exclusively for cooking food. Remove the packaging from the
appliance as well as the protective plastic sheet, and, if necessary,
remove traces of glue with a suitable solvent. To dispose of the
packaging, follow local directives.
When installing the appliance, the following regulations must be
observed:
Applicable national laws in force;
Regional and/or local regulations, such as building codes;
Directives and regulations of the local electricity board;
Accident prevention regulations in force;
Fire prevention regulations;
Applicable I.E.C. regulations.
To use the appliance correctly follow the warnings below:
The appliance must never be left unattended when it is being used!
The appliance is designed for professional use and therefore should
only be used by qualified personnel.
Care must be taken when using the appliance because the cooking
surfaces are very hot.
The appliance should be installed under an extractor fan for
removing cooking fumes.
If the appliance is installed in line:
Respect a minimum distance of 80mm between the appliance and
any walls made of flammable material, partitions, kitchen furniture or
nearby equipment.
The surfaces in contact with the appliance must be covered with
non-combustible heat insulating material.
The appliance, and especially the power lead, must not be installed
anywhere near heat sources.
The temperature of the environment in which the appliance is
installed must not rise above 50°C.
Switch the appliance off in the case of a failure or malfunction.
Connection to the distribution network
Before connecting the appliance note the specifications necessary for
the installation: voltage, frequency, number of phases and power on the
data plate of the appliance.
The adhesive polyester data plate is behind the control panel
“T” fig.2.
The installer must make the connection after having installed a main
switch, which is easy to reach and disconnects every pole supplying
electrical power to the appliance. The switch supplying electrical energy
to the appliance must have a minimum distance of at least 3mm
between the poles when the contacts are open.
THE CABLE:
Must not be installed near heat sources, the ambient temperature of
the surrounding environment must not rise to over 50°C.
Must be protected by a rigid metal or plastic tube
Must at least meet H07 RN-F standards.
Must have the minimum section indicated in the table fig.1.
To reach terminal board “M” fig.2, remove the control panel by loosening
the screws on the lower part of the panel. Following the indications in
the wiring diagram, connect the wires of the power cable to the terminal
board. The appliance must be connected to a good earth. There is a
screw marked with the symbol near the terminal board where the
earth conductor should be connected. Hold the cable in place until you
can block it with cable clamp fig.1. The appliance must be connected
to a good earth. The appliance must also be connected to an
equipotential earth. Connect the earth with the screw marked on the
rear panel of the. The equipotential wire must have a section of 10mm2.

GB / IE - 2 5410.424.00
Part 2 Use
General Instructions
The hot plates are equipped with a temperature limiting device
which cuts off the electric power supply when the temperature
reaches the maximum value allowed. The limiting device is
automatically reactivated.
We recommend using ONLY pots with smooth flat bottoms to avoid
scratching the pyroceramic cook top.
Never place pans too close together and do not allow them to touch
each other.
Never place anything between the pan bottom and the cooking
zone.
Never place anything in the cooking zone, and especially not metal
items (cutlery, watches, etc) or items which may be demagnetized
(credit cards, ATM cards, etc.).
In case of a breakage of the ceramic hob, switch the appliance off,
disconnect the electricity supply and contact after-sales service.
The room where the appliance is installed must have air inlets to
ensure that the appliance can operate correctly and provide the
necessary air exchange in the room itself. The air inlets must be of
appropriate size and must be protected by gratings and placed so
that they cannot be obstructed.
Turning the hot plates on & off
Switch the power on using the switch upstream of the appliance.
Turn knob “A” fig.2 of the desired plate, until it corresponds with the
dial on the panel in the chosen position; the relevant green
luminous indicator green “B” fig.2 on the control panel and index
“F” fig.1 on the cooktop will light. The maximum heating power is
produced with the knob in position “6”, the minimum power is
produced in position “1”.
When you turn the appliance on, you should turn the knob to
position “6”; when the maximum heating temperature for cooking is
reached, turn the knob to a lower position.
Turn the knob to position “0”.
Switch the power off using the switch upstream of the appliance.
Part 3 Cleaning and care of the appliance
General cleaning
The appliance must be cold and the electrical power turned
off to clean it. In any case, if anomalies are noticed or
suspected, turn the appliance off and disconnect it from the
mains. Call the authorised repair service.
Unauthorised persons should never attempt to repair the
appliance, or carry out maintenance. Tampering with the
appliance voids the warranty!
The removable parts should be washed separately with warm water and
detergent, then rinsed in running water. The steel parts can be cleaned
with a damp cloth and with a non-abrasive detergent and then dried by
using a soft, dry cloth; for stubborn deposits use hot water and vinegar.
Do not use harsh or abrasive detergents to clean the stainless steel
parts. Iron cleaning pads should not be used as they cause the
formation of rust. For the same reason, avoid contact with ferrous
materials. When cleaning, avoid using abrasive paper or cloth; instead
and only in special cases you can use pumice stone powder; we
recommend using sponges (ex. Scotch) to remove stubborn deposits.
Cleaning the pyroceramic cooktop
The pyroceramic cooktop can be cleaned using a scraper with a sharp
blade to remove the residues of food. Clean the cooktop with a
detergent, wash and dry. To avoid damaging the cooktop remove any
traces of sugar, aluminium foil plastics immediately with the scaper;
don't use abrasive or corrosive products, the blade of the scraper must
be in contact with the cooktop along the entire length of the blade; don't
use the corner of the scraper. To minimise the emission of polluting
substances in the environment we suggest cleaning the appliance with
products that are at least 90% biodegradable. Malfunctions do not
always depend on the quality of the components used. These
appliances are manufactured using top quality components.
Malfunctions may be caused by voltage surges, dust and/or dirt getting
into the components.
Maintenance
The appliance needs no specific maintenance besides normal cleaning; we do however suggest having it checked once a year by the assistance
centre for which, we recommend drawing up a maintenance contract.
Ecology and environment
Our appliances are studied and optimised, with lab tests, to provide high
performance and yields. However, in order to reduce energy
consumption (electricity, gas and water), we suggest not using the
appliance for any length of time if it is empty or under conditions that
compromise optimum yield. All packaging materials are environment-
friendly. They can be kept without creating problems or burnt in a waste
incinerator plant. The following plastic components can be recycled:
Polyethylene: external packaging material and/or pluribol film
Polypropylene: straps
Polystyrene foam: corner pieces, sheets and protection blocks
At the end of the appliance’s useful life, dispose of it properly. 90% of
each appliance is made of metal (stainless steel, iron, aluminated sheet,
etc.) hence it can be recycled by the relative recycling organisations in
compliance with the standards in force in your country.

DE / AT / CH - 1 5410.424.00
Teil 1 Installation
GLASKERAMIKKOCHFELD MIT INDUKTION
Allgemeine Anmerkungen
Das in dieser Gebrauchsanweisung beschriebene Gerät wurde gemäß
folgenden Vorschriften gebaut: “Niederspannung” 73/23/EWG,
93/68/EWG; “Elektromagnetische Kompatibilität” 89/336/EWG,
92/31/EWG, 93/68/EWG.
Die Installation muss von kompetentem Personal laut der Vorschriften
und Gesetze des Landes sowie in Übereinstimmung mit dieser
Gebrauchsanweisung durchgeführt werden. Dieses Gerät ist
ausschließlich für das Kochen von Speisen gedacht. Die Verpackung
des Gerätes entfernen, die Schutzfolie abnehmen und eventuelle
Klebstoffrückstände mit einem geeigneten Lösungsmittel entfernen. Das
Verpackungsmaterial muss vorschriftsmäßig entsorgt werden.
Während der Installation sind alle geltenden Vorschriften zu
berücksichtigen:
Vorschrift der gültigen Gesetze der Materie
Regionale und/oder lokale Bauvorschriften
Vorschriften und Regeln des Stromwerkes
Geltende Unfallverhütungsgesetze
Brandschutzvorschriften
entsprechende IEC-Vorschriften
Für einen korrekten Gebrauch folgende Hinweise beachten:
Das Gerät nur unter Aufsicht betreiben!
Das Gerät ist für gewerbliche Zwecke gebaut und darf nur von
Fachpersonal betrieben werden.
Es ist darauf zu achten, dass sich die Geräteoberflächen während
des Betriebs erhitzen.
Es wird empfohlen, das Gerät unter einer Abzughaube
aufzustellen, um die während des Garens erzeugten Dämpfe
abzuleiten.
Bei der Aufstellung neben anderen Geräten:
Zwischen dem Gerät und eventuellen Wänden aus brennbarem
Material, Trennwänden, Küchenmöbeln oder nebenstehenden
Geräten mindestens 80mm Abstand halten.
Die Kontaktflächen müssen mit nicht brennbarem
Wärmeisoliermaterial verkleidet werden.
Das Gerät darf nicht in der Nähe von Wärmequellen aufgestellt
werden, das gilt in besonderem Maße für das Versorgungskabel.
Die Raumtemperatur muss stets unter 50°C liegen.
Im Schadensfall oder bei mangelhaftem Betrieb das Gerät ausschalten.
Netzanschluss
Vor dem Anschluss sind folgende für die Geräteversorgung
notwendigen Daten am Typenschild zu prüfen: Spannung, Frequenz,
Phasenanzahl und Leistung.
Das Typenschild aus selbsthaftendem Polyester befindet sich
hinter der Bedienblende „T“ Abb.2.
Der Installateur muss beim Anschluss einen leicht zugänglichen
Hauptschalter zwischenschalten, der die Stromzufuhr allpolig
unterbricht. Die mindeste Kontaktöffnungsweite muss pro Pol 3mm
betragen.
DAS KABEL:
Darf nicht in der Nähe von Hitzequellen verlegt werden und die
Raumtemperatur darf nicht über 50°C liegen.
Es muss in einem Metallrohr oder in einem steifen Kunststoffrohr
verlegt werden.
Es muss mindestens dem Typ H07 RN-F entsprechen.
Es muss einen Mindestquerschnitt gemäß der Tabelle aufweisen
Abb.1.
Um an das Klemmenbrett “M” Abb.2 zu gelangen, ist die Bedienblende
durch Ausschrauben der am unteren Teil der Blende selbst befindlichen
Befestigungsschrauben zu entfernen. Unter Befolgung der Anweisungen
des elektrischen Schaltplans die Leiter des Netzkabels an der
Klemmleiste anschließen.
Das Gerät muss unbedingt geerdet werden. Zu diesem Zweck befindet
sich in der Nähe des Anschlussklemmenbretts eine durch das Symbol
gekennzeichnete Erdungsklemme, an der das Erdungskabel befestigt
wird.
Außerdem immer dem Boden entlang führen, indem es mit der
Kabelklemme “ ” Abb.2 fixiert wird.
Das Gerät muss unbedingt geerdet werden.
Das Gerät ist ferner in ein Potentialausgleichssystem einzubeziehen.
Der Anschluss erfolgt über die mit dem Symbol gekennzeichnete
Schraube, die sich an der Geräterückwand befindet.
Der Potentialleiter muss einen Mindestquerschnitt von 10mm2
aufweisen.
Der Hersteller übernimmt für Schäden aufgrund falscher Installation, unsachgemäßer Wartung und Nichtbeachtung der Sicherheitsvorschriften
keine Haftung.

DE / AT / CH - 2 5410.424.00
Allgemeine Anmerkungen
Die Platten sind mit einem Temperaturstopp ausgestattet, der die
elektrische Speisung dann unterbricht, sobald die Platten den
maximal zulässigen Temperaturwert überschreiten. Der
Temperaturstopp tritt automatisch in Betrieb.
Es ist empfehlenswert, Töpfe NUR mit glattem und nicht rauem
Boden zu benutzen, um Schrammen auf der Glaskeramikplatte zu
vermeiden.
Die Kochtöpfe so weit voneinander entfernt auf dem Kochfeld
anordnen, dass sie sich nicht berühren.
Keinerlei Gegenstand zwischen Topfboden und Kochzone
anordnen.
Keine Gegenstände auf die Kochzone legen. Dies gilt
insbesondere für metallische Objekte (Besteck, Uhren usw.) oder
entmagnetisierbare Objekte (Kreditkarten, Bankautomatenkarten
usw.).
Im Falle des Bruchs des Glaskeramikkochfelds das Gerät
ausschalten und vom Stromnetz trennen und dann den
Kundendienst verständigen.
Der Raum, in dem das Gerät installiert ist, muss über Lufteinlässe
verfügen, damit ein korrekter Betrieb des Geräts gewährleistet und
der Raum selbst gelüftet werden kann. Die Lufteinlässe müssen
von angemessener Größe sein, müssen mit Gittern geschützt
werden und so angebracht werden, dass sie nicht verstopfen.
Ein- und Ausschalten der Elektroplatten
Den Hauptschalter stromaufwärts des Gerätes einschalten.
Den Drehschalter “A” (Abb. 2) der gewünschten Platte drehen, bis
die gewünschte Position mit der Markierung an der Bedienblende
übereinstimmt; die grüne Kontrollleuchte “B” (Abb. 2) der
Bedienblende und die Anzeige „F“ (Abb. 1) auf der Platte schalten
sich ein.
Die maximale Leistung entspricht der Position “6“, die minimale
hingegen der Position “1”. Anfangs ist es empfehlenswert, den
Drehschalter auf Position “6” zu stellen; bei Erreichen der
maximalen Temperatur kann der Drehschalter auf eine untere
Stufe gestellt werden.
Den Drehschalter auf Position “0” drehen.
Den Hauptschalter stromaufwärts des Gerätes ausschalten.
Teil 3 Reinigung und Instandhaltung
Allgemeine Reinigung
Die Reinigung nur bei ausgestecktem und abgekühltem Gerät durchführen.
Die abnehmbaren Teile mit warmem Wasser und Reinigungsmittel
waschen und unter fließendem Wasser nachspülen.
Die Teile aus Edelstahl können mit einem feuchten Lappen und einem
nicht scheuernden Mittel gereinigt werden. Danach mit einem weichen
und trockenen Lappen abwischen; für hartnäckigeren Schmutz warmes
Wasser und Essig verwenden. Zur Reinigung der Teile aus rostfreiem
Stahl, keine aggressive Mittel oder scheuernde Reinigungsmittel
verwenden. Die Benutzung von Stahlwolle auf Edelstahlteilen ist zu
vermeiden, da sich hierdurch Rost bilden könnte. Aus demselben Grund
ist der Kontakt mit eisenhältigem Material, schweren Lappen oder
Stahlwolle zu meiden. Glaspapier oder Schmirgelpapier sollten bei der
Reinigung nicht verwendet werden; man kann in besonderen Fällen
pulverförmigen Bimsstein verwenden; bei stärkerer Verschmutzung
empfehlen wir die Benutzung von Schwämmen (z.B. Schwamm der Fa.
Scotch). Bei hartnäckigen Verschmutzungen kann handelsüblicher
Backofen- oder Grillreiniger zur Hilfe genommen werden. Dazu sind die
Hinweise des Herstellers des Produkts zu beachten.
Reinigung der Glaskeramikplatte
Die Speisereste mit einem scharfen Schaber von der
Glaskeramikkochplatte entfernen. Danach die Platte mit einem
Reinigungsmittel reinigen, nachspülen und trocknen.
Damit die Glaskeramikplatte nicht beschädigt wird, sind
Zuckerrückstände, Alufolie oder Kunststoffgegenstände unverzüglich mit
dem Schaber zu entfernen; keine scheuernden oder korrosiven Mittel
verwenden. Den Schaber der ganzen Breite nach auf die Platte
aufsetzen; nicht mit den Ecken des Schabers kratzen.
Um die Umweltbelastung durch Reinigungsmittel zu verringern, wird
empfohlen, das Gerät nur mit Produkten, die zu mindestens 90%
biologisch abbaubar sind, zu reinigen.
Wartung
Das Gerät benötigt neben der normalen, regelmäßigen Reinigung keine besonderen Wartungsarbeiten; es wird dennoch eine jährliche Kontrolle
durch eine Kundendienststelle empfohlen, weshalb der Abschluss eines Wartungsvertrages ratsam ist.
Umweltschutz
Unsere Geräte werden durch zahlreiche Laboruntersuchungen geprüft
und optimiert, um so besonders hohe Leistungen zu erzielen. Dennoch
wird zur Einschränkung des Energieverbrauchs (Strom, Gas und
Wasser) empfohlen, das Gerät nicht für längere Zeit unbenutzt
eingeschaltet zu lassen und es nur unter optimalen
Betriebsbedingungen zu verwenden. Alle als Verpackung verwendeten
Materialien sind umweltverträglich. Sie können daher ohne Gefahr
aufbewahrt oder in einer dafür vorgesehenen Müllverbrennungsanlage
verbrannt werden. Die folgenden Kunststoffteile sind für eine eventuelle
Wiederverwertung geeignet:
Polyäthylen: Außenhülle der Verpackung und/oder Noppenfolien
Polypropylen: Bänder
Polystyrolschaum: winkel-oder würfelförmiges Schutzmaterial
sowie Schutzabdeckungen
Nach Ablauf der vorgesehenen Lebensdauer des Geräts ist dieses
ordnungsgemäß zu entsorgen. Alle unsere Geräte werden zu mehr als
90% aus Metall hergestellt (Edelstahl, Eisen, Aluminiumblech etc.), sie
können daher den jeweiligen ortsüblichen Entsorgungsstellen
problemlos zur Wiederverwertung zugeführt werden.
Vor der Entsorgung sind die Geräte funktionsuntüchtig zu machen, indem das Netzkabel am Gerät abgeschnitten wird. Eventuell vorhandene
Verschlussvorrichtungen an Geräteinnenräumen oder an der Oberseite des Gerätes entfernen, damit sich niemand darin einschließen kann.
Teil 2 Gebrauch

FR - 1 5410.424.00
1ère Partie Installation
PLANS DE CUISSON ELECTRIQUES EN VITROCERAMIQUE
Conseils généraux
L’appareil auquel la présente notice d’emploi se réfère, a été fabriqué
conformément aux exigences requises par les Directives: ”Basse
Tension” 73/23/CEE, 93/68/CEE; “Compatibilité électromagnétique”
89/336/CEE, 92/31/CEE, 93/68/CEE et EN55014.
L’installation doit être effectuée par un personnel qualifié selon les
normes et les prescriptions en vigueur dans le pays et conformément à
la présente notice. Cet appareil a été conçu pour la cuisson des
aliments uniquement. Sortir l’appareil de l’emballage, retirer le film
protecteur et, si cela est nécessaire, éliminer toute trace de colle en
utilisant un solvant approprié. Il est recommandé d’éliminer l’emballage
conformément aux prescriptions en vigueur.
Lors de l’installation, observer et respecter toutes les normes en
vigueur, à savoir:
Dispositions légales en vigueur sur cette matière;
Normes régionales et/ou locales relatives aux normes de
construction;
Prescriptions et normes de la compagnie de l’électricité;
Normes pour la prévention des accidents en vigueur;
Prescriptions contre les incendies;
Normes CEI correspondantes.
Pour utiliser correctement cet appareil, respecter les consignes
suivantes:
L’appareil ne doit être utilisé que sous surveillance!
Cet appareil n’est destiné qu’à un usage professionnel de la part
d’un personnel qualifié.
Lorsqu’il fonctionne, les surfaces de l’appareil sont très chaudes:
observer les précautions nécessaires.
Il est recommandé d’installer l’appareil sous une hotte aspirante afin
d’évacuer les vapeurs qui se produisent pendant la cuisson.
S’il est installé avec d’autres appareils:
Respecter une distance minimale de 80mm entre l’appareil et les
parois réalisées en matériau inflammable, les cloisons, les meubles
de cuisine ou d’autres appareils adjacents.
Les surfaces en contact avec les éléments sus-mentionnés devront
être revêtues avec un matériau isolant thermique de type non
combustible.
L'appareil et, en particulier, le câble d’alimentation ne doivent pas se
trouver à proximité de sources de chaleur.
La température environnante et celle de l’appareil ne doivent pas
dépasser 50°C.
Débrancher l’appareil en cas de panne ou de mauvais fonctionnement.
Connexion électrique
Avant d’effectuer la connexion électrique, contrôler sur la plaque
signalétique les données nécessaires à l’alimentation de l’appareil:
tension, fréquence, nombre de phases et puissance.
La plaque signalétique “T” fig.2 en polyester autoadhésif se
trouve derrière le panneau de commande.
L’installateur sera chargé d’effectuer la connexion en interposant un
interrupteur principal facilement accessible et coupant l’alimentation
électrique de manière omnipolaire. L’ouverture minimum entre les
contacts doit être d’au moins 3mm par pôle.
LE CABLE:
ne doit pas être installé trop près d’une source de chaleur et la
température à proximité ne doit pas dépasser 50°C.
doit être protégé par un tube en métal ou en plastique rigide.
ne doit pas avoir les caractéristiques inférieures à H07 RN-F.
doit avoir une section minimale comme indiqué dans le tableau fig.1.
Pour accéder au bornier “M” fig.2, enlever le bandeau en dévissant les
vis de fixation du bas. Suivre les indications du schéma électrique pour
connecter les conducteurs du câble d’alimentation au bornier.
Il est indispensable de raccorder l’appareil à une prise de terre efficace.
A cet effet, à proximité du bornier, il y a une vis marquée du symbole
à laquelle il faudra raccorder le fil de terre.
Le maintenir collé au fond et le bloquer avec le serre-câble fig.1.
Il est indispensable de raccorder l’appareil à une prise de terre efficace.
De plus, l’appareil doit être inclus dans un système équipotentiel. La
connexion s’effectue à l’aide d’une vis marquée du symbole située au
dos de l’appareil.
Le conducteur équipotentiel doit avoir une section de 10mm2.

FR - 2 5410.424.00
2ème Partie Utilisation
Conseils généraux
Les plaques sont munies d’un limiteur de température qui coupe
l’alimentation électrique lorsque la température atteint la valeur
maximum admise. Le réarmement du limiteur est automatique.
Il est recommandé d’utiliser UNIQUEMENT des marmites à fond
plat et lisse afin de ne pas rayer la vitrocéramique.
Eviter de placer les récipients trop près les uns des autres et éviter
qu’ils ne se touchent.
Ne jamais interposer aucun objet entre le fond du récipient et le
foyer.
Ne placer aucun objet sur le foyer, surtout des objets métalliques
(couverts, montres, etc.) ou démagnétisables (cartes de crédit,
bancomat, etc).
En cas de rupture de la table en vitrocéramique, l’éteindre, la
débrancher et contacter le service assistance.
Dans la pièce où l’appareil est installé, il doit y avoir des prises d’air
pour garantir le fonctionnement correct de l’appareil et pour le
changement d’air dans la pièce même. Les prises d’air doivent avoir
des dimensions adéquates, être protégées par des grilles et placées
de façon à ne pas être obstruées.
Allumage et extinction des plaques électriques
Allumer l’interrupteur placé en amont de l’appareil.
Tourner la manette “A” fig.2 de la plaque désirée, en faisant
correspondre l’index du bandeau avec la température choisie; le
voyant vert “B” fig.2 du bandeau et l’index “F” fig.1 du plan de
cuisson s’allumeront.
La puissance maximum correspond à la position “6”, la puissance
minimum à la position “1”. A la mise en marche, il est conseillé de
mettre la manette sur le “6”; une fois que la température de
cuisson maximum a été atteinte, tourner la manette sur une
position plus basse.
Pour éteindre, tourner la manette sur la position “0”.
Eteindre l’interrupteur électrique installé en amont de l’appareil.
3ème partie Nettoyage et soin
Nettoyage général
Le nettoyage ne doit s’effectuer que lorsque l’appareil est
froid et que le courant est coupé. A chaque fois que l’on
soupçonne une anomalie dans le fonctionnement de
l’appareil, couper le courant et prévenir le service
technique agréé.
Ne pas s’improviser dépanneur car la manipulation de
l’appareil annule la garantie!
Les parties amovibles doivent être lavées séparément avec de l’eau
chaude et du détergent et être rincées à l’eau courante. Les parties en
acier peuvent être nettoyées avec un chiffon humide et avec un
détergent absolument non abrasif. Vous pourrez les frotter avec un
chiffon doux et sec. En cas de taches très résistantes, utiliser de l’eau
chaude et du vinaigre. Pour le nettoyage des parties en acier
inoxydable, vous ne devez pas utiliser de substances agressives ou
bien de détergents abrasifs. Il est déconseillé d’employer la paille de fer
car elle pourrait former des points de rouille. Pour la même raison, éviter
tout contact avec des matériaux ferreux, des chiffons lourds ou rugueux
ou avec de la laine d’acier.
Pendant le nettoyage, ne pas utiliser de papier de verre ou de toile
d’émeri. Cependant, on pourra utiliser, mais uniquement dans des cas
particuliers, de la pierre ponce en poudre. En cas de salissures
résistantes, utiliser une éponge (par ex. Scotch).
Nettoyage du plan en vitrocéramique
Le nettoyage du plan en vitrocéramique s’effectue en utilisant un grattoir
avec une lame bien tranchante afin d’enlever tous les résidus
d’aliments. Mouiller le plan avec un produit détergent, laver et essuyer.
Pour éviter d’abîmer le plan de cuisson, enlever immédiatement à l’aide
du grattoir toute trace de sucre, de papier aluminium ou d’objets en
plastique. Ne pas utiliser de produits abrasifs ou corrosifs. Toute la
longueur de la lame doit toucher le plan de cuisson. Ne pas utiliser
l’arête du grattoir. Afin de réduire l’émission de substances polluantes
dans l’atmosphère, il est recommandé de nettoyer l’appareil avec des
produits ayant une biodégradabilité supérieure à 90%.
Les pannes ne dépendent pas toujours de la qualité des composants
qui, dans notre cas, sont d’excellente qualité. Elles peuvent être
causées par des écarts de tension ou par de la poussière et/ou de la
saleté qui pénètre dans les composants servant au fonctionnement.
Maintenance
L'appareil n’a pas besoin d’une maintenance particulière outre le nettoyage normal. Dans tous les cas, il est préférable de le faire contrôler une
fois par an par le service technique agréé. Dans ce but, il est recommandé de stipuler un contrat de maintenance.
Ecologie et environnement
Nos appareils ont été étudiés et optimisés avec des tests de laboratoire
pour obtenir des performances et des rendements élevés. Cependant,
afin de minimiser les consommations d’énergie (électricité, gaz et eau),
il est recommandé d’éviter d’utiliser trop longtemps l’appareil sans
aliments ou dans des conditions qui en compromettraient le rendement
optimal. Tous les matériaux utilisés pour l’emballage sont compatibles
avec l’environnement. Ils peuvent être conservés sans danger ou être
brûlés dans des installations spéciales prévues pour la combustion des
déchets. Les parties en matière plastique sujettes à recyclage sont les
suivantes:
Polyéthylène: pellicule extérieure de l’emballage et/ou pellicule
pluribol
Polypropylène: feuillards
Polystyrène expansé: cornières, plaques et cubes de protection.
A la fin du cycle de vie de l’appareil, éviter de le jeter dans la nature.
Nos appareils ont été réalisés avec plus de 90% de matériaux
métalliques (acier inox, fer, tôle aluminée, etc.) et il est donc possible de
les recycler en faisant appel aux structures de récupération,
conformément aux normes en vigueur dans le pays d’installation.

ES - 1 5410.424.00
Capítulo 1 Instalación
PLACAS VITROCERÁMICAS
Advertencias Generales
El equipo al que se refiere el presente manual de instrucciones, está
fabricado de conformidad con los requisitos de las Directivas: “Baja
Tensión” 73/23/CEE, 93/68/CEE; “Compatibilidad electromagnética”
89/336/CEE, 92/31/CEE, 93/68/CEE yEN55014.
La instalación debe ser efectuada por personal cualificado, según las
normas y las disposiciones vigentes en el país y de conformidad con las
presentes instrucciones. Este equipo se ha proyectado únicamente para
la cocción de los alimentos. Quite el embalaje del aparato, quite la
película protectora y, si fuera necesario, elimine los residuos de la cola
con un disolvente adecuado. Se aconseja eliminar el embalaje de
acuerdo con lo que disponen las normas vigentes.
Durante la instalación se deben observar y cumplir las normas
siguientes:
Normas legales vigentes en materia.
Normas regionales y/o locales, por ejemplo reglamentación de la
construcción.
Disposiciones y normas de la empresa que suministra la corriente
eléctrica.
Normas vigentes para la prevención de accidentes.
Disposiciones para la prevención de incendios.
Relativas Normas CEI.
Para su uso correcto, cumpla siempre las siguientes advertencias:
¡El aparato debe utilizarse solamente si alguien puede controlarlo!
Está destinado a uso profesional por parte de personal cualificado.
Durante el funcionamiento las superficies de cocción están muy
calientes, por lo tanto es necesario prestar la máxima atención.
Se aconseja instalar el aparato debajo de una campana extractora
que evacue velozmente los vapores producidos durante la cocción.
Si el aparato está instalado en batería:
Respete una distancia mínima de 80mm entre el aparato y las
paredes eventuales de material inflamable, tabiques, muebles de
cocina o equipos adyacentes.
Las superficies en contacto con el aparato se tendrán que revestir
con material aislante térmico de tipo no combustible.
El aparato, y en especial el cable de alimentación, no deben
colocarse cerca de manantiales de calor.
El ambiente que rodea al aparato no debe superar la temperatura
de 50°C.
Desconecte el aparato en caso de avería y mal funcionamiento.
Conexión a la red
Antes de proceder con la conexión a la red eléctrica, compruebe los
datos técnicos siguientes: tensión, frecuencia, número de fases y
potencia en la placa de características del aparato.
La placa de características “T” fig.2 de poliéster
autoadhesivo está situada detrás del tablero de mandos.
El instalador debe hacerse cargo de la conexión, tras haber intercalado
un interruptor principal de fácil acceso que debe cortar el suministro de
energía de modo omnipolar.
Entre los contactos abiertos debe haber una distancia mínima por lo
menos de 3mm por polo.
EL CABLE:
No debe disponerse cerca de manantiales de calor; el ambiente
alrededor del cable no debe superar la temperatura de 50°C.
Debe estar protegido por un tubo metálico o de plástico rígido.
Debe tener características no inferiores a H07 RN-F.
Debe tener una sección mínima tal y como se indica en la tabla
fig.1.
Para acceder al tablero de bornes “M” fig.2 es necesario desmontar el
panel aflojando los tornillos colocados en la parte inferior del panel
mismo. Cumpliendo las instrucciones del esquema eléctrico, conecte
los conductores del cable de alimentación a la regleta de conexiones.
Es indispensable conectar el aparato a una toma de tierra que funcione
correctamente. Para ello, en el tablero de bornes se ha colocado un
tornillo, identificado con el símbolo donde se debe conectar el
conductor de tierra.
Además mantenga el cable apoyado en el fondo y finalmente sujételo
por medio del prensahilo dispuesto a tal fin fig.1.
Es indispensable conectar el aparato a una toma de tierra que funcione
correctamente.
El equipo debe estar incluido en un sistema equipotencial. La conexión
se realiza por medio del tornillo marcado con el símbolo situado en el
panel posterior del aparato.
El cable equipotencial debe tener una sección de 10mm2.

ES - 2 5410.424.00
Capítulo 2 Uso
Advertencias Generales
Las placas están equipadas con limitador de temperatura que corta
la alimentación eléctrica cuando la temperatura alcanza el valor
máximo permitido. El limitador se reactiva automáticamente.
Se aconseja usar SOLO ollas con fondo plano y que no sea áspero
para no rayar la vitrocerámica.
Evítese que las ollas queden posicionadas demasiado próximas
unas con otras y, que las mismas entren en contacto.
No interponga ningún objeto entre el fondo de la olla y la zona de
cocción.
No apoye ningún objeto en la zona de cocción, especialmente
objetos metálicos (cubiertos, relojes, etc.) ni desmagnetizables
(tarjetas de crédito, tarjetas de débito, etc.).
En caso de rotura de la placa de vitrocerámica, se deberá apagar
el aparato, desconectar la alimentación eléctrica y contactar con el
servicio de asistencia.
La habitación destinada a la instalación del aparato deberá
disponer de tomas de aire para garantizar el correcto
funcionamiento del aparato y para que se renueve el aire de su
interior. Las tomas de aire deberán ser de tamaño adecuado, estar
protegidas por rejillas y colocadas de manera que no se puedan
tapar.
Encendido y apagado de las placas eléctricas
Accione el interruptor colocado antes del aparato.
Gire el mando “A” fig.2 correspondiente a la placa deseada,
haciendo coincidir el indicador del panel con la posición elegida; se
encenderá el piloto verde “B” fig.2 en el panel de mandos y el
indicador “F” fig.1 en la placa. La máxima potencia corresponde a
la posición “6” y la mínima a la posición “1”.
Al poner en marcha el aparato, es aconsejable colocar el mando
en el “6”; una vez alcanzado el valor máximo de cocción, gire el
mando hasta una posición inferior.
Gire el mando hasta la posición de apagado “0”.
Desconecte el interruptor eléctrico instalado antes del aparato.
Capítulo 3 Limpieza y cuidado
Limpieza general
La limpieza se debe realizar únicamente con el aparato frío y
desconectado de la red eléctrica. En caso de que se
sospeche un problema de funcionamiento es necesario
desconectar la alimentación eléctrica y ponerse en contacto
con el servicio de asistencia técnica autorizado.
No se convierta en un mantenedor improvisado, la
manipulación del aparato por parte de personas inexpertas
anula la garantía.
Las piezas retirables se deben lavar por separado con agua caliente y
detergente y luego aclarar con agua corriente. Las piezas de acero se
pueden limpiar con un paño húmedo y detergente en absoluto no
abrasivo, luego se pueden frotar con un paño suave y seco; para las
manchas persistentes, utilice agua caliente y vinagre. Para la limpieza
de las piezas de acero inoxidable no deben emplearse sustancias
agresivas o detergentes abrasivos. No es aconsejable utilizar
estropajos metálicos porque podrían producir formaciones de óxido. Por
el mismo motivo, evite el contacto con materiales ferrosos, trapos
pesados o ásperos, o lana de acero. Durante la limpieza, evite también
el uso de papel de lija o tela esmeril; en su lugar, y sólo en casos
especiales, se puede utilizar piedra pómez en polvo; en caso de
suciedad persistente se aconseja el auxilio de esponjas (p. ej. Scotch).
Limpieza de la placa vitrocerámica
La limpieza de la placa vitrocerámica se realiza utilizando una rasqueta
con la cuchilla afilada para eliminar los residuos alimenticios.
Luego limpie la placa con un producto detergente, lávela y séquela.
Para no estropear la placa, elimine en seguida con la rasqueta
cualquier marca de azúcar, papel de aluminio u objetos de plástico; no
utilice productos abrasivos o corrosivos, la cuchilla debe apoyarse en
toda su longitud, no use el canto de la rasqueta.
Para reducir la emisión al medio ambiente de sustancias
contaminantes, se aconseja limpiar el aparato con productos que sean
más de un 90% biodegradables.
Las averías no siempre dependen de la calidad de los componentes,
que en nuestro caso son de óptima calidad, también pueden ser
provocadas por alteraciones de tensión, polvo y/o suciedad que penetra
en los componentes del aparato.
Mantenimiento
El aparato no necesita especiales operaciones de mantenimiento además de la normal limpieza; se aconseja en cualquier caso efectuar un
control anual en el centro de asistencia, y para ello se recomienda estipular un contrato de mantenimiento.
Ecología y medio ambiente
Nuestros aparatos han sido estudiados y optimizados, con pruebas de
laboratorio, para obtener las mejores prestaciones y los rendimientos
más elevados. En cualquier caso, para reducir el consumo energético
(electricidad, gas y agua) se aconseja evitar la utilización durante un
periodo de tiempo largo en vacío o en condiciones que afecten al
óptimo rendimiento. Todos los materiales utilizados para el embalaje
son compatibles con el medio ambiente. Se pueden conservar sin
peligro o es posible quemarlos en una instalación de combustión de
desechos adecuada.
Los componentes en material plástico que están sujetos a una posible
eliminación con reciclaje son:
Polietileno: película exterior del embalaje y/o película de plástico
con burbujas
Polipropileno: flejes
Poliestireno celular: esquinas, láminas y cubos de protección.
Al final de la vida del producto, evite que el aparato sea desechado en
el medio ambiente. Nuestros aparatos están realizados con materiales
metálicos (acero inoxidable, hierro, chapa con aluminio, etc.) en un
porcentaje superior al 90% y por lo tanto es posible reciclarlos, por
medio de las estructuras tradicionales de reciclado, respetando las
normativas vigentes en el propio país.

04/2008 DISEGNI / DIAGRAMS - A 5410.424.00
5415.292.00
Mod.PIN35E7
01050 - PIN35E7
01051 - PIN70E7
00241
01054
01053
01542 - FILTER
00194
00311
01070 - Blu
01331 - Grey
01537 - PIN35E7
01538 - PIN70E7
01539 - PIN35E7
01540 - PIN70E7 01541 - 2×3,5kW
01579-8PIN
01580 Green led
01591-10PIN

04/2008 DISEGNI / DIAGRAMS - B 5410.424.00

Il costruttore si riserva il diritto di modificare senza preavviso, le caratteristiche delle apparecchiature presenti in questa
pubblicazione.
The manufacturer reserves the right to modify the appliances presented in this publication without notice.
Der Hersteller behält sich das Recht vor, die in dieser Broschüre vorgelegten Geräte ohne Voranzeige zuändern.
Фабрика оставляет за собой право без предупреждения изменять характеристики оборудования, описываемого вданной инструкции.
Le Fabricant se réserve le droit de modifier sans préavis les caractéristiques des appareils présentés dans cette publication.
El Fabricante se reserva el derecho de modificar sin previo aviso las características de los aparatos presentados en esta publicación.
This manual suits for next models
1
Table of contents
Languages:
Other Tecnoinox Hob manuals
Popular Hob manuals by other brands
Whirlpool
Whirlpool GMA 6422/IX manual
Haier
Haier HAMTSJ86MC/1 instruction manual
Bosch
Bosch PEE68 CA1 Series instruction manual

Lincat
Lincat IH21 Installation, operating and servicing instructions
Hoover
Hoover HVE 642 Instructions for use and installation
CDA
CDA HVG95 Manual for installation, use and maintenance
