TED 5000 Series User manual

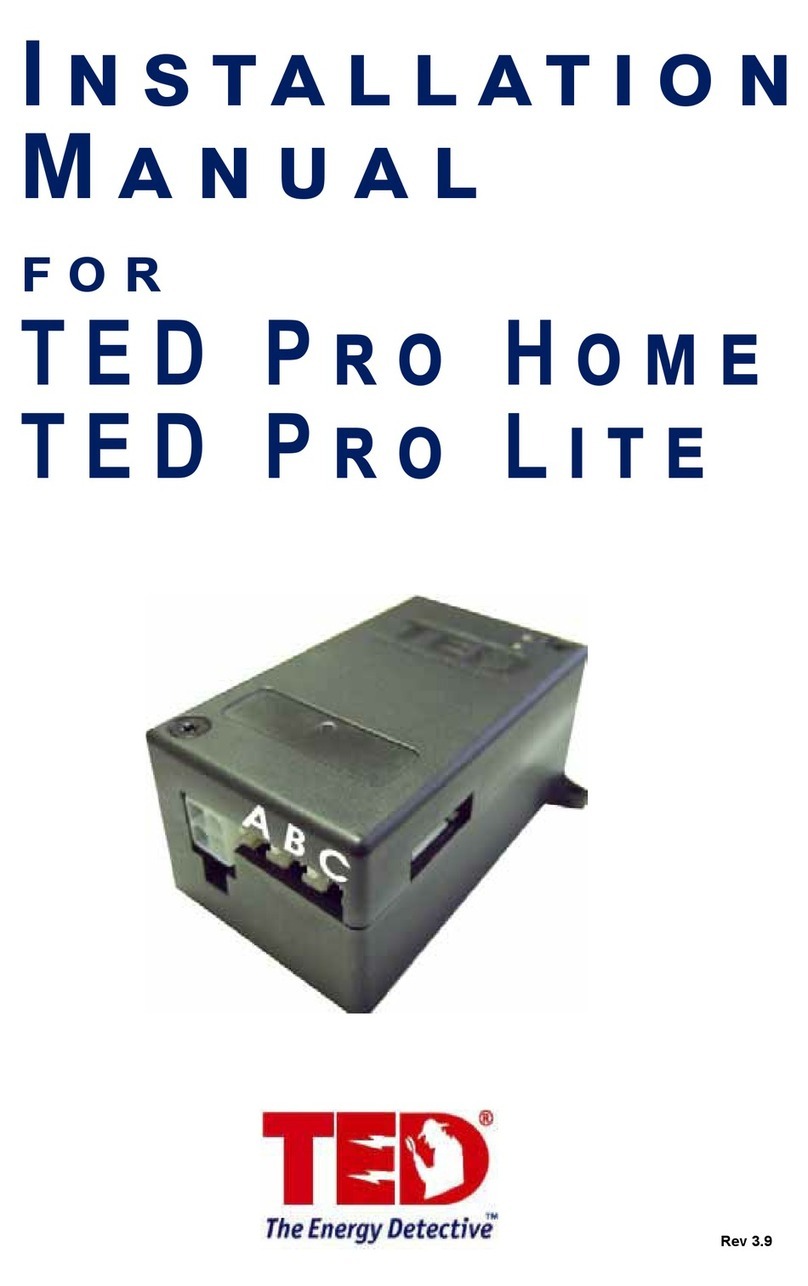
STEP 1 Identify the components in your TED package: Optional Wireless Display Optional Additional
MTU/CTSets
Set of Current
Transformers
Measuring
Transmitting Unit
Power Cable
for MTU Gateway Ethernet
Cable
STEP 2 STEP 3
A.) Turn off power.
B.) Remove circuit breaker panel cover.
C.) Write the ID number of your MTU as shown on
the label below. It will be in the form of: A xxxxxx,
where “x” is the ID number. You will need to know
this number to set up the TED system.
Prepare Breaker Panel
B 82 33 27
MTU Code: _____________
Install the Measuring Transmitting Unit (MTU) to Circuit Breaker
A.) For increased signal-strength, connect only the black wire
from the MTU power cord to a spare 15, 20, or 30 Amp cir-
cuit breaker.
B.) Cap-off or cover the red wire with electrical tape (you will not
use the red wire).
C.) If there is no spare circuit breaker in the panel, the black
wire can be attached to any 15, 20, or 30 Amp breaker in
the panel. However, the circuit breaker must be approved
for two conductors by the “authority having jurisdiction in the
installation location.”
D.) Connect the white wire to the neutral bus in the panel.
EXAMPLE 2
Installing MTU Inside Panel
Typical Combination Breaker Panel
EXAMPLE 1 Installing MTU Outside Panel
Typical Combination Breaker Panel
STEP 4 Installing and Connecting the Current Transformers (CTs)
A.)
B.) The Current Transformers must be installed with the red polarity dots both facing the source of
power. If both CTs are not installed in this manner, the reading will be wrong.
NOTE: Do NOT install the CT over the neutral (N) grounded conductor.
C.) Install one CT over each incoming power conductor, by pressing on the handle to open the split
core then clipping it over the power line.
D.) The CTs should be installed on the secondary side of the main switch or main circuit breaker,
however, if this is not possible, such as in the case of a combination breaker panel, then install on
the primary side of the main breaker.
E.) Ensure that the two sides of the split core CTs are mated tightly together over the incoming
power line. NOTE: The CTs should be loose-tting around the wires.
F.) Connect the CTs and Power Cable to the MTU by plugging the plastic mating connectors together.
NOTE: The connectors are polarized and can only be inserted in one way. Do not force.
STEP 5 Mounting the MTU
A.) Determine the best location to mount the MTU:
1.) Choose a location where it will not interfere with existing
equipment or wiring.
2.) The MTU may be attached using double-sided tape (if allowed
in your jurisdiction), or with sheet metal or machine screws.
B.) Arrange and tie-wrap all wiring in a neat and tidy manner.
C.) Turn the power back on.
D.) The MTU will blink approximately 10 times when power is first
applied.
E.) After initial blinking, it will blink when transmitting or receiving data.
F.) Replace breaker panel cover only after installing Gateway and
ensuring the entire TED system is operational.
STEP 6 Plug in Gateway to Outlet
A.) Plug the Gateway into a 120V outlet. DO NOT plug the Gateway into an
outlet connected to any other electronic equipment with an external power
supply (such as a laptop or printer.)
B.) If setting up in a home office, we highly recommend that you purchase a
filter to remove noise from your office electronics. You may purchase a filter
online at the TED Store under “Accessories.”
C.) The green LED will flash about 5 times when power is first applied.
5000 SerieS inStallation Guide
Avoid a common mistake. Your TED components com-
municate via PLC (Power Line Communication), in other
words, the data transmits over the existing wiring in your
home. If, after you have installed your TED correctly
and you nd that there is no communication between the
components, it is very likely a PLC-issue. To resolve this
issue, please visit: www.theenergydetective.com/PLC
Wireless
Display
Low Voltage
Power Adapter
Display Recharging
Stand
NOTICE - IMPORTANT:
TED 5000 series is only suitable for use on 120/240V single-phase 60Hz services. TED is only suitable for services of 200 Amps or less, or 400 Amps with parallel 200A feeds.
TED is only suitable for services with maximum 350 MCM conductors. If you have a 3-phase or 230V 50Hz electrical service, TED 5000 will not work. Visit for more details.
IMPORTANT
Shop for TED products online at: 1.877.766.5412
www.PowerMeterStore.com

STEP 7 Display Set up. (Optional Display for “C” Models)
Congure Product IDs
STEP 9
STEP 10 Utility Rate Wizard Setup
A.) From Edit Menu at the top of Footprints screen:
1.) Choose Utility Settings Wizard.
2.) Click on Utility Rate Setup Tab.
B.) Enter Meter Read Date. The date may uctuate from bill-to-bill
by a couple of days. Do not change the date each month, as the
next monthly bill will likely adjust for it.
C.) Enter in the number of energy rate seasons (Summer, Winter,
etc.) that your utility uses. If none are used, enter “1.”
D.) Click on Plan Type Tab.
1.) Select your tariff rate structure: Flat, Tiered, Time-of-Use, or
Tiered and Time-of-Use.
2.) Click Next to enter Utility rates.
E.) Once Utility rates are entered, click on Additional Charges Tab.
F.) Select any additional charges that are applied to your monthly
utility bill, including taxes and/or surcharges.
G.) Select Write to Device tab and then click the Update button.
OPTIONAL Export Data
A.) Select Export tab from top of dashboard.
B.) Select the data you wish to export.
C.) If you have multiple MTUs or a Solar/Wind Installation, the data for each MTU is separate.
D.) The exported le will be in CSV format (viewable on most all spreadsheets).
E.) Open the CSV le to view the selected data.
OPTIONAL Create Load Prole for a Specic Device in the Home
A.) From Edit Menu at top of Footprints Screen:
1.) Choose Load Prole Wizard.
2.) You can track up for 5 devices. Select “Add” next to a blank device.
3.) Name the device a unique name, such as “HVAC” or “Pool Pump”.
4.) If you have multiple MTUs, select the MTU that the device is measured under.
5.) Most devices have only one Start/Stop stage, however, some devices, such as some HVAC
systems, have multiple start-up stages. You may select up to three start/stop stages.
6.) Adjust the Percent Error to avoid false-positive readings. The default percentage is 10%.
B.) For best results, turn off as many appliances as possible prior to setting up Load Proles.
C.) Click the “Learn” button and then turn on the device you would like to prole.
D.) Within 30 seconds, a numeric value will auto-ll in the Stage box.
E.) When Load Prole is complete, press the Save button to complete the process.
F.) You can now click on the Load Prole Tab from the main Dashboard to view Load data.
G.) You can view each device independently. (
5000 SerieS Quick Start Guide
STEP 8
A.) Plug Display AC/DC power supply into a 120V outlet. For ease of set up, temporarily
locate it where you can view both your computer and Display simultaneously.
B.) Plug power supply cable into the back of Stand.
C.) Carefully insert Display into Charging Stand.
D.) After 15 seconds, remove Display from Charging Stand and re-insert. This will engage
the battery charging system. It will be fully charged in 24 hours.
E.) Note the Display ID Code located on the back of the display and write it below:
Display ID Code:____________
F.) Once you enter Display information in the Footprints software (Step 8), relocate the
Display to desired location.
1.) Display should be kept close to Gateway for best reception.
2.) There should be no metal, block, brick, or concrete walls between Gateway and
Display. Generally, wood and sheetrock do not cause interference.
G.) Under System Settings Wizard, click on “Display Settings” to change screen options.
Footprints Software Setup
A.) Go to the following link to download the TED 5000 Installation Application:
B.) Plug the Ethernet Cable into the Gateway.
C.) Plug other end of the Ethernet Cable into your Internet Router. If you don’t
have a router, it may be plugged directly into your computer. If you plug the
Gateway into your computer, you may need to change the IP Address. We
highly recommend that you plug the Gateway directly into your router.
D.) Open an Internet browser. (Internet Explorer, Firefox, Google Chrome)
E.) Type the following address in the browser address bar:
F.) This will open the Footprints Software program. You can view live dashboard
data, modify system setup, modify/set utility rates, and update Gateway,
MTU, or Display rmware.
G.) If you have problems connecting to the Gateway, contact your network
service provider or IT professional.
A.) From EDIT Menu at top of Footprints Screen:
1.) Choose System Settings Wizard.
2.) Click on Product Identication Tab.
3.)
a.) For multiple MTUs, select the “System Layout” tab rst
and select the correct number of MTUs.
b.) You will then identify what each MTU is measuring. (i.e.
Load, Generation, Adjusted-Load, Stand-Alone)
4) Your Gateway ID will auto-ll.
5.)
B.) Click on “Write to Device” Tab.
C.) Click Update button and settings will be written to the Gateway.
D.) Click Finish. The screen will automatically refresh.
E.) Kilowatt readings should now be seen on the Footprints
dashboard and (optional) Display.
F.) Rates can be customized by following the directions in Step 10.
Need Additional Help with Installation or Troubleshooting?
1.) View additional support documents and online support forum. www.theenergydetective.com/support
2.) View Installation and Troubleshooting Videos. Installation:www.theenergydetective.com/videoTroubleshooting:http://www.theenergydetective.com/troubleshooting
Shop for TED products online at: 1.877.766.5412
www.PowerMeterStore.com
Other manuals for 5000 Series
1
Table of contents
Other TED Measuring Instrument manuals
