7
GB
D
F
NL
I
P
DK
S
FIN
N
GR
TR
PL
CZ
SK
SLO
RO
H
SR
HR
BG
RF
Ver ical s eam ironing
• Set the iron temperature control slide and the steam output control dial (located on the
control panel) to the MAX position.
• Hang the garment on a coat hanger and hold the fa ric slightly taut with one hand.
As s eam is very ho : never a emp o remove creases from a garmen while i
is being worn, always hang garmen s on a coa hanger.
• Holding the iron in a vertical position, tilted slightly forwards, press repeatedly on the steam
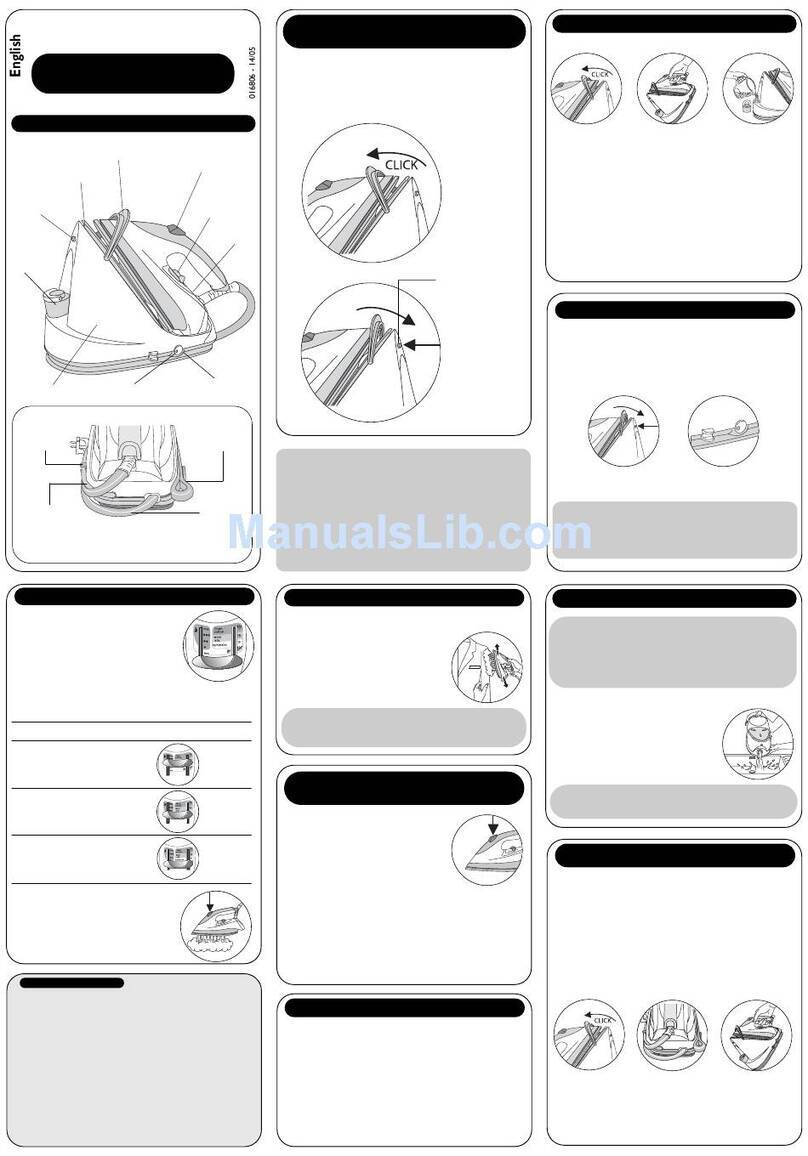
control utton (underneath the iron handle) moving the iron from top to ottom - fig.9.
Refilling he wa er ank
When the red “tank empty” indicator light turns on, there is no more steam - fig.10.
The water tank is empty.
• Unplug the generator. Open the water tank filler cover- fig.4.
Fill the water tank up without exceeding the MAX level - fig.5.
• Close the water tank filler cover.
• Replug the generator in. Press the “restart” utton on the control panel - fig.11. to
continue ironing. When the green light stops flashing, the steam is ready.
Recommenda ions: for fabrics
o her han linen or co on,
hold he iron a few
cen ime res from he
garmen o avoid burning he
fabric.
Maintenance and cleaning
Cleaning your genera or
• Do not use detergent or descaling products for cleaning the soleplate ase-unit.
• Never hold the iron or the ase unit under the tap.
• Empty and rinse the remova le water tank
• Regularly clean the soleplate with a damp, non-metallic washing up pad.
• Clean the plastic parts of the appliance occasionally with a soft cloth.
Rinsing he boiler
• To extend the efficient operating life of your oiler and avoid scale particles on your
linen, your generator is equipped with an orange “ oiler rinse” warning light that
flashes on the control panel after a out 10 uses - fig.12.
• If the orange “ oiler rinse” warning light flashes, you can continue ironing normally ut
remem er to rinse the oiler first, the next time that you use it.
• Before proceeding, check that the generator is cool and unplugged for more than 2
hours.
Wi h he rinsing accessory
• Use the accessory provided with the packaged product. It will make it easier to rinse
the oiler as the generator will need less handling.
• Your rinsing accessory has een designed to work on a wide range of taps. Choose the
seal (a or ) - fig.13. that is est suited to your tap.
• Place your steam generator on the edge of your sink, with the iron to one side,
standing on its heel.
• Unscrew anti-clockwise a quarter of a turn the oiler rinse cap cover - fig.14.
• Using a coin, gently unscrew the oiler rinse cap - fig.15.
• Place the plastic nozzle of the rinsing pipe into the hole of the oiler and turn gently to
the right until it locks. The outlet of this nozzle must e positioned over the sink - fig.16.
• Attach the other end of the rinsing accessory to your untreated tap - fig.17.
• Turn the tap on gently and gradually and let cold water run through the rinsing pipe
into the sink for a out 1 minute - fig.18.
• Switch off the tap and remove the rinsing pipe.
• Screw ack and tighten up the oiler rinse cap with a coin.
• Put the oiler rinse cap cover ack in place.
• The nex ime you use he genera or, hold down he “res ar ” bu on o urn
off he orange ligh -
fig.11
.
OR wi hou he rinsing accessory
• Place your steam generator on the edge of your sink, with the iron to one side,
standing on its heel.
• Unscrew anti-clockwise a quarter of a turn the oiler rinse cap cover - fig.14.
• Using a coin, gently unscrew the oiler rinse cap - fig.15.
• Holding your steam generator in a tilted position, and using a jug, fill the oiler with 1/4
litre of tap water - fig.19.
Cau ion! Above all, you mus
no use descaling produc s o
rinse he boiler: hey may
damage i . Before cleaning or
emp ying your genera or, i is
impera ive ha you leave i
o cool for more han 2 hours,
o preven any risk of burns.
